Build an Agency Website with HTML & CSS -1
by Nabendu Biswas / July 22nd, 2020
#html #beginners #css
Series: Agency-html
We will build a simple Agency site in HTML and CSS. If you are new to web-development, learn HTML first from my other series here. After that learn CSS from my series here.
In this series we are going to use a bit of old layout theme of float, instead of CSS Grid or Flexbox. As even in 2020 float, position are very much used and you can find them in a lot of old projects.
So, open up VS Code and create a folder images and styles in it. Create a file index.html in it. Also, as with emmet shortcuts, type ! and you will see the options.
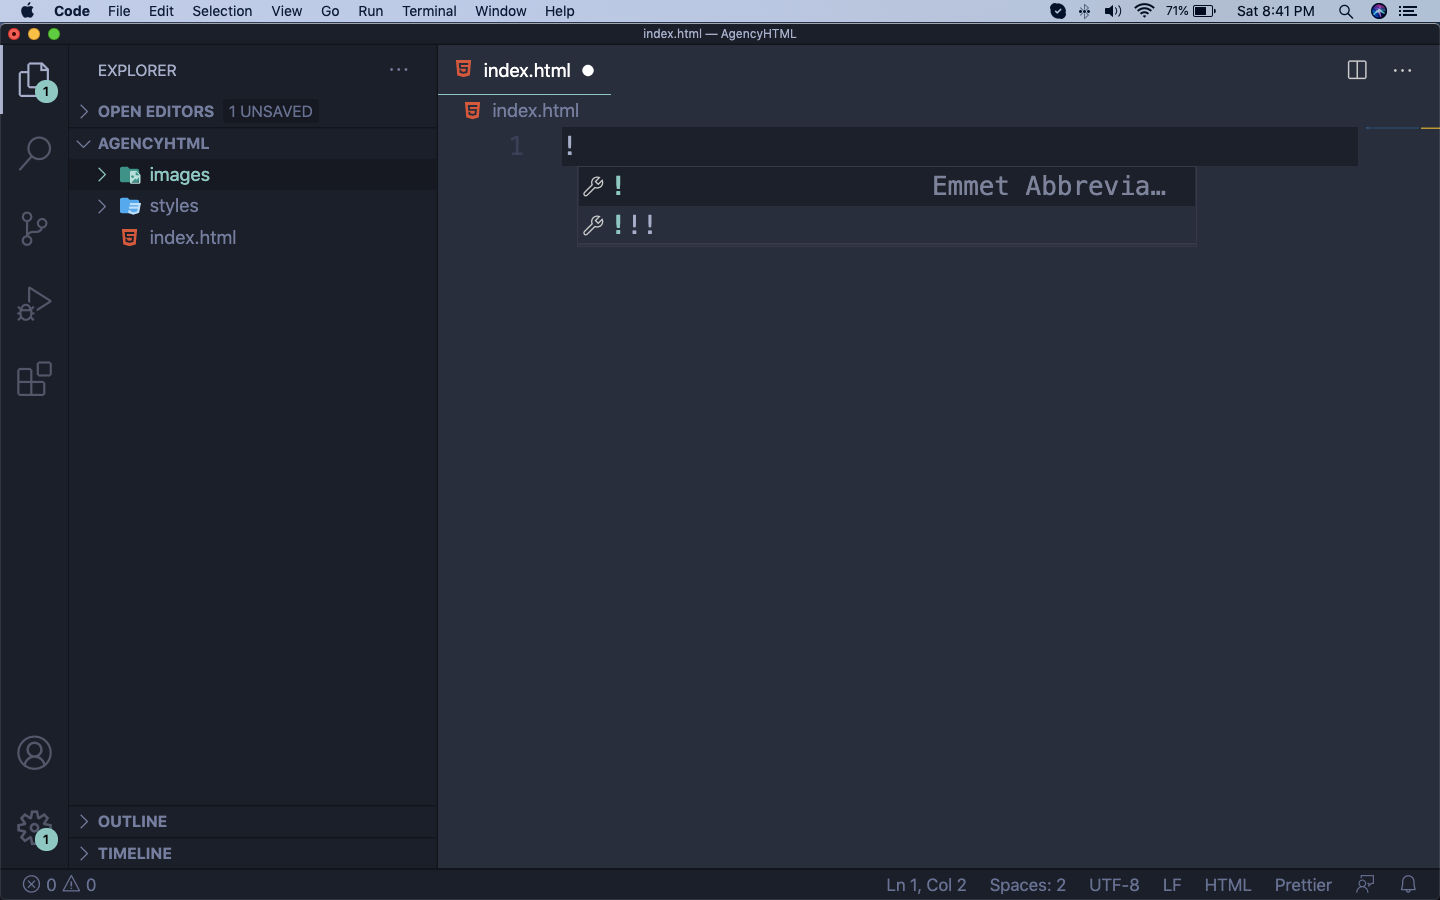 index.html
On pressing tab, you will get the whole html skeleton. Just change the title to Agency Site or anything.
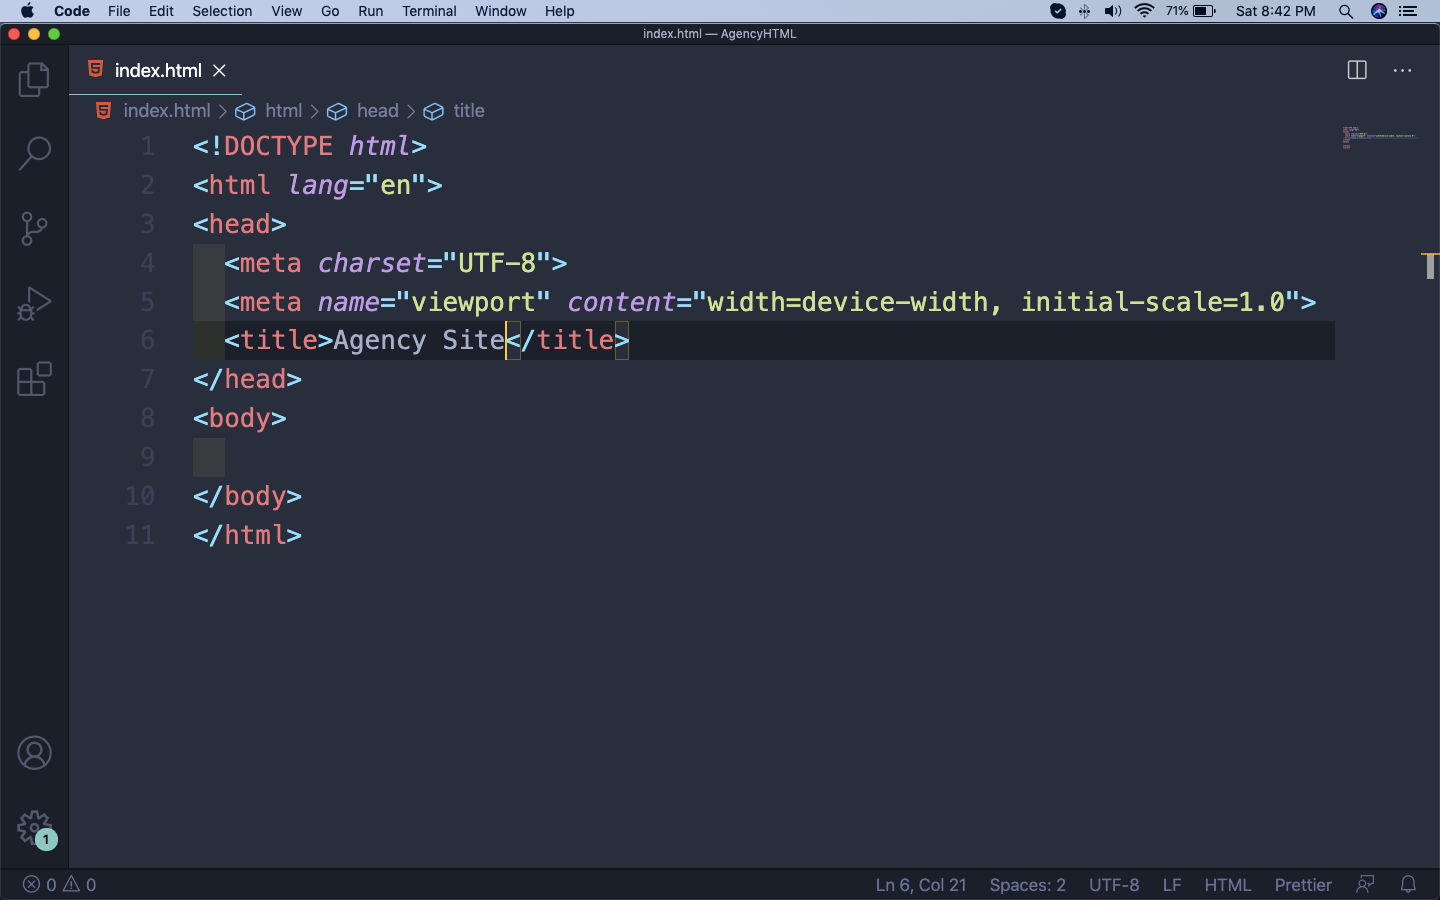 Agency Site
Next, let’s create a css file style.css inside styles folder. After that link it in the html file.
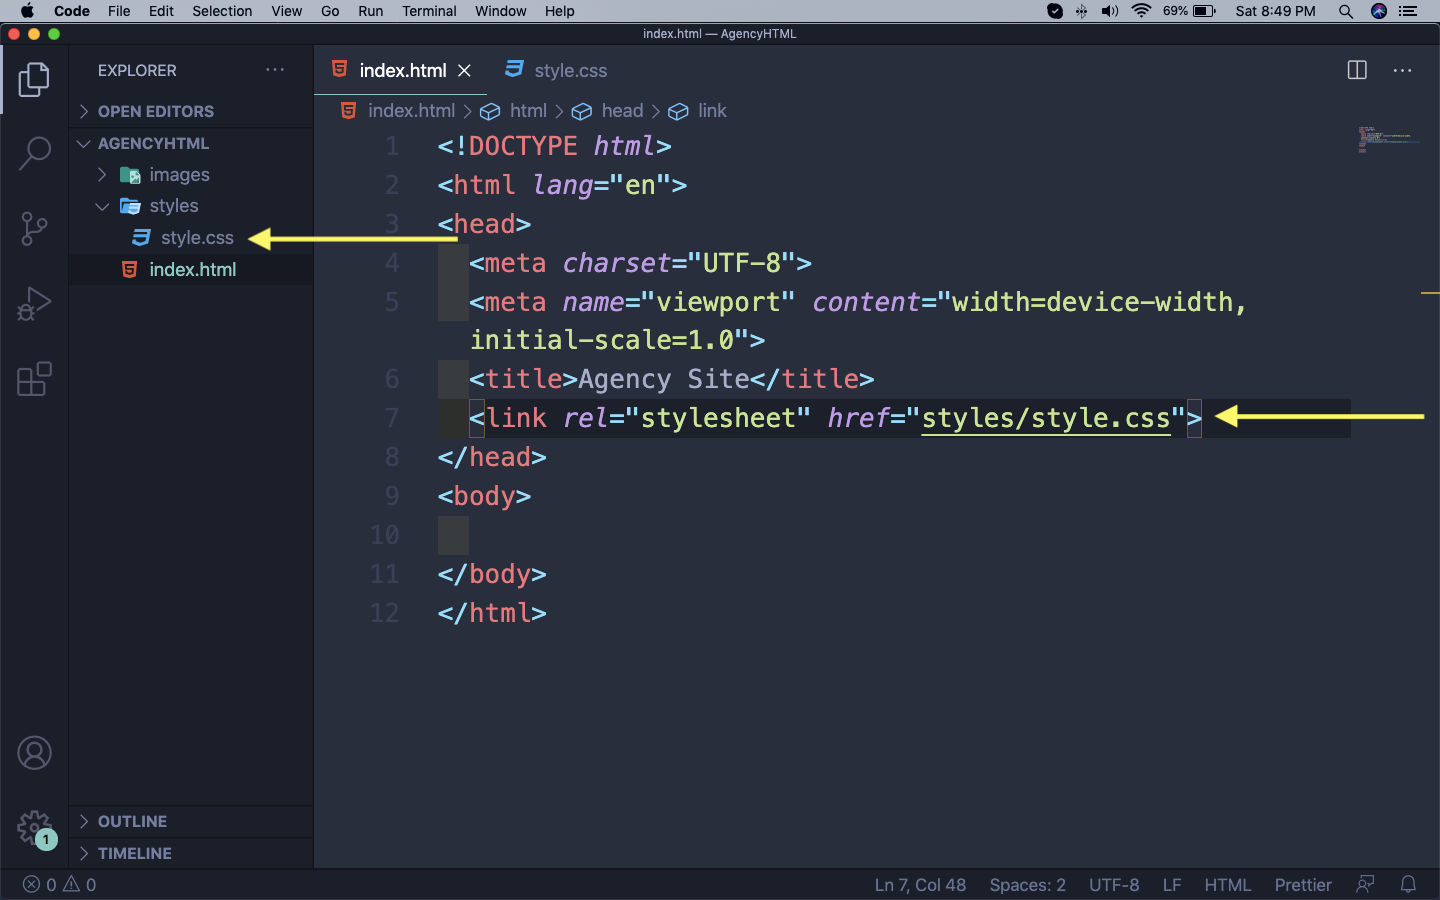 style.css
Let’s go ahead and write html first. We are going to use HTML5 semantic tag in this project. So, we will write the code for our header inside the <header> tag.
Here, we have a main div wrapping everything with the container class. We will create our navbar with the unordered list, with three list items inside it.
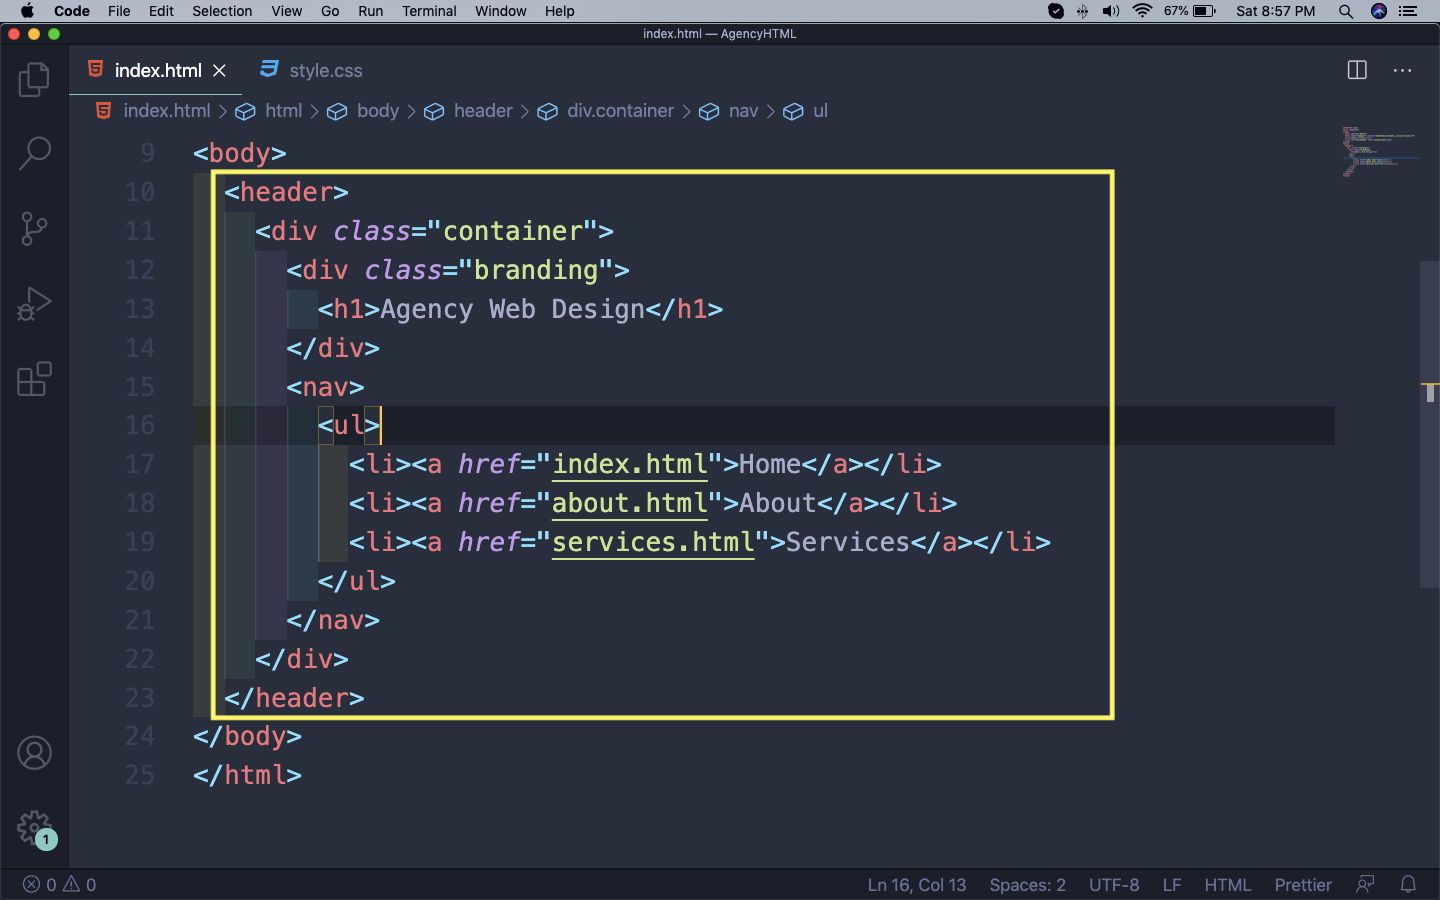 index.html
Now, we will see the code in browser. But as usual we will use live server to check our code. You can learn how to install and use live server from my earlier blog post here.
 Browser
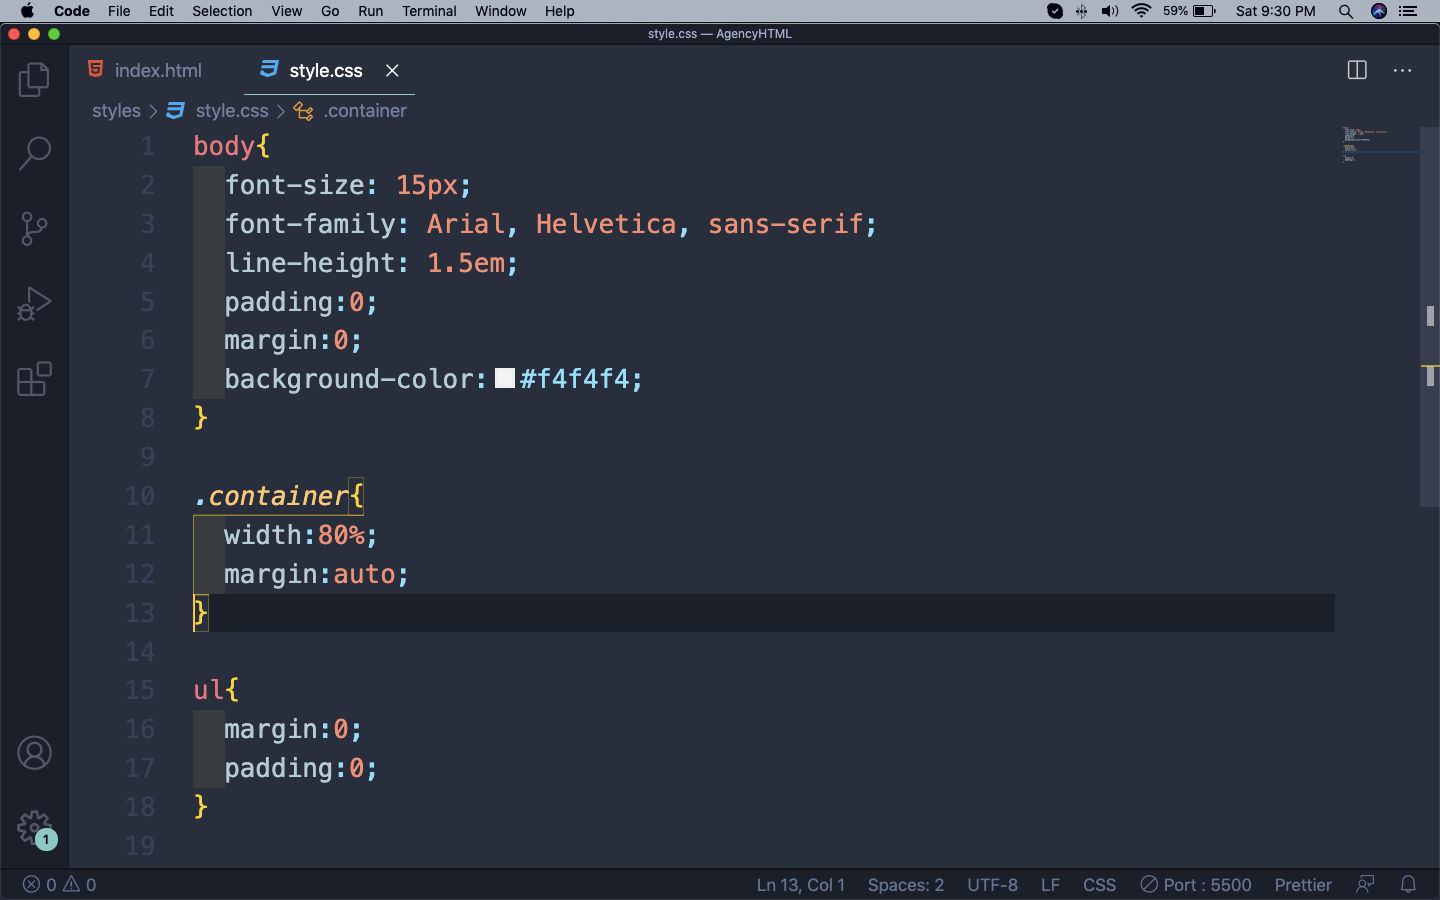
Next, let put code in style.css. We will first put some global styles for body and after that for the container and ul.
 global styles
This will centre our header text, because of margin: auto.
 margin: auto
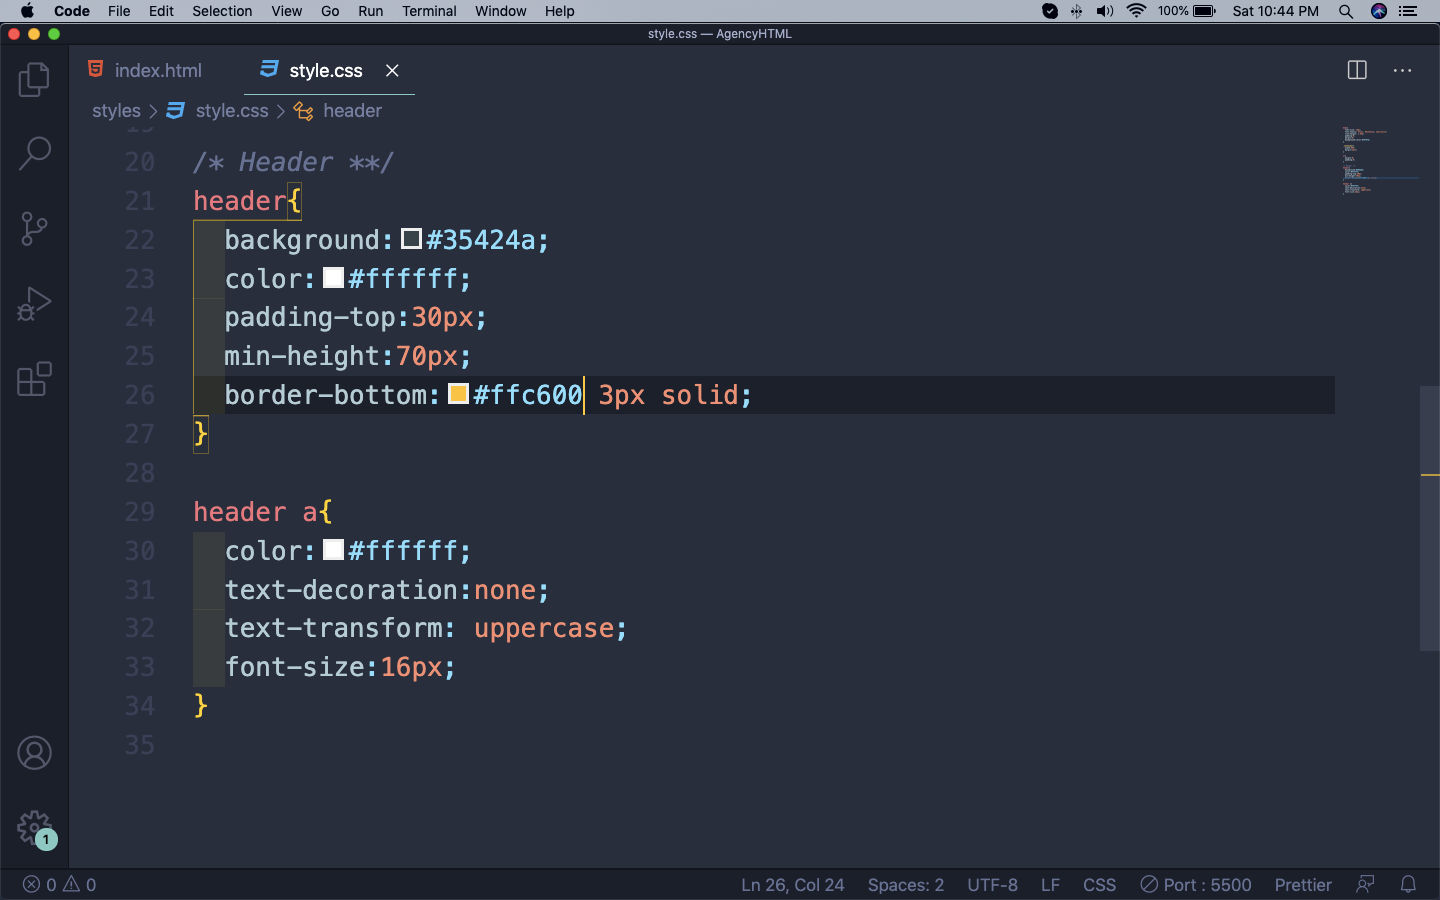
Next, we will start adding styles for our header. We are first targeting the header tag and then the anchor tag. We are just giving basic styles, most of which we learnt in the CSS series.
 style.css
This will show our header as below now.
 Styled header
Now, let’s make those list items appear in a line by making them inline from the current block.
 li are inline
Now, the menu items will be shown in one single line.
 List items in a line
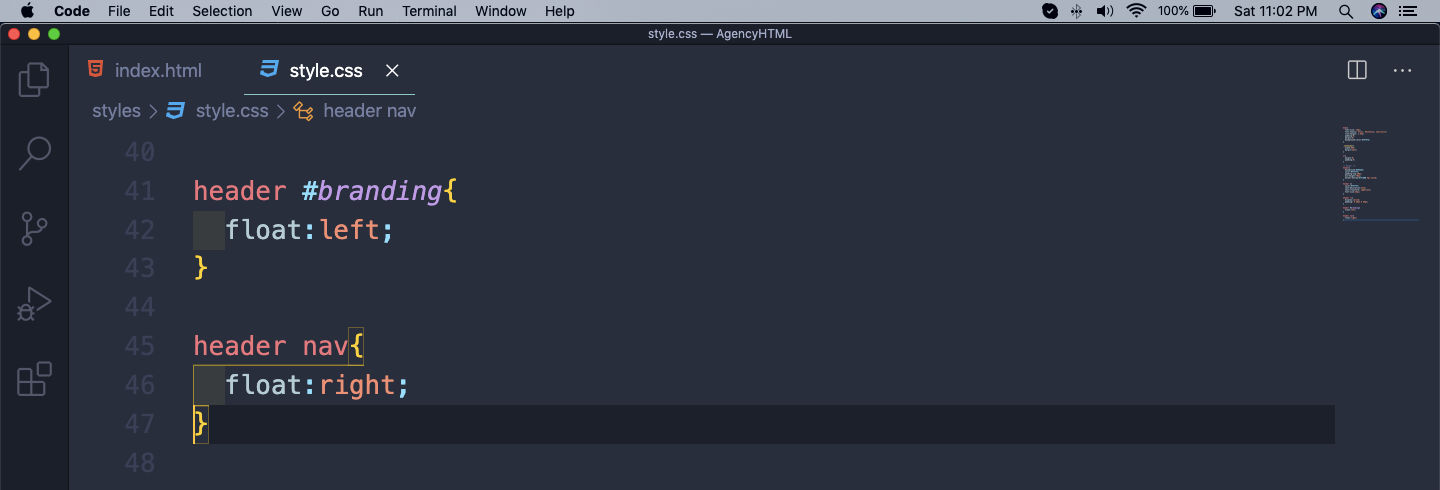
Next, we will use float to move the nav items to the right and our branding to the left.
 Using float
This will move the nav to the right, but the items are a bit more to down.
 Nav down
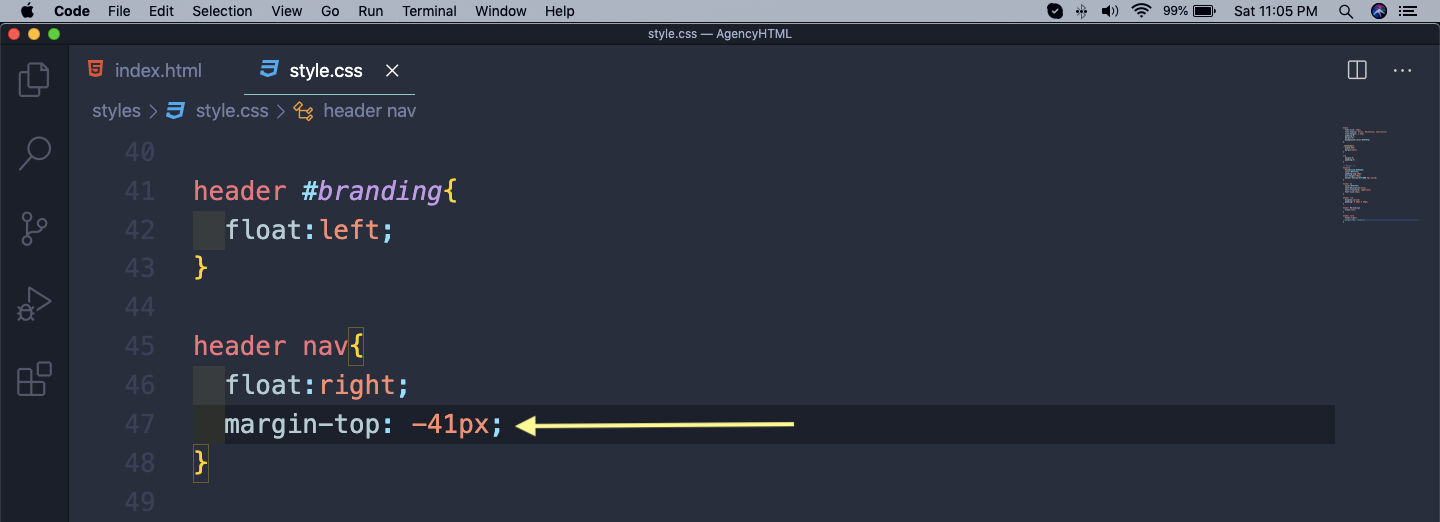
So, to fix it we will use the margin-top property, with a value of -41px.
 margin-top used
It will bring the nav to the correct position.
 nav correct
Lastly in the header, we will change the color of Agency. To do so wrap the word with a span with class of highlight.
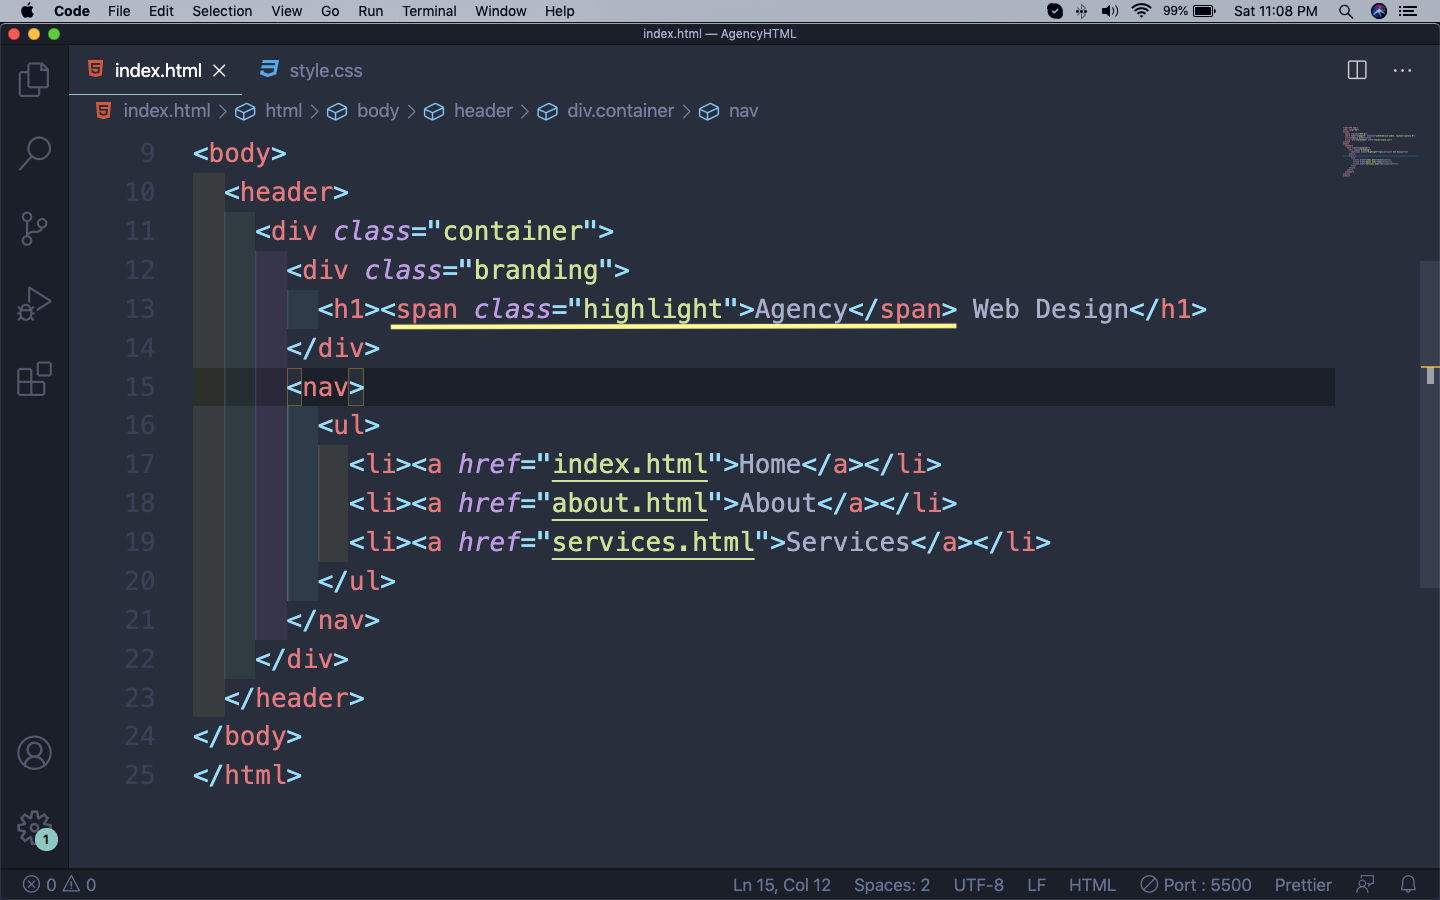 Agency
Now, in our style.css file add the yellow color for the highlight and also add a hover property.
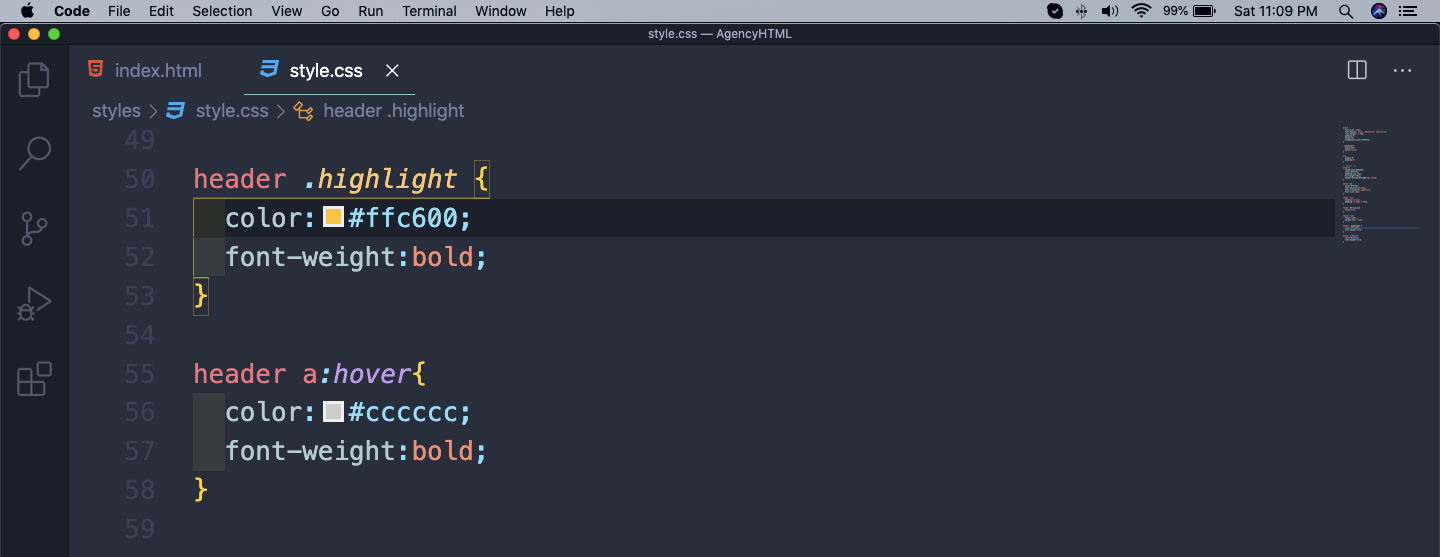 style.css
Now, our header is complete with a hovering effect over menu items.
 Header complete
This completes part-1 of the series. See you soon.