Welcome to part-10 of Angular Basics series. In this part , we will learn about Reactive approach to create forms in Angular.
The starting point can be taken from here.
We have a simple html form in the project, which we are going to change into Angular reactive approach.
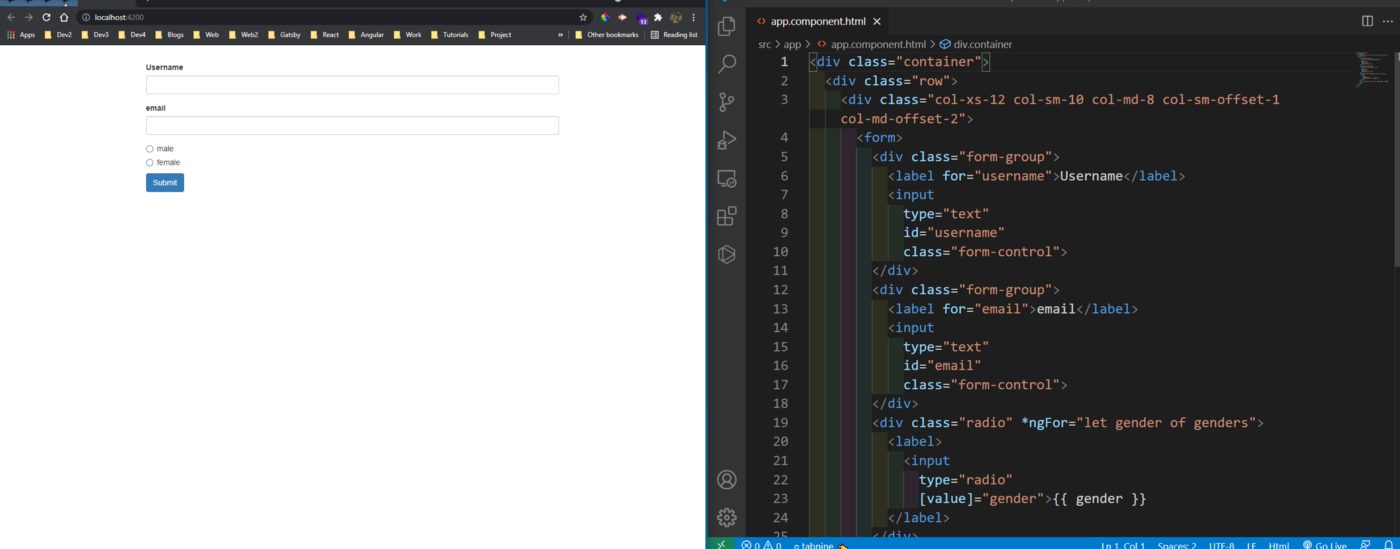 localhost
The first thing we will do is to change the FormsModule to ReactiveFormsModule in app.module.ts file.
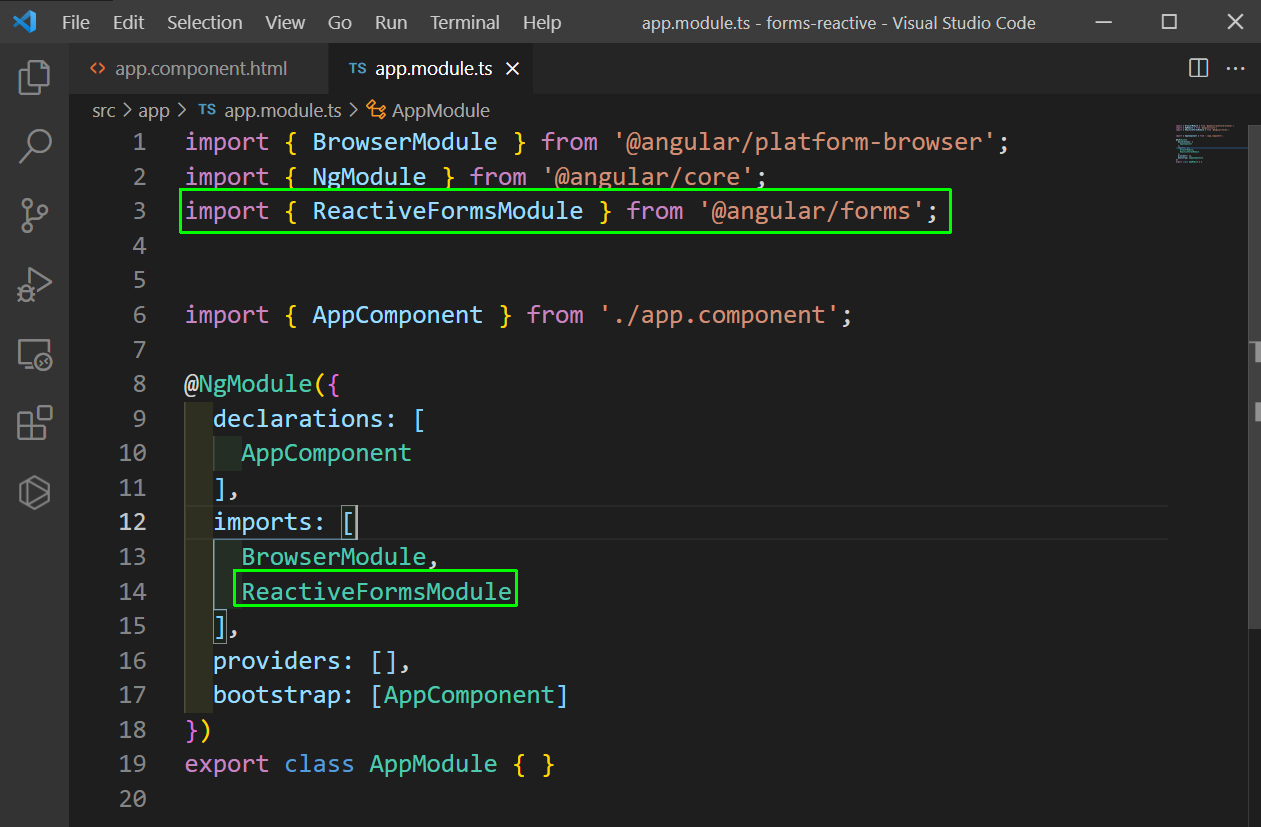 app.module.ts
Now in app.component.ts file we will add the signupForm and then in ngOnInit add the username, email and gender.
We also have an onSubmit to console log the signupForm.
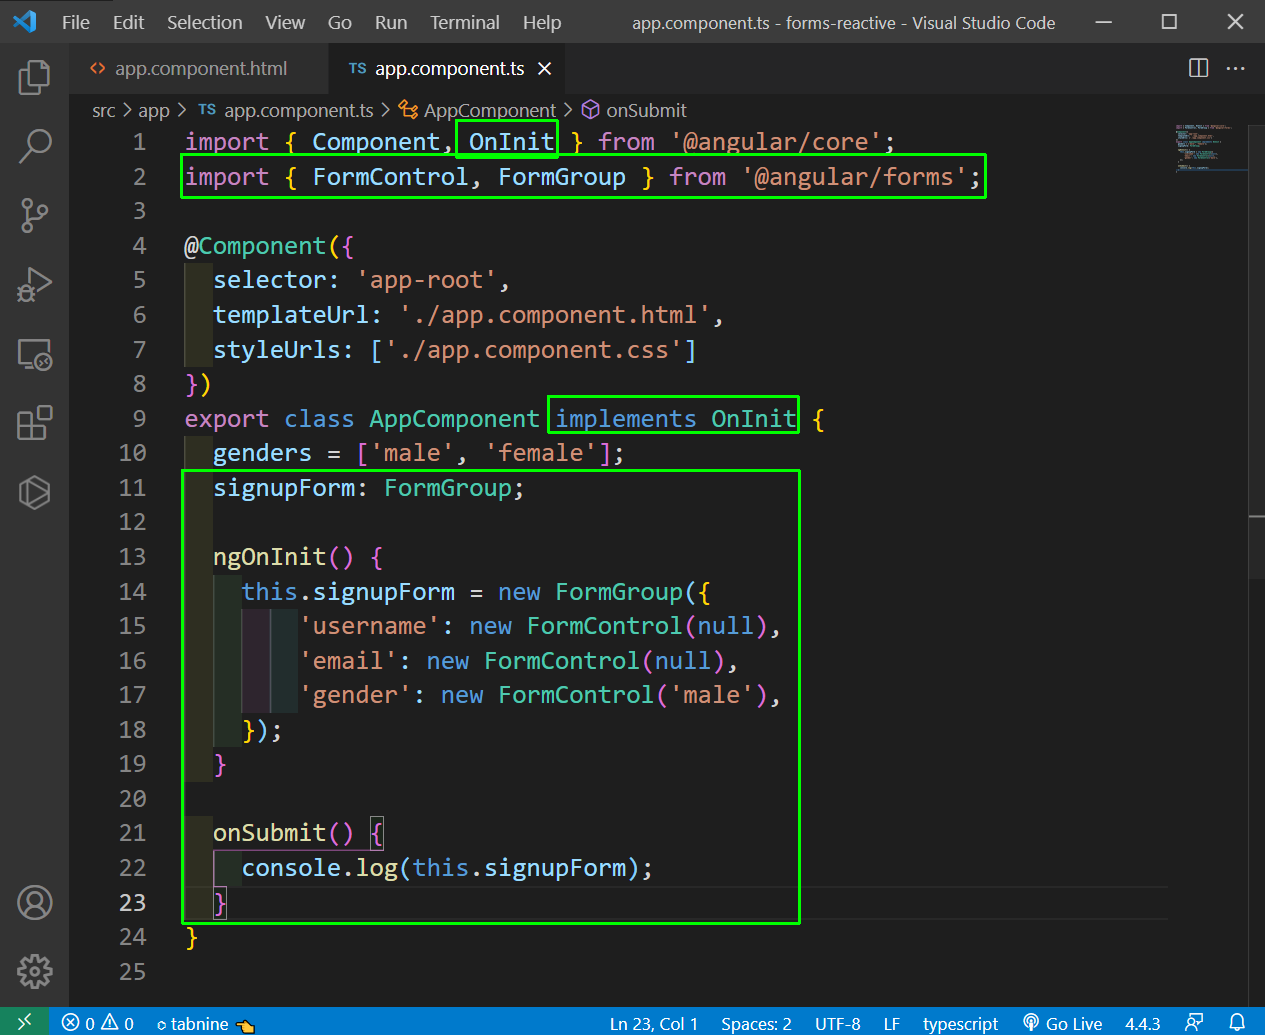 app.component.ts
Now, in app.component.html file add the formGroup, ngSubmit and formControlName and we are done.
 app.component.html
Now, in localhost when we add values and submit the form, we will get the values.
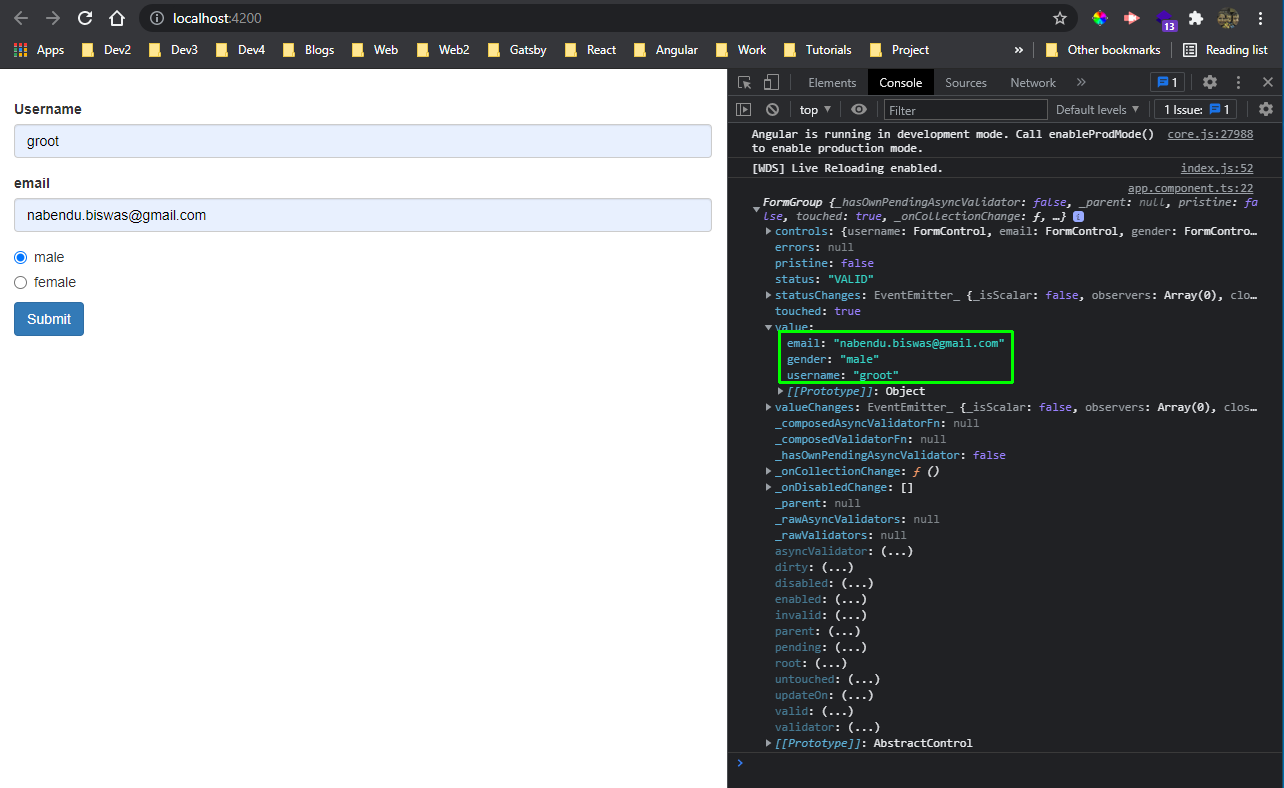 localhost
Now, we will add validators in our project and for this first in app.component.ts file, add Validators in FormControl.
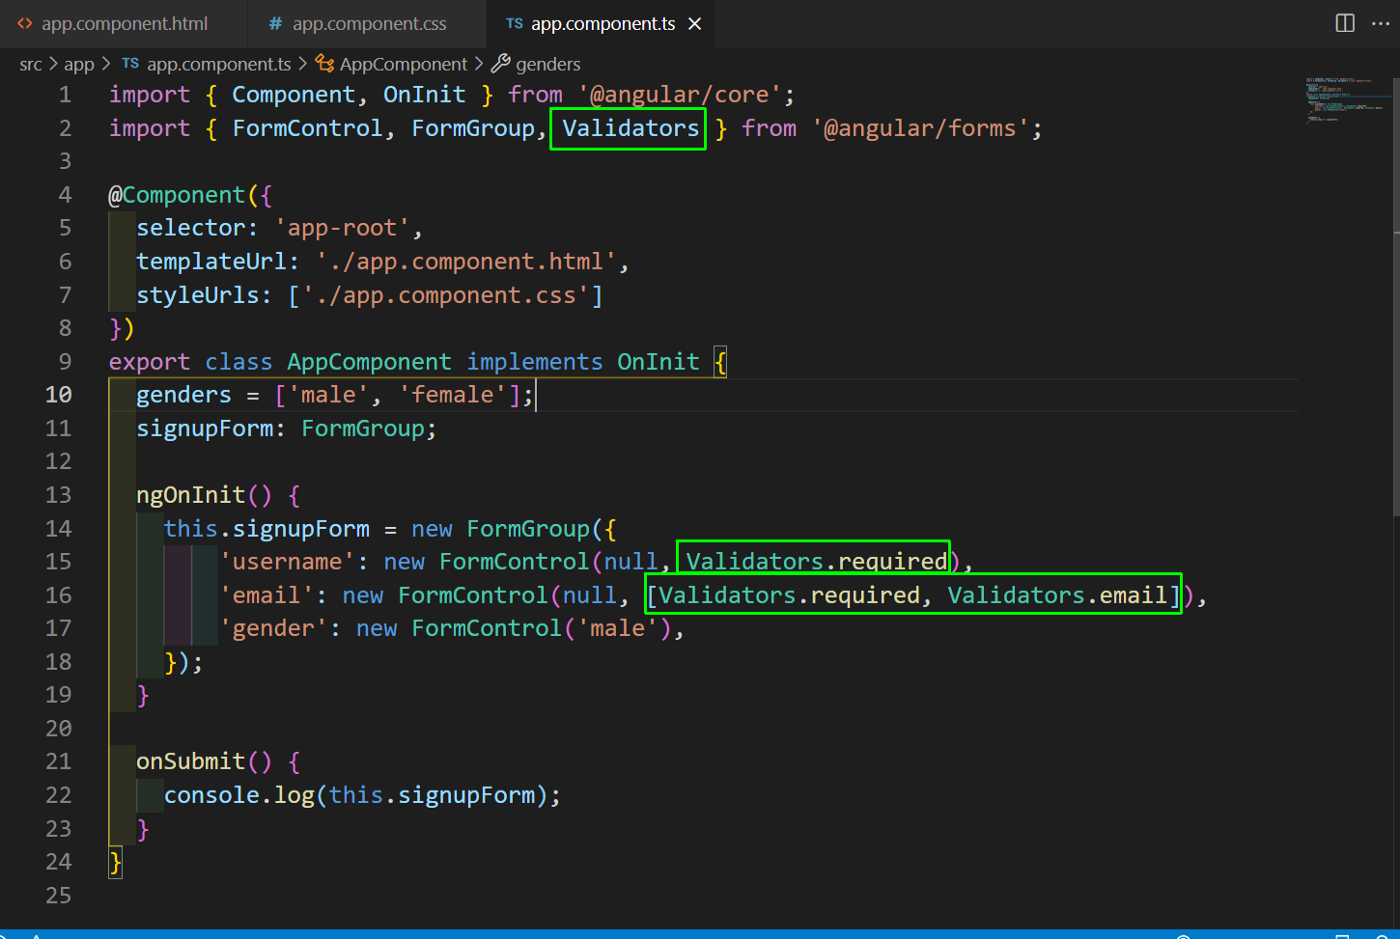 app.component.ts
Next, in app.component.html file, we will add get methods to check whether the username or email is valid.
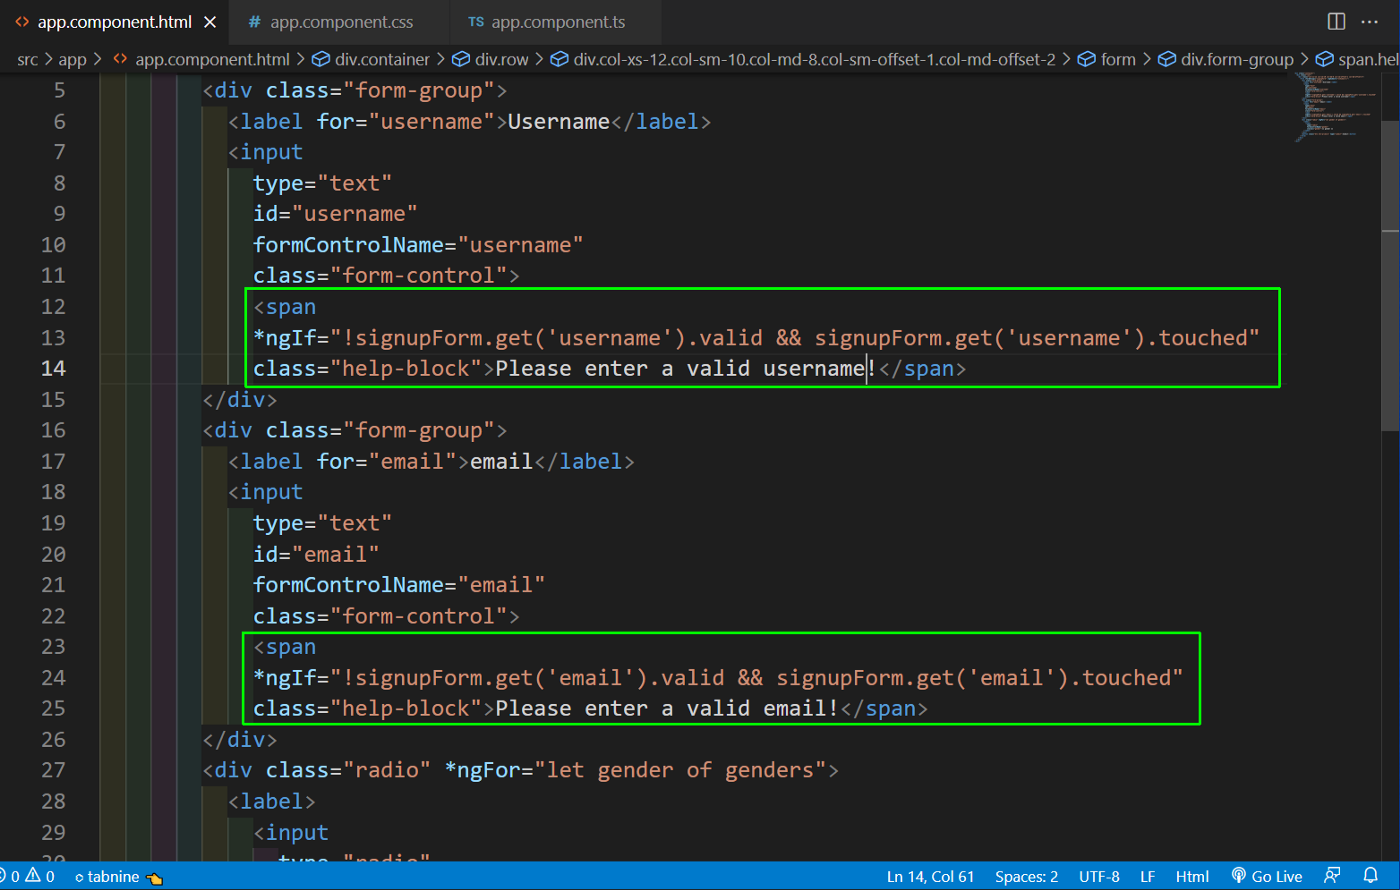 app.component.html
Now, in app.component.css file we will add the class to show the red border on error.
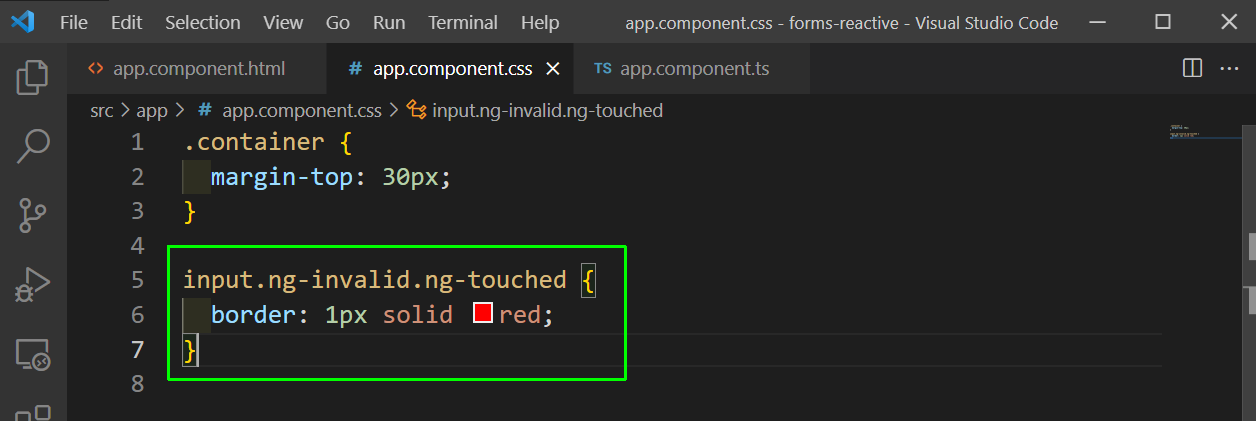 app.component.css
Now, our validations are working perfectly on localhost.
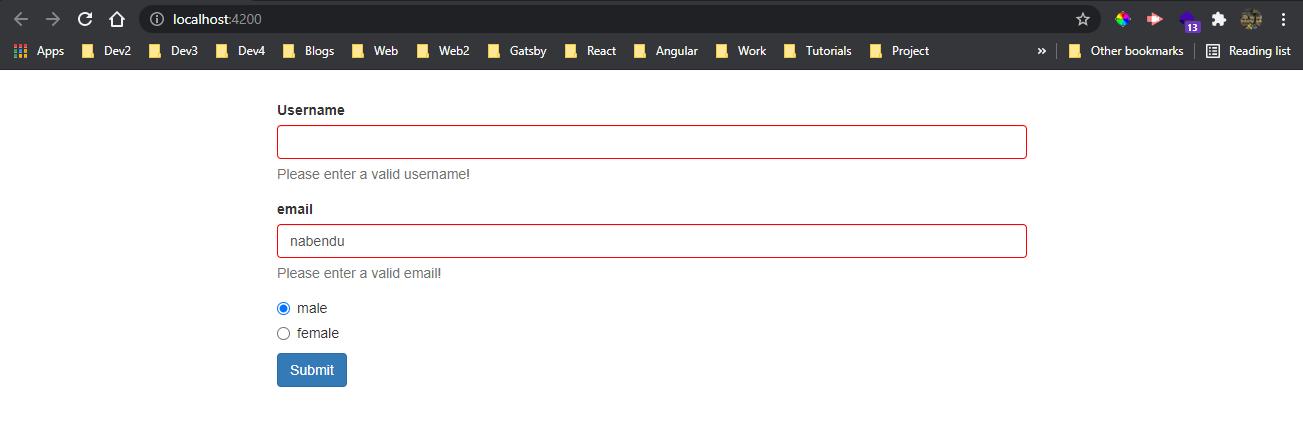 localhost
Now, we will complete our form by getting the default values in it, by using the setValue in ngOnInit. We are also resetting the form after the user submits it.
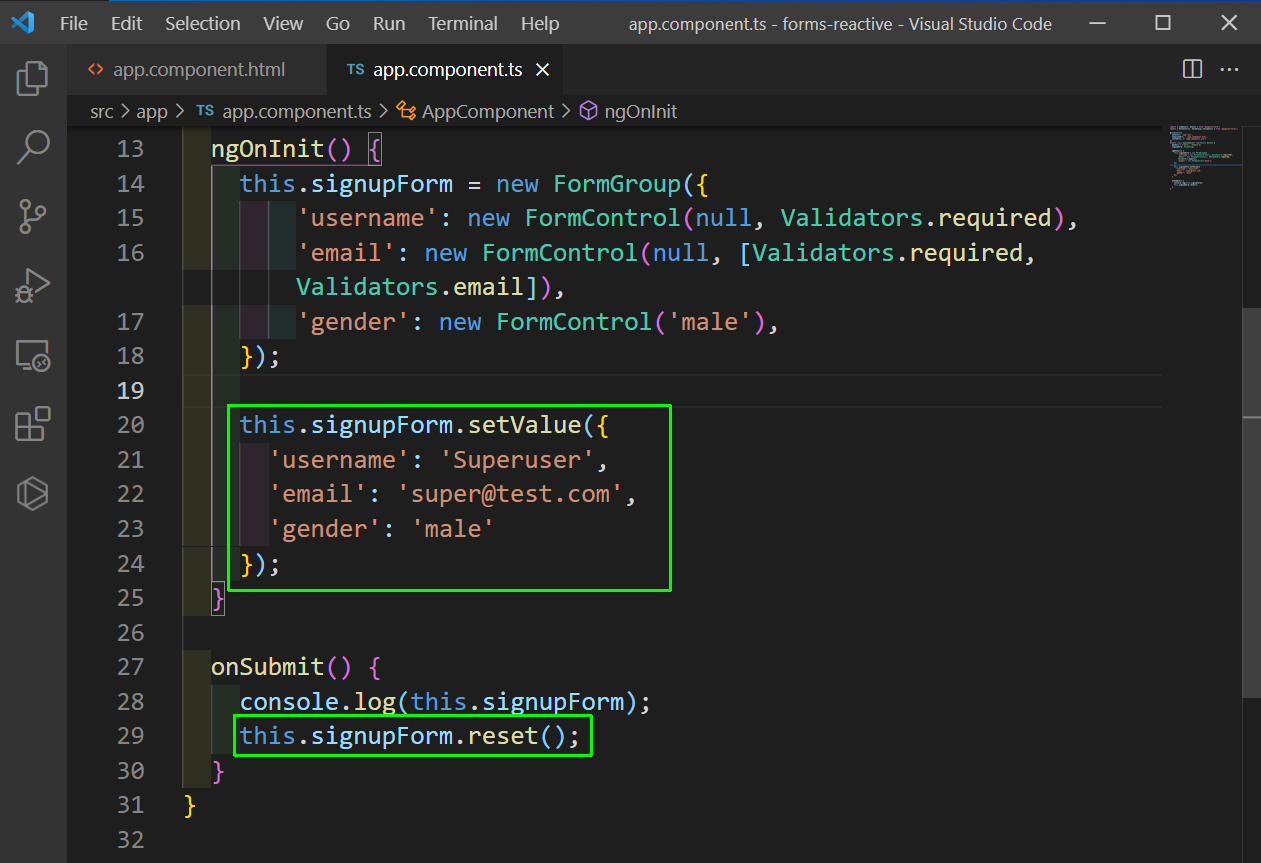 app.component.ts
Our app is complete now and the default values are been selected and the reset also working properly. The code for the same can be taken from this github repo.
 localhost