Welcome to part-11 of Angular Basics series. In this part , we will learn about pipes in Angular. Pipes are used to transform output in our templates.
The starting point can be taken from here.
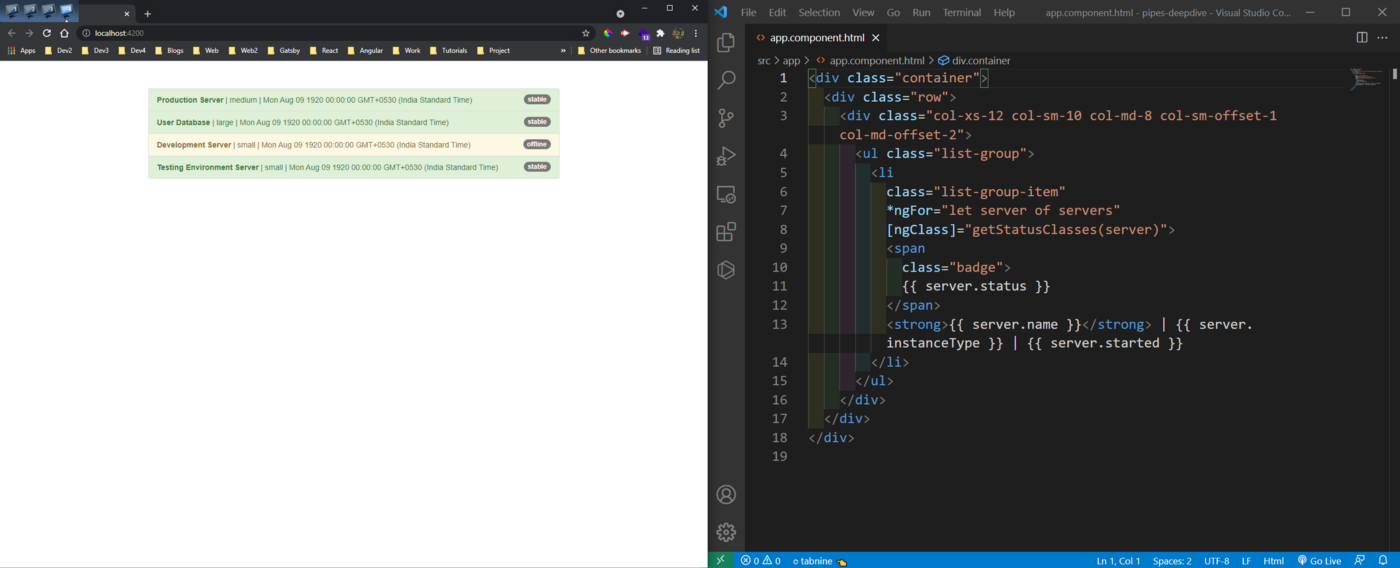
We have a list of servers showing in our project, which we are going to transform in our project.
 Starting
We will first use two inbuilt pipes to transform the data. First is uppercase and second is date in app.component.html file.
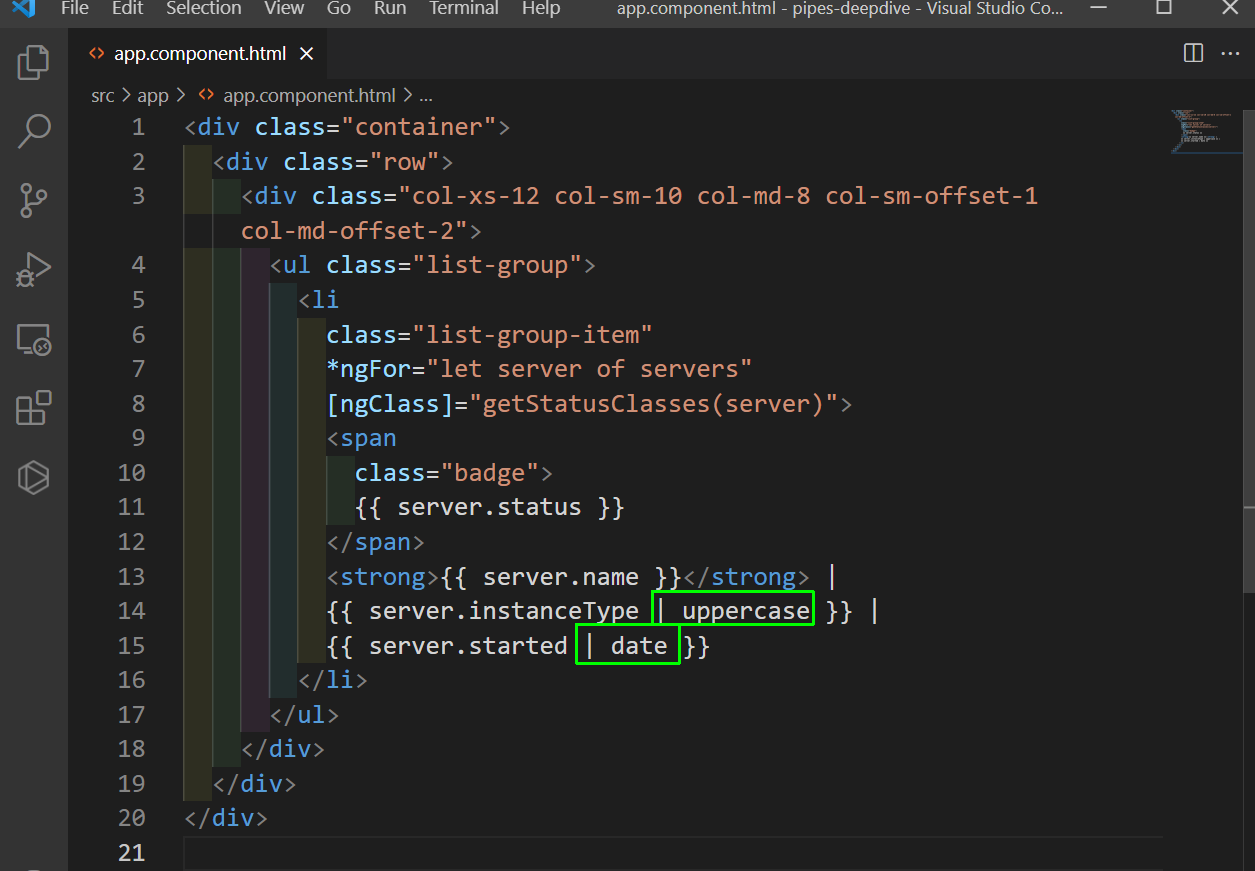 app.component.html
Now, in localhost both the instanceType and started are transformed.
 localhost
We can also parameterize the pipe and also can chain multiple pipes. We will add parameter to date and also change it to uppercase.
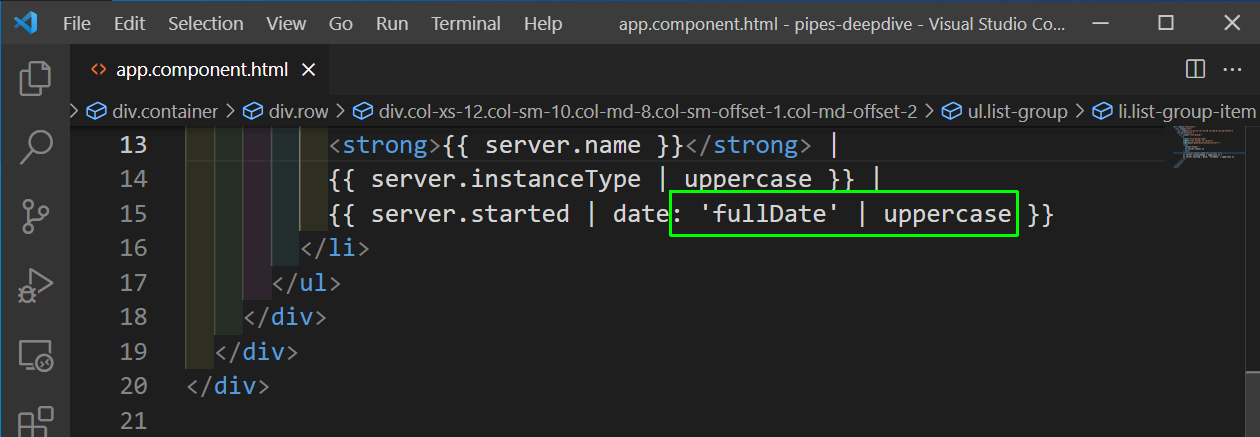 parameterize
Our dates are formatted correctly now in localhost.
 localhost
We will now create a custom pipe for shortening the strings. Create a file short.pipe.ts inside the app folder. We have to use the pipe decorator to make it a pipe.
The simple function just takes a value and a limit and if the length of the value is greater then the limit, then return the substring with the limit followed by three dots.
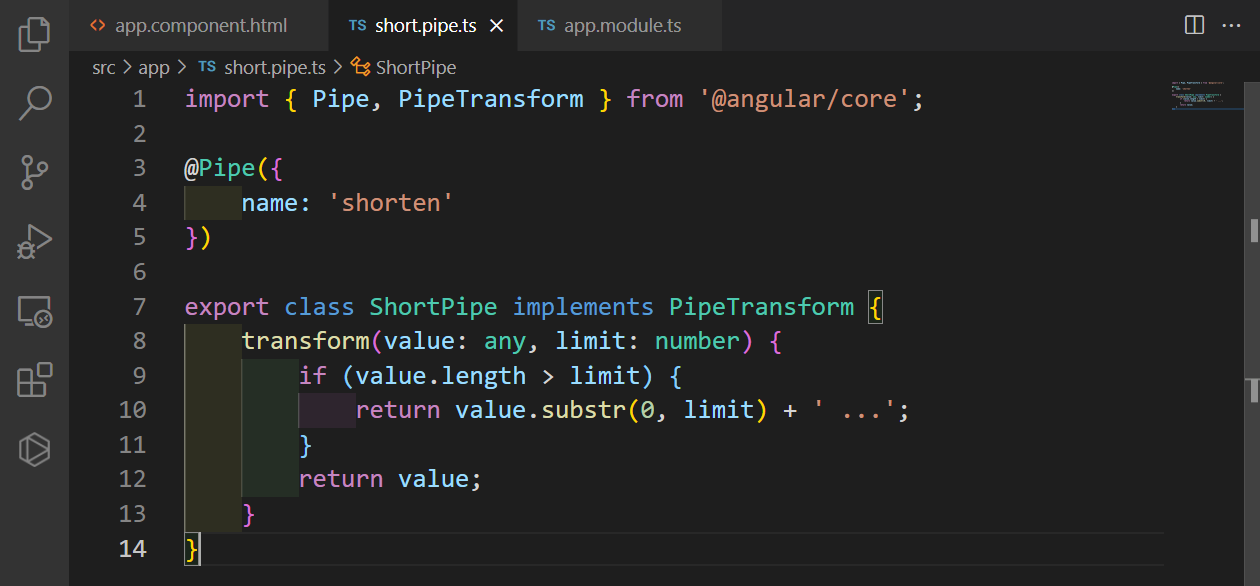 short.pipe.ts
Next, we will include the pipe in app.module.ts file.
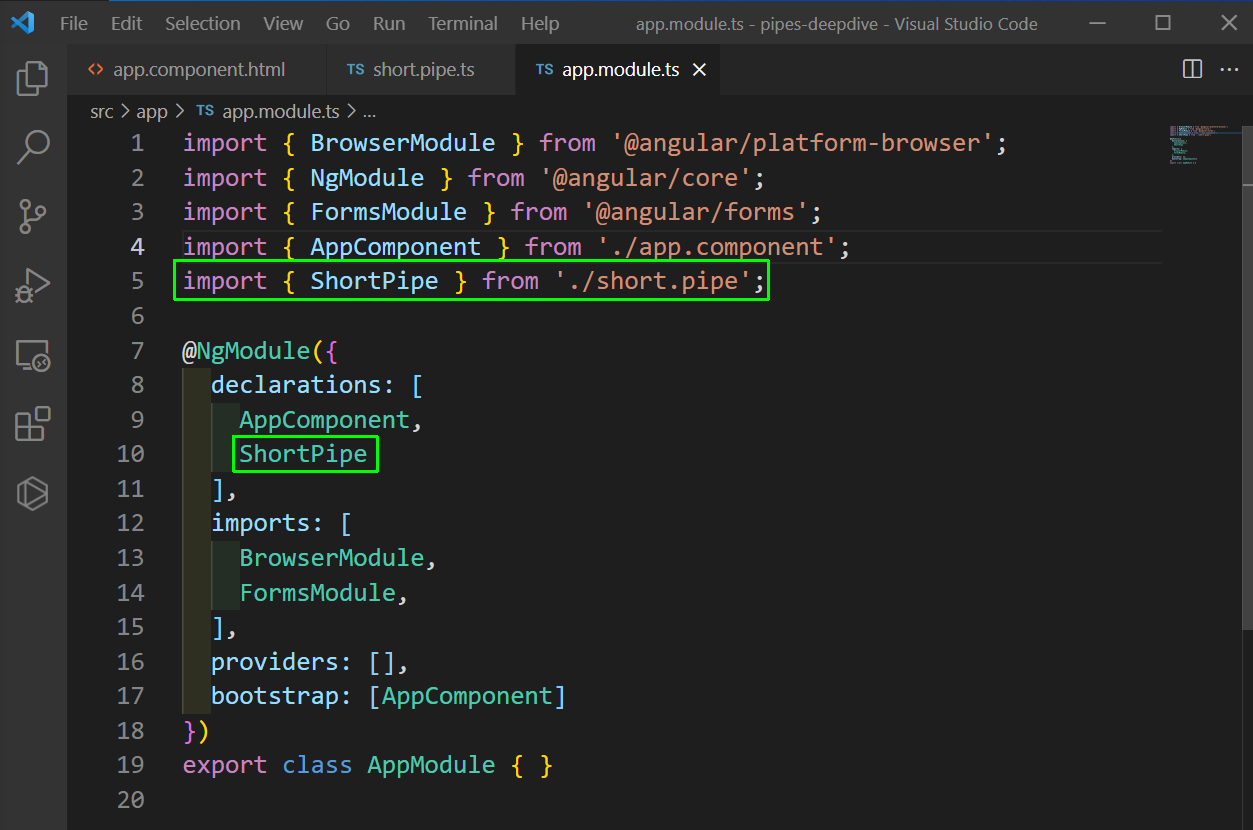 app.module.ts
Lastly, we will use the shorten in app.component.html file.
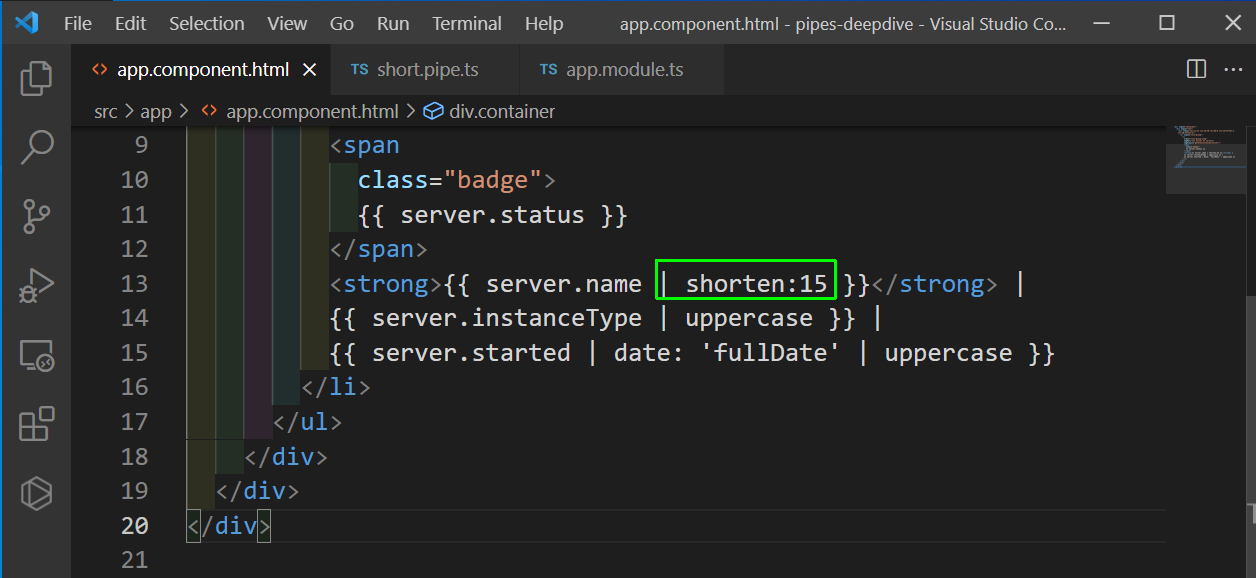 app.component.html
Now, in localhost the pipe is performing as desired.
 Pipe working
We will create a new filter pipe, but this time using command line with the below command. It will also add the filter pipe in app.module.ts file.
Now, in the filter.pipe.ts file we are passing a value and the filterString. After that we are checking whether it matches and pushing it to an array.
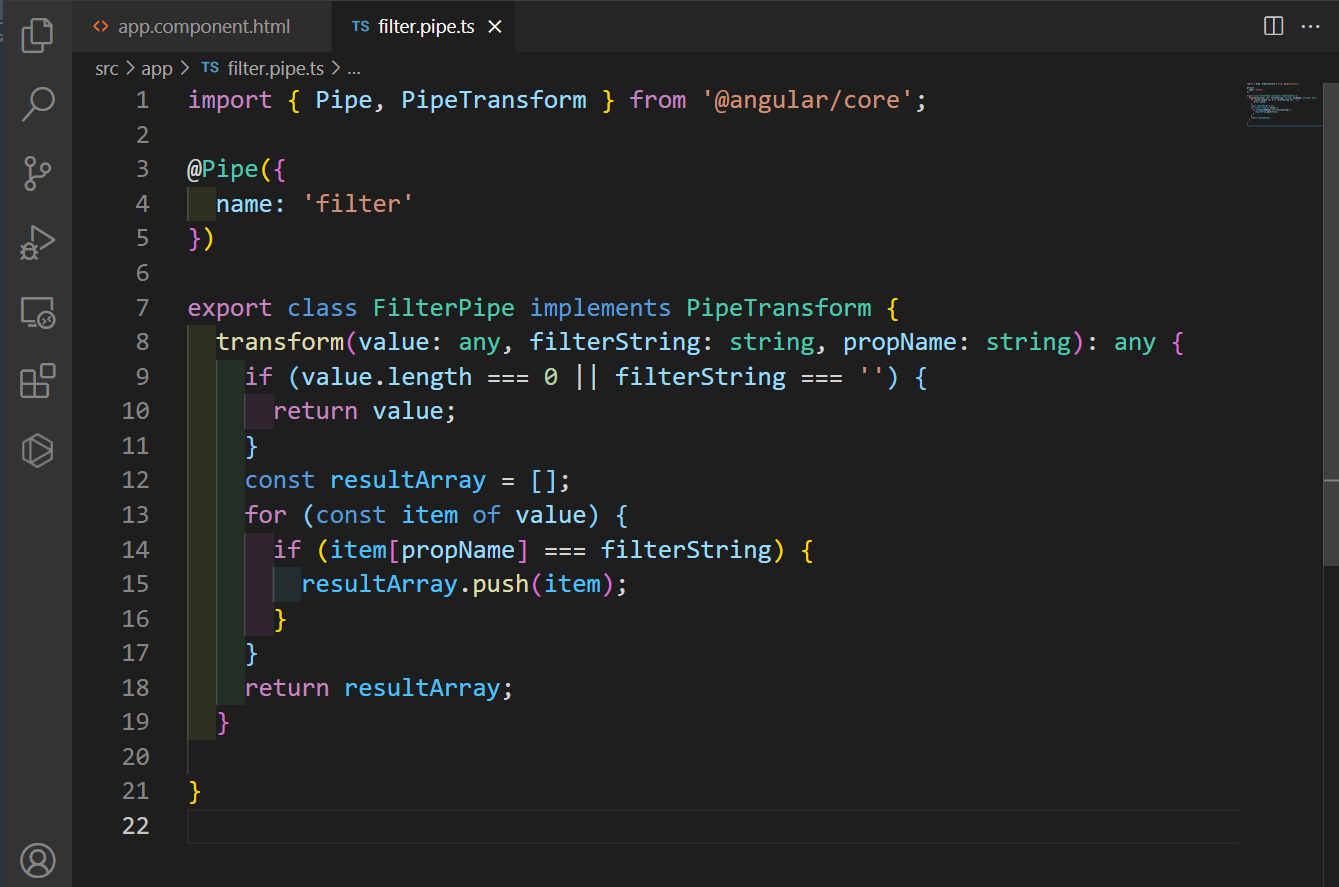 filter.pipe.ts
Now, in app.component.html file, we will add an input box with ngModel with filteredStatus.
We are also using our filter and passing filteredStatus and the status of the server.
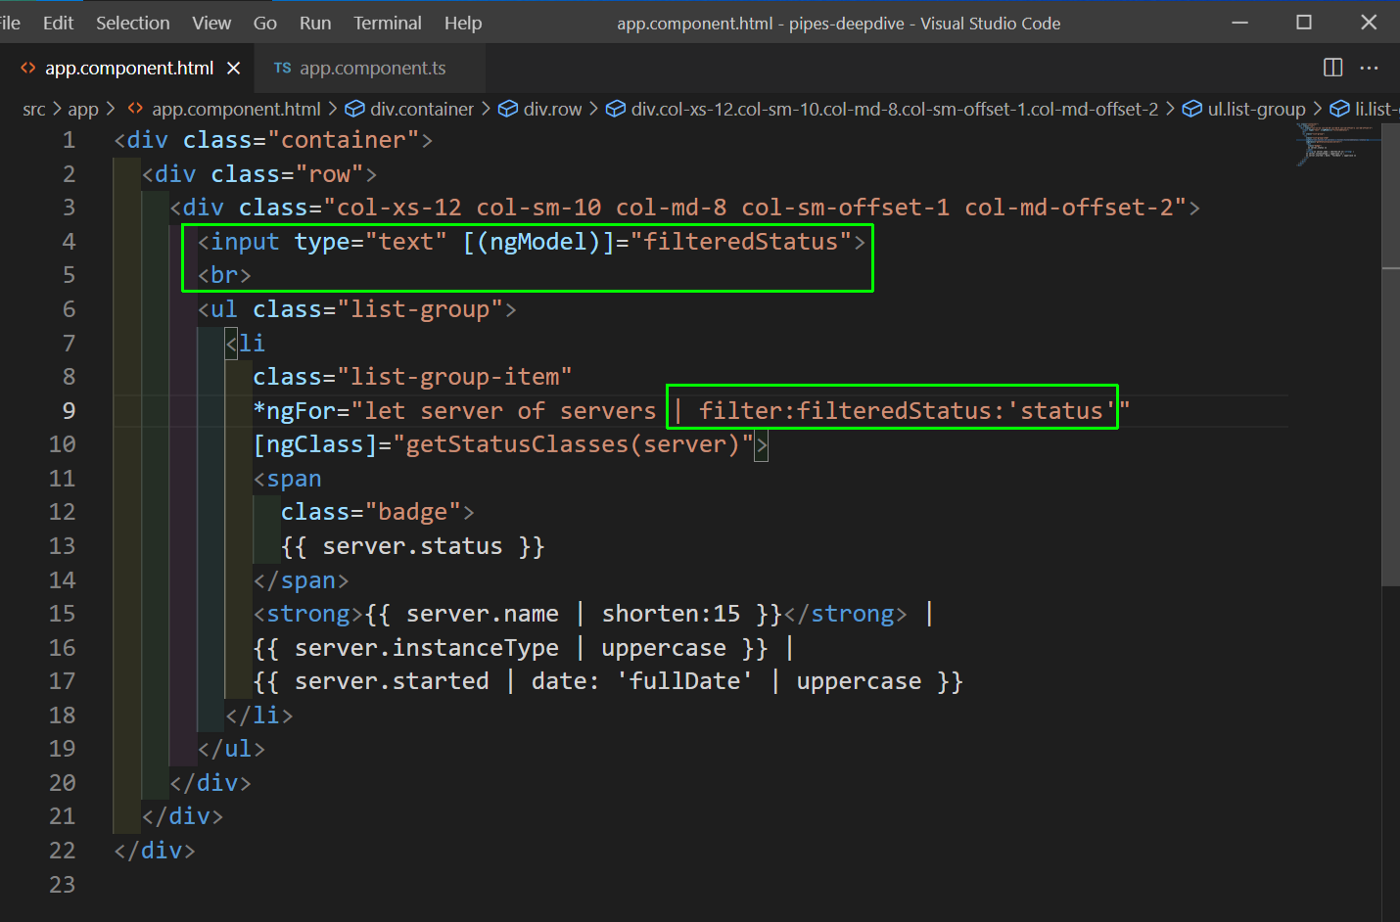 app.component.html
We also need to add the filteredStatus in app.component.ts file.
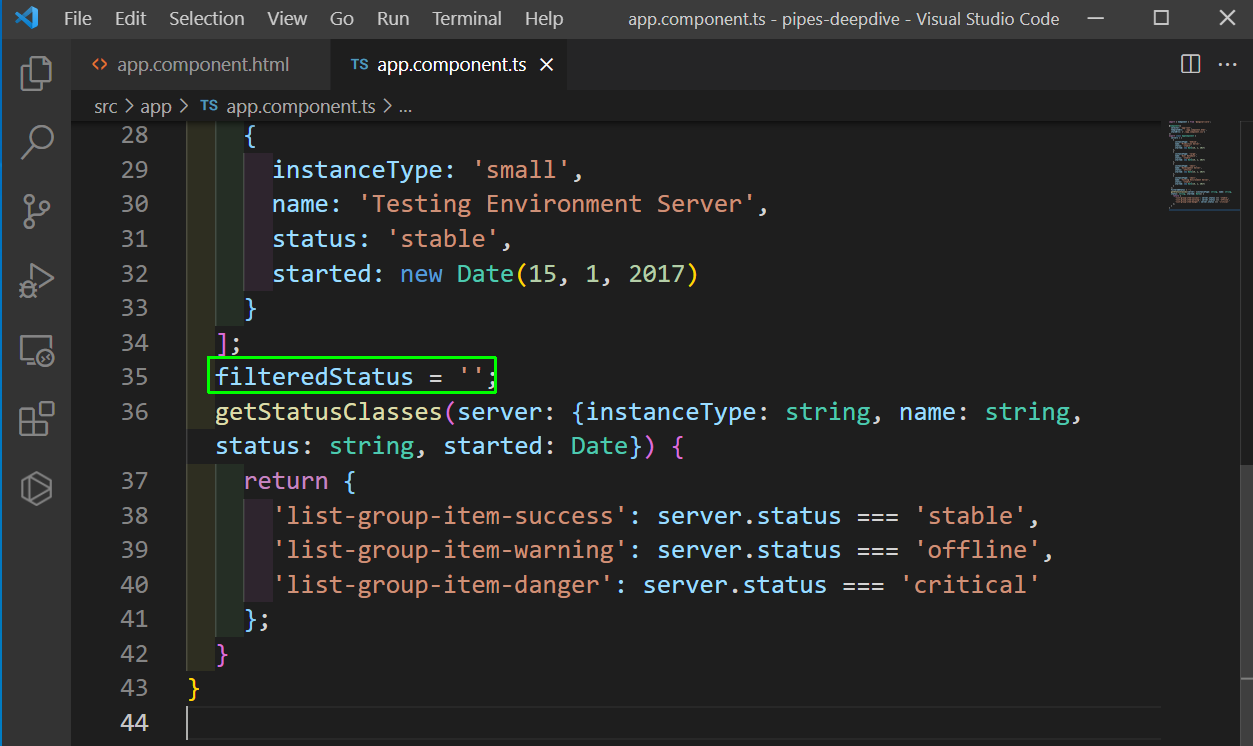 app.component.ts
Now, our filter is complete and working properly. This completes our post and you can find the code for the same in this github repo.
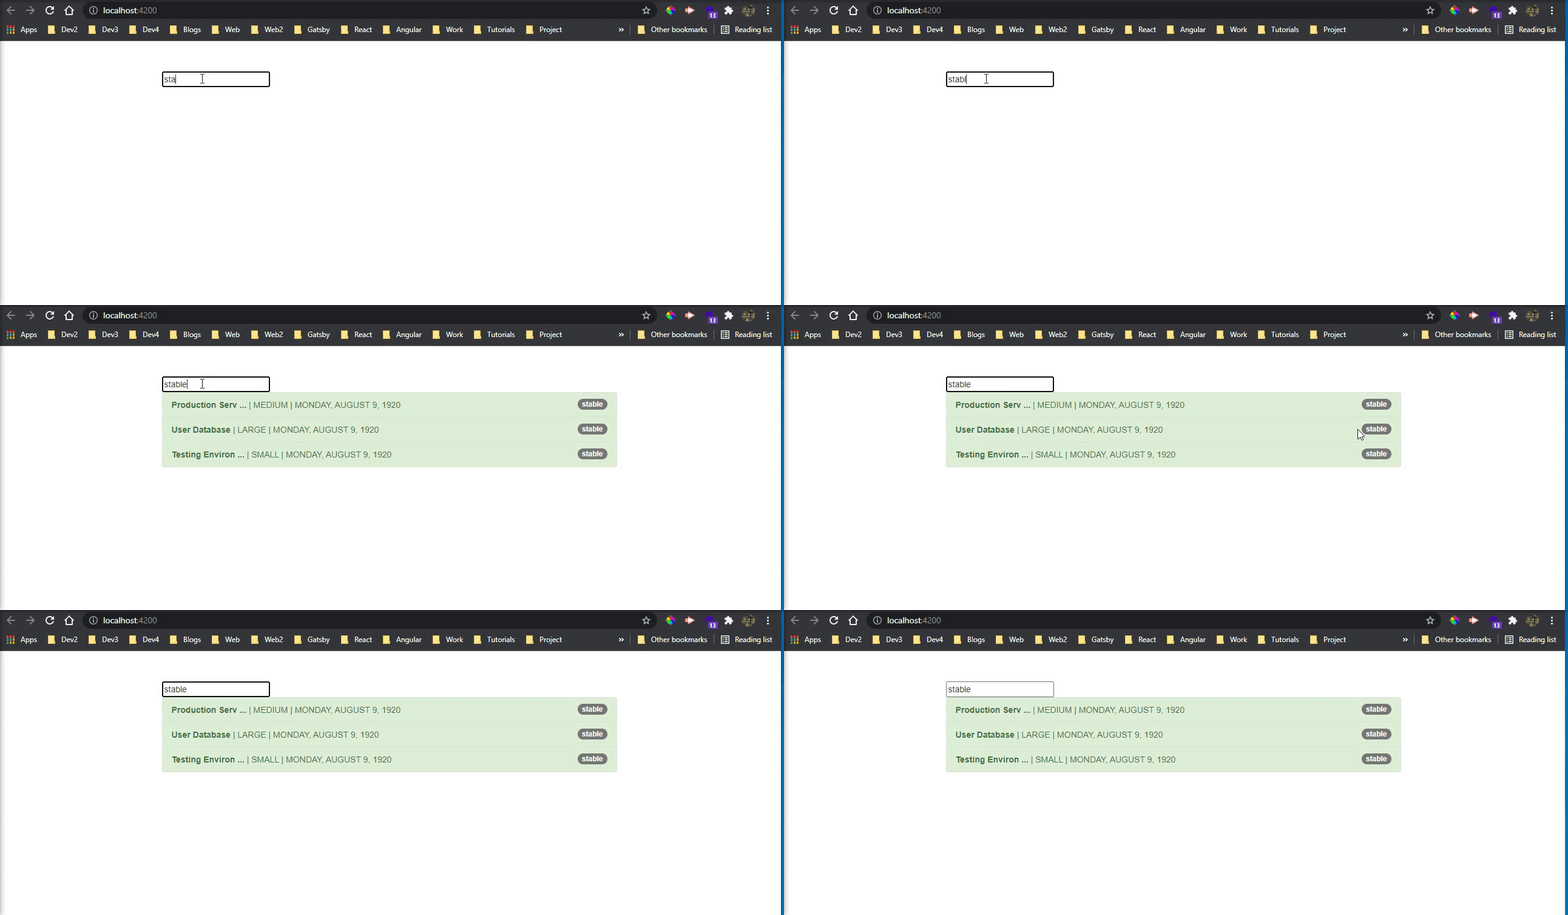 Working properly