Welcome to the second part of Angular Basics. You can find the first part here. We will start from where we left.
First we will understand the Component Selector. We have already seen the normal way to select that is giving the the selector name in quotes.
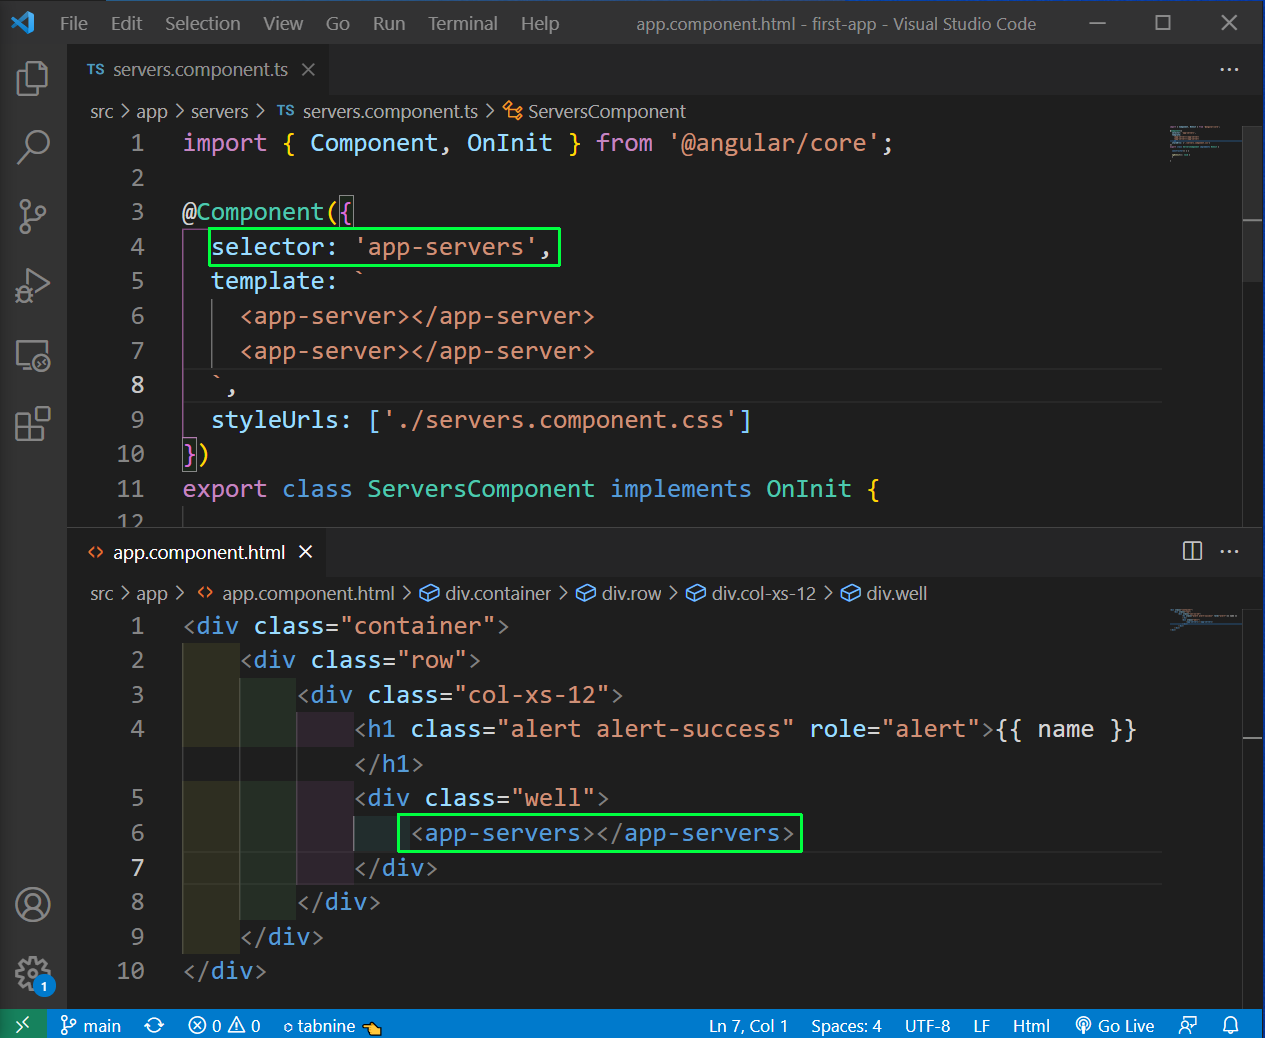 Common way
The second way is to give the component name in a array. But now, we have to use the component name inside a div, as an attribute.
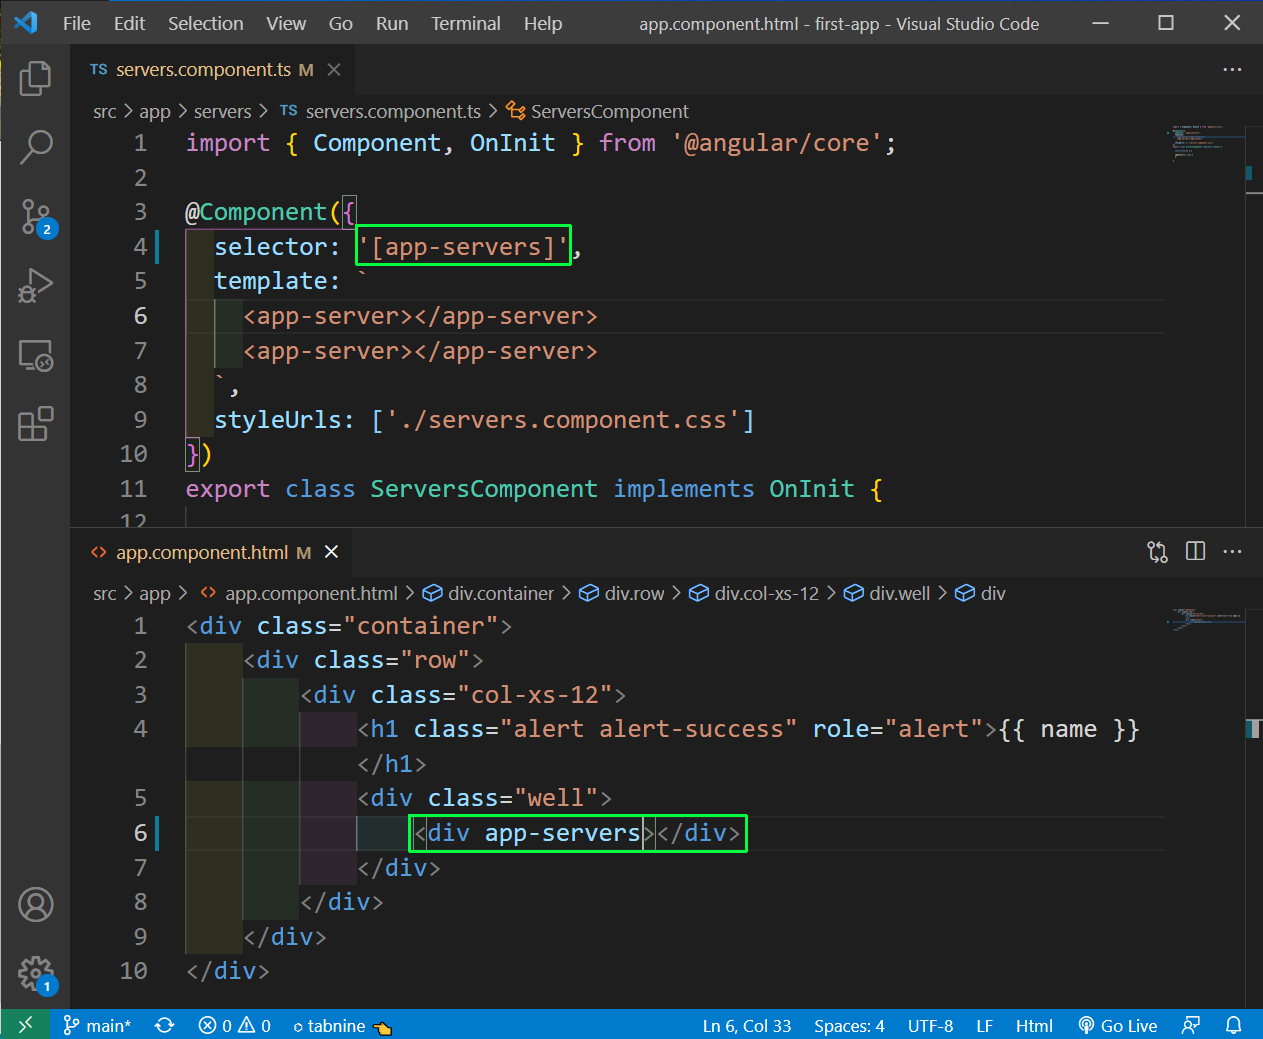 Array way
Their is another way and it is to add a dot in the selector name. By this we add it with a class in the div. This way is also useful if we also use the class as a CSS selector for styling.
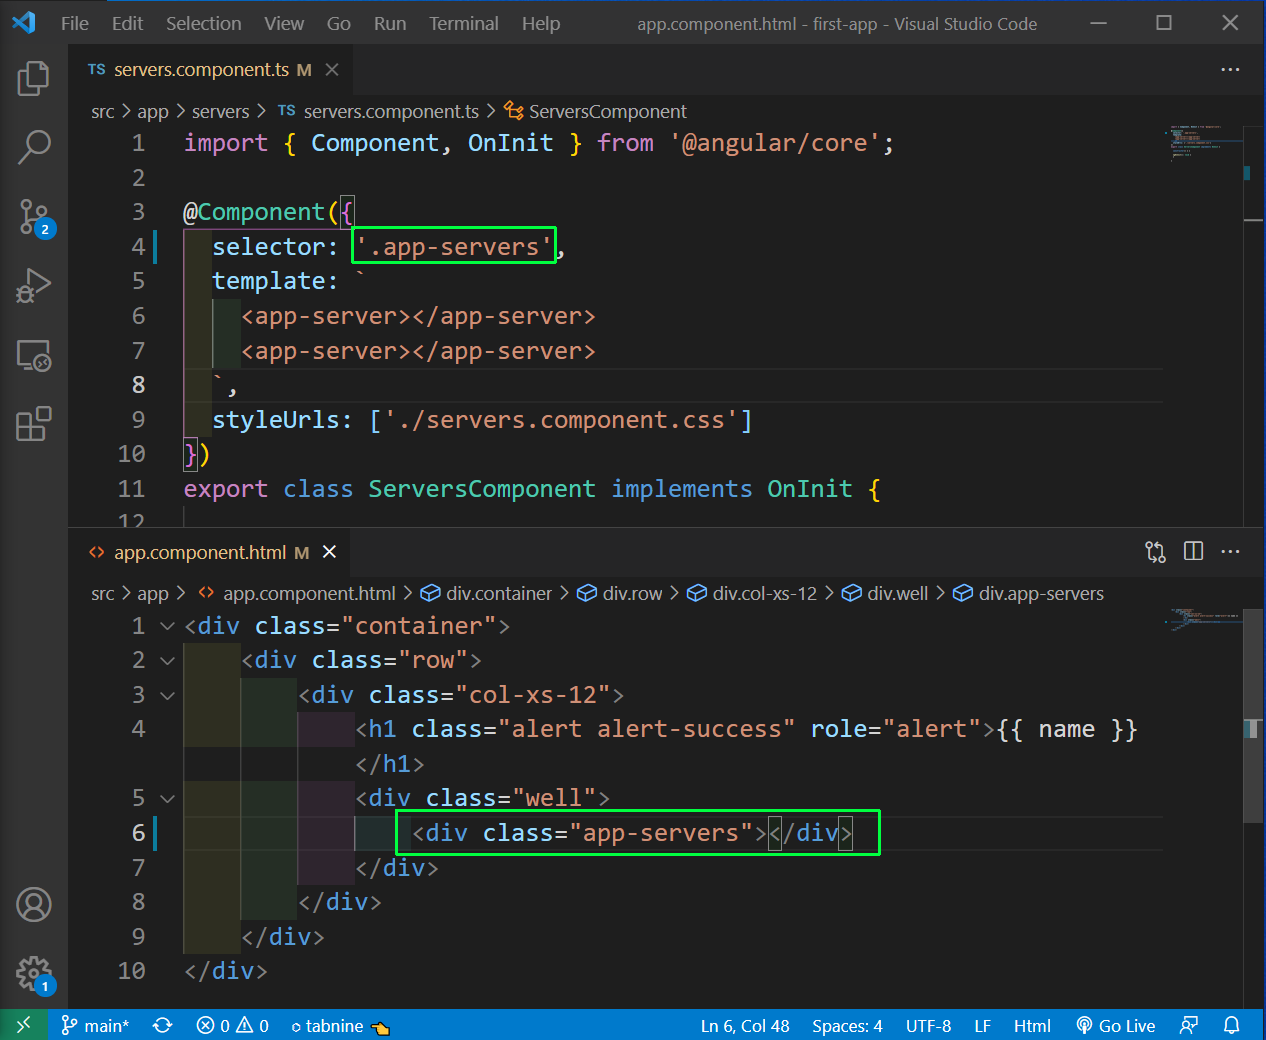 Third Way
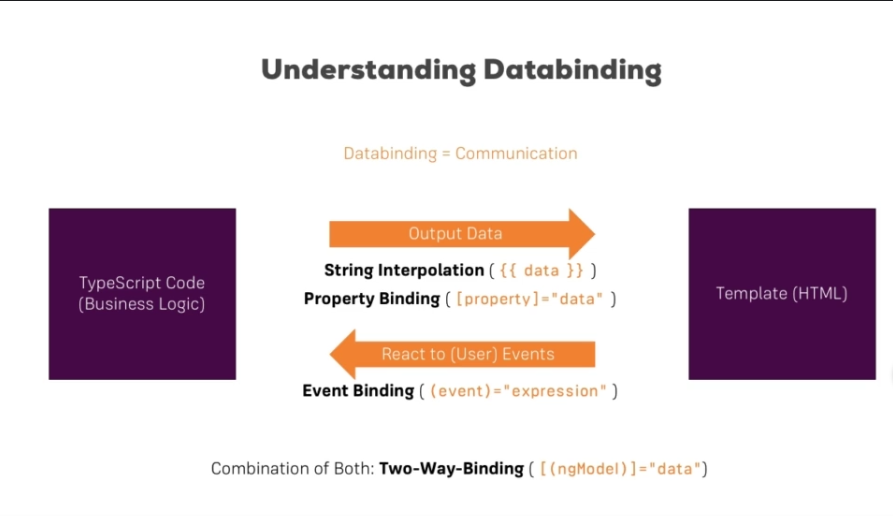
We will understand Data binding in more details next. We will understand it from the below image.
When we want to output data from TypeScript code to HTML, we use String Interpolation or Property Binding.
But when we want to react to an user event like click, we use Event Binding. Their is another way also and it is known as Two-way Binding.
 Data Binding
We will first look into String Interpolation first. The main concept here, is that it only represent things which can be converted to strings.
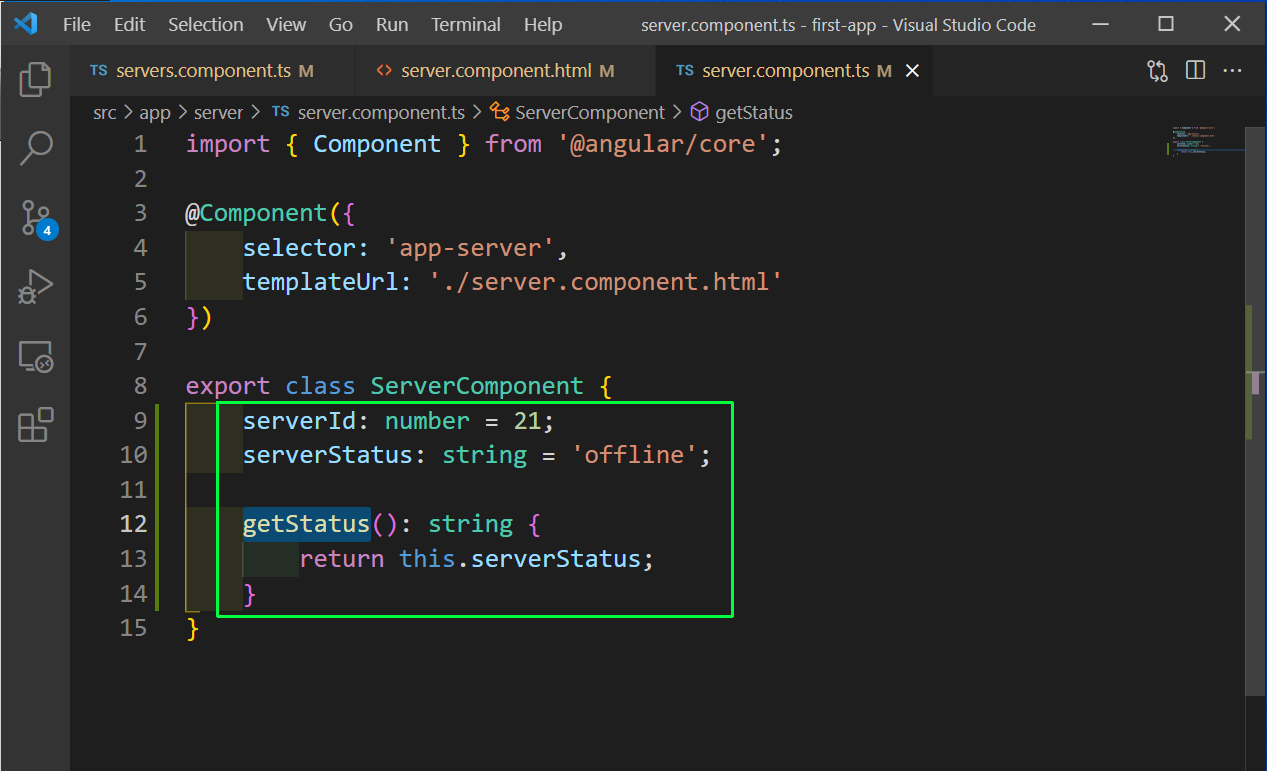
So, in server.component.ts file add the following.
 server.component.ts
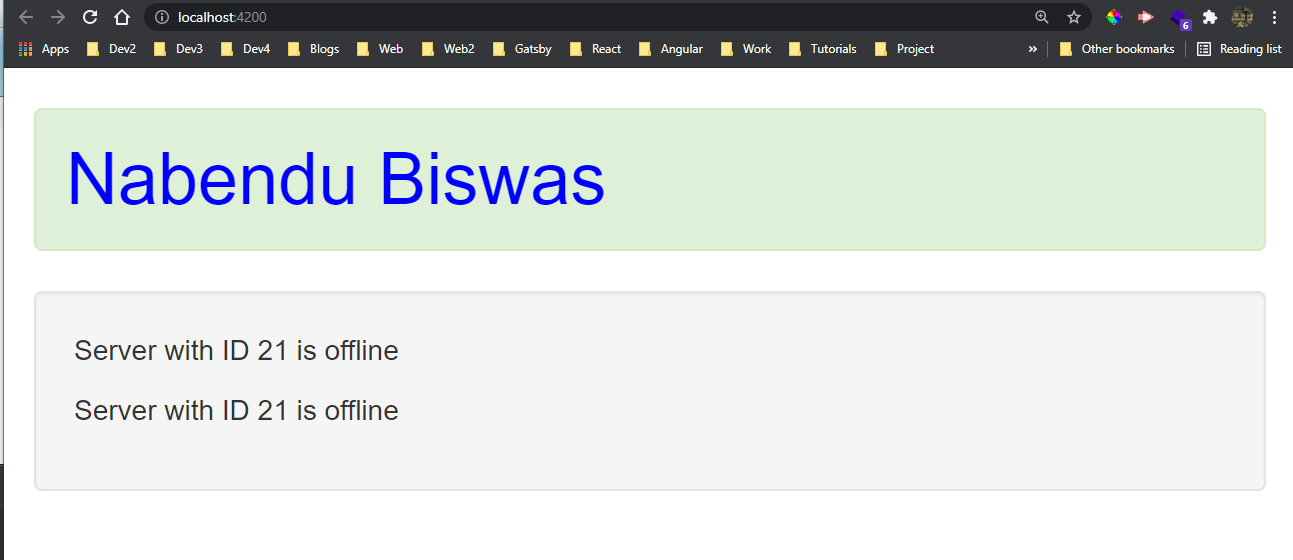
Now, in server.component.html file, we are using string interpolation in three ways. First is to directly show as string. Second is the show the serverId taken from the typescript file. And third is to show the output of the function getStatus(), which is a string
 server.component.html
Now, our localhost shows as below.
 localhost
Now, we will learn about Property Binding. Let’s go to servers.component.html file and add the code for a Button. Later on we will have the functionality to add new servers, once we click on it.
 servers.component.html
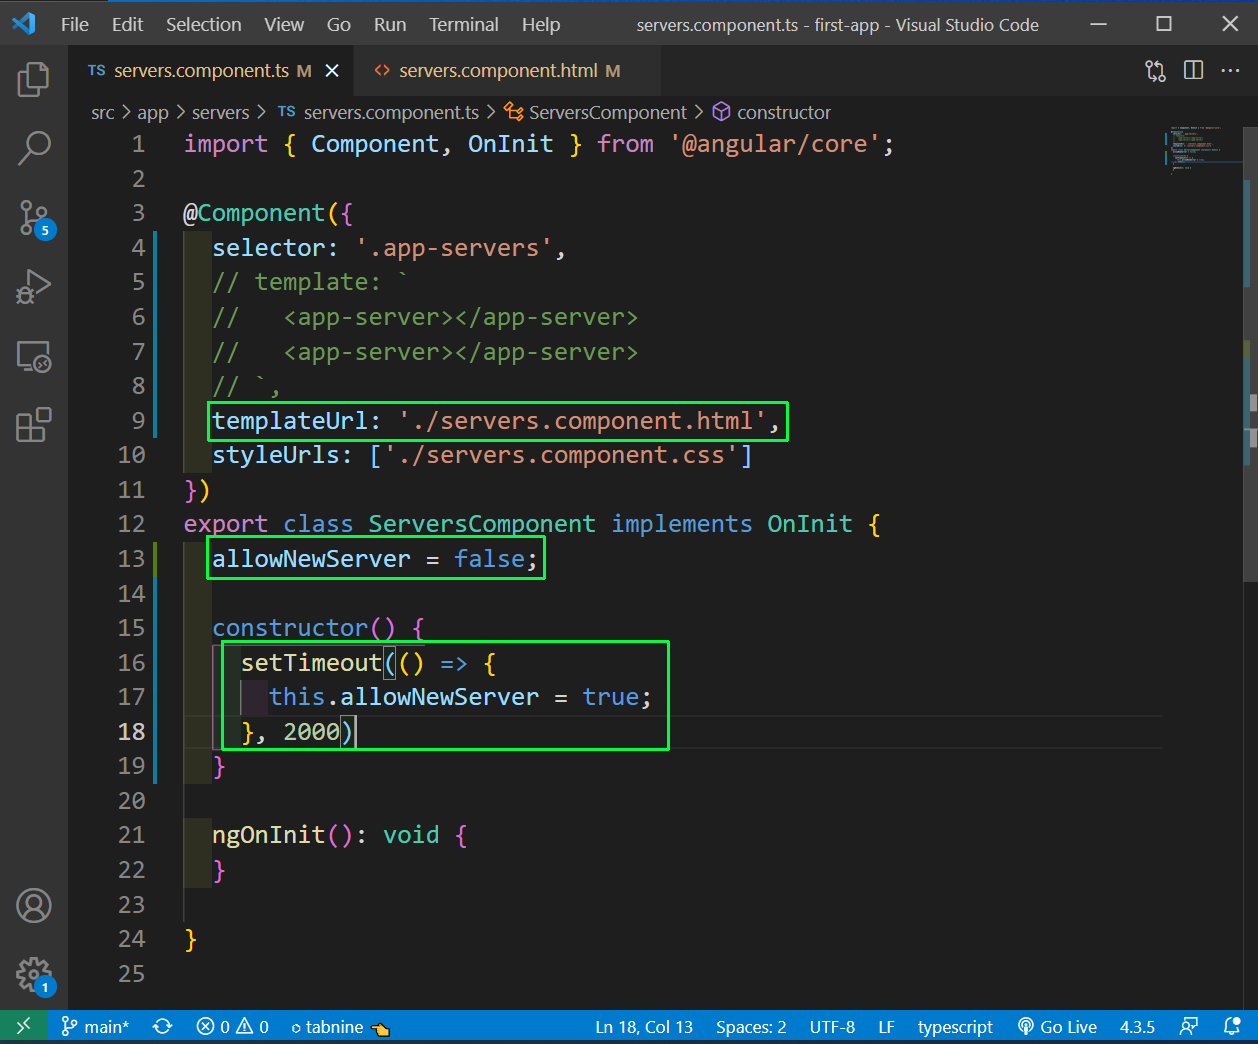
Next, in the servers.component.ts file comment the template code first and after that add the templateUrl pointing to the servers.component.html file.
We also have a allowNewServer property and based on it, we want to disable the button in the html file. In the constructor, we have a setTimeout function, which makes the allowNewServer property true after 2 seconds.
 servers.component.ts
Now, back in servers.component.html file we have the html disabled property. But we are binding it here by using it in square brackets and making it equal to the opposite value of allowNewServer property.
 servers.component.html
We can also use Property binding in the case of String interpolation, just as in the below case.
 Property Binding
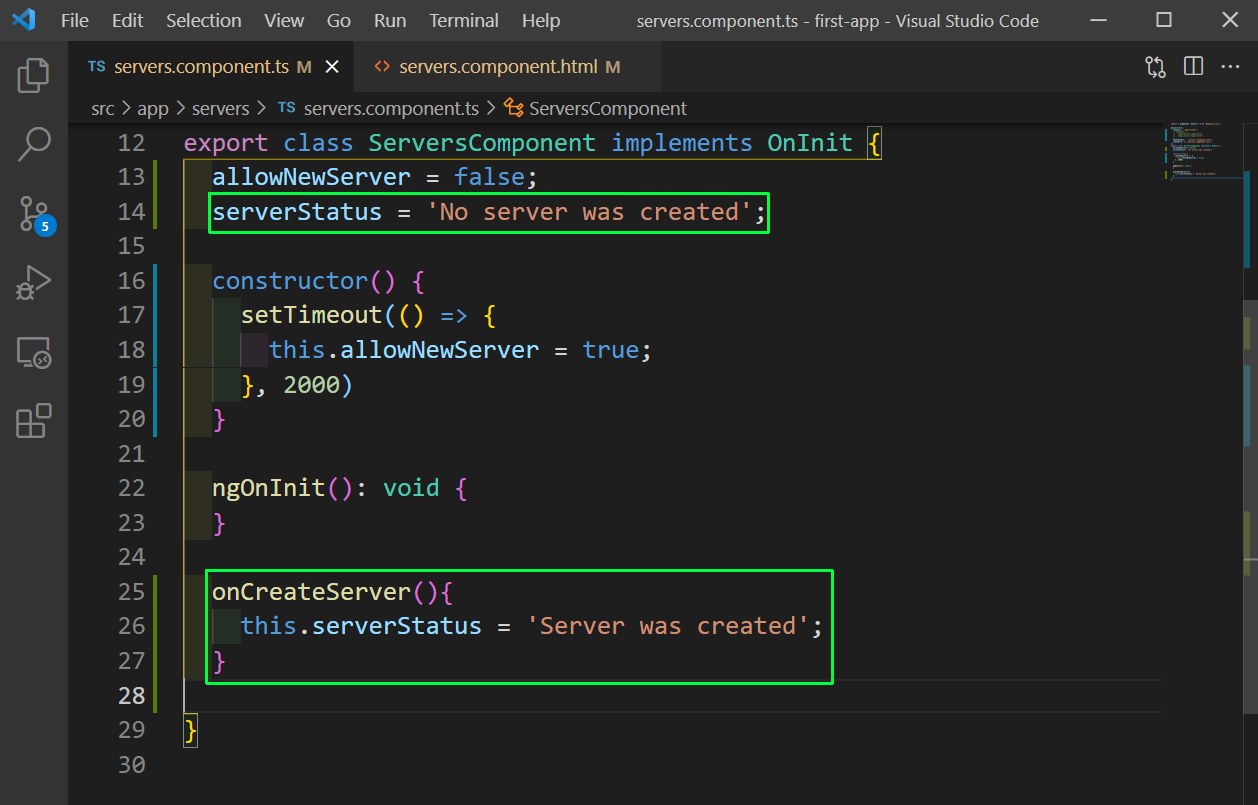
Now, we will learn to react to events and learn about Event Binding. We have created a new variable serverStatus in servers.component.ts file. We also have a function onCreateServer which changes it’s text.
 servers.component.ts
Now, back in servers.component.html file, we have a click event of Angular which is given by normal brackets and will run the function onCreateServer once the user clicks on it.
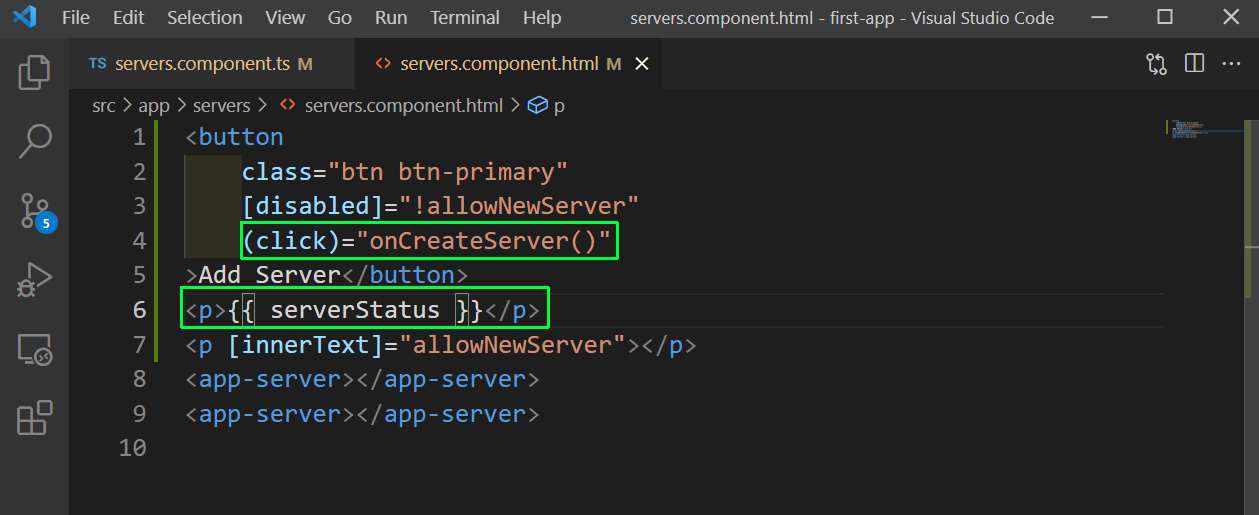 servers.component.html
Now, in localhost our event is working fine.
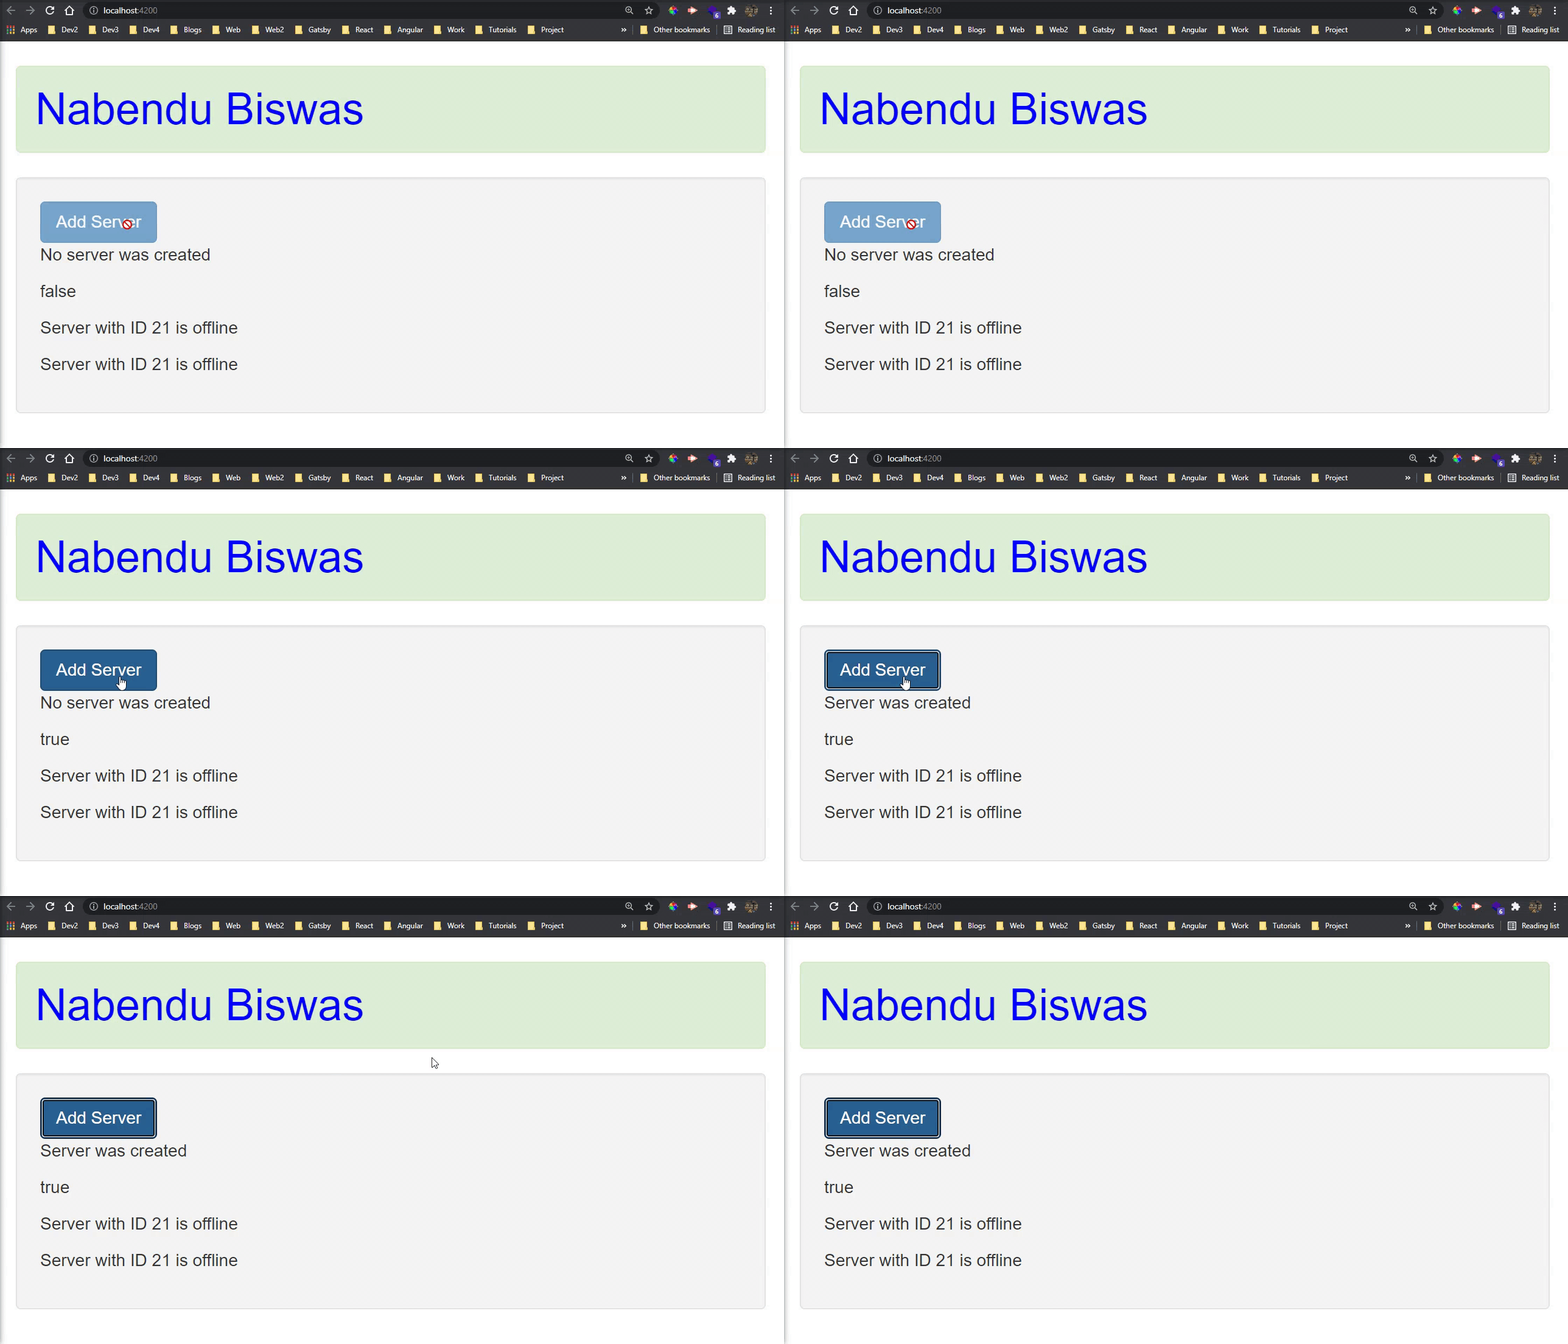 Working fine
Now, we will also learn to pass data in event binding. In the servers.component.html file, we have an input field which will call a function onUpdate and pass the $event. This gives us access to DOM events like event.target.value.
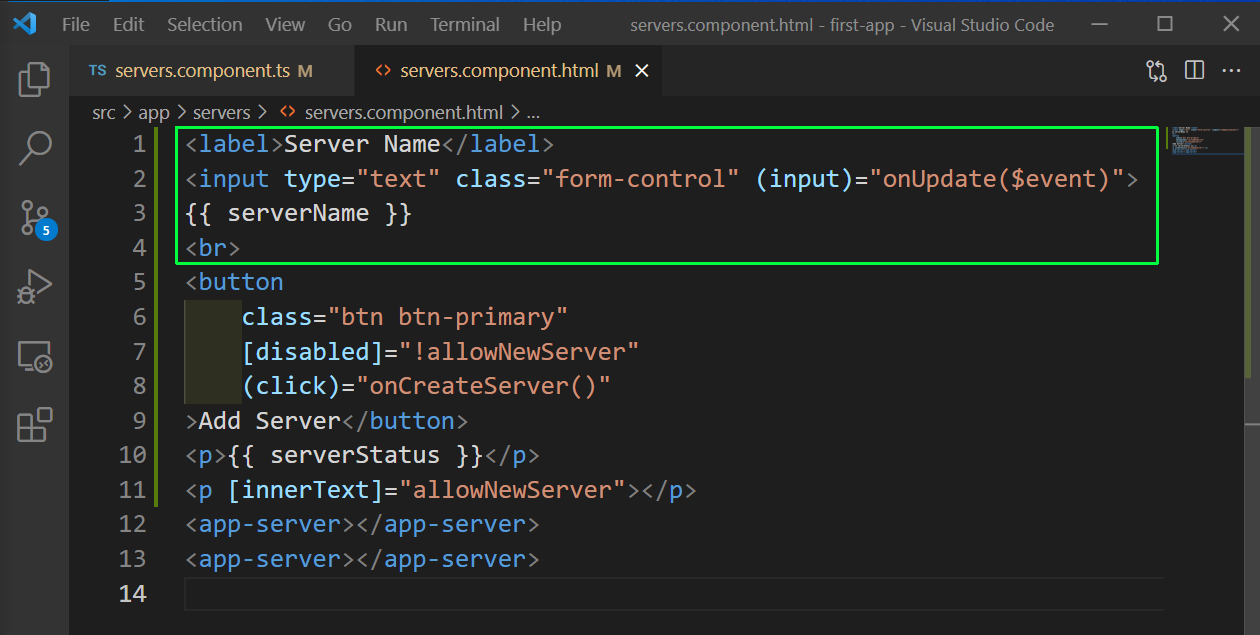 Event binding
Next in the TypeScript file we will add this new function and make the variable serverName equal to the event.target.value.
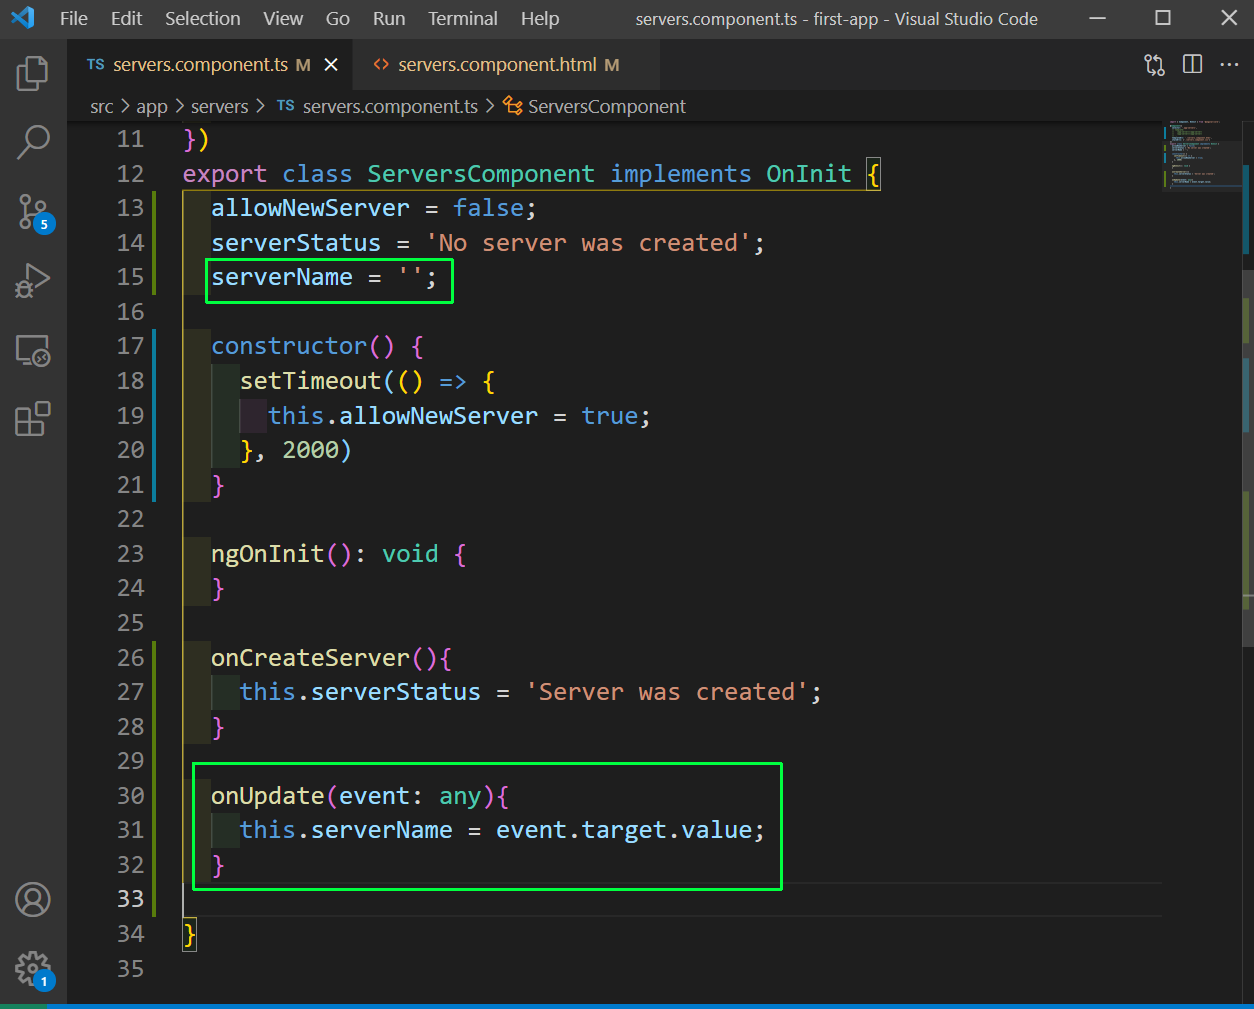 Function
Now, whenever the user types in the Input box, we will get it shown below.
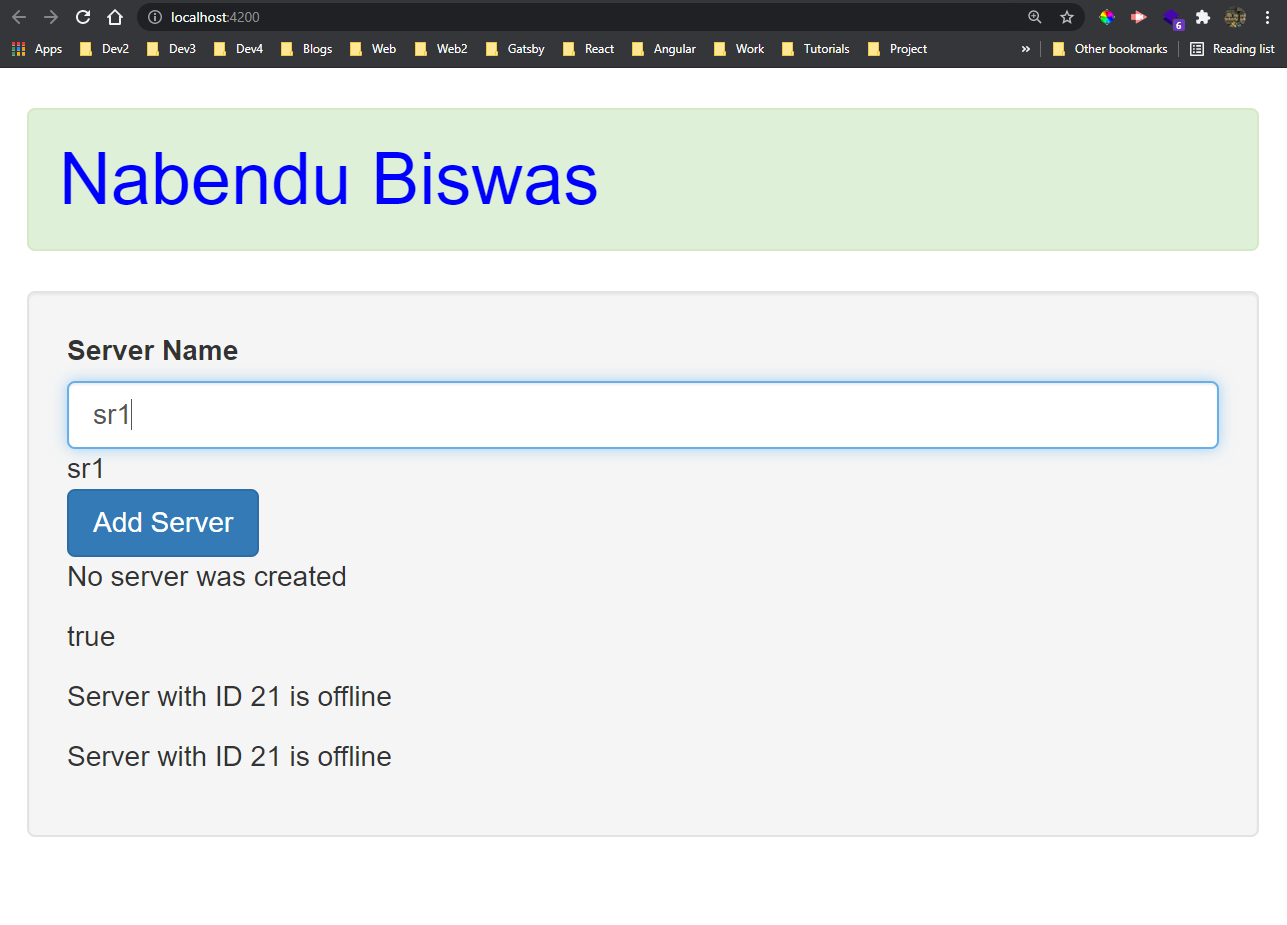 Server Name
We have learnt about Property binding and Event Binding and now it’s time to combine both in Two-way binding.
It uses a special directive called ngModel about which we will learn later. In the input it is directly binded to the variable serverName and changes it to whatever the user inputs.
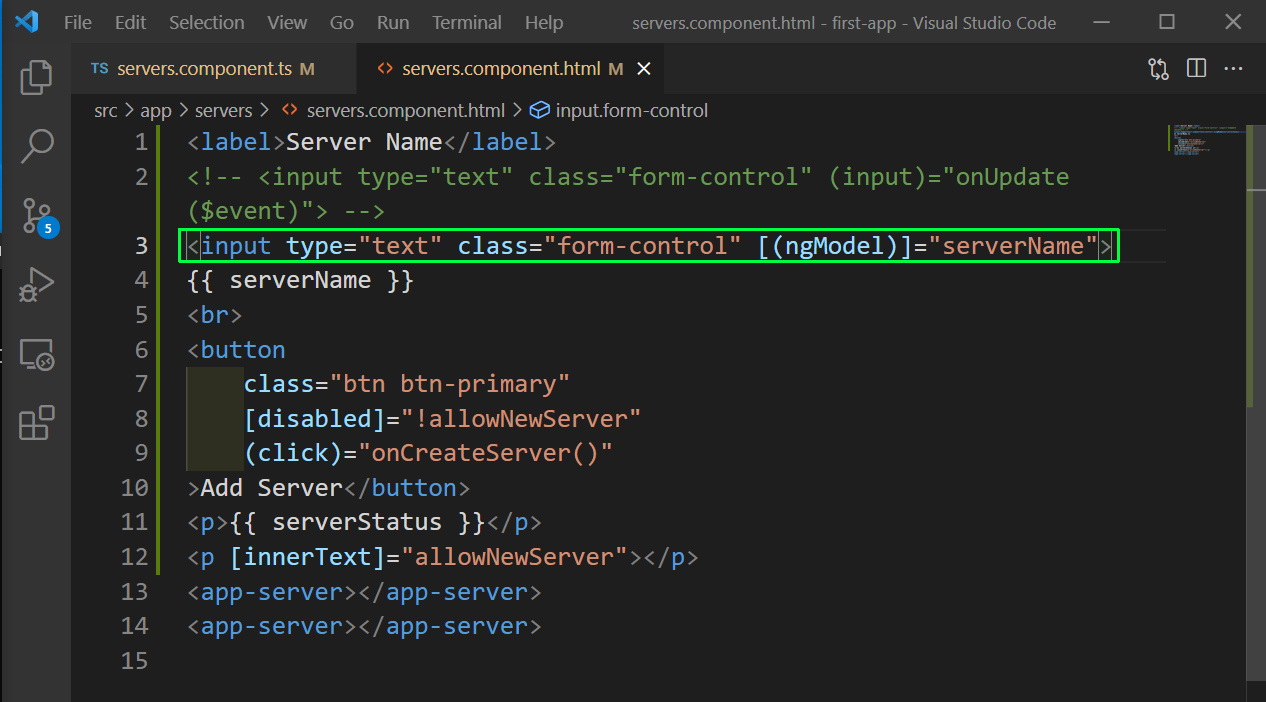 ngModel
Let’s complete our mini app with Server name updated on click of the button. In the servers.component.ts file, the function onCreateServer also show the newly created server.
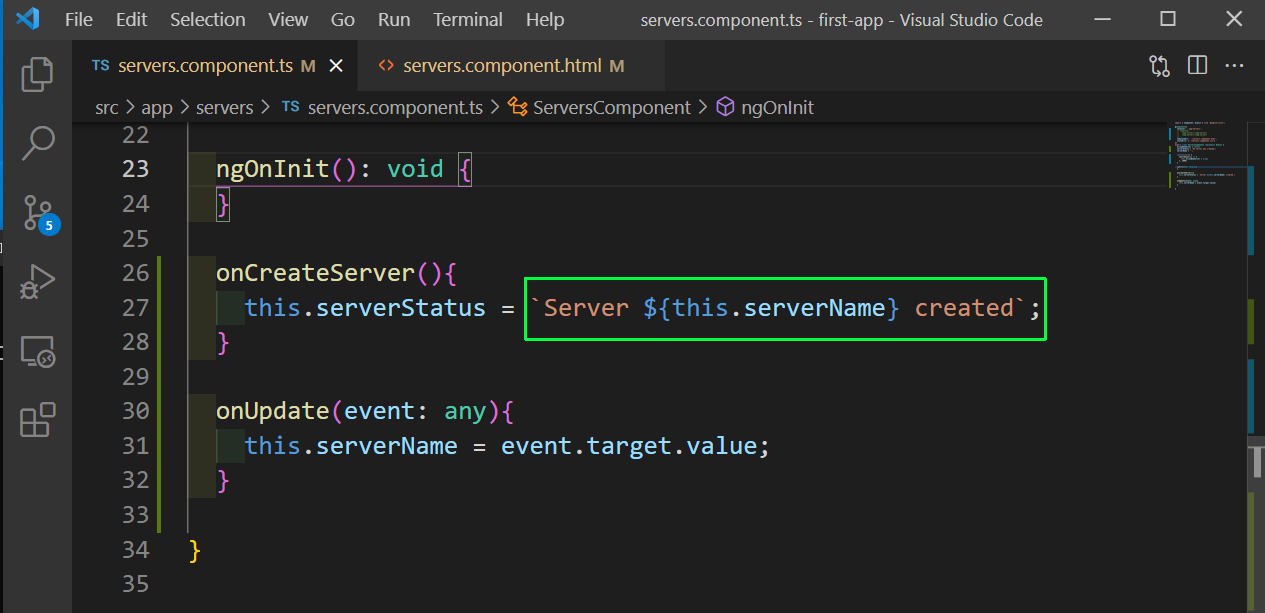 servers.component.ts
Now, whenever we click the button the new server name will be shown.
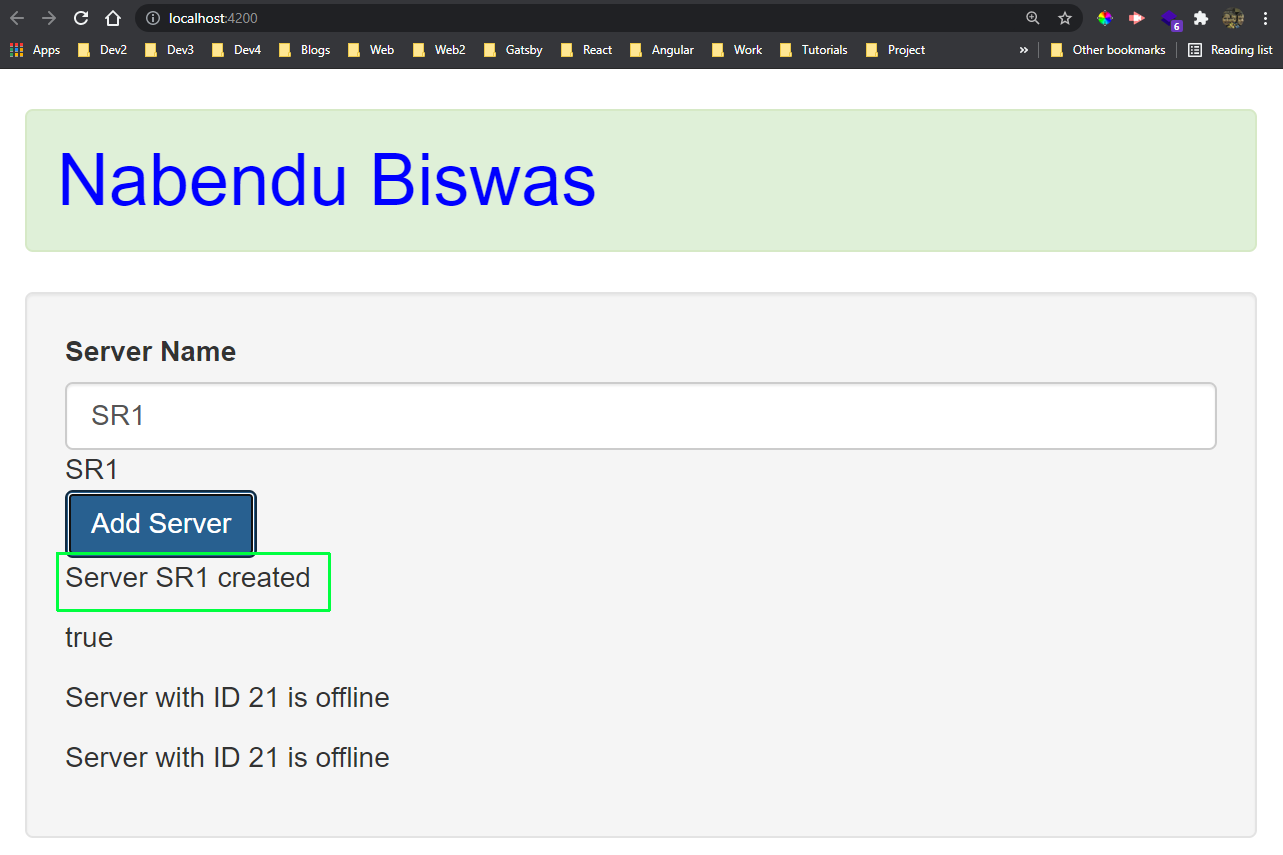 Sever Name
Now, we will learn about Directives. They are instructions in the DOM. There are couple of built in directive that are useful and we will look into them now.
We will first look into the ngIf directive which works like an if statement. First add a new variable serverCreated in the typescript file, which is initially false.
Now inside the function onCreateServer make this variable true.
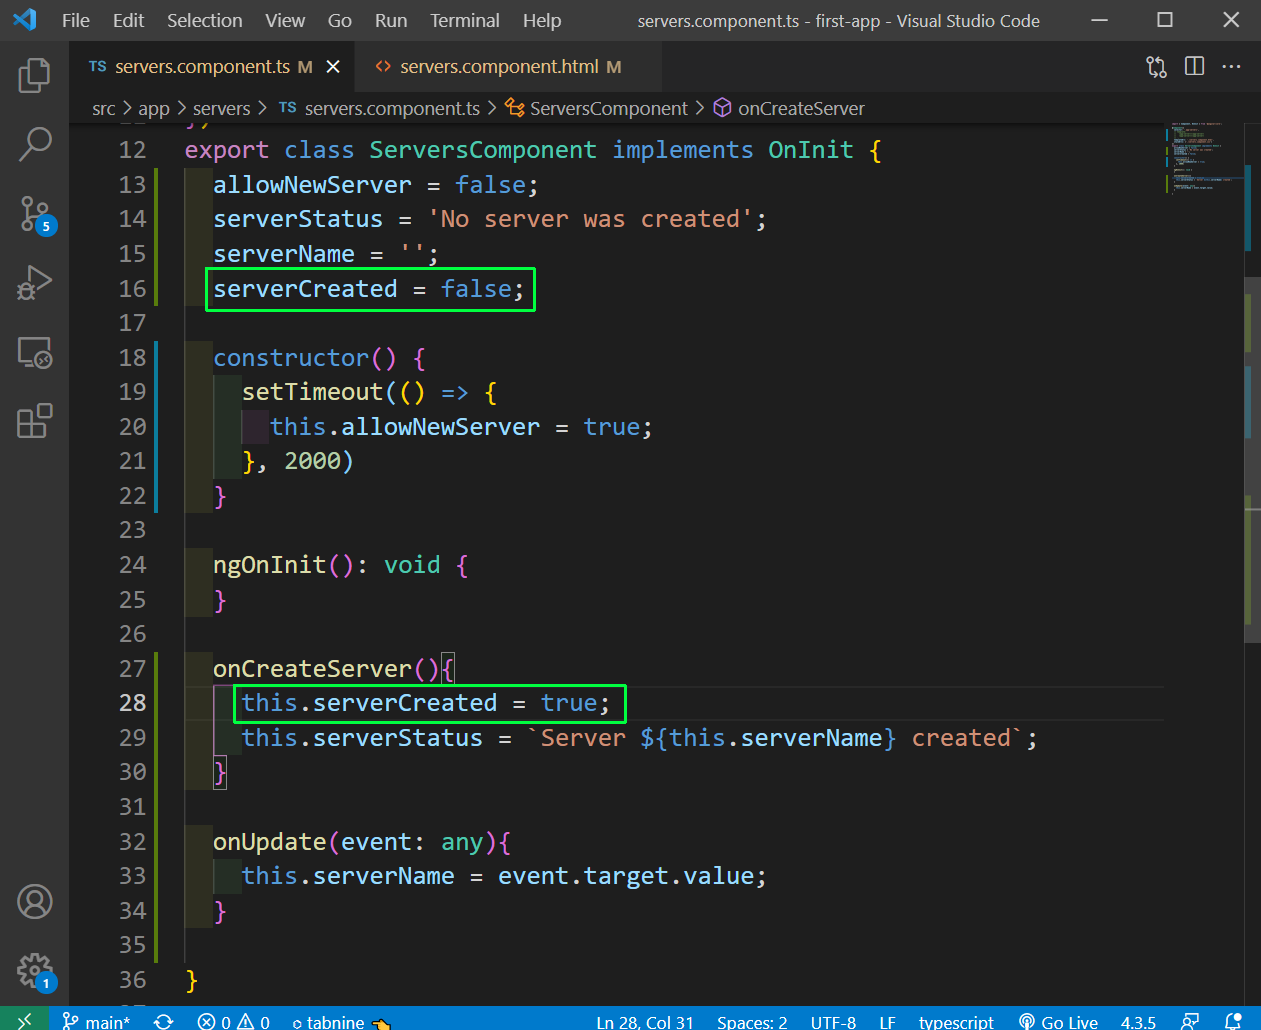 TypeScript
Now, in the servers.component.html file add a new p tag which show the server Name. But there is an ngIf directive, which will show this p tag only if serverCreated is true and it becomes true when we click on Add Server button.
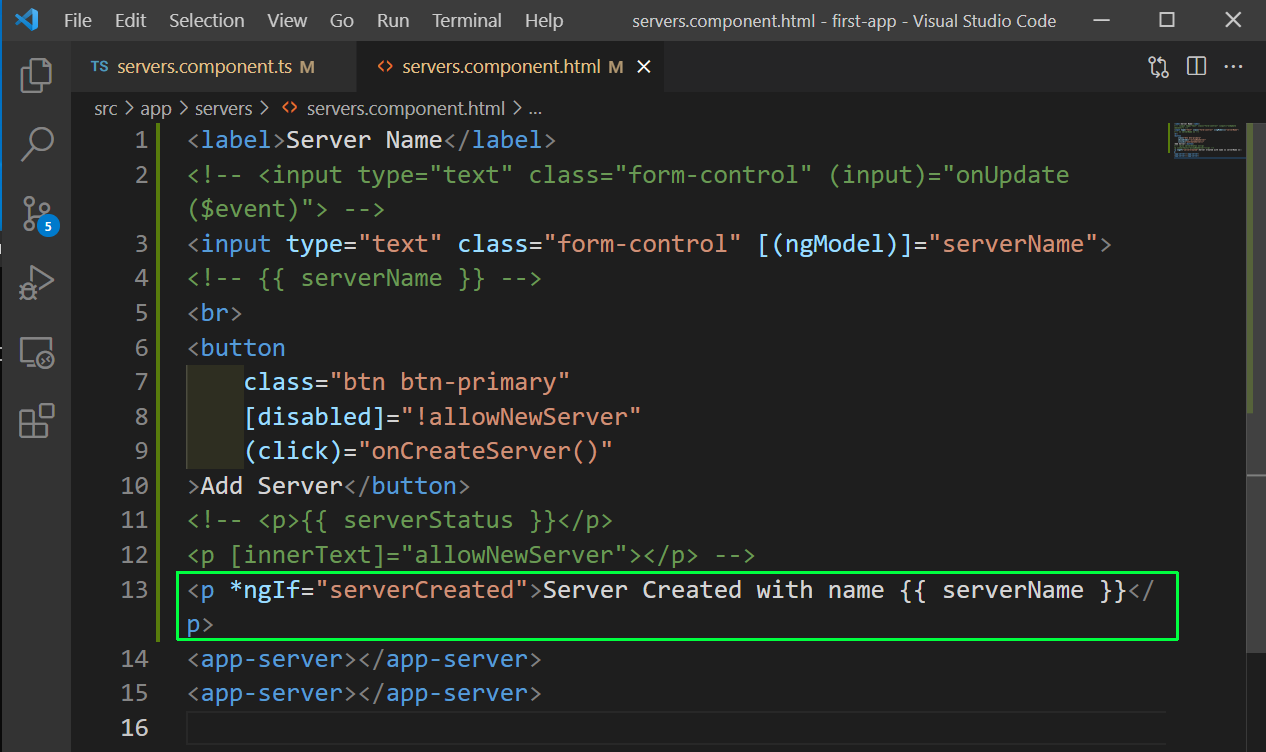 servers.component.html
Now, we will look into the alternative of ngIf which will have the else condition also. Here, we have the else part in ngIf only and then have a unique marker.
Now, next use ng-template to create the else part and here, we use the marker.
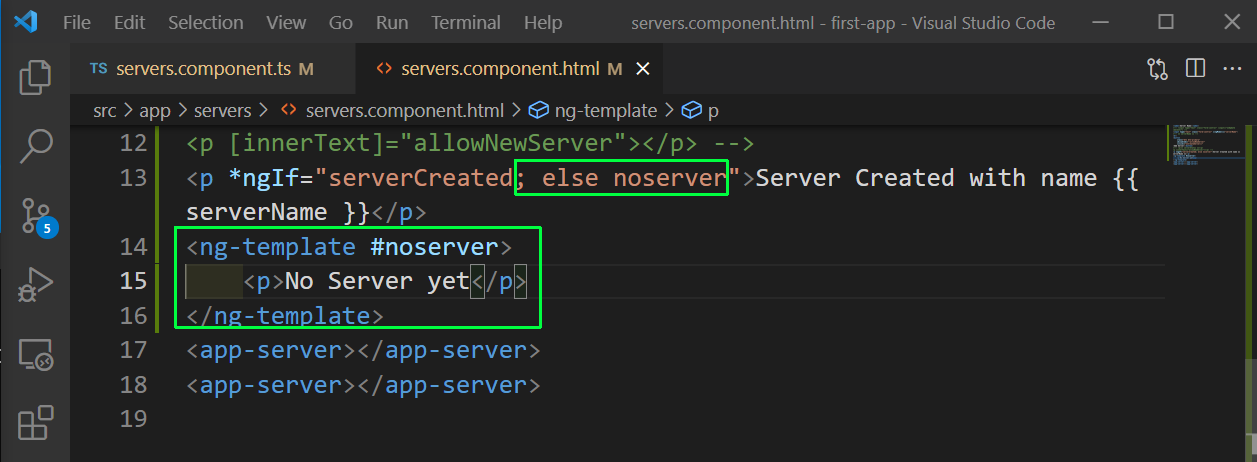 ngIf-else
Now, the initial text of No Server yet will be shown, which will be changed to the if part, once the user enter something in input and press the Add Server button.
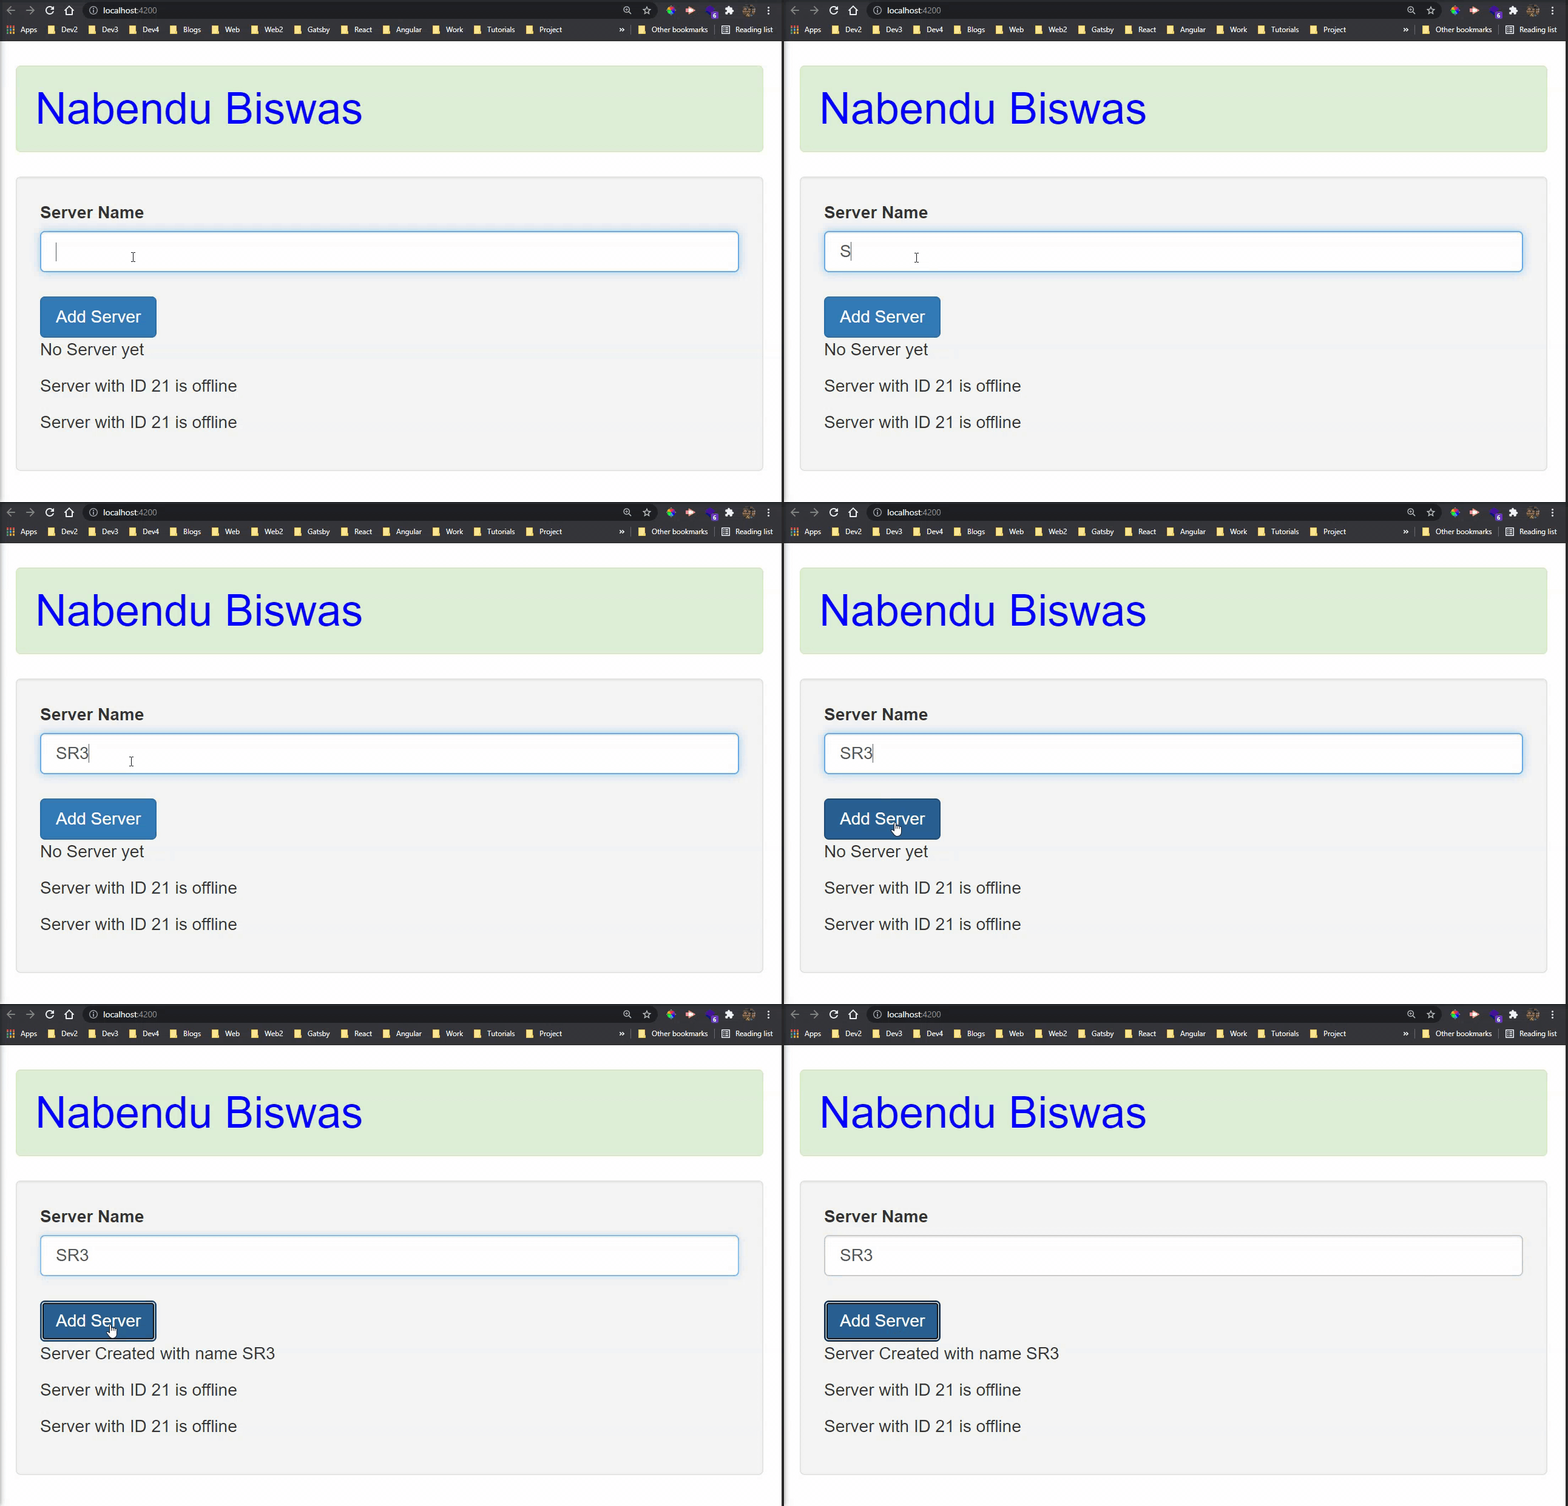 Gif
Gif
Now, we will look into ngStyle which allows us to dynamically update the styles. First in the server.component.ts file add a constructor and here change the serverStatus and serverId based on random function.
We also have a getColor(), which will return green if serverStatus is online or red otherwise.
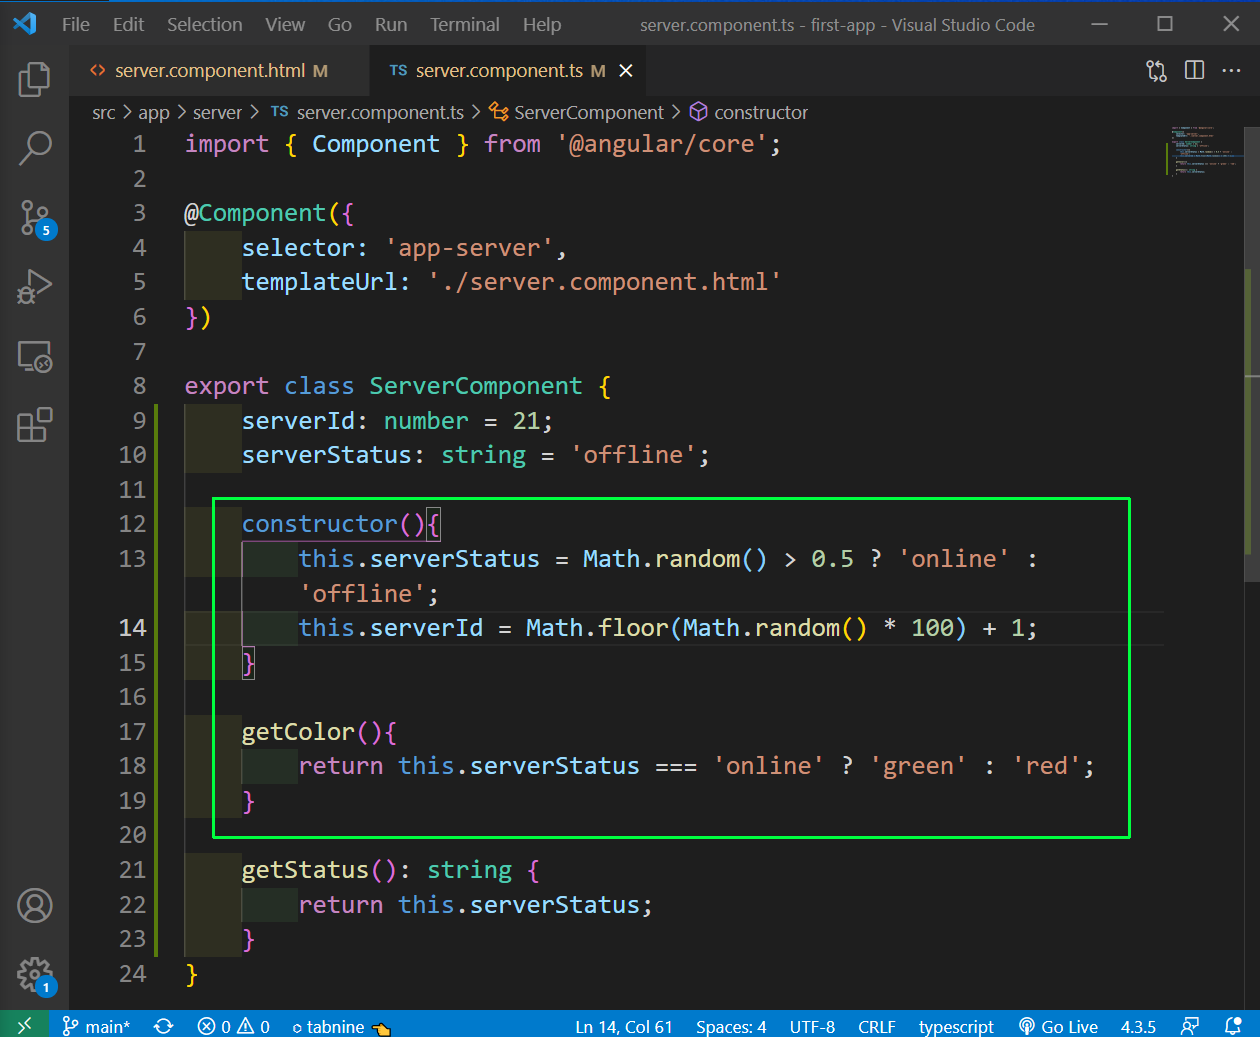 server.component.ts
Now, in the server.component.html file we will use ngStyle to change the backgroundColor, based on output of getColor()
 backgroundColor
Now, we will get a random server id and a random background color also in our localhost.
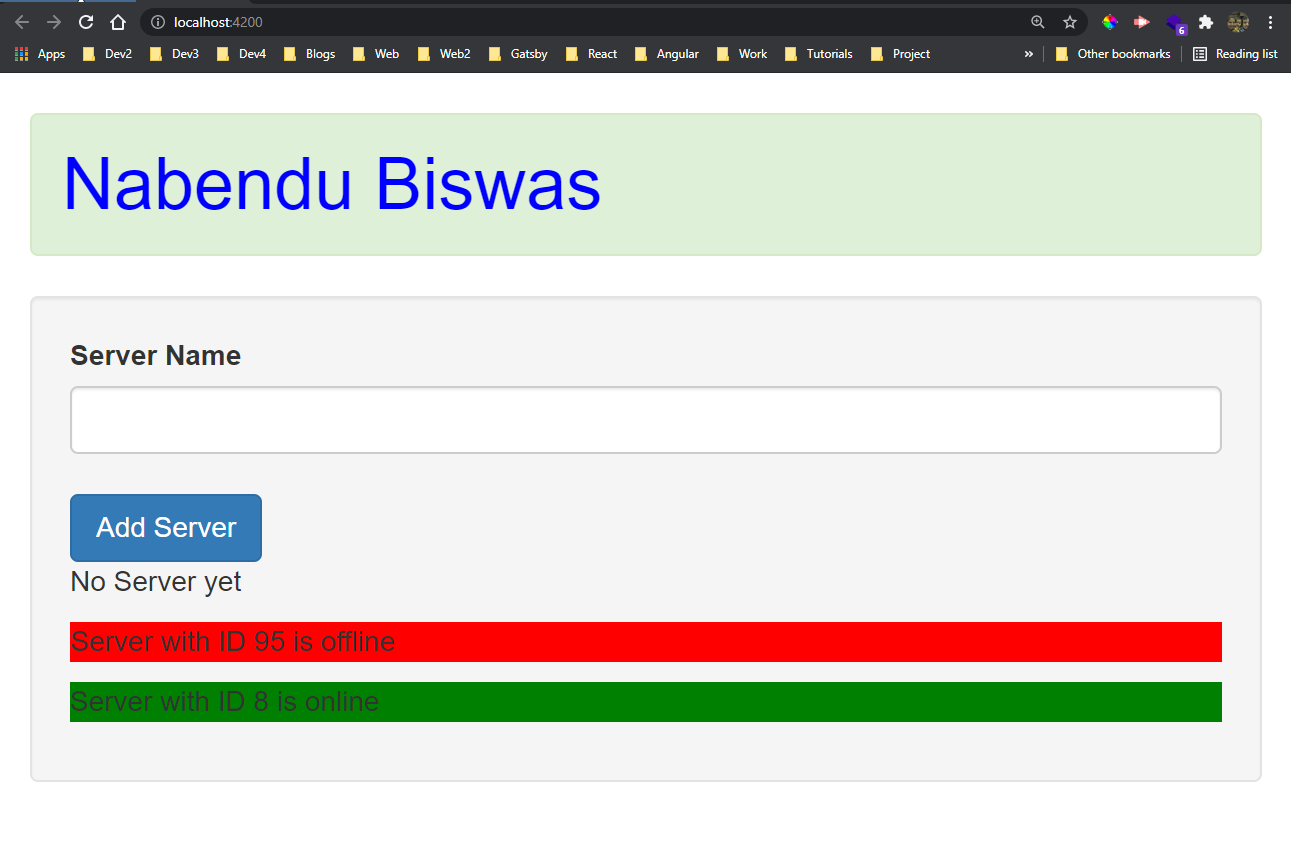 localhost
Now, we will look into ngClass which allows us to dynamically change the CSS class. We will first add two inline CSS classes in our server.component.ts file.
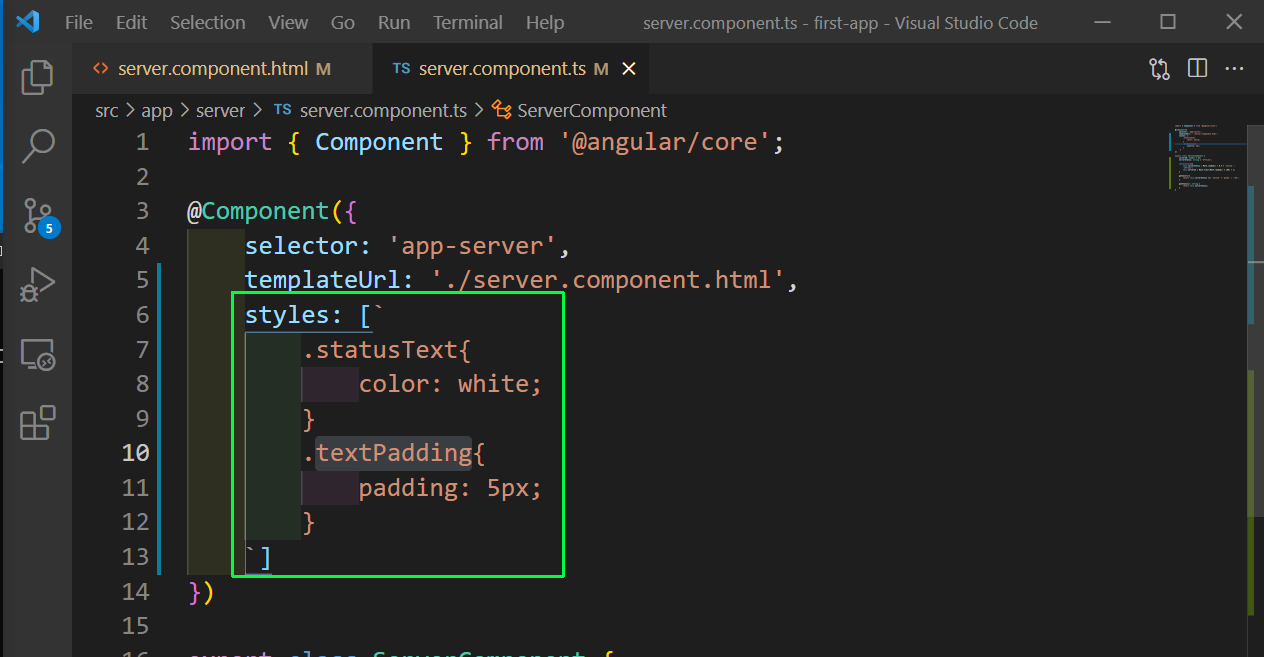 server.component.ts
Next in the server.component.html file adding the ngClass, which will add the class statusText if the serverStatus is online. Also, adding a normal class of textPadding.
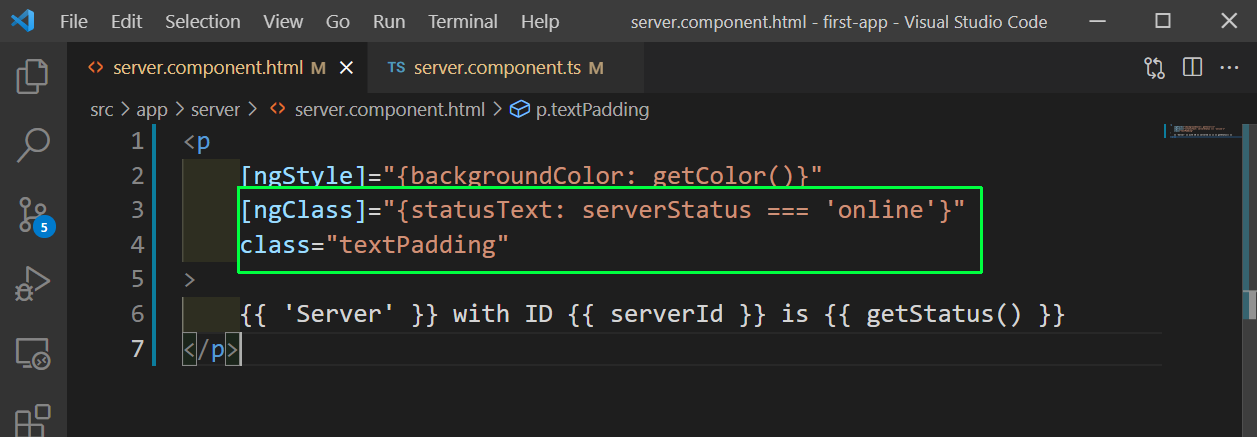 server.component.html
Now, the text color is shown properly in our localhost.
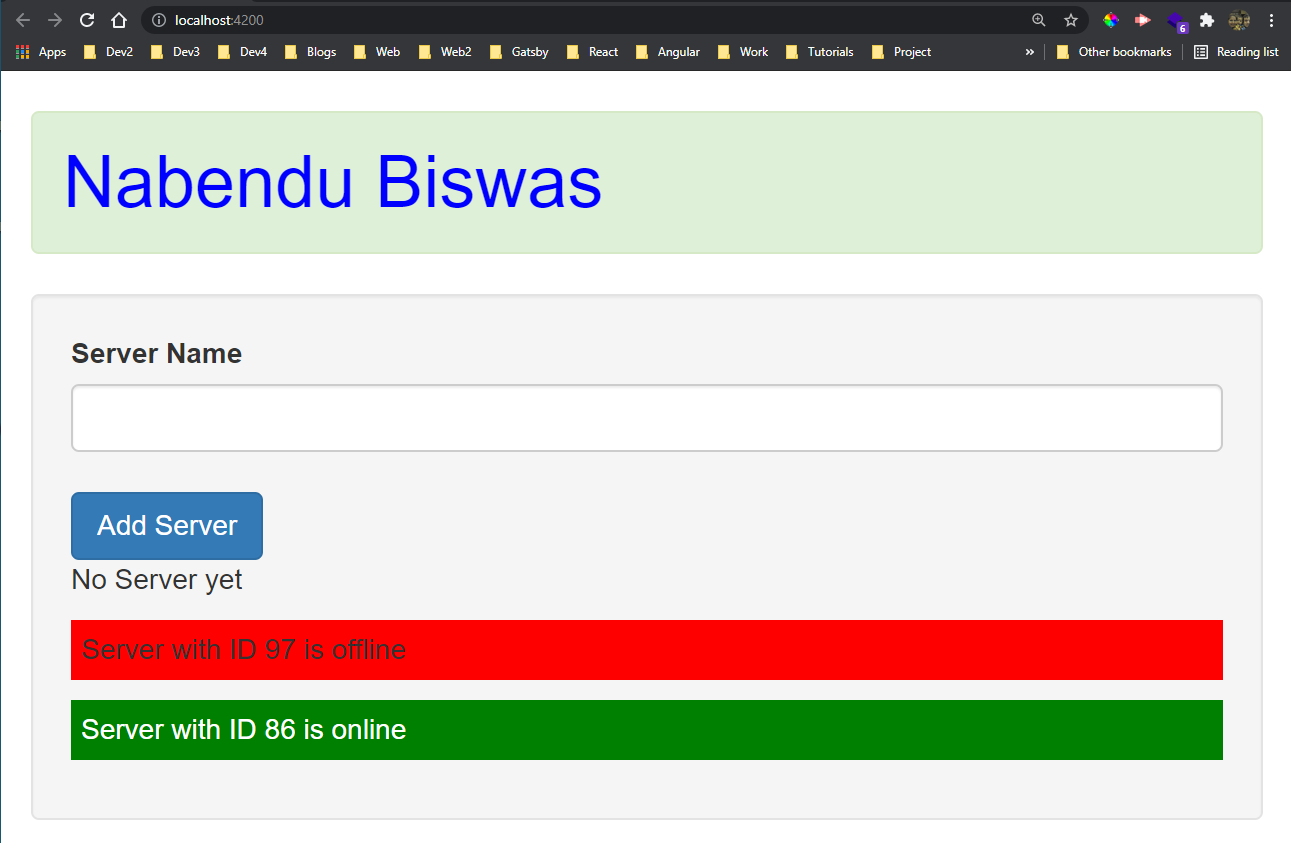 localhost
We will now look into the last built-in directive and it is ngFor. First in the server.component.ts file add a servers array with two items. After that inside onCreateServer push the serverName entered.
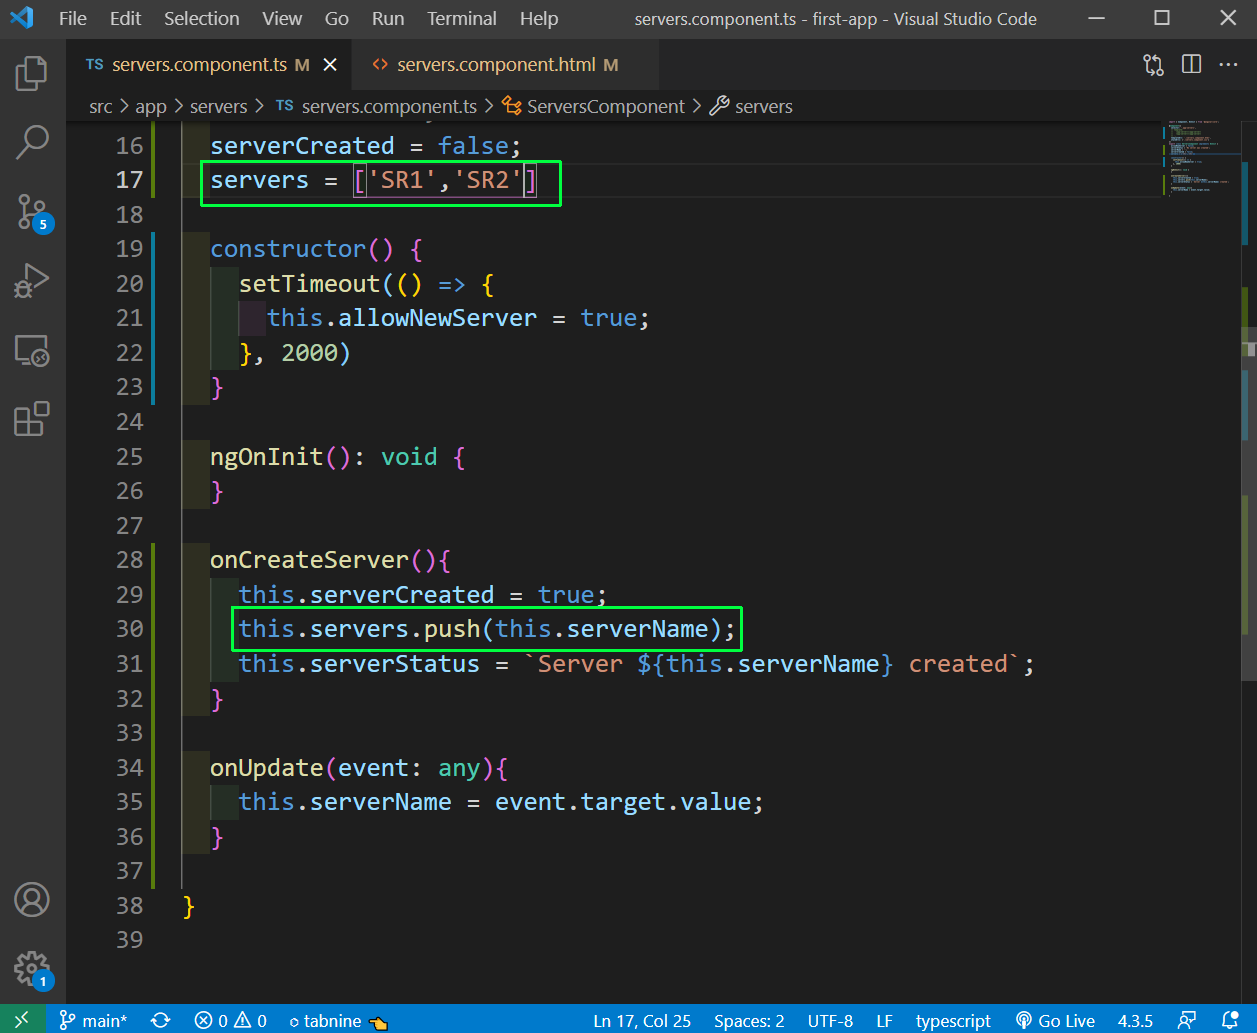 server array
Next in the server.component.html file add the ngFor which will loop through servers array and create the component app-server.
 ngFor
ngFor
This completes the long part-2. You can find the code for the same here.