Welcome to the fourth part of Angular Basics. We will deep dive into directives in this part.
The starting point of the project can be taken from this zip file. Our little project have an array of number in app.component.ts file.
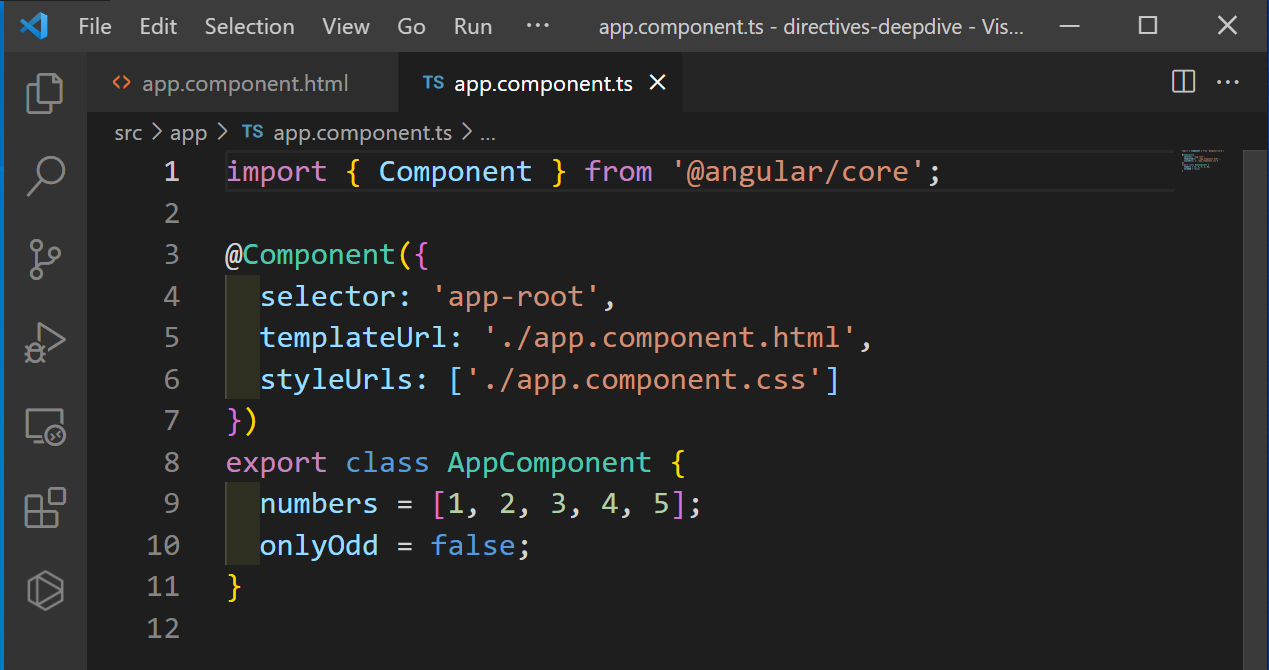 app.component.ts
Also our app.component.html file contains the below. It is not complete and will be working on the same.
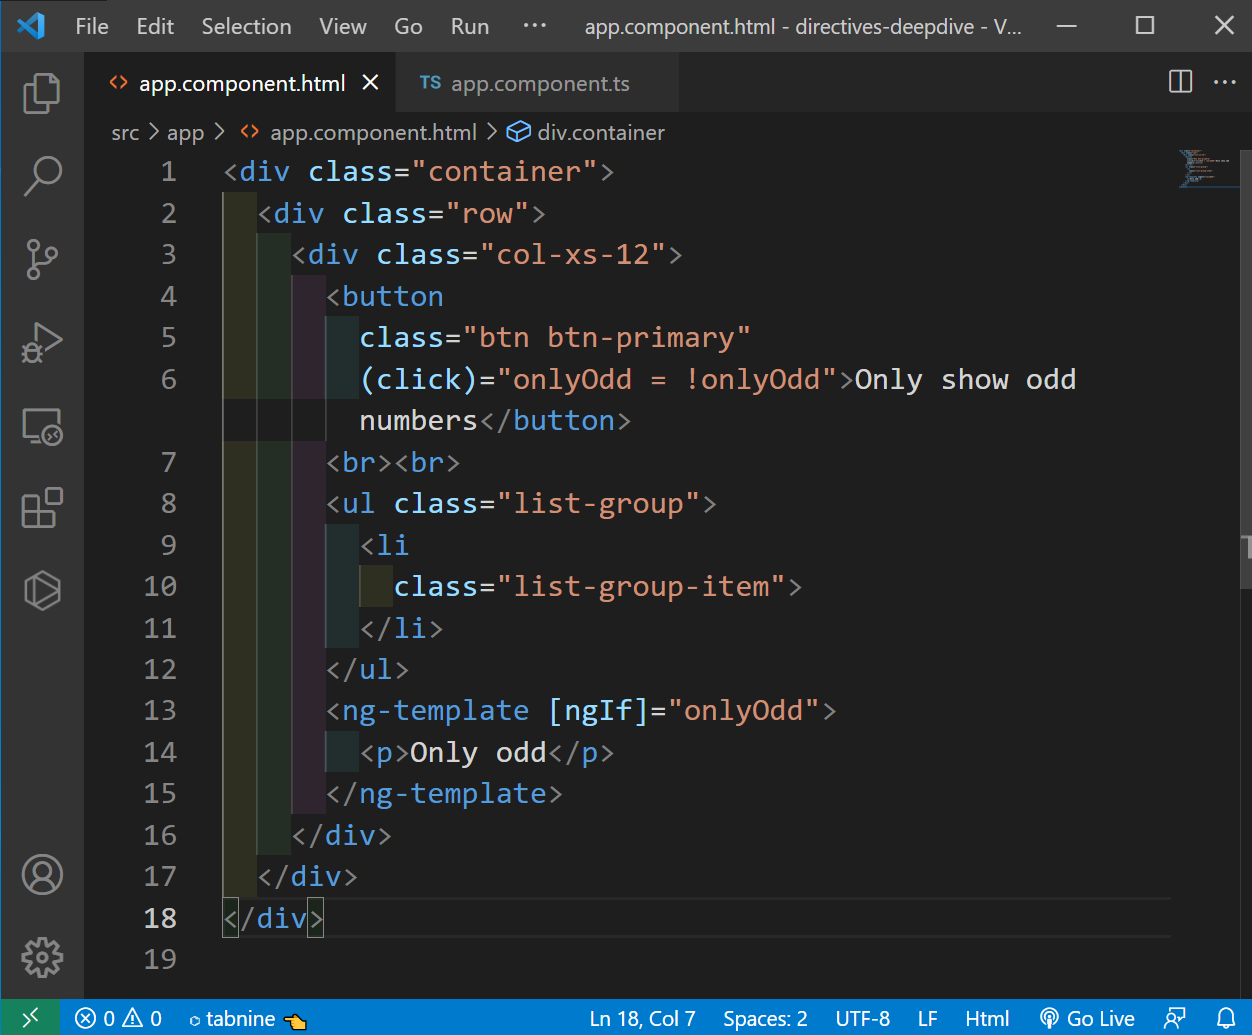 app.component.html
Now, we will update the code to show the numbers, by adding the code with ngFor in app.component.html file.
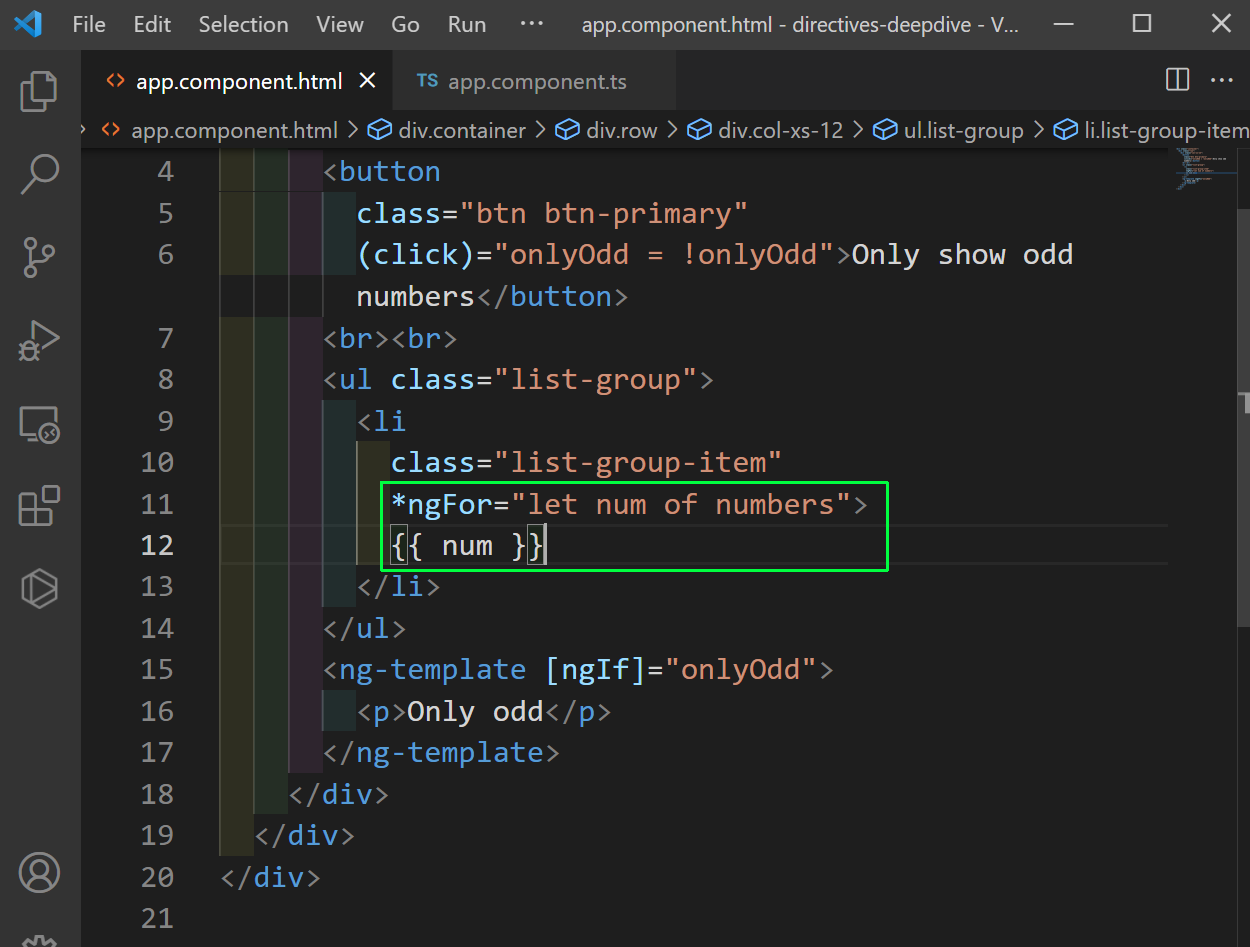 app.component.html
Now, in localhost the numbers will be shown, but the button will not work.
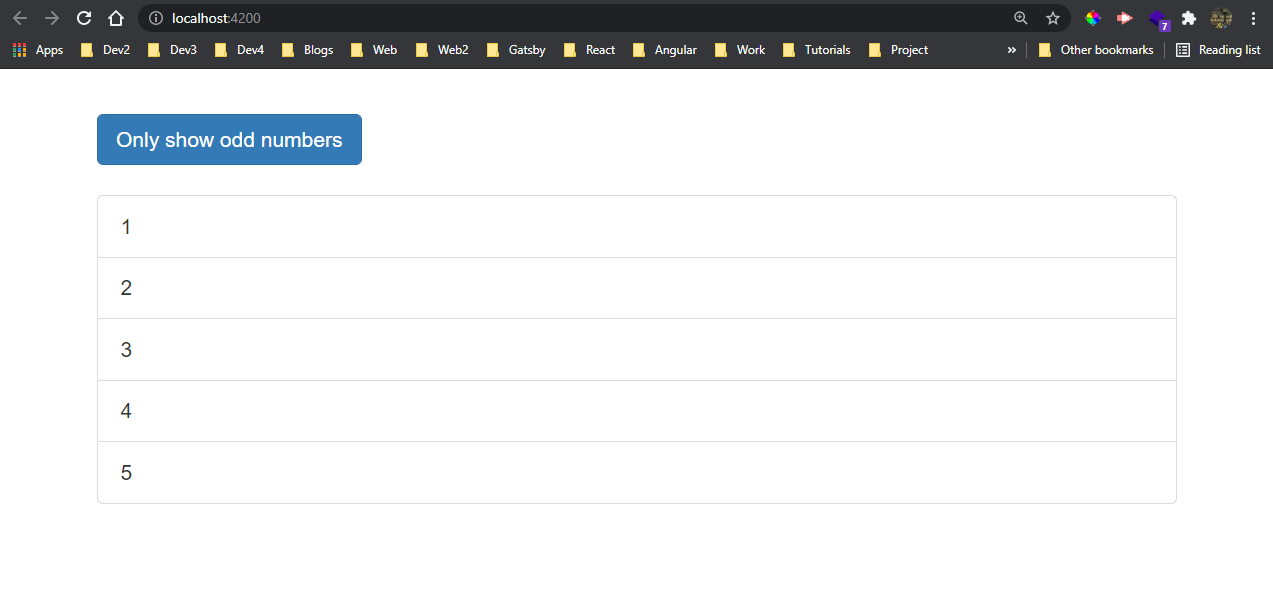 Number
For the number to work now with button, we will first change the numbers array to odds and evens in app.component.ts file.
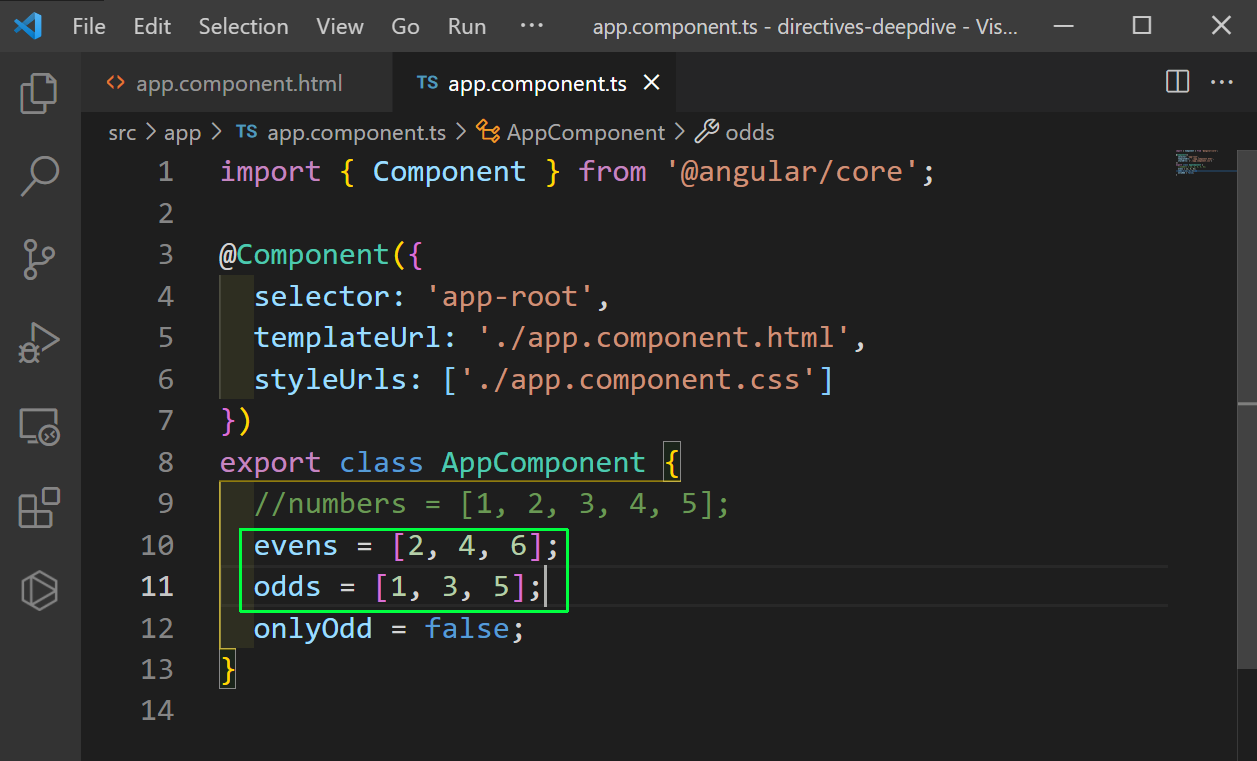 app.component.ts
Next, in app.component.html file, we will update the logic to show, evens or odds array on click of the button.
We are using ngIf for the same, which uses the boolean variable onlyOdd.
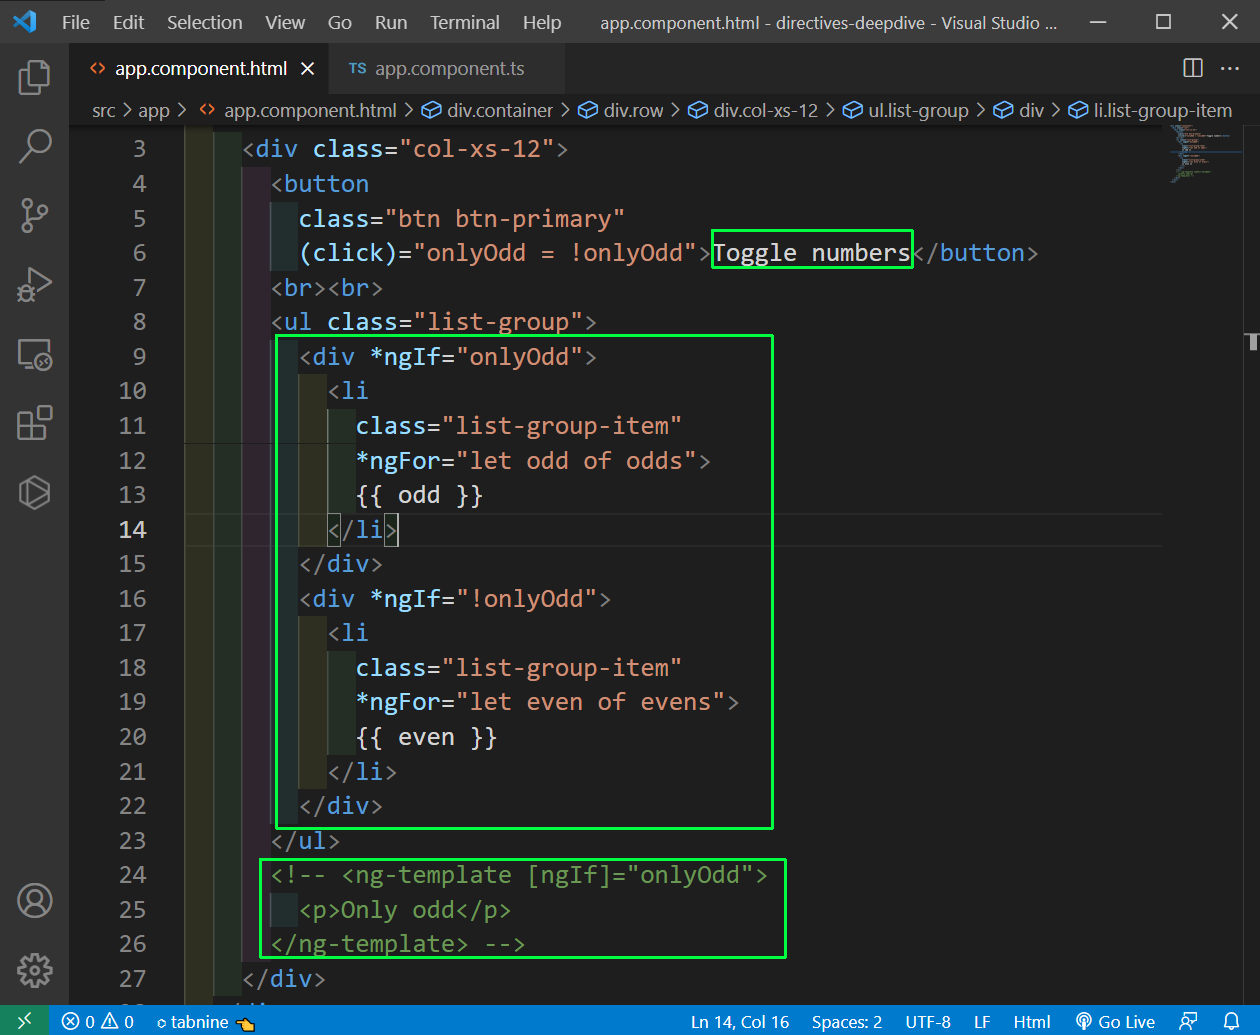 app.component.html
Now, our app is working properly and showing the odd or even number on clicking it.
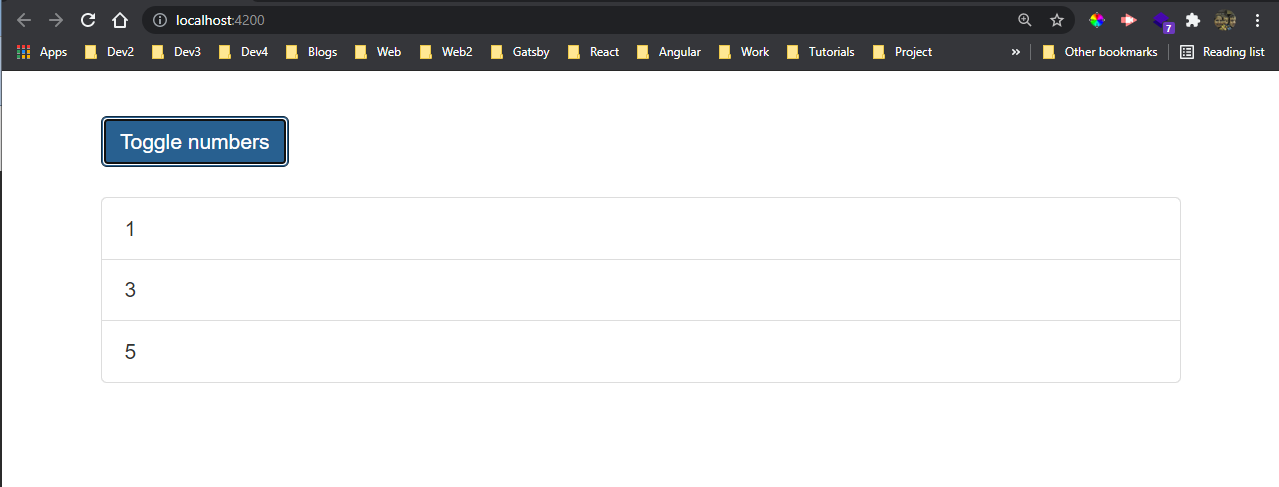 Toggle
Let’s recap ngClass and ngStyle a bit. We will add a class of oddNum in app.component.css file.
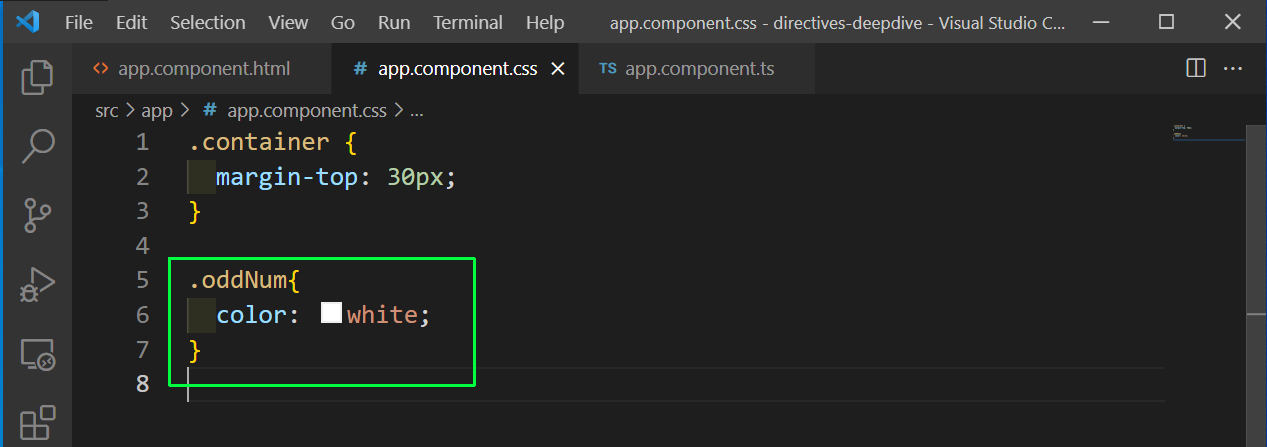 app.component.css
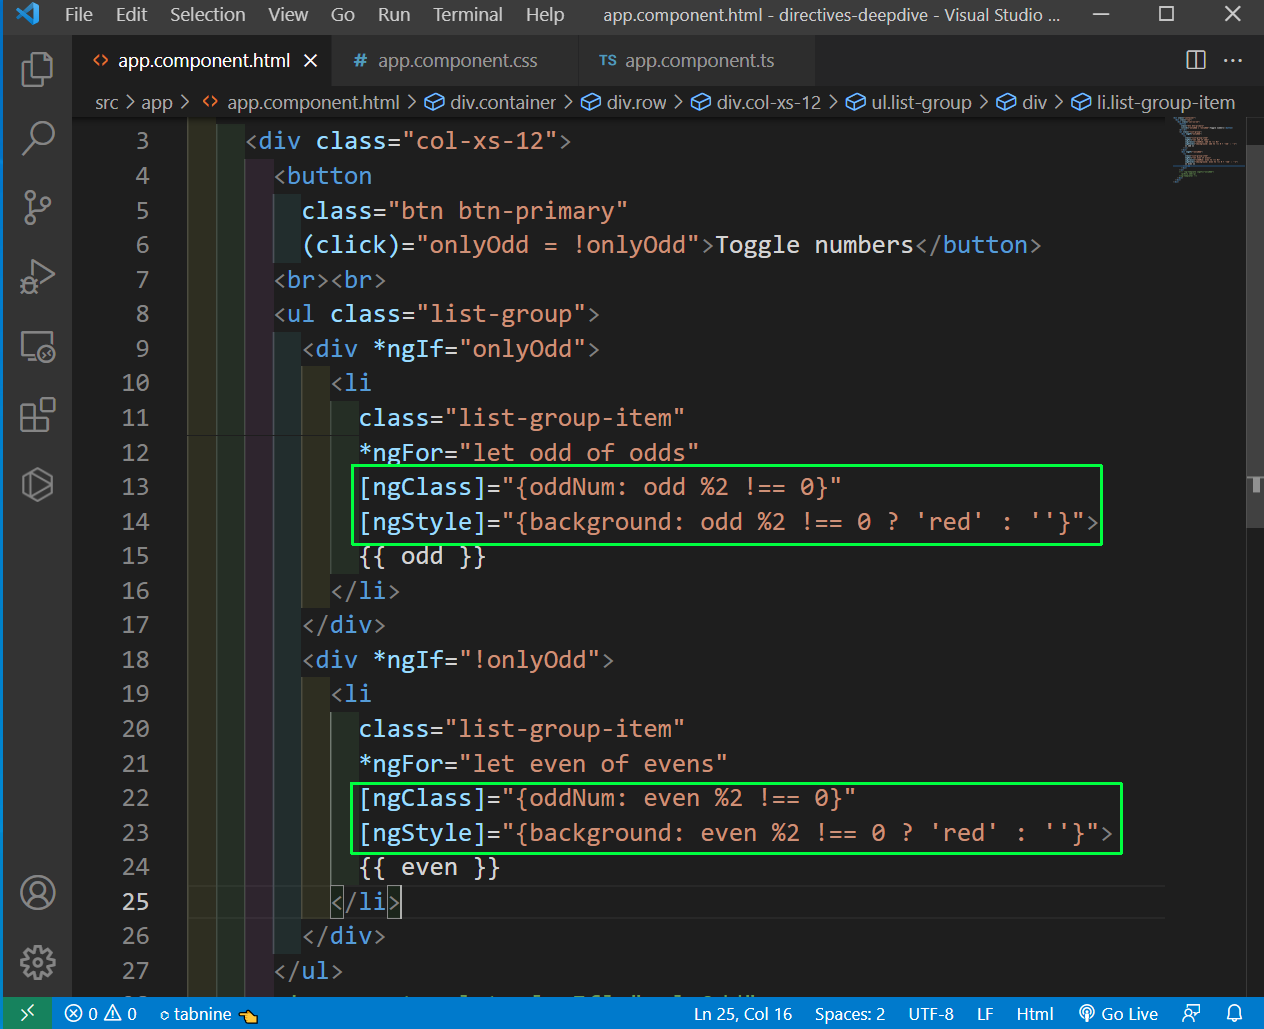
Now, back in app.component.html file, we will add the directives for ngClass and ngStyle, which add class and style directly.
 app.component.html
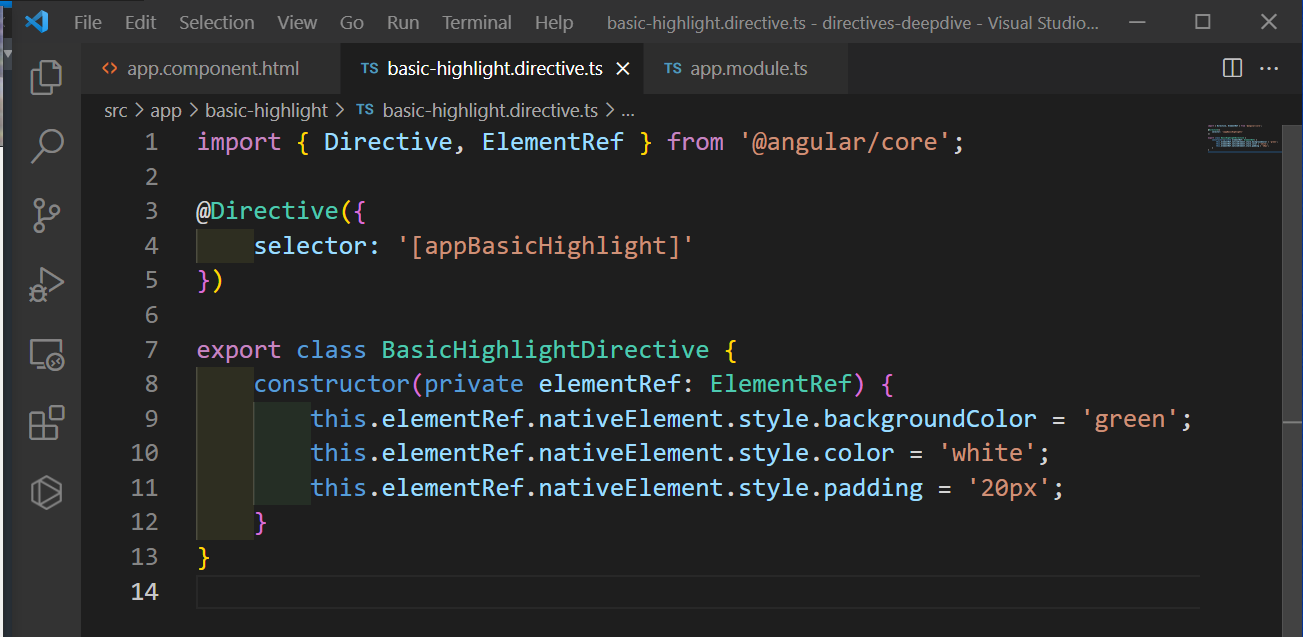
Now, we are going to build our own directive. Create a folder basic-highlight inside app folder and then a basic-highlight.directive.ts in it.
Here, we are changing the background-color, color and padding of any element in which it will be attached.
 basic-highlight.directive.ts
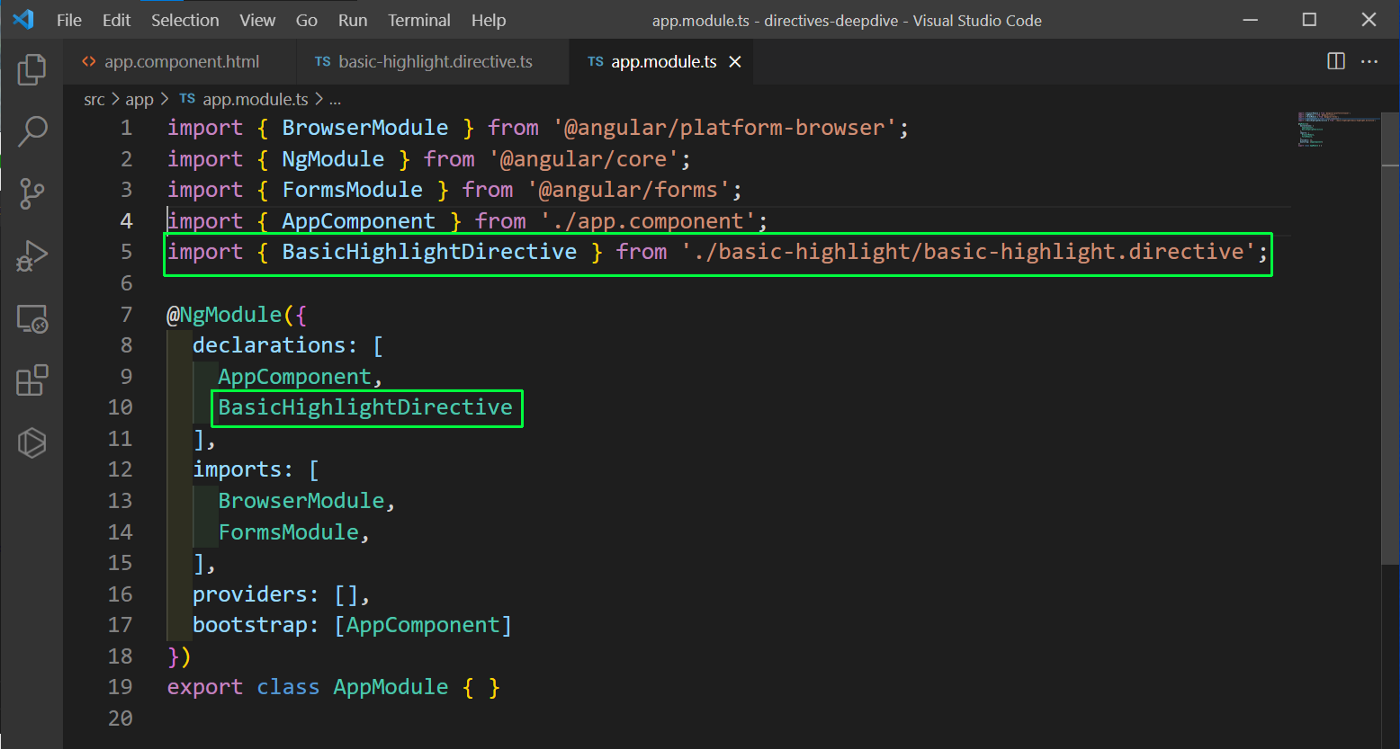
We also need to include this directive in app.module.ts file.
 app.module.ts
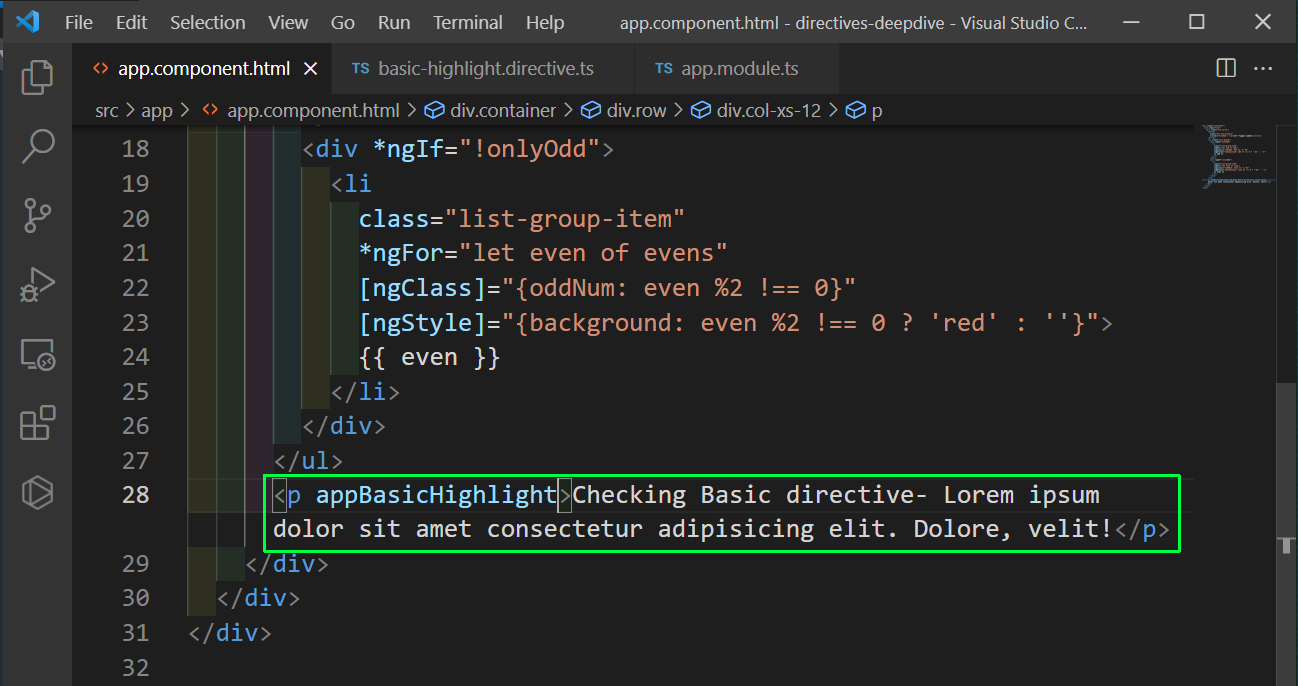
After that we can use this directive in any file and we are using it to add style to a paragraph in app.component.html file.
 app.component.html
Now, we will be able to see the paragraph with the styles in localhost.
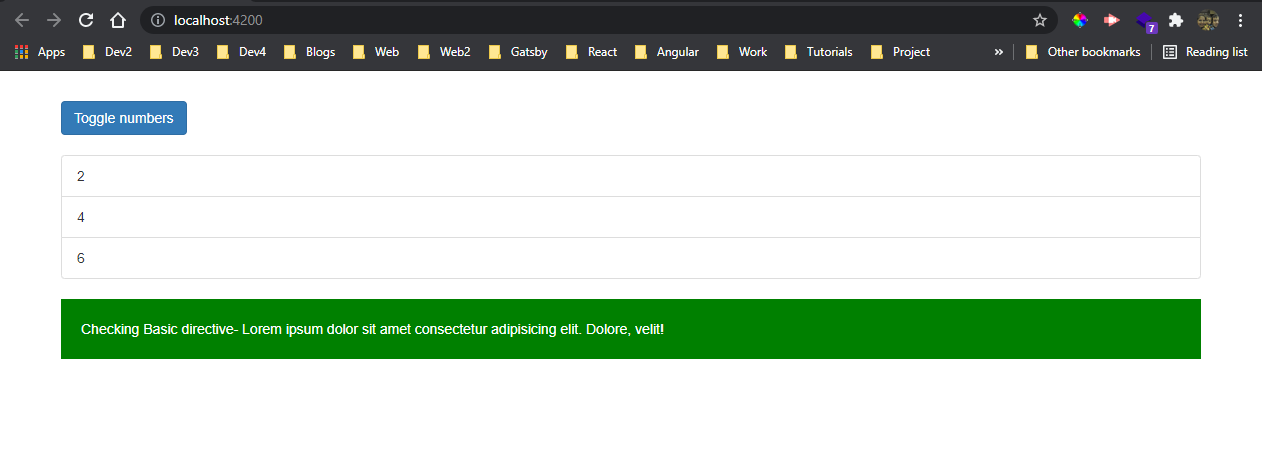 localhost
Now, we will create another custom directive. This time we will also create a new directive through the command line.
ng g d best-directive
In this directive, we will react to some events like the moving of mouse on the element. So, in the best-directive.directive.ts file, we will have a HostListener for mouseenter and mouseleave.
We are also using the HostBinding to bind some CSS properties.
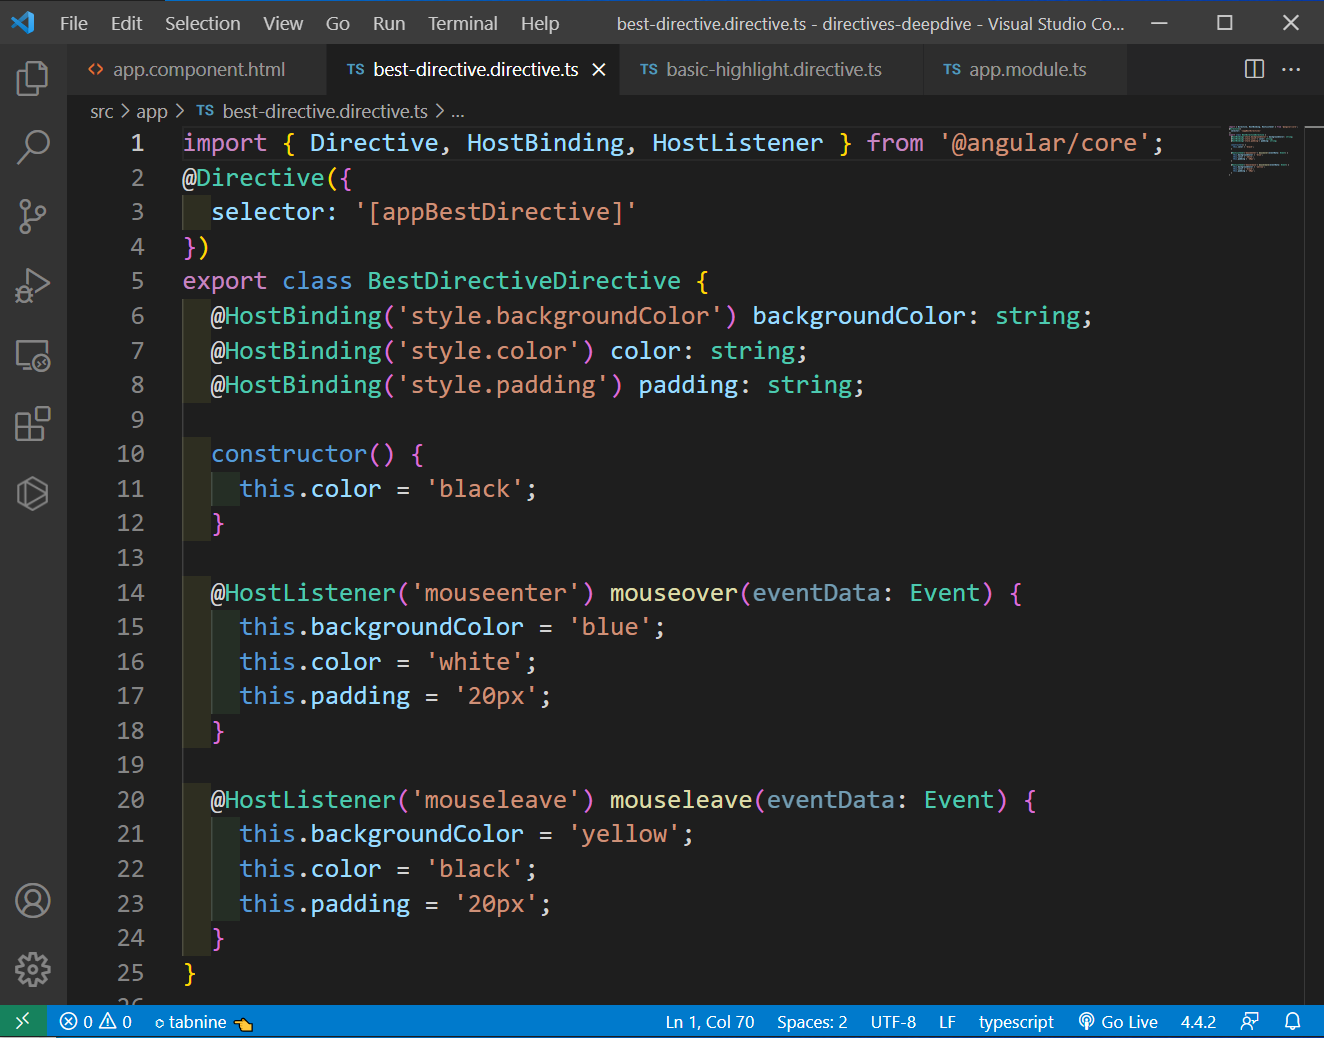 best-directive.directive.ts
Now, in the app.component.ts file, we will be adding the appBestDirective in a new paragraph.
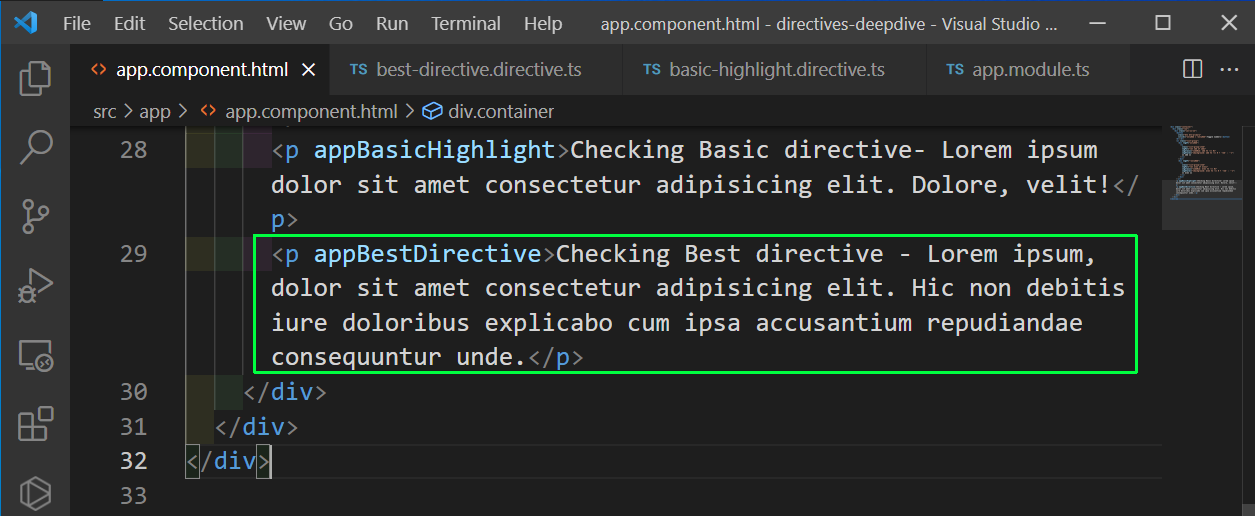 app.component.ts
Now, the mouseover and mouseleave is working properly in our paragraph.
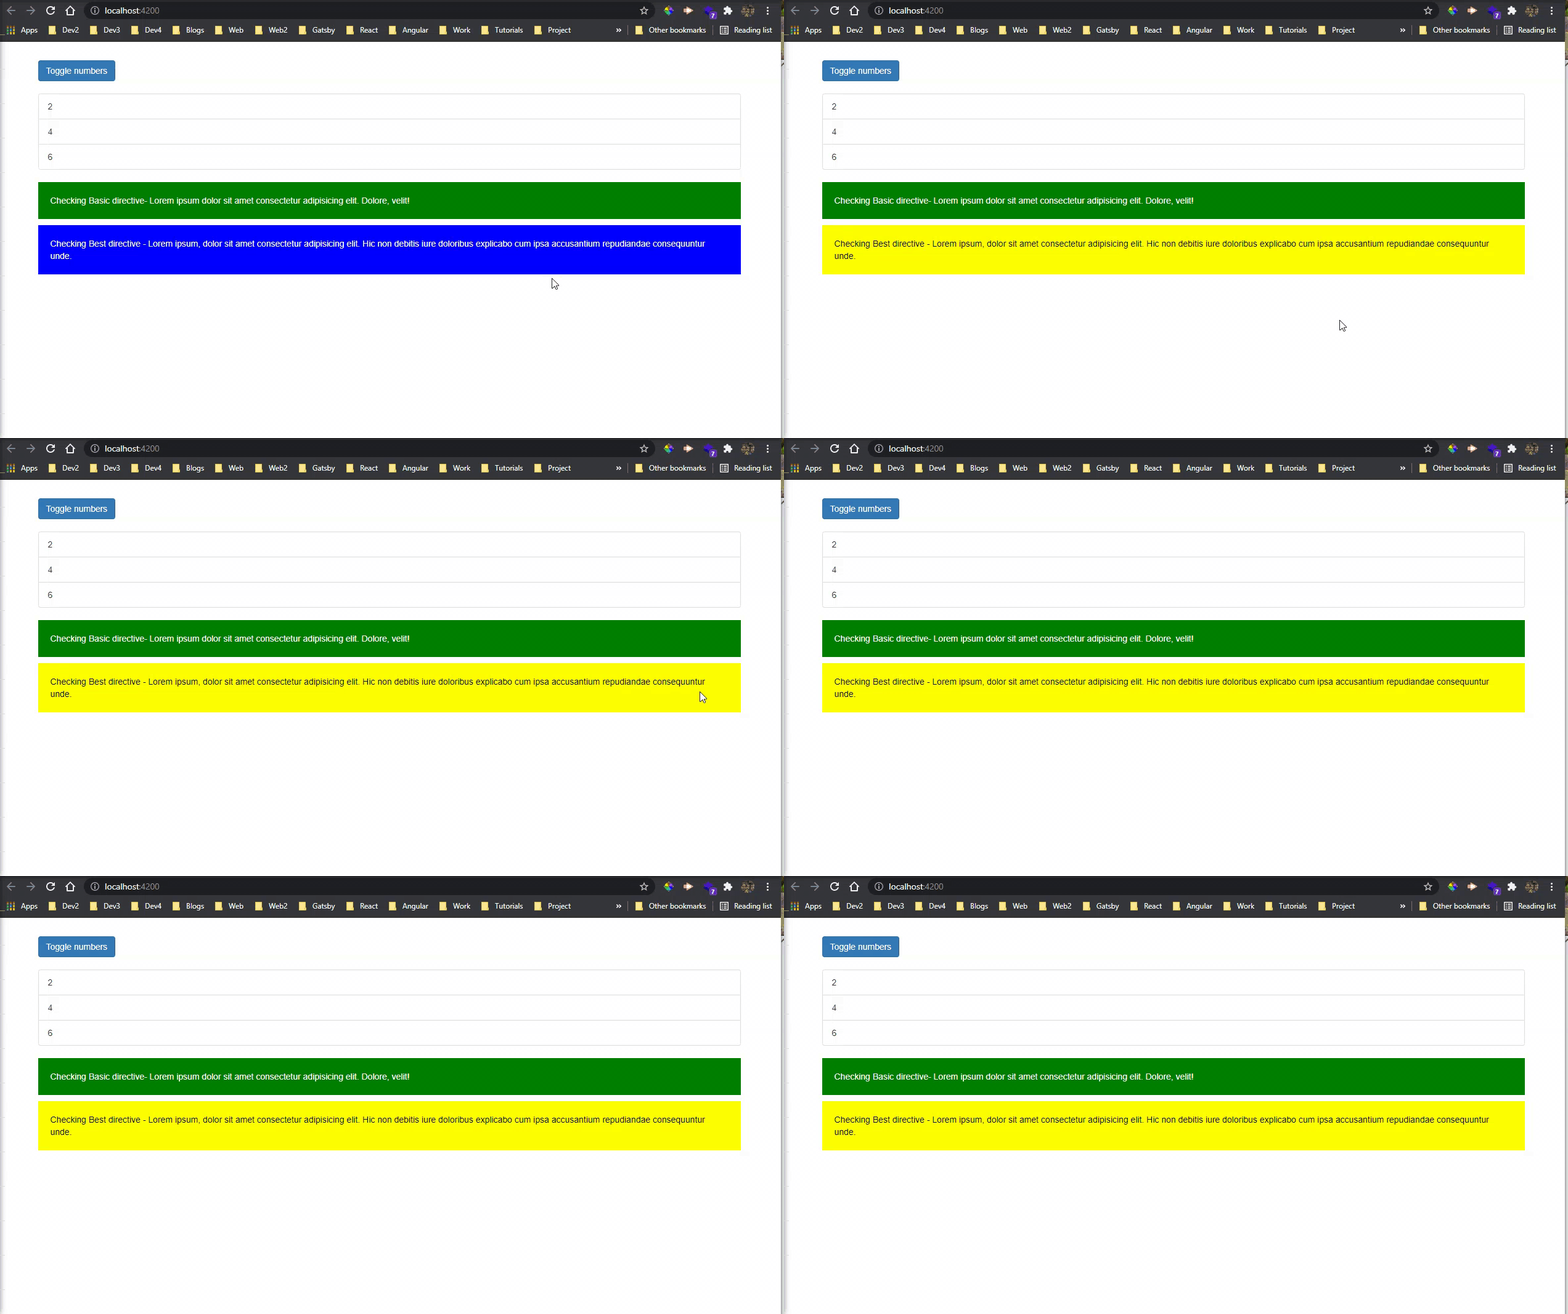 mouseover and mouseleave
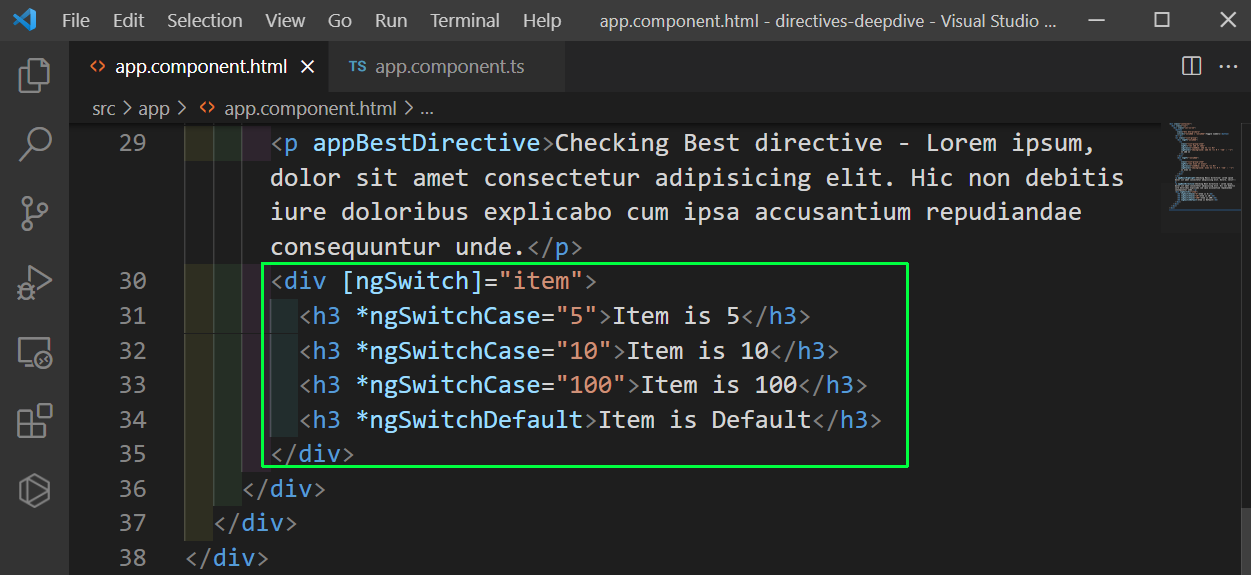
Finally, let’s understand ngSwitch. Suppose, we have a item of 5 in our app.component.ts file and for different values, we need to show different things.
 app.component.ts
Now, in app.component.html** file, we will use the ngSwitch to show different case. The switch is very useful in case of multiple if else statements.
 app.component.html
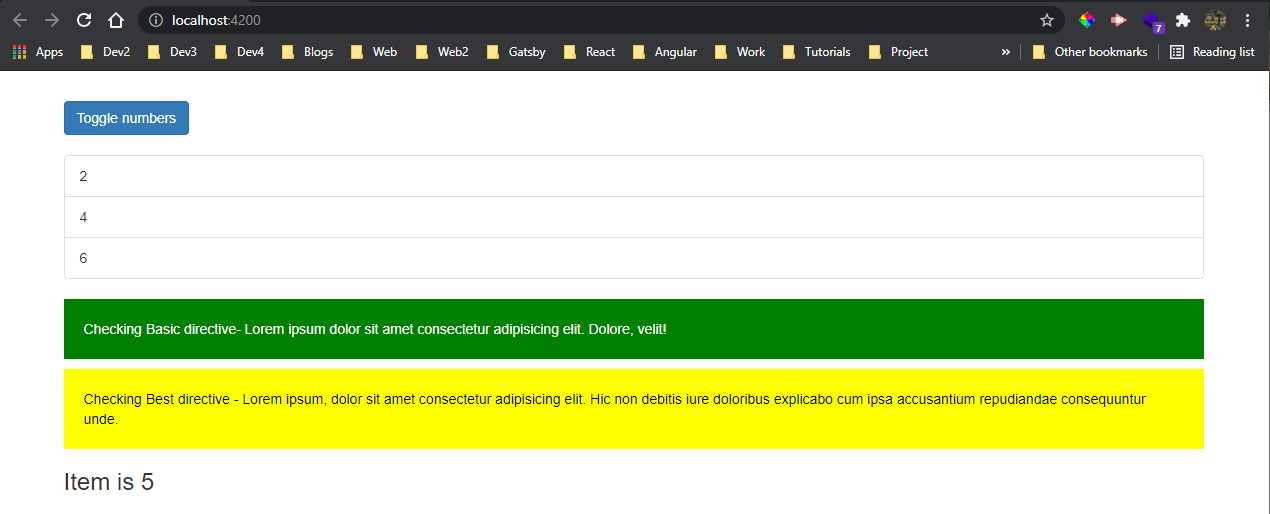
The ngSwitch is showing the statement based on the item and with this we will complete this part.
 ngSwitch
The code for the same can be found in this github repo.