Welcome to the sixth part of Angular Basics. We will learn to change paths with Routing in this post. The starting point for this project can be taken from this zip file.
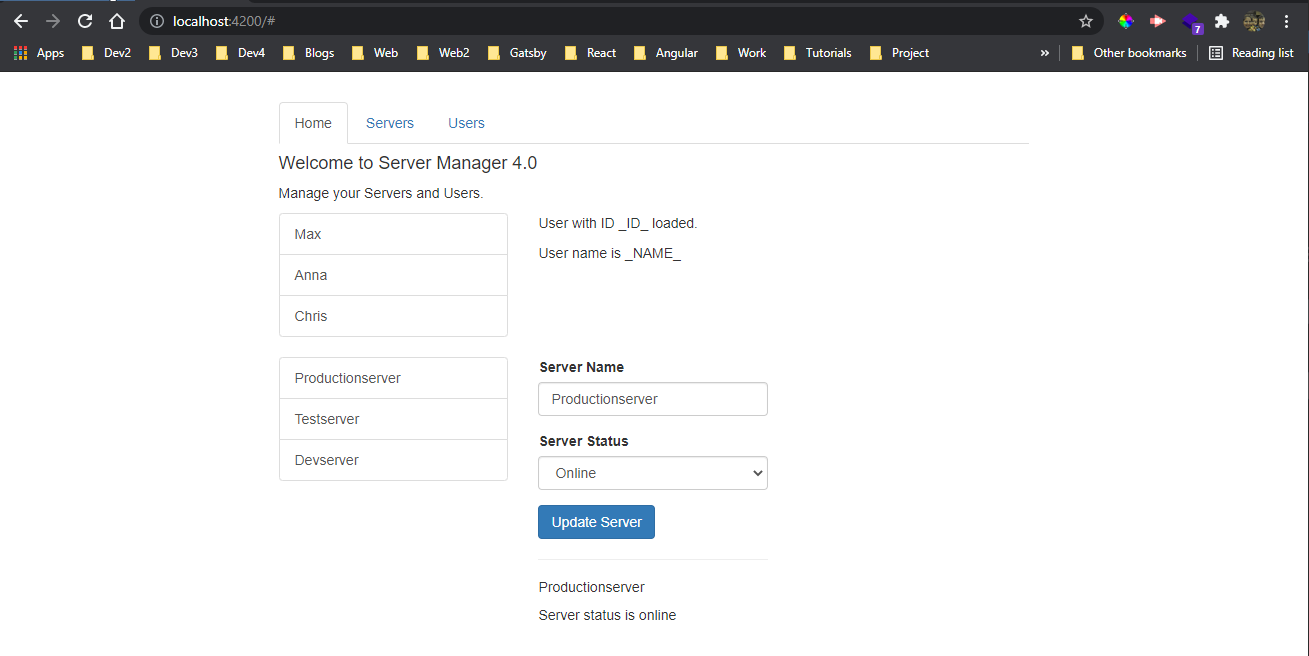
On running the project in localhost, we can find a simple project with different tabs. It is not working now and that is the thing, which we are going to fix.
 Basics
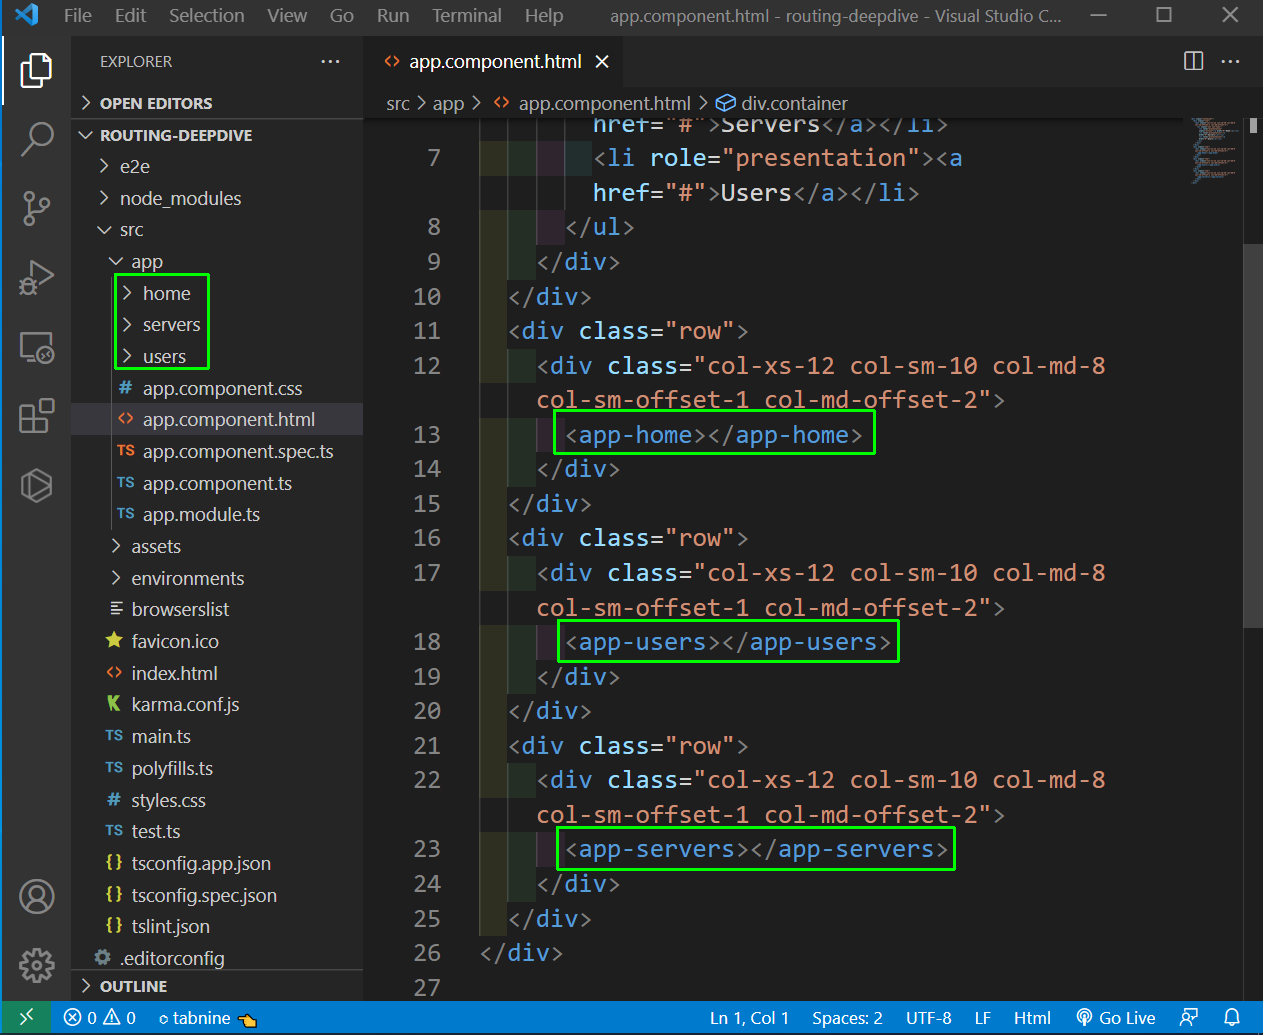
We have three components in our project which are the home, servers and users. In the app.component.html file, we are loading all of them.
 app.component.html
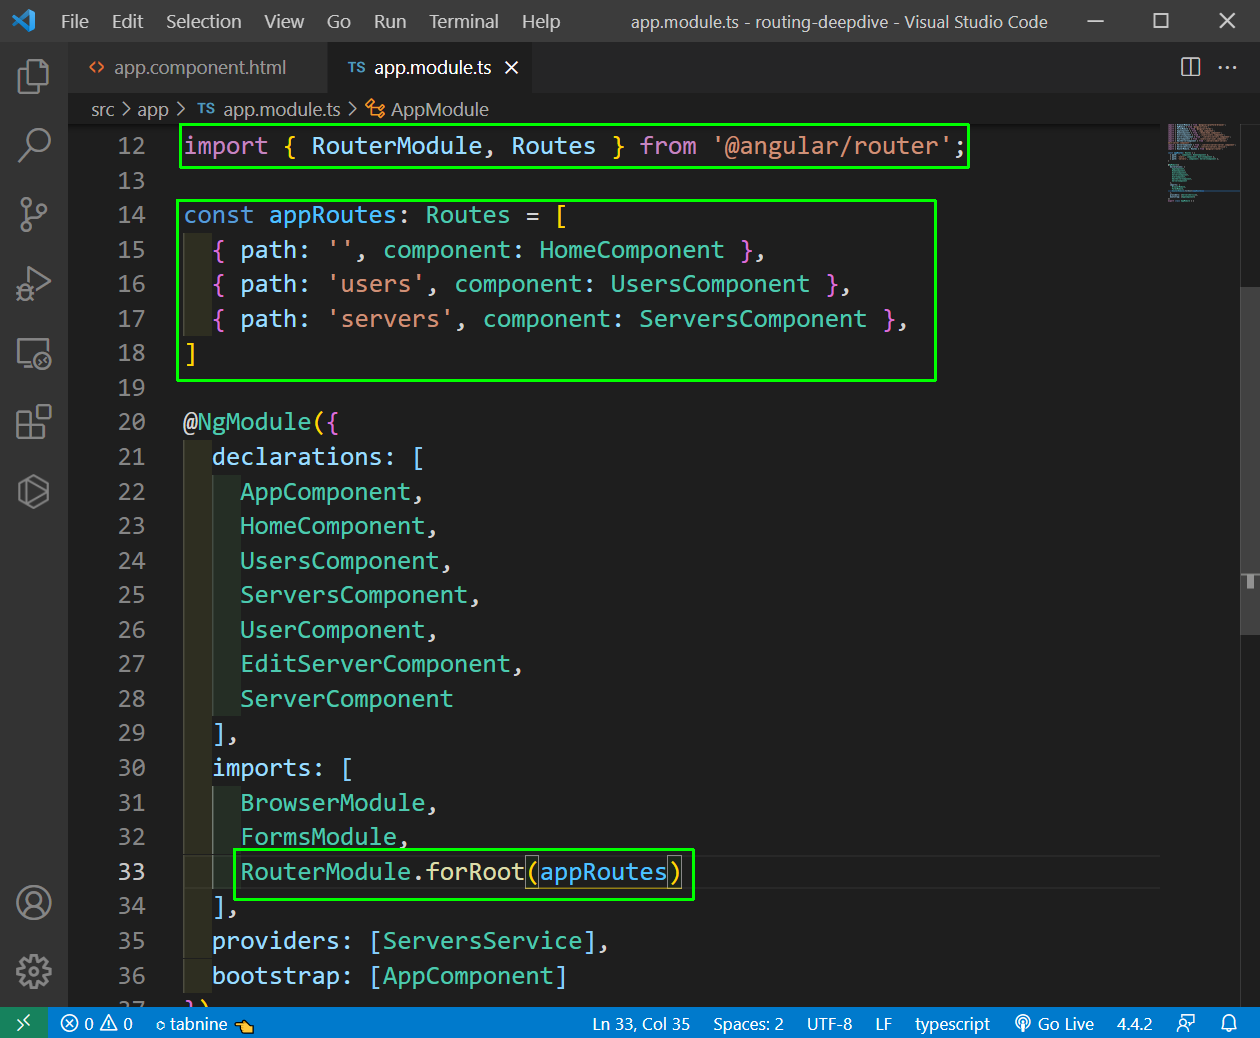
To add routing in our project, we have to add the path in app.module.ts file, which will be mapped to the components.
 app.module.ts
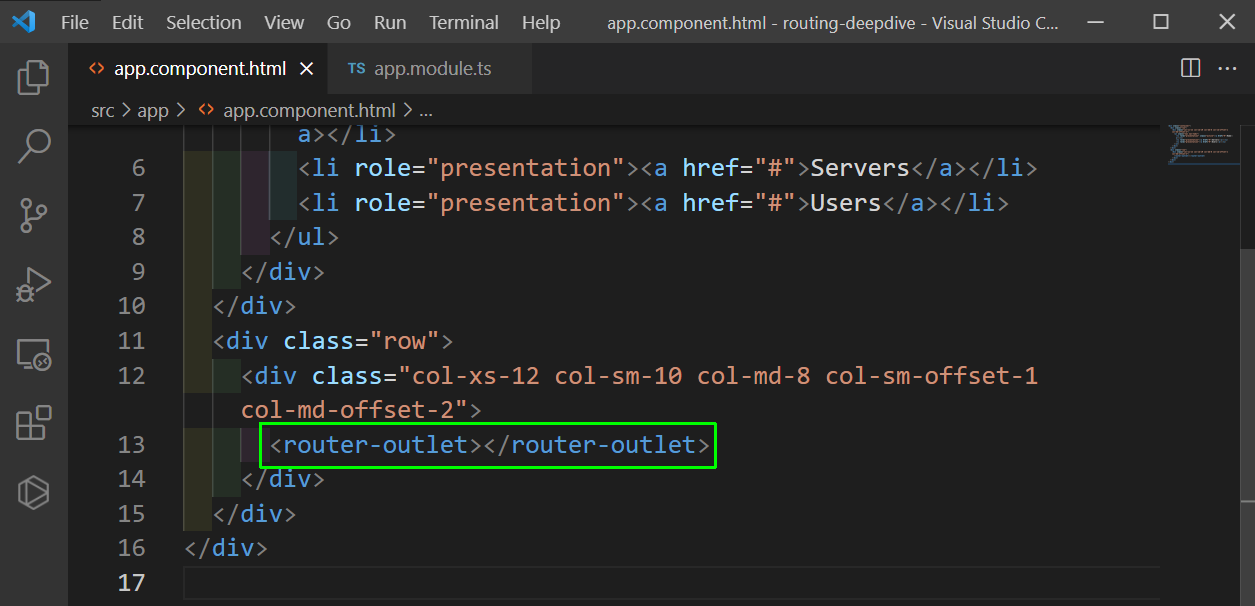
Now, back in app.component.html file, we will have the router-outlet and will remove the other components.
 app.component.html
Now, our routing is working fine in localhost, if we manually put the route.
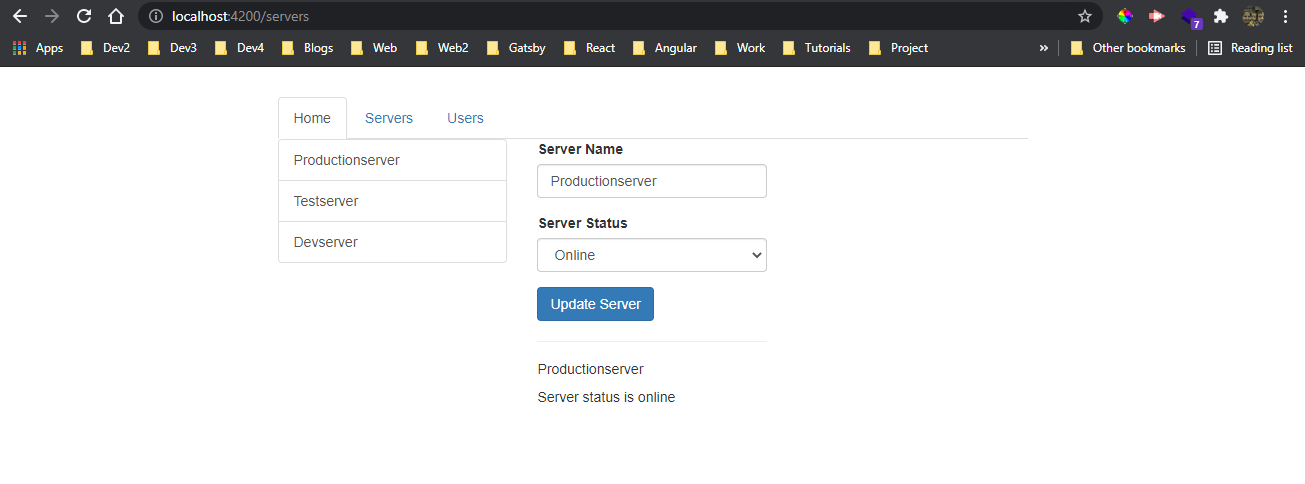 localhost
Now, we will add the logic for working links in our project. We will add the directive routerLink in our app.component.html file and there are two ways to use it.
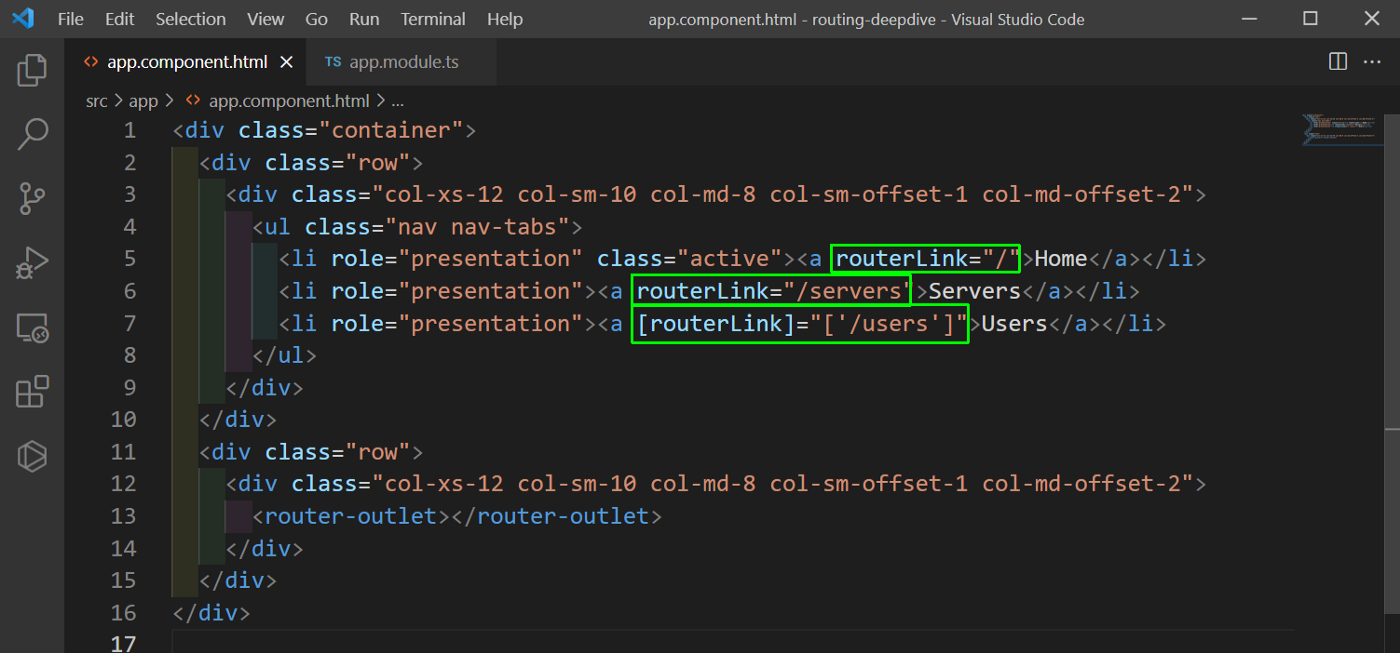 app.component.html
Now, in our app, if we click on the link they will take to the proper paths.
 Proper path
Now, we will work to get the visual indication of our current route. We will be using routerLinkActive for the same. Also, we need to give the routerLinkActiveOptions in the home route for not matching / everytime.
Beside this i have also updated the /servers to servers because, we can work with absolute paths
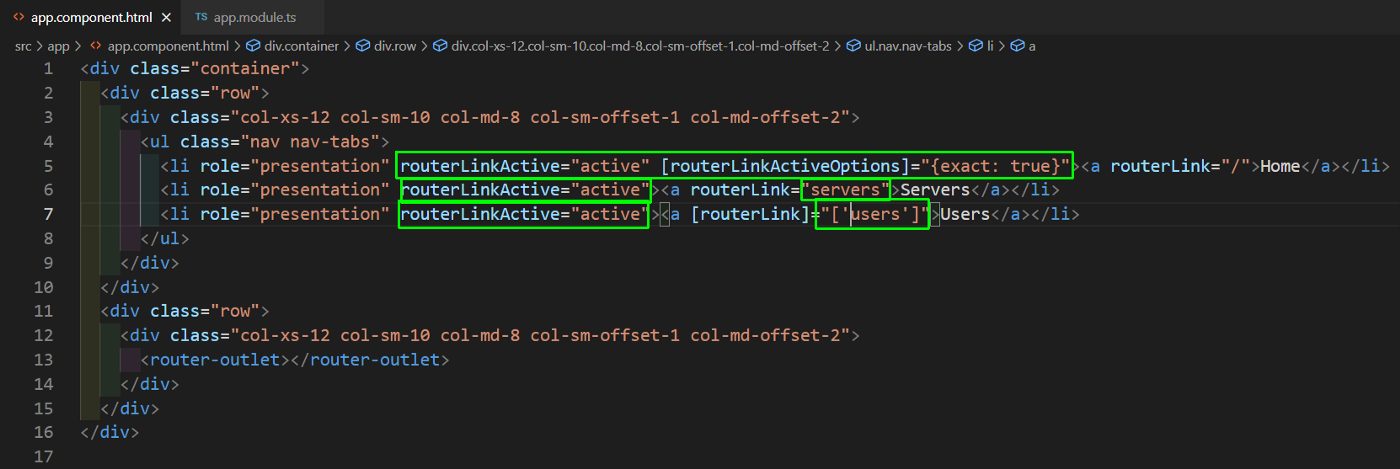 app.component.html
Now, the highlights are been shown properly.
 Highlights
Now, we will learn how to load a route programmatically. For this we will first have a button in our home.component.html file, which will call the function onLoadServer on clicking.
 home.component.html
Now in the home.component.ts file, we will use router.navigate to go to the server route.
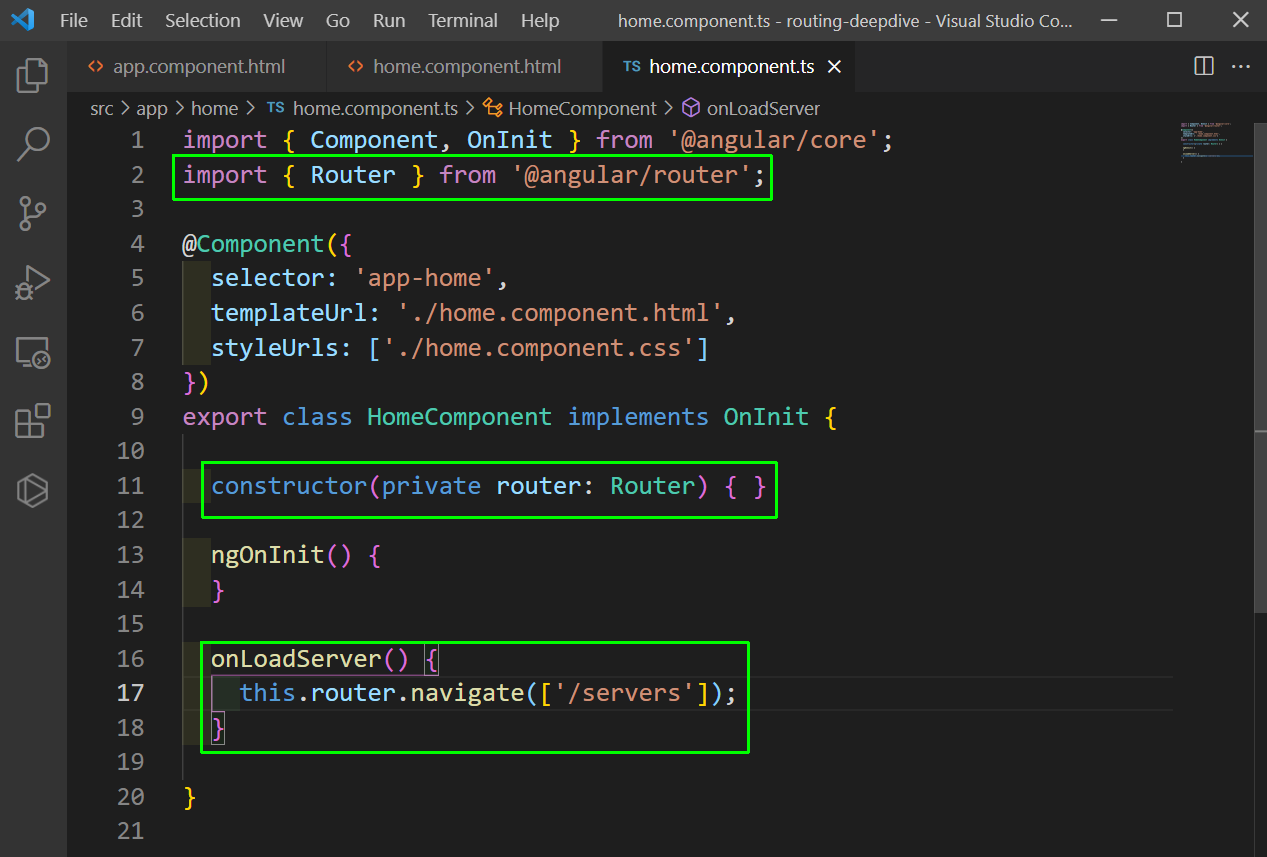 home.component.ts
Now, we have a Load Server button on our home page and on click of it, we will navigate to the server page.
 Navigate
We will now enhance our application by adding other routes to it. We are basically adding parameters to our routes.
In the app.module.ts file add a new route, which will take the id and name parameters.
 app.module.ts
Now, in the user component we can access it by route.snapshot.params. Add the user with id and name in user.component.ts file.
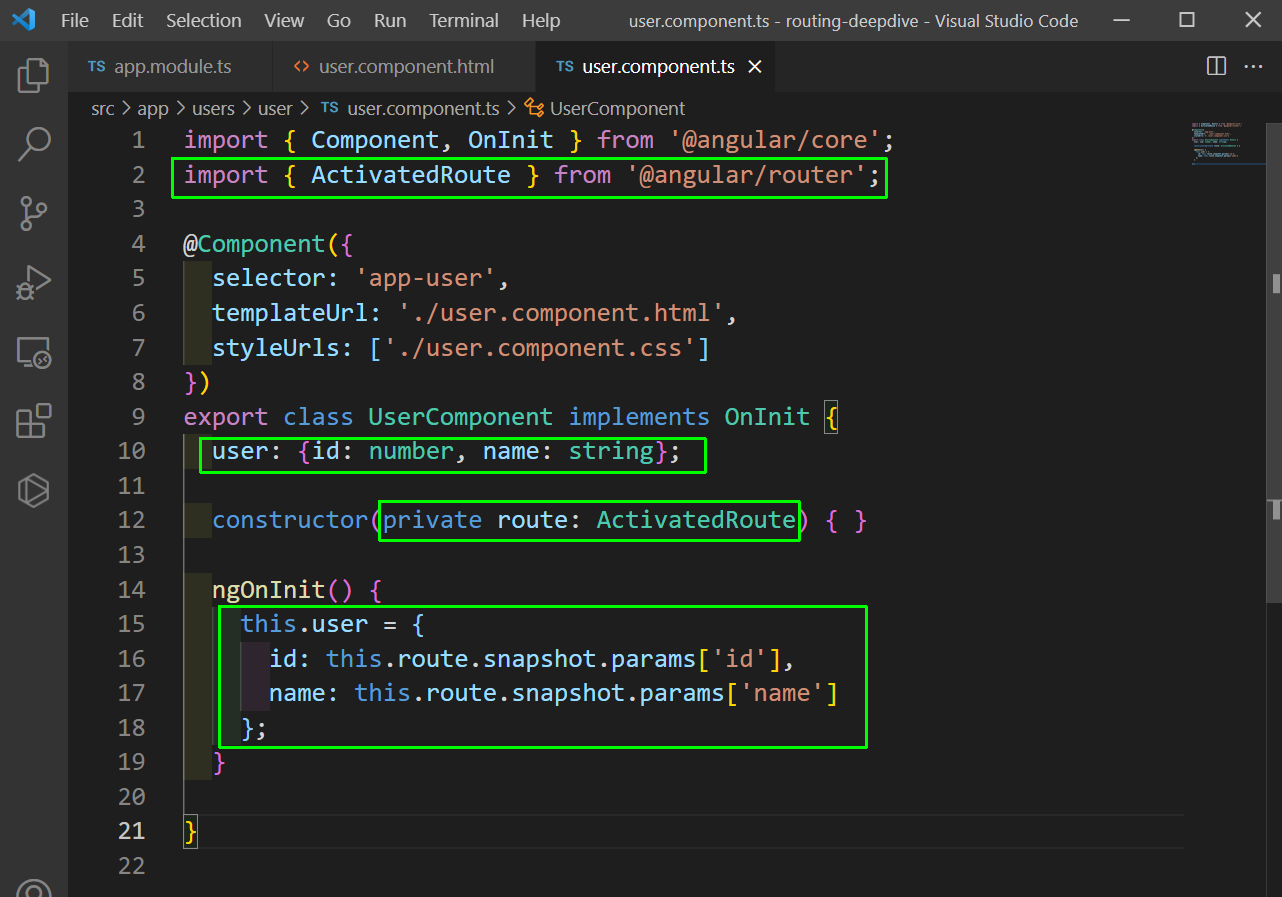 user.component.ts
Now, we can show the same through user.component.html file.
 user.component.html
Now, if we go to the route http://localhost:4200/users/1/nabendu we will see the data.
 The data
Now, we will look into a issue. Here, we will add a routerLink to our user.component.html file.
 user.component.html
Now, when we click on it the link changes but the data doesn’t. This happens because we are not actively listening for this change.
 localhost
In this kind of cases, we have to use observable, which will actively listen for such changes. We will add the same in user.component.ts file.
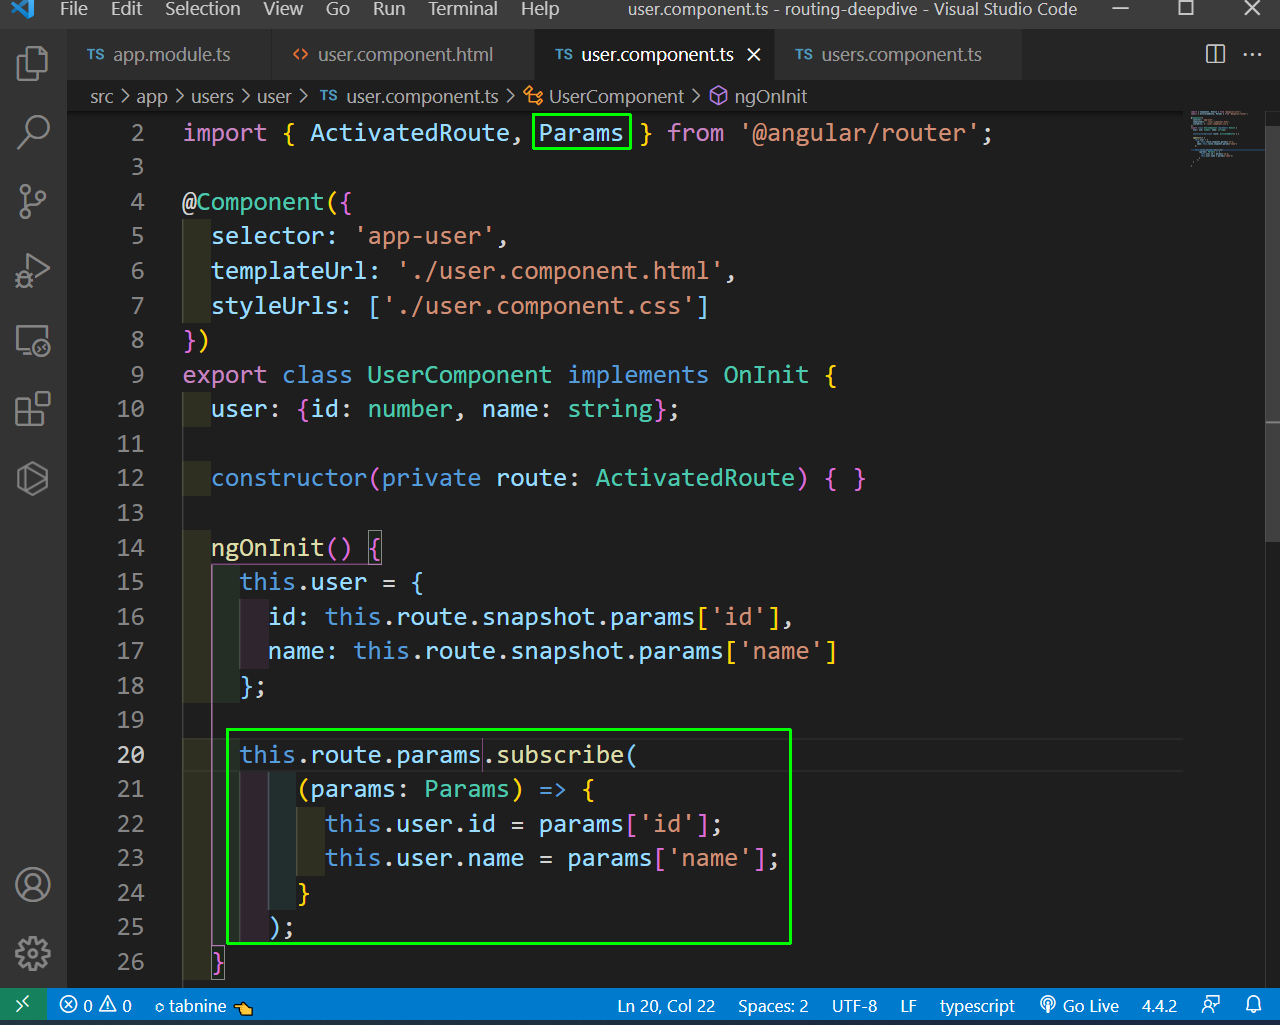 user.component.ts
Now, our link will be working perfectly.
 Working perfectly
Next, we will learn to add query parameters and fragments in our app. We will create a new route with id and edit in our app.module.ts file.
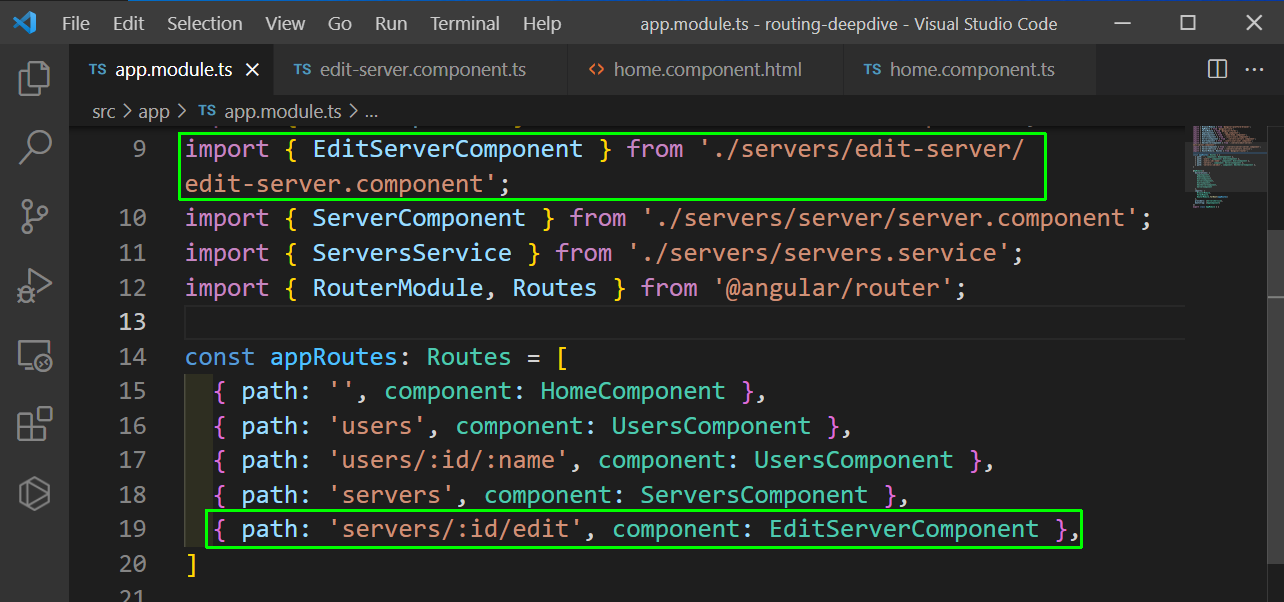 app.module.ts
After that we will go to the home.component.html file and add a value 1 to onLoadServer function.
 home.component.html
Now in our home.component.ts file, we will add the id and edit. We also need to pass the queryParams and fragment.
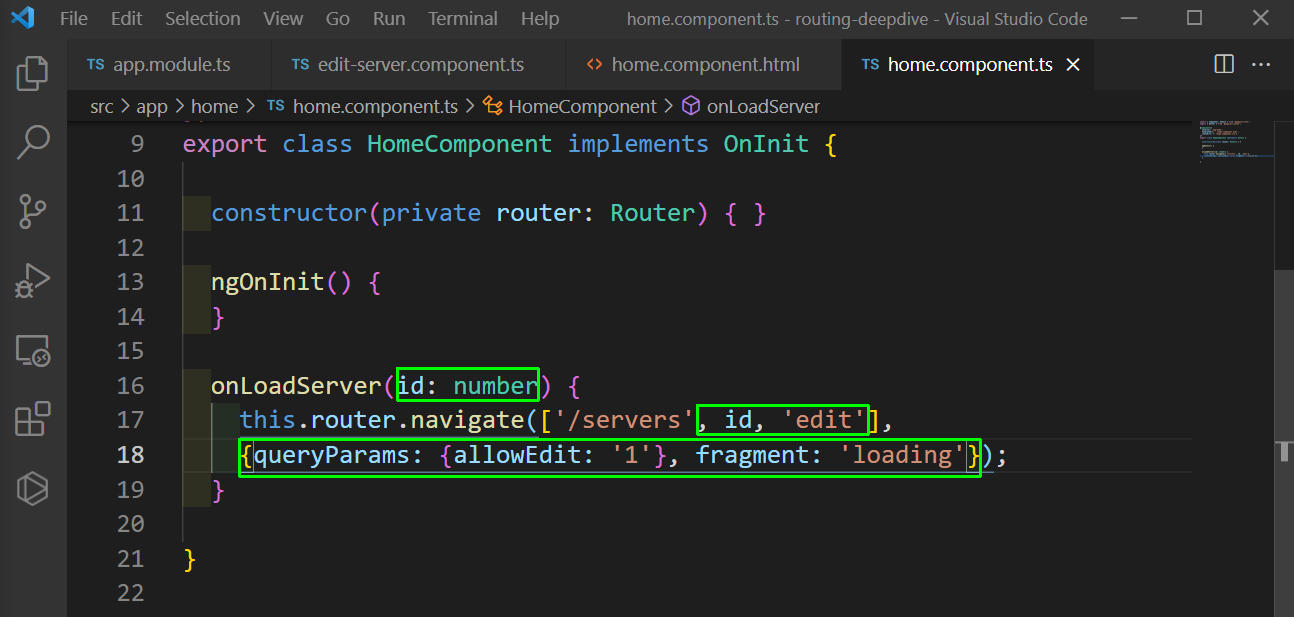 home.component.ts
Now in the edit-server.component.ts file, we can get the queryParams and fragment.
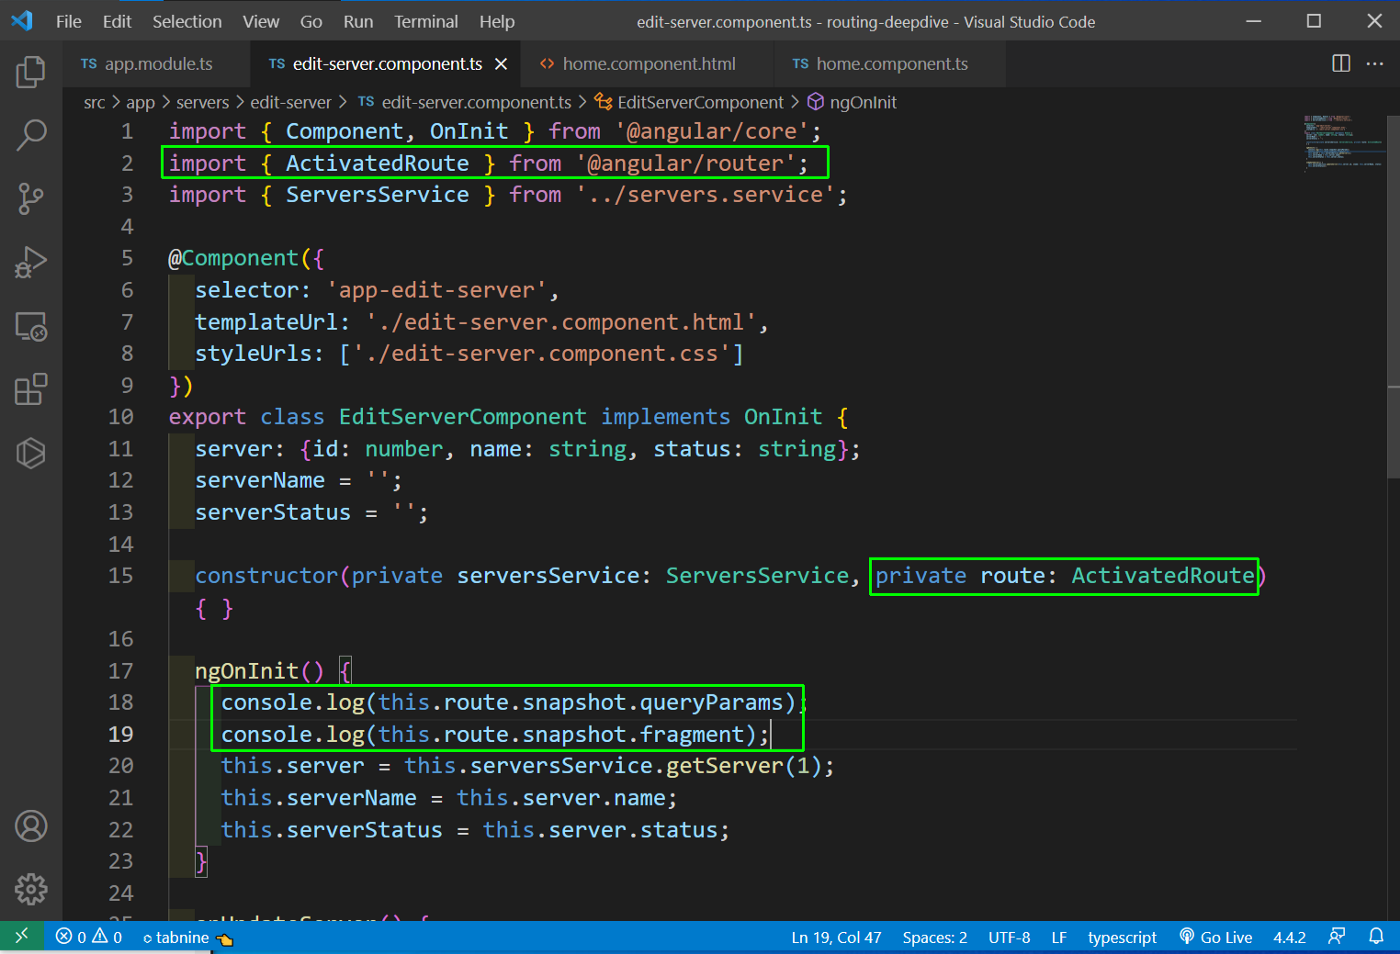 edit-server.component.ts
Now, in the home page when we will click on the Load Server button, we will be taken to the Edit server page and we can see the queryParams and fragment in the console log.
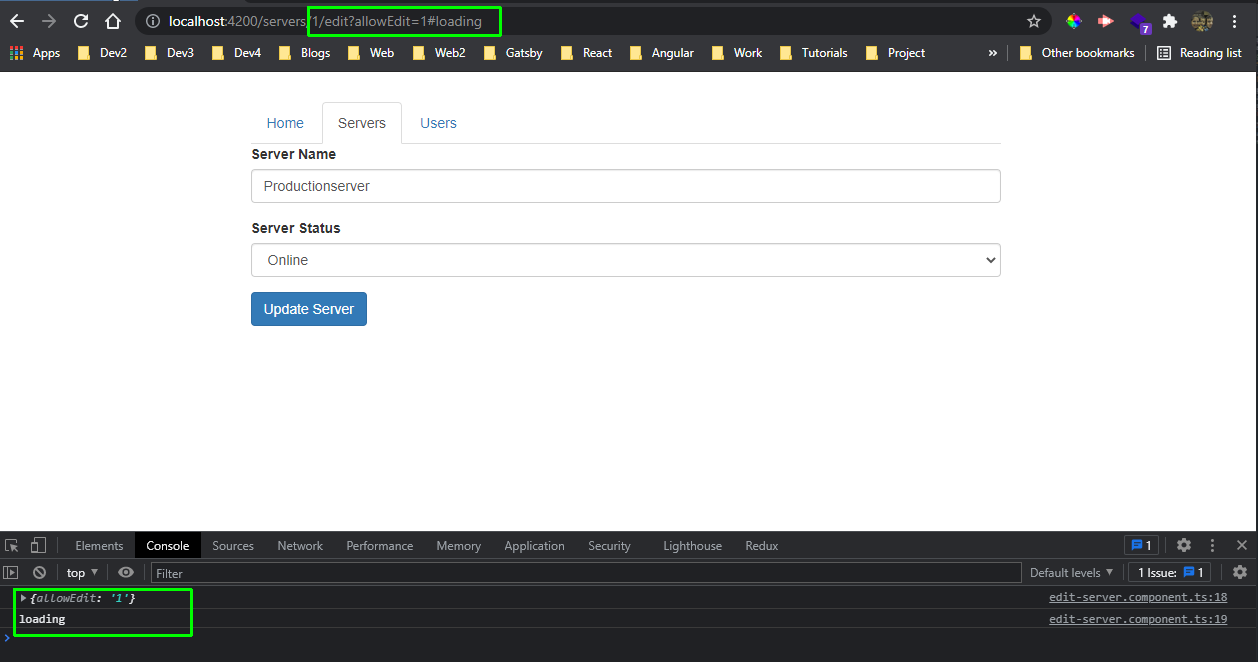 localhost
This completes part-6 of the series. We will complete routing in part-7. The code for this part can be found in this github repo.