Welcome to part-9 of Angular Basics series. In this part , we will learn about forms in Angular. Angular provide us with two approaches to create forms. They are Template Driven and Reactive approach.
We will look into Template Driven approach in this post. The starting point can be taken from here.
We have a simple html form in the project, which we are going to change into Angular template driven form.
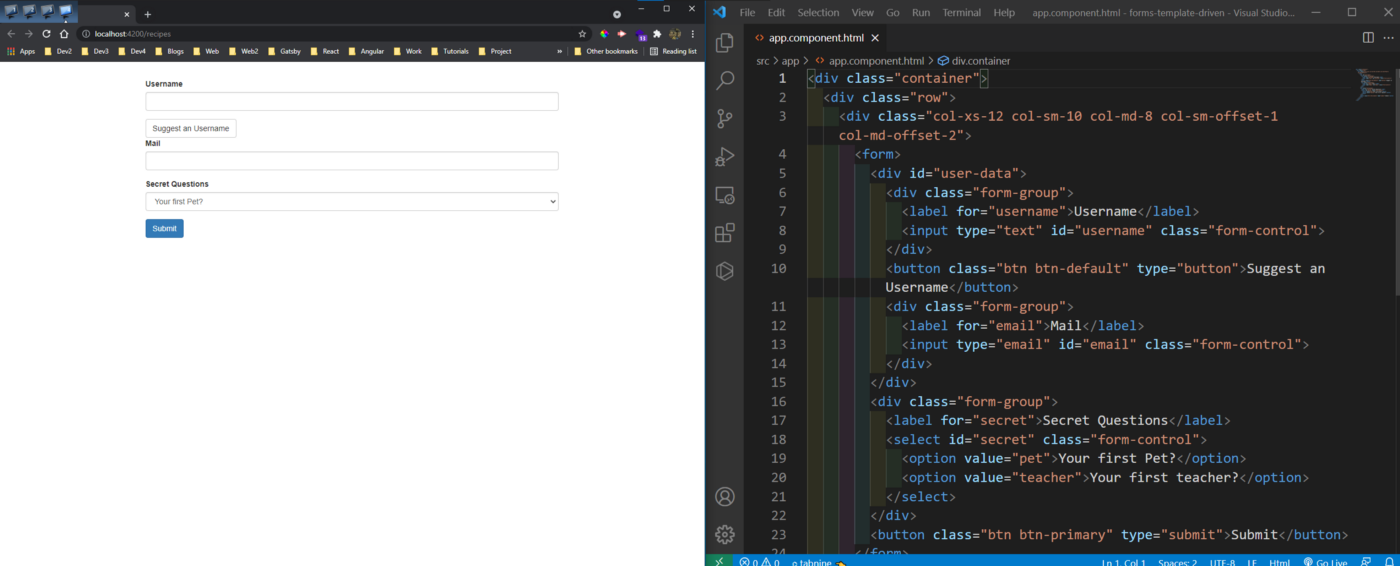 localhost
One thing to make sure is to have a FormsModule imported in our app.module.ts file, which is generally automatically done by Angular CLI.
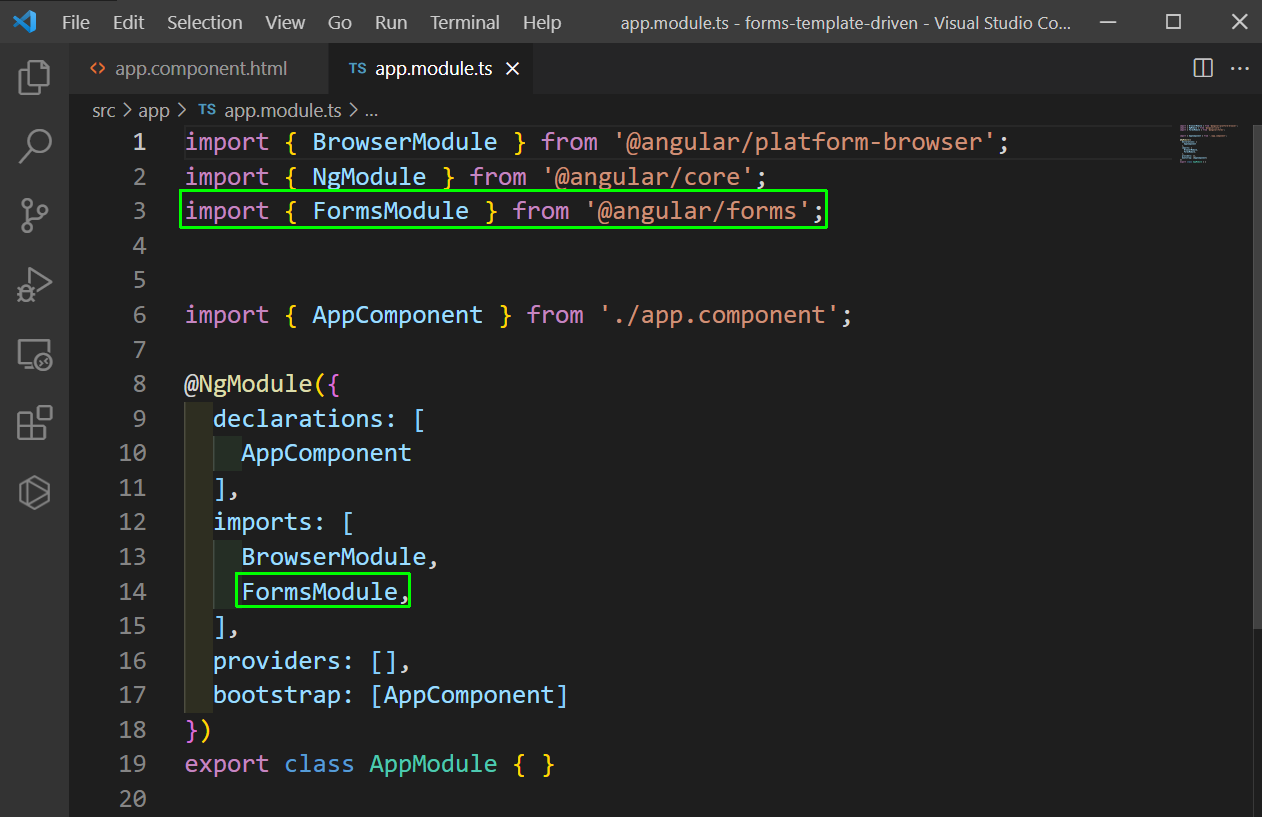 app.module.ts
Now, to convert the html form to an Angular template driven form, we need to add ngModel and name to it. This ngModel is different then the directive, which uses [()].
We also have to use the ngSubmit on the form. We are using a reference to target the ngForm here.
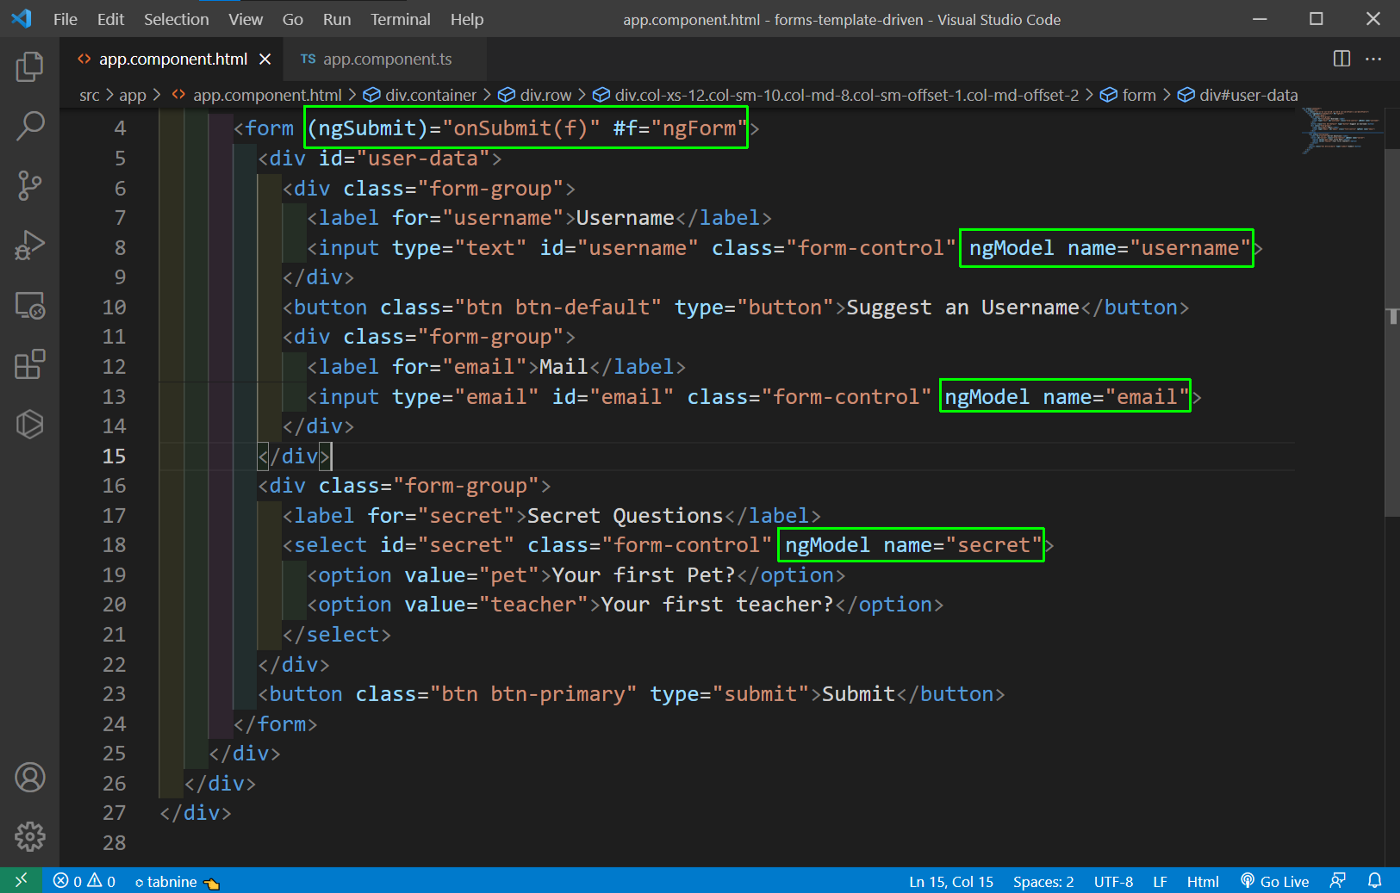 app.component.html
Next, in the app.component.ts file we are importing the NgForm and console logging the form.
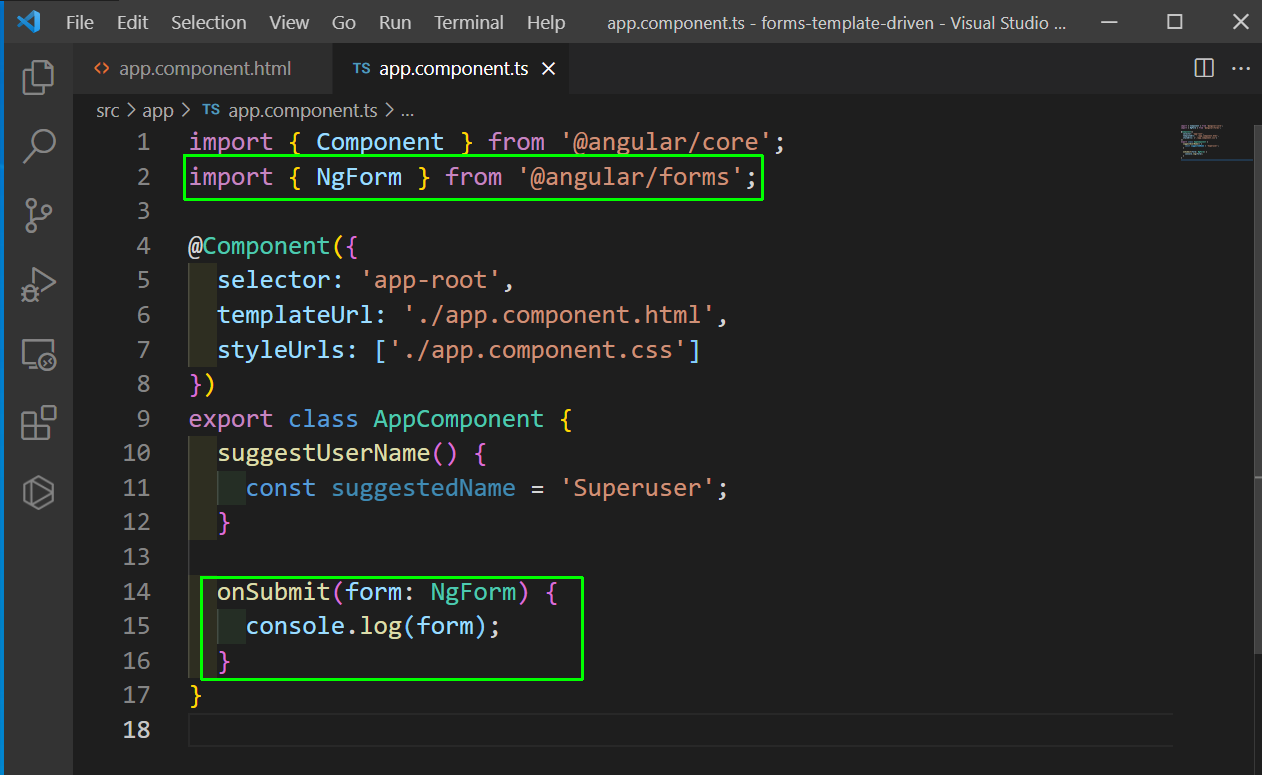 app.component.ts
Now, in localhost if we enter anything we will get it in the console. Notice that we have access to various properties here.
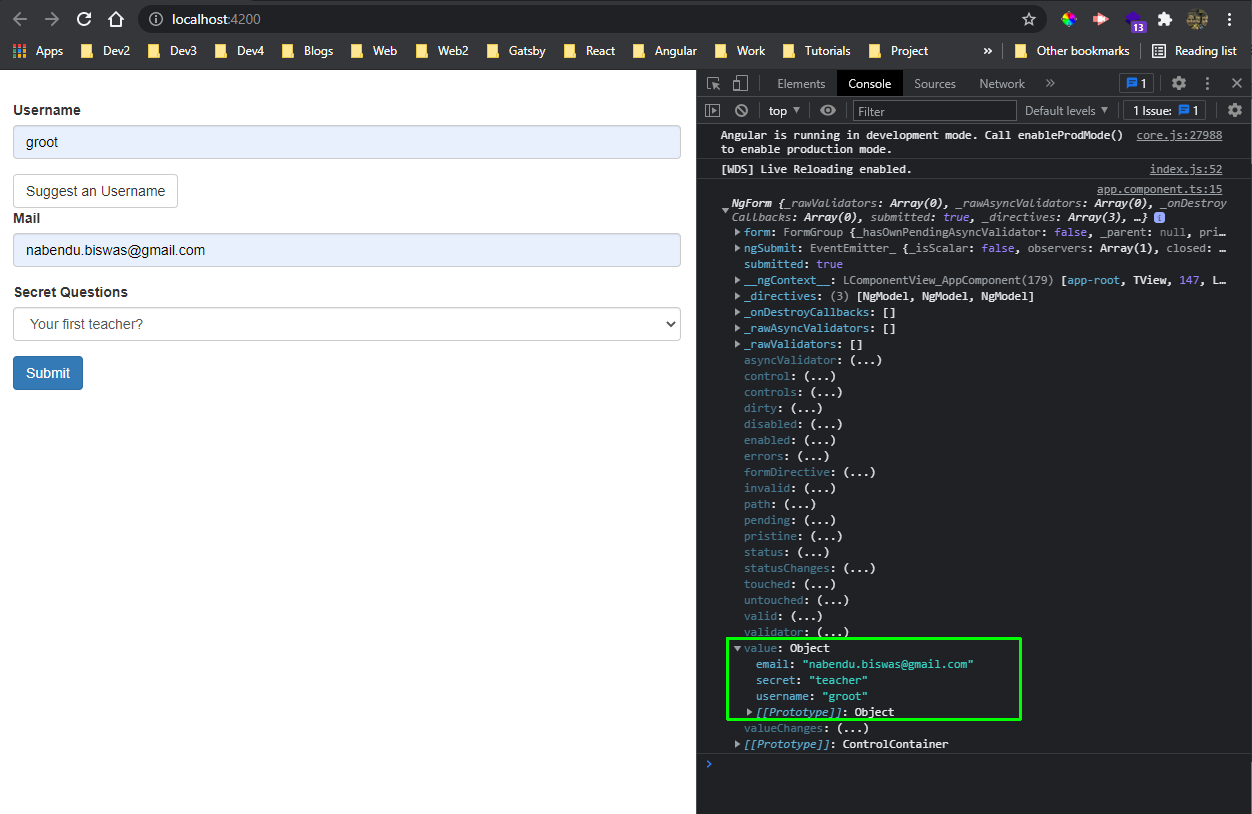 localhost
We can also use another way to pass data to the typescript file. We need to only call the onSubmit() without any parameters in app.component.html file
 app.component.html
Next in app.component.ts file we will use the ViewChild to get access to the reference f and assign it to a signupForm. After that we can get the values entered by the user.
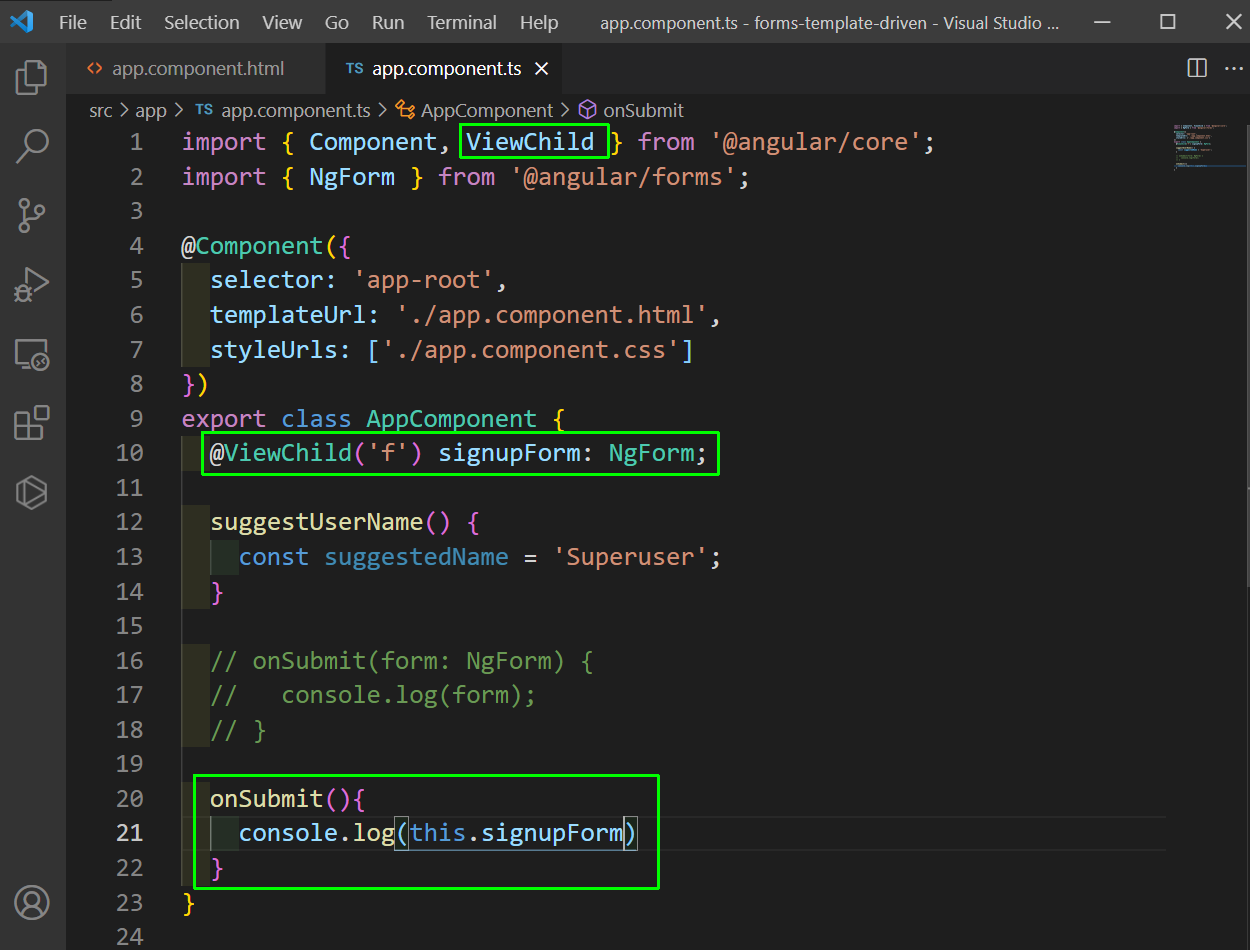 app.component.ts
Now, in localhost we will still have access to NgForm.
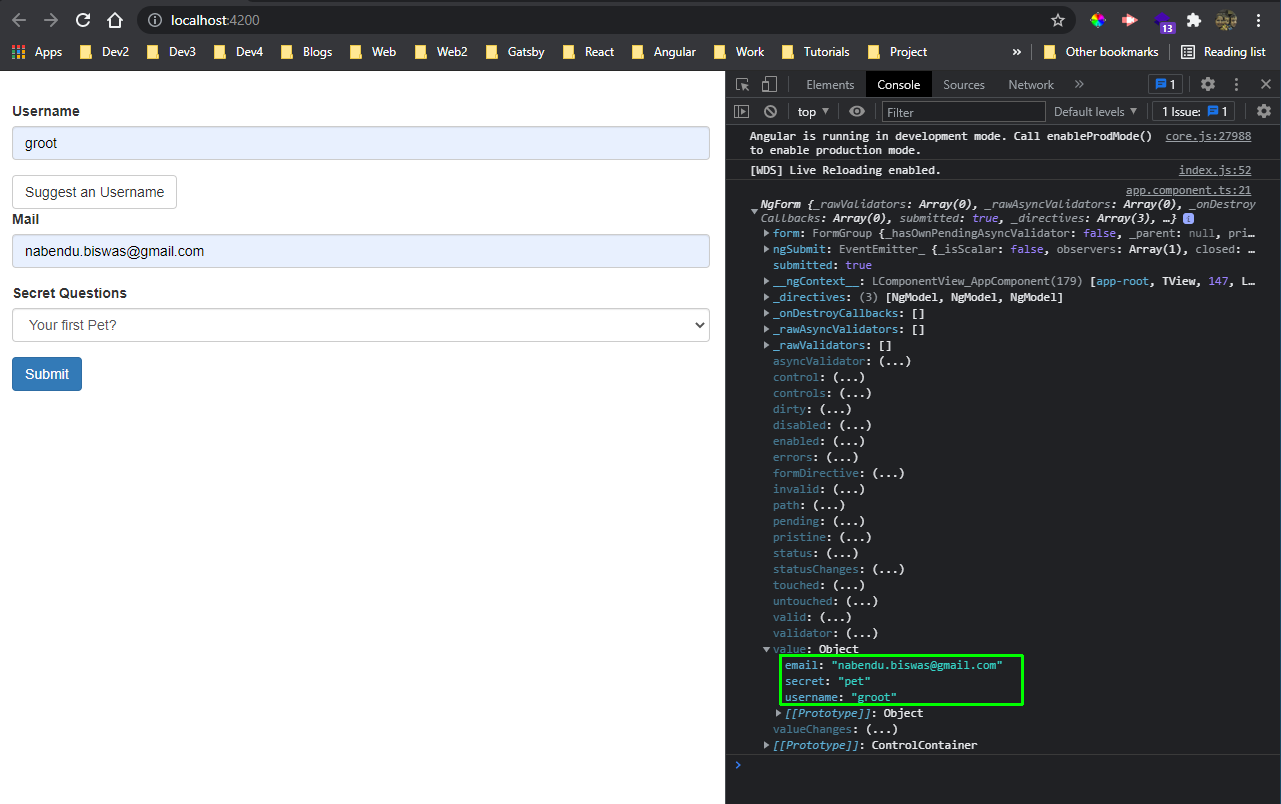 localhost
Now, we will learn to add validators in our app. We are making the username required and the email required and to be a valid email in app.component.html file.
 app.component.html
Now, if we submit the wrong fields, like not a valid email. We will get the valid property as false.
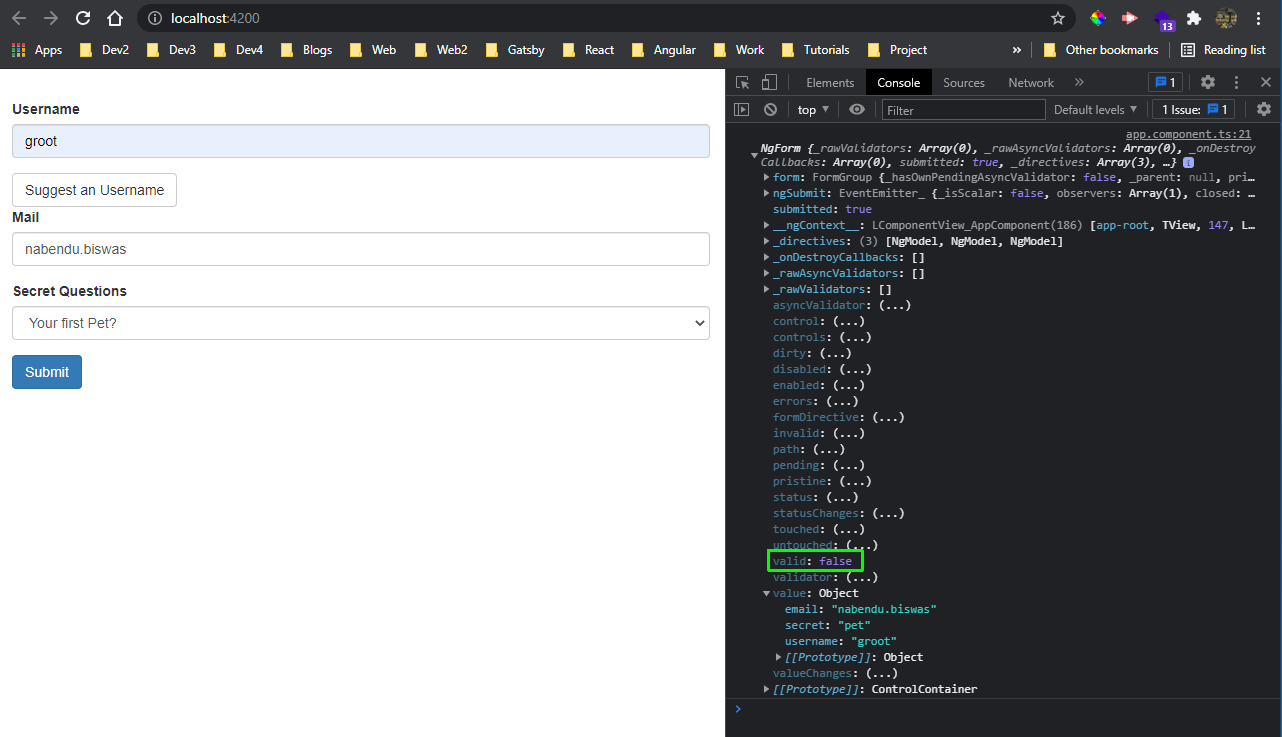 localhost
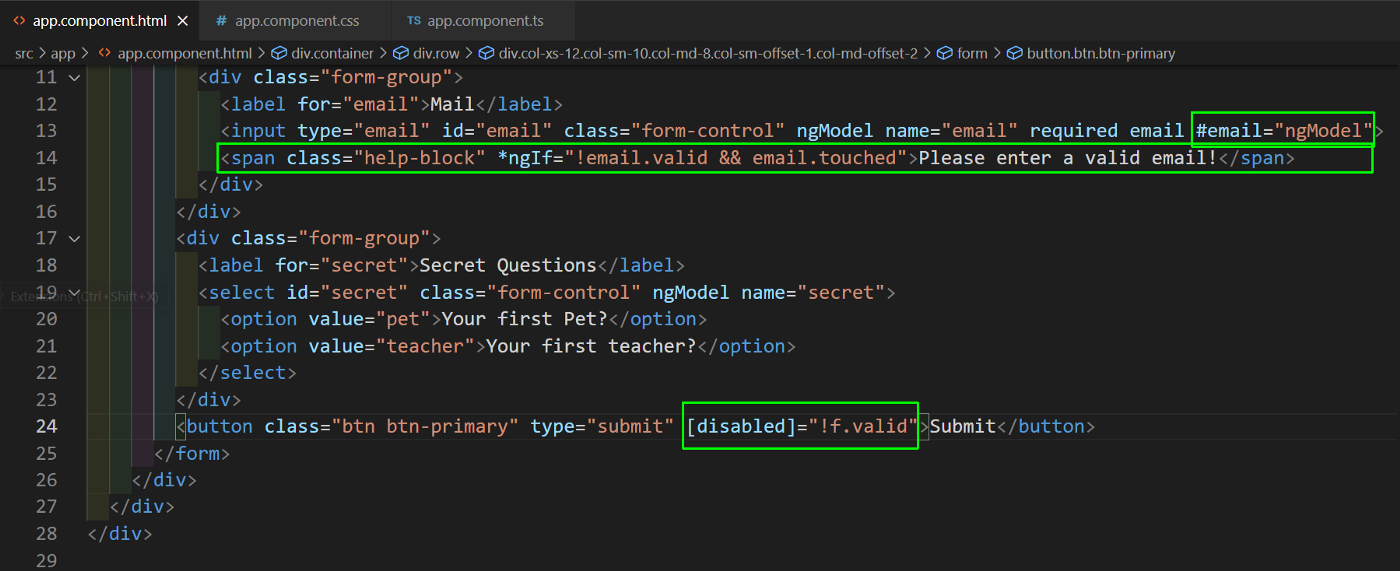
In app.component.html file, we will first make the button enabled only if the form is valid. Next, we are referencing the email and showing a text, if email is not valid and is touched.
 app.component.html
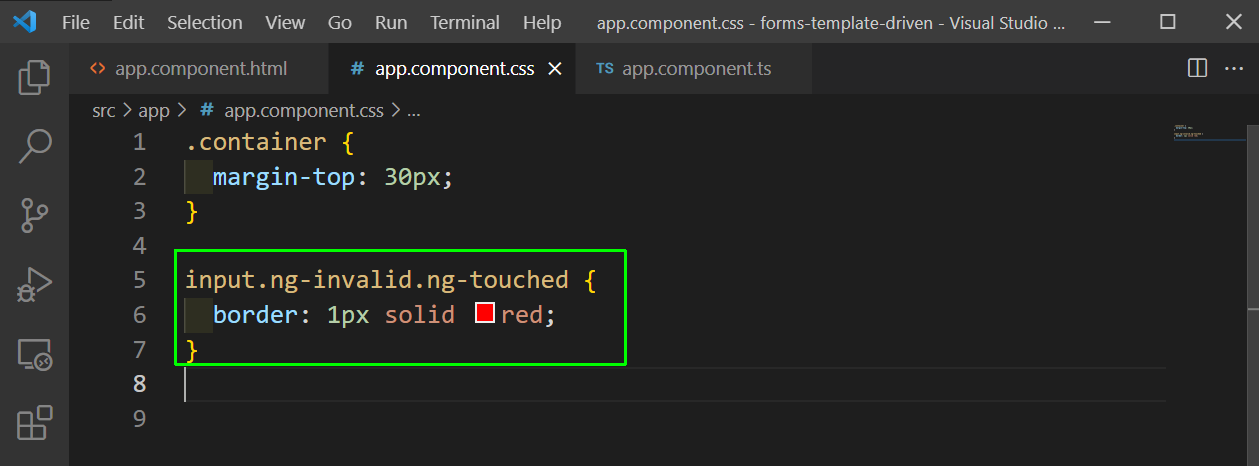
We also need to add CSS in app.component.css to show a red border.
 app.component.css
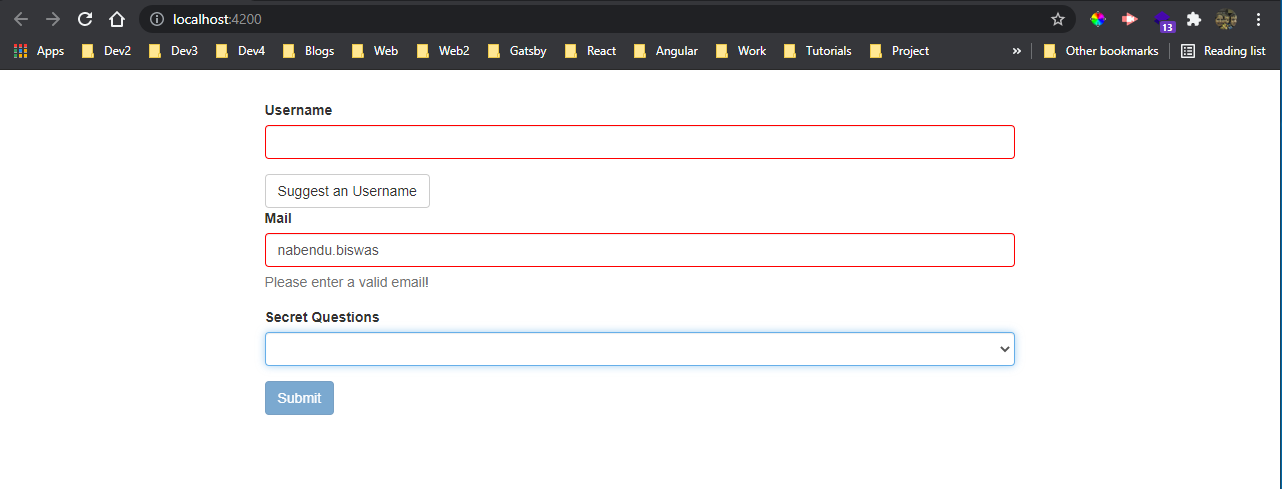
Now, localhost will show red borders and Submit button will be disabled if the form is not valid.
 localhost
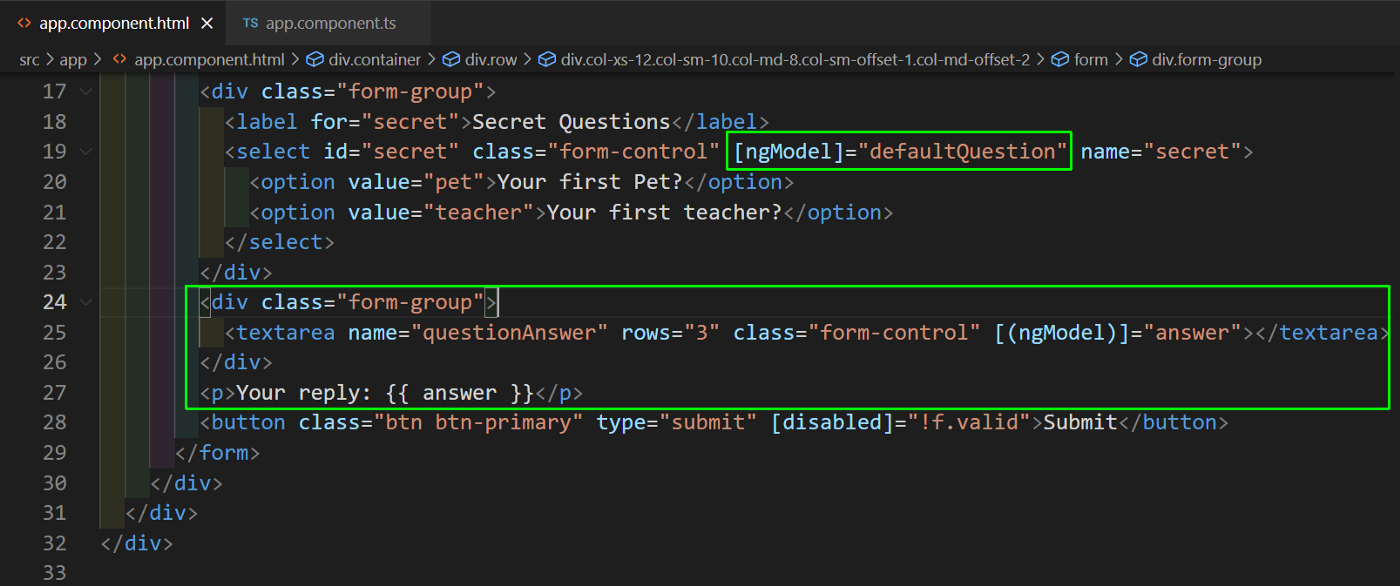
Now, we will look into the example to using one way binding and two way binding in ngModel. First in the select we are using one-way binding to set the option to a default value.
Next, we have created a textarea and used two way binding to show instantly the user’s input.
 app.component.html
Now in app.component.ts file just add those variables.
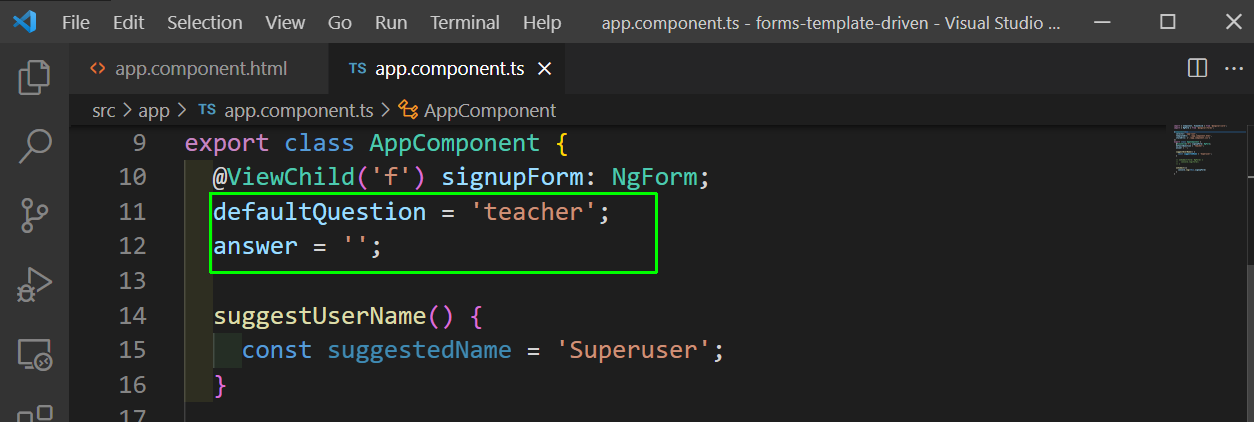 app.component.ts
Now, in localhost it will work as desired.
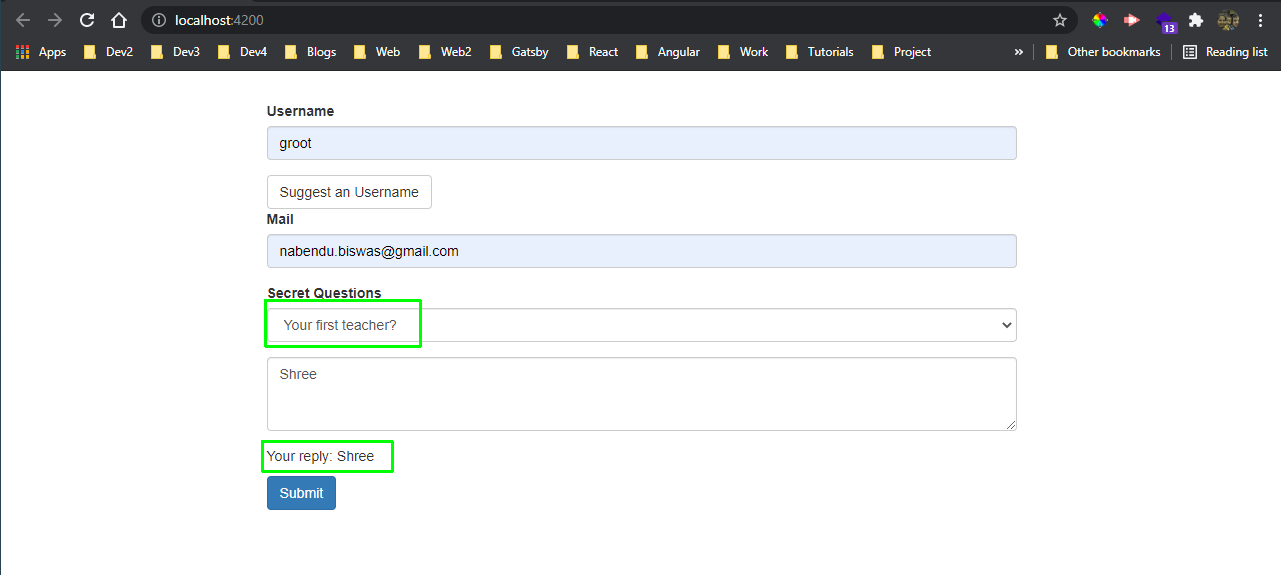 localhost
We will now learn to use radio buttons. First add a new variable genders in app.component.ts file.
After that we will be adding the radio button in app.component.html file. Everything is as earlier, expect that we have a value binding for gender.
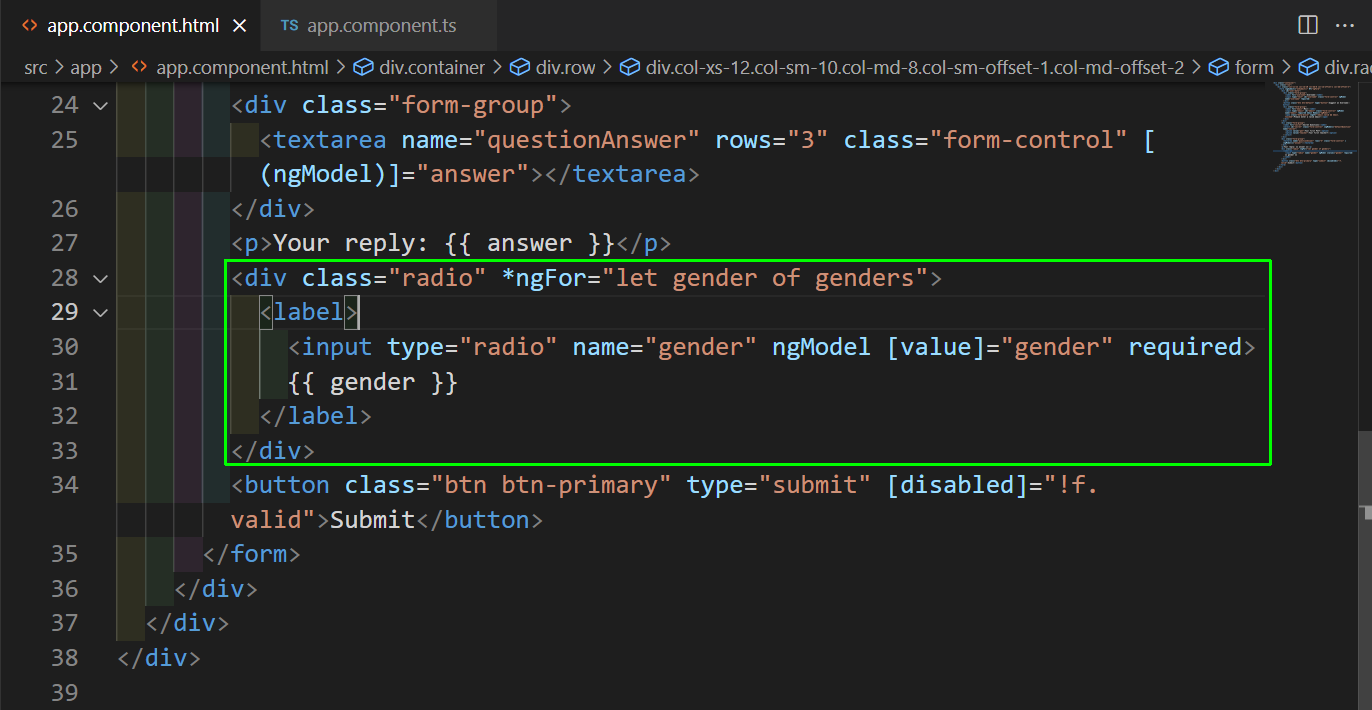 app.component.html
Our radio button is now working properly in localhost.
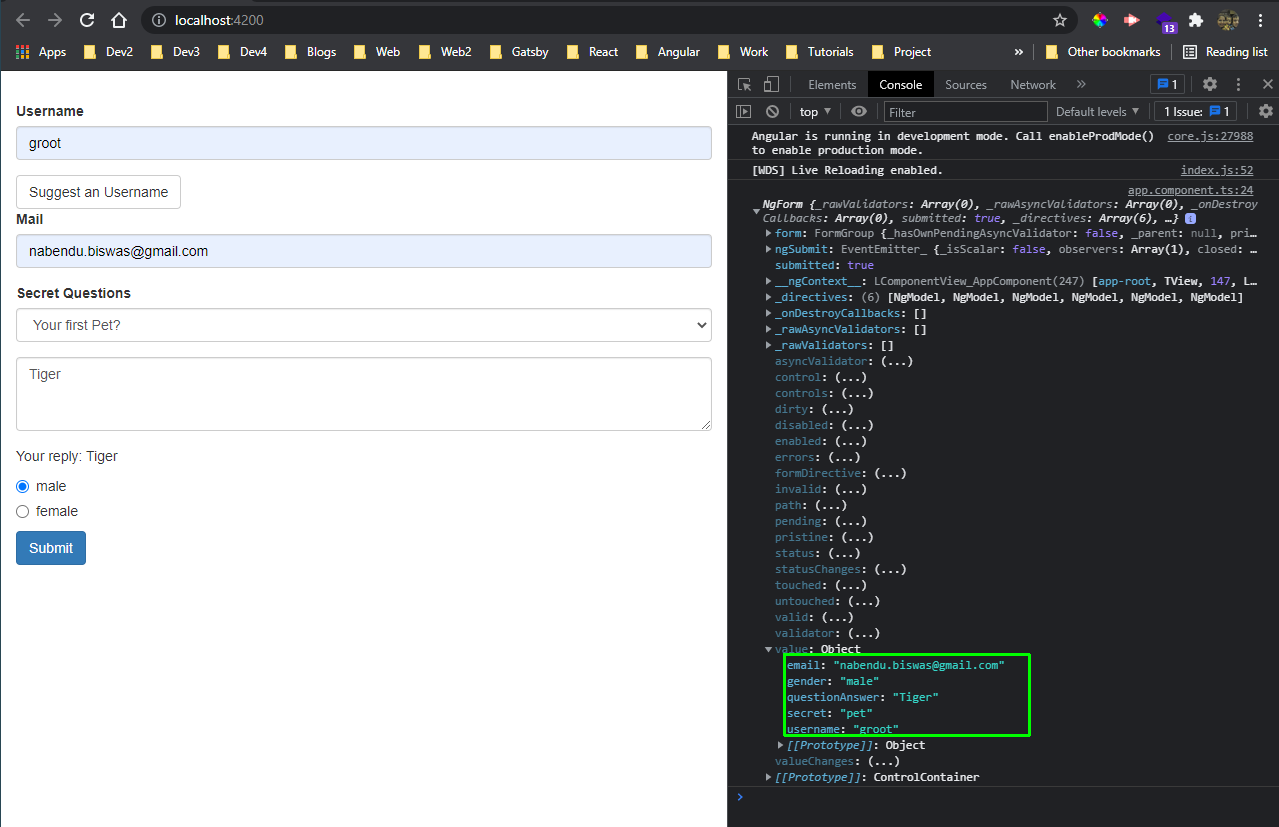 localhost
Now, we will add functionality to Suggest an Username button. First add a click listener in app.component.html file.
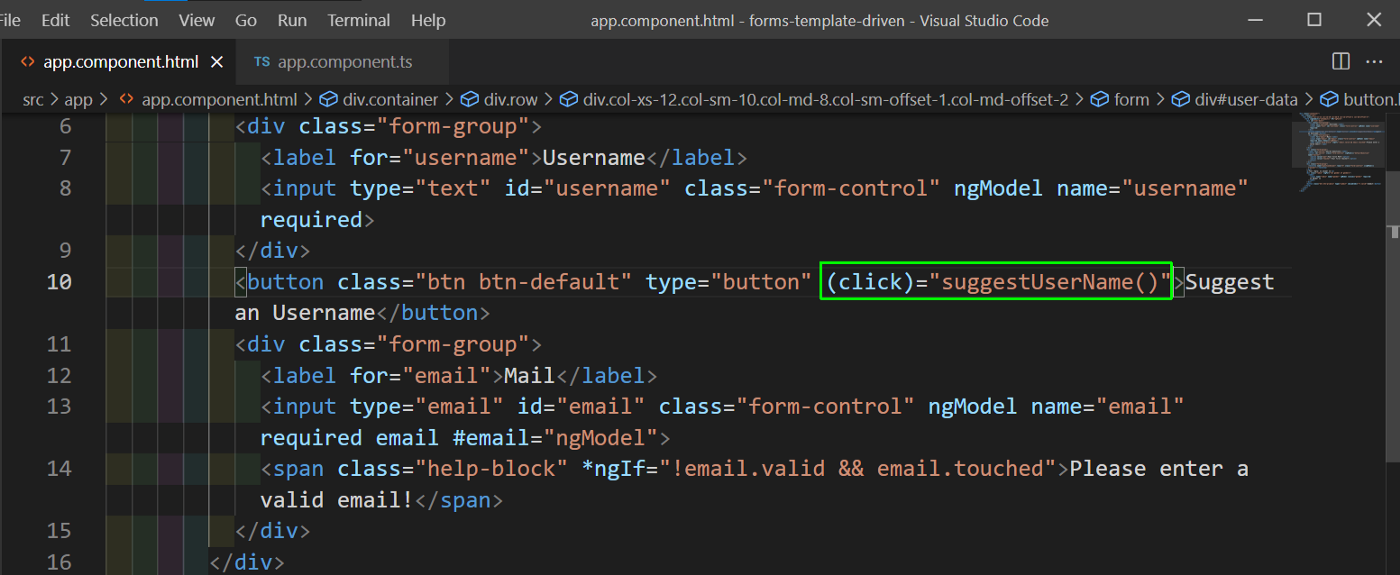 app.component.html
Now, we will update the function suggestUserName in app.component.ts file. We are using patchValue provided by Angular to update the username value.
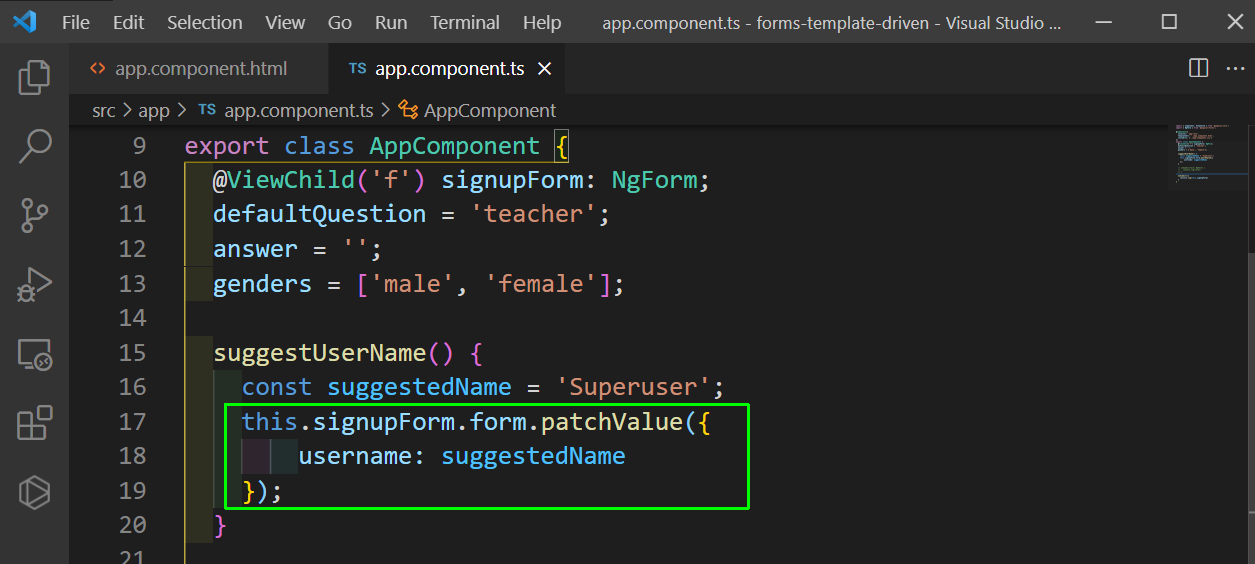 app.component.ts
Now, in localhost on click of the Suggest an Username button, we will get the Superuser text.
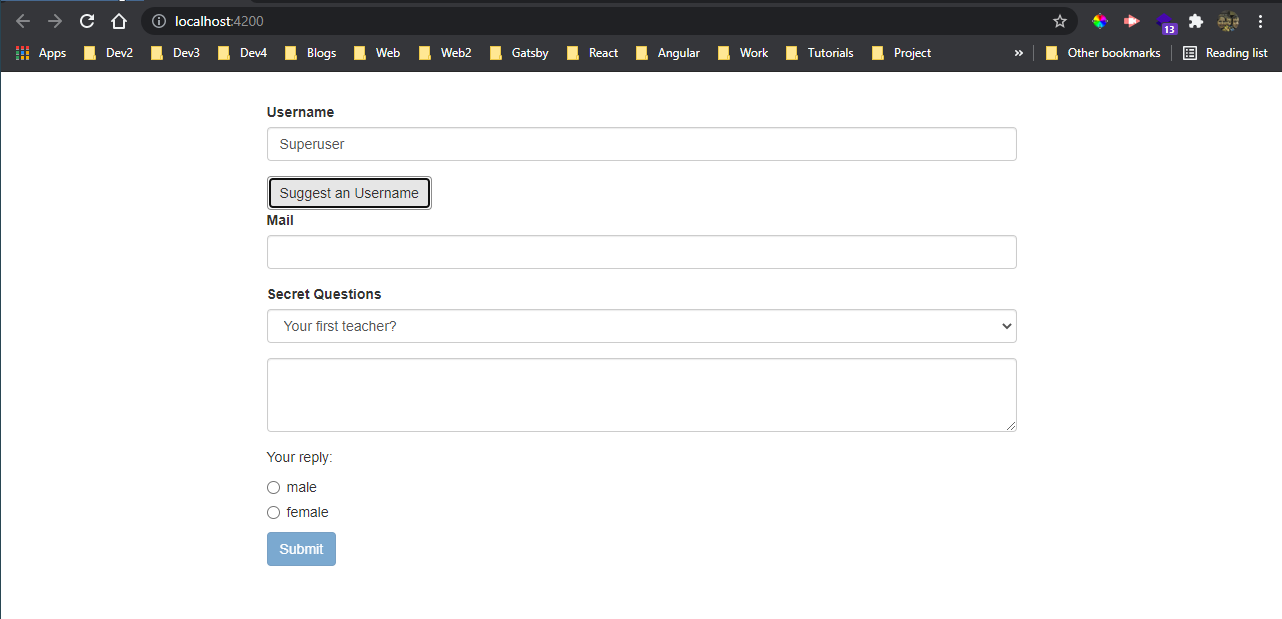 localhost
Now, we will output the data entered by the user in form. We will add a user object in app.component.ts and also a variable submitted.
In the onSumbit, we are assigning the entered value to this user. We are also making the submitted to true and also resetting the form.
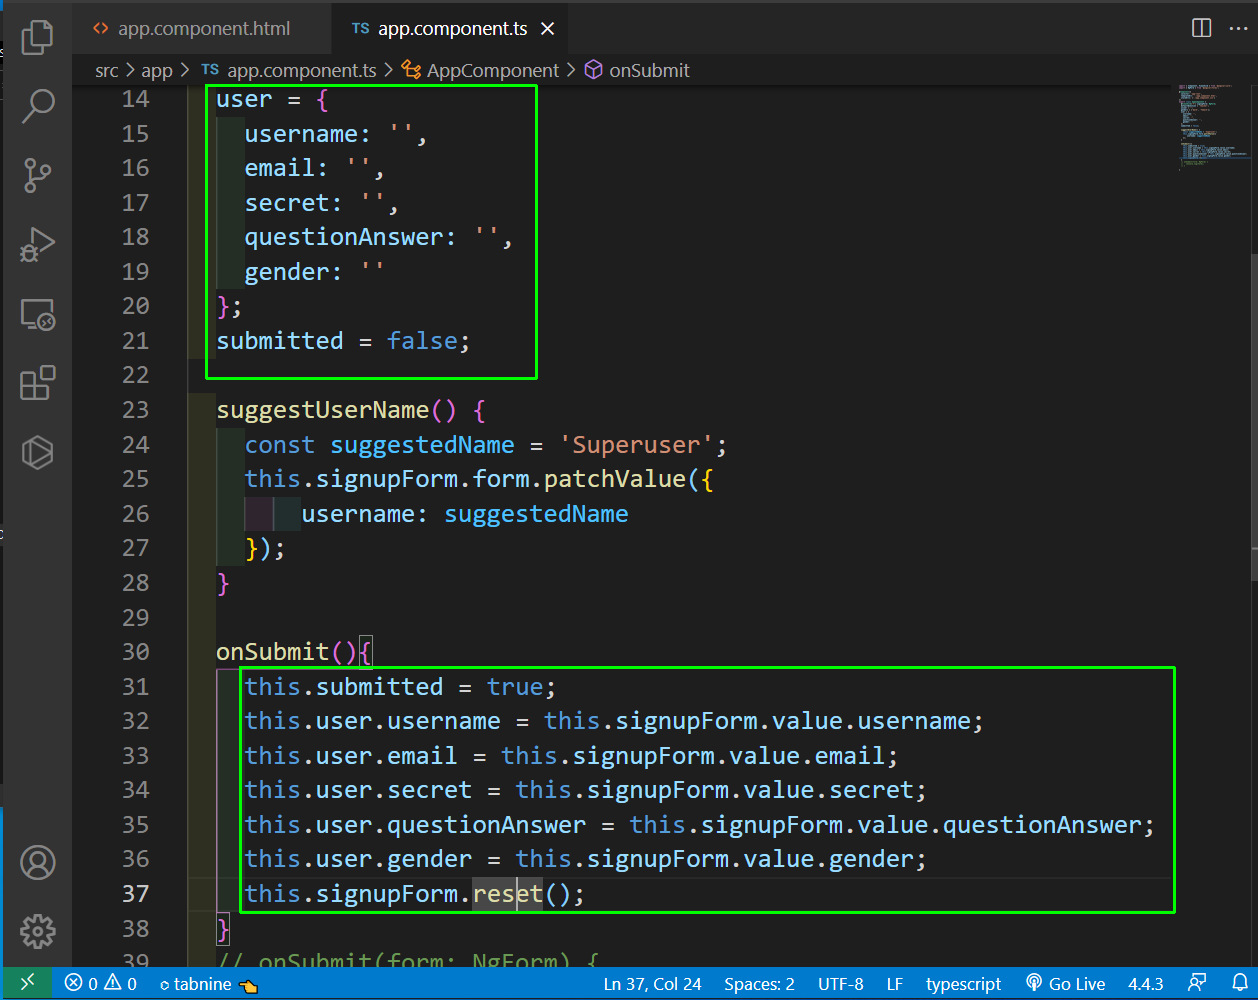 app.component.ts
Now, in app.component.html file, we are showing the entered data if the submitted is true.
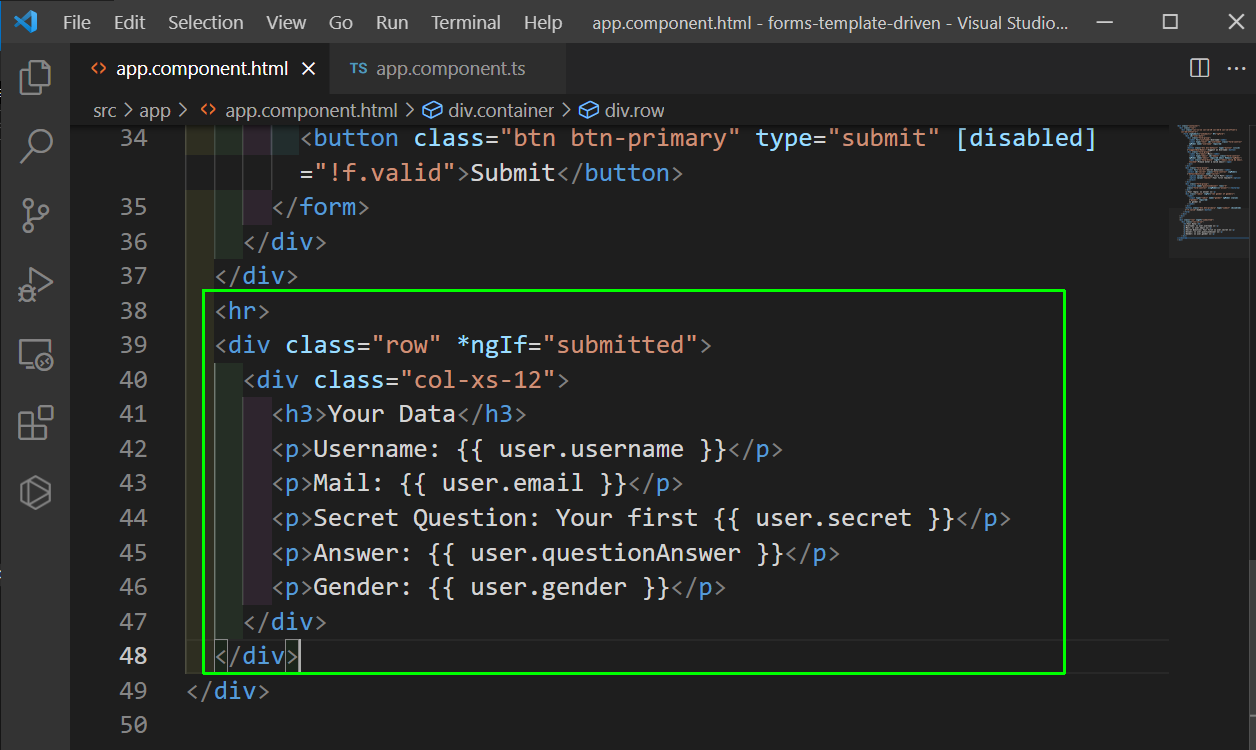 app.component.html
Now, our data is been shown properly once we submit it. This completes our post. You can get the code for the same from this github repo.
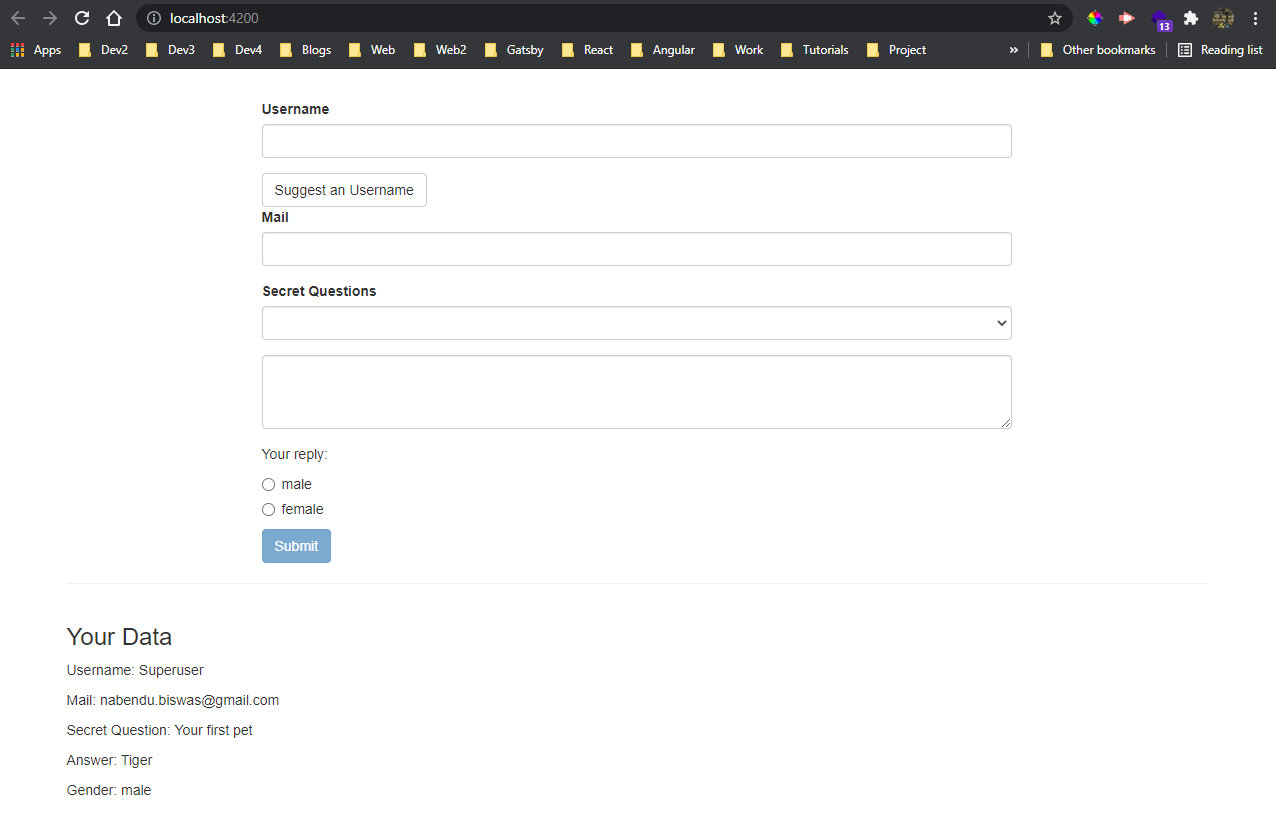 localhost