Build a complete app with React and GraphQL — 2
by Nabendu Biswas / May 22nd, 2019
#javascript #react #graphql
Series: React-graphql
Welcome to part-2 of the series. This series have been inspired by this youtube tutorial from freecodecamp.
We will first add another type author to schema.js
The process is almost similar to the one for books type.
    const graphql = require('graphql');

    const { GraphQLObjectType, GraphQLString, GraphQLSchema, GraphQLID, GraphQLInt } = graphql;

    // Dummy data
    var books = [
        { name: 'Name of the Wind', genre: 'Fantasy', id: '1' },
        { name: 'Two States', genre: 'Drama', id: '2' },
        { name: 'The Long Earth', genre: 'Sci-Fi', id: '3' },
    ];

    var authors = [
        { name: 'Patrick Rothfuss', age: 44, id: '1' },
        { name: 'Chetan Bhagat', age: 45, id: '2' },
        { name: 'Terry Pratchett', age: 66, id: '3' }
    ];

    const BookType = new GraphQLObjectType({
        name: 'Book',
        fields: ( ) => ({
            id: { type: GraphQLID },
            name: { type: GraphQLString },
            genre: { type: GraphQLString }
        })
    });

    const AuthorType = new GraphQLObjectType({
        name: 'Author',
        fields: ( ) => ({
            id: { type: GraphQLID },
            name: { type: GraphQLString },
            age: { type: GraphQLInt }
        })
    });

    const RootQuery = new GraphQLObjectType({
        name: 'RootQueryType',
        fields: {
            book: {
                type: BookType,
                args: { id: { type: GraphQLID } },
                resolve(parent, args){
                    return books.find(item => item.id === args.id);
                }
            },
            author: {
                type: AuthorType,
                args: { id: { type: GraphQLID } },
                resolve(parent, args){
                    return authors.find(item => item.id === args.id);
                }
            }
        }
    });


    module.exports = new GraphQLSchema({
        query: RootQuery
    });
One thing to note that we have make the id as GraphQLID. The difference from GraphQLString is that, we can pass a number also in id.
 number in id
The usual string will also work.
 id is string
Next, we will make the relation between the book and author types. Each book have an author, so in book array we add a key authorId, for each object corresponding to the id in authors array.
Also, in BookType we are adding query to get the author by using the parent’s authorId.
    …
    …
    var books = [
        { name: 'Name of the Wind', genre: 'Fantasy', id: '1', authorId: '1' },
        { name: 'Two States', genre: 'Drama', id: '2', authorId: '2' },
        { name: 'The Long Earth', genre: 'Sci-Fi', id: '3', authorId: '3' },
    ];

    var authors = [
        { name: 'Patrick Rothfuss', age: 44, id: '1' },
        { name: 'Chetan Bhagat', age: 45, id: '2' },
        { name: 'Terry Pratchett', age: 66, id: '3' }
    ];

    const BookType = new GraphQLObjectType({
        name: 'Book',
        fields: ( ) => ({
            id: { type: GraphQLID },
            name: { type: GraphQLString },
            genre: { type: GraphQLString },
            author: {
                type: AuthorType,
                resolve(parent, args){
                    return authors.find(item => item.id === parent.authorId);
                }
            }
        })
    });

    …
    …
Now, we can query in graphiql and get the author details also for a book.
 author details also present
Now, we will do the opposite. Each author have book, in fact each author can have many books. So, we have a new variable type called GraphQLList.
    const graphql = require('graphql');

    const { GraphQLObjectType, GraphQLString, GraphQLSchema, GraphQLID, GraphQLInt, GraphQLList } = graphql;

    // Dummy data
    var books = [
        { name: 'Name of the Wind', genre: 'Fantasy', id: '1', authorId: '1' },
        { name: 'Two States', genre: 'Drama', id: '2', authorId: '2' },
        { name: 'The Long Earth', genre: 'Sci-Fi', id: '3', authorId: '3' },
        { name: 'The Colour of Magic', genre: 'Fantasy', id: '4', authorId: '3' },
        { name: 'The Light Fantastic', genre: 'Fantasy', id: '5', authorId: '3' },
        { name: 'Five Point something', genre: 'Drama', id: '6', authorId: '2' },

    ];

    var authors = [
        { name: 'Patrick Rothfuss', age: 44, id: '1' },
        { name: 'Chetan Bhagat', age: 45, id: '2' },
        { name: 'Terry Pratchett', age: 66, id: '3' }
    ];

    const BookType = new GraphQLObjectType({
        name: 'Book',
        fields: ( ) => ({
            id: { type: GraphQLID },
            name: { type: GraphQLString },
            genre: { type: GraphQLString },
            author: {
                type: AuthorType,
                resolve(parent, args){
                    return authors.find(item => item.id === parent.authorId);
                }
            }
        })
    });

    const AuthorType = new GraphQLObjectType({
        name: 'Author',
        fields: ( ) => ({
            id: { type: GraphQLID },
            name: { type: GraphQLString },
            age: { type: GraphQLInt },
            books: {
                type: new GraphQLList(BookType),
                resolve(parent, args){
                    return books.filter(obj => obj.authorId === parent.id);
                }
            }
        })
    });
    ...
    ...
Now, on running our query for authors, we get all his books
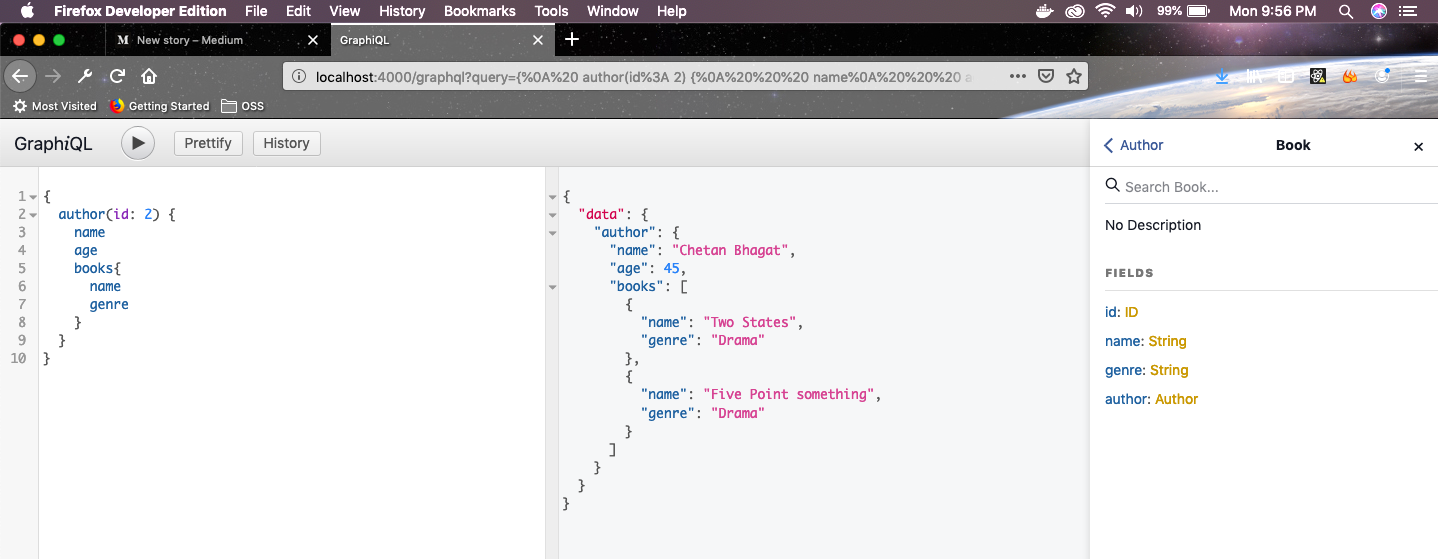 author’s books
Now, what if we want all the books in our database or all authors. It is very simple using GraphQL, as we need to just update our RootQuery with GraphQLList as below in schema.js.
    …
    …
    const RootQuery = new GraphQLObjectType({
        name: 'RootQueryType',
        fields: {
            book: {
                type: BookType,
                args: { id: { type: GraphQLID } },
                resolve(parent, args){
                    return books.find(item => item.id === args.id);
                }
            },
            author: {
                type: AuthorType,
                args: { id: { type: GraphQLID } },
                resolve(parent, args){
                    return authors.find(item => item.id === args.id);
                }
            },
            books: {
                type: new GraphQLList(BookType),
                resolve(parent, args){
                    return books;
                }
            },
            authors: {
                type: new GraphQLList(AuthorType),
                resolve(parent, args){
                    return authors;
                }
            }
        }
    });

    module.exports = new GraphQLSchema({
        query: RootQuery
    });
Now, a books query will return all books.
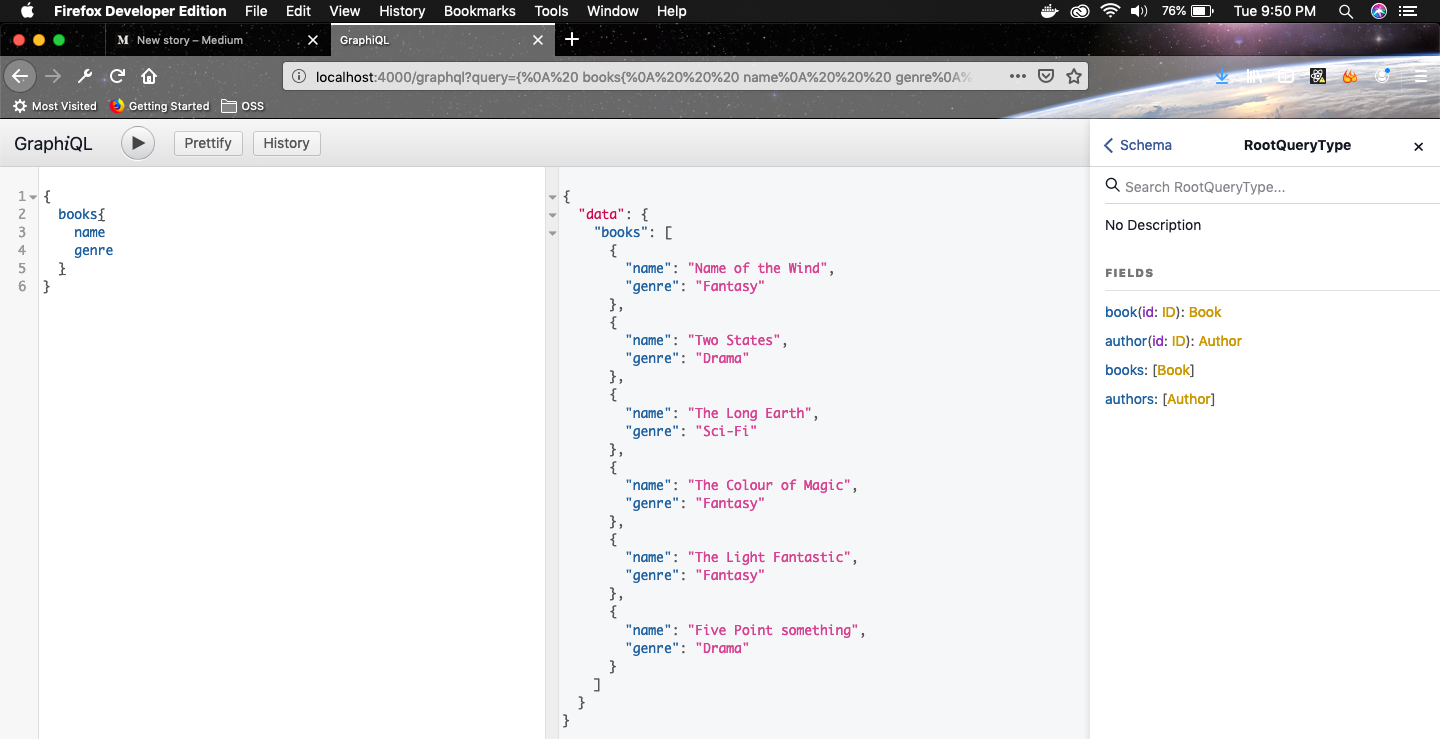 The books query
An authors query can also be done. We can also include the book.
 authors query
Now, it’s time to store all our data into mongoDB. So, head over to https://www.mongodb.com and login.
After logging in, we will see the below. Since i already have a Project it will take me to that. We need to click on the project and click on New Project button.
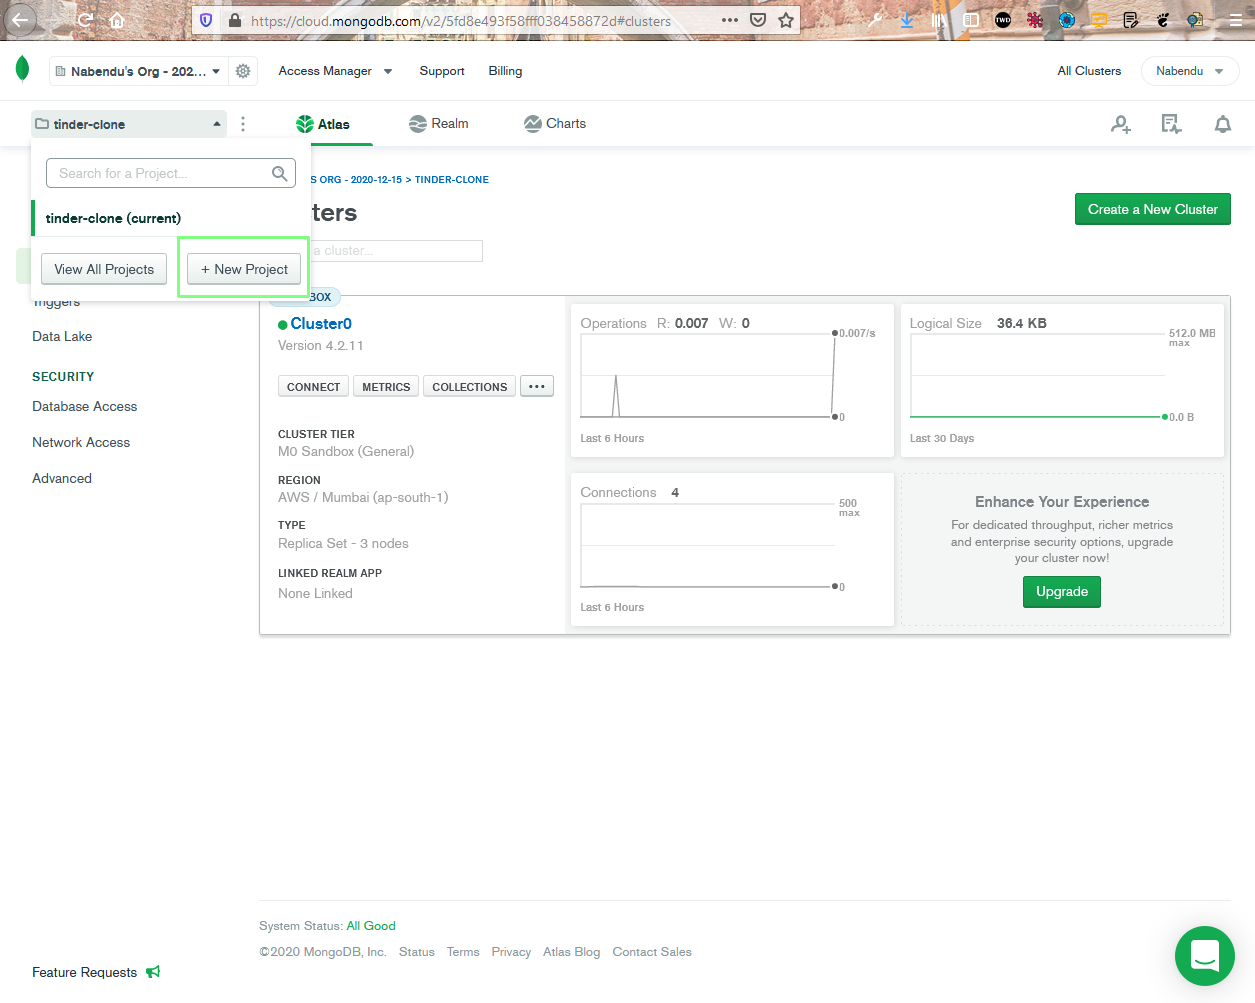 New Project
We need to give the Project a name like graphql-react and click on Next button. I had already created a project with same name, so giving me warning.
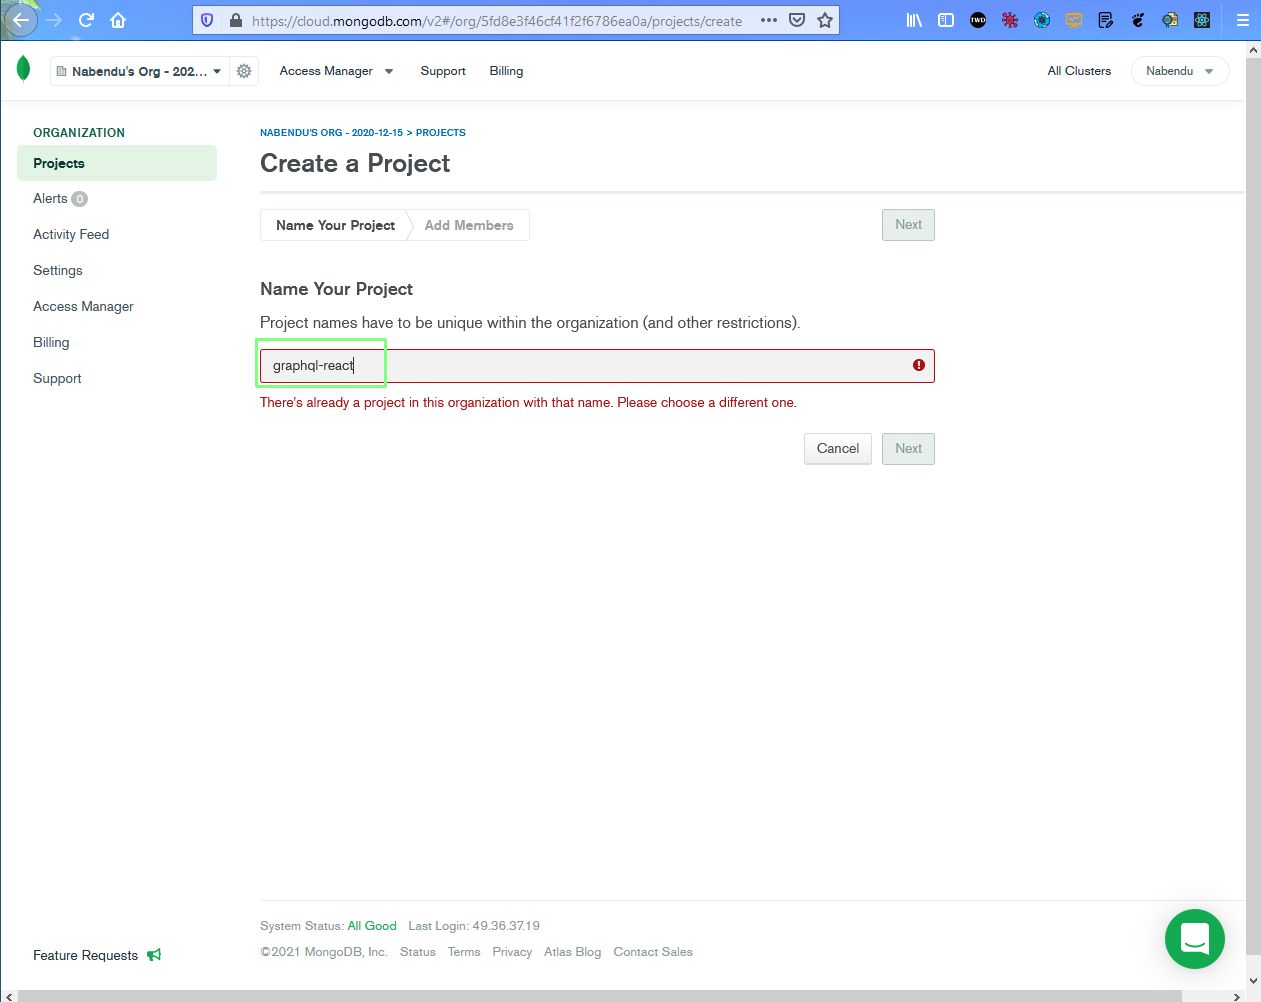 database
In the next screen, just click on the Create Project button.
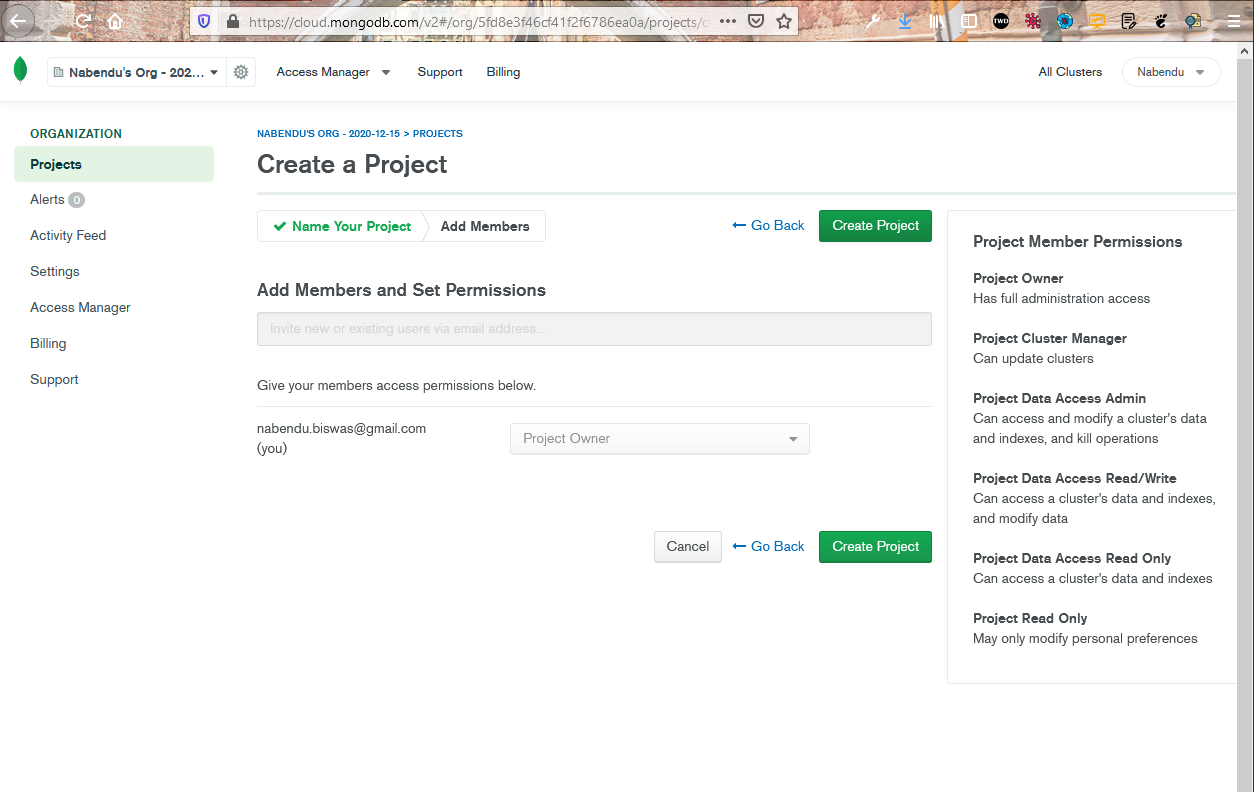 Create Project
In the next screen click on Build a Cluster button.
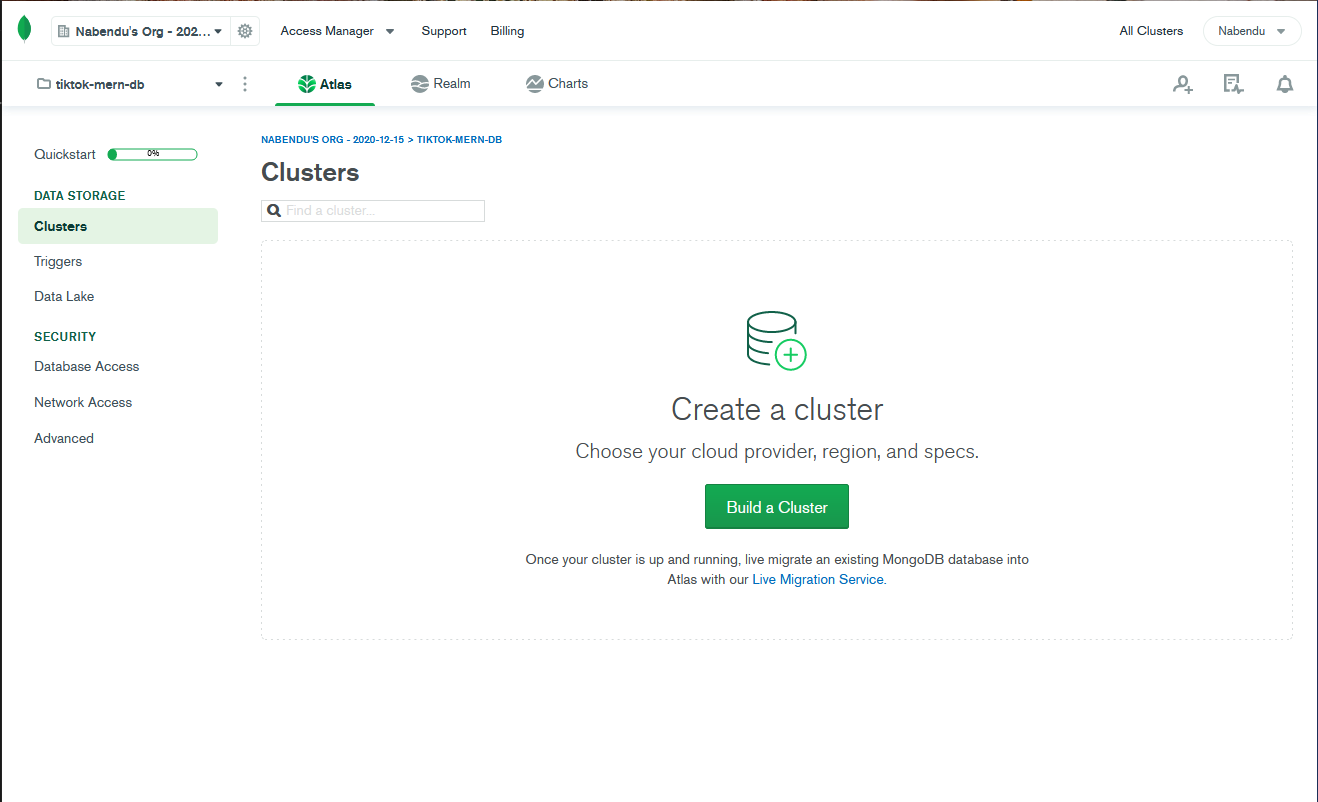 Cluster
In the next screen you can click on the Free tier.
 Free Tier
In the next screen you need to choose the AWS region in which the database will be created. I changed it to Mumbai, as i live in India and it will give me low latency. After that we need to click on the Create Cluster button.
 Create Cluster
The next screen will show that the Cluster is been created and it will take time. So, we can go back and create our first API endpoint.
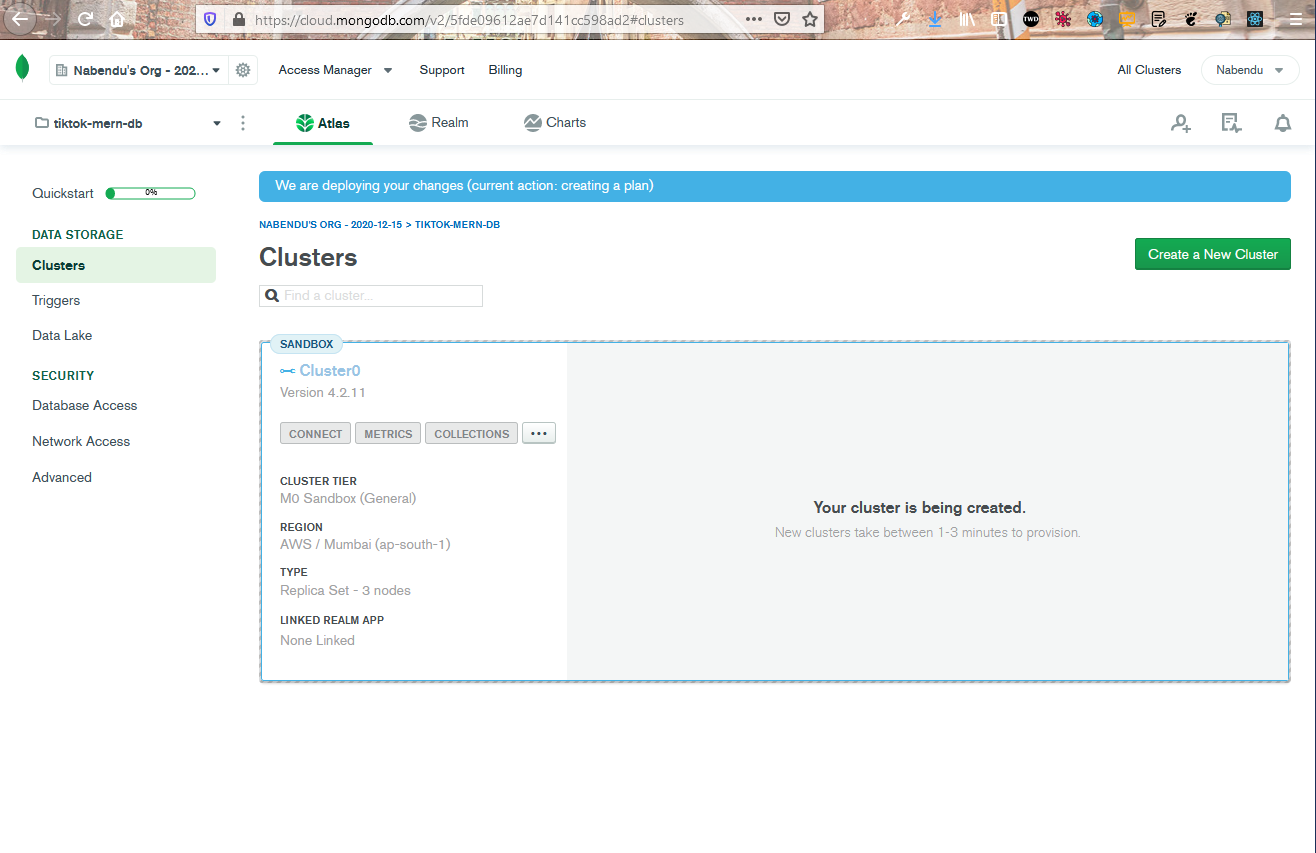 Getting created
Now, once the cluster is created click on the Database Access tab and then the Add New Database User button.
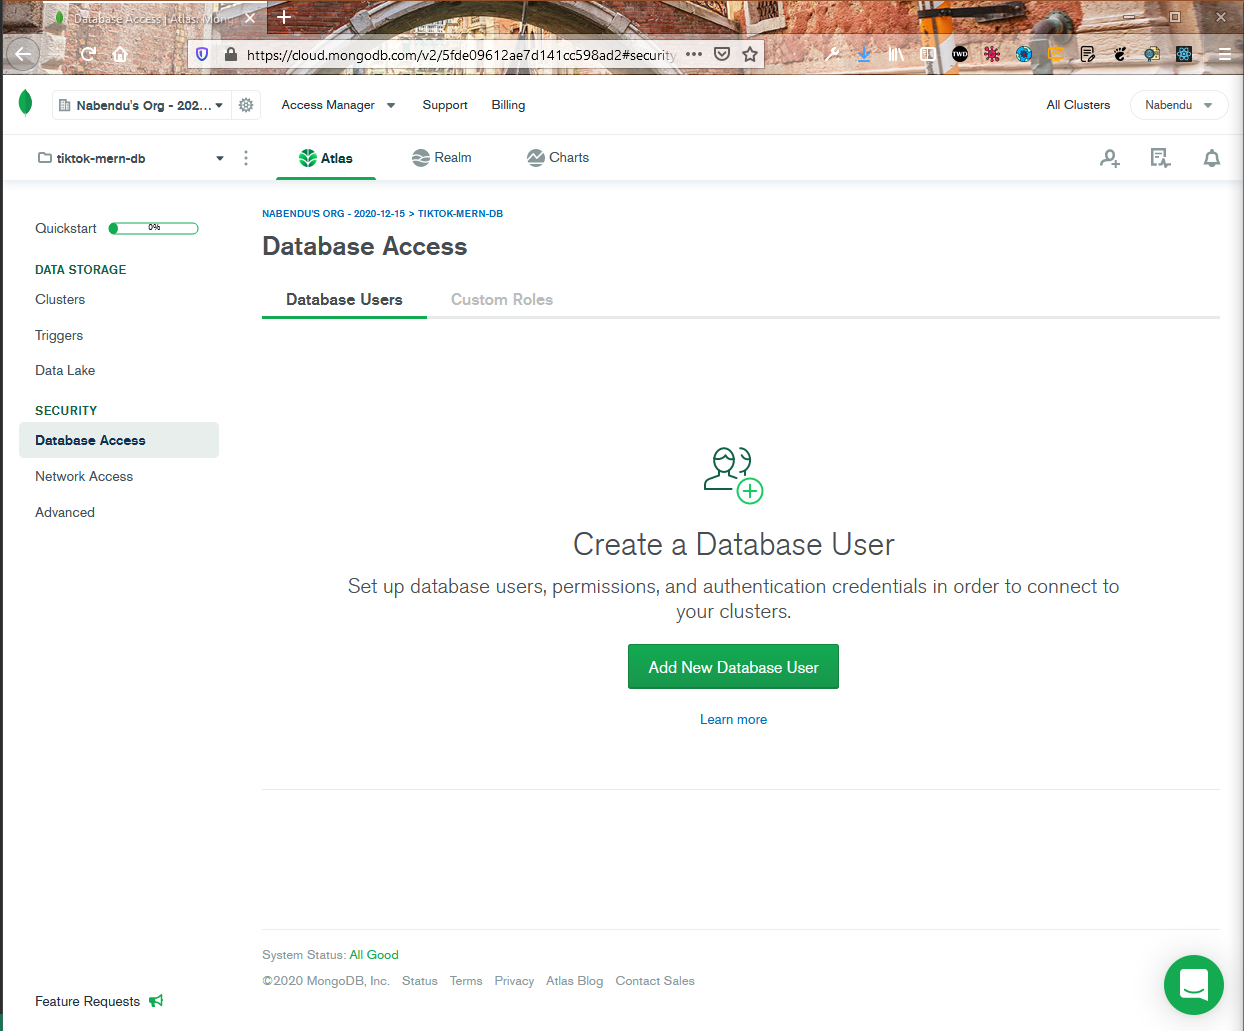 New database
In the next screen, we need to give a username and password. We need to remember both of them. After that scroll a bit down and click on Add User button.
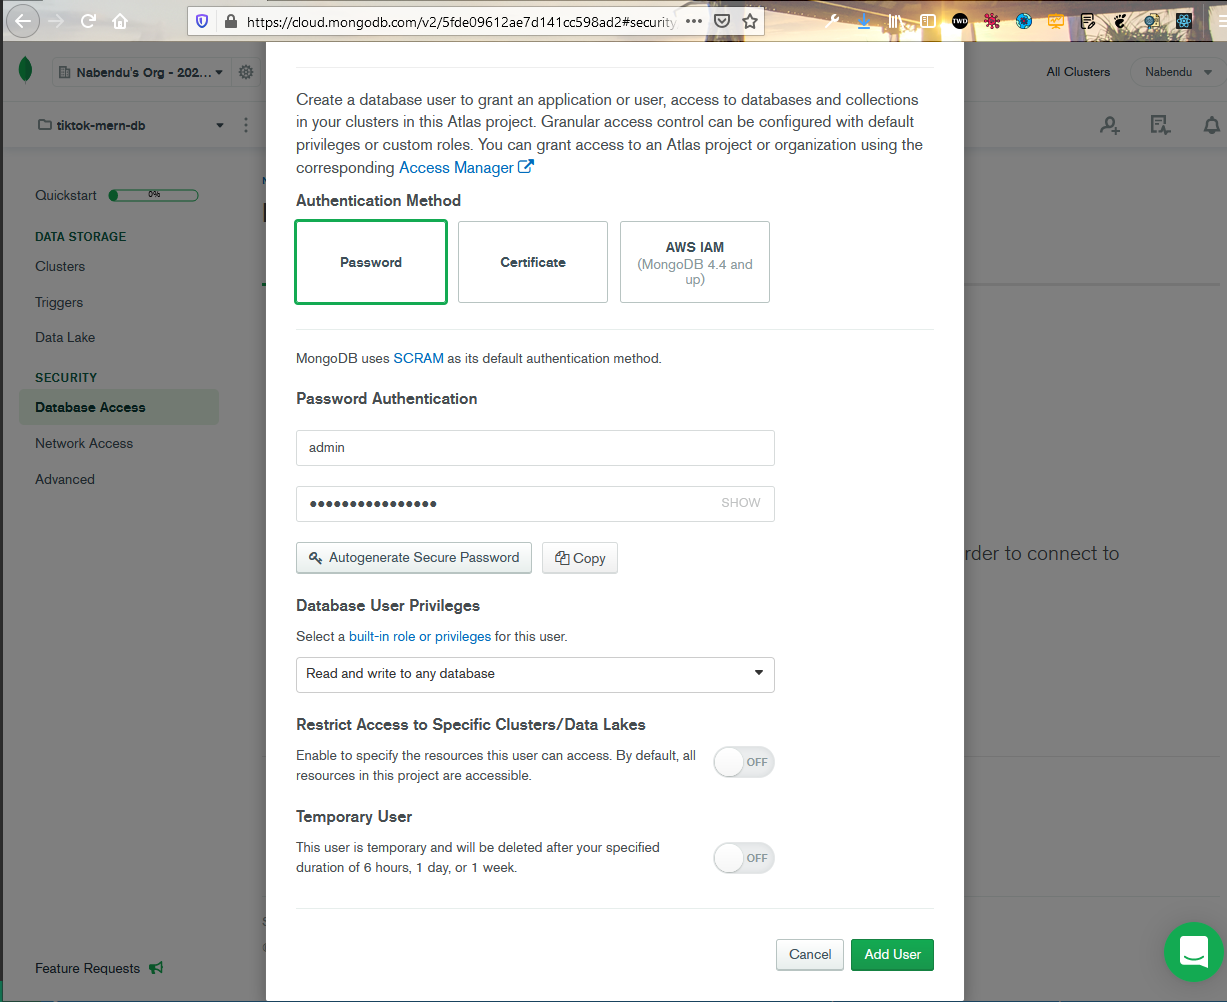 Add User
Now, we need to go to the Network Access tab and after that click on Add IP Address button.
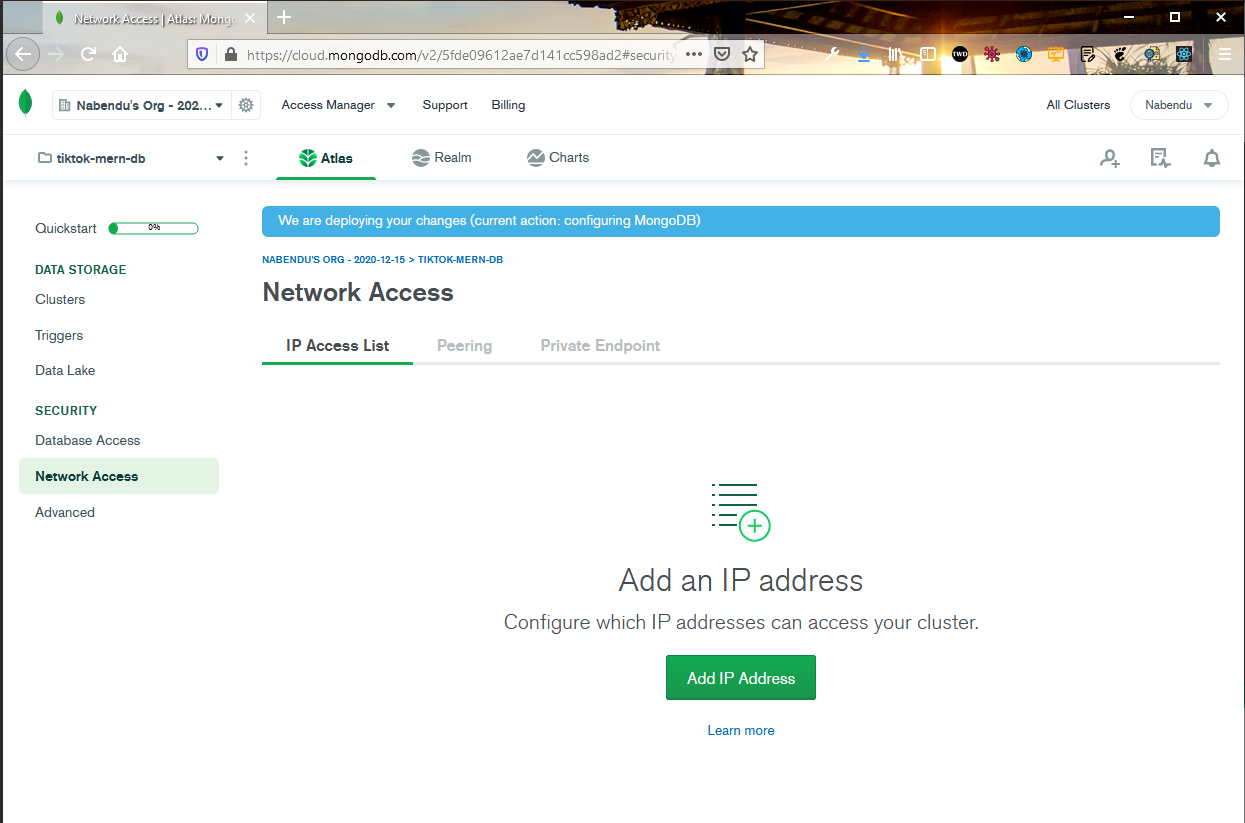 IP Address
In the pop-up click on ALLOW ACCESS FROM ANYWHERE button first and then the Confirm button.
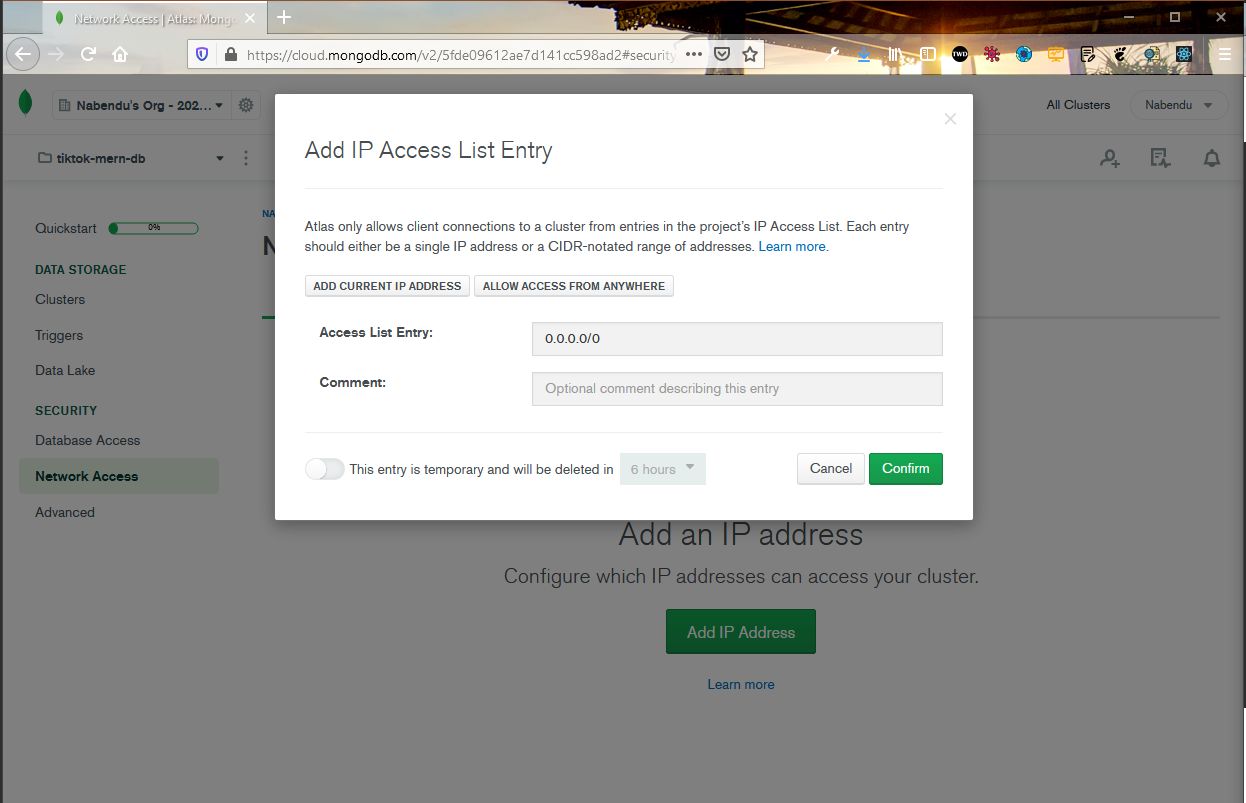 Confirm
Then go back to the Cluster tab and click on the CONNECT button. It will open the below pop-up. Here, you need to click on Connect your application tab.
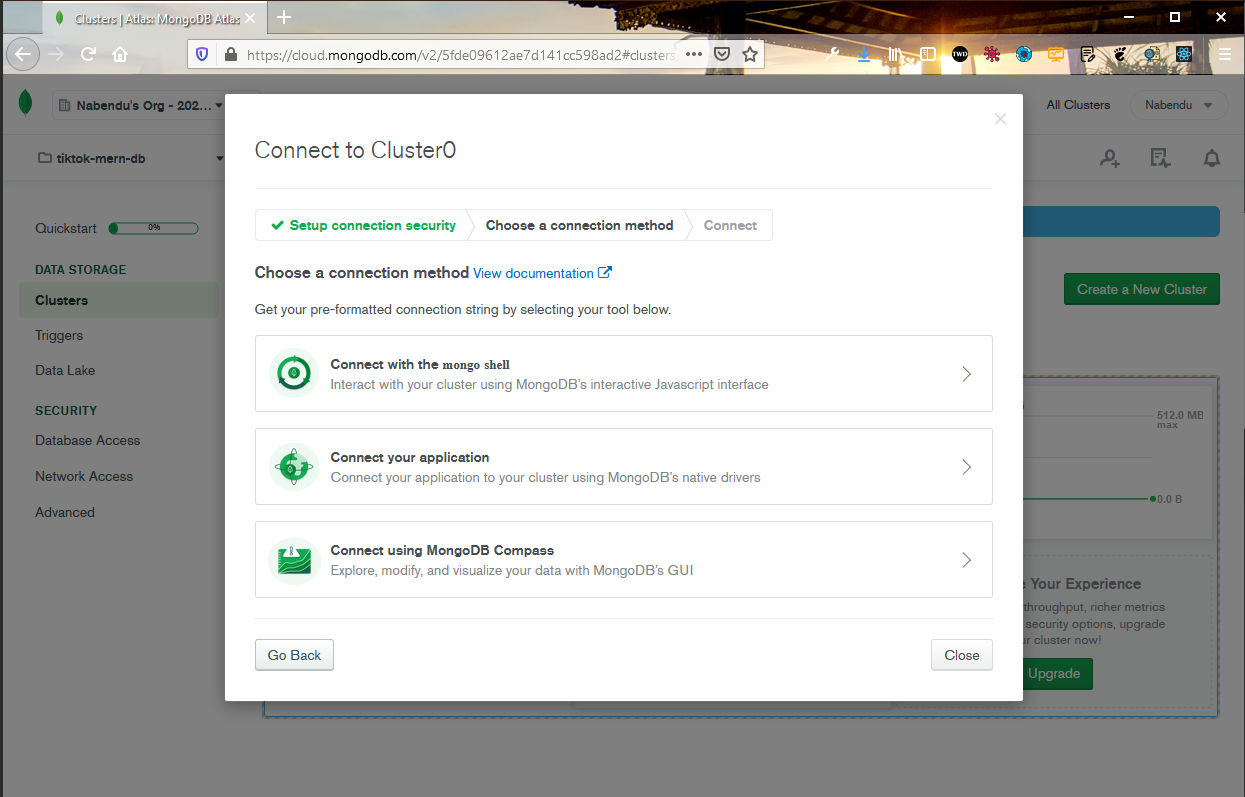 Connect
Now, you will get the Connection url, which you need to Copy by clicking on Copy button.
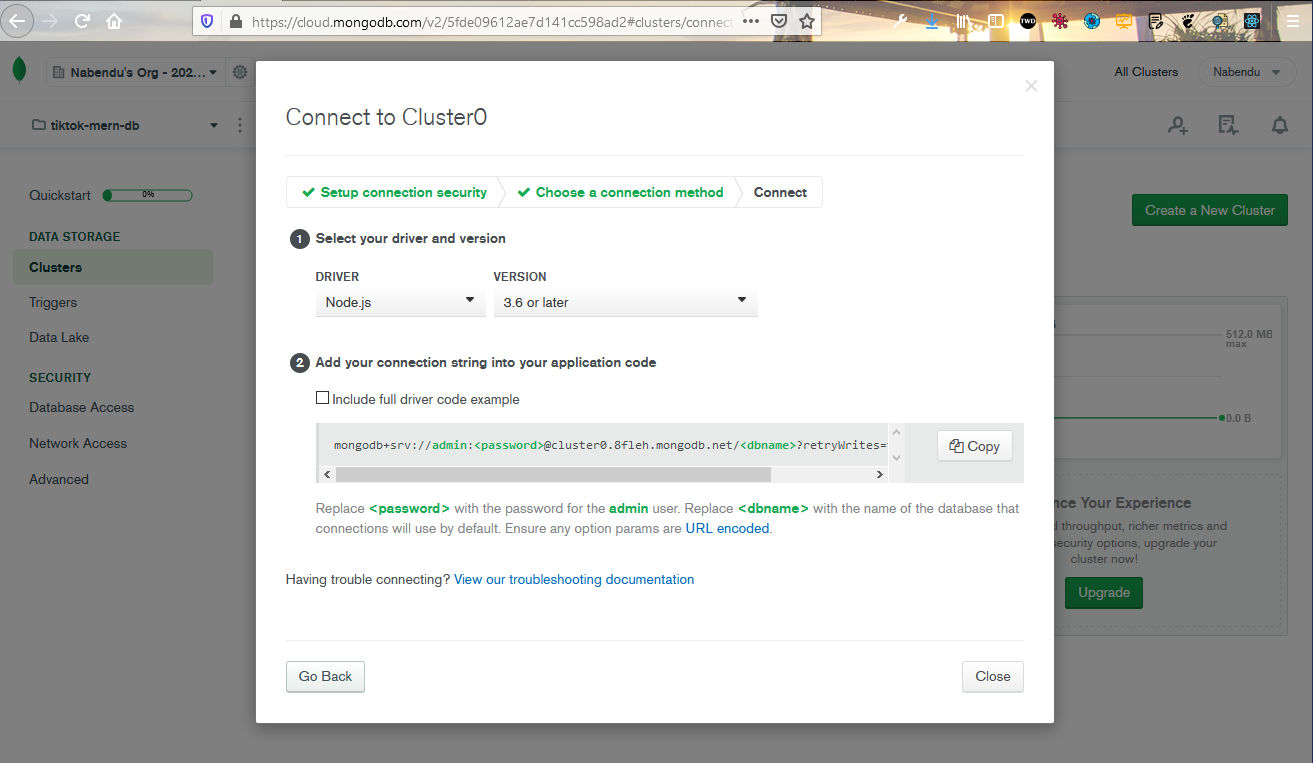 Copy
Copy
Now, open your terminal and stop nodemon and install mongoose.
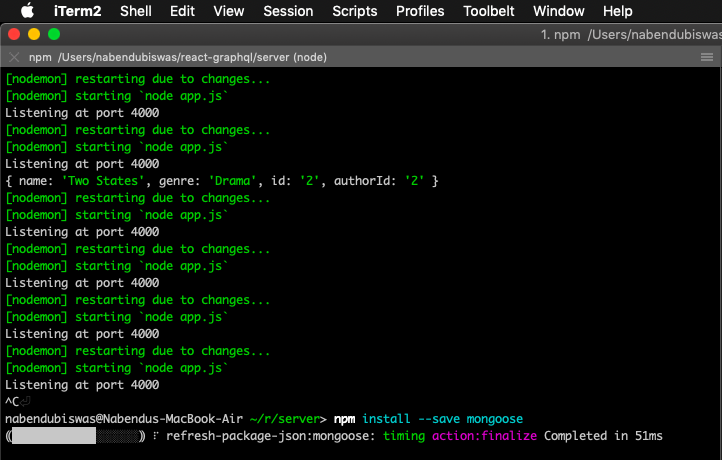 install mongoose
Next, we add the code in App.js to connect to our database.
    const express = require('express');
    const { graphqlHTTP } = require('express-graphql');
    const schema = require('./schema/schema');
    const mongoose = require('mongoose');

    const app = express();

    const connection_url = 'mongodb+srv://admin:yourpassword@cluster0.91nul.mongodb.net/graphqLReactDB?retryWrites=true&w=majority'
    mongoose.connect(connection_url, {
        useNewUrlParser: true,
        useCreateIndex: true,
        useUnifiedTopology: true
    })

    app.use('/graphql', graphqlHTTP({
        schema,
        graphiql: true
    }));

    app.listen(4000, () => {
        console.log('Listening at port 4000');
    });
The running nodemon, will show the success message.
 Connected finally
Now, we need to create our mongodb schemas. So, go ahead and create a folder models inside server. Inside it we create two files — book.js and author.js
In author.js add below code to export an authorSchema.
    const mongoose = require('mongoose');
    const Schema = mongoose.Schema;

    const authorSchema = new Schema({
        name: String,
        age: Number
    });

    module.exports = mongoose.model('Author', authorSchema);
In book.js add below code to export an bookSchema.
    const mongoose = require('mongoose');
    const Schema = mongoose.Schema;

    const bookSchema = new Schema({
        name: String,
        genre: String,
        authorId: String
    });

    module.exports = mongoose.model('Book', bookSchema);
Next, head over to schema.js and delete the dummy data and all return statements with dummy data. We will add an mutation, which will be used to insert data in our database.
    const graphql = require('graphql');
    const Book = require('../models/book');
    const Author = require('../models/Author');

    const { GraphQLObjectType, GraphQLString, GraphQLSchema, GraphQLID, GraphQLInt, GraphQLList } = graphql;

    const BookType = new GraphQLObjectType({
        name: 'Book',
        fields: ( ) => ({
            id: { type: GraphQLID },
            name: { type: GraphQLString },
            genre: { type: GraphQLString },
            author: {
                type: AuthorType,
                resolve(parent, args){
                    //return authors.find(item => item.id === parent.authorId);
                }
            }
        })
    });

    const AuthorType = new GraphQLObjectType({
        name: 'Author',
        fields: ( ) => ({
            id: { type: GraphQLID },
            name: { type: GraphQLString },
            age: { type: GraphQLInt },
            books: {
                type: new GraphQLList(BookType),
                resolve(parent, args){
                    //return books.filter(obj => obj.authorId === parent.id);
                }
            }
        })
    });

    const RootQuery = new GraphQLObjectType({
        name: 'RootQueryType',
        fields: {
            book: {
                type: BookType,
                args: { id: { type: GraphQLID } },
                resolve(parent, args){
                    //return books.find(item => item.id === args.id);
                }
            },
            author: {
                type: AuthorType,
                args: { id: { type: GraphQLID } },
                resolve(parent, args){
                    //return authors.find(item => item.id === args.id);
                }
            },
            books: {
                type: new GraphQLList(BookType),
                resolve(parent, args){
                    //return books;
                }
            },
            authors: {
                type: new GraphQLList(AuthorType),
                resolve(parent, args){
                    //return authors;
                }
            }
        }
    });

    const Mutation = new GraphQLObjectType({
        name: 'Mutation',
        fields: {
            addAuthor: {
                type: AuthorType,
                args: {
                    name: { type: GraphQLString },
                    age: { type: GraphQLInt }
                },
                resolve(parent, args){
                    let author = new Author({
                        name: args.name,
                        age: args.age
                    });
                    return author.save();
                }
            }
        }
    });


    module.exports = new GraphQLSchema({
        query: RootQuery,
        mutation: Mutation
    });
Next, head over to graphiql to add an author with mutation.
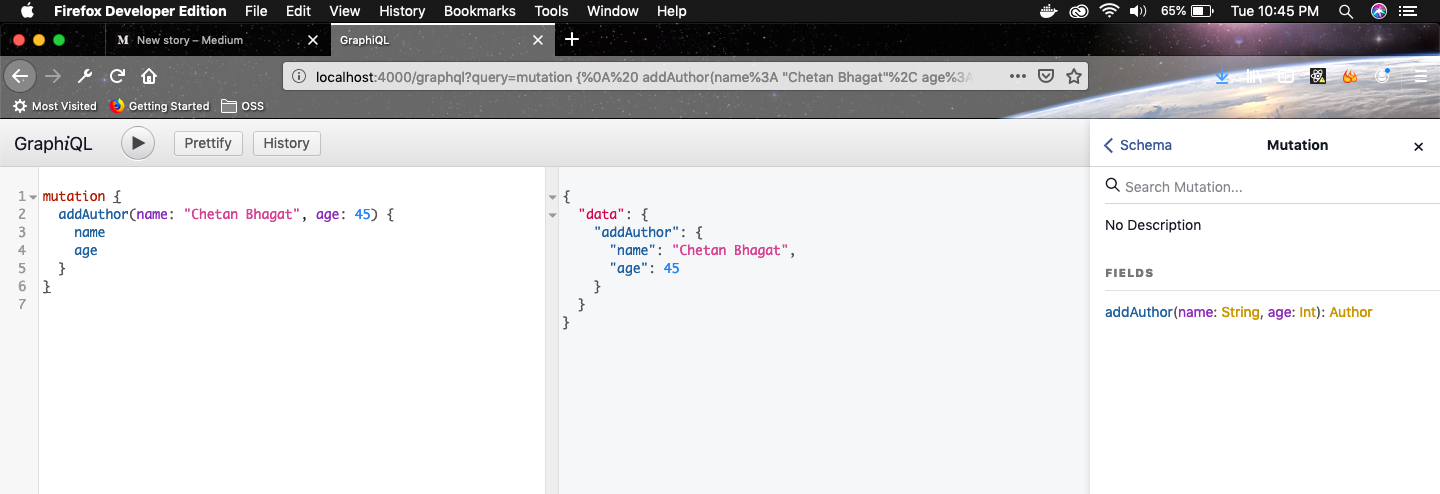 Author added with mutation
Also, check in your mongoDB whether that author was added by clicking on COLLECTIONS in Clusters tab.
Now, we will add mutation to add a book.
    ...
    ...

    const Mutation = new GraphQLObjectType({
        name: 'Mutation',
        fields: {
            addAuthor: {
                type: AuthorType,
                args: {
                    name: { type: GraphQLString },
                    age: { type: GraphQLInt }
                },
                resolve(parent, args){
                    let author = new Author({
                        name: args.name,
                        age: args.age
                    });
                    return author.save();
                }
            },
            addBook: {
                type: BookType,
                args: {
                    name: { type: GraphQLString },
                    genre: { type: GraphQLString },
                    authorId: { type: GraphQLID }
                },
                resolve(parent, args){
                    let book = new Book({
                        name: args.name,
                        genre: args.genre,
                        authorId: args.authorId
                    });
                    return book.save();
                }
            }
        }
    });
    ...
    ...
Next, head over to graphiql to add an book with mutation. Notice, that the authorId we have to get from mlab, from the newly created author.
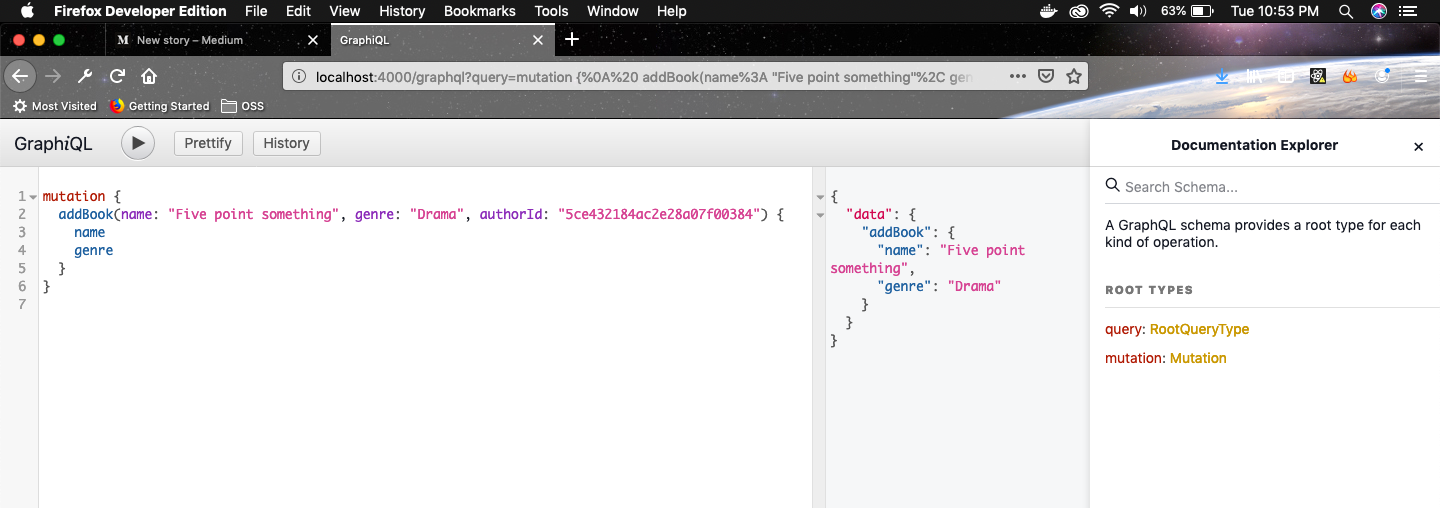 book mutation
Add some more book and then head over to mongoDB to verify your additions.
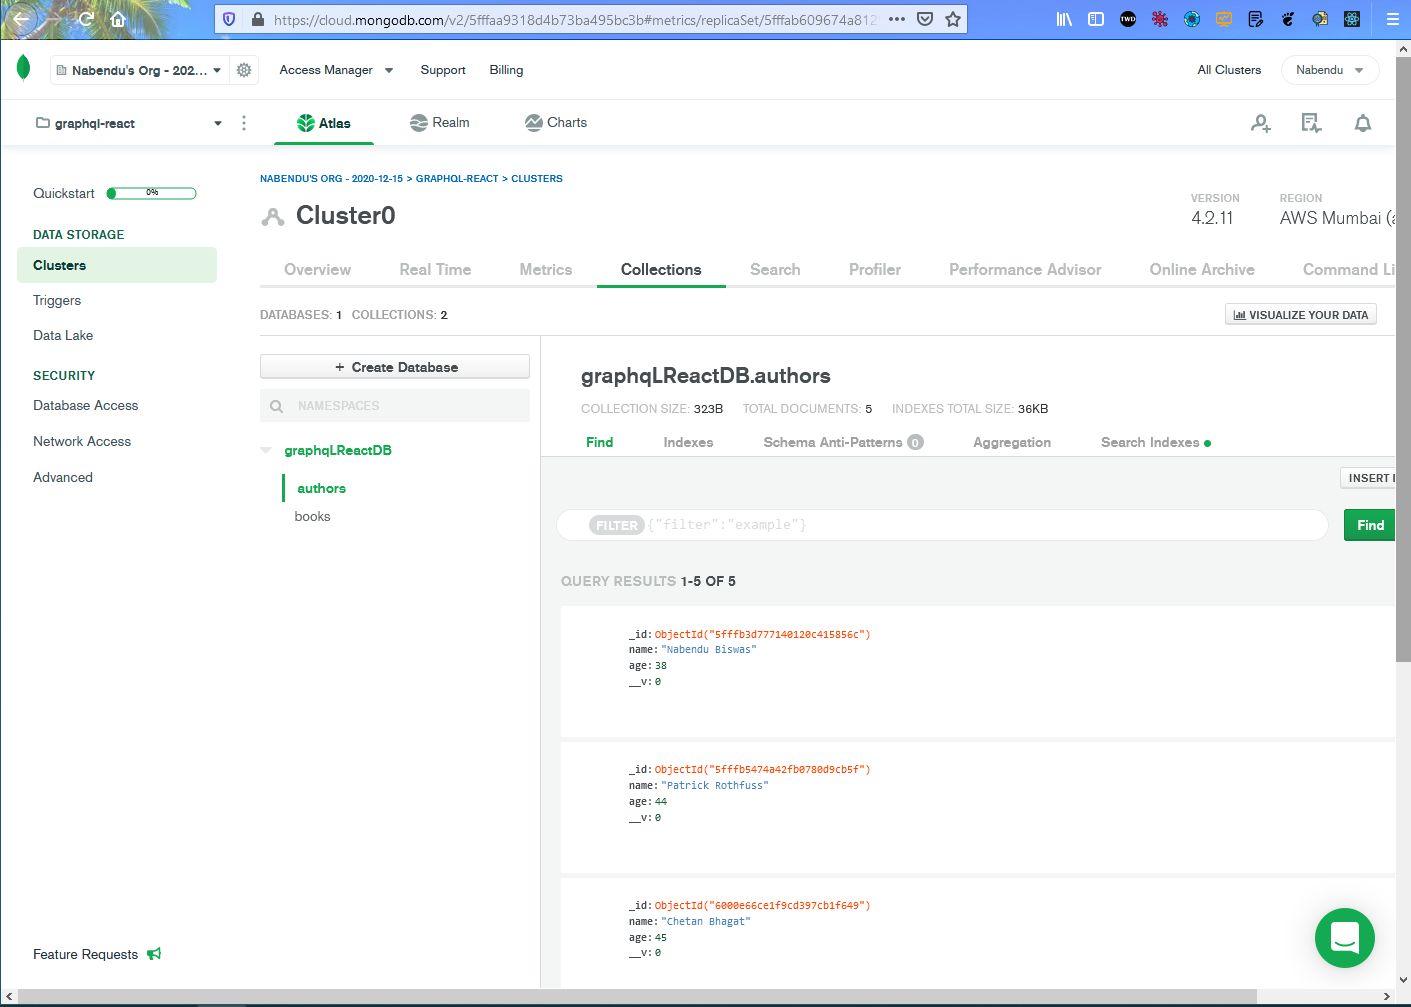 mlab checking
This concludes part-2 of the series. You can find code till here in the github link.