Build a Cloudinary Image Uploader with ReactJS and NodeJS
by Nabendu Biswas / June 1st, 2021
#javascript #react #nodejs
In this post, we will build a Cloudinary uploader through which we will be able to upload images through our app to cloudinary. We will use ReactJS and NodeJS in the project.
So, open your terminal and create a new folder and inside that folder create a new react app called frontend.
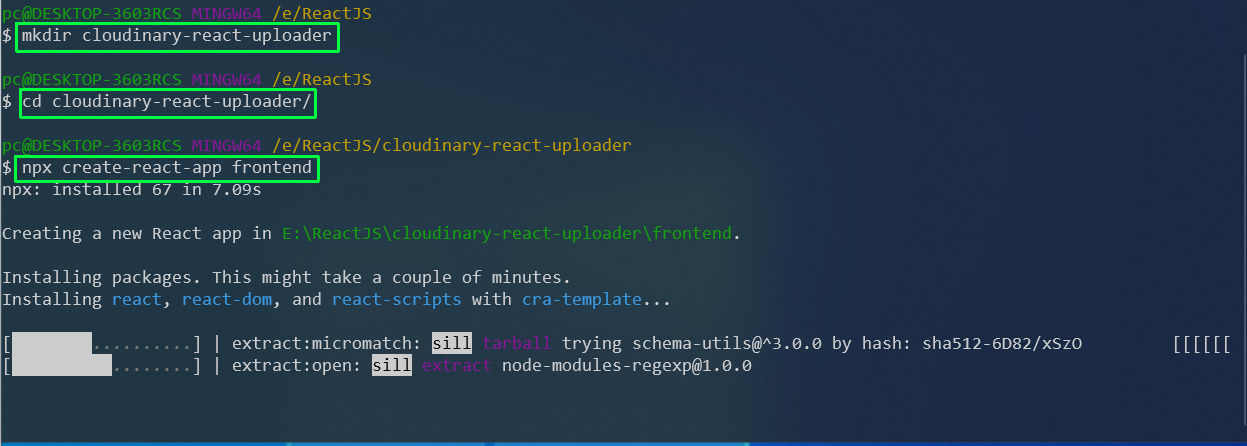 Initialization
Next, we will remove the unnecessary files, which are not required in the project.
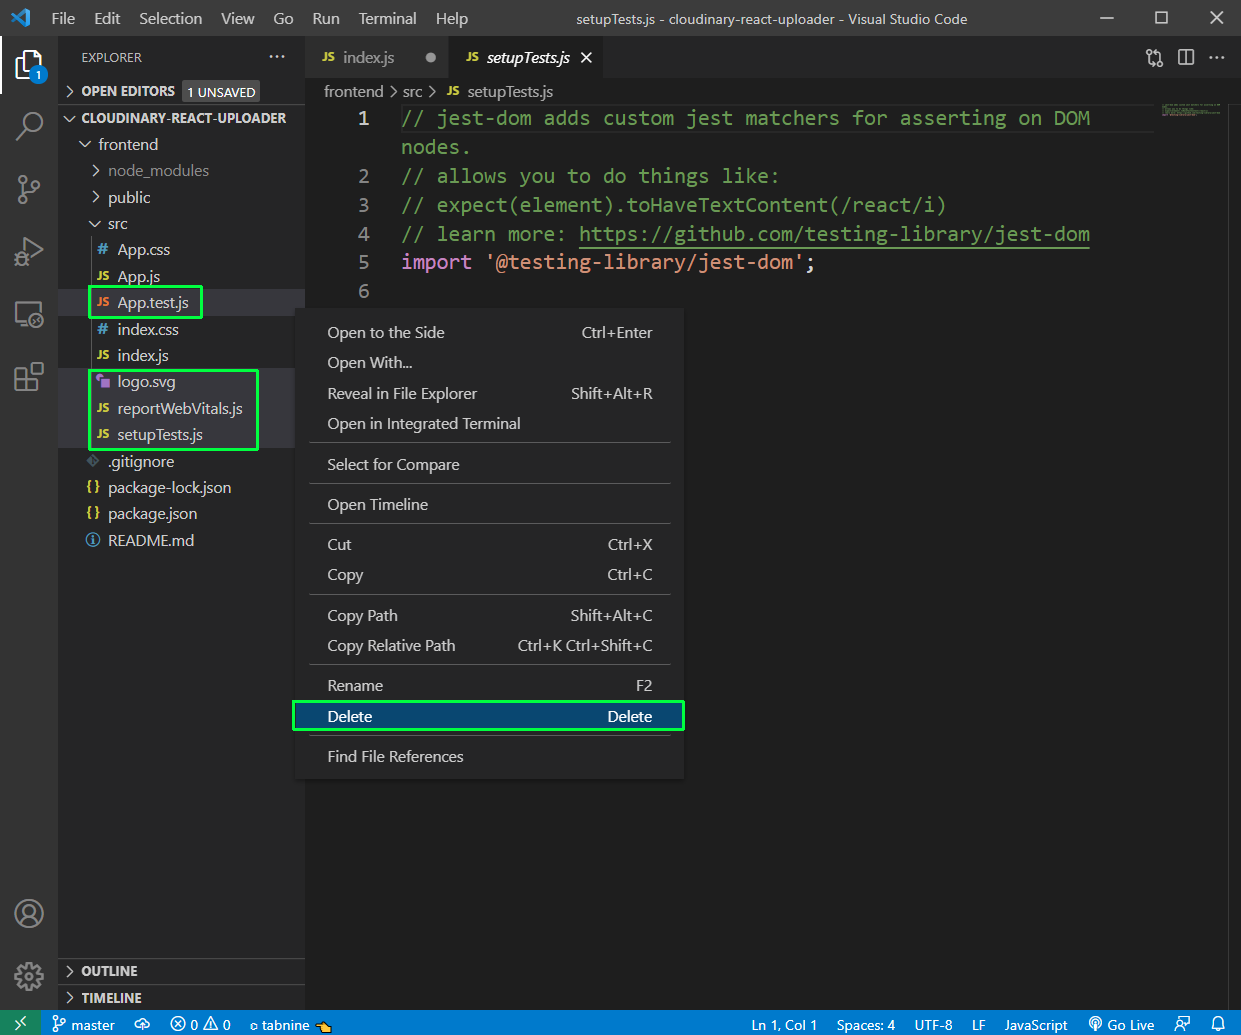 Remove
Remove from index.js file and updated file contains below content.
    import React from 'react';
    import ReactDOM from 'react-dom';
    import './index.css';
    import './base.css';
    import App from './App';

    ReactDOM.render(
        <React.StrictMode>
            <App />
        </React.StrictMode>,
        document.getElementById('root')
    );
Now, create a file base.css inside the src folder. It will contain most of our styles for our little app.
    :root {
        --text-color: #333;
        --accent-color: rgb(15, 73, 54);
        --btn-text-color: #f9f9f9;
        --alert-success-bg-color: #d4edda;
        --alert-success-text-color: #073813;
        --alert-danger-bg-color: #dbb1b6;
        --alert-danger-text-color: #3a070c;
    }

    * {
        box-sizing: border-box;
        color: var(--text-color);
    }
    .container {
        margin: 0 auto;
        max-width: 1200px;
        padding: 2rem;
    }

    img {
        border-radius: 5px;
    }

    .nav {
        display: flex;
        justify-content: space-between;
        align-items: center;
    }

    .nav-brand {
        font-size: 24px;
    }

    .nav-items {
        list-style: none;
        display: flex;
    }

    .nav-item > a {
        margin: 0 1rem;
        text-decoration: none;
        font-size: 16px;
        color: #333;
        padding-bottom: 2px;
        font-weight: 500;
        text-transform: uppercase;
    }
    .nav-item > a:hover {
        border-bottom: 4px solid var(--accent-color);
    }

    .title {
        text-align: center;
        margin-bottom: 4rem;
    }

    .btn {
        padding: 0.5rem 1rem;
        border: 1px solid var(--accent-color);
        background-color: var(--accent-color);
        color: var(--btn-text-color);
        border-radius: 5px;
        transition: 250ms;
        cursor: pointer;
        font-size: 16px;
    }

    .btn:hover {
        border: 1px solid var(--accent-color);
        background-color: var(--btn-text-color);
        color: var(--acent-color);
    }

    .form {
        margin-bottom: 2rem;
    }

    .form-input {
        display: block;
        margin-bottom: 10px;
    }

    .alert {
        padding: 1rem 2rem;
        border-radius: 5px;
        position: fixed;
        top: 2rem;
        right: 0rem;
        min-width: 200px;
    }

    .alert-success {
        background-color: var(--alert-success-bg-color);
        color: var(--alert-success-text-color);
    }

    .alert-danger {
        background-color: var(--alert-danger-bg-color);
        color: var(--alert-danger-text-color);
    }
Now, install react router in the frontend folder.
npm i react-router-dom
After that update App.js file as below. We are using Router here and have two routes for /upload and /, which loads Home and Upload components.
    import React from 'react';
    import './App.css';
    import { BrowserRouter as Router, Link, Switch, Route } from 'react-router-dom';
    import Upload from './pages/Upload.js';
    import Home from './pages/Home.js';

    function App() {
        return (
            <div className="container">
                <Router>
                    <nav className="nav">
                        <div className="nav-brand">Cloudinary React</div>
                        <ul className="nav-items">
                            <li className="nav-item">
                                <Link to="/">Gallery</Link>
                            </li>
                            <li className="nav-item">
                                <Link to="/upload">Upload</Link>
                            </li>
                        </ul>
                    </nav>
                    <Switch>
                        <Route component={Upload} path="/upload" />
                        <Route component={Home} path="/" />
                    </Switch>
                </Router>
            </div>
        );
    }

    export default App;
Also, remove everything from App.css and update with below content.
    .gallery {
        display: grid;
        grid-template-columns: repeat(auto-fit, 300px);
        grid-gap: 2rem;
        justify-content: center;
    }

    @media (max-width: 786px) {
        .gallery {
            grid-template-columns: 1fr;
            justify-items: center;
        }
    }
Now, create a pages folder inside src and two files Home.js and Upload.js inside it. Right now they will contain just a functional component.
The content for Home.js is below.
    import React from 'react'

    const Home = () => {
        return (
            <div>
                <h1>Home</h1>
            </div>
        )
    }

    export default Home
The content for Upload.js is below.
    import React from 'react'

    const Upload = () => {
        return (
            <div>
                <h1>Upload</h1>
            </div>
        )
    }

    export default Upload
Now, our basic app will look like below in localhost.
 localhost
Now, we will start adding logic to our to Upload.js file. Here, we have added an input type file, whose onChange calls a function handleFileInputChange.
Now, inside handleFileInputChange() we are calling another function previewFile, which shows the preview of the selected file in browser.
    import React, { useState } from 'react'

    const Upload = () => {
        const [fileInputState, setFileInputState] = useState('');
        const [previewSource, setPreviewSource] = useState('');

    const handleFileInputChange = (e) => {
            const file = e.target.files[0];
            previewFile(file);
            setFileInputState(e.target.value);
        };

    const previewFile = (file) => {
            const reader = new FileReader();
            reader.readAsDataURL(file);
            reader.onloadend = () => {
                setPreviewSource(reader.result);
            };
        };

    return (
            <div>
                <h1>Upload</h1>
                <form>
                    <input
                        id="fileInput"
                        type="file"
                        name="image"
                        onChange={handleFileInputChange}
                        value={fileInputState}
                        className="form-input"
                    />
                    <button className="btn" type="submit">
                        Submit
                    </button>
                </form>
                {previewSource && (
                    <img
                        src={previewSource}
                        alt="chosen"
                        style={{ height: '300px' }}
                    />
                )}
            </div>
        )
    }

    export default Upload
Now, in localhost if we upload an image, we will get this nice preview.
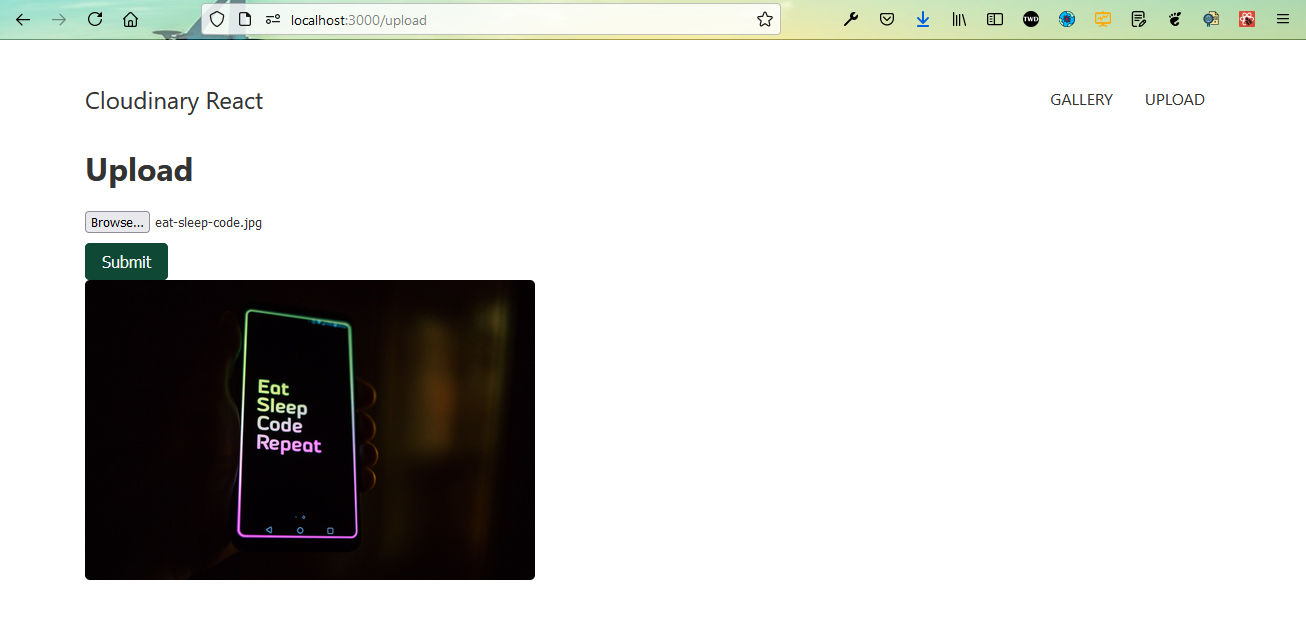 Nice Preview
Now, we will add the onSubmit functionality to our form in Upload.js, which calls a function handleSubmitFile. We are also adding a class for styles, which we have already added in base.css file.
<form onSubmit={handleSubmitFile} className="form">
Next, we will add the function for handleSubmitFile in Upload.js file. Here, we have also created a new state selectedFile, which we are setting in handleFileInputChange().
Inside the we are first reading the file and sending it to another function uploadImage(), which takes the base64 encoded Image and pass it to a API endpoint of /api/upload, which we have not created yet.
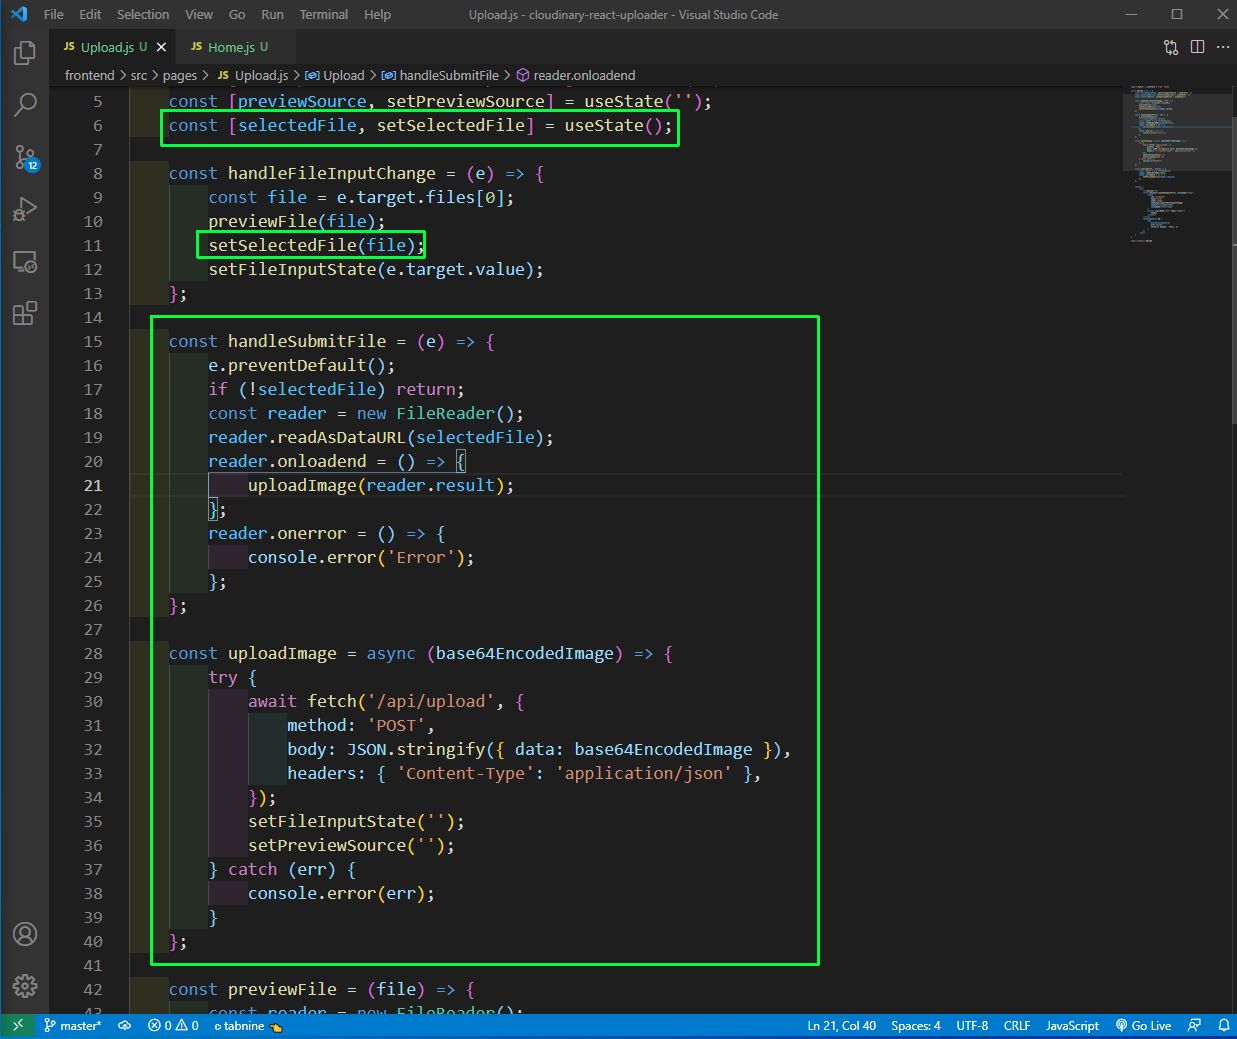 Upload.js
Now, before moving to the backend we need to connect the frontend with it. So, go to the package.json file and add the proxy for backend.
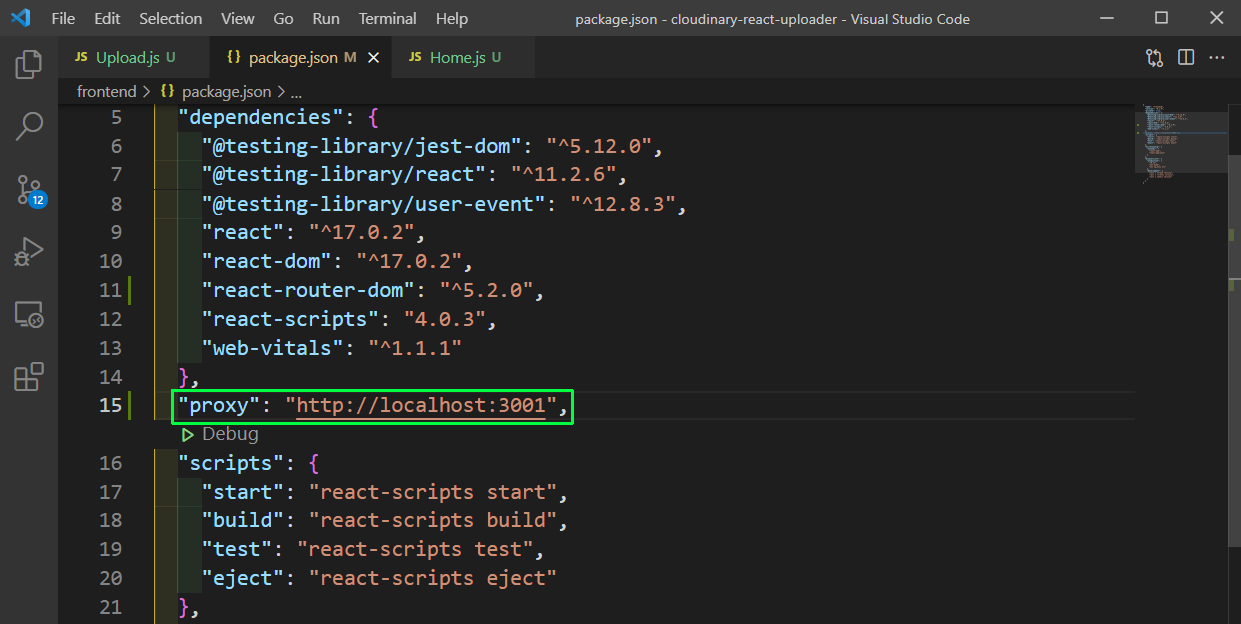 package.json
Now, create a folder backend inside our project and change to it. After that give the command npm init. You can press enter to all things except entry point which would be server.js
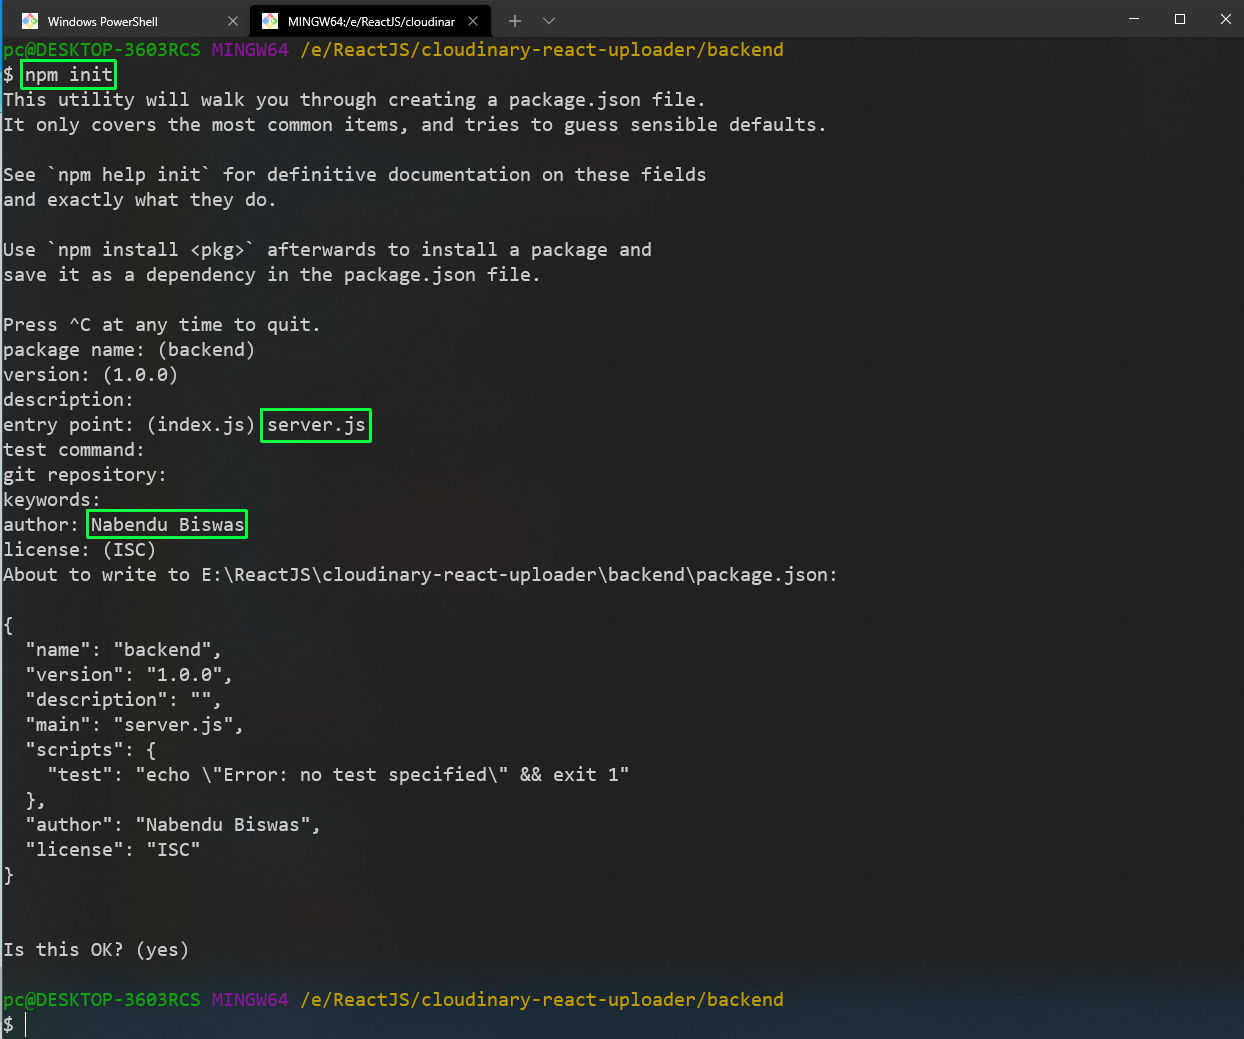 npm init
After that in the backend folder, we need to install our dependencies.
npm i cloudinary cors dotenv express nodemon
Now, create a server.js file in the backend folder and put the below content in it.
Here, we are doing the basic node stuff and creating a post route, where we are getting the image as base64 encoded Image from our frontend.
    const express = require('express');
    const app = express();
    var cors = require('cors');

    app.use(express.json({ limit: '50mb' }));
    app.use(express.urlencoded({ limit: '50mb', extended: true }));
    app.use(cors());

    app.post('/api/upload', async (req, res) => {
        try {
            const fileStr = req.body.data;
            console.log(fileStr);
        } catch (err) {
            console.error(err);
            res.status(500).json({ err: 'Something went wrong' });
        }
    });

    const port = process.env.PORT || 3001;
    app.listen(port, () => {
        console.log('listening on 3001');
    });
Now, start the backend with nodemon server.js command. After that go back to the frontend and submit a file and we will see a large console log.
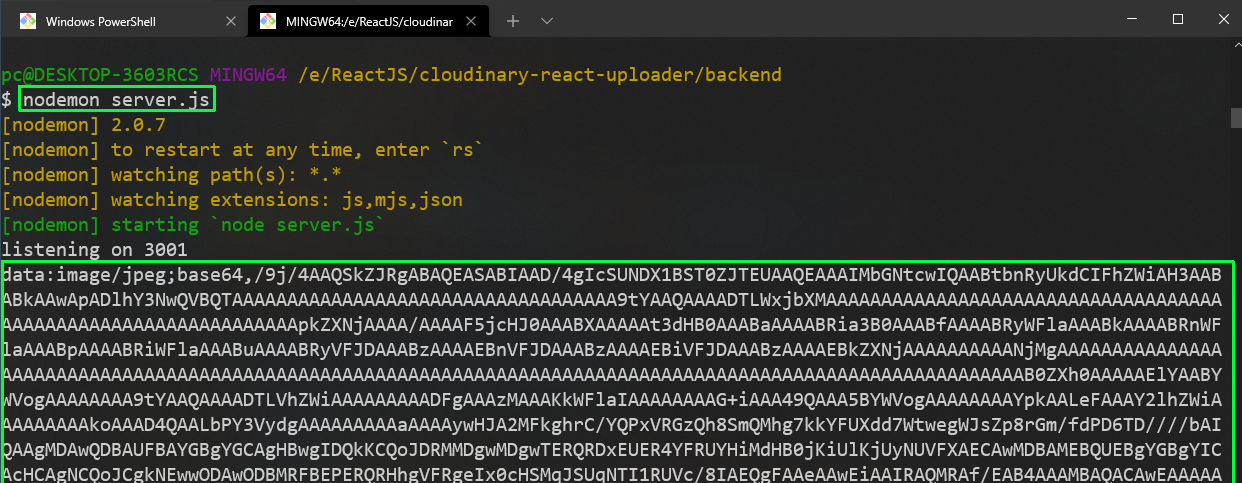 nodemon
Now, we will configure our cloudinary. So, create a utils folder in the backend folder and inside it a cloudinary.js file. Put the below content in it. Here, we are just doing the imports and using the cloudinary secrets.
    require('dotenv').config();

    const cloudinary = require('cloudinary').v2;

    cloudinary.config({
        cloud_name: process.env.CLOUDINARY_NAME,
        api_key: process.env.CLOUDINARY_API_KEY,
        api_secret: process.env.CLOUDINARY_API_SECRET,
    });

    module.exports = { cloudinary };
Next, login to cloudinary.com and create your account, if you don’t have one. In the dashboard you will get the the three secrets required in our project.
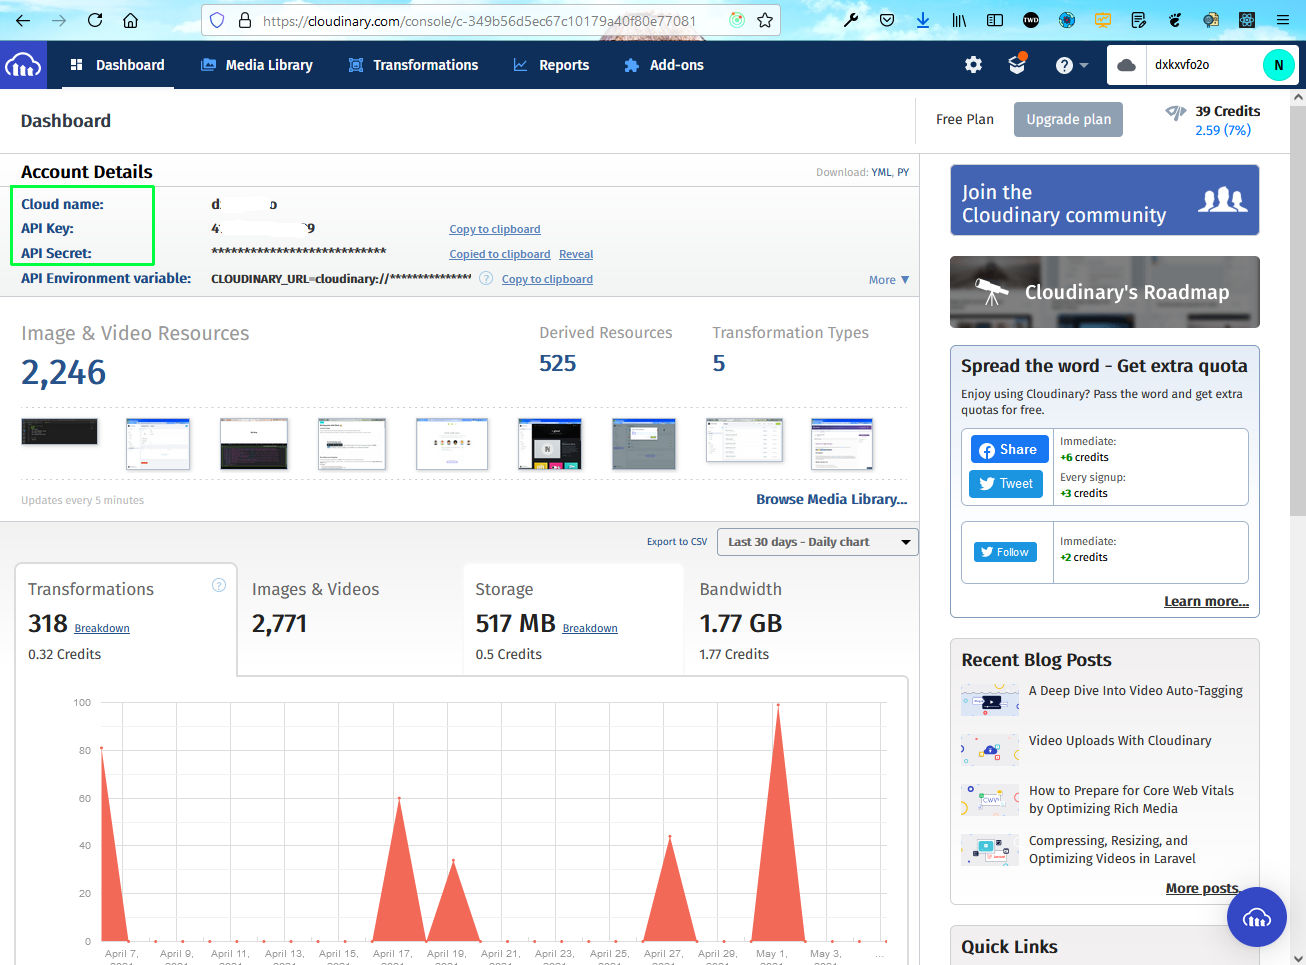 Cloudinary
Next, create a .env file in the backend folder and put the three secrets.
    CLOUDINARY_API_KEY=4xxxxxxxxxxxxxx9
    CLOUDINARY_API_SECRET=rxxxxxxxxxxxxxxxxxxxxxxxxs
    CLOUDINARY_NAME=dxxxxxxxxxo
Before creating our code in server.js file, we need to do the setup in cloudinary. So, in cloudinary site click on the setting icon in the top right corner. Then click on the Upload tab. Scroll a bit down and you will find the Upload presets and here click on Add upload preset link.
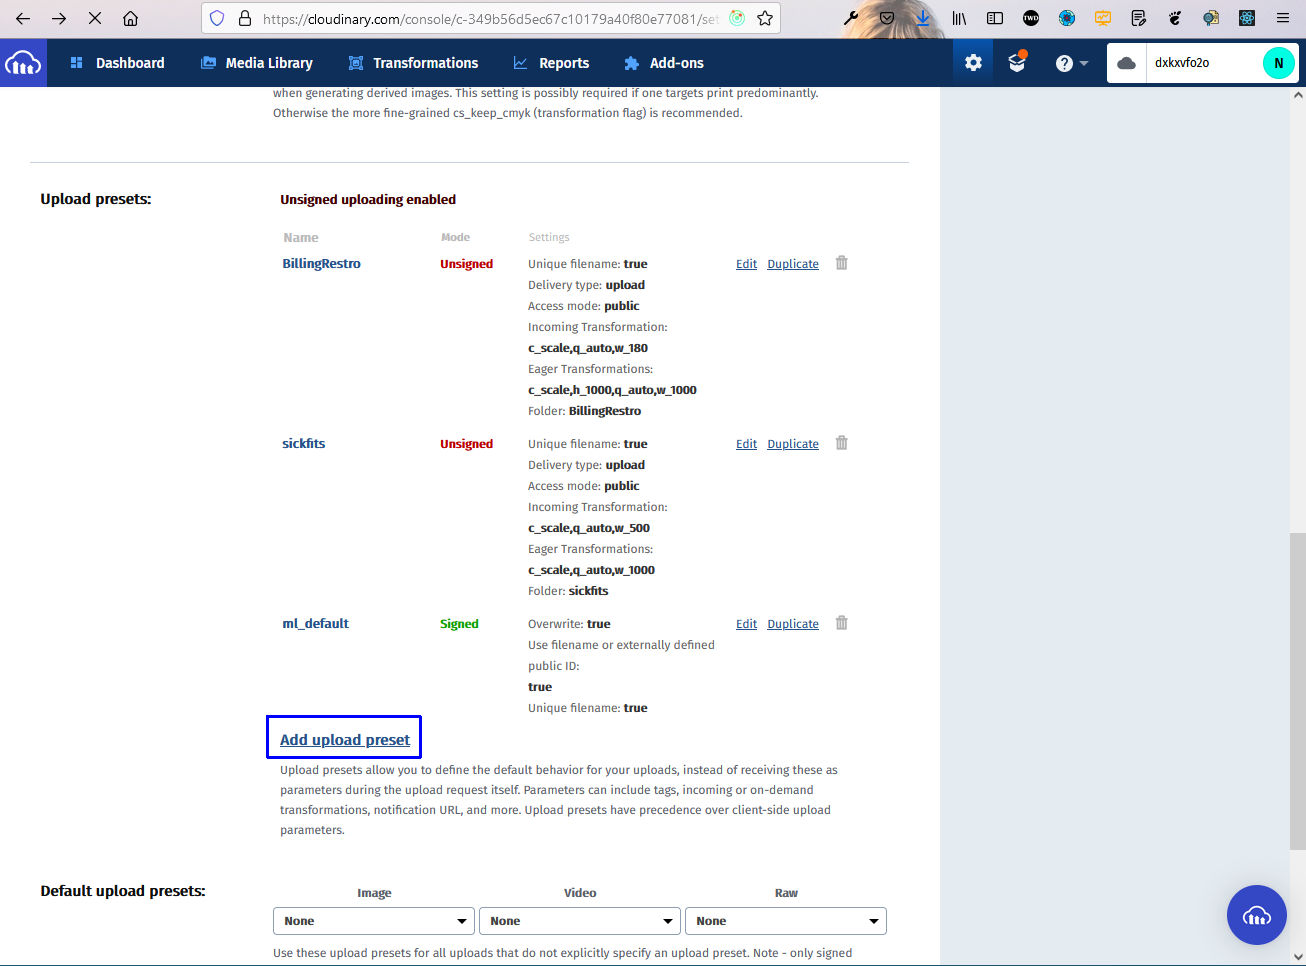 Upload
In the next screen give the upload preset a name and the Signing mode as Signed and a folder, in which images will be saved. Click on the Save button after that.
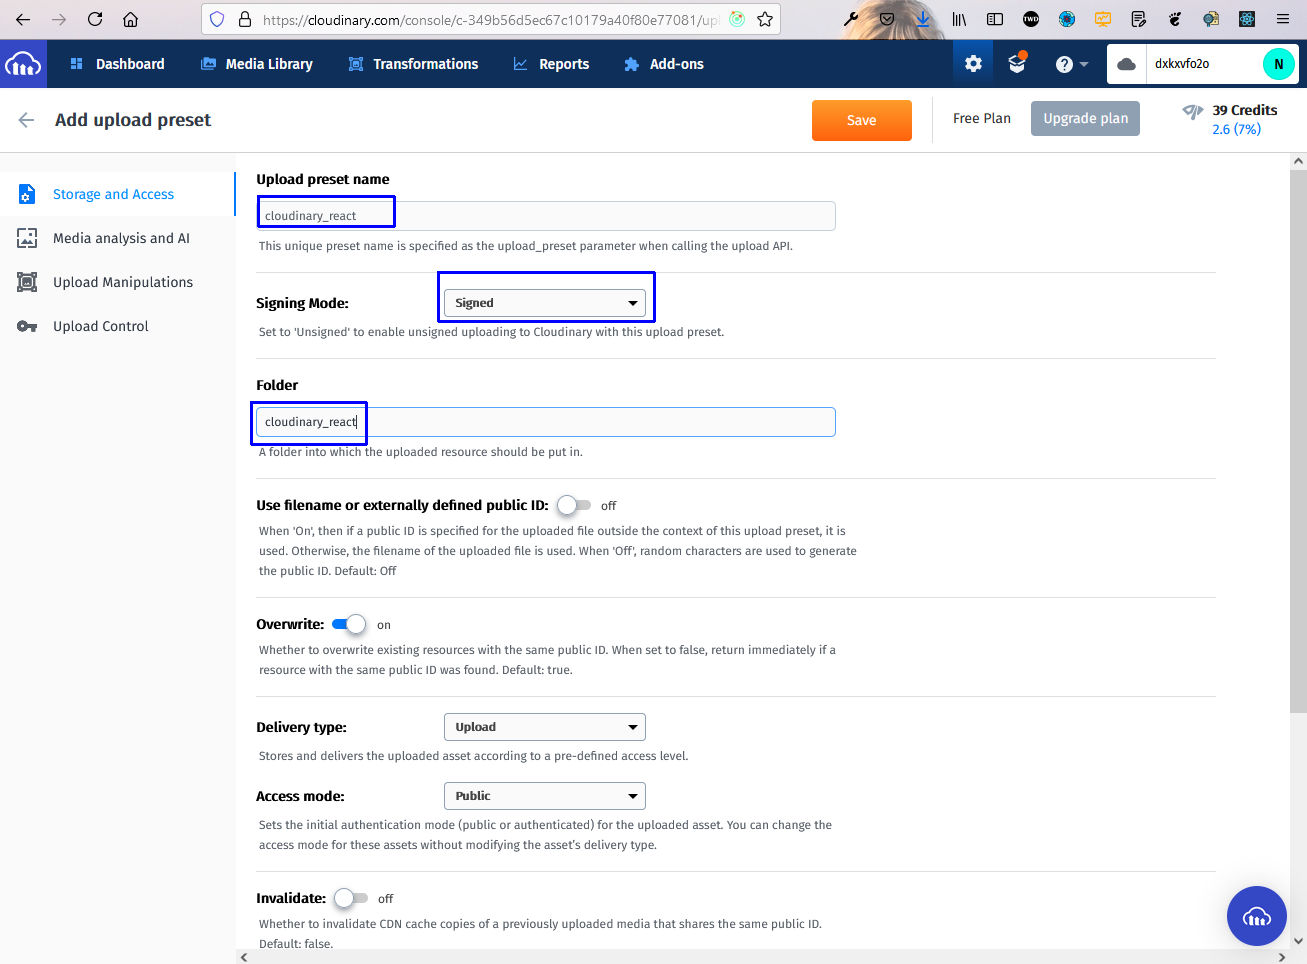 Save
Save
In the next screen you will get the new presets.
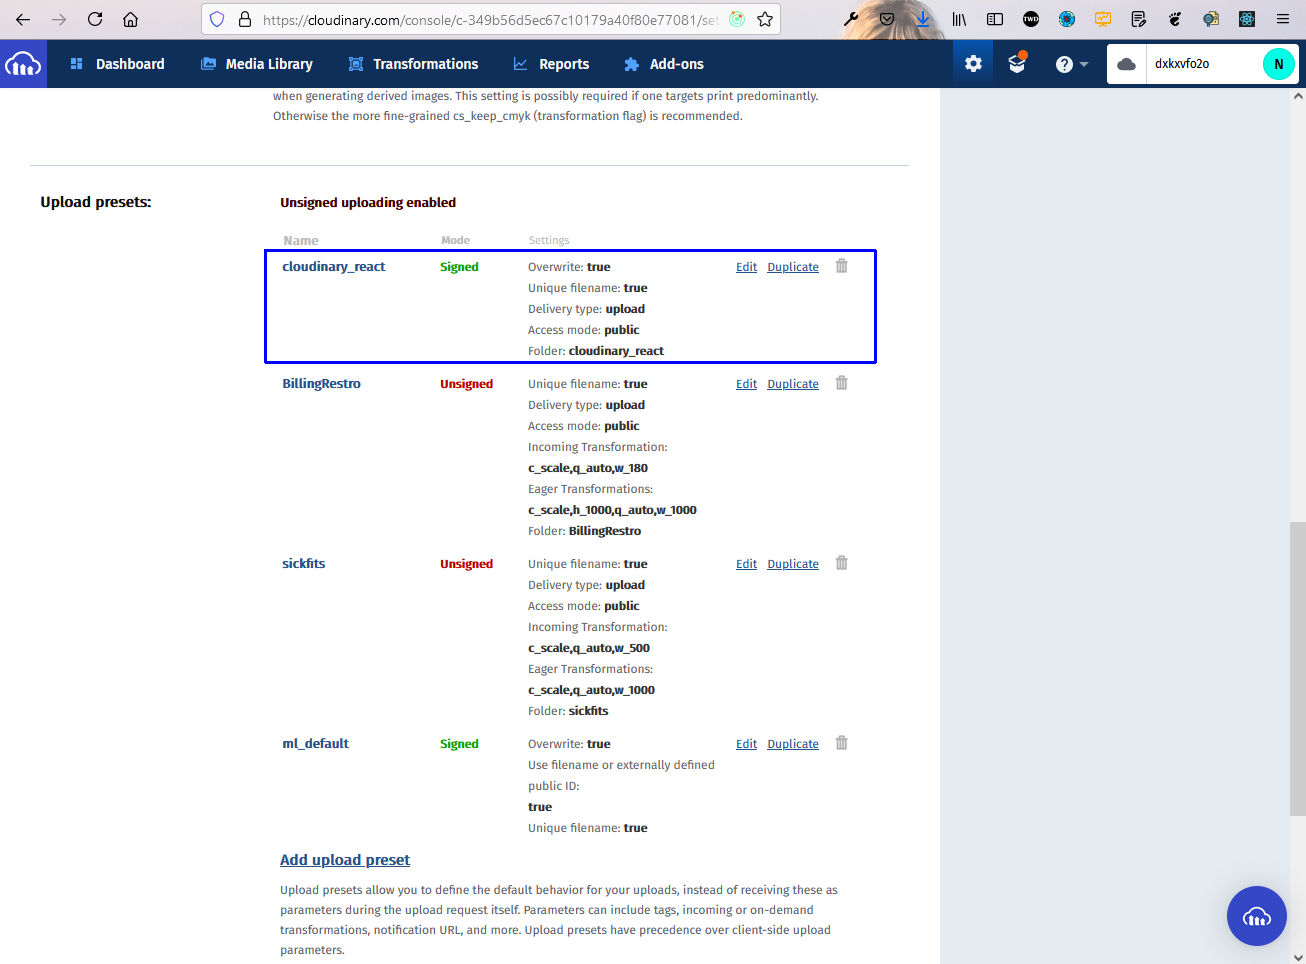 New presets
Now, back in our server.js file we will add the import for cloudinary first and after that inside our post, we will use the cloudinary uploader to upload our image to the cloudinary_react folder in cloudinary.
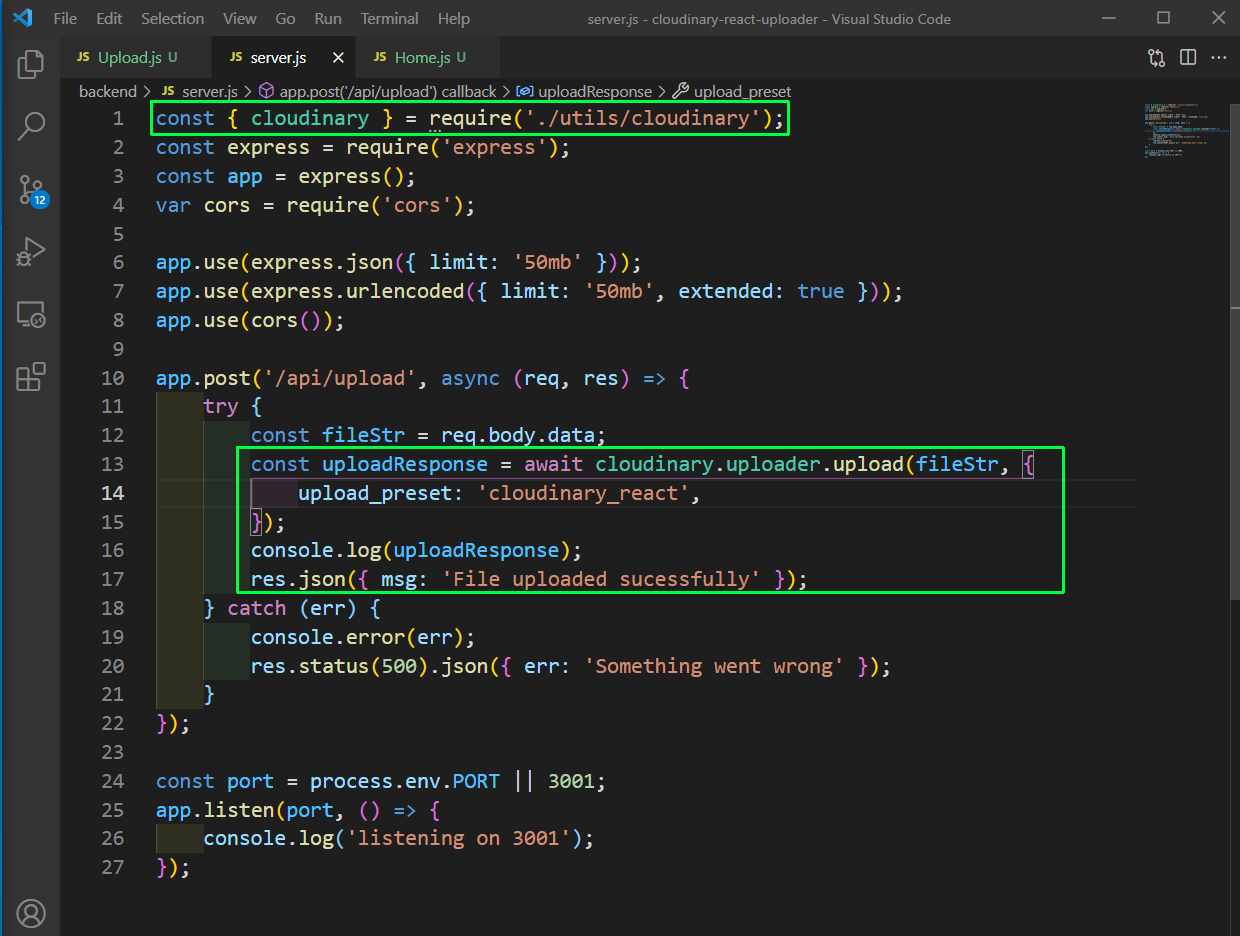 server.js
Now, upload any file from the frontend and it will be uploaded in cloudinary. Notice that we didn’t created the folder cloudinary_react manually and it was created by cloudinary.
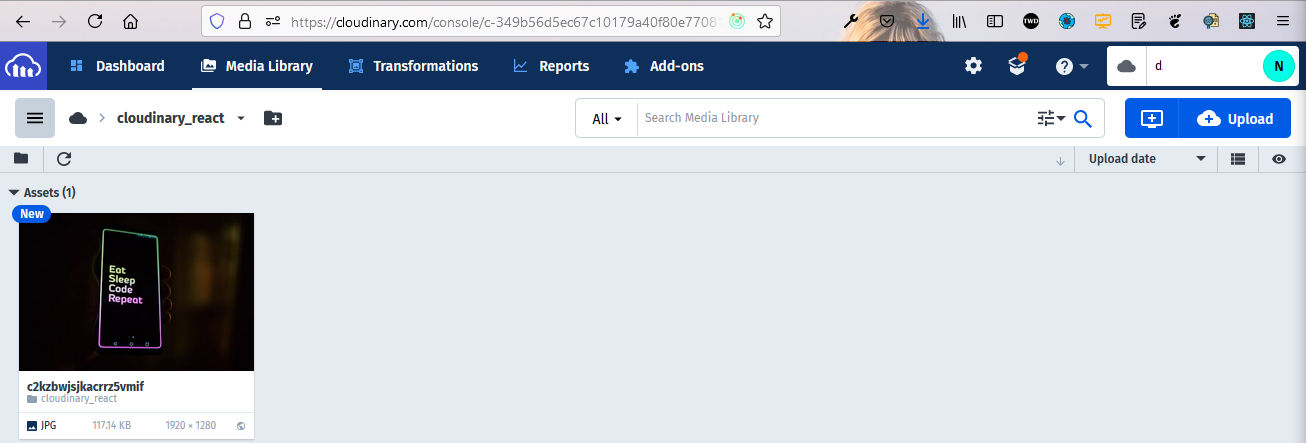 Cloudinary image
Next, we will add a GET request to get all the images from our cloudinary folder. So, add the /api/images endpoint in our server.js file.
Here, we are using the inbuild cloudinary method to get the files from our cloudinary_react and send them back.
 server.js
Now, i have added some more images from the frontend and now if we go to http://localhost:3001/api/images endpoint, we will get all of our images.
 All images
Now, in the frontend folder install the package for cloudinary with below command.
npm i cloudinary-react
Next, in the Home.js file update with the below content. Here, we are doing the required imports first. After that we are calling a loadImages() from useEffect, which is called only once.
Inside the loadImages function, we are doing a API call to /api/images and setting the data to imageIds state.
Inside our return statement we are looping through imageIds array and using the Image from cloudinary-react to show the image. Notice that we also need the cloud name, which we are again saving in an environment variable.
    import React, { useEffect, useState } from 'react';
    import { Image } from 'cloudinary-react';

    export default function Home() {
        const [imageIds, setImageIds] = useState();
        const loadImages = async () => {
            try {
                const res = await fetch('/api/images');
                const data = await res.json();
                setImageIds(data);
            } catch (err) {
                console.error(err);
            }
        };

    useEffect(() => {
            loadImages();
        }, []);

    return (
            <div>
                <h1 className="title">Cloudinary Gallery</h1>
                <div className="gallery">
                    {imageIds &&
                        imageIds.map((imageId, index) => (
                            <Image
                                key={index}
                                cloudName={process.env.REACT_APP_CLOUDINARY_NAME}
                                publicId={imageId}
                                width="300"
                                height="200"
                                crop="scale"
                            />
                        ))}
                </div>
            </div>
        );
    }
Next, create a .env file in the frontend folder and add our cloud name to it.
REACT_APP_CLOUDINARY_NAME=dxxxxxxxo
We will also include it in the .gitignore file.
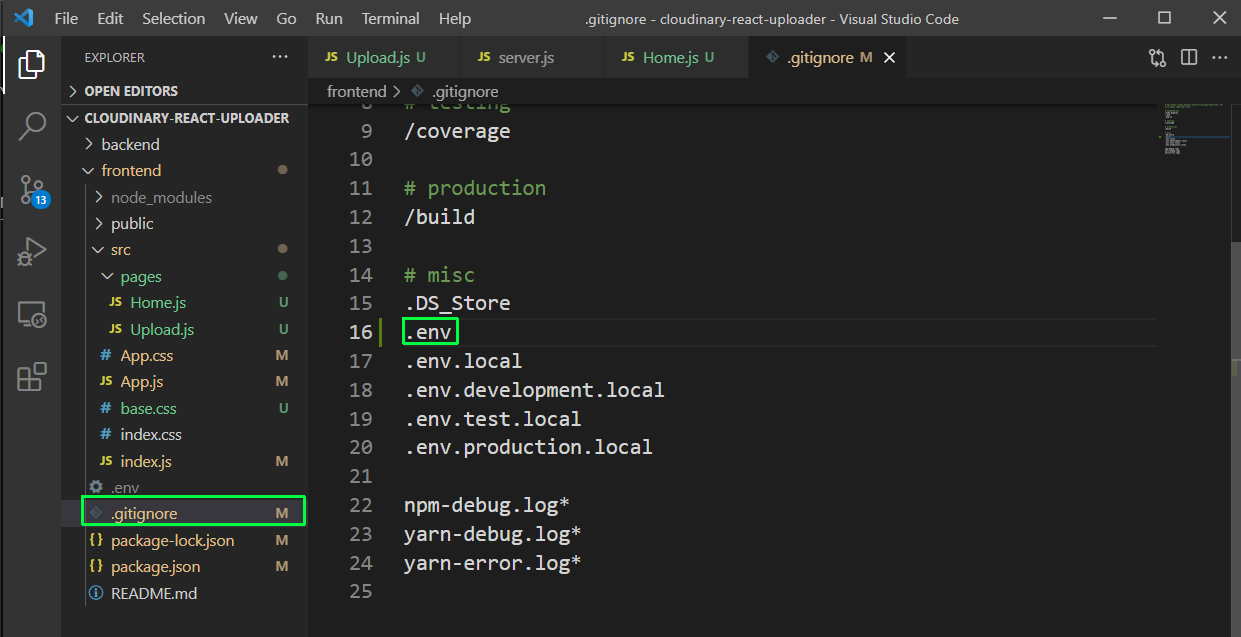 .gitignore
I have also forgot to create a .gitignore in the backend folder. So, created the same and put our environment file in it and also the node_modules, as we don’t want to push them to github.
 .gitignore
Our app is completed now and upload and showing of all images is working.
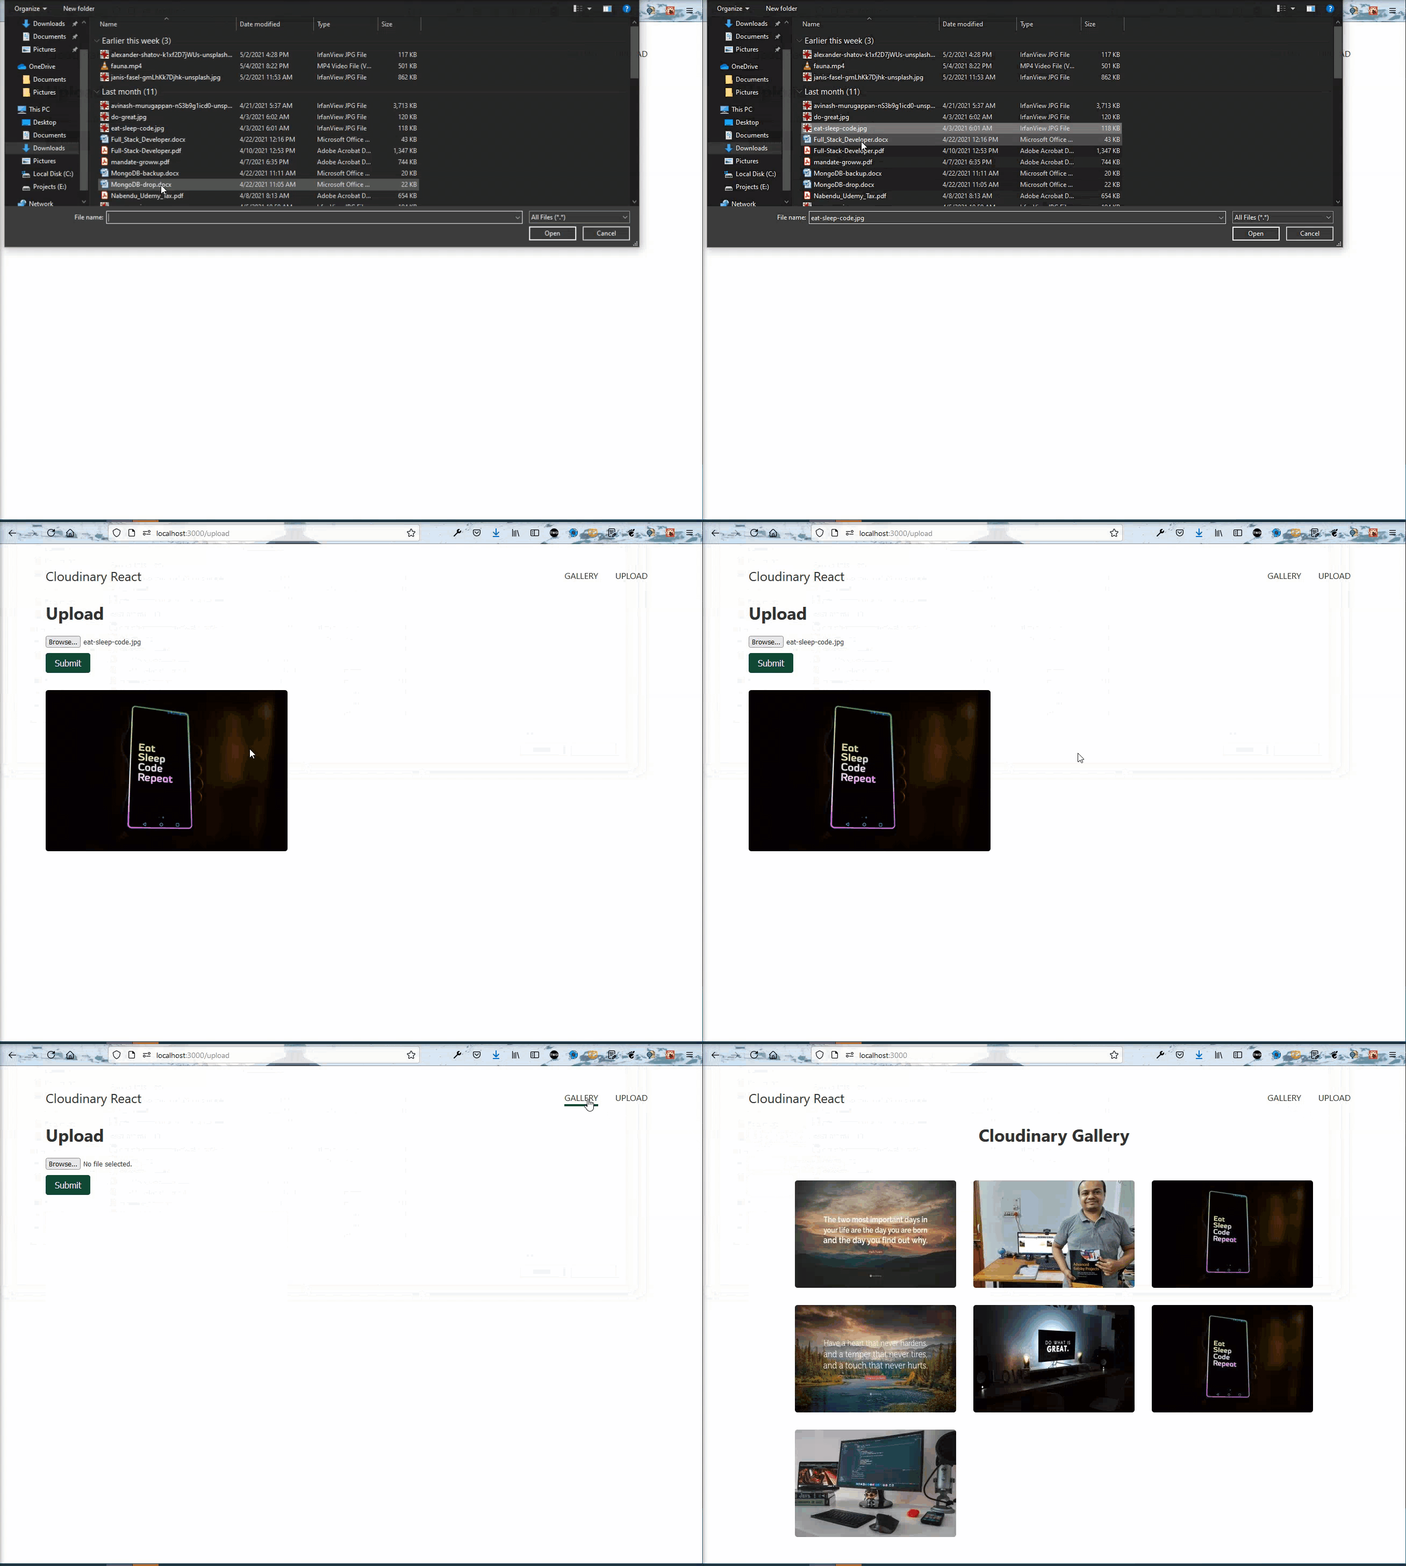 App complete
You can find the code for the same in this github repo.