CSS Crash Course for Beginners -3
by Nabendu Biswas / July 18th, 2020
#css #beginners #webdev
Series: CSS-Basics
Welcome to part-3 of the series.
Class & Id
We have the concept of class and id in CSS. They can be used to target any HTML element. The difference between both of them is that the same class can be used at different places, but we can use id only once. Let’s update our html from previous part to wrap the h1, h3 and p with a div with class of box-1.
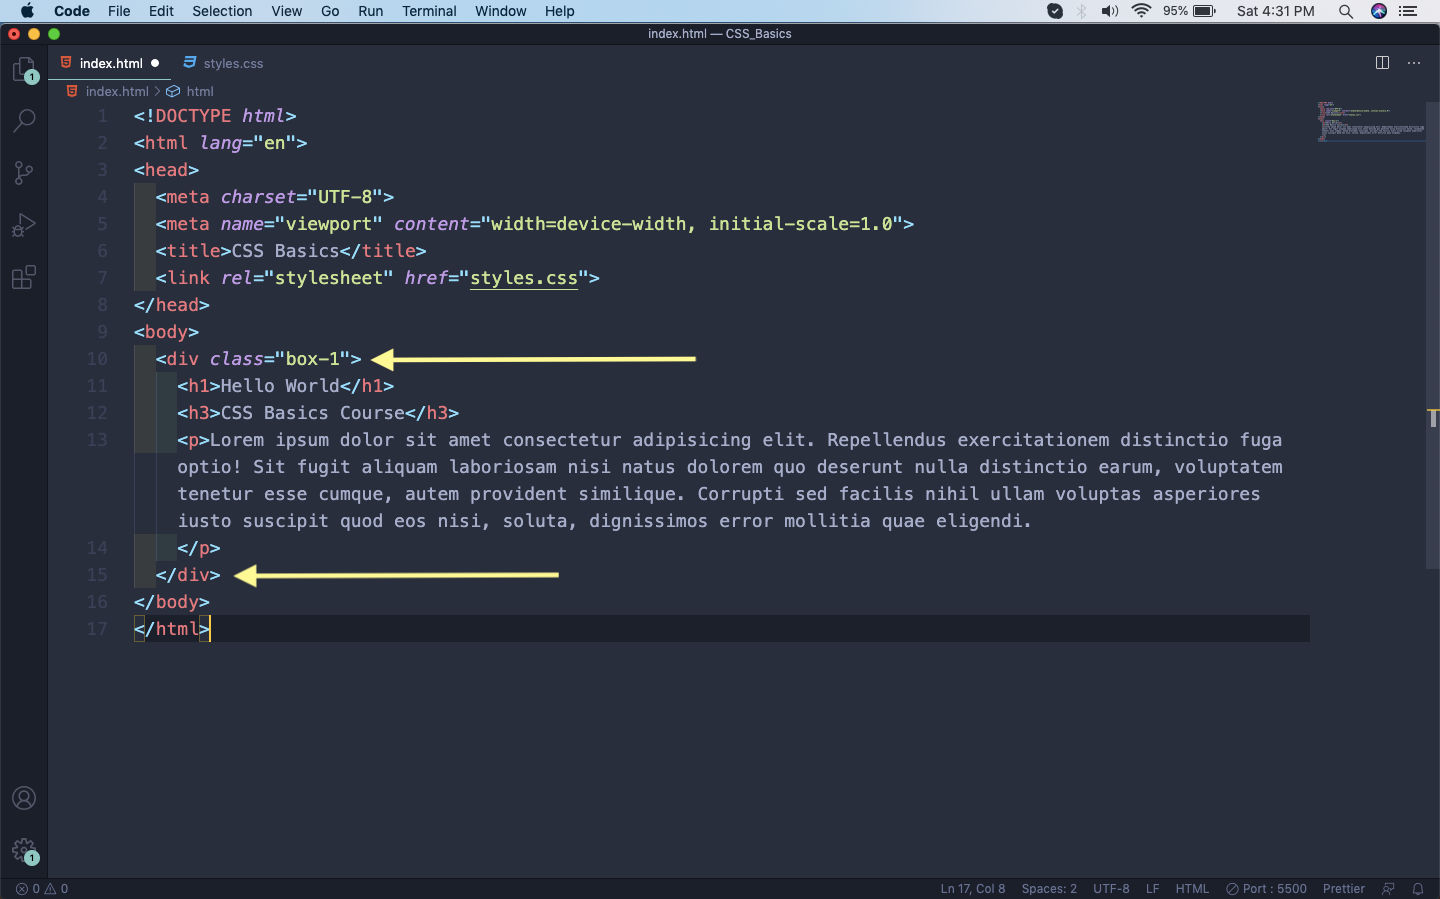 Class
Class
Now, we target the class by using a dot(.) and the class-name in our style sheet. So, we will target our class and give it a background color of lightyellow.
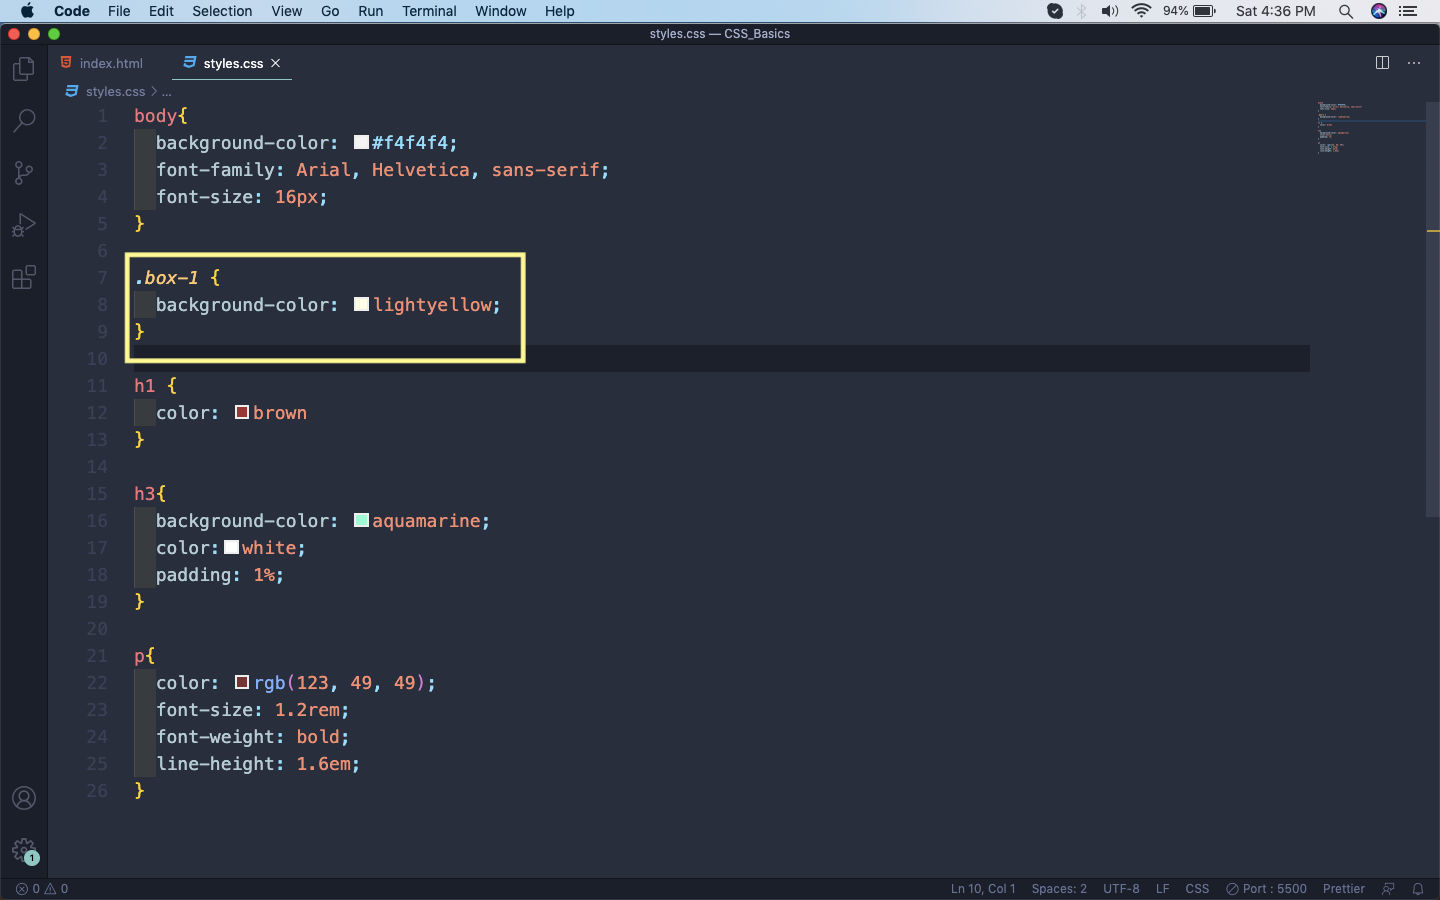 styles.css
Now, in our webpage the three html elements will have a light yellow background.
 Class
Class
Now, to understand the difference between class and id we will create another section in our html file. It will be a h1 and p, wrapped with a div. Notice that it have the same class-name box-1. Now, we are giving an id to the p tag, with the attribute id.
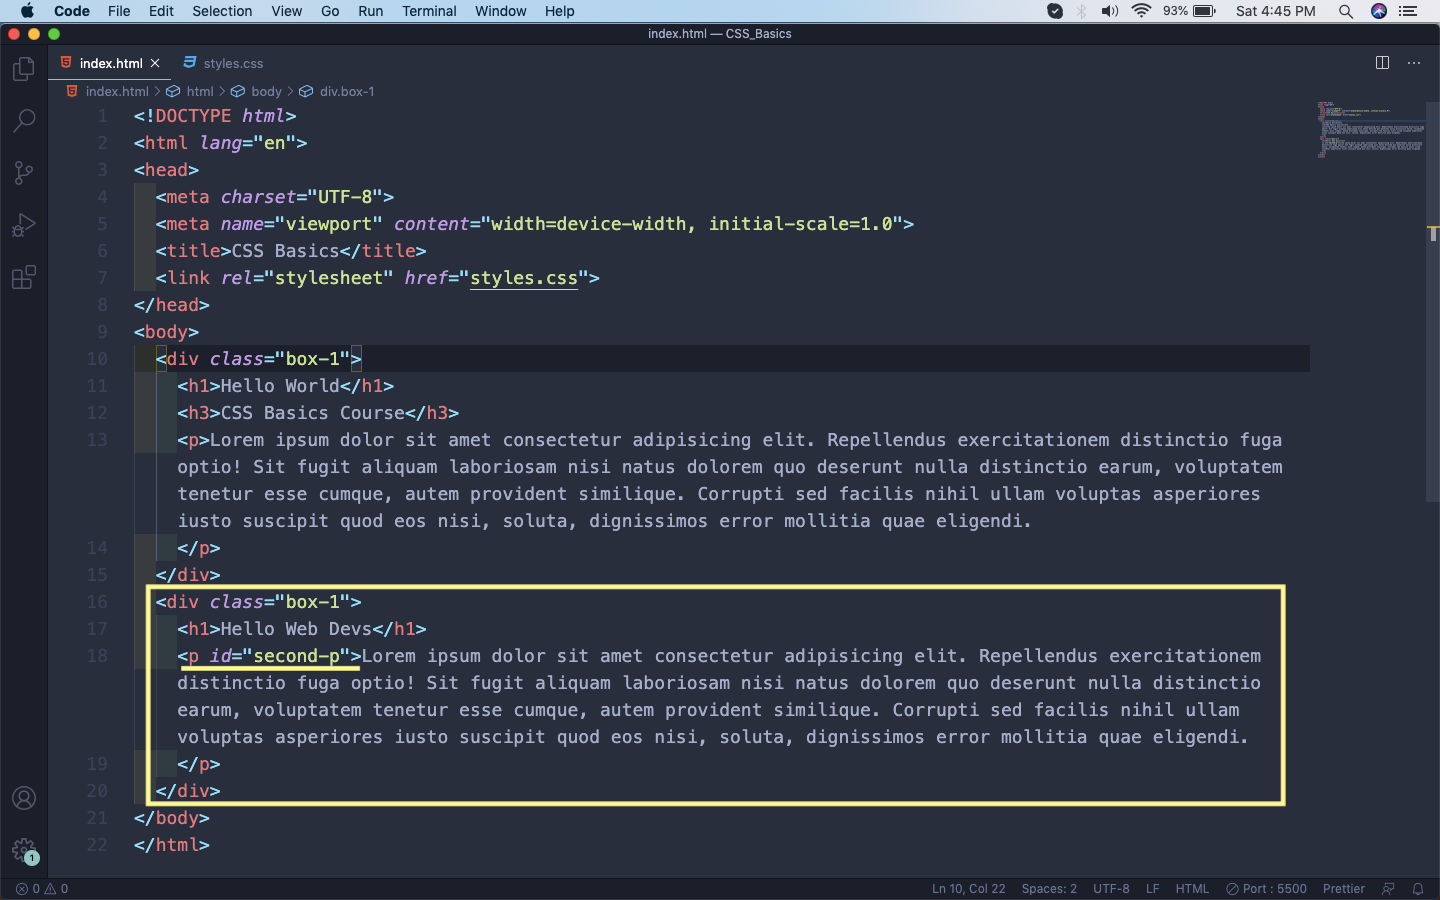 html
html
In our styles.css we will target the id by hash(#) followed by it’s name. Here, we are giving it a color of red.
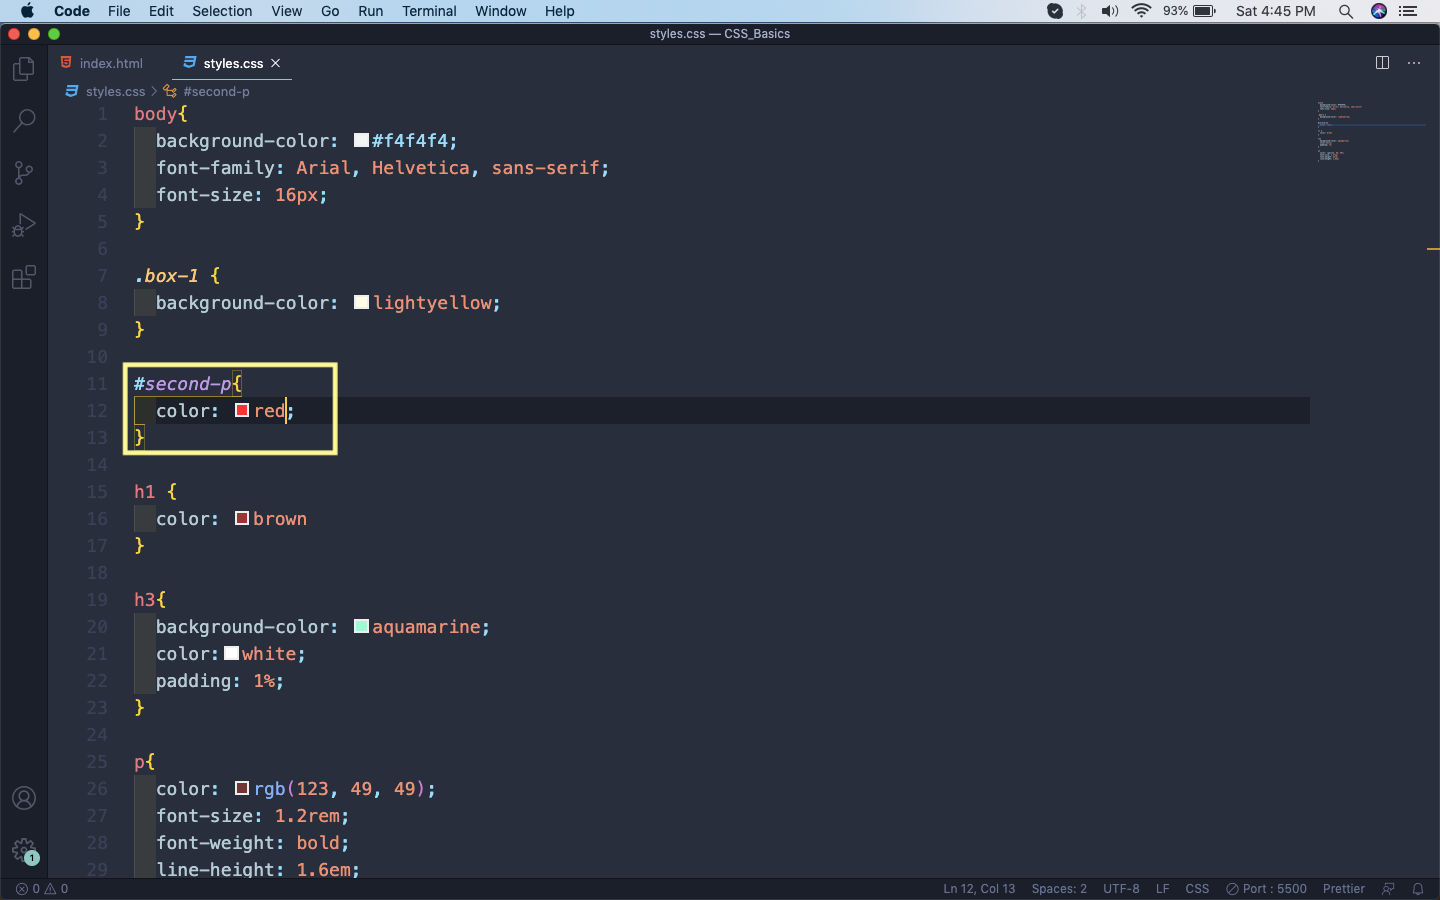 styles.css
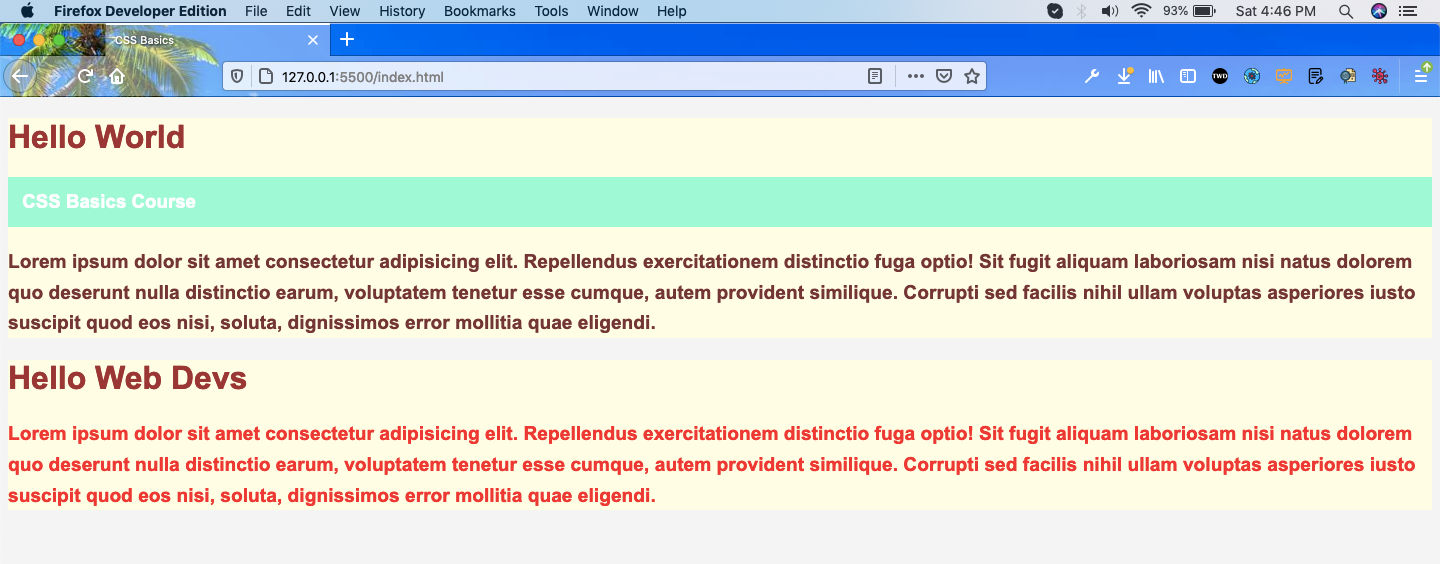
Now, back to our page we can see both of the class and the id in action. As, you can see both the sections have yellow background color, due to our class box-1. The second paragraph text is of red color due to our id second-p.
 Web-page
Box Model
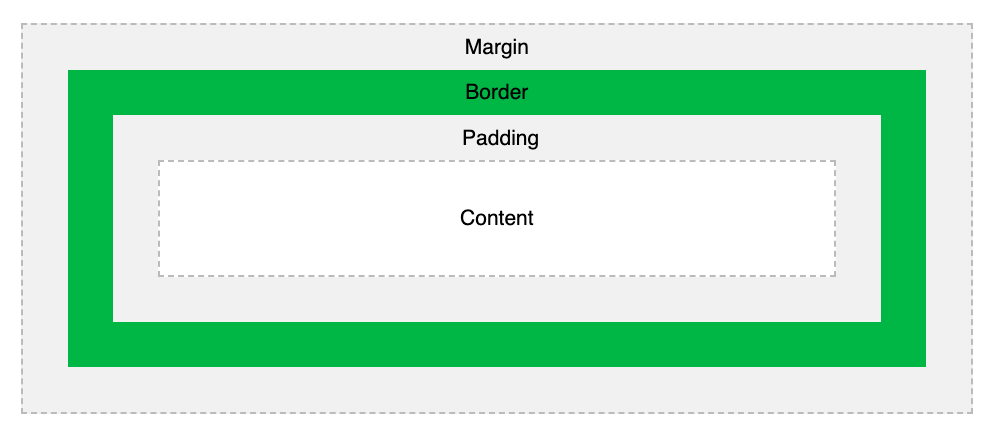
Every HTML element uses the box model which is the space around each element. The box model contains of -
Content
Padding
Border
Margin
We can understand it better from the below diagram.
 Box Model
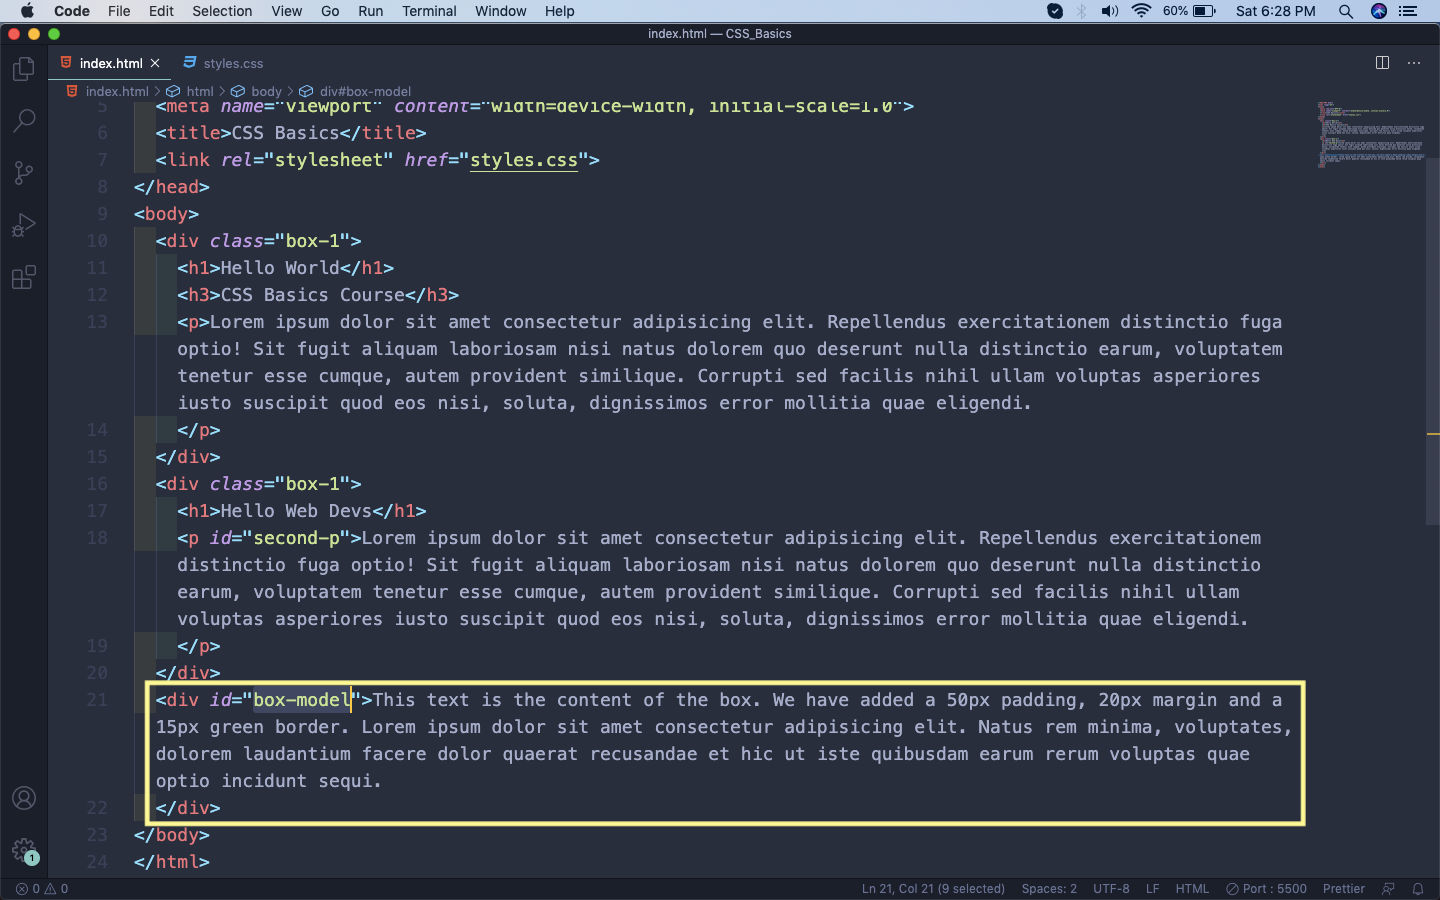
Let’s see it in action by updating our html file. We are just adding a div with an id of box-model.
 box-model
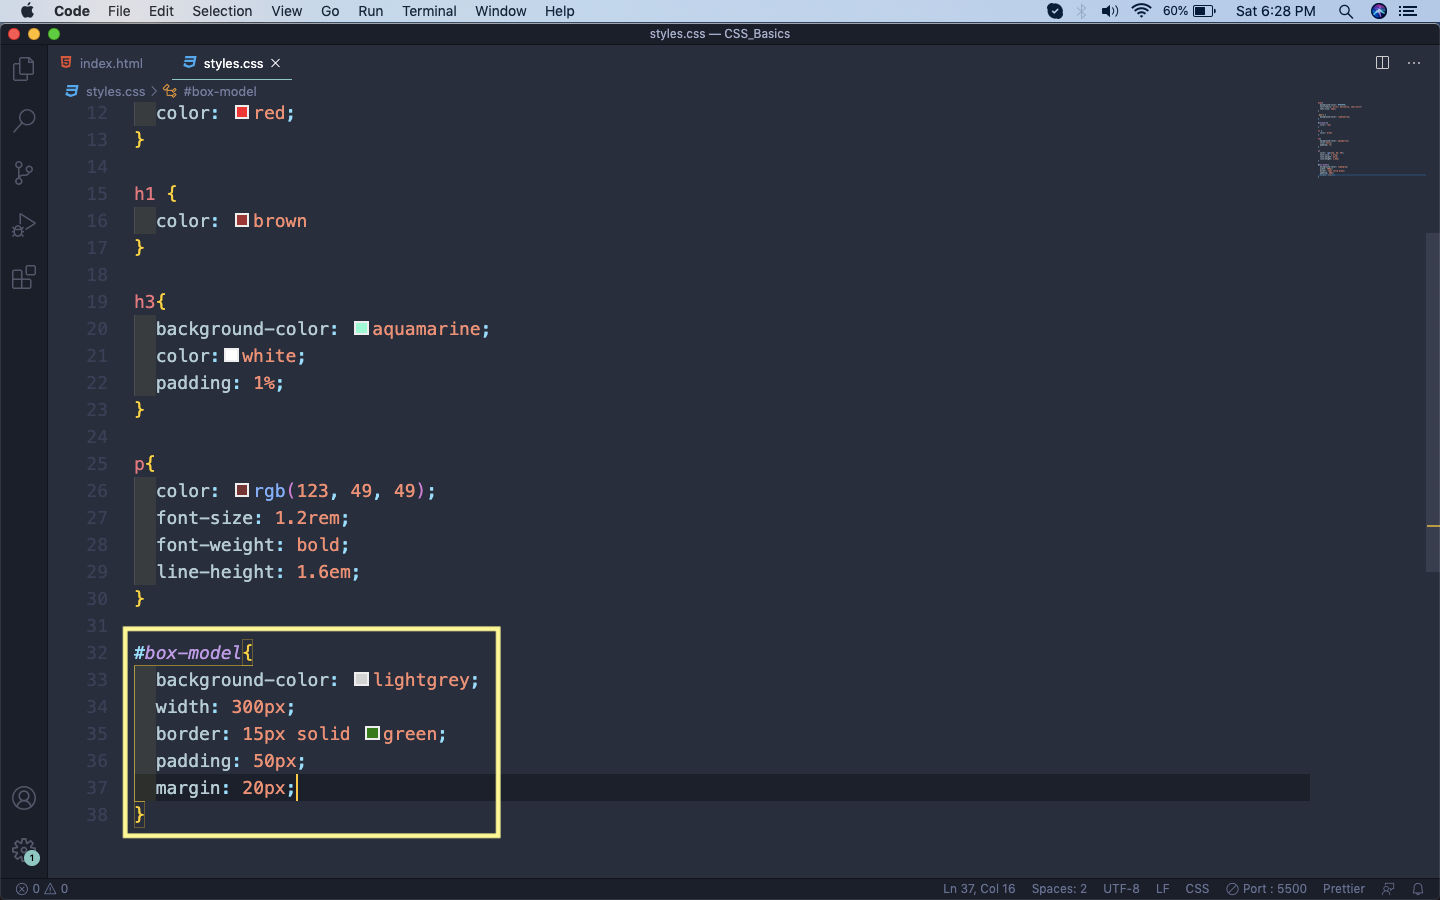
Now, let’s add the styles for this div in our styles.css file.
 styles.css
Let’s now see it on our browser. I had also opened the developer console in my Firefox developer edition browser, which also shows the box model in the lower right corner.
Now, the content is the text inside our div, which is 300px x 175.65px After that the padding is 50px all around it, which is transparent. Surrounding it is a 15px green border. After that we have a 20px margin, which is surrounding it.
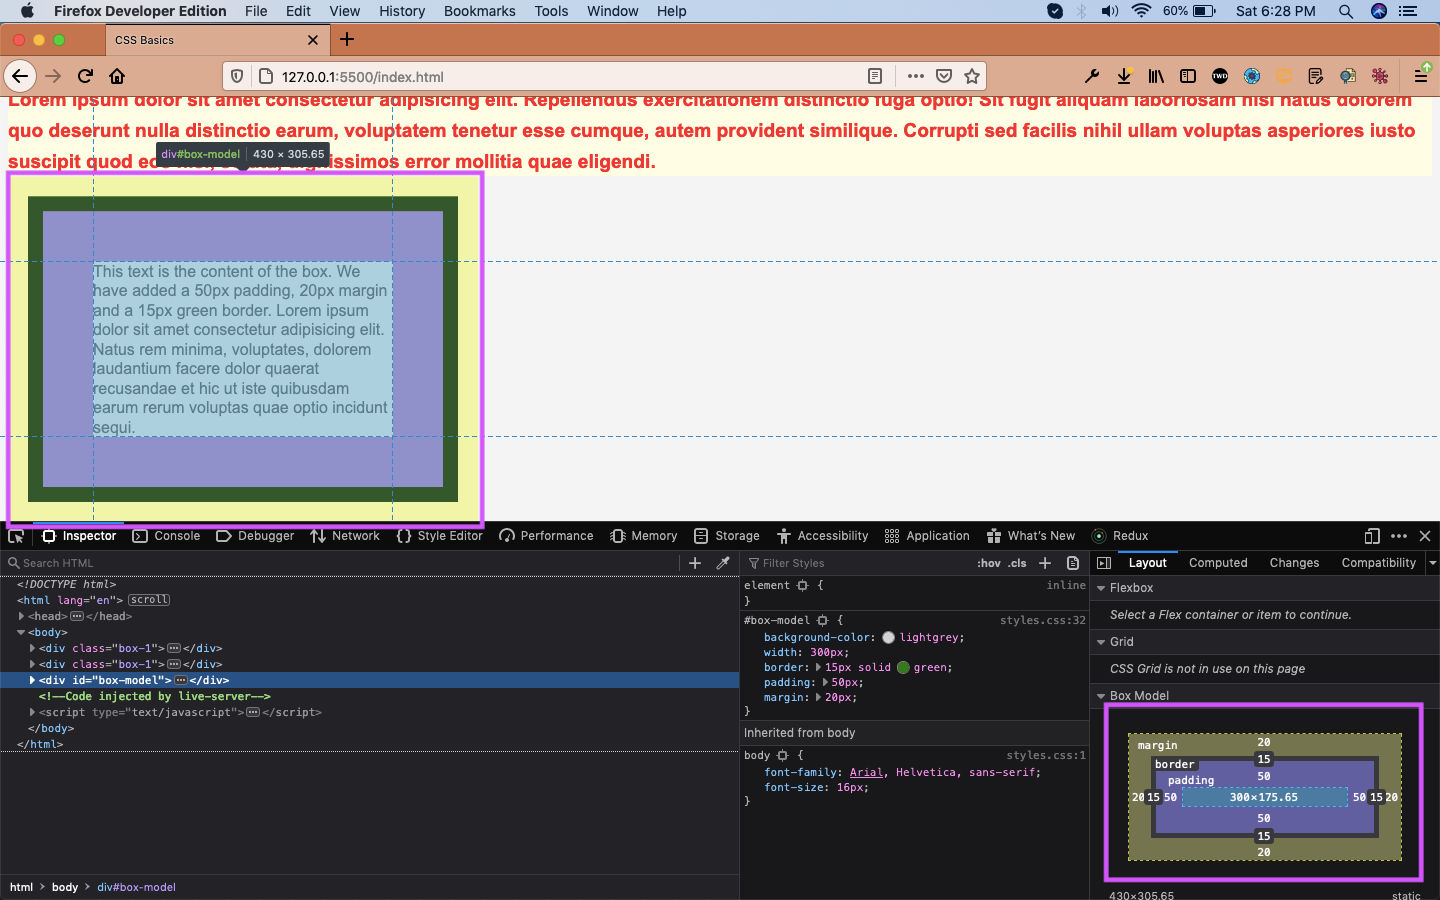 Browser
One important thing to keep in mind is that the margin is always between, surrounding html element. But the padding is around the content of the element.
The margin and padding which we declared earlier have three other forms, because they are all around the element. I will show for margin, but it applies for padding also.
    **Short-form for margin all around**
    margin: 20px;

    **Full-form for margin**
    margin-top: 5px;
    margin-right: 10px;
    margin-bottom: 5px;
    margin-left: 10px;

    **Short-form to represent the above**
    margin: 5px 10px 5px 10px;

    **Another short form with two values- representing top-bottom and right-left values**
    margin: 5px 10px
This completes part-3 of the series.