CSS Crash Course for Beginners -4
by Nabendu Biswas / July 19th, 2020
#css #beginners #webdev
Series: CSS-Basics
Welcome to part-4 of the series. We will start this part by looking into some more CSS properties related to fonts.
More Font Properties
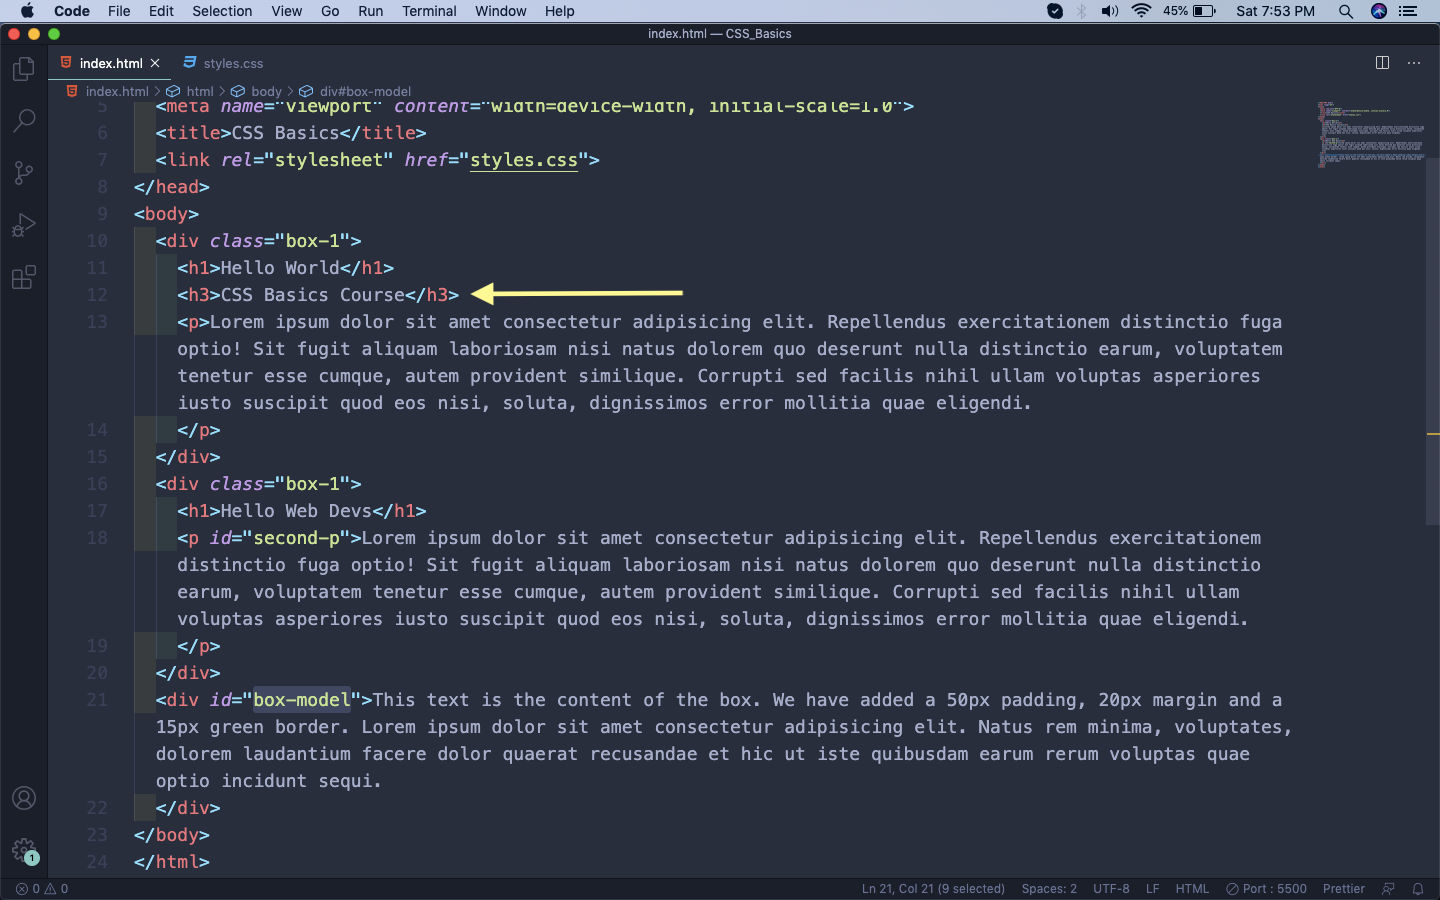
We will be targeting the h3 tag in our first div section for this part. Below is the the h3 tag which contains the CSS Basics Course text.
 index.html
Earlier, we were directly using the h3 to show it’s styles. But this is not advisable in larger projects, as this might target all the h3 in the project.
    h3{
        background-color: aquamarine;
        color:white;
        padding: 1%;
    }
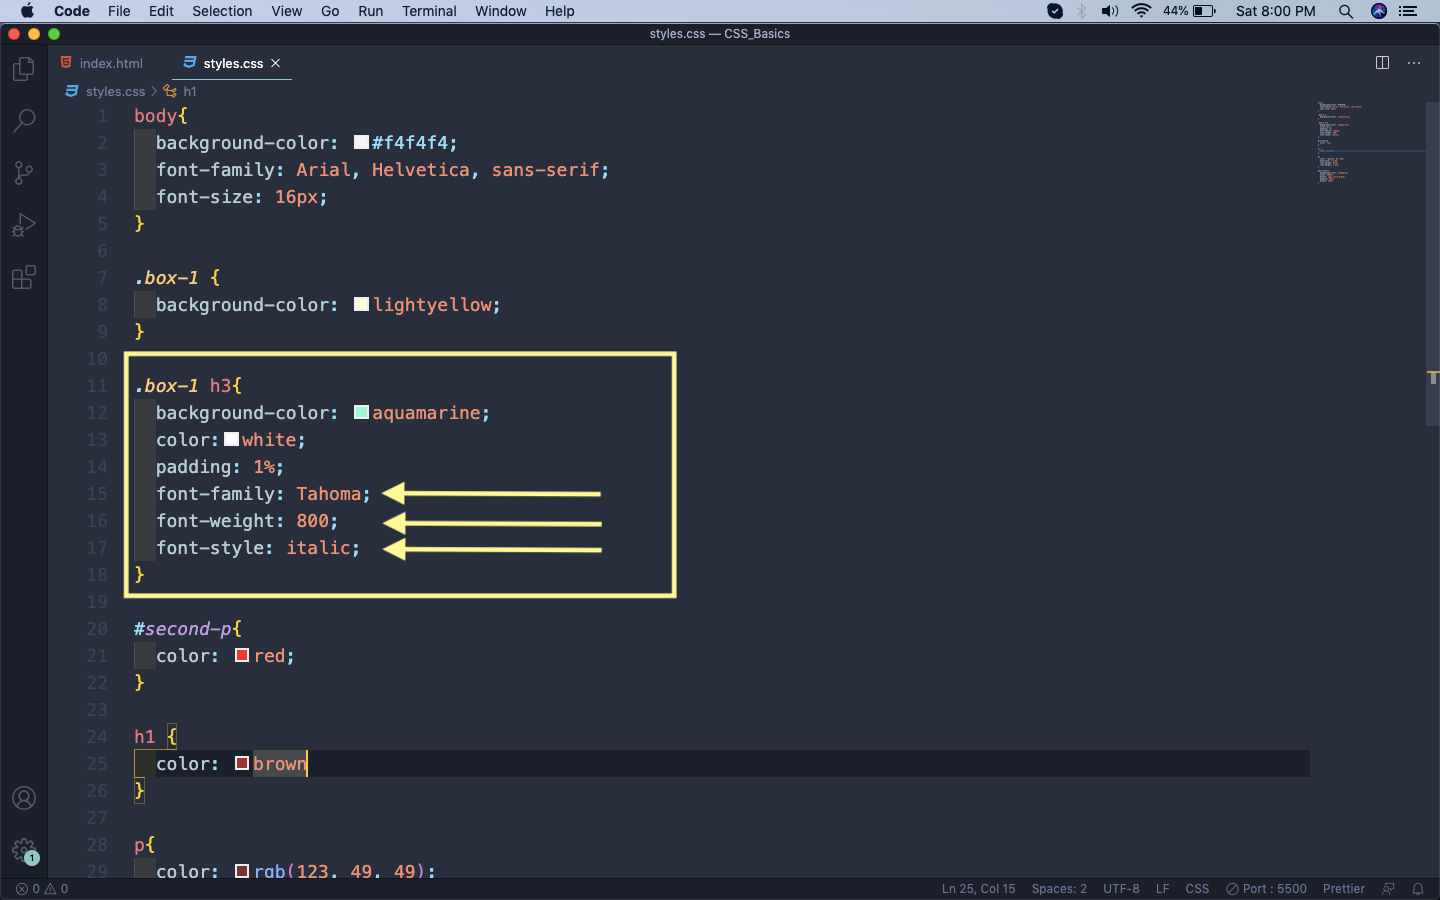
We will target the h3 by .box-1 h3 , in which we are first targeting the class box-1 and then the h3 inside it.
Now, first we will write three font properties — font-family, font-weight and font-style.
We had already learnt about font-family, font-weight in part-2. The third property is font-style, which by default is normal but we can make the text italics also.
 styles.css
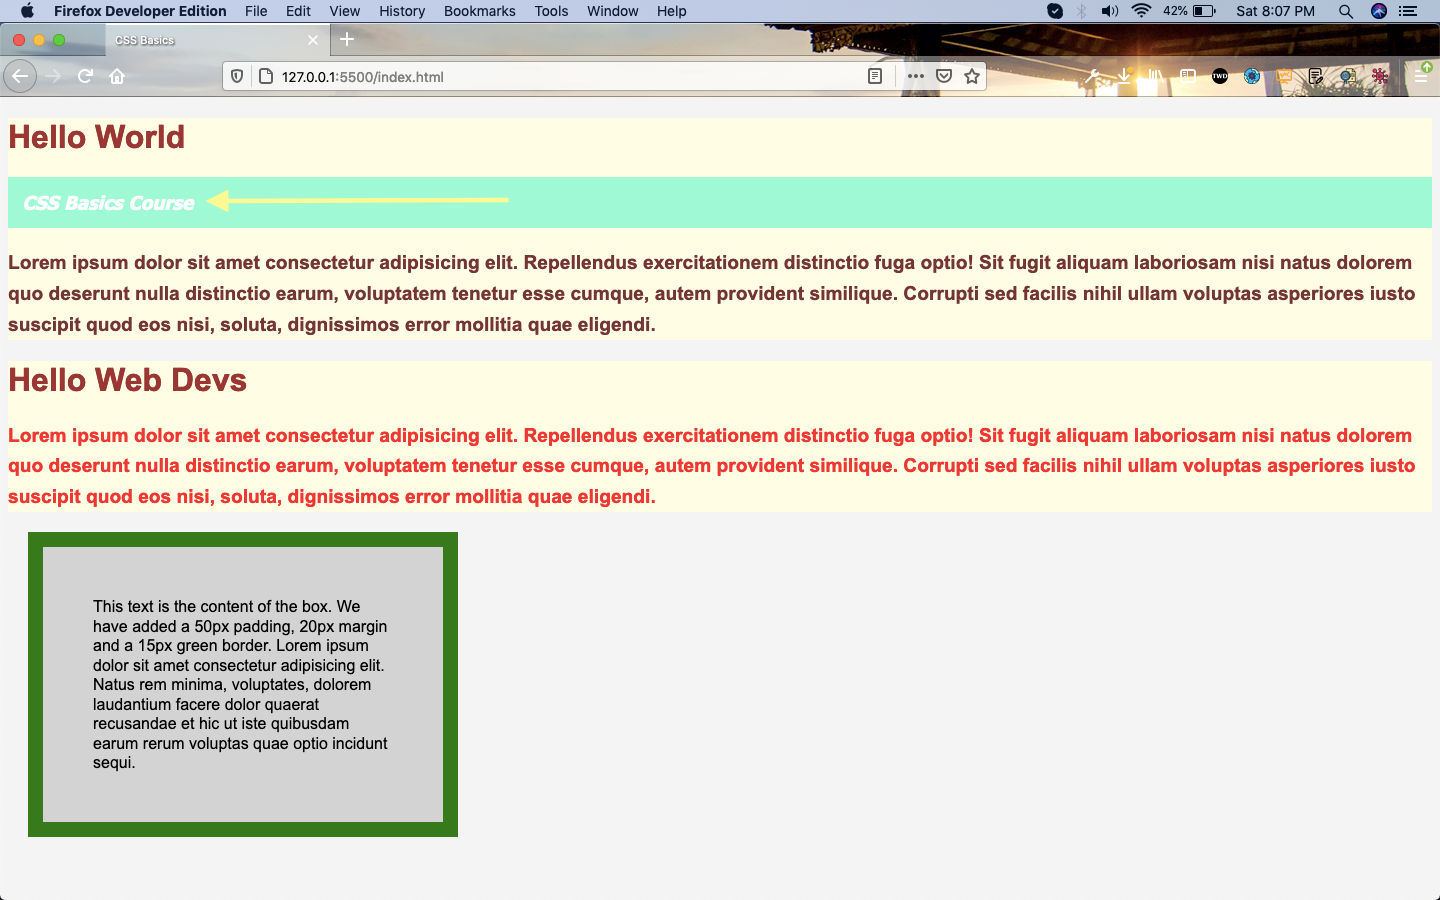
So, our CSS Basics Course text looks like below.
 Our Text
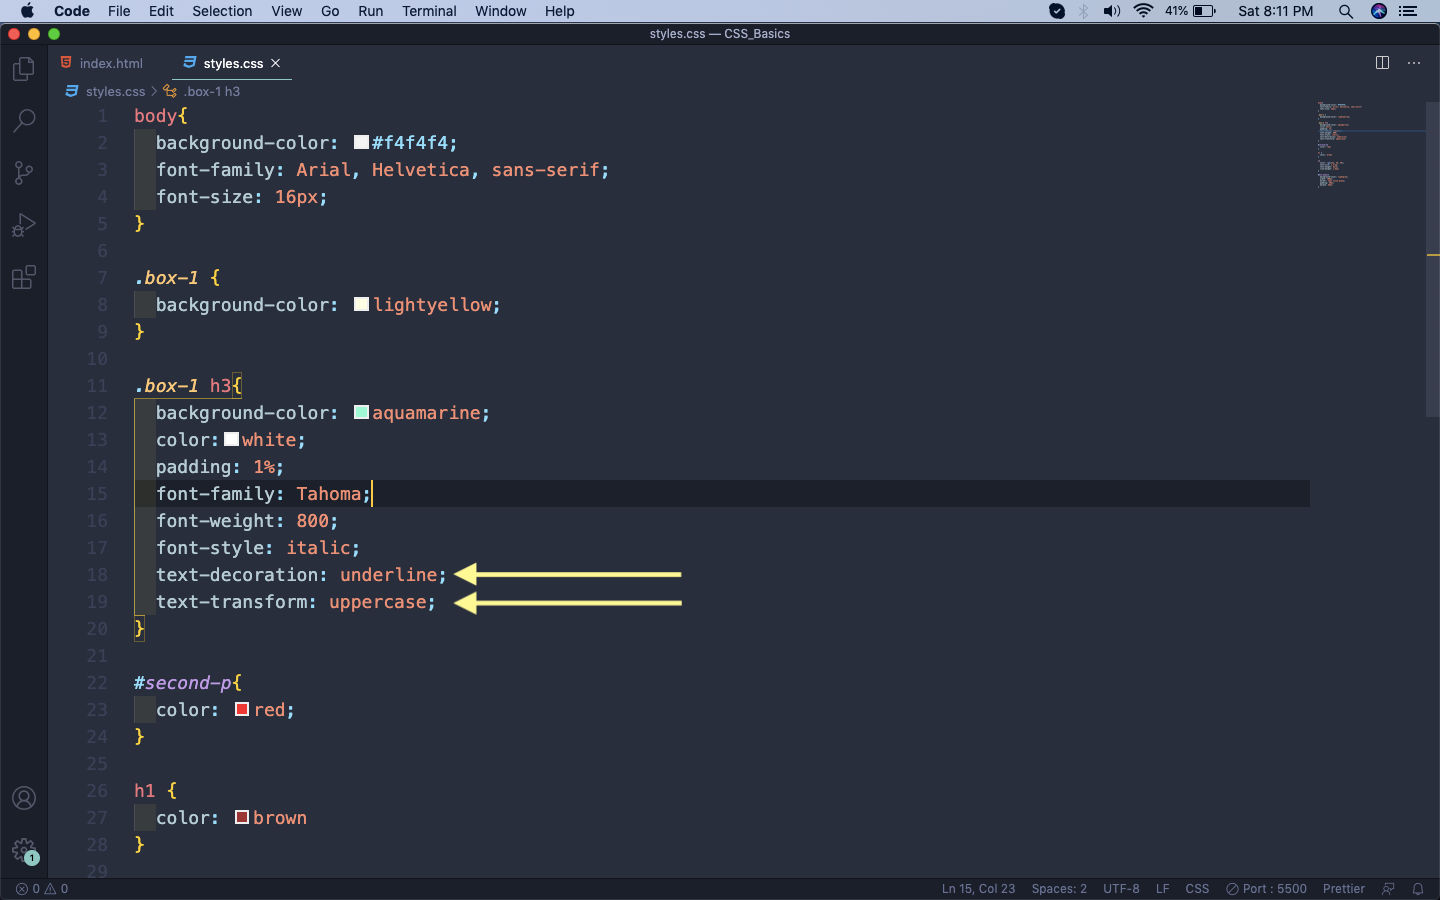
Next, we will look into two text properties — text-decoration and text-transform.
The text-decoration property is mainly used to have an underline in our text. Beside this we can have a line-through and overline value also.
The text-transform property is mainly used to make all text uppercase. Beside this we can have a lowercase and captalize value also.
 text
text
So, our CSS Basics Course text is now uppercase and underlined.
 Uppercase
The next property which we will see is the letter-spacing property. As the name suggests, it will add spacing between letters.
 letter-spacing
So, our CSS Basics Course text is now spaced.
 Spaced letters
The next property which we will see is the word-spacing property. As the name suggests, it will add spacing between words.
 word-spacing
So, now we have space between the three words.
 space between words
Styling Lists
As in our HTML series, we found that by default the list are very ugly. So, let’s first create a list in our html file. Here, we are creating an unordered list, within a div with class-name categories.
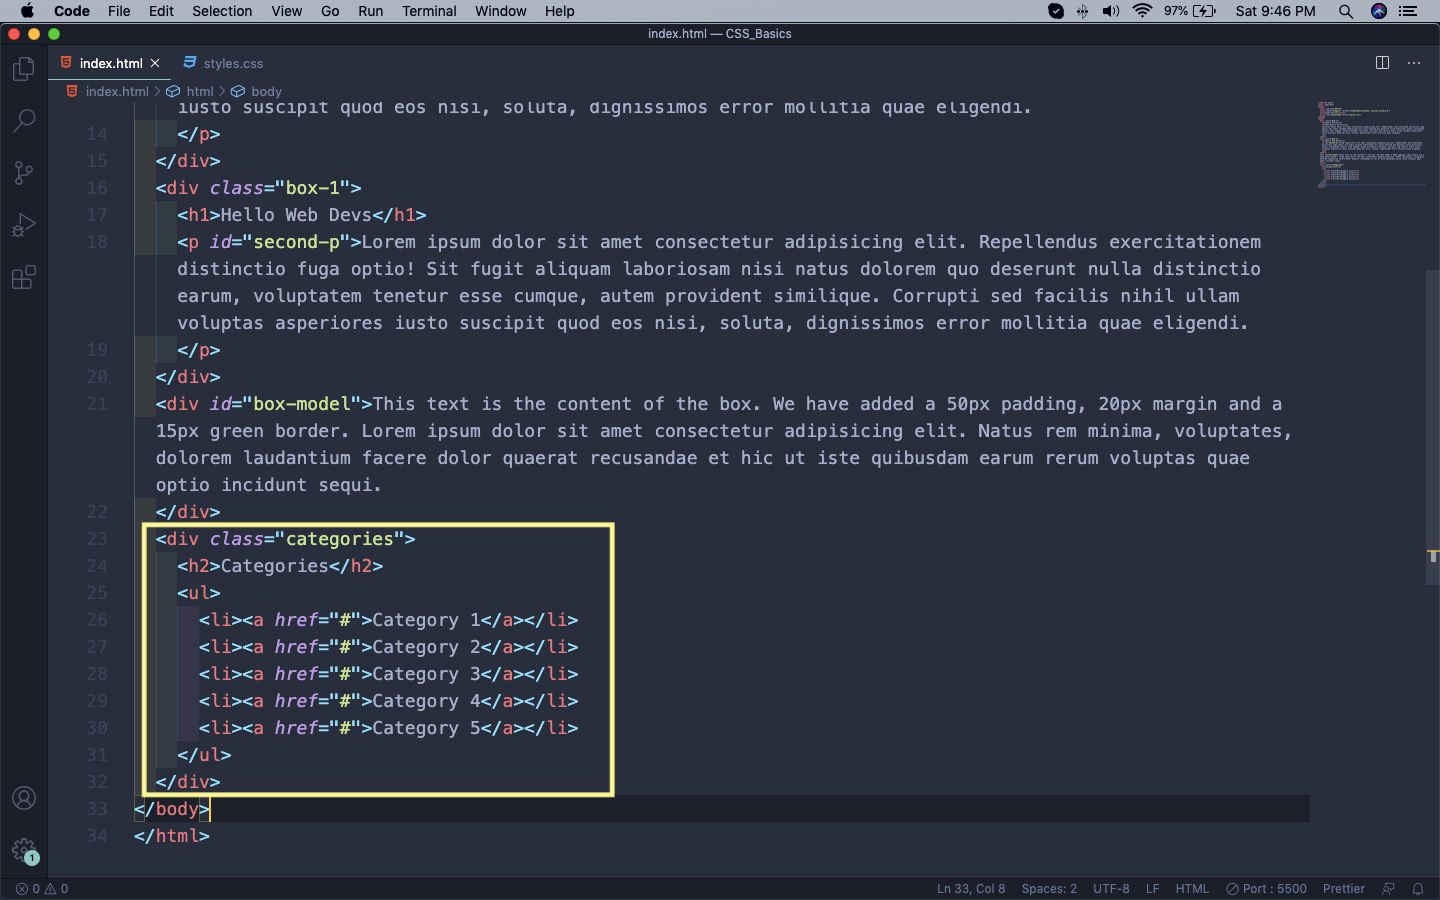 ul
ul
Next, let’s first add some styles to the categories class to show a box. It is having a grey border, with padding on all sides. We are also using a new property border-radius, which makes the sharp edges of the border more round.
 styles
So, now our web-page will have the unordered list.
 List
List
Next, we will target the h2 tag and use another important CSS property called text-align with center value. It will center the text in the center of the page. It have other values also like left and right.
 text-align
So, the h2 tag containing text Categories will be shown at the center.
 Text
Text
Next, we will target the ul tag and make the padding as 0.
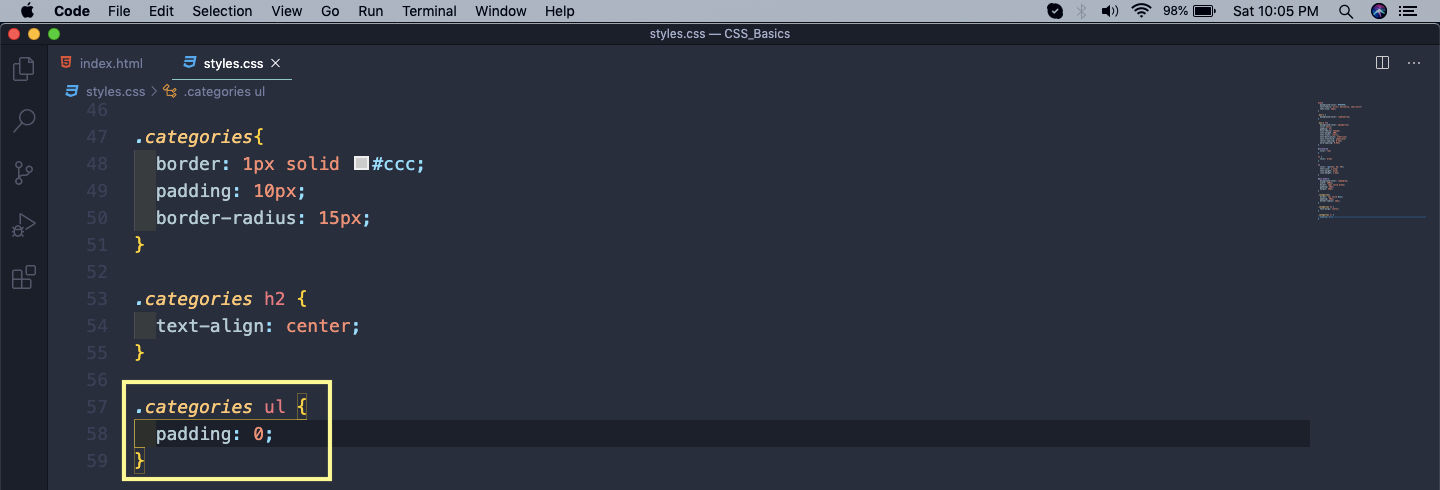 padding
Now, it will move the list to the left. This will show the dots of ul on top of our border.
 List to left
To solve this issue we will use another CSS property of list-style and give it a value of none. This will remove the dots. Some other values of list-style are circle, square.
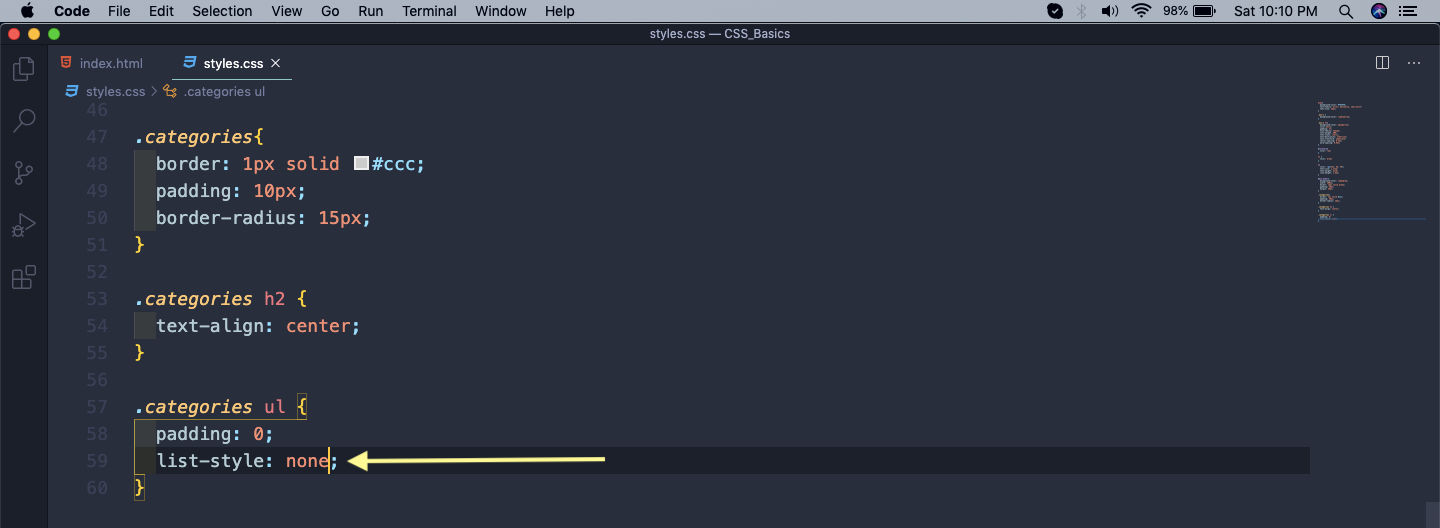 list-style
Now, the dots are removed from the list.
 dots removed
Next, we will make these ugly anchor links have no underline by setting the property text-decoration to none. Also, will make them black in color.
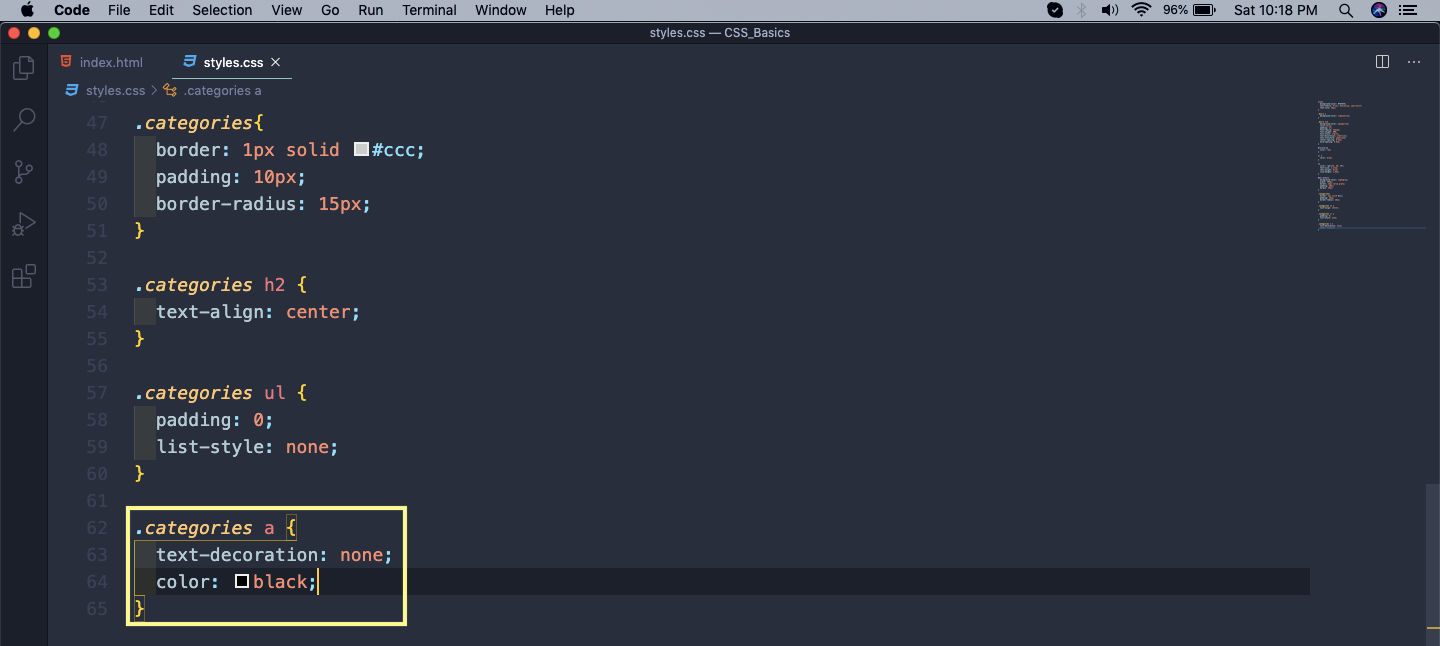 anchor
Now, our links are looking perfect.
 anchor links
Next, we will use another useful property called hover. When added to any html element, it changes the hover property of it.
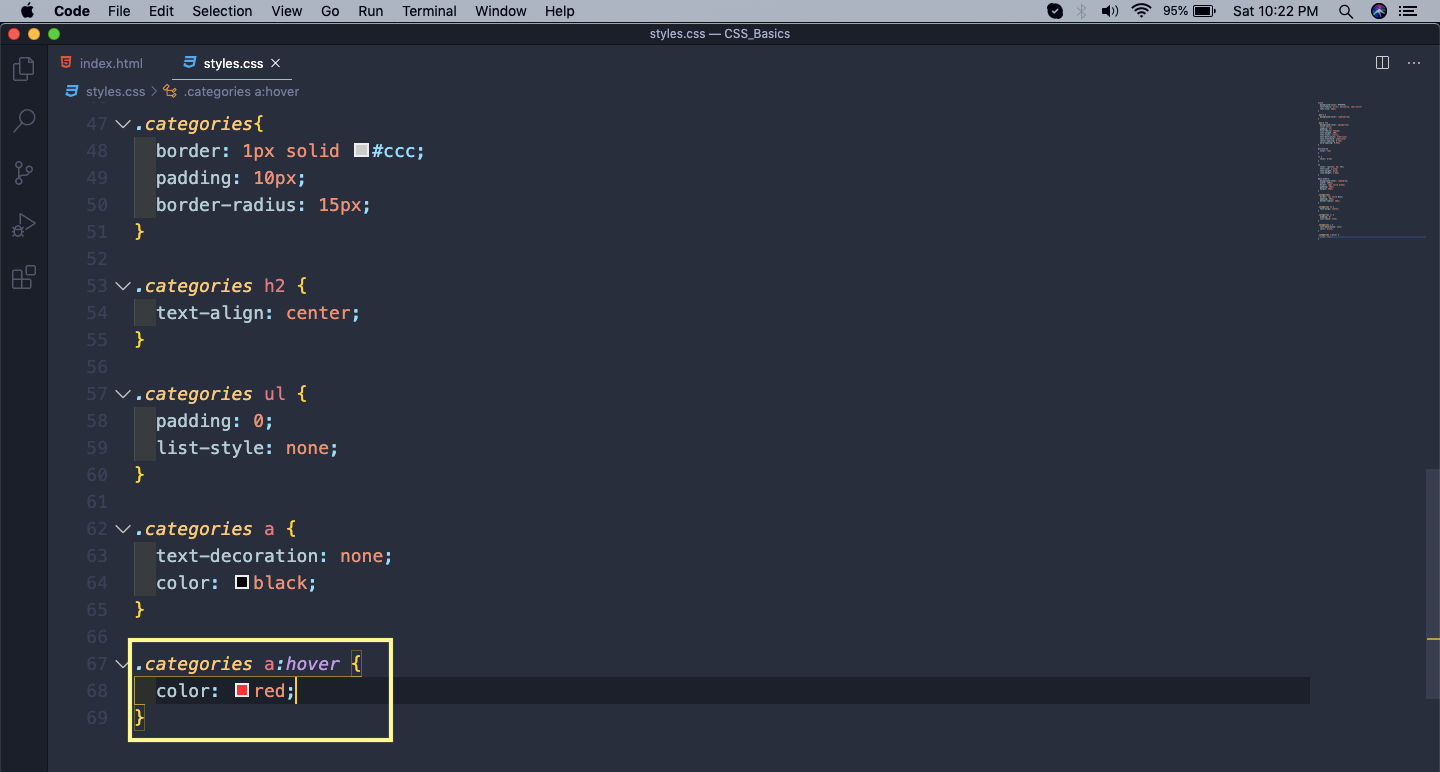 hover
hover
Now, when we move our mouse over any link it will turn to red color.
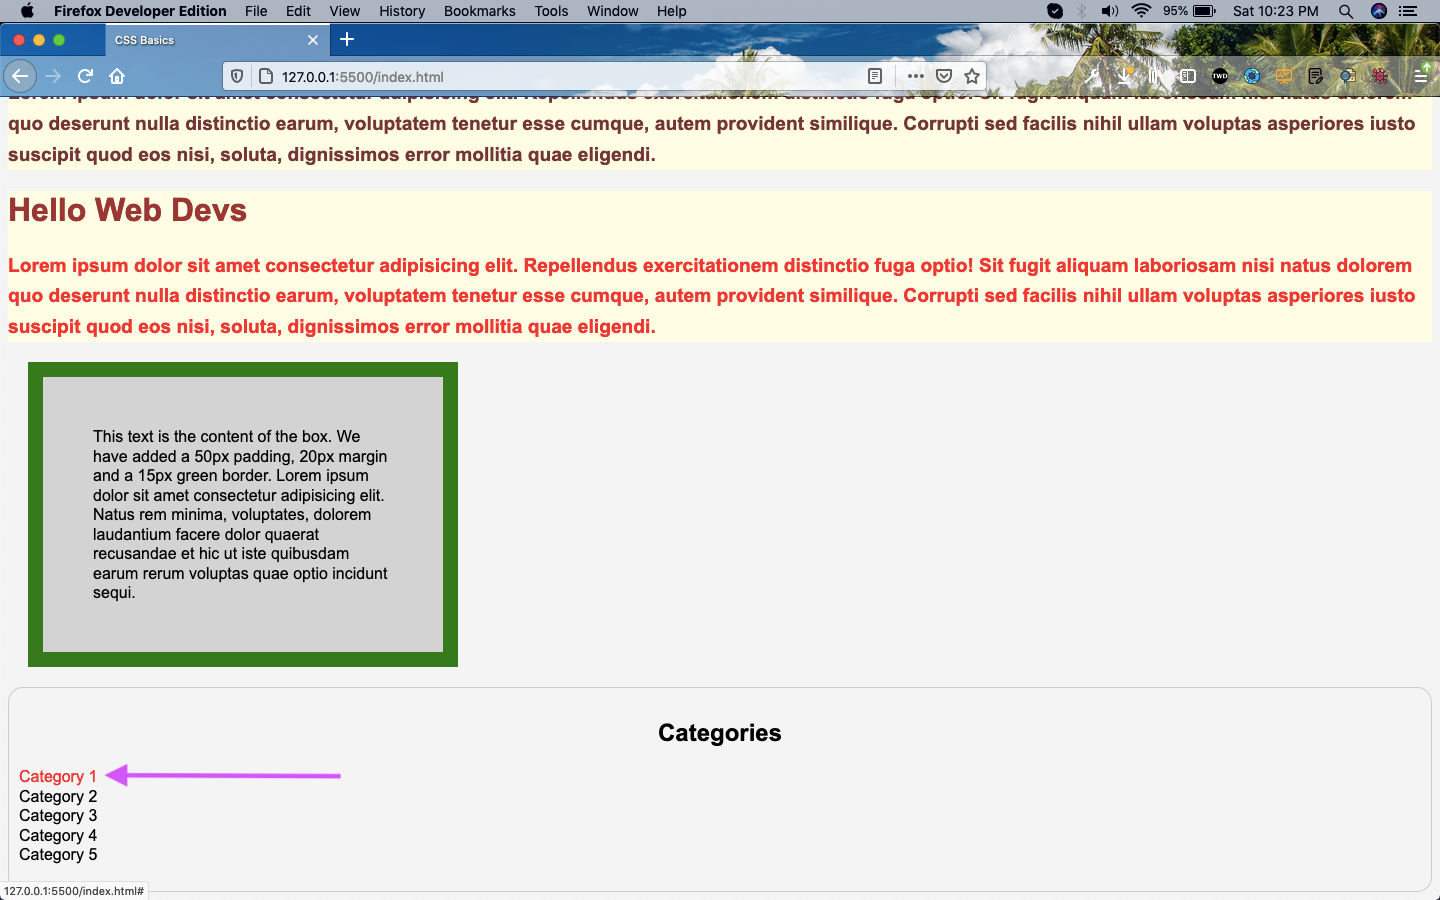 Red color link
Next, we will style our li a bit. We are giving it a padding at the bottom and also a border at bottom only.
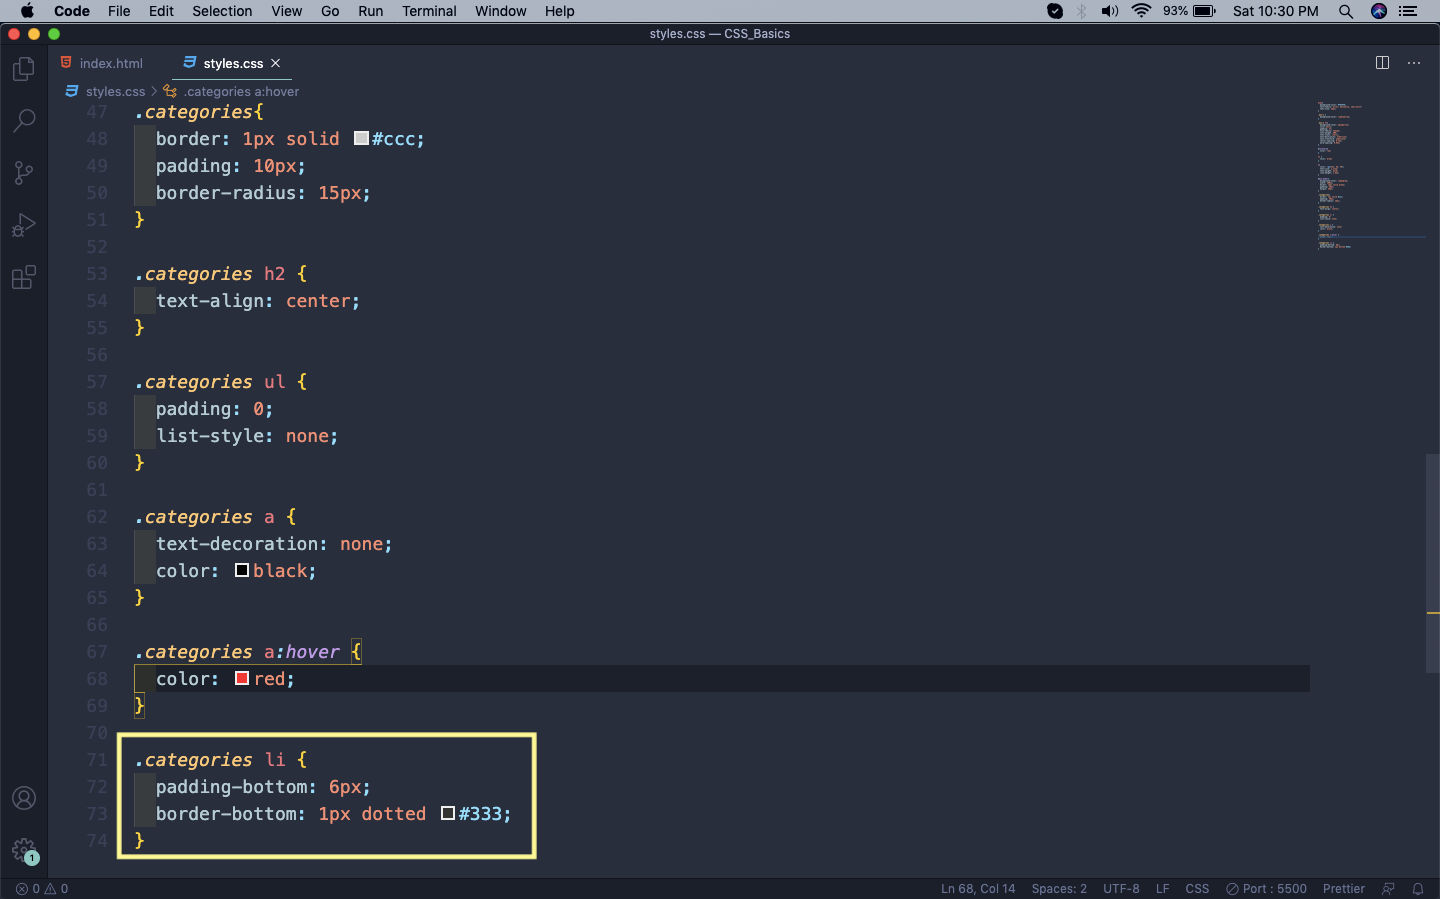 styled li
It will show our list in the perfect way.
 Perfect list
This completes part-4 of the series.