CSS Crash Course for Beginners -5
by Nabendu Biswas / July 20th, 2020
#css #beginners #webdev
Series: CSS-Basics
Welcome to part-5 of the series. We will start to style forms in this part.
Styling Forms
We will first create a simple form and after that style it. So, head over to index.html and create a simple form like below. Notice that i had also put some break rows(<br>) and horizontal rule(<hr>), on top and bottom of the form. They are done to provide the needed space, so that we can view correctly.
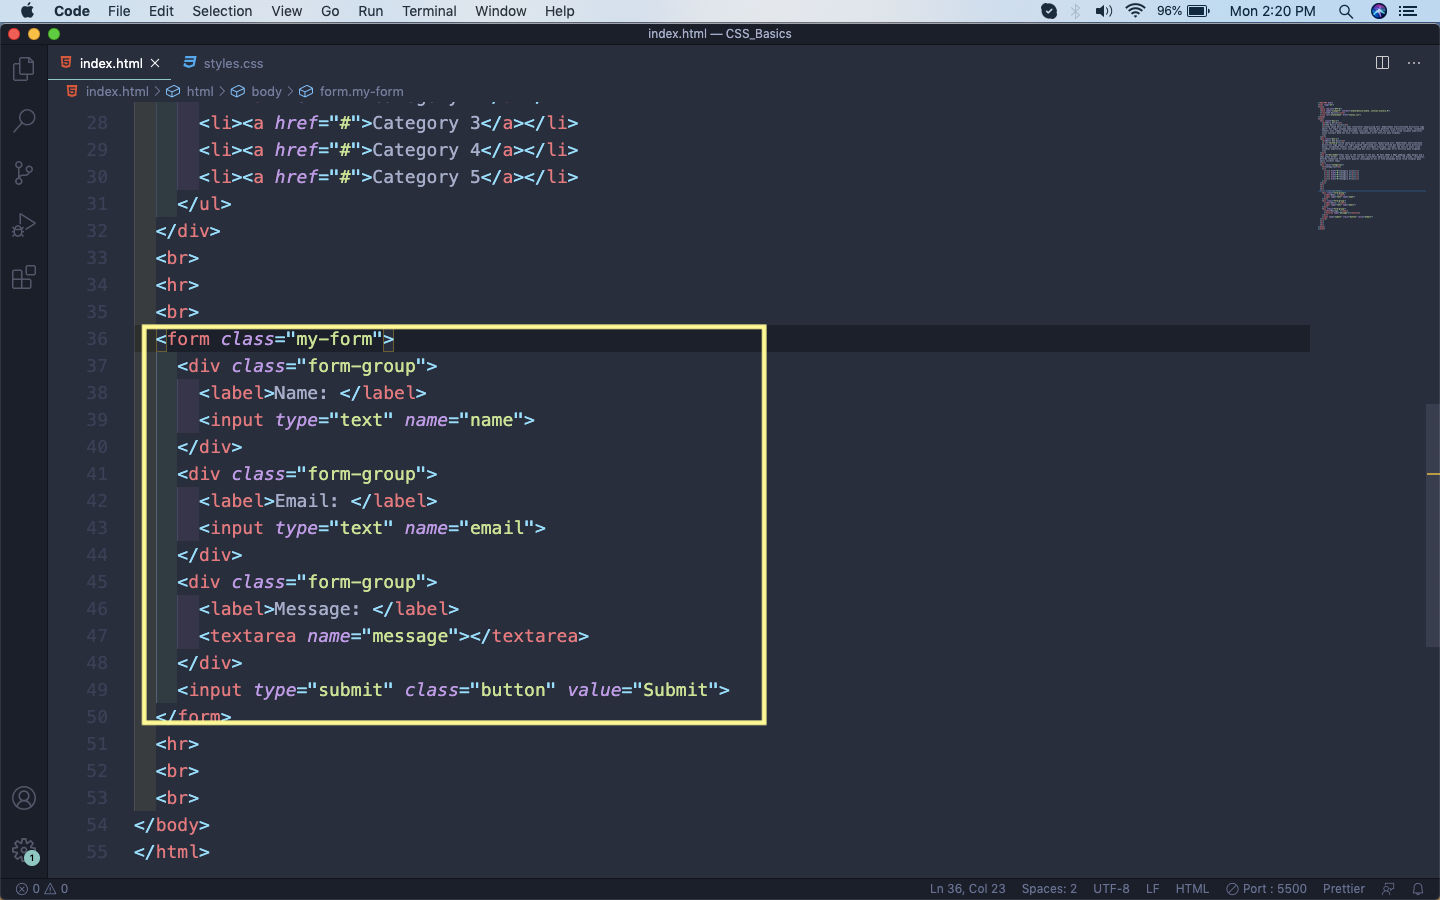 index.html
It will show this ugly form on the web-page.
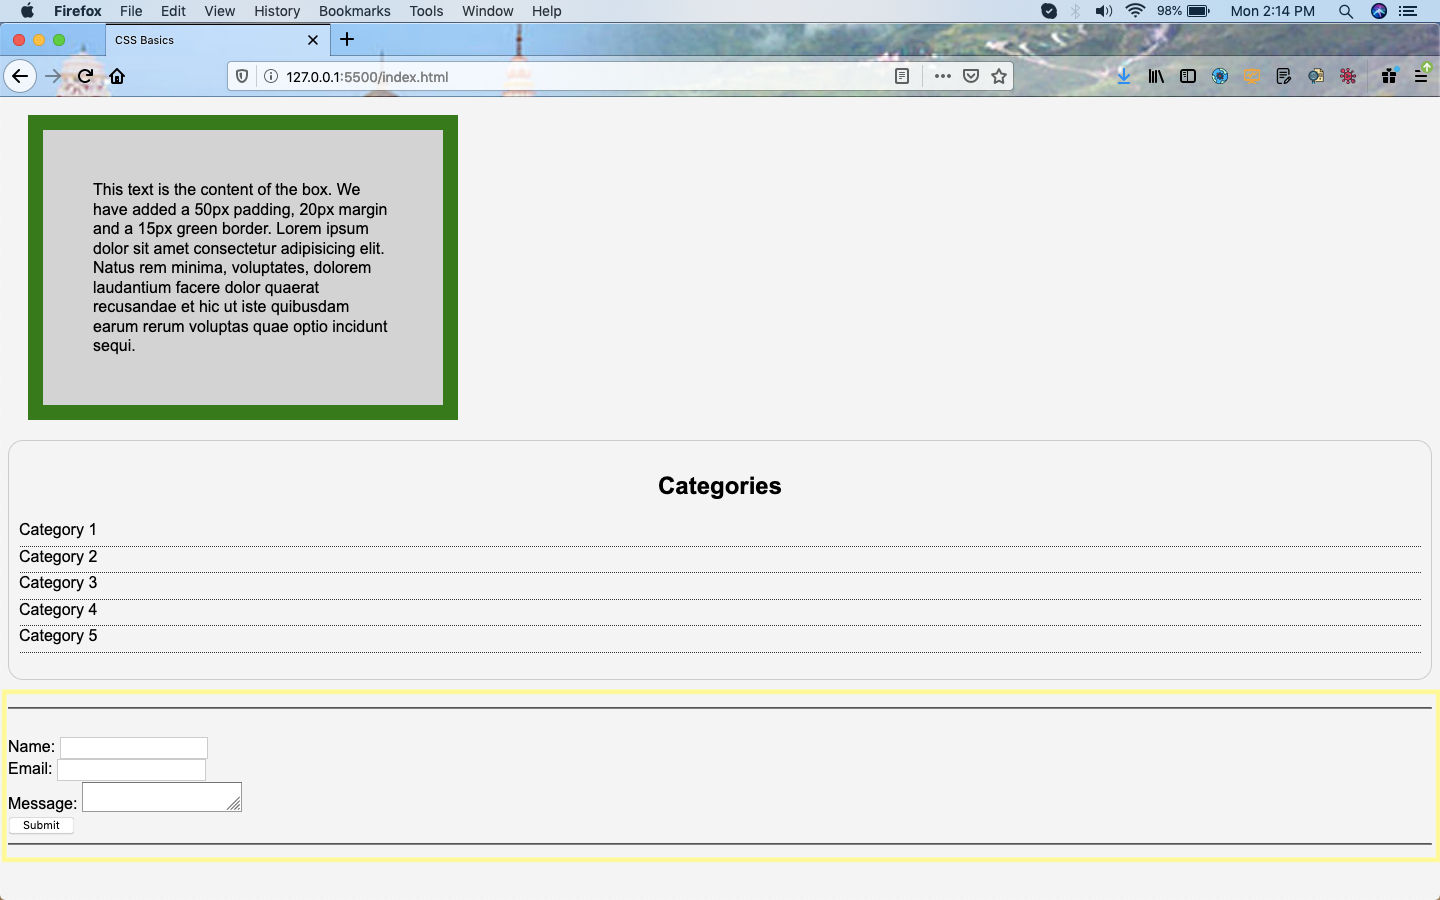 Ugly form
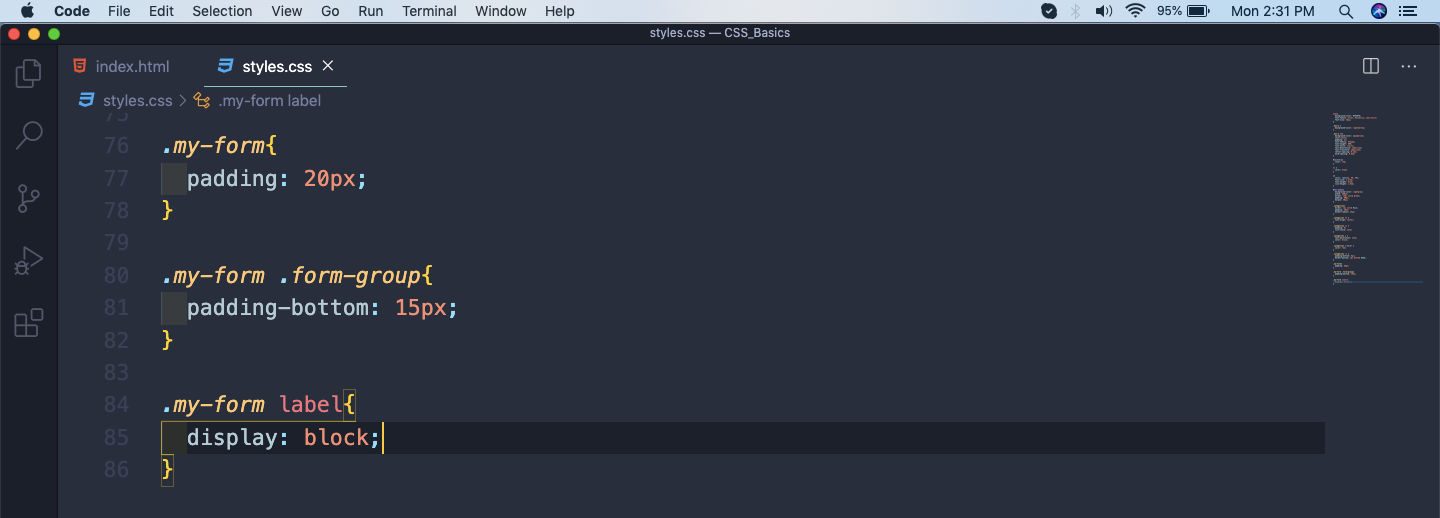
Now, let’s add some styles to the form. Here, we are targeting the form class my-form and adding padding all around. After that for form-group adding bottom padding.
 styles.css
It will show our form like below now.
 Some Styles
The next thing we will do is target the labels. By default the label are inline elements, so they will appear on the same line as input. We can make them block level element by using the property display: block.
 display block
Now, the labels will be shown on each line.
 label
label
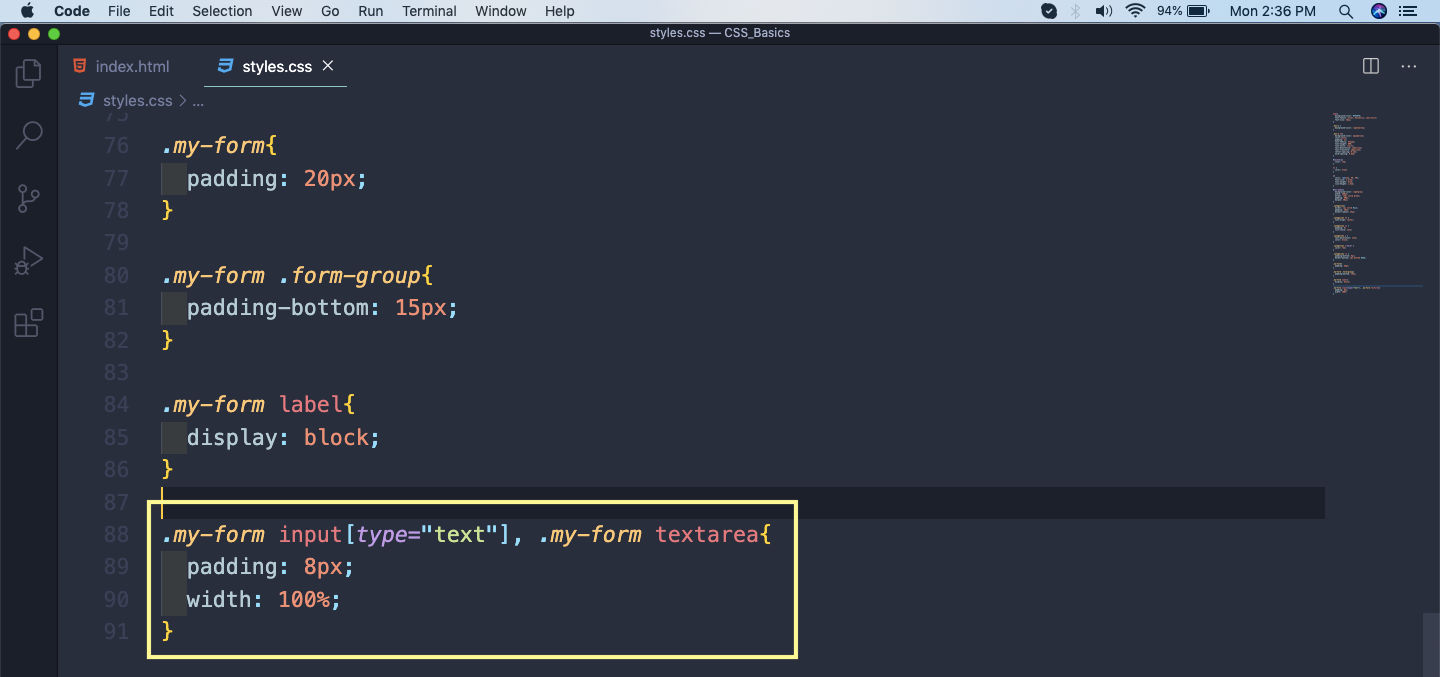
Next, we will target the inputs but only the text. We can do this by input[type=”text”]. If we don’t do this it will target all input using the button, which is input type=”submit” in our case.
We can also target other elements by using the comma(,). We are using it to select the textarea.
In this we are just giving some padding and making the width 100%.
 More Styles
Now, our form is almost styled.
 Almost perfect
Next, we will style our button. Here, we are first giving giving it a top-down margin of 0.2em. After that padding of 15px on left and right. Making the border to be none, giving a line-height.
Then a bit of border-radius to make the edges of the box, smooth. Finally giving the font-size, color and background.
We are also adding a hover state to the button.
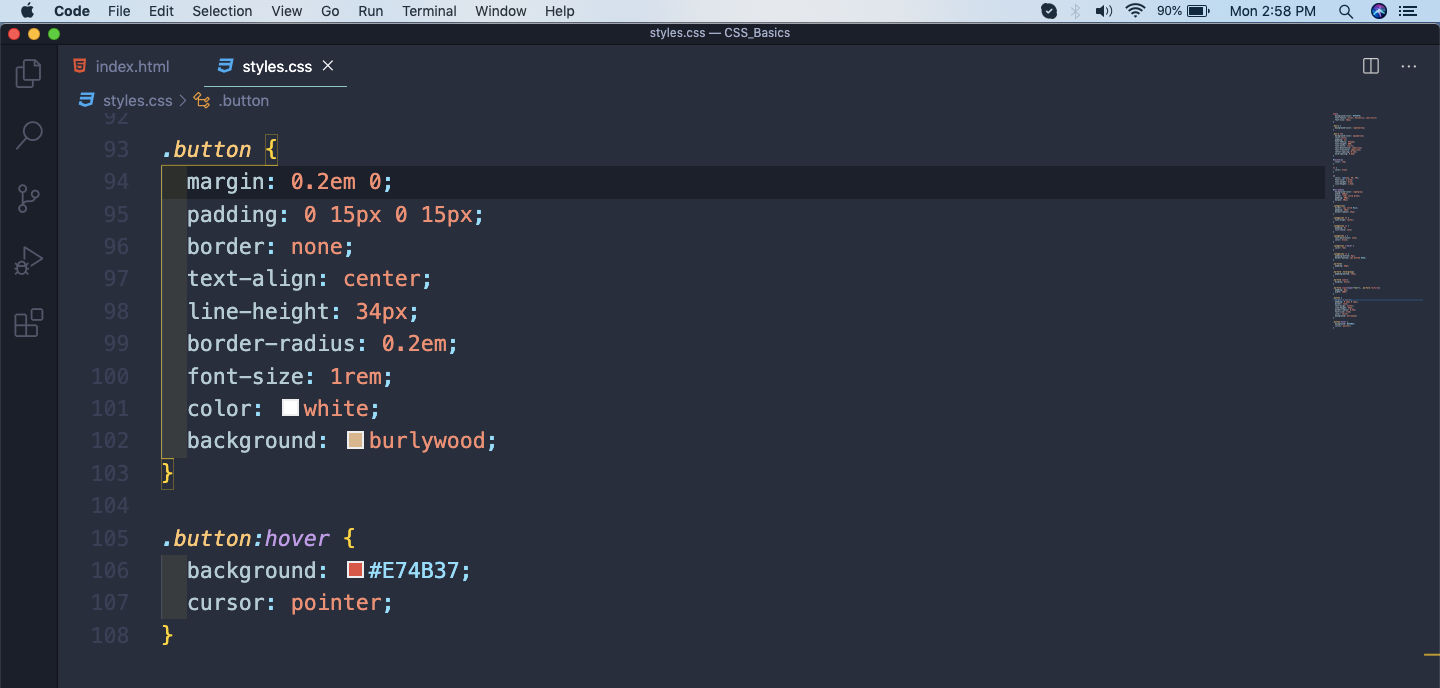 Button styling
These styles gives our button a great look, with a hover state.
 Awesome button.
This completes part-5 of the series. See you soon.