CSS3 in 10 days — Day 8
by Nabendu Biswas / September 28th, 2019
#css #beginners #webdev
Series: CSS-10days
Welcome to Day 8 of learning CSS. As i have told earlier, this series is inspired by this awesome youtube series in freecodecamp channel.
We will start with Accordionon day-8. Open your code editor and create a new 8.1-Accordion folder and two files index.html and sandbox.css inside it.
Next, in index.html put the basic html.
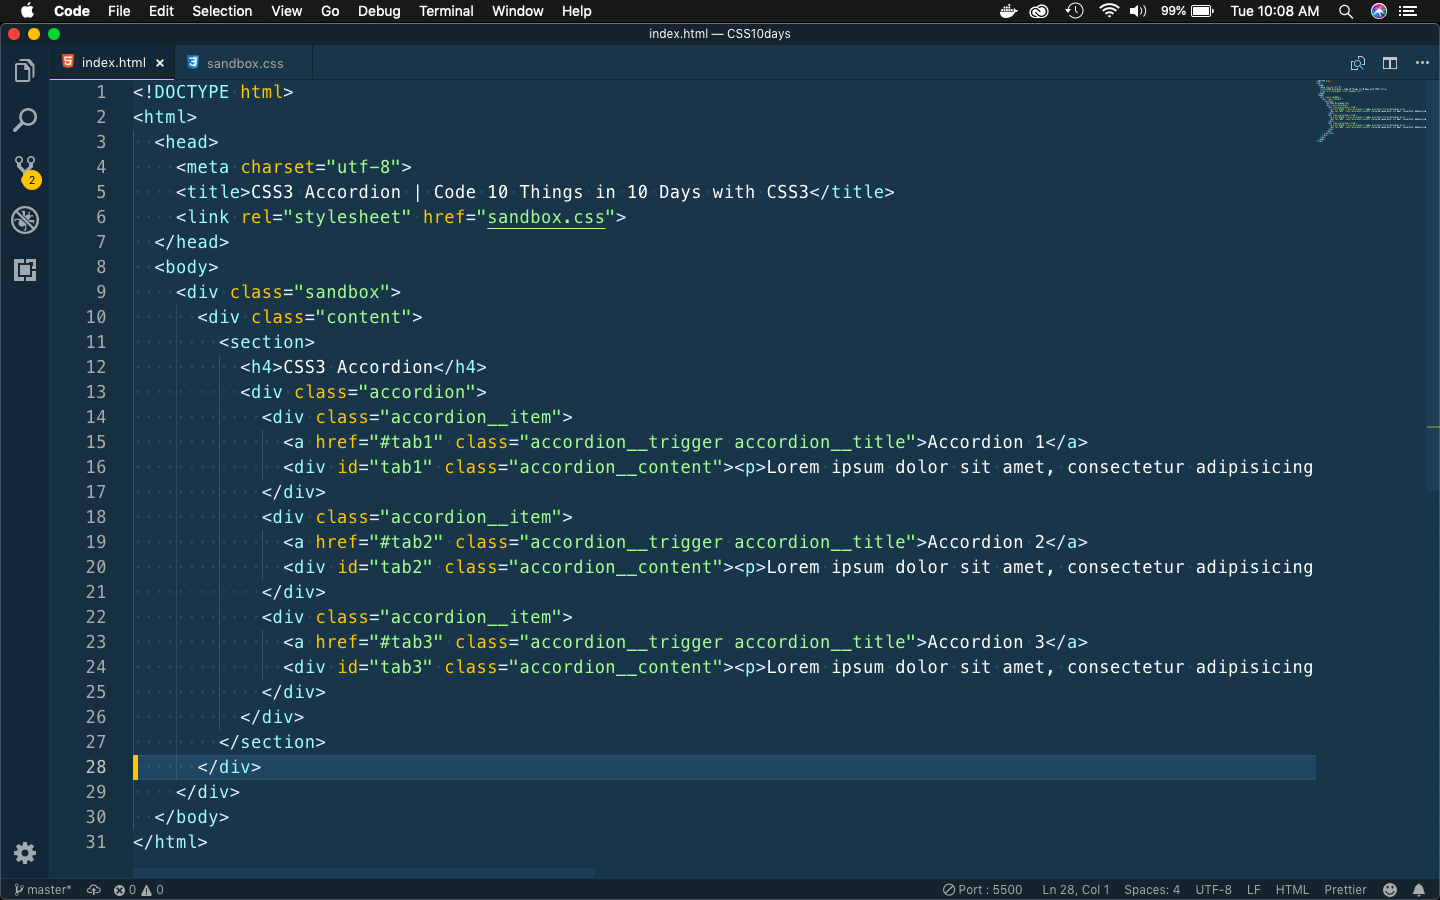 Basics
Let first put some basic css in sandbox.css to show the layout.
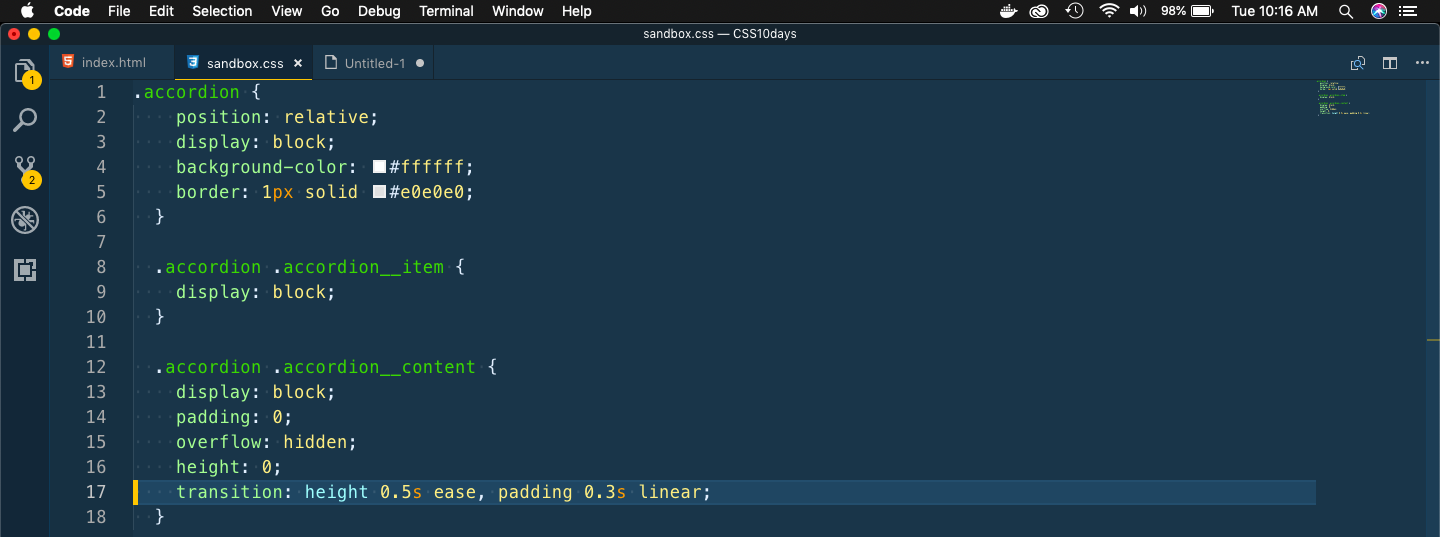 Basic style
It will show the below.
 Basic layout
We will now complete the Accordion functionality, but putting the below styles.
 More Styles
It will complete the accordion functionality.

We will now style the accordion. Put the below in sandbox.css
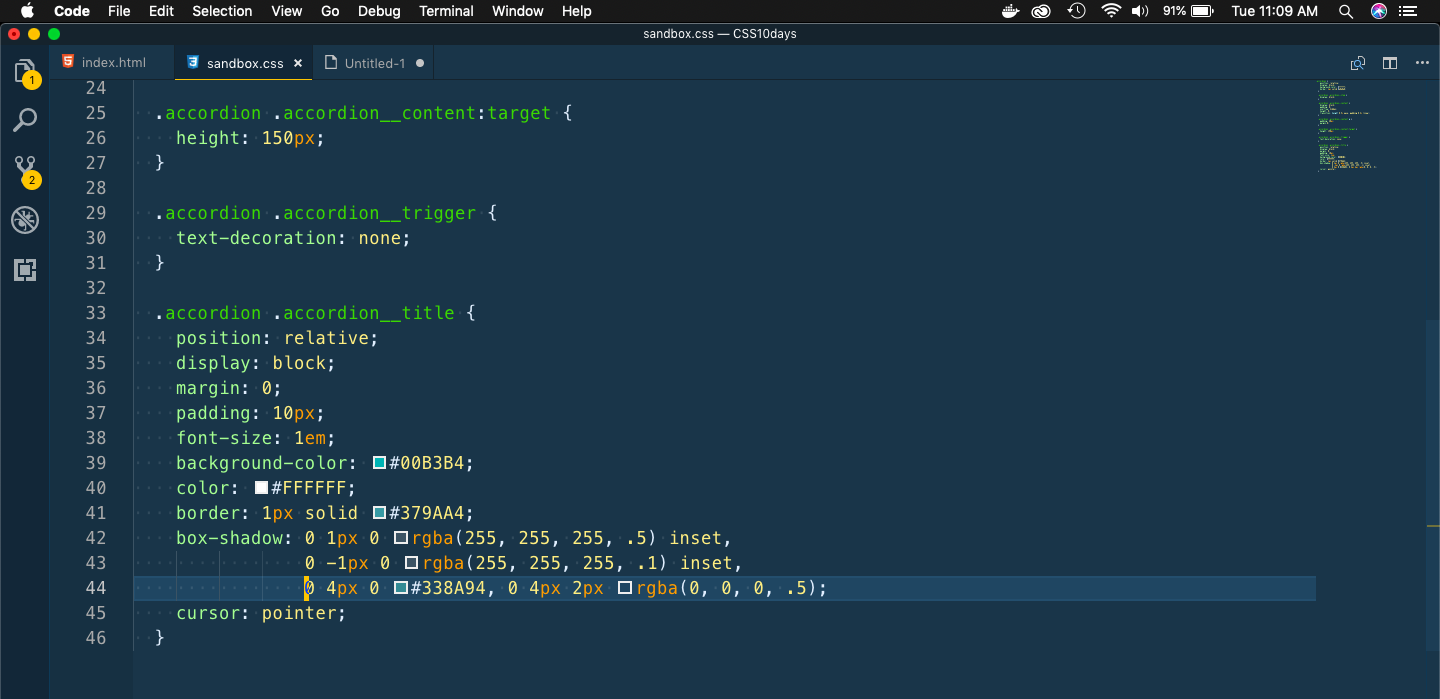 sandbox
It will style the Accordion nicely.
 Accordion Styled
Let’s add a hover style and a small down arrow in the Accordion.
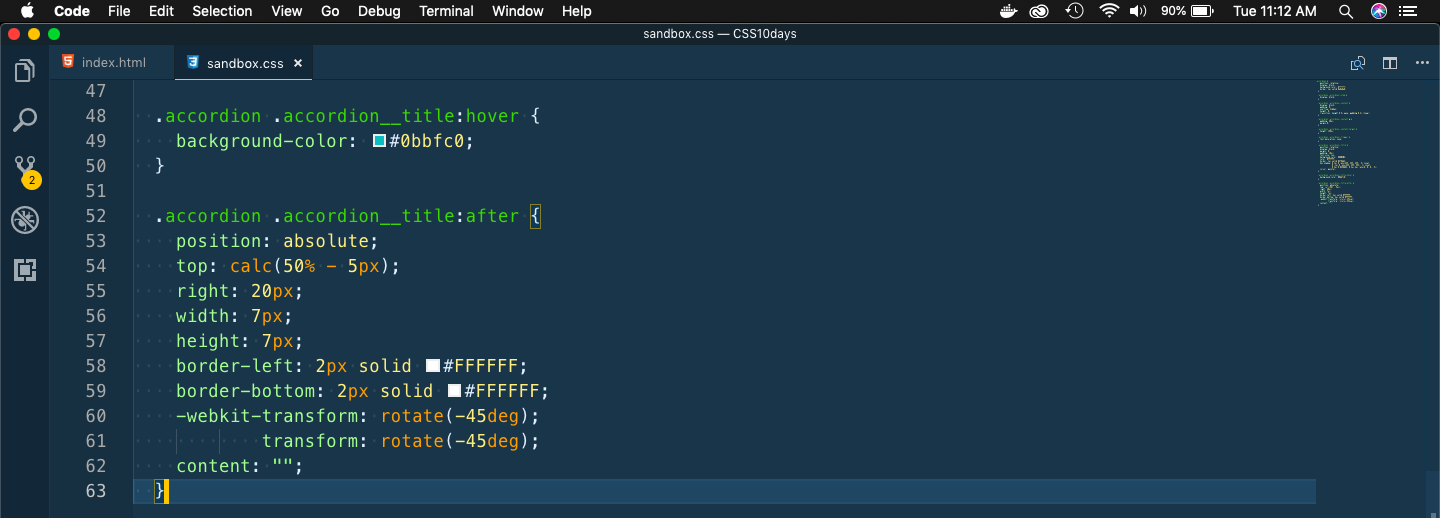 hover and arrow
And that’s complete our Accordion.
 Accordion
Next, we will start with Sliding Panels on Images on day-8. Open your code editor and create a new 8.2-SlidingPanels folder and two files index.html and sandbox.css inside it.
Next, in index.html put the basic html.
    <!DOCTYPE html>
    <html>
        <head>
            <meta charset="utf-8">
            <title>Sliding Panels | Code 10 Things in 10 Days with CSS3</title>
            <link rel="stylesheet" href="sandbox.css">
        </head>
        <body>
            <div class="sandbox">
            <div class="content">
                <section>
                <h4>Slide from Top</h4>
                <div class="slide slide-top">
                    <div class="slide-content">Lorem ipsum dolor sit amet, consectetur adipisicing elit.</div>
                    <img src="https://placeimg.com/300/200/animals">
                </div>
                </section>
                <section>
                <h4>Slide from Right</h4>
                <div class="slide slide-right">
                    <div class="slide-content">Lorem ipsum dolor sit amet, consectetur adipisicing elit.</div>
                    <img src="https://placeimg.com/300/200/tech">
                </div>
                </section>
                <section>
                <h4>Slide from Bottom</h4>
                <div class="slide slide-bottom">
                    <div class="slide-content">Lorem ipsum dolor sit amet, consectetur adipisicing elit.</div>
                    <img src="https://placeimg.com/300/200/architecture">
                </div>
                </section>
                <section>
                <h4>Slide from Left</h4>
                <div class="slide slide-left">
                    <div class="slide-content">Lorem ipsum dolor sit amet, consectetur adipisicing elit.</div>
                    <img src="https://placeimg.com/300/200/people">
                </div>
                </section>
            </div>
            </div>
        </body>
    </html>
It will show this basic page with images
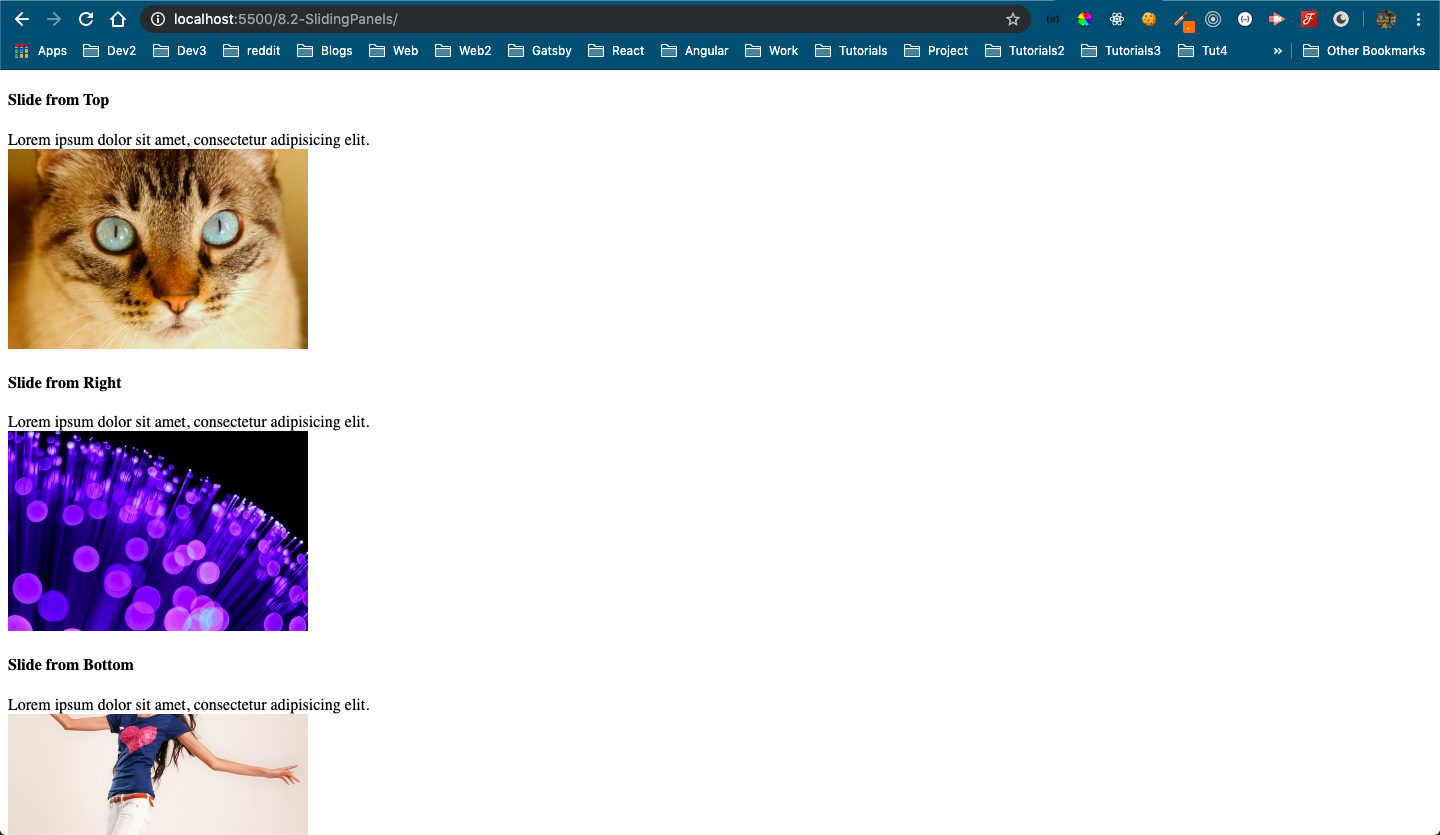 Only images
Next, we will put some styles in sandbox.css
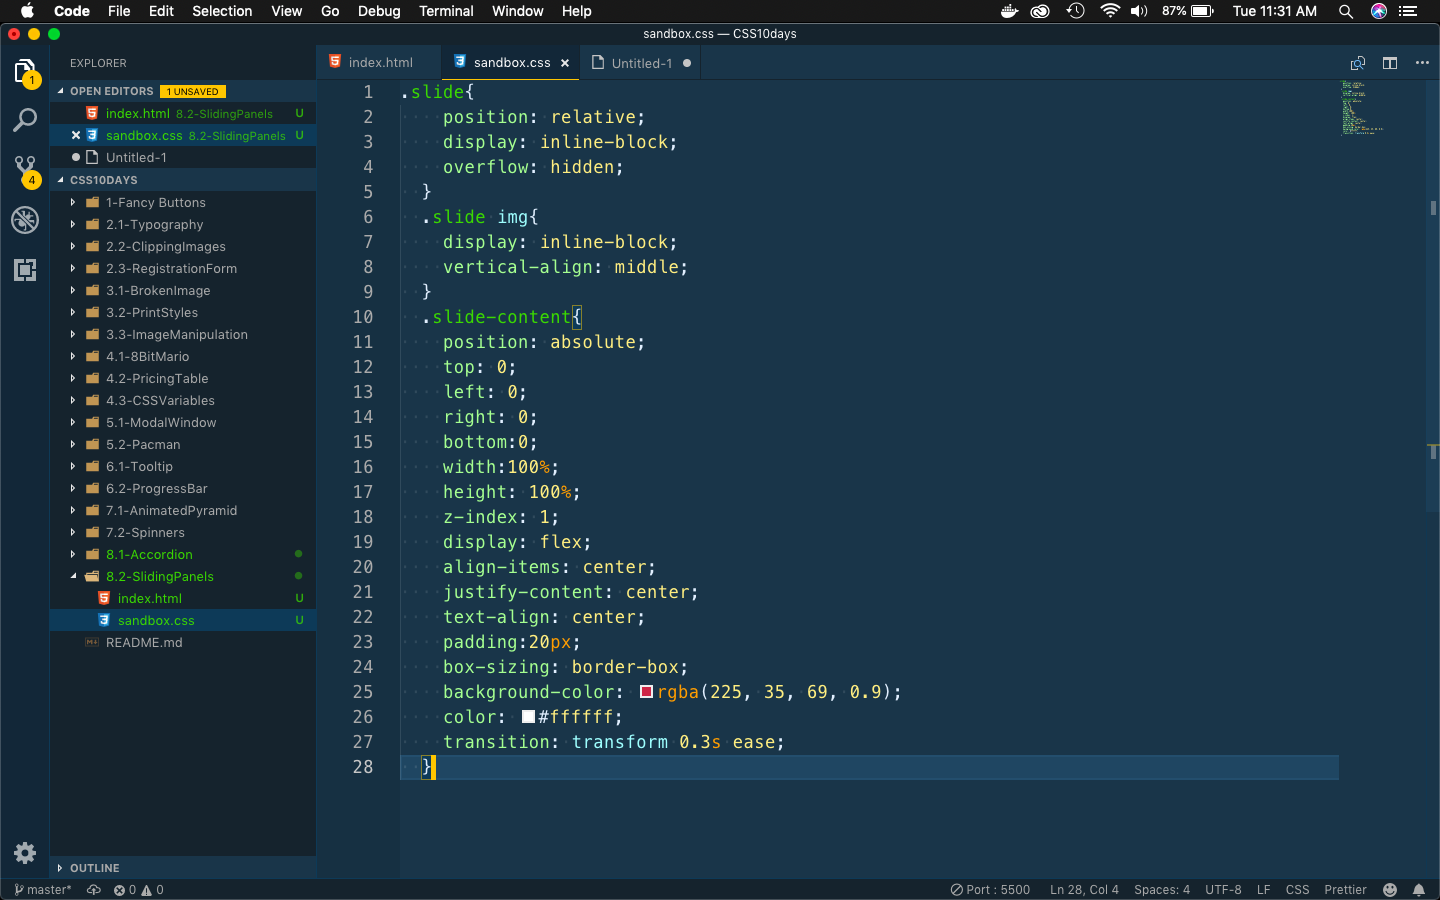 Some styles
It will cover all of the images.
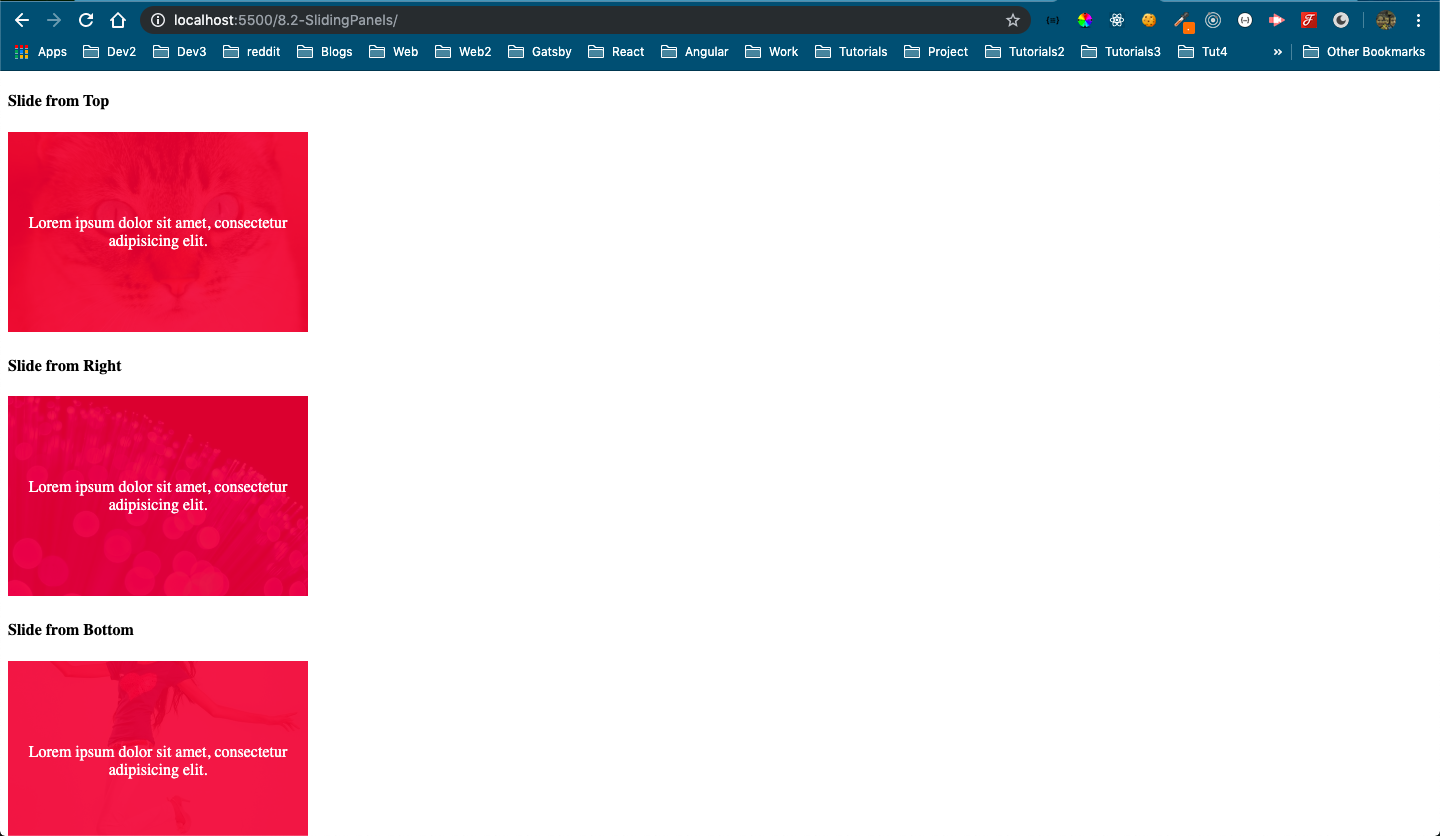 All images covered
Now, let’s hide it and show only when the user hovers over the images.
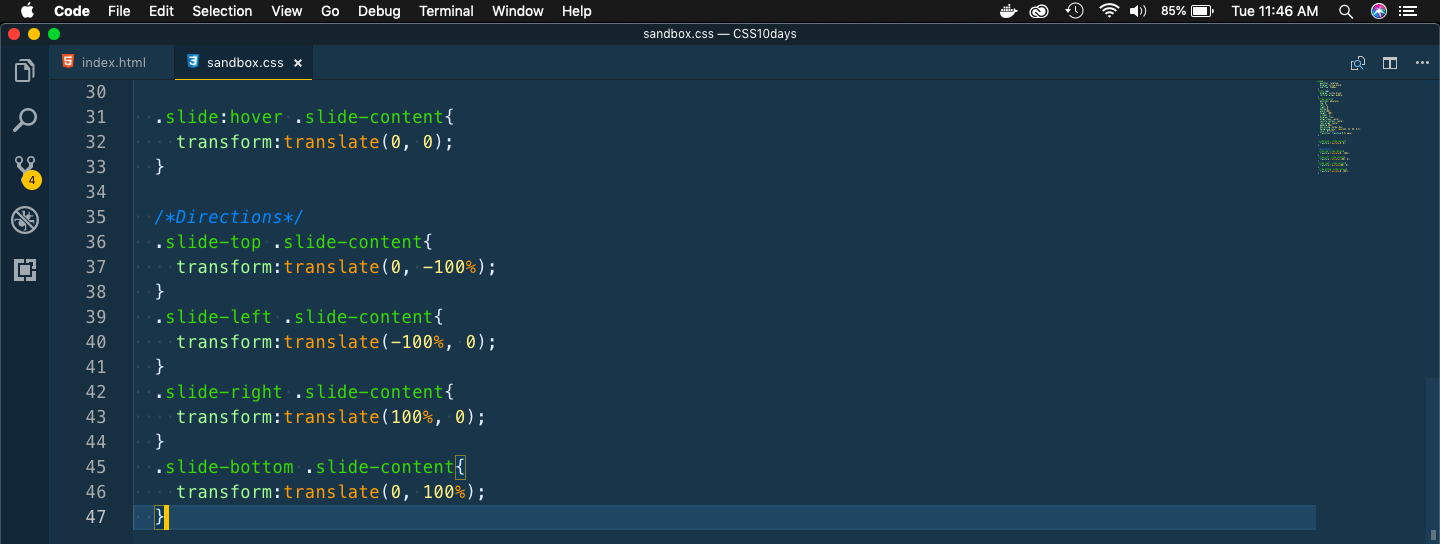 hovering
The first two will slide as below.
 First two
The next two will slide as below.
 Last two
This completes day 8 of the course. You can find the code for the same here.