Drum Kit using HTML, CSS, and Javascript
by Divya M C M / September 10th, 2021
#css #javascript #webdev
How about building drum kit on your own virtually with the help of some scripting language?Sounds cool right! Let’s start building a simple drum kit using HTML, CSS, and Javascript that runs in a browser which will play the sound when the user press on particular key on the keyboard.
Folder Structure of the project
- index.html — contains the HTML layout which defines the element structure that would be shown on the page.
- images folder — contains .jpg images used in our project.
- sounds folder — contains . wav files used in our project.
- style.css — contains CSS code for styling. Using CSS we can style the different portions to make it more visually appealing.
HTML Layout
Open VSCode and create the basic HTML structure in an index.html file by ! and then pressing tab. Give the title as ‘Drum Kit’. Link style.css to the created HTML file.
<title>Drum Kit</title>
<link rel="stylesheet" href="style.css">
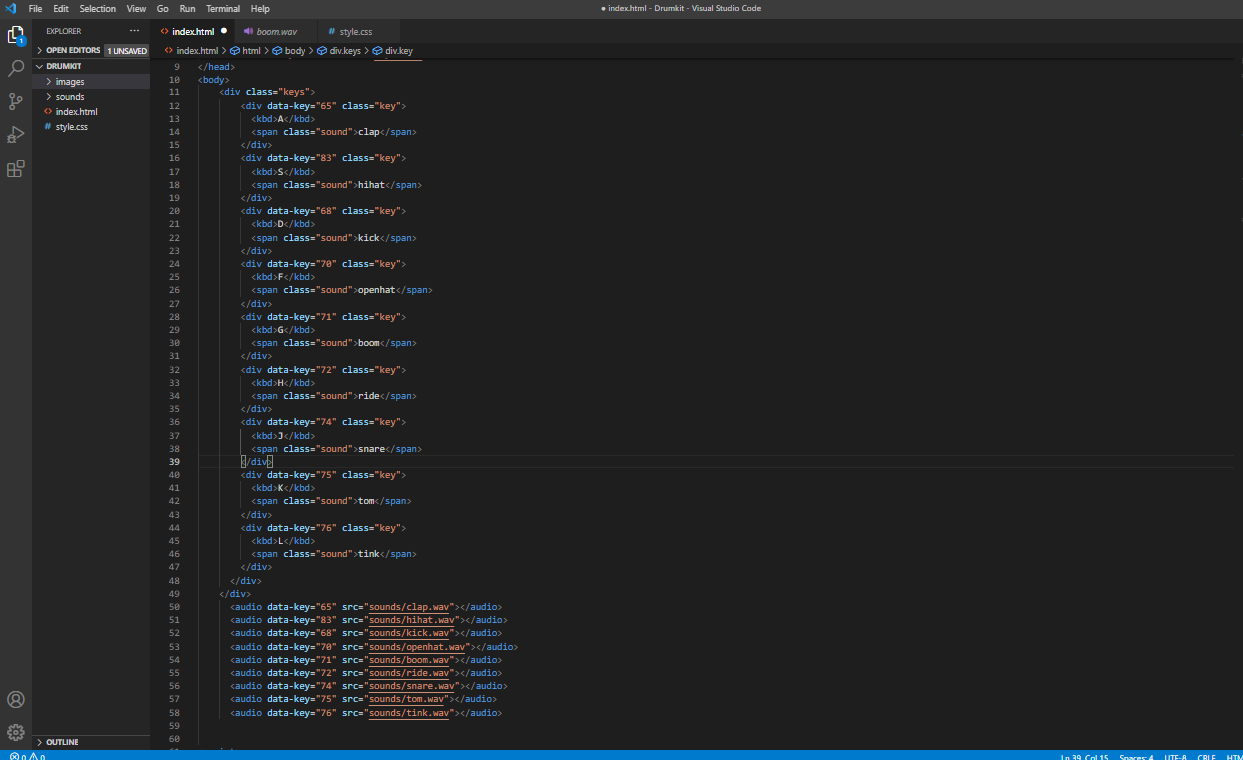
Inside the body, Create a div element with the class of keys which will wrap all the drum kit keys used in our application.Inside the div class we have another set of div’s with a class of key. Now each one of these keys here has a sound associated with it. For every key on the keyboard when we do key up or key down action, there is going to be something called the key code that is associated with that key. For ex: key code of ‘A’ is 65.
In our project, we are using ‘A’, ‘S’, ‘D’, ‘F’, ‘G’ ‘H’, ‘J’, ‘K’, ‘L’ keys to play the sounds of the drum kit. When we press any of the above keys on the keyboard then we’re going to play the corresponding audio element.For example when we press key ‘A’ (_Keycode ‘65’)_ on keyboard we’re going to check if that was the ‘A’ Key then we’re going to play the corresponding audio that also has the same data-key and we’re going to find the key div element,add a class of playing so it will animate itself on in.
Now, what is this data-key?
The data-* attribute is used to store custom data private to the page or application.
The data-* attribute gives us the ability to embed custom data attributes on all HTML elements.
The stored (custom) data can then be used in the page’s JavaScript to create a more engaging user experience
The data-* attribute consist of two parts:
- The attribute name should not contain any uppercase letters, and must be at least one character long after the prefix “data-". In our case it is data-key.
- The attribute value can be any string. In our case value is a number which represents keycode.
Here is the HTML code,
<div class="keys">
<div data-key="65" class="key">
<kbd>A</kbd>
<span class="sound">clap</span>
</div>
</div>
<audio data-key="83" src="sounds/hihat.wav"></audio>
 index.html
CSS Styling
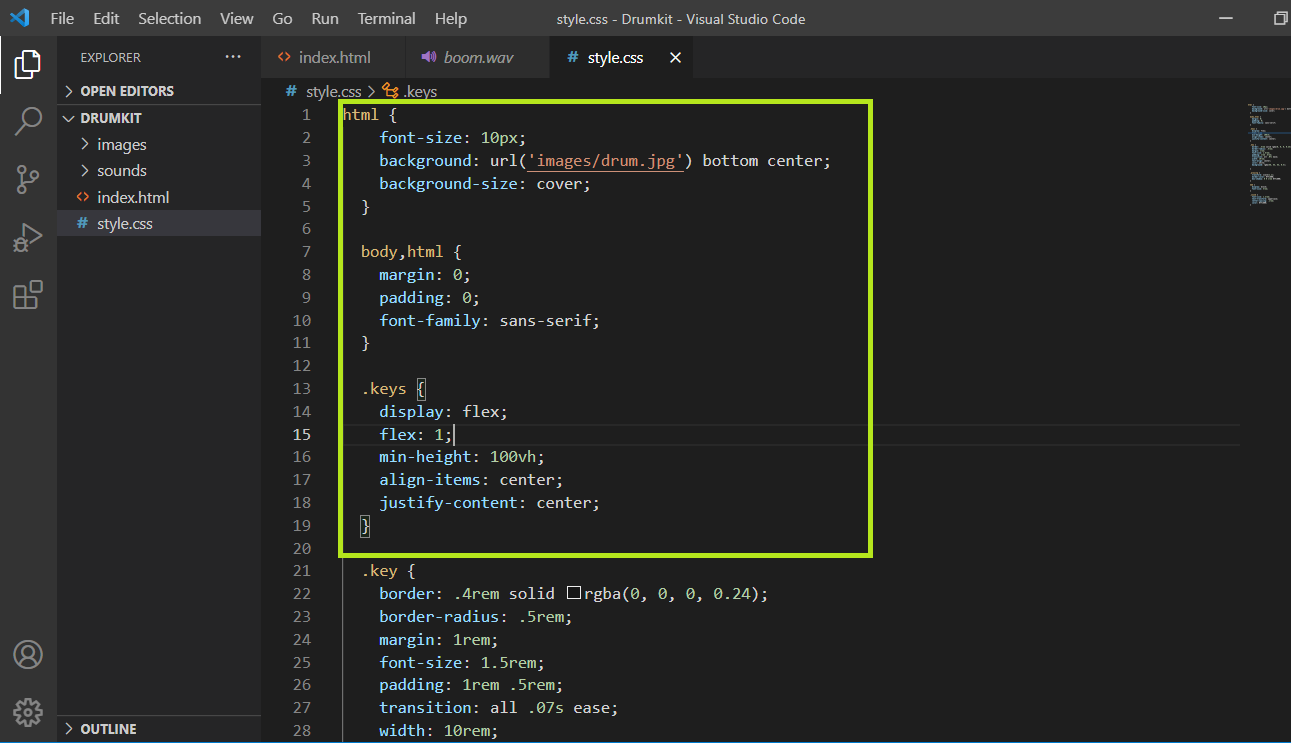
CSS is used to style the different portions and make it more visually appealing.Experiment on color, background, font-family, margin and font size you want to give to the body,heading and the keys.
 style.css
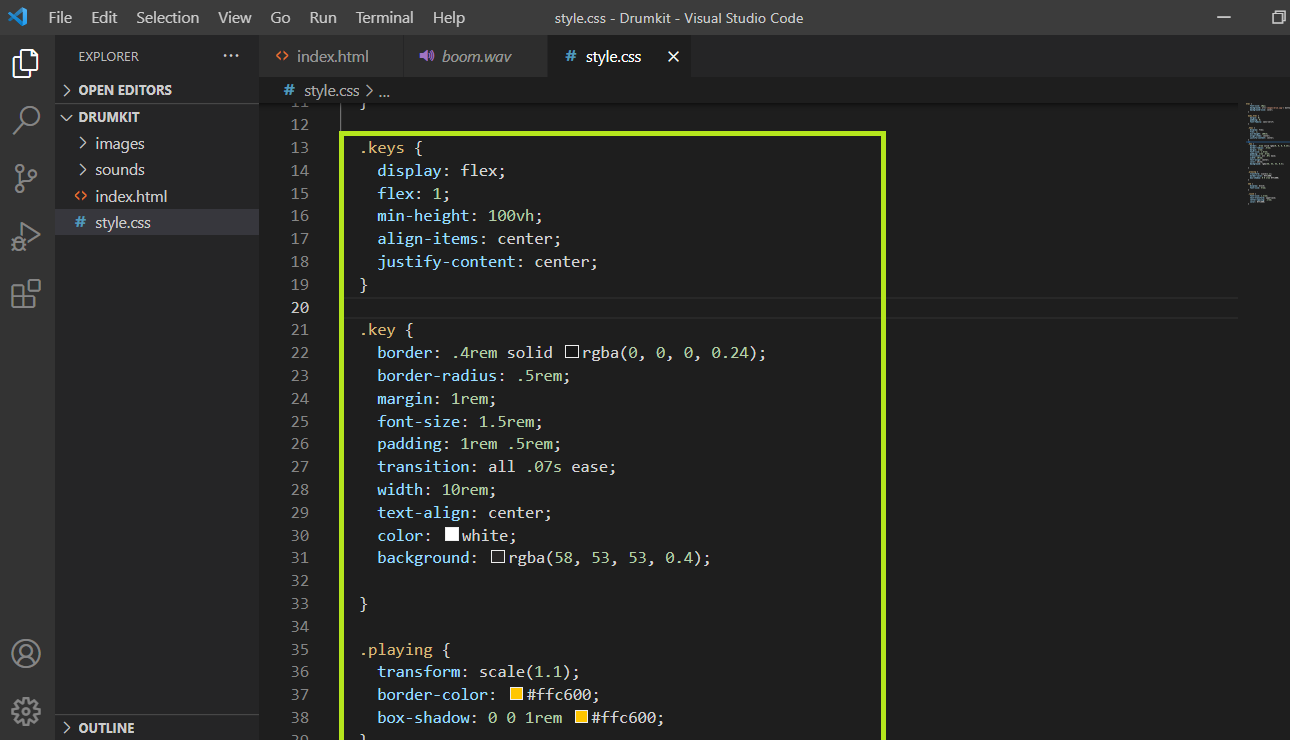
When we press any of these keys ‘A’, ‘S’, ‘D’, ‘F’, ‘G’ ‘H’, ‘J’, ‘K’, ‘L’ on keyboard then let’s do some animation on key div element . On key press from the keyboard the corresponding key div element on the UI should scale a bit and the border should be changed to yellow with shadow which means we have to change the existing property value.This transition should happen on key down(key press)and we will use CSS transitions which allows you to change property values smoothly, over a given duration.
we will define the property values that has to be changed in playing class which will get added to the key div element on key down action using Javascript function.
 style.css
Javascript logic
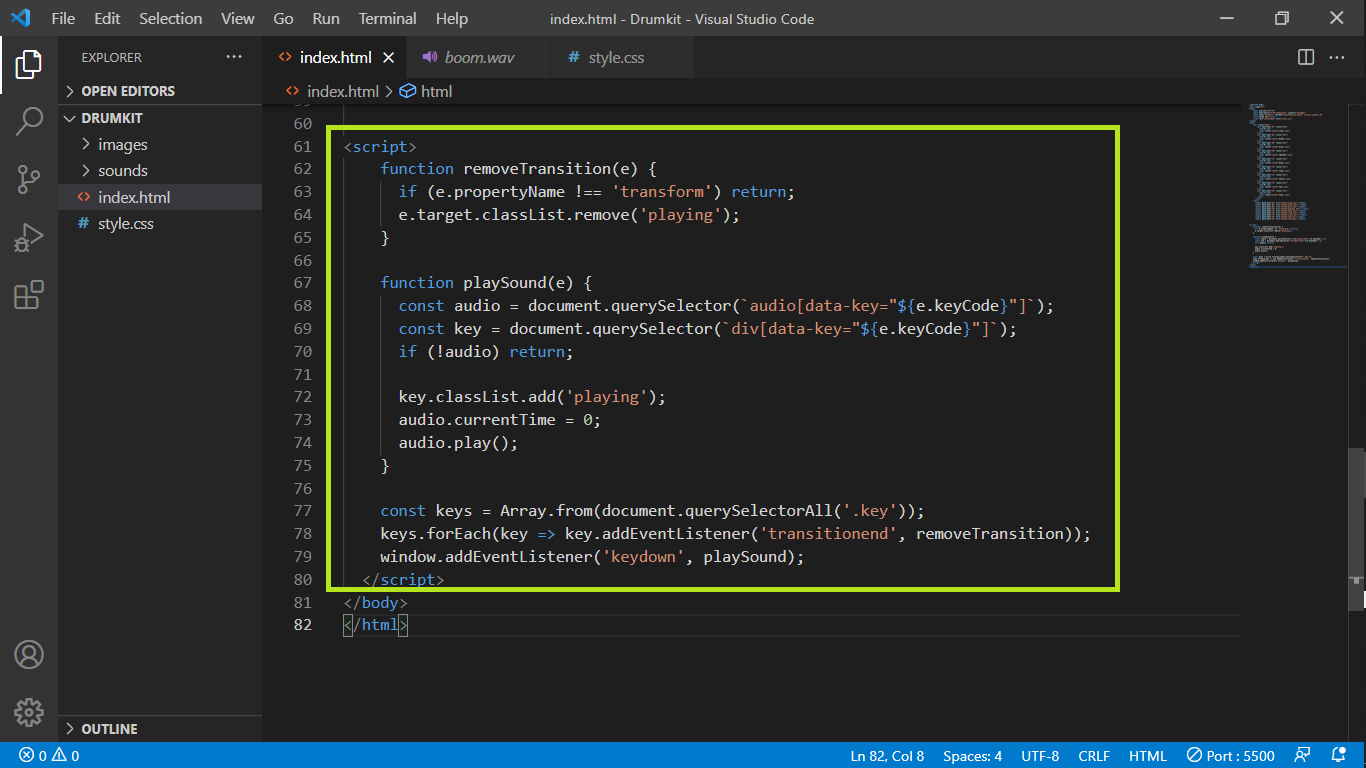
The logic of the player is defined inside the script tag.Our first goal is to listen to the key down event and call playSound function. We are passing the event object to the function where event object holds all kinds of info like what key was actually hit which also contains the keycode.Take an example, we press keycode 65 (‘A’) on the keyboard. Next, we are finding out is there an audio element on the page that has a data-key of 65 for that we are going to use document.querySelector() to select an audio element where it has a data — key same as e.keycode.
window.addEventListener(‘keydown’, playSound);
function playSound(e) {
const audio = document.querySelector(`audio[data-key="${e.keyCode}"]`);
In a similar way, find out is there an div element on the page that has a data-key of 65 for that we are going to use document.querySelector() to select an div element where it has a data — key same as e.keycode. The returned element is assigned to a constant variable called key.
const key = document.querySelector(`div[data-key="${e.keyCode}"]`);
If audio element is not present i.e If the pressed key on the keyboard don’t have an audio element associated with it then return in other words statement stops the execution of a function.
if (!audio) return;
We are going to add the playing class on the div element which is assigned to constant variable key . This playing class will add animation to the div element of the corresponding key pressed as mentioned in CSS section before.
key.classList.add(‘playing’);
Next we are going to the play the audio. Before playing the audio we will
rewind it to the start of the element so that if you hit key in succession over and over again it will just rewind it to the start. So let’s say,
audio.currentTime = 0;
audio.play();
we are done with playSound function. As we already discussed,we are adding the animation once the listed key is pressed but we also want to remove the animation in sometime. The requirement is to add the animation only during the key press. we can use a transitionend event that will fire when the element has stopped animating itself on in.
const keys = Array.from(document.querySelectorAll(‘.key’));
keys.forEach(key => key.addEventListener(‘transitionend’, removeTransition));
Now, what is the transitionend event?
As we already discussed,when the listed key is pressed the div element CSS will be transitioned to scale a bit and the border will be changed to yellow with shadow.The **transitionend** event is fired when a CSS transition has completed. Once the transitionend event occurs we will call removeTransition function by passing event object. The event object contains a propertyName called ‘transform’ which indicates the transform has finished. If the transition is completed then we will remove the animation by removing the class playing.
function removeTransition(e) {
if (e.propertyName !== ‘transform’) return;
e.target.classList.remove(‘playing’);
}
*
We are done!! Time to run the code and check the results. https://www.youtube.com/watch?v=fqnWbdOG2-U
Find the complete source code here