Flutter Essential Course for Beginners
by Nabendu Biswas / March 30th, 2021
#flutter #beginners #dart
Series: Flutter
Welcome to the flutter essential course. This course will teach you all the basics of flutter in a detail way and can be taken after my flutter crash course.
So, open up a terminal and create a new flutter app using the below command.
flutter create simple_app
After that cd into the folder and open the code in VSCode. I have also connected my physical device to my computer via USB.
On running the app from Run ->Start without debugging , i will get the basic app running on my phone.
The basic app will be shown on my phone as below.
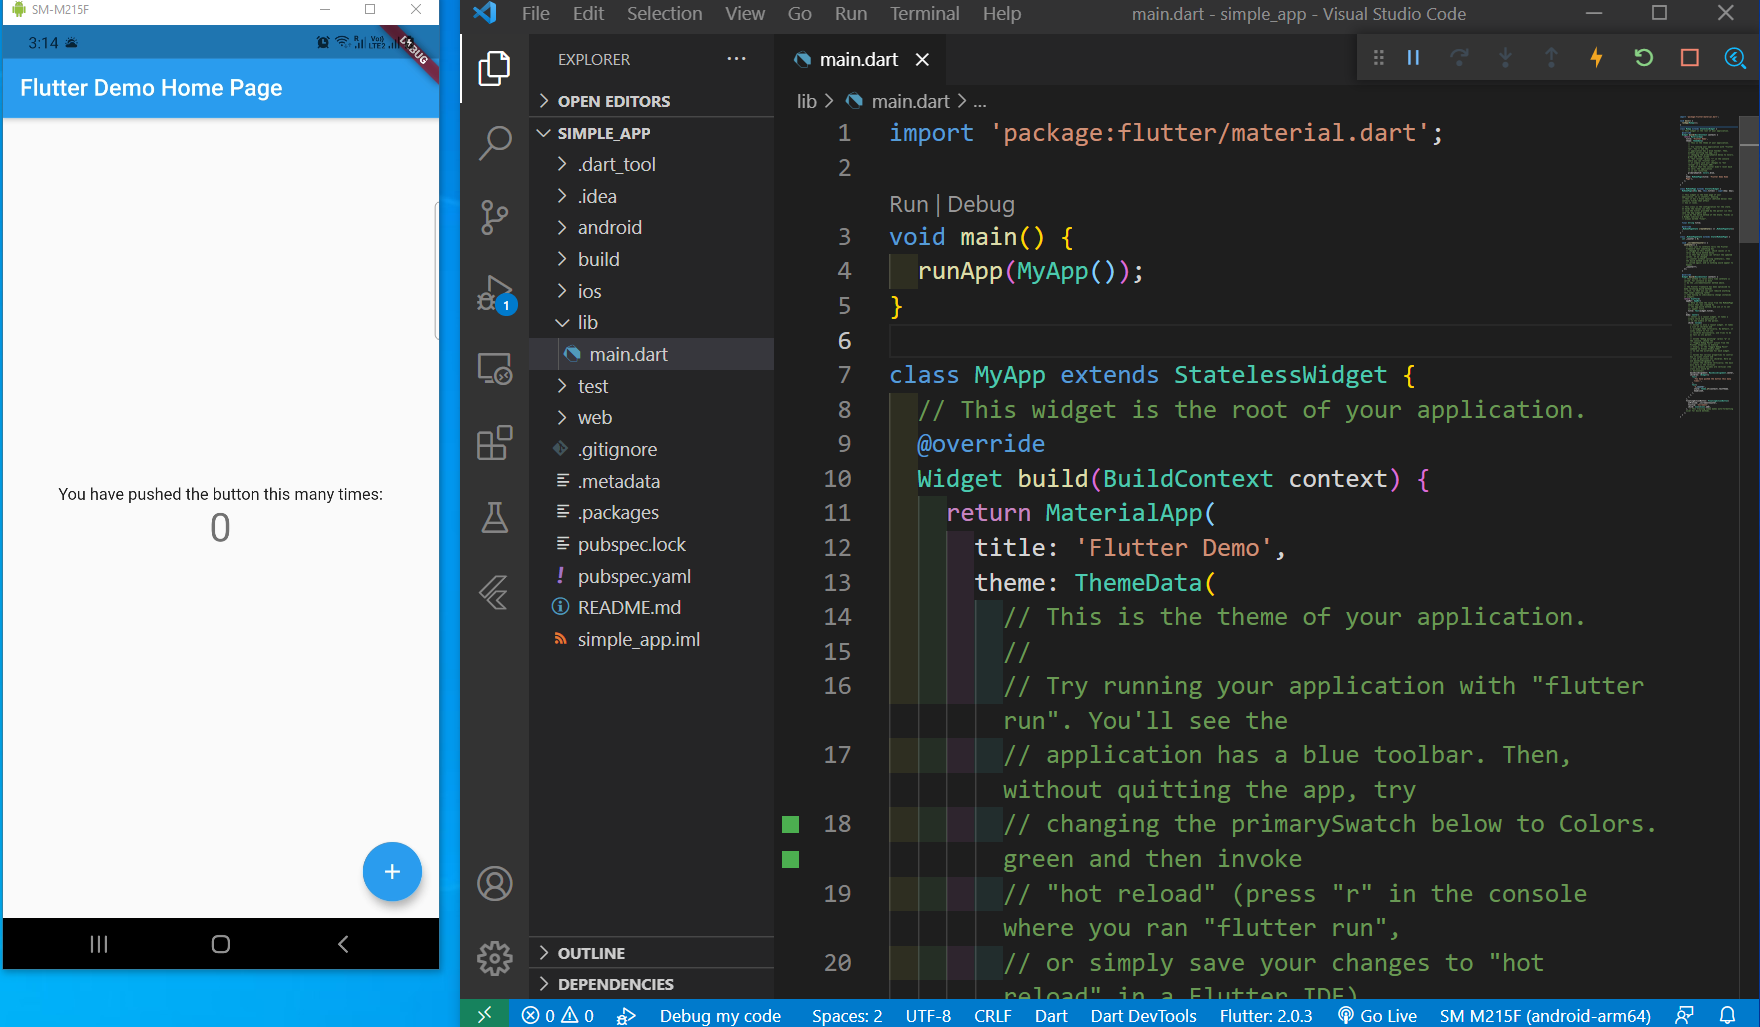 Basic app
The code for a flutter app starts from main.dart, which shows as the default app. We can have there type of app in flutter, which basically gives the feell and looks of an app. They are -
Material App
Cupertino App
Widget App
We generally use the material app for getting an android type of fell, although it can be used for iphone also. The Cupertino App gives the looks of an iphone app. We will rarely use a widget app, as it is very low-level.
We will use Material app for this tutorial. So, remove everything in main.dart and put the below content in it.
Here, we are first importing material and then in our starting function of main, putting the MaterialApp inside the runApp.
It contains a home, which specifies a Container which will show a color and a child with Text.
    import 'package:flutter/material.dart';

    void main() {
        runApp(MaterialApp(
            home: Container(
            color: Colors.grey,
            child: Text("Hello Flutter")
            )
        ));
    }
Now, VSCode setup with flutter also comes with hot reload, but if we add MaterialApp directly in the runApp, then we have to manually reload by pressing the green reload button. It will show this ugly app in our phone.
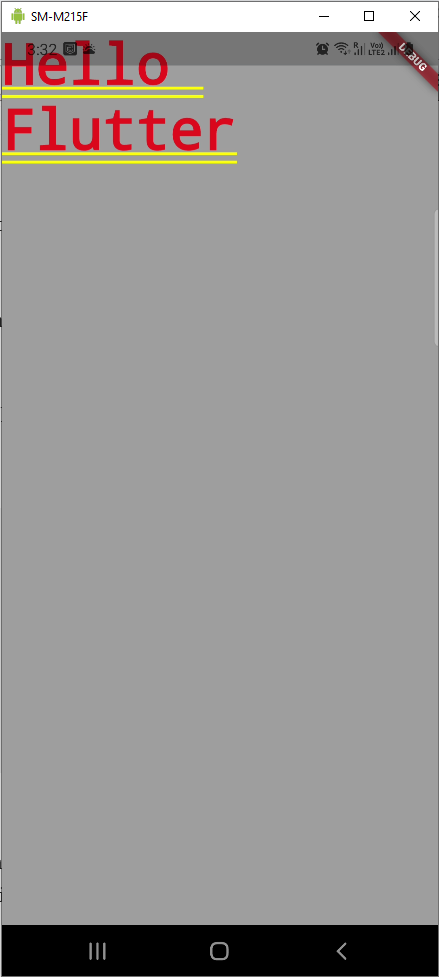 Ugly App
Now, we will create a new class in our project. There are two type of classes in flutter — Stateless and Stateful.
We will create a stateless class first by typing the shortcut stless and pressing tab in VSCode. Do this after our main(). We will name the new class HomePage and put all the code of Container from our main() here.
After that will call HomePage() from main. The changes are in below screenshot and it will not change our app. One of the major benefit of getting out of the runApp is that now hot reload will work and our changes will be shown instantly, after saving.
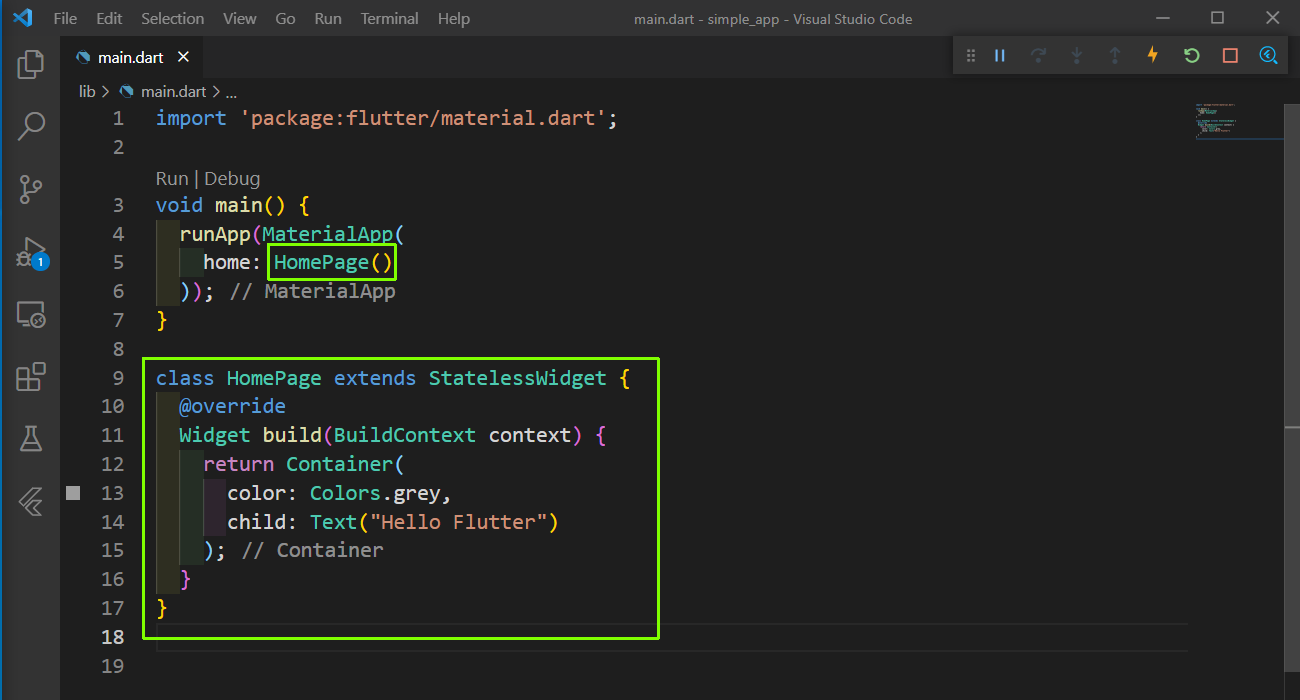 main.dart
But to beautify our app, we need to use a widget called Scaffold. Now, it is a basic widget, which contains other widgets like Appbar. Inside the AppBar, we need to give a title.
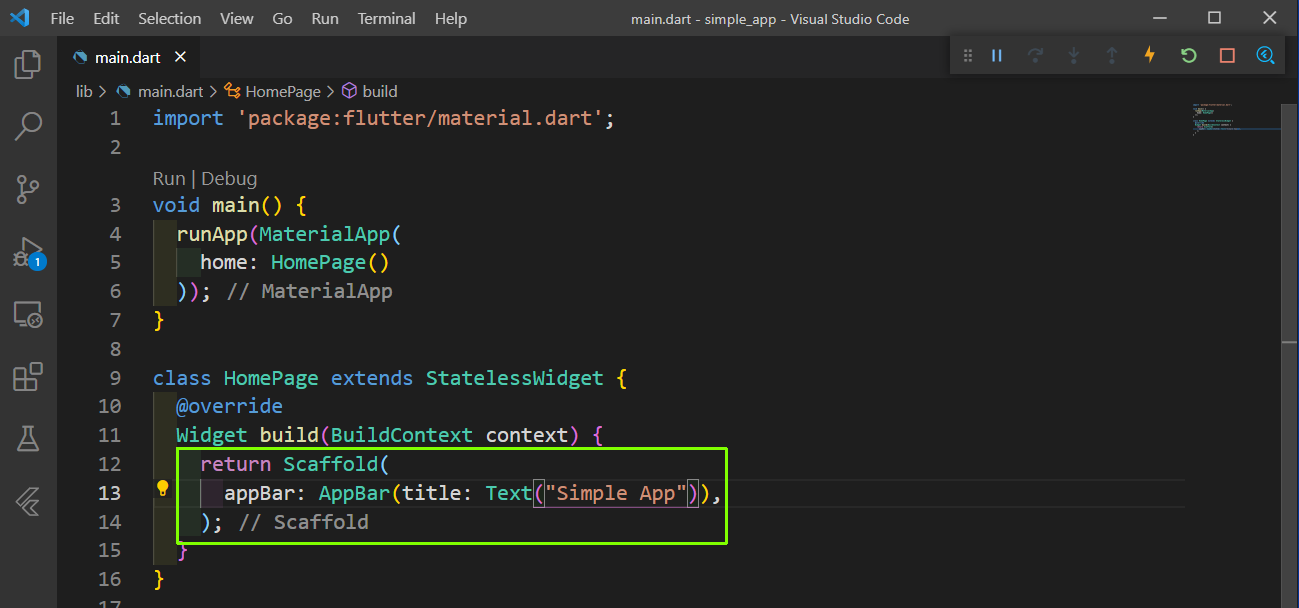 main.dart
Now, it will show this basic appbar with the text, in our app.
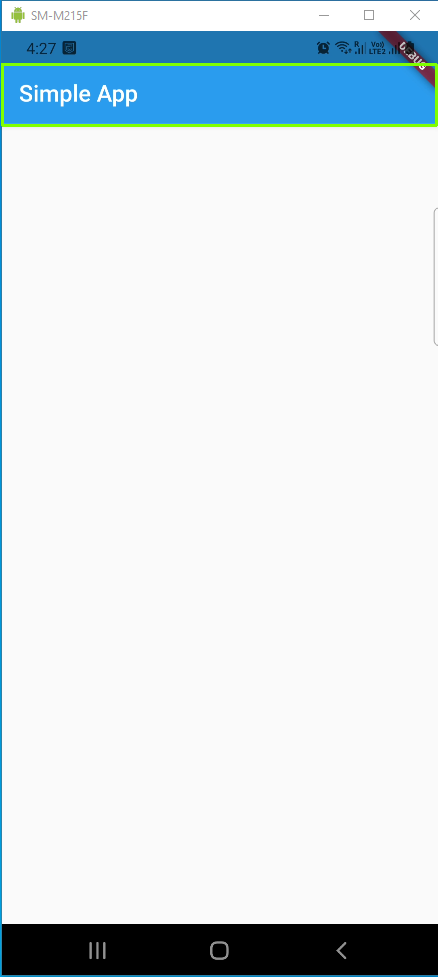 Basic app
Now, most of the time we have a general theme for the project. It is used to give a general color scheme to the project. We will use Theme for the same in runApp(). We have to reload our app for this to show, because anything in runApp() needs restart.
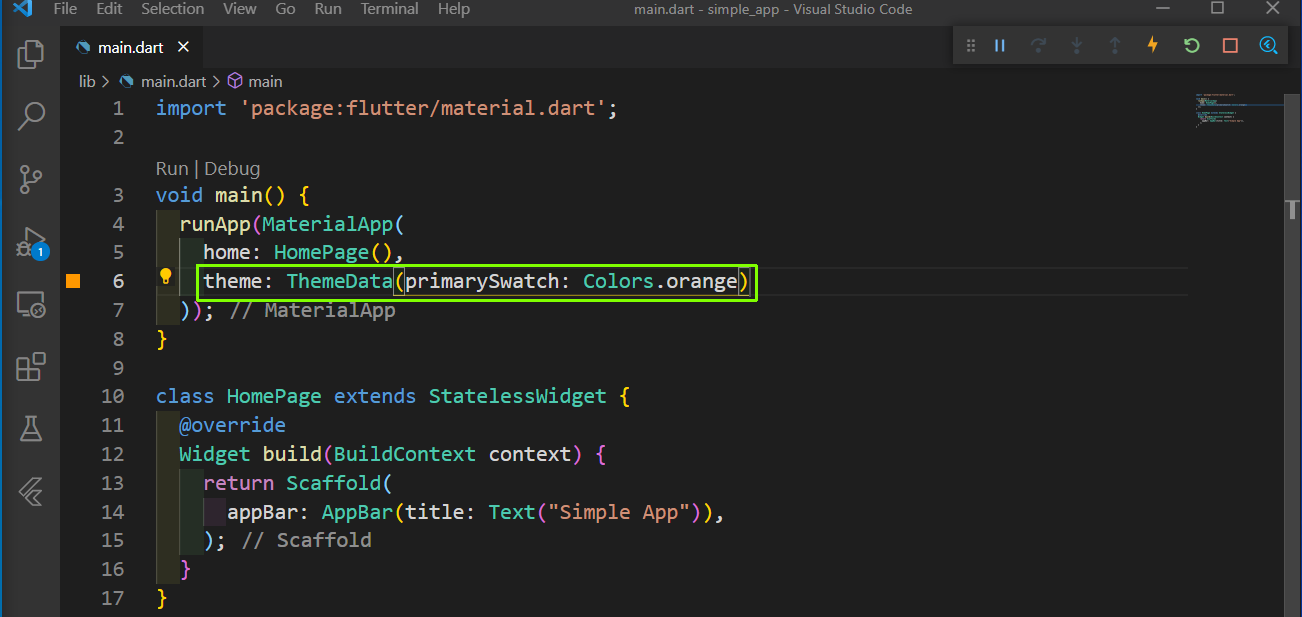 theme
theme
Now, we will see this nice orange color in the app bar.
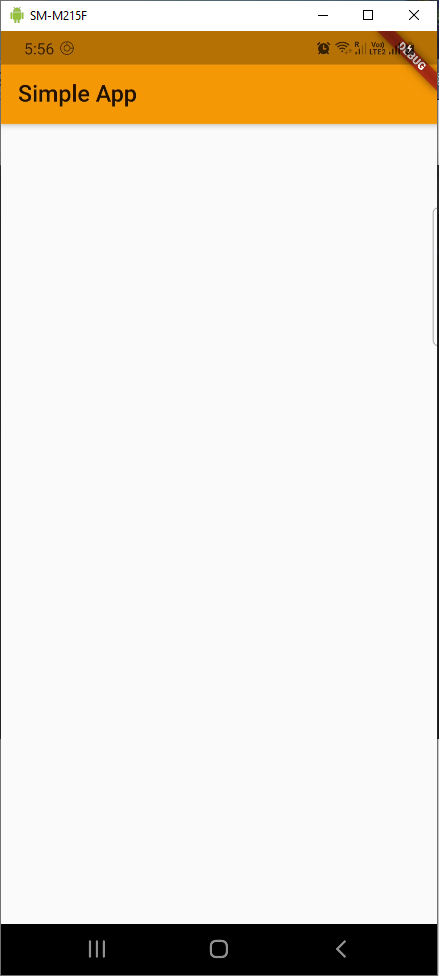 Orange bar
Now, we will show a square box in the app. So, add the code for body which will contain a Container.
 body
body
We want to center the red box and for that we need to wrap the Container with a Center. Now, we can manually code it, but there is a very good VSCode feature.
For this click on the Container and you will get a yellow bulb in the same line. Now, click on it and select Wrap with Center.
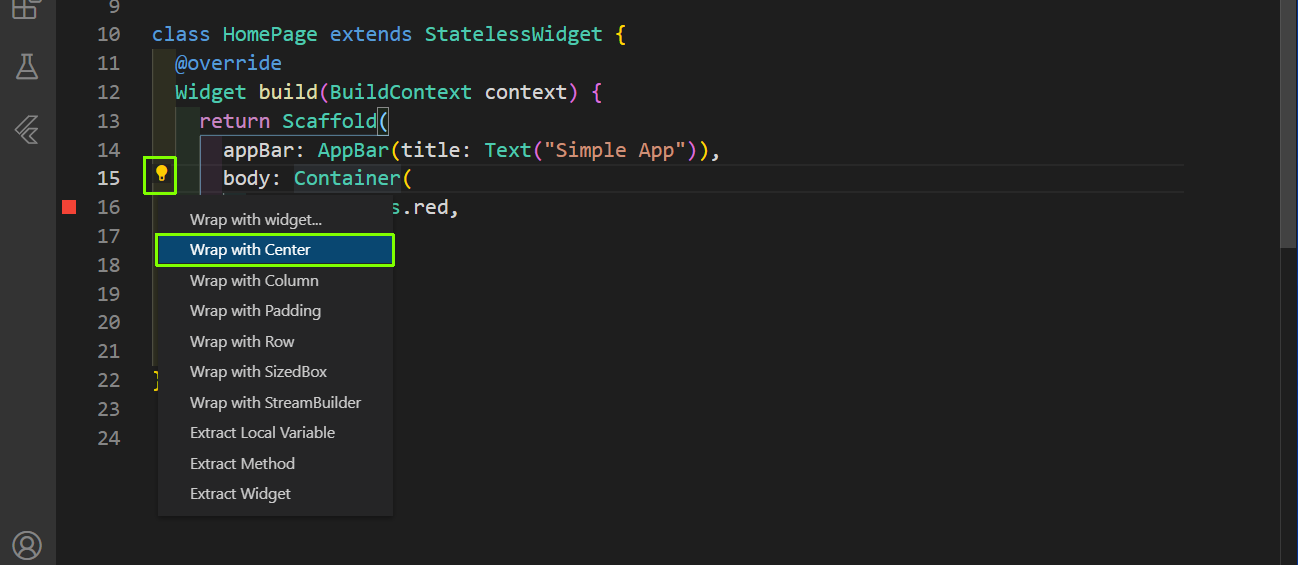 Wrap with Center
Now, we will add a Text to the container via child and also some padding to it. The Center is also added from our earlier shortcut.
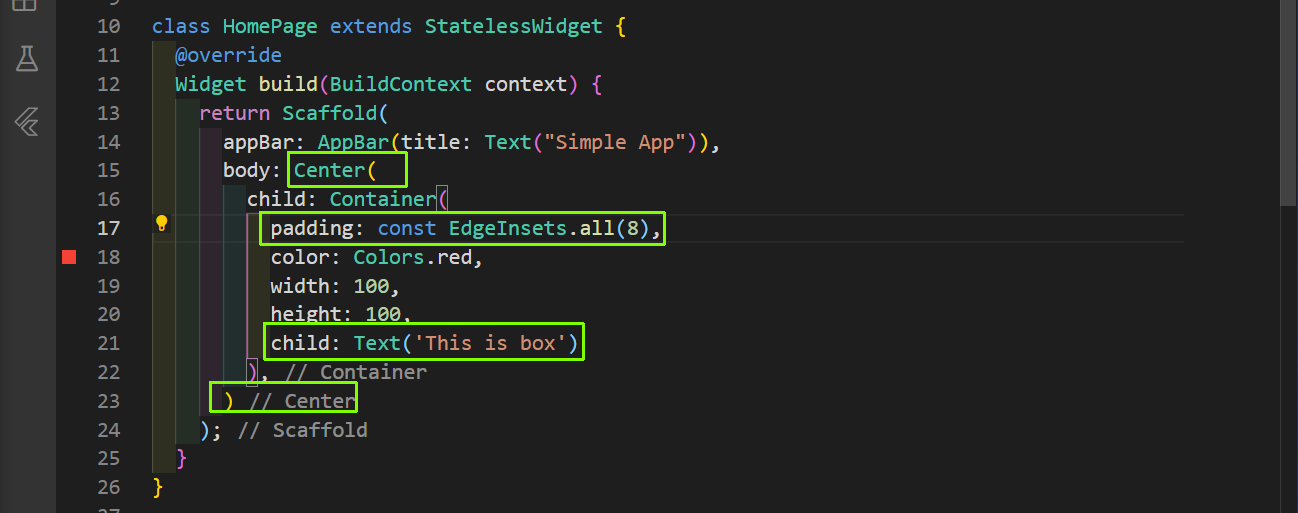 padding
Now, we can see the centered red box with padded text.
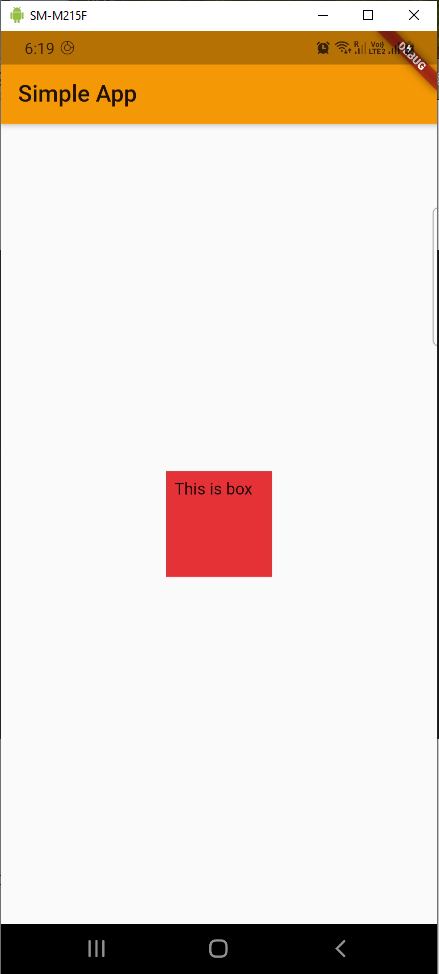 Red box
Now, we will add some more properties to the box and the text. First remove the general color property alt Line 18. After that add the alignment property to center the text vertically.
We will now decorate the box by adding decoration property. Here, we will do BoxDecoration in which we will put the color, borderRadius, gradient and boxShadow.
Next, we will update the Text by adding textAlign and additional font properties in TextStyle. Also, notice that this textAlign will center the text horizontally.
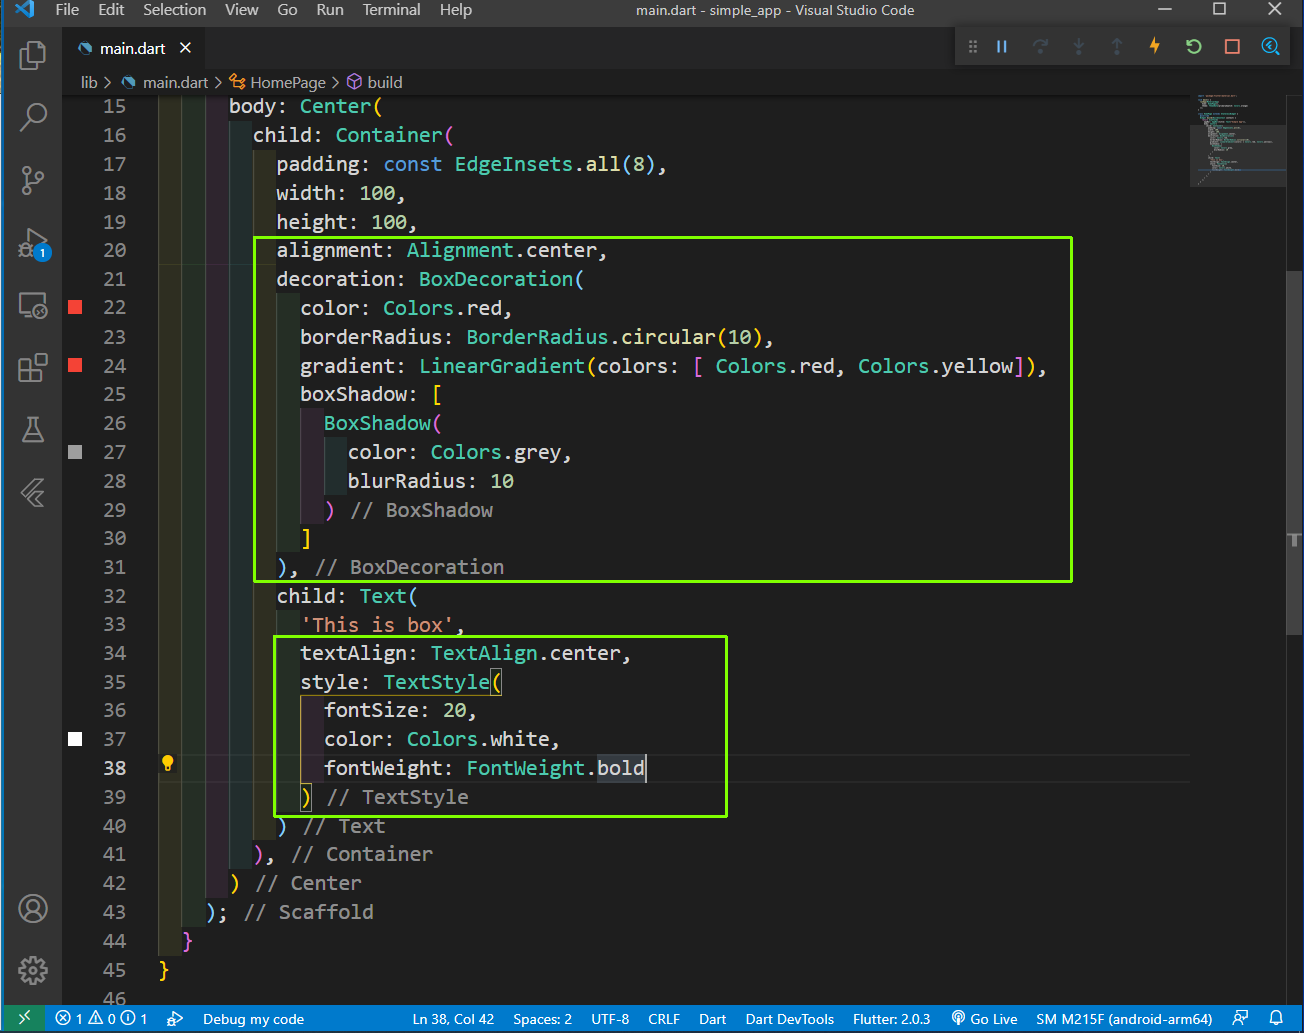 decoration
Now, our box is looking very beautiful in the app.
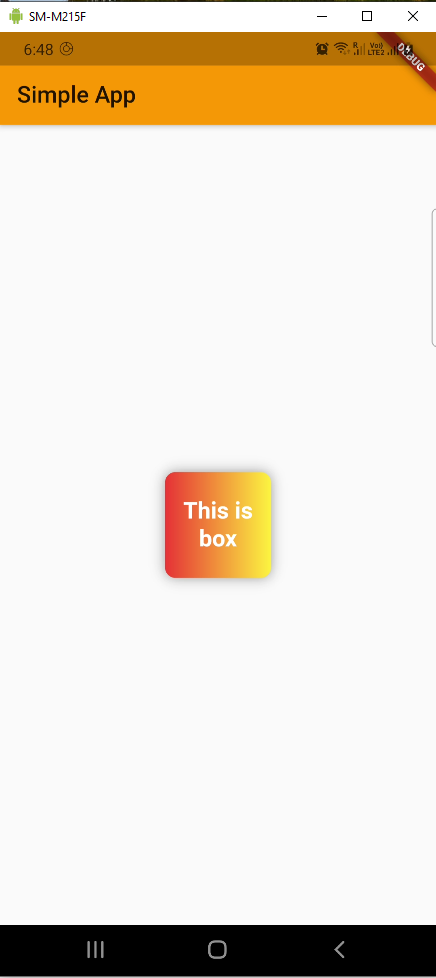 Simple App
We will now look into more widget like Row, but first remove everything and add three Container of different color boxes, inside a Row widget.
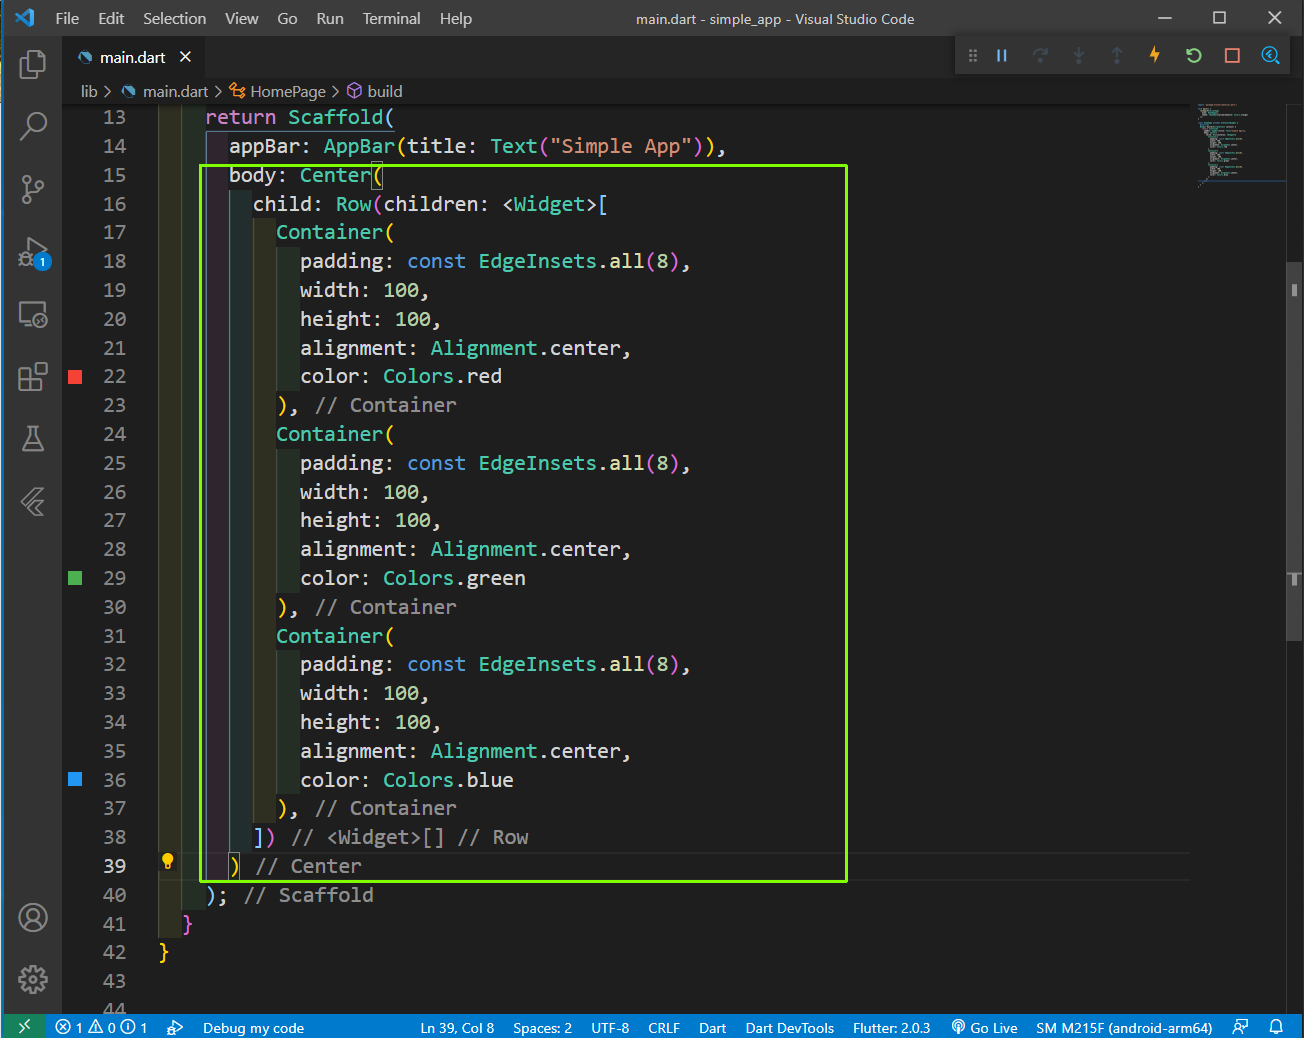 main.dart
It will show these three boxes at the center of the screen.
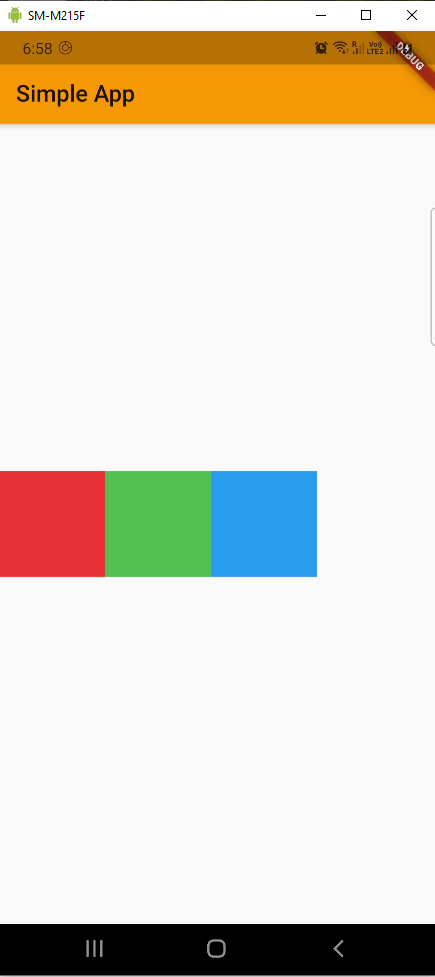 Boxes
Boxes
Now, we will first remove the Center wrapping our Row, by clicking on it and then the bulb. It will open an option Remove this widget, which we need to click.
After that we will use a mainAxisAlignment property, which have all the values of flexbox like center, spaceBetween, stretch, start,end. But, we will use the spaceEvenly property.
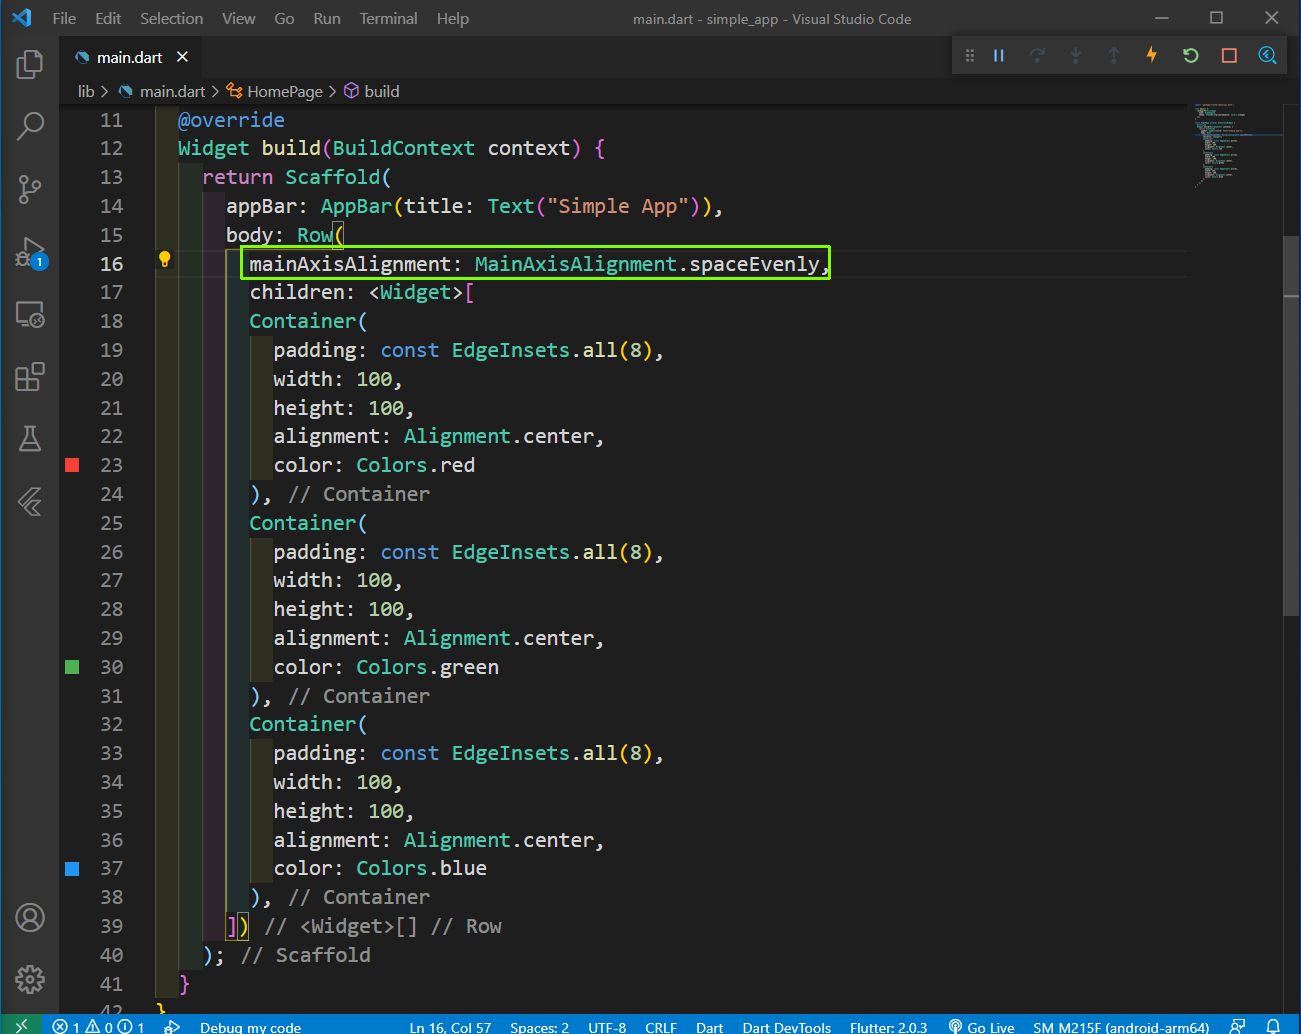 spaceEvenly
We will look into the other crossAxisAlignment property. But for that to work, we need to wrap the Row with a Container. Again, we are doing it by clicking on the Row and then the bulb beside it. After that click on Wrap with Container.
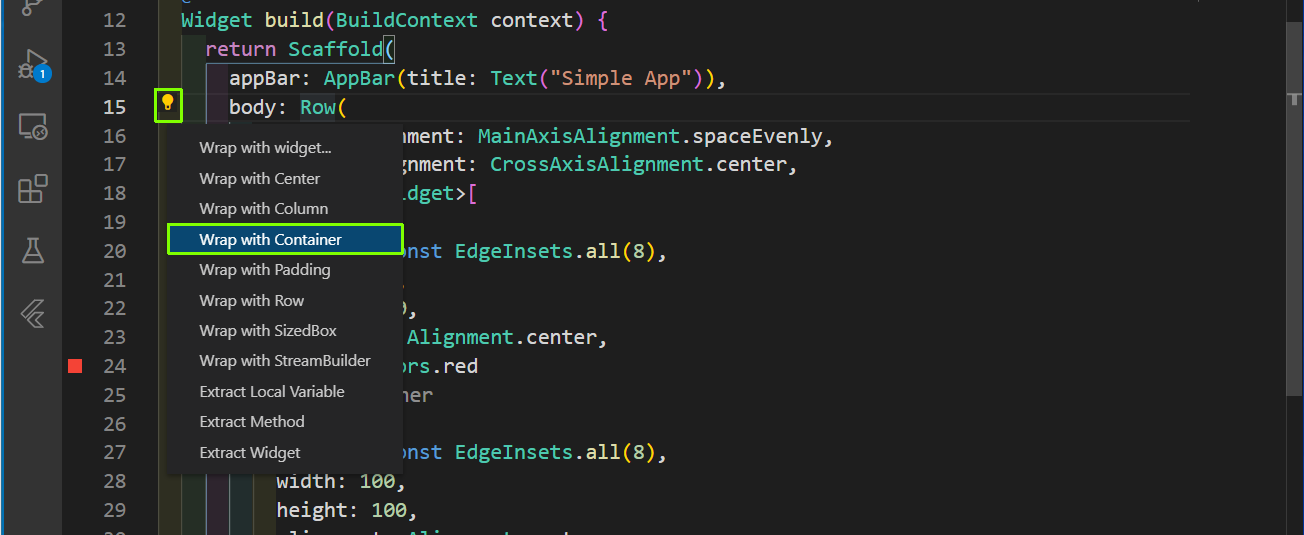 Wrap Container
Now, we will add a height to the Container and a color. Also, after that we will give the crossAxisAlignmentproperty of center to all three boxes. It also have flexbox like center, spaceBetween, stretch, start,end.
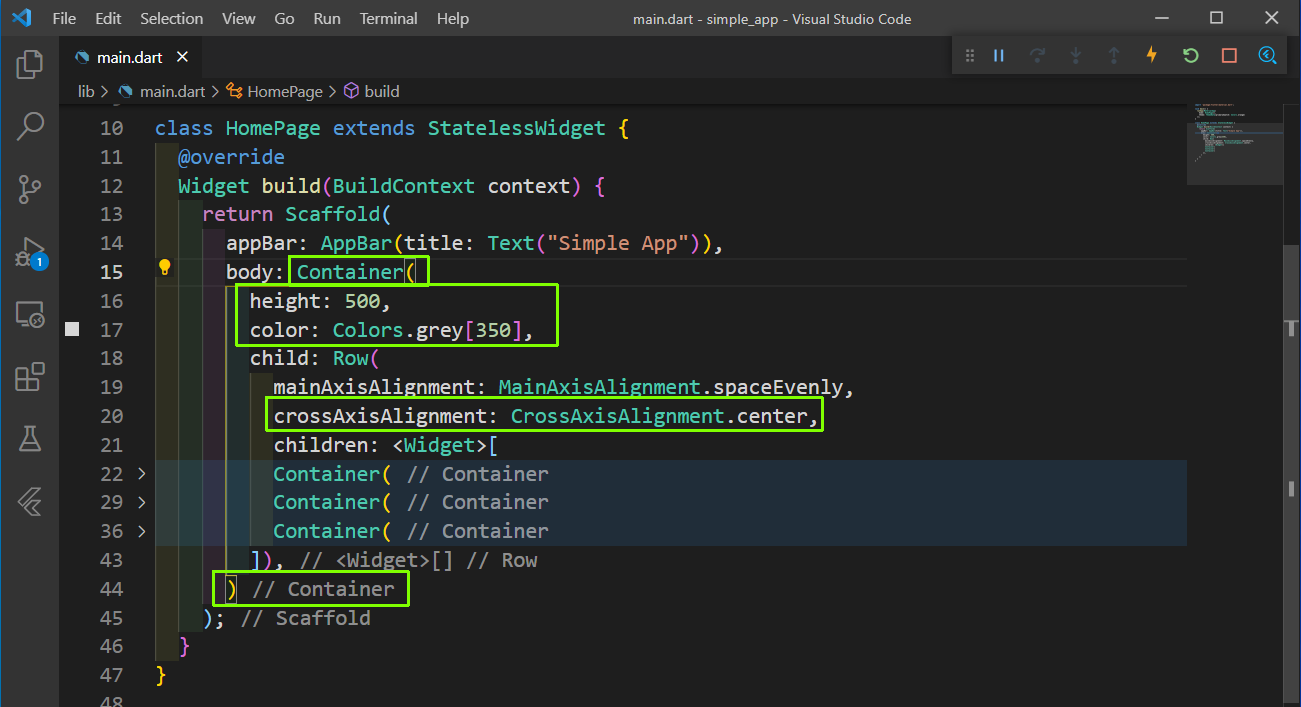 Container
Now, our app will look like below.
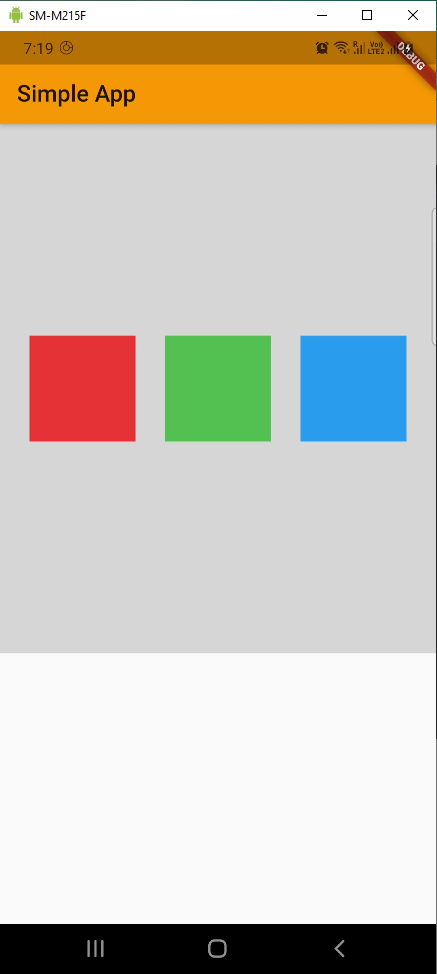 App
App
Now, this mainAxisAlignment and crossAxisAlignment concept is exactly similar to flexbox. Now, we will make the Row to a Column and the main axis and the cross axis will change. We also need to change the height to width to see it in action.
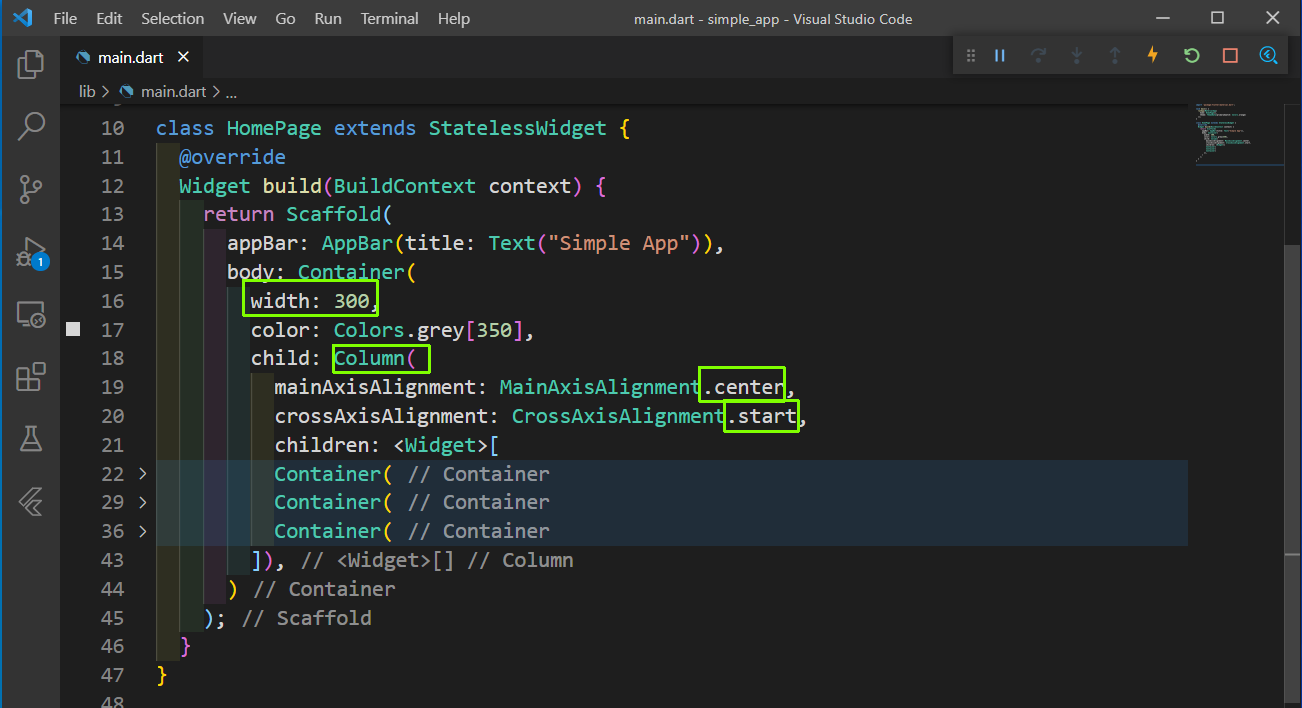 Column axis
With these changes the app will look like below.
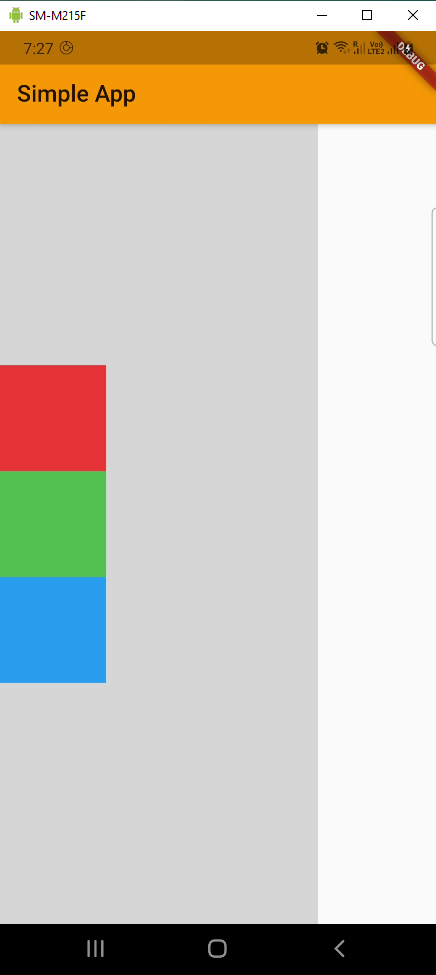 App
App
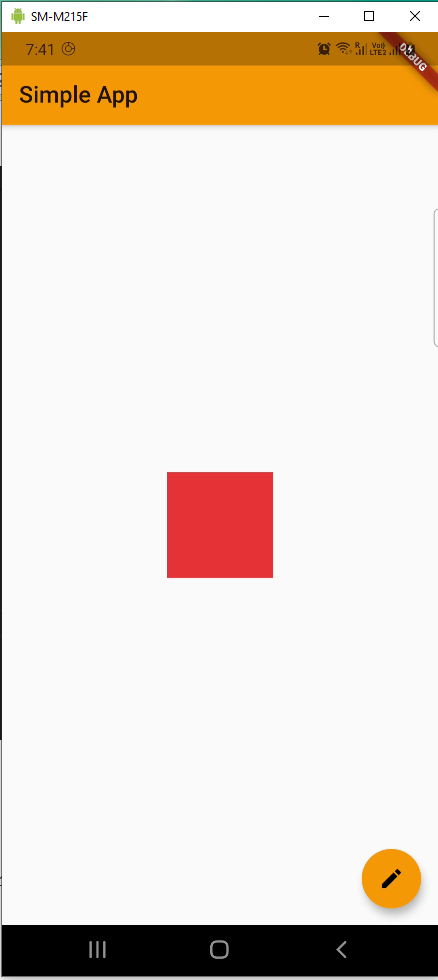
Now, we will start again and look into drawer and other designs. We will first look into buttons and create a floatingActionButton. The placing of it will be taken care automatically by flutter. It will be of our theme color.
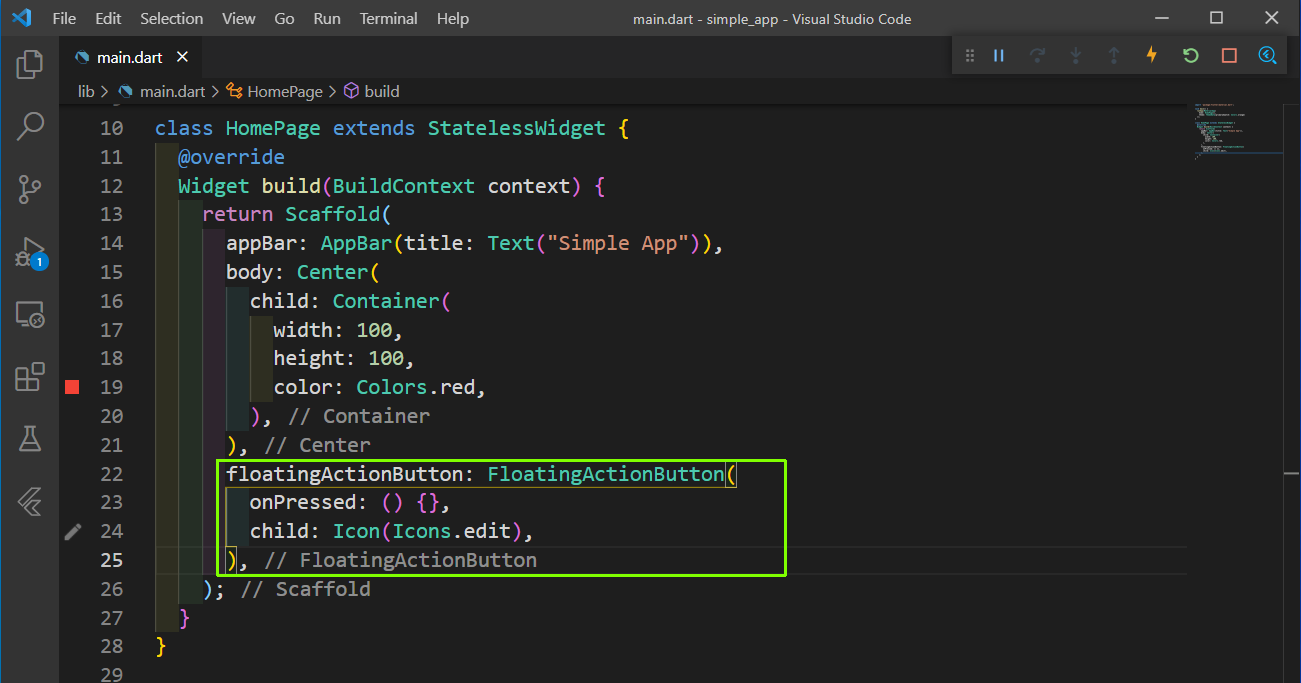 floating button
And we have a beautiful button on the bottom right corner of the screen.
 Button
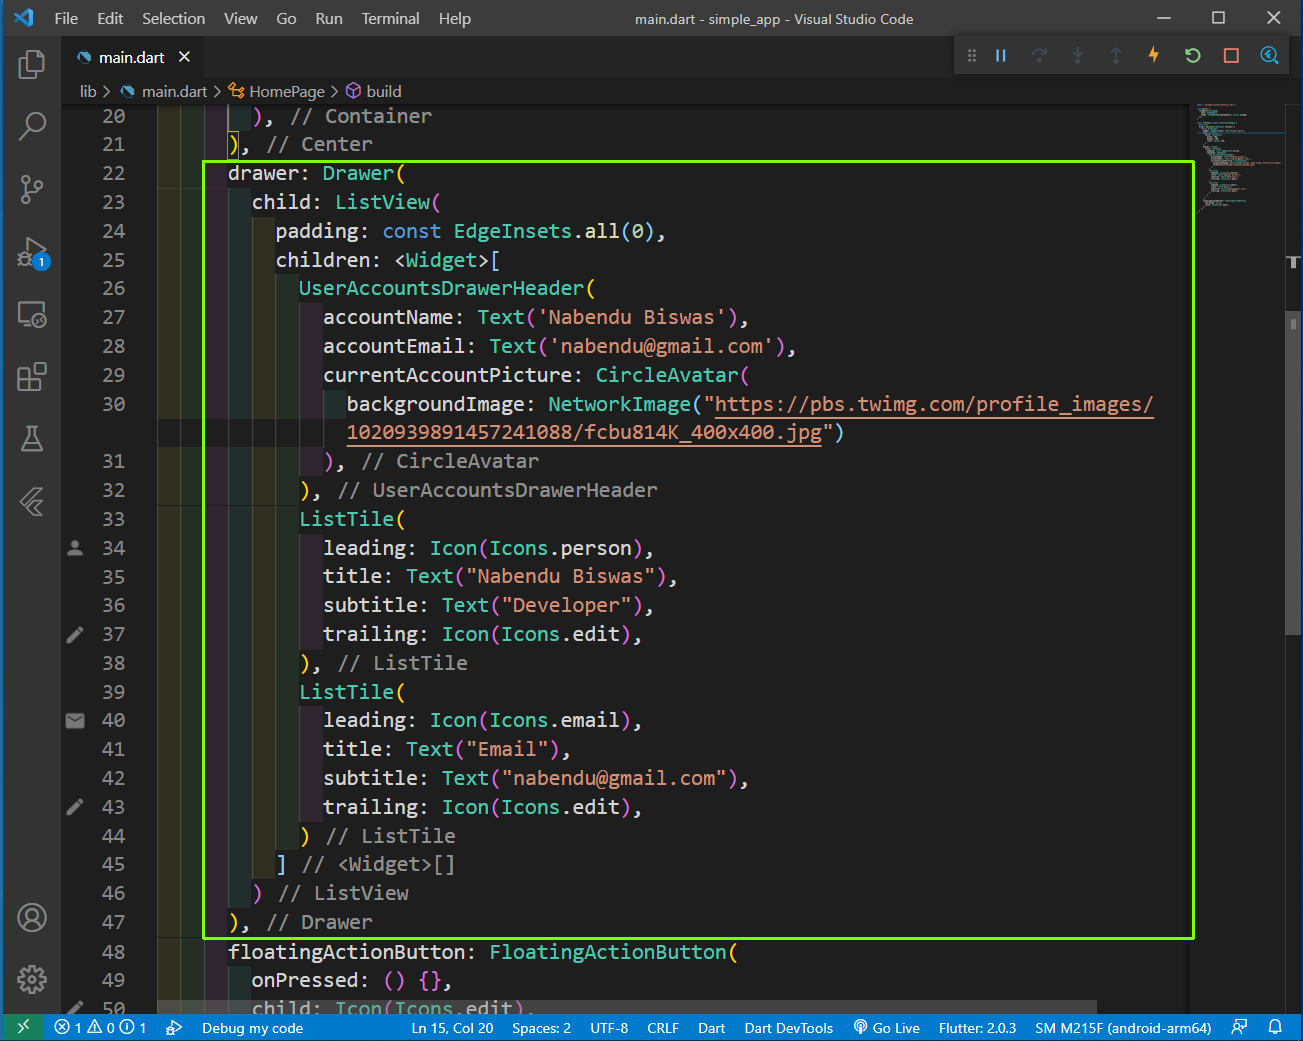
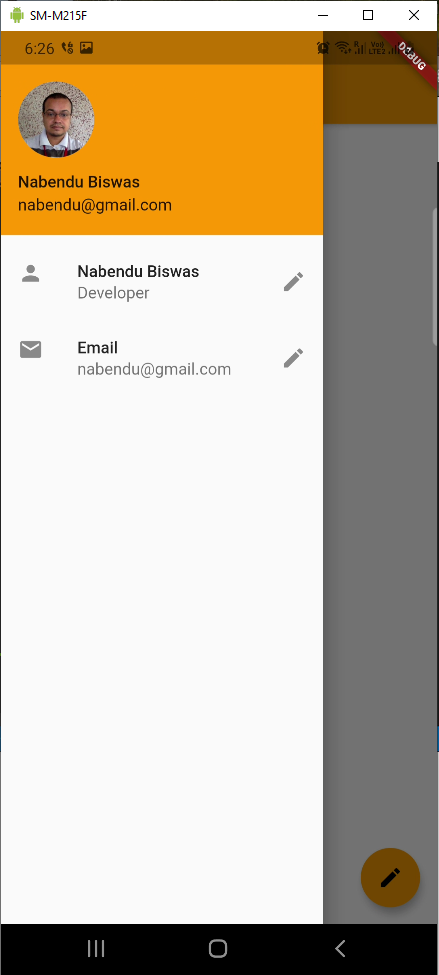
Now, we will create a drawer in our app. The major part of the drawer is the UserAccountsDrawerHeader and ListTile. The header part is used to create a gmail type header and the ListTile to create the body.
 main.dart
Now, we have an awesome looking header which can be opened with the click of the list icon on the top right of the app.
 App
App
Now, we will work on our body which now only contains a red square box in the middle.
We want to use local images in our app and for that create an assets folder and place a bg.jpg image in it. After that in pubspec.yaml file first uncomment the assets code and change it to point to the whole assetsfolder.
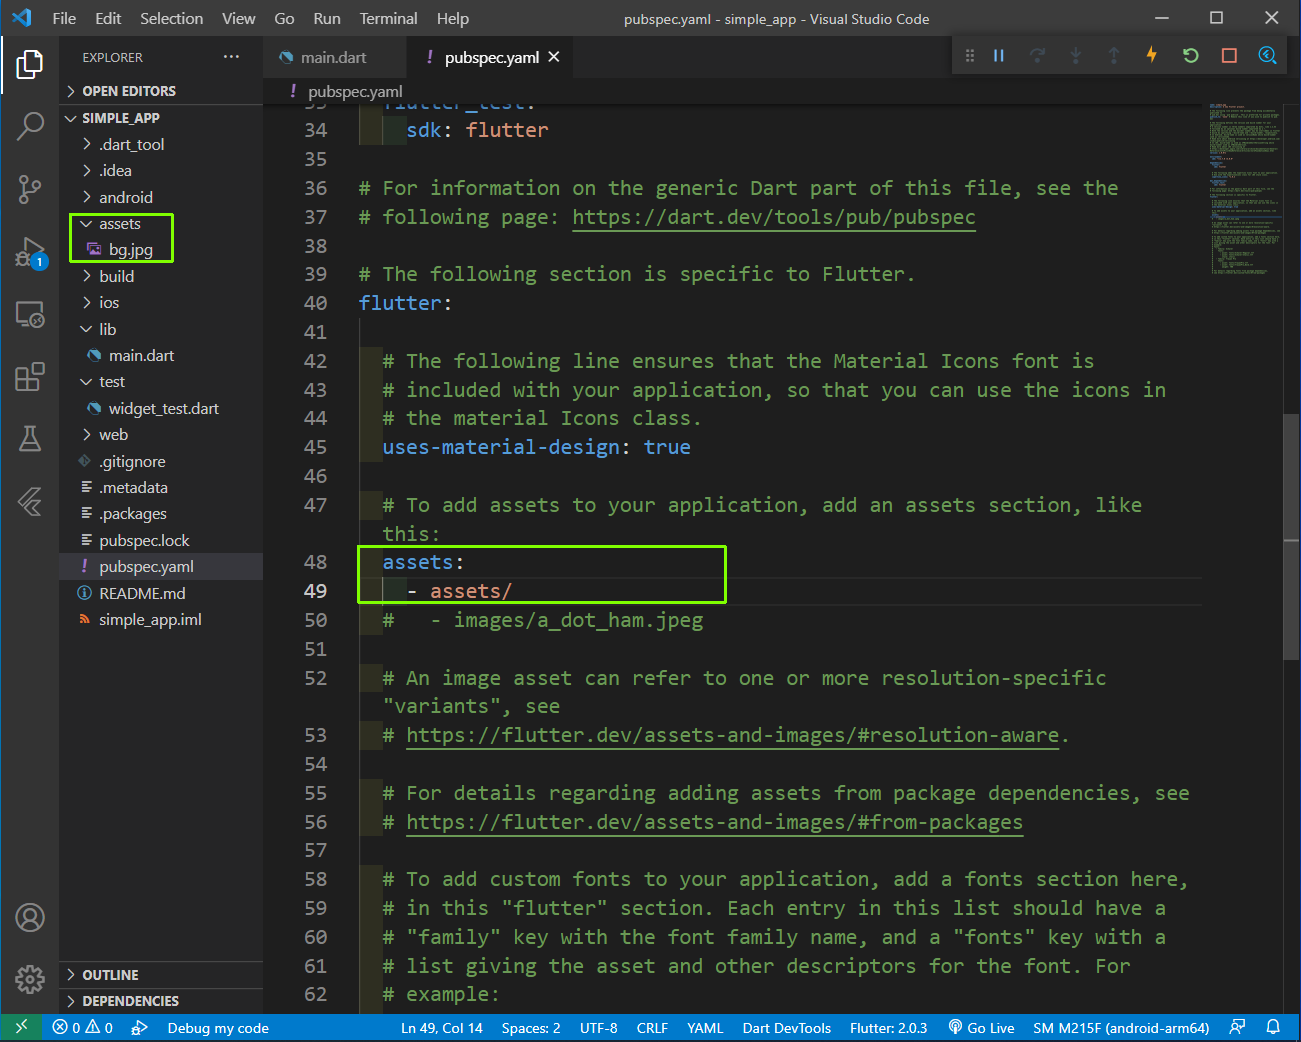 assets
Back to our main.dart we will first replace our Container with a Card and add our Image. Also, added a backgroundColor.
After the image we have a SizedBox widget. Now, this widget can be used to give space between elements like margin and the code is also more simpler, because we are not wrapping it like padding.
After that we have a Text box, with some styles and also a TextField, wrapped with a Padding.
But also notice we got an warning in VSCode at bottom right for a overflow.
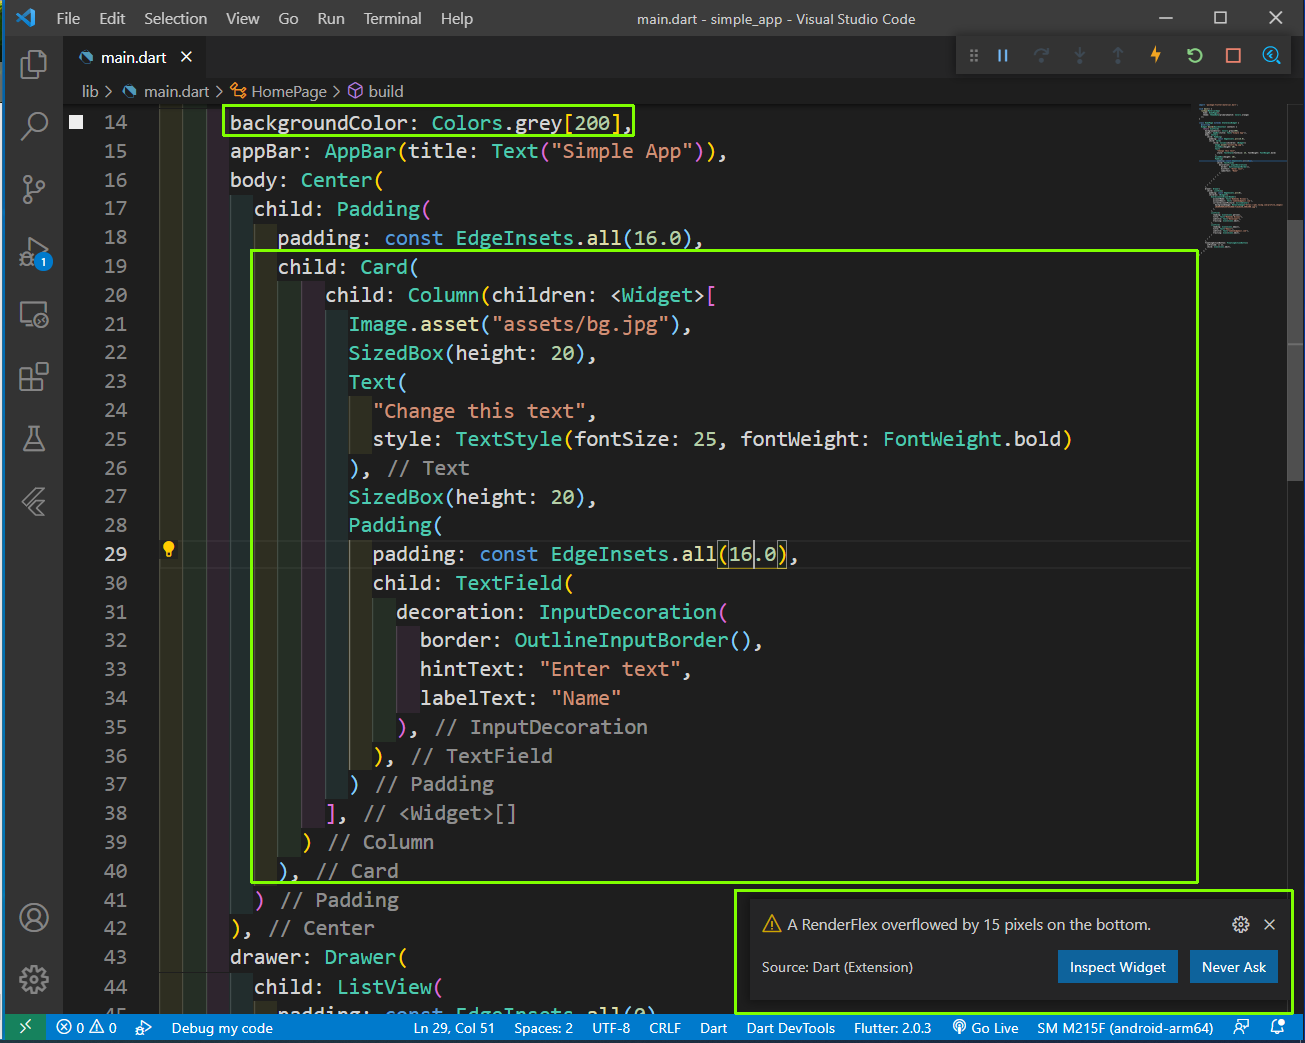 main.dart
If we go to app and click on the keyboard, we will find it overlapping our Input text and flutter recognizes it and gave as an warning.
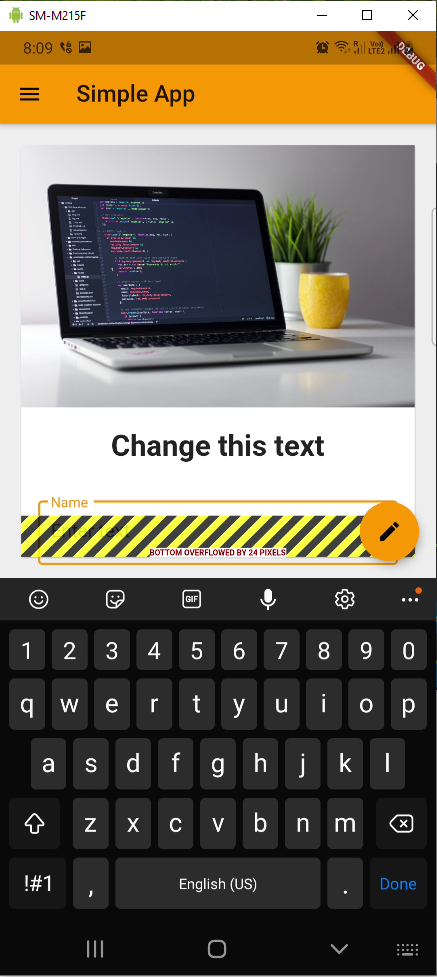 Warning
To fix it go to the Card and clicked on it, to get the yellow bulb. Click on the bulb and then Wrap with Widget. Now give the widget name SingleChildScrollView.
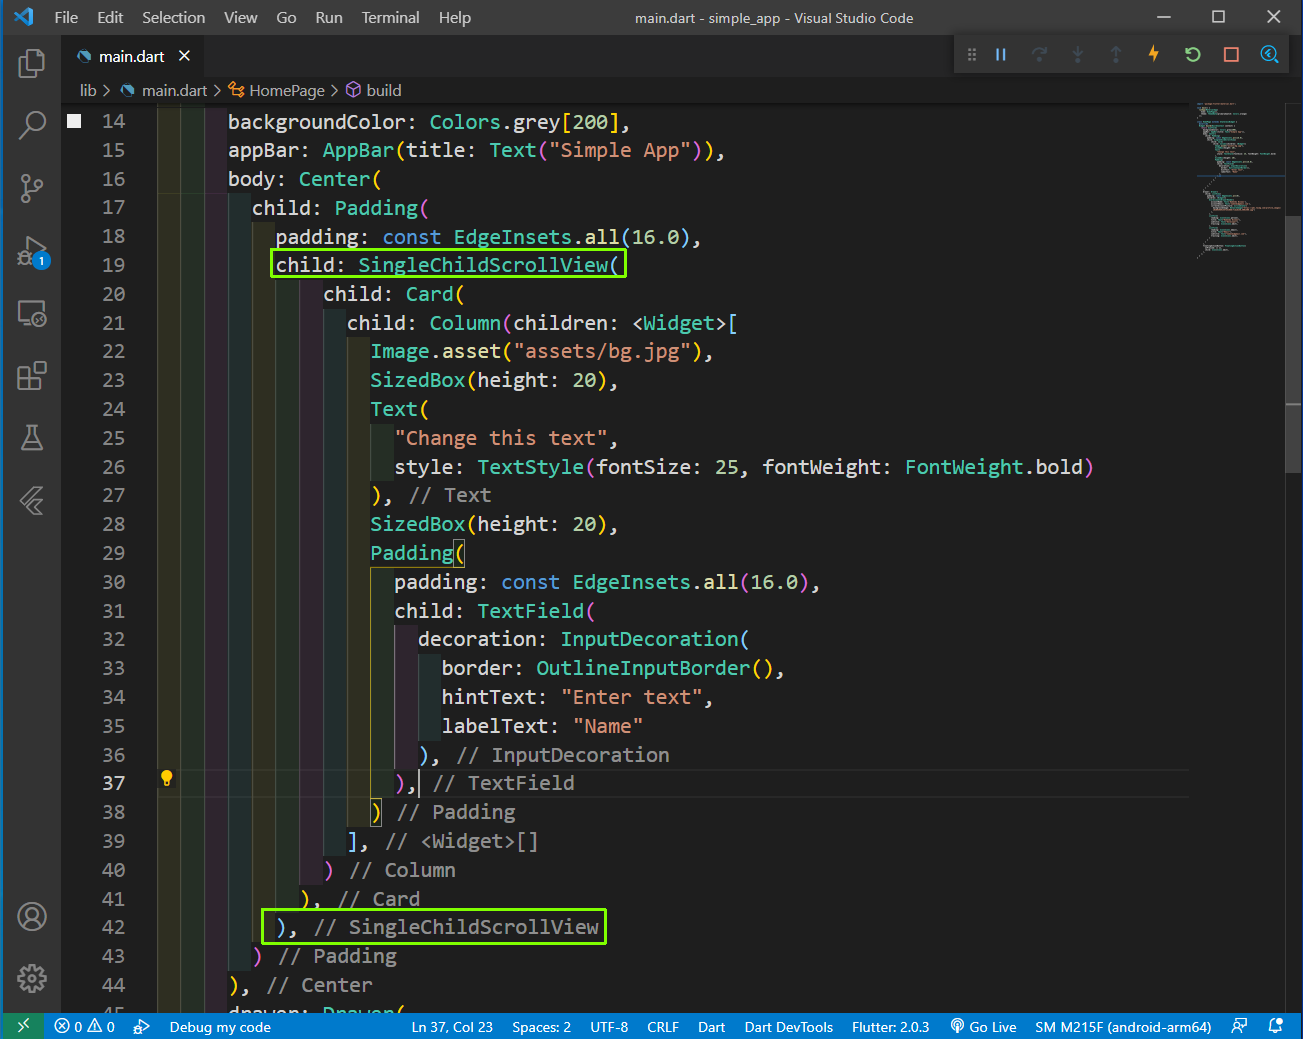 SingleChildScrollView
Now, our issue is solved and we can click on the keyboard, without getting any error.
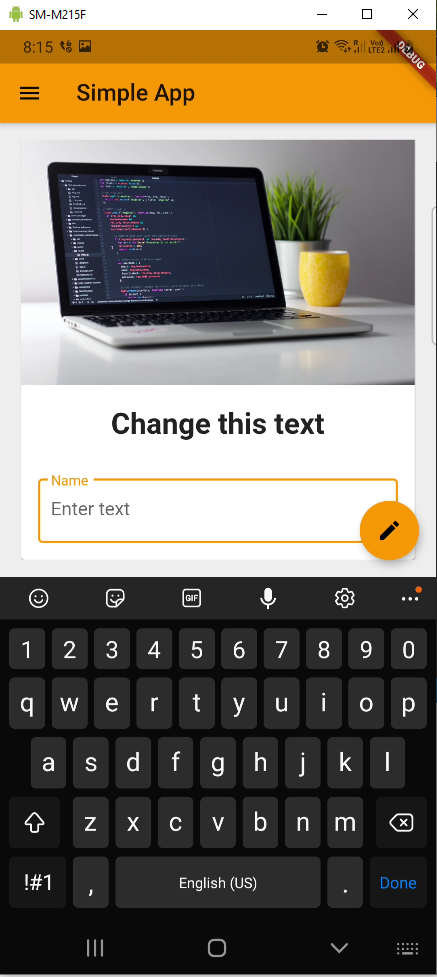 SingleChildScrollView
Now, we want to enter a name in the TextInput and change the bold Text above it, after we click the Send button at the bottom right. For this we need to convert our StatelessWidget into a StatefulWidget.
For doing so, we will again take the help of our bulb by clicking on the HomePage. It will show the yellow bulb, on clicking of it we will get two options. Click on the Convert to StatefulWidget option.
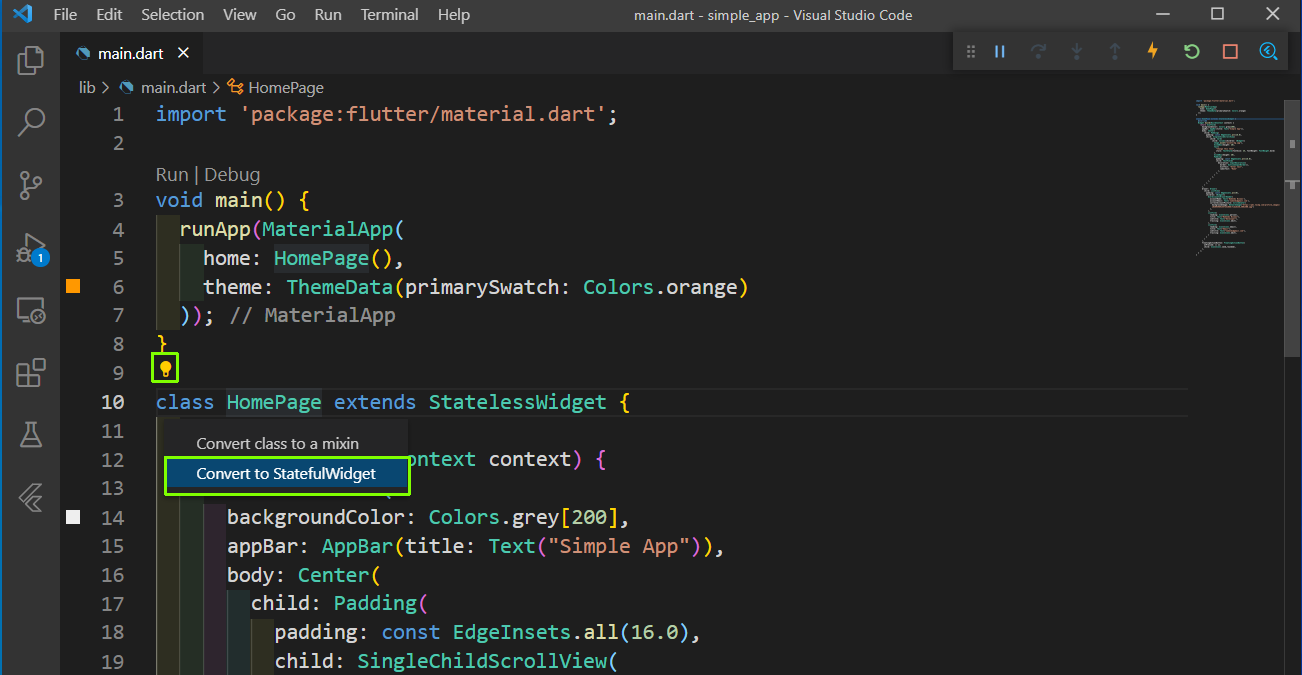 main.dart
Now, we will see two classes, with the second one containing state. Here, we will declare a variable myText and give it a string. Also, a TextEditingController called _nameController for our Text Input field. Notice the underscore(_) in the variable name and it will make it private.
After that we use the myText in the Text field and the _nameController in the TextField.
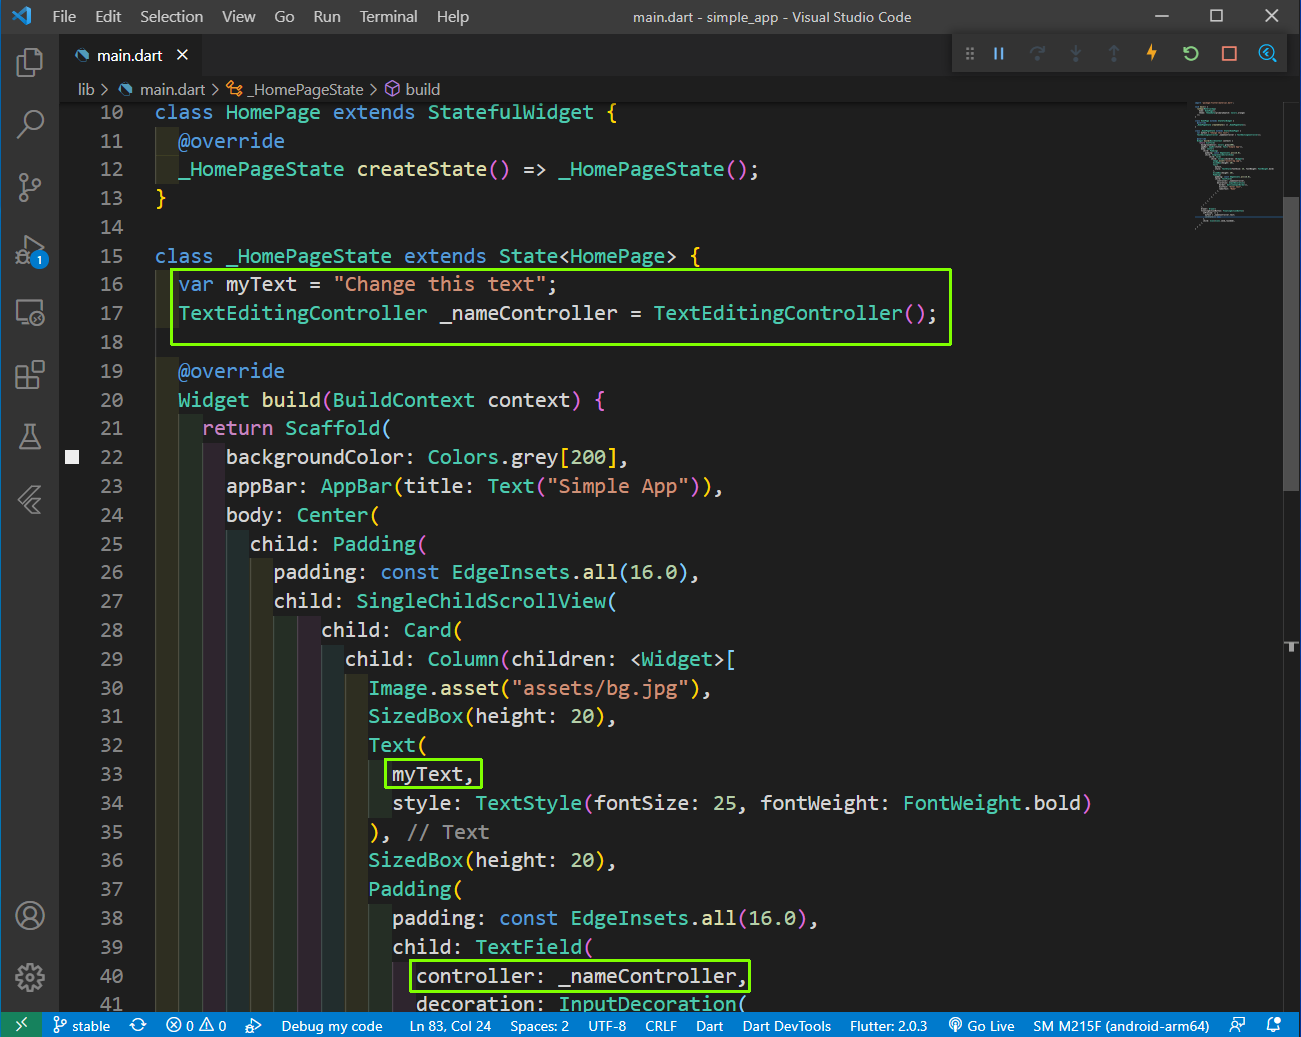 Stateful
Next, in our floating button’s onPressed event we will make the myText equal to _nameController.text
Also notice that we are using React style setState() after that and it works also in the same fashion. After we press the button our app needs to re-render for the state change.
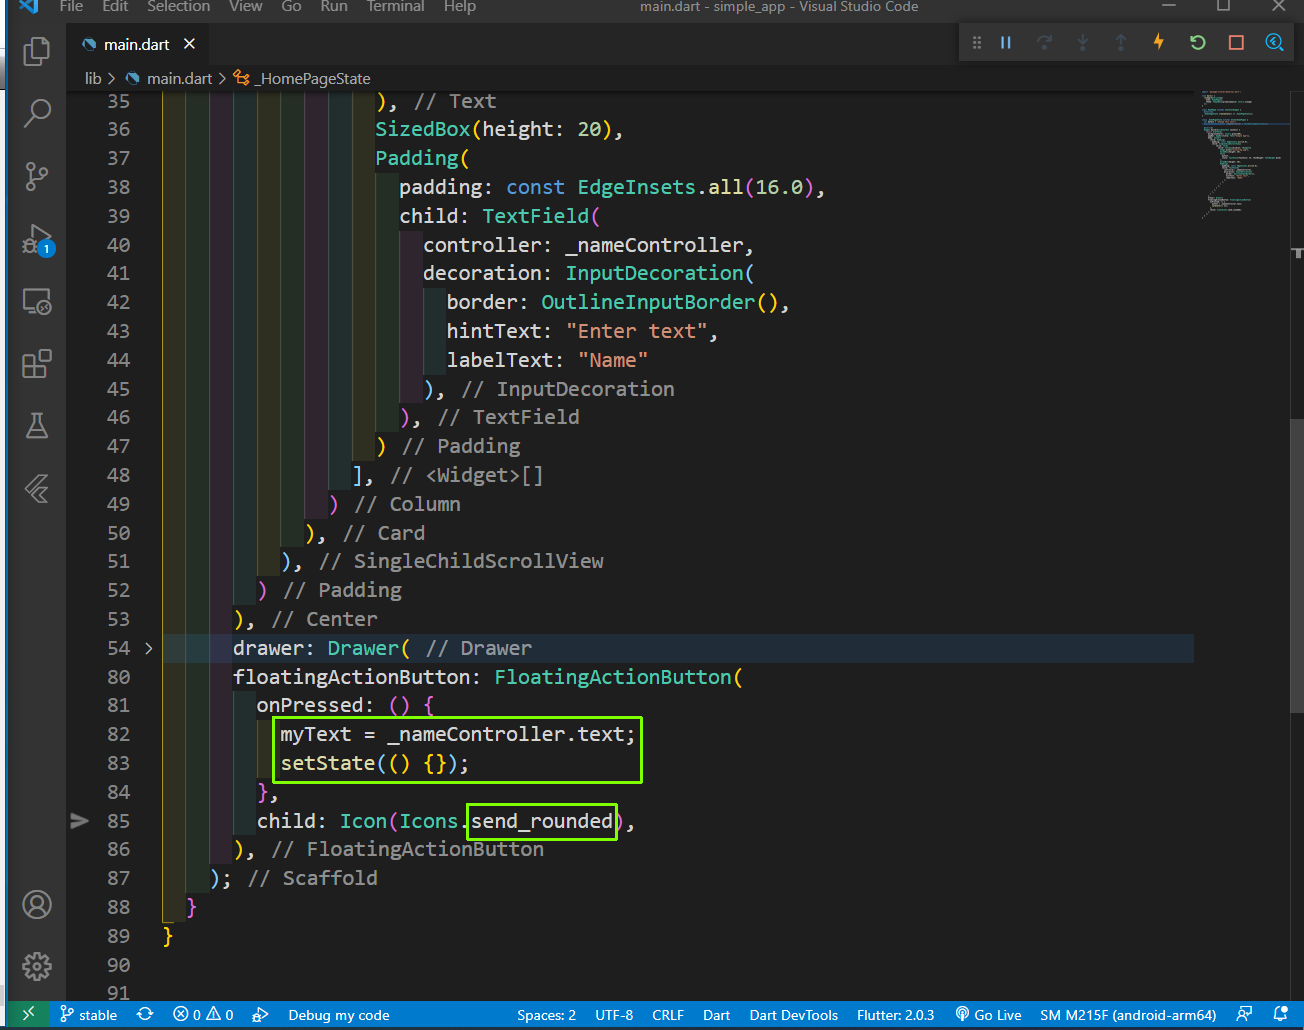 setState
Now, on typing something and clicking on the Send button, will change the text.
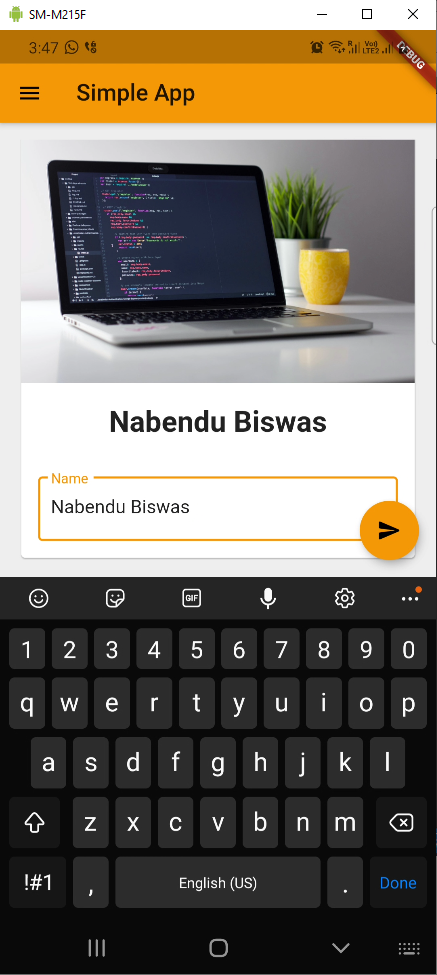 Text Changed
Till now we have done everything in a single file and it’s not good in flutter, as with any other language. We will first move the drawer to a different file. So, create a file drawer.dart in the lib folder. We will create a Stateless class called MyDrawer in drawer.dart file using stless shortcut.
Now, we will cut the completed Drawer code from main.dart and place it in the class.
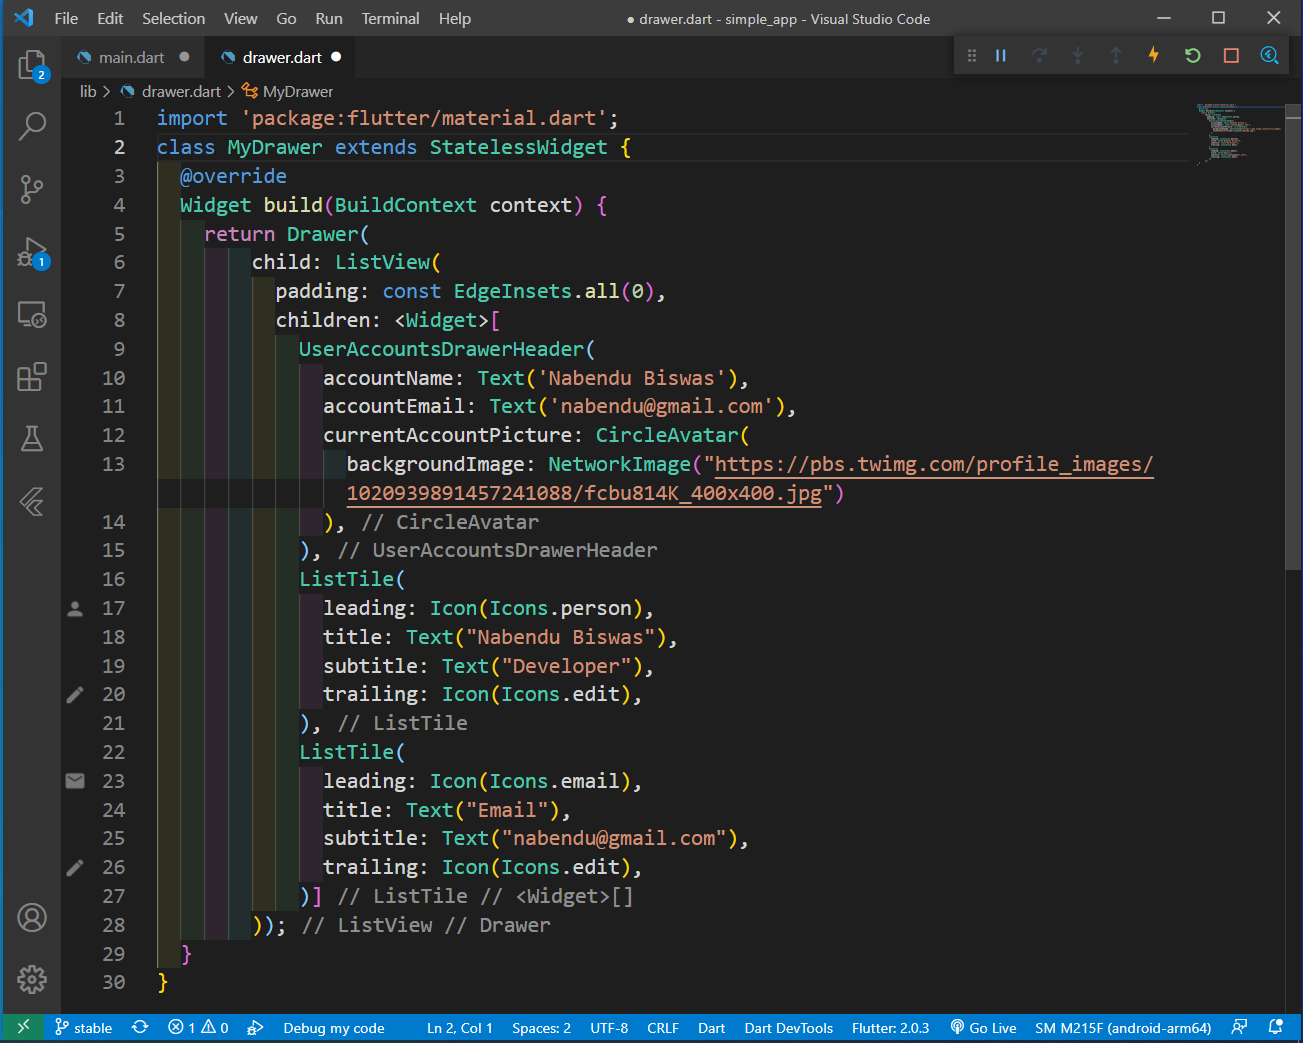 drawer.dart
Now, add the MyDrawer() in our main.dart file and also import it at the top.
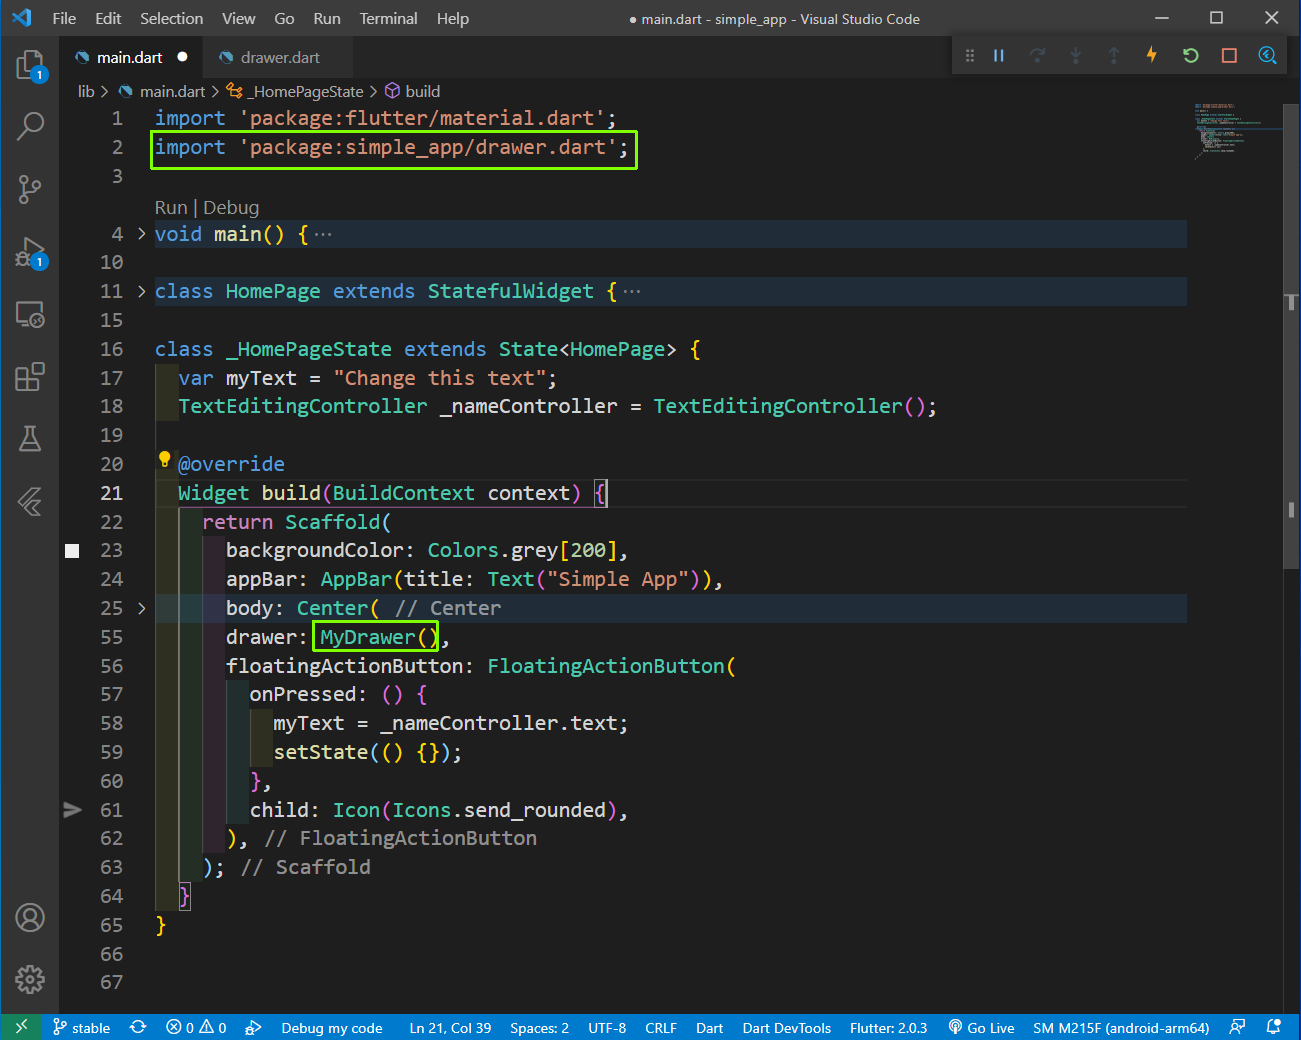 main.dart
Now, we want to make a Card component also, but it contain controller. So, we need to select all of Card code and then click on the bulb and then Extract Widget columns.
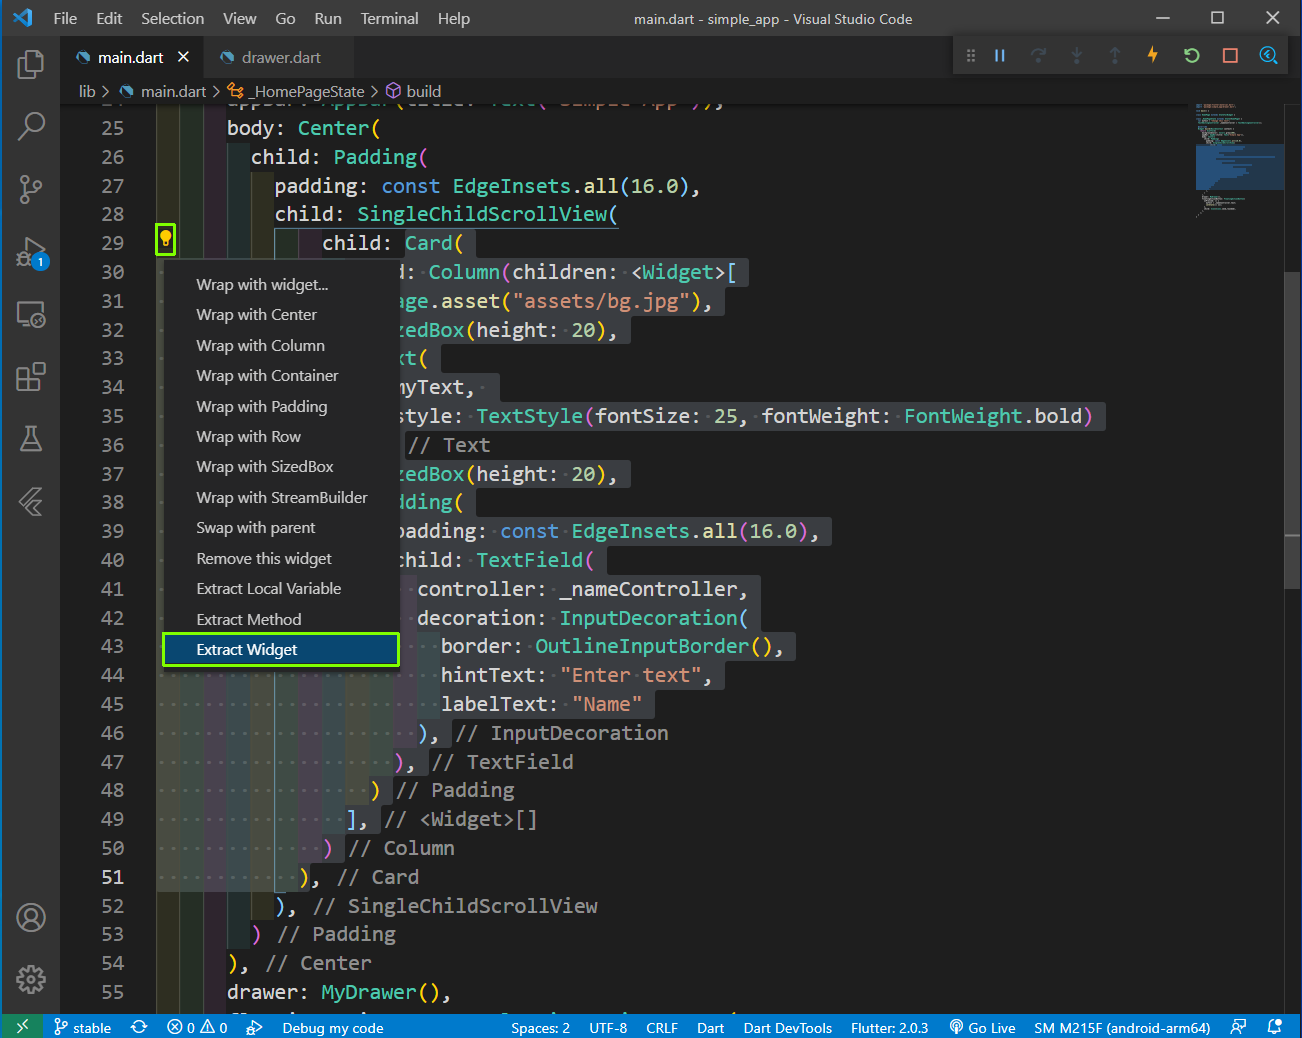 Extract Widget
It will open a small text box at the top of VSCode to enter our widget name. Give a name and press enter.
 NameWidget
It will create a class NameWidget below our existing class.
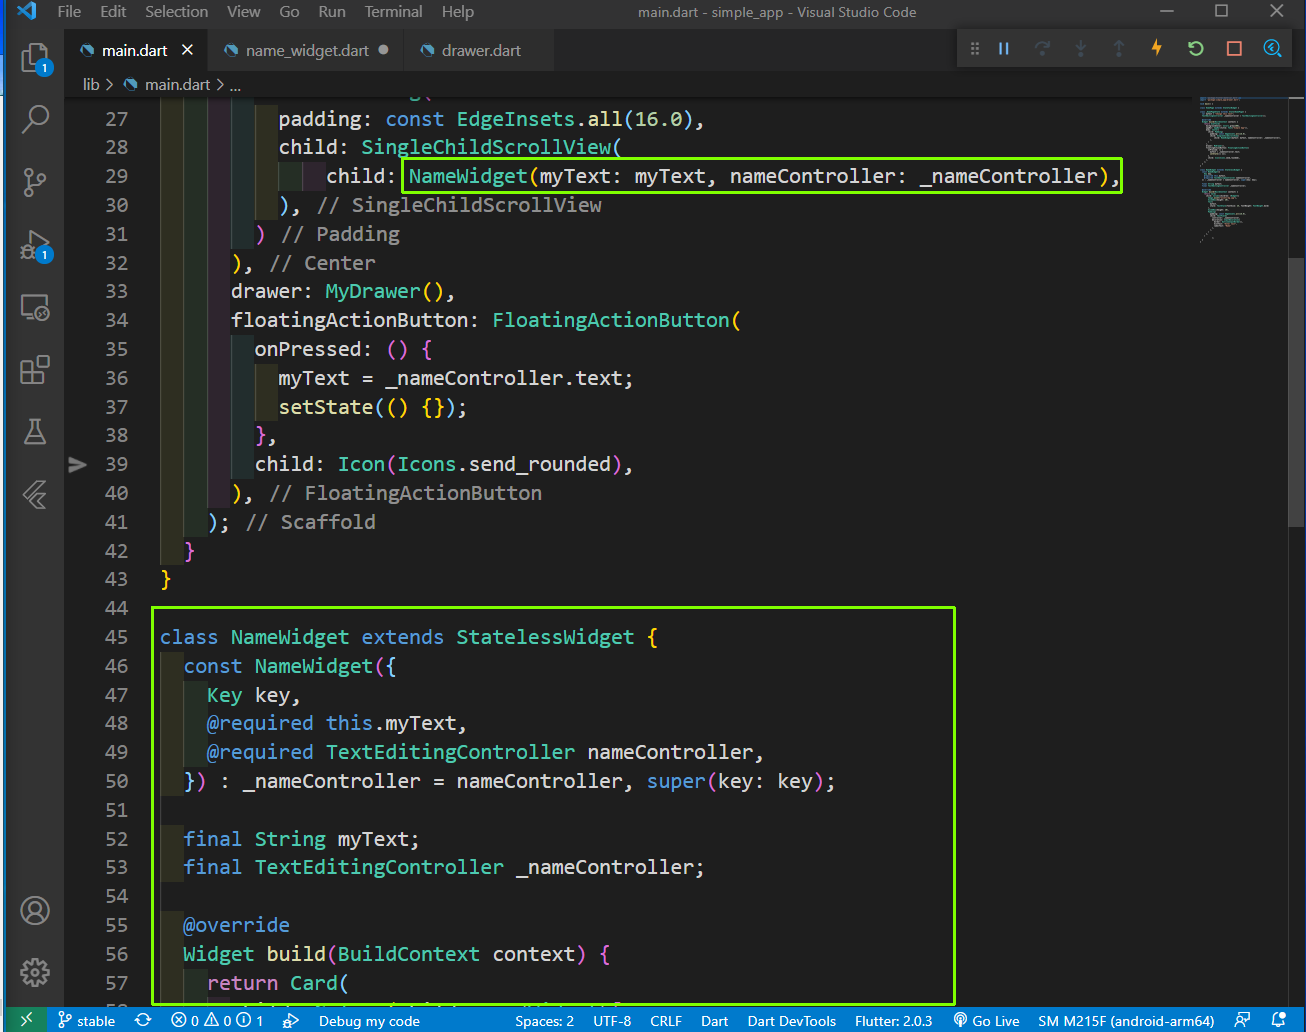 NameWidget
We don’t want to keep it in the main.dart file, so create a file name_widget.dart in the lib folder and import material.dart in it.
Cut the whole code of NameWidget and paste inside it.
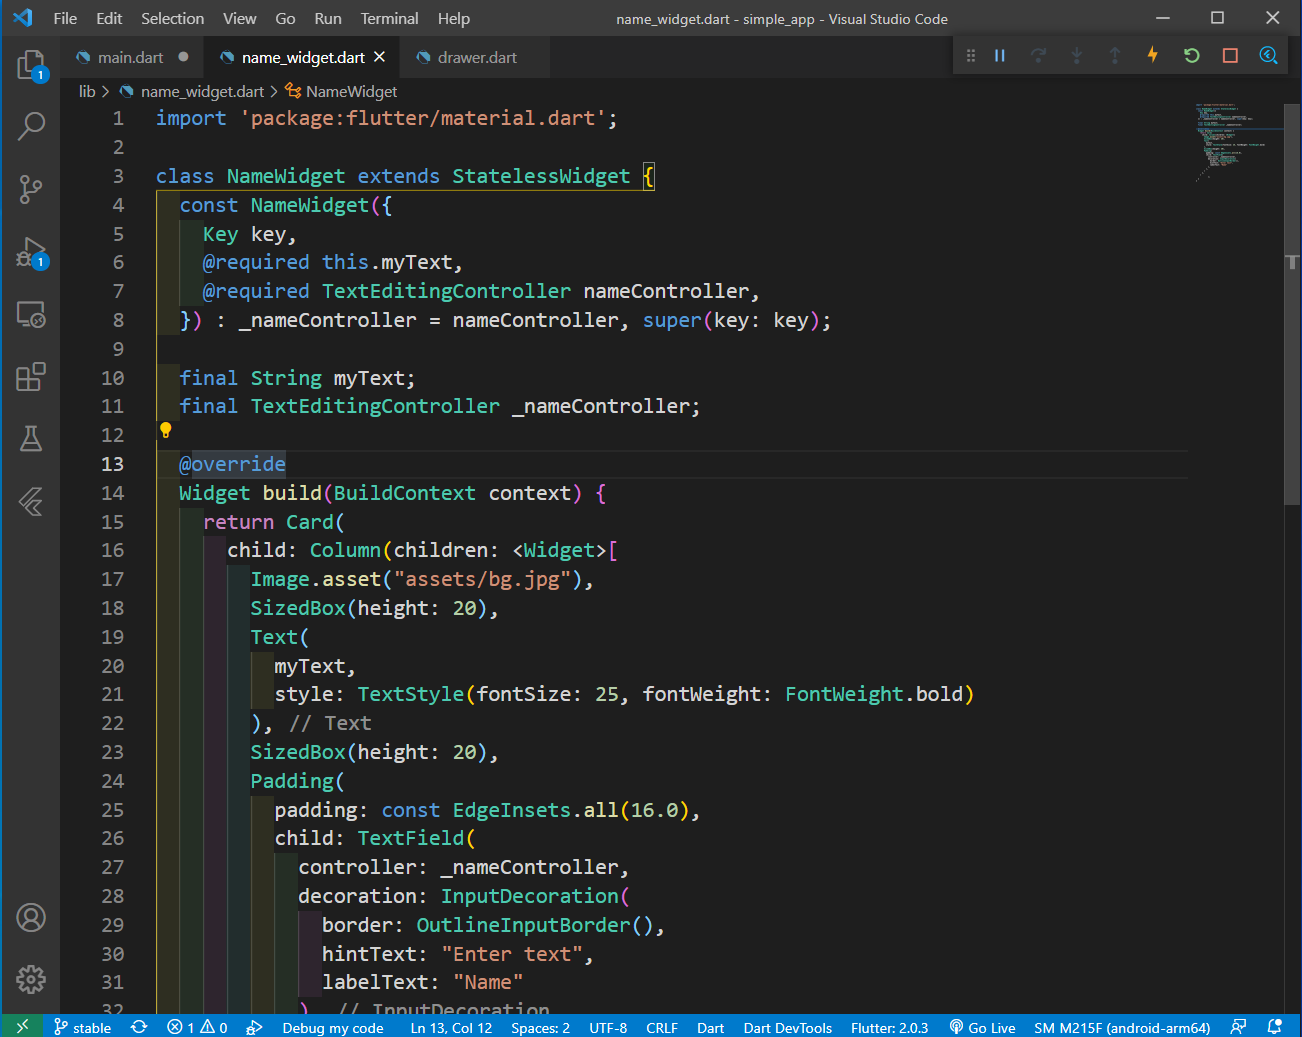 name_widget.dart
Back in our main.dart take the cursor to the end of NameWidget and press Ctrl + Spacebar on Windows to auto-generate the import.
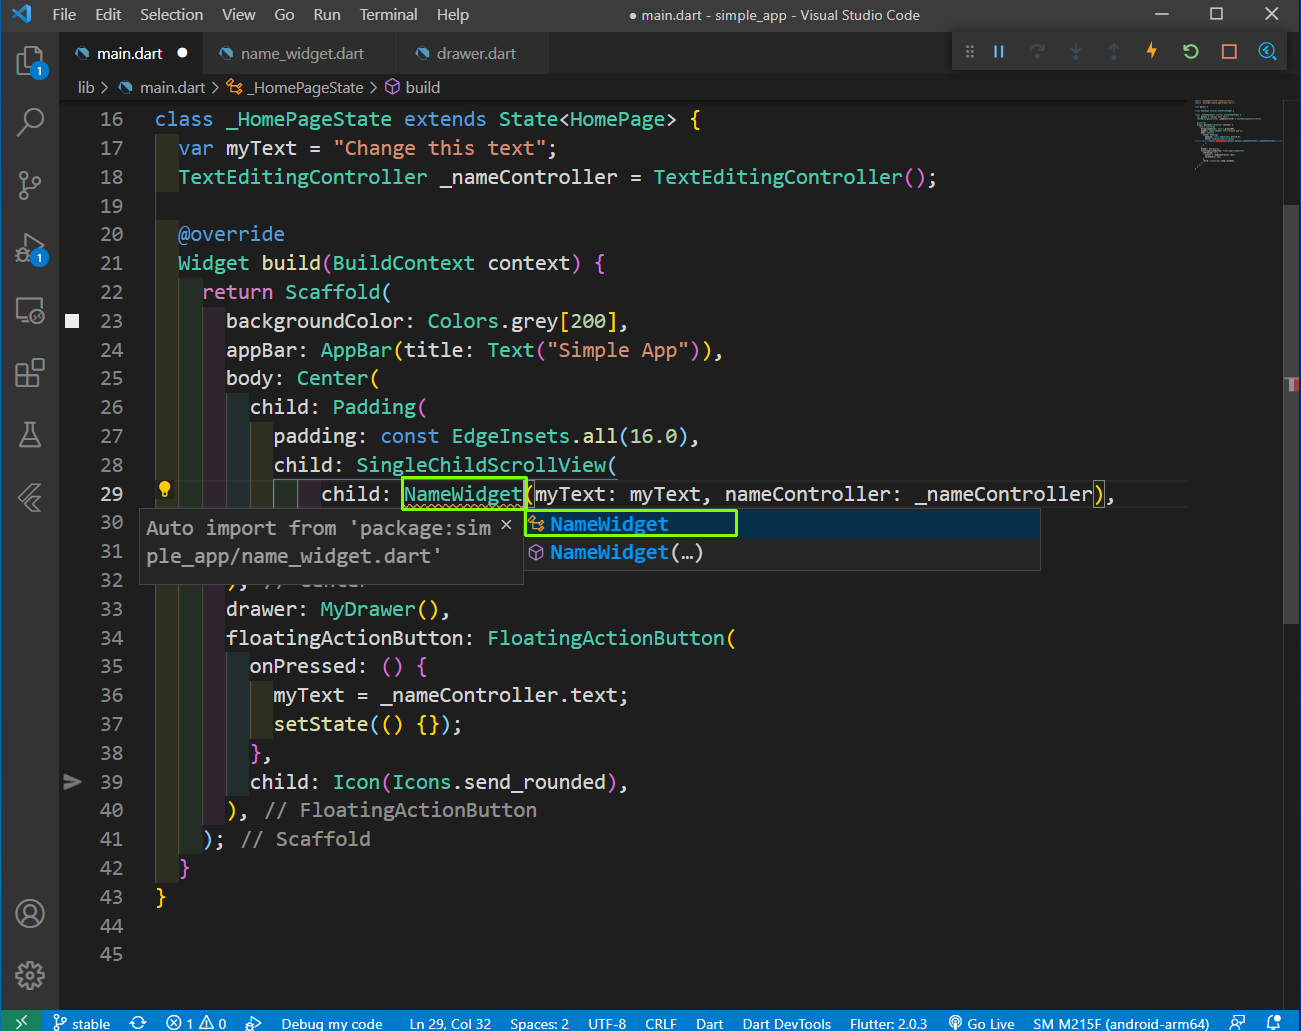 main.dart
Now, we will remove the HomePage itself from main.dart. Since, it’s a page, we will create a pages folder inside the lib folder and a home_page.dart inside it.
After putting the entire HomePage content, we need to do some imports.
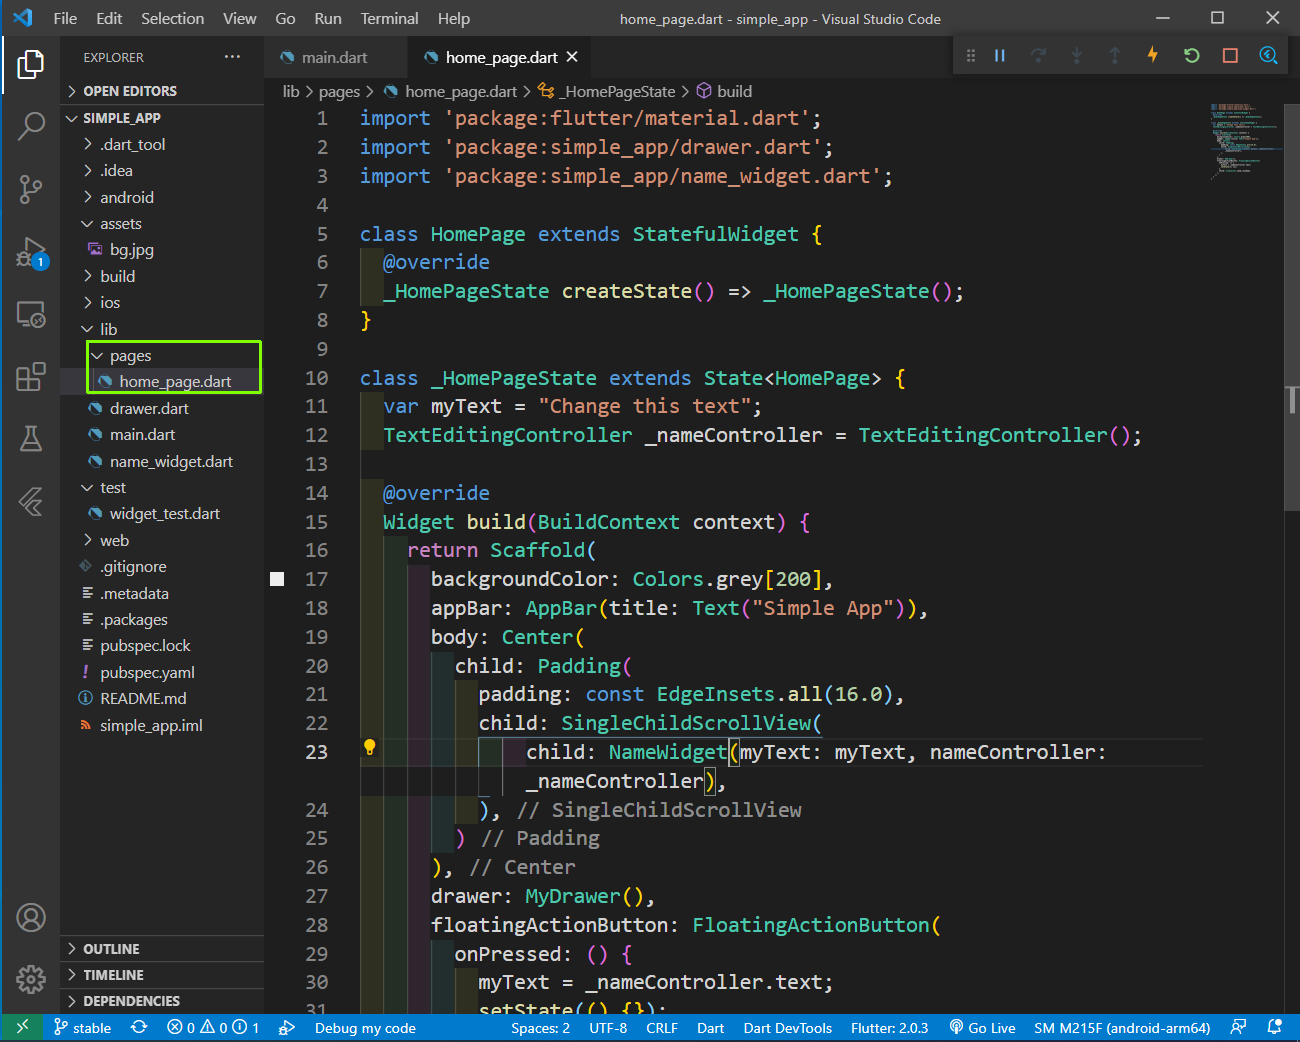 home_page.dart
Our main.dart is now only 9 lines long and we have completely optimize our app. But we need to do a hot restart of our app.
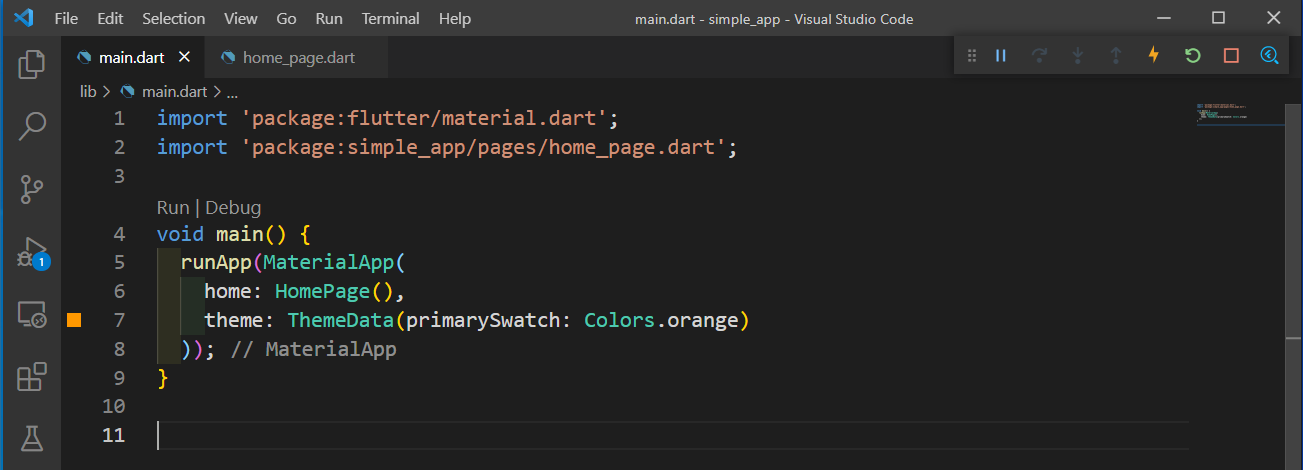 main.dart
Now, our app will behave the same and this completes our post. You can find the code for the same in this github repo.