Video Chat app using Gatsby and twilio-3
by Nabendu Biswas / April 10th, 2020
#gatsby #twilio #react
Series: Gatsby-twilio
Welcome to part-3 of the series. We will finally start creating twilio function in this part. First click on the three dots in the left side of twilio dashboard page.
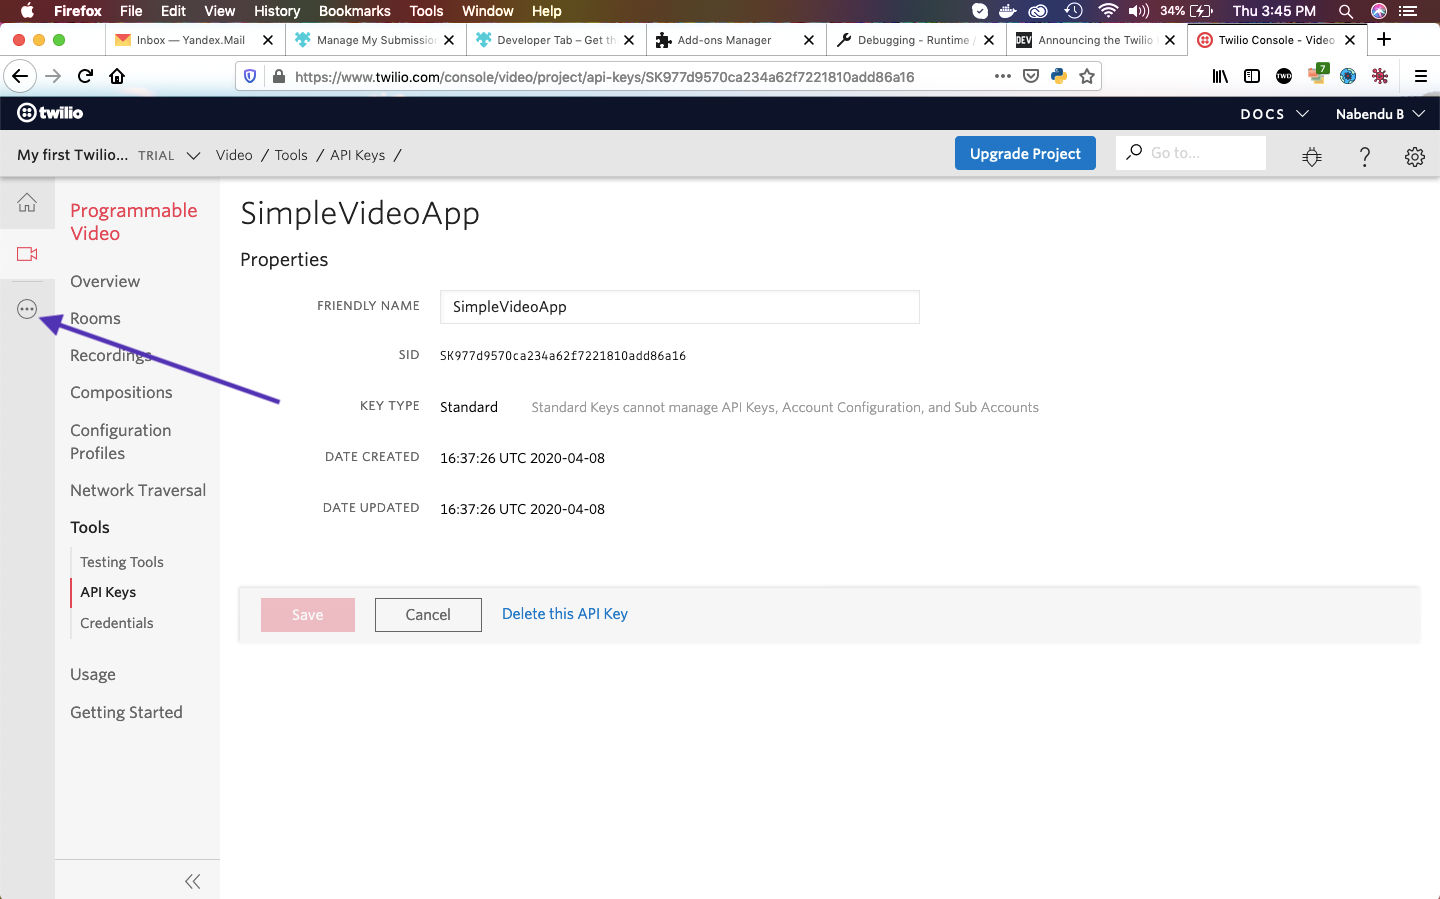 twilio dashboard
Next, if you scroll a bit down you will find Functions. Click on it.
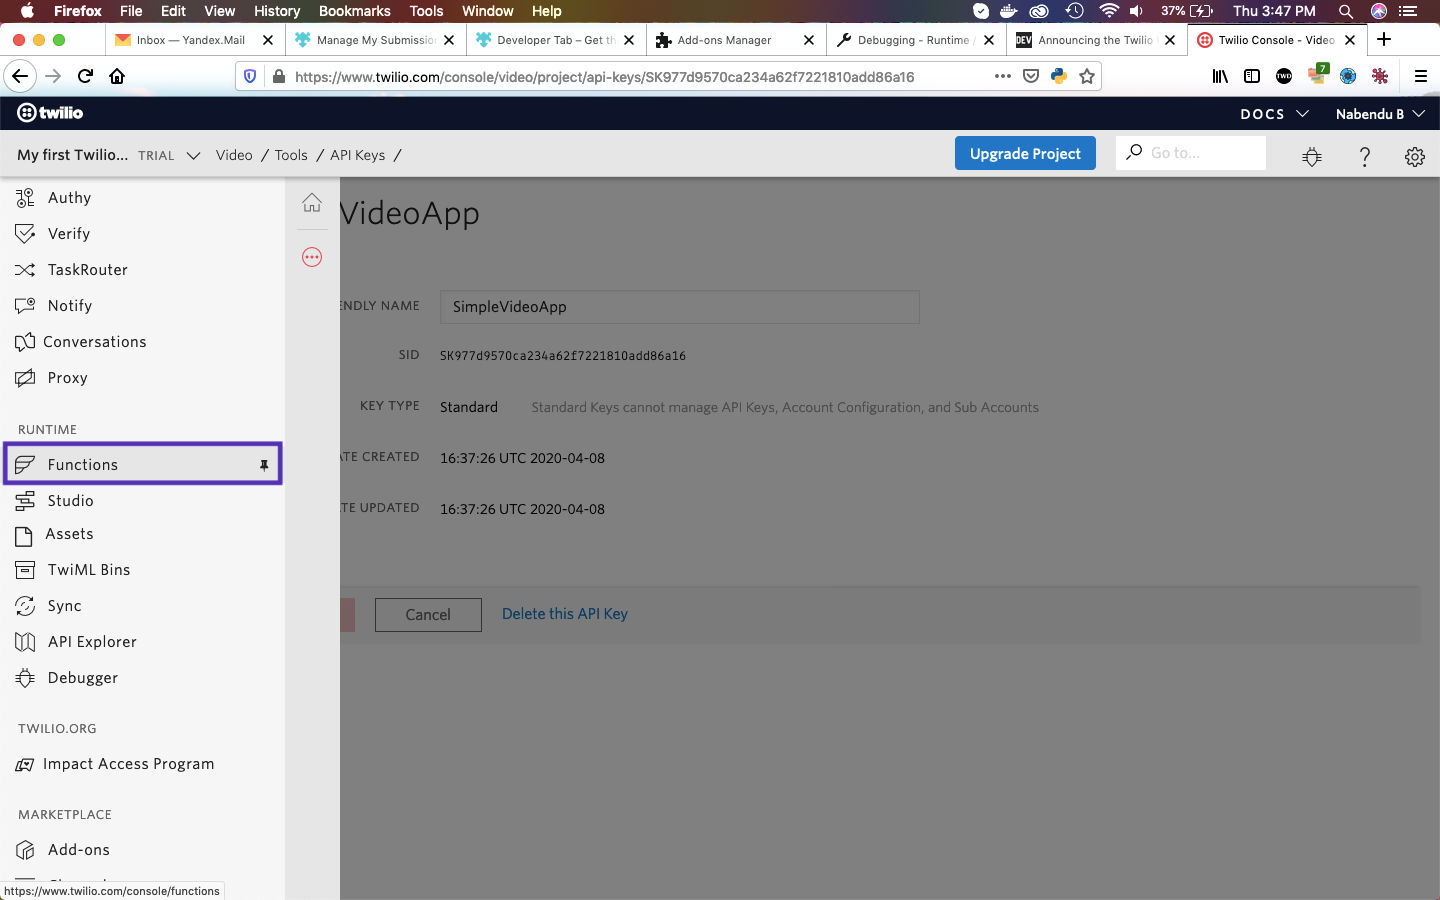 Functions
In the next screen, click on Create a Function button.
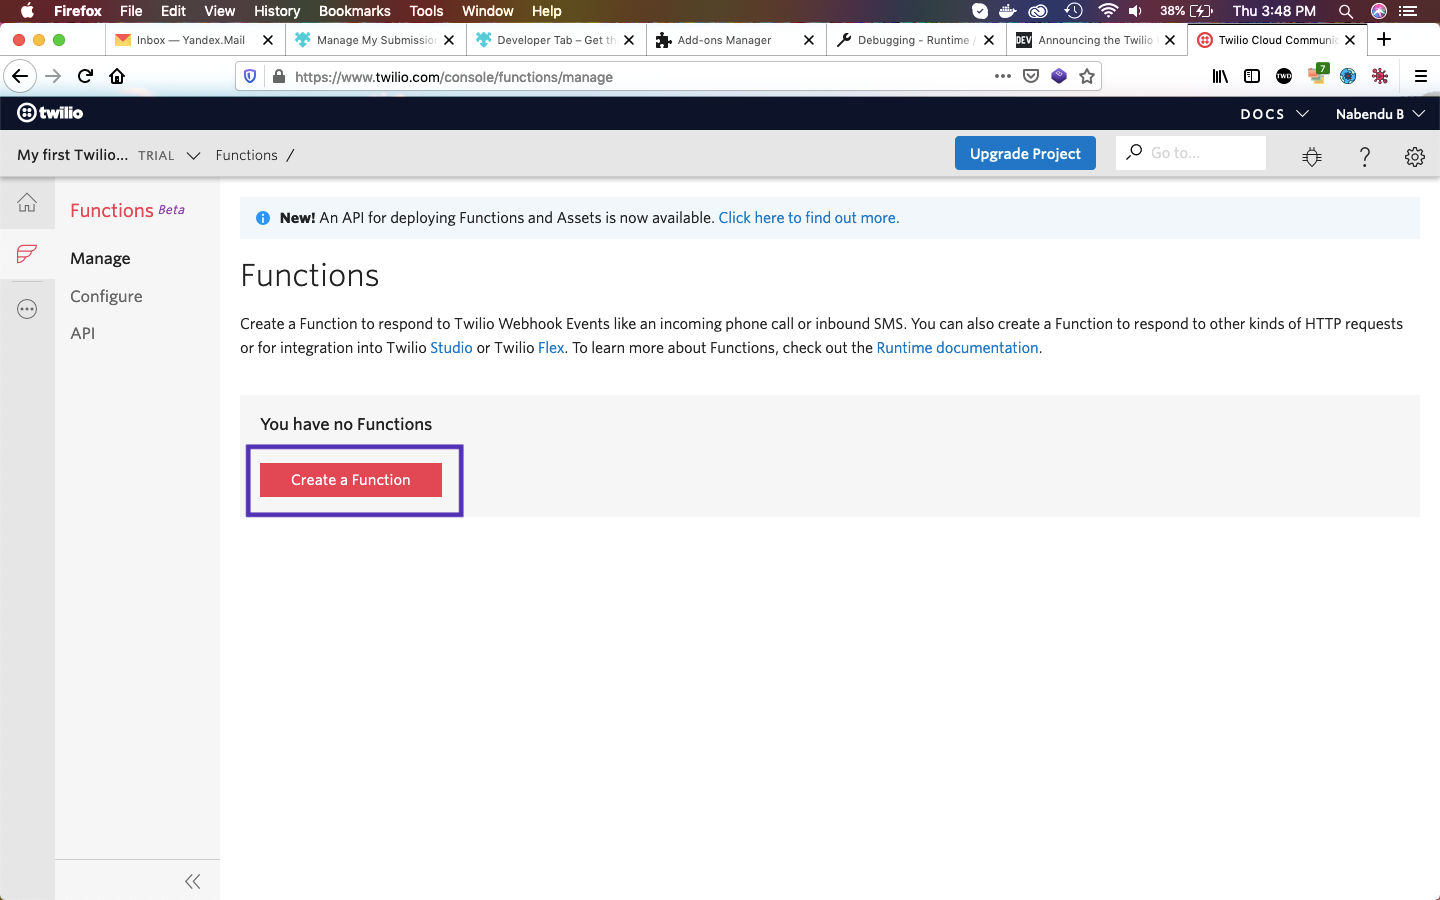 Create a Function
A pop-up will appear in which you need to click on Blank and then Create button.
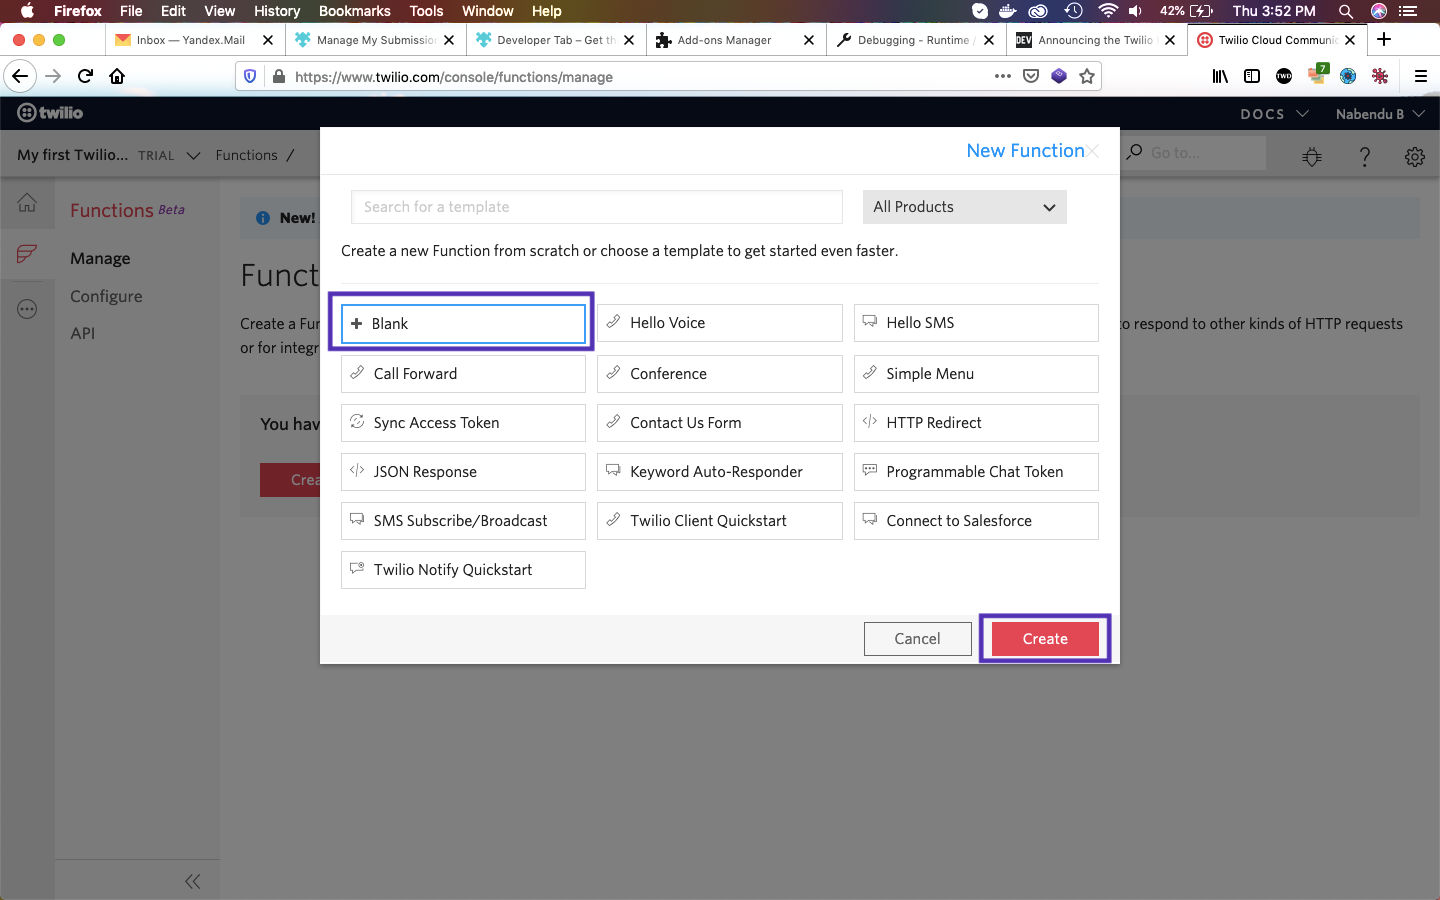 Create
In the next page, we need to first give our function a name and a path. I gave it Create Token and /create-token respectively.
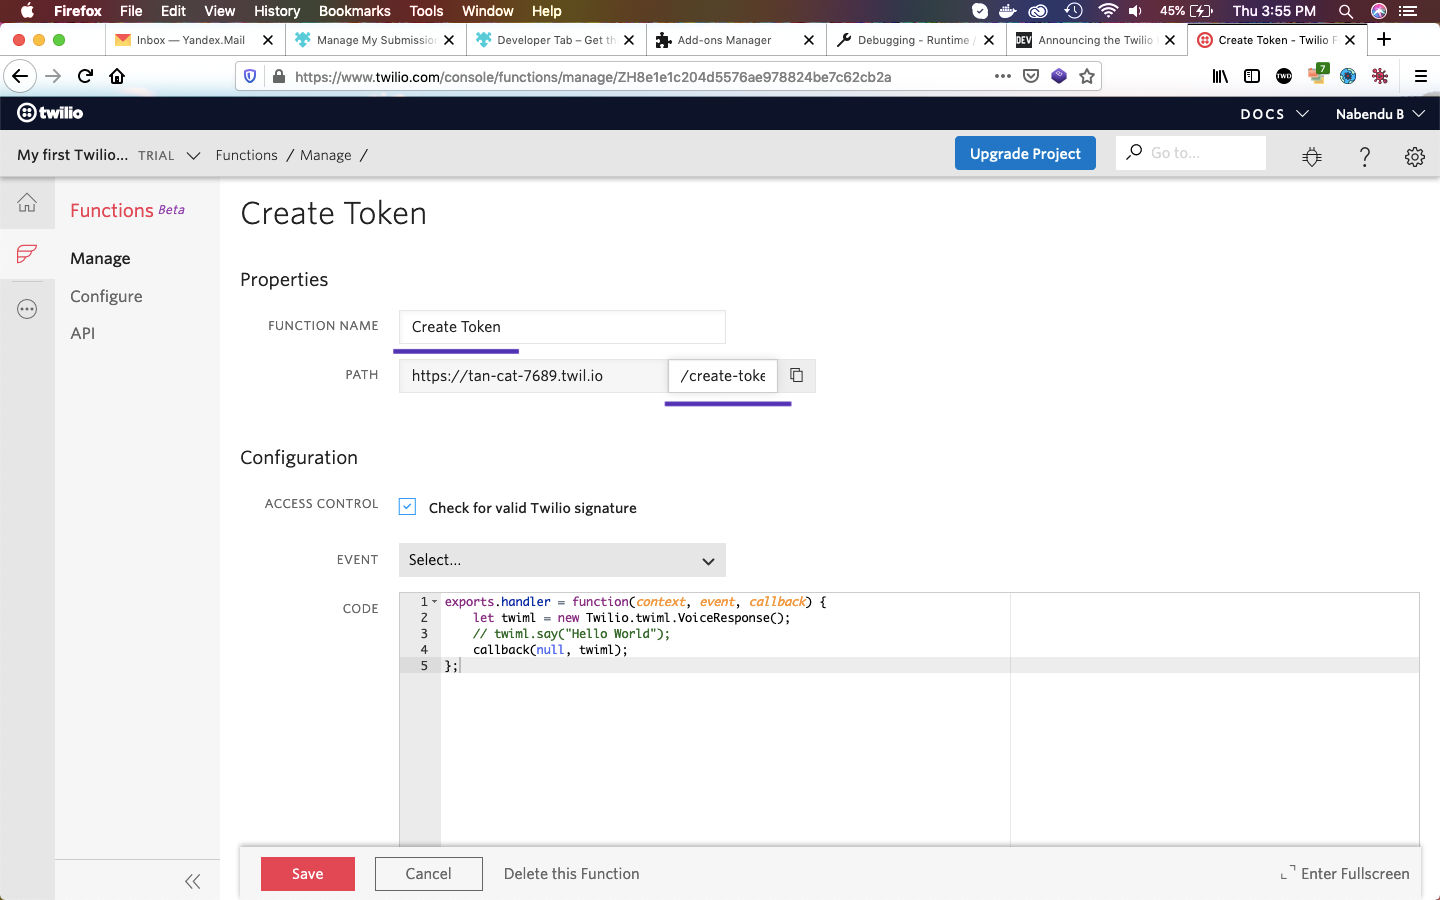 Create Token
Next, we need to first remove the checkbox and then remove everything inside the function.
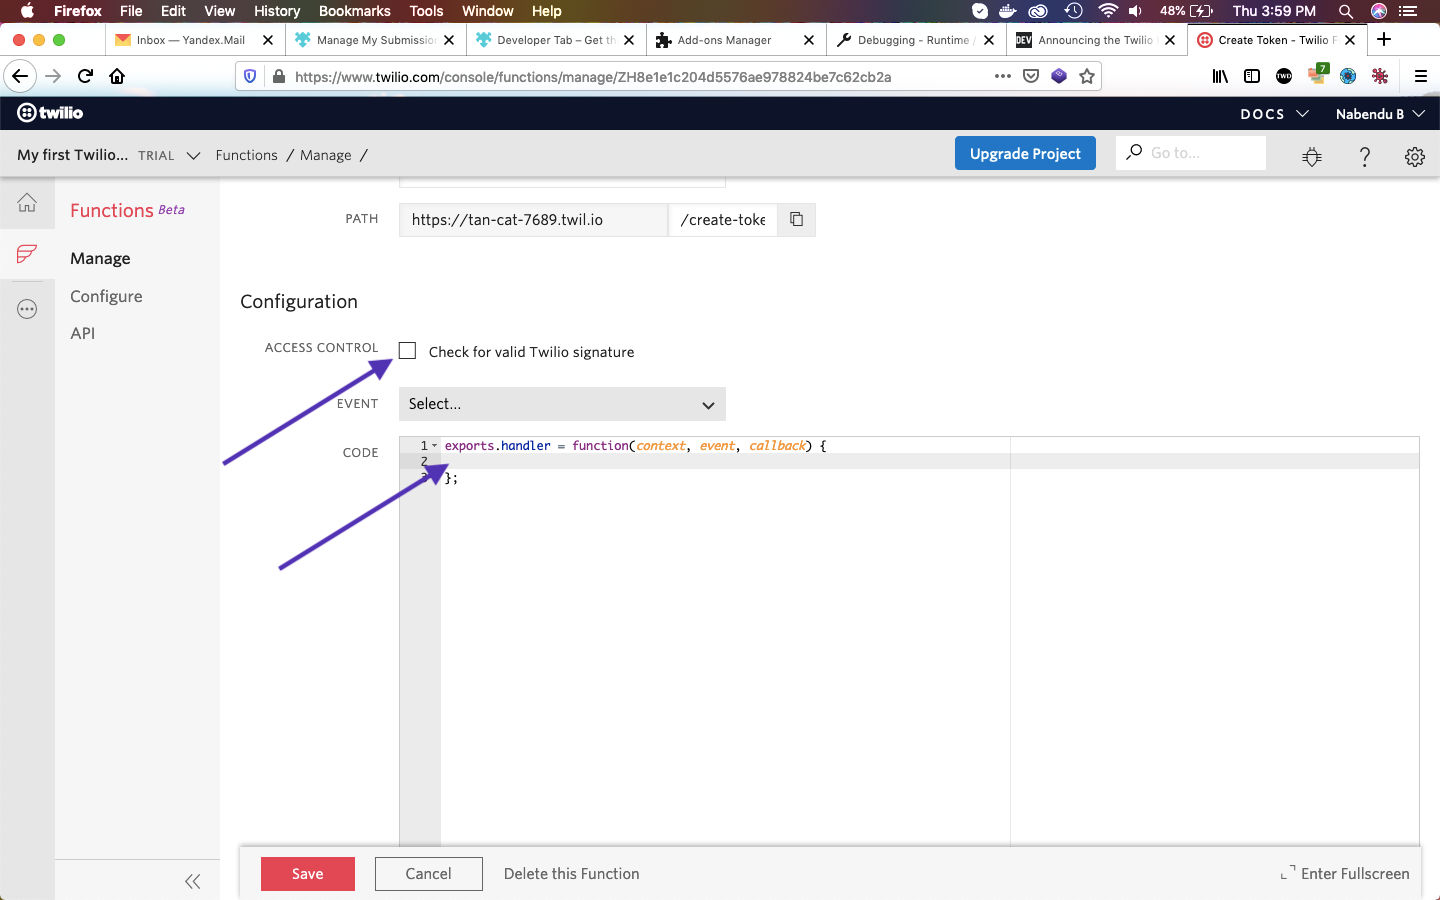 Remove
Next, we will write some code in the function. This code will use some inbuilt twilio variables and get a new access token from our stored variables.
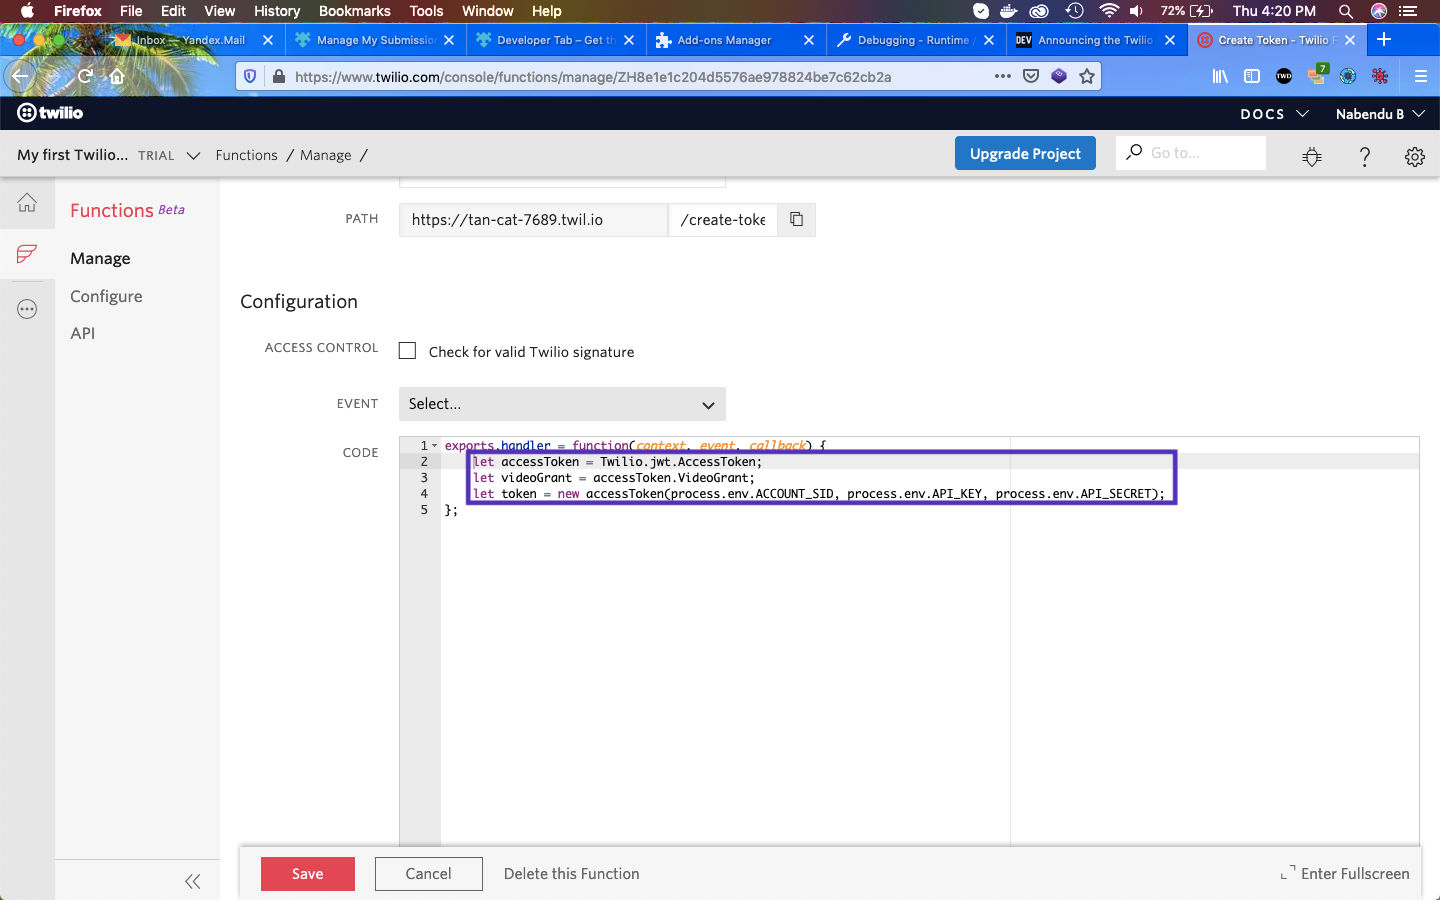 Some Code
After writing these three lines of code, click on Save button. After that click on the Configure link on the left side menu. It will open the below page.
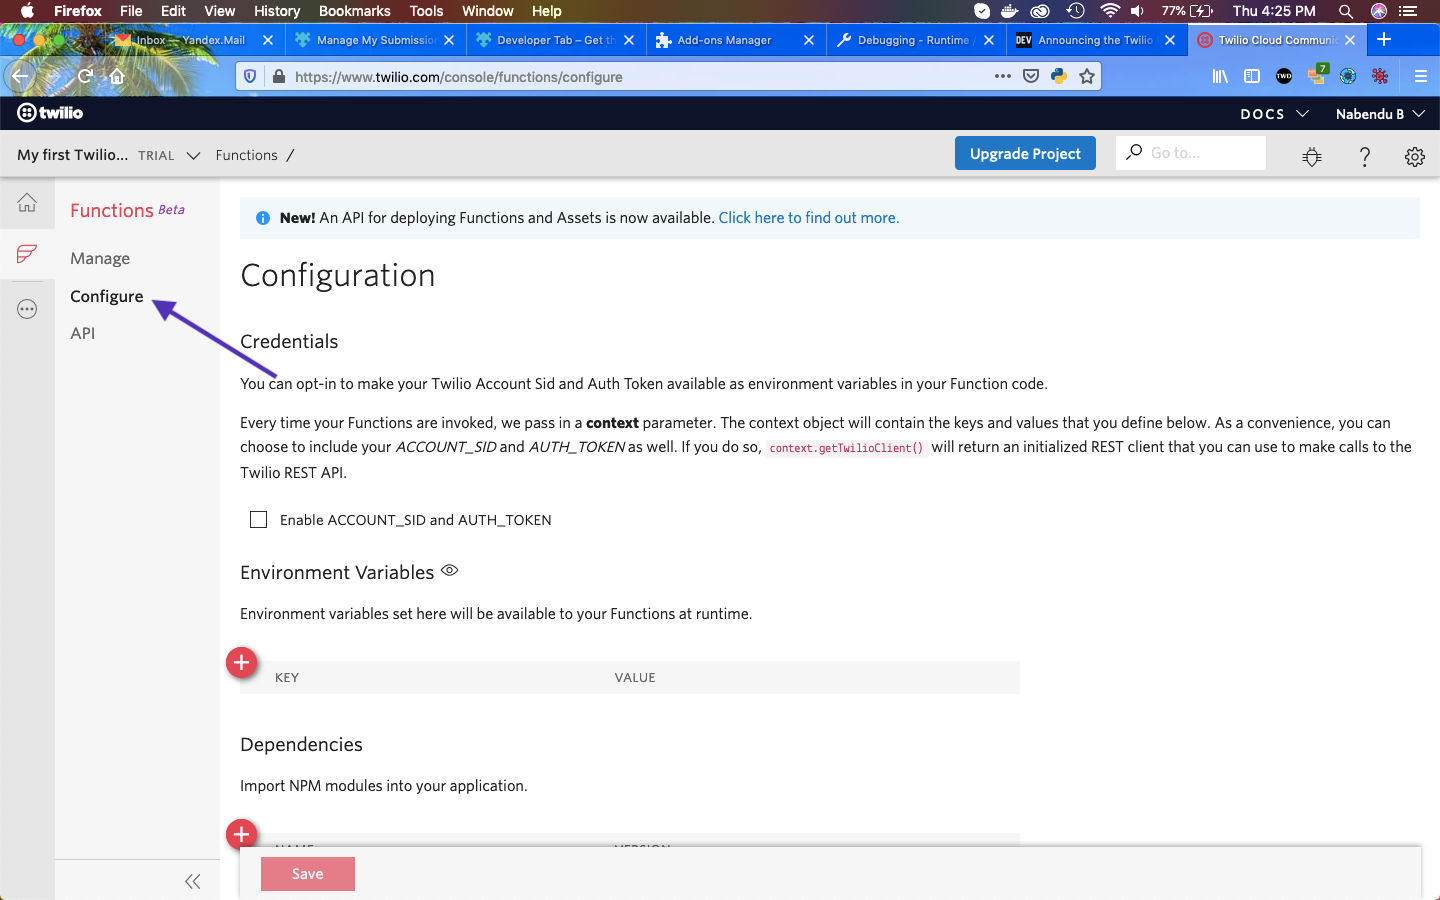 Configure
We need to first enable the checkbox for Enable ACCOUNT_SID and AUTH_TOKEN. After that click on the + button next to KEY twice and enter API_KEY and API_SECRET in the KEY column.
The VALUE for both of them you will get from TWILIO_API_SID and TWILIO_API_SECRET, which you saved in the .env file in part-2.
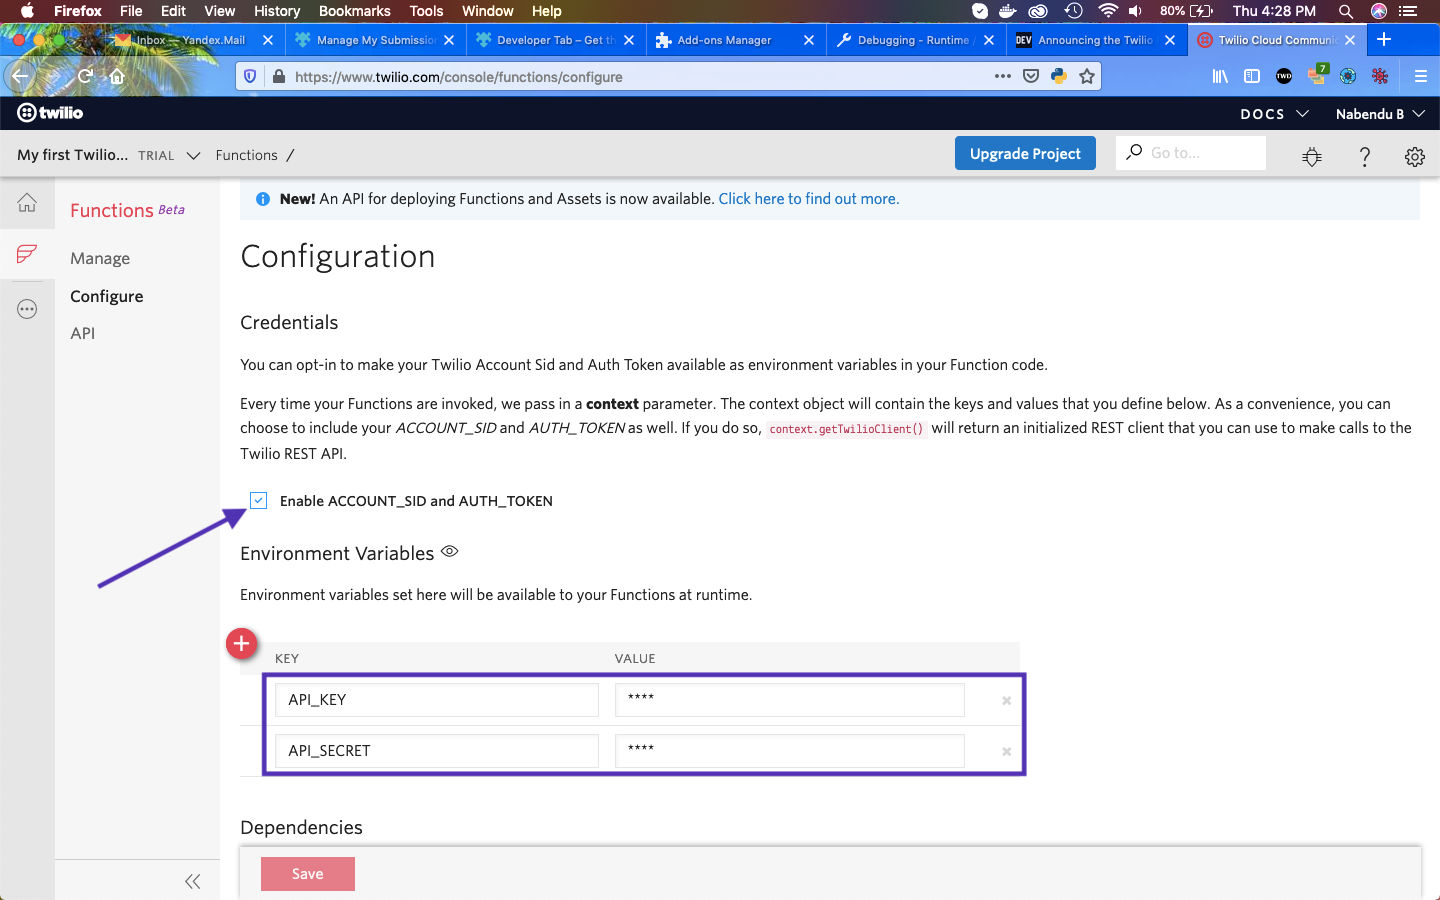 Configuration
After clicking on the Save button in the above screen, we need to click on the Manage link.
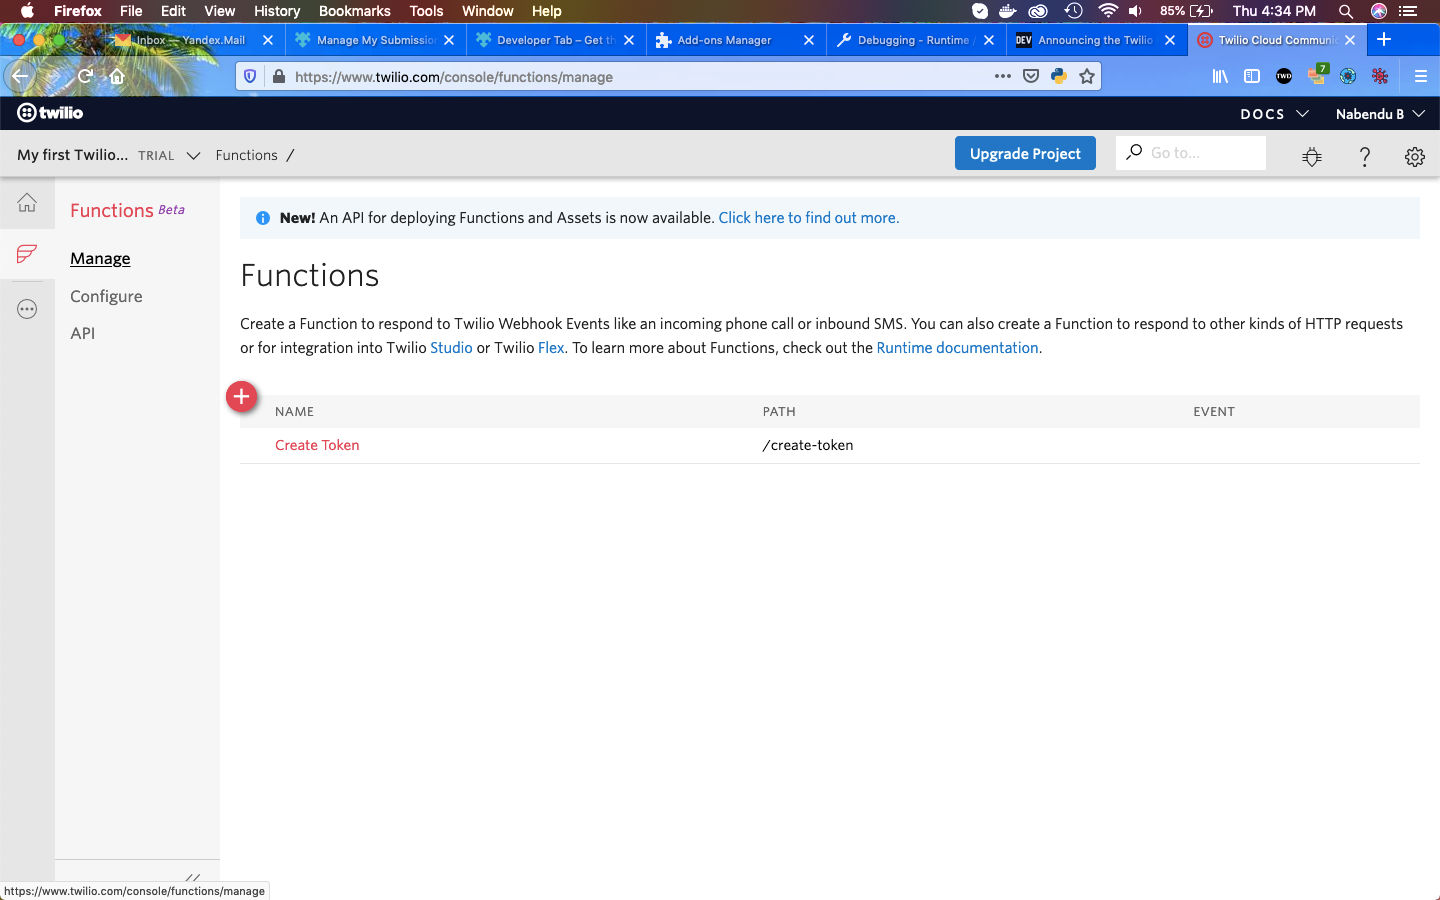 Manage
We need to click on the function name ie Create Token to go to the edit page. Next, we are adding the next four lines in the function. Here, we are doing a callback with the token with JWT.
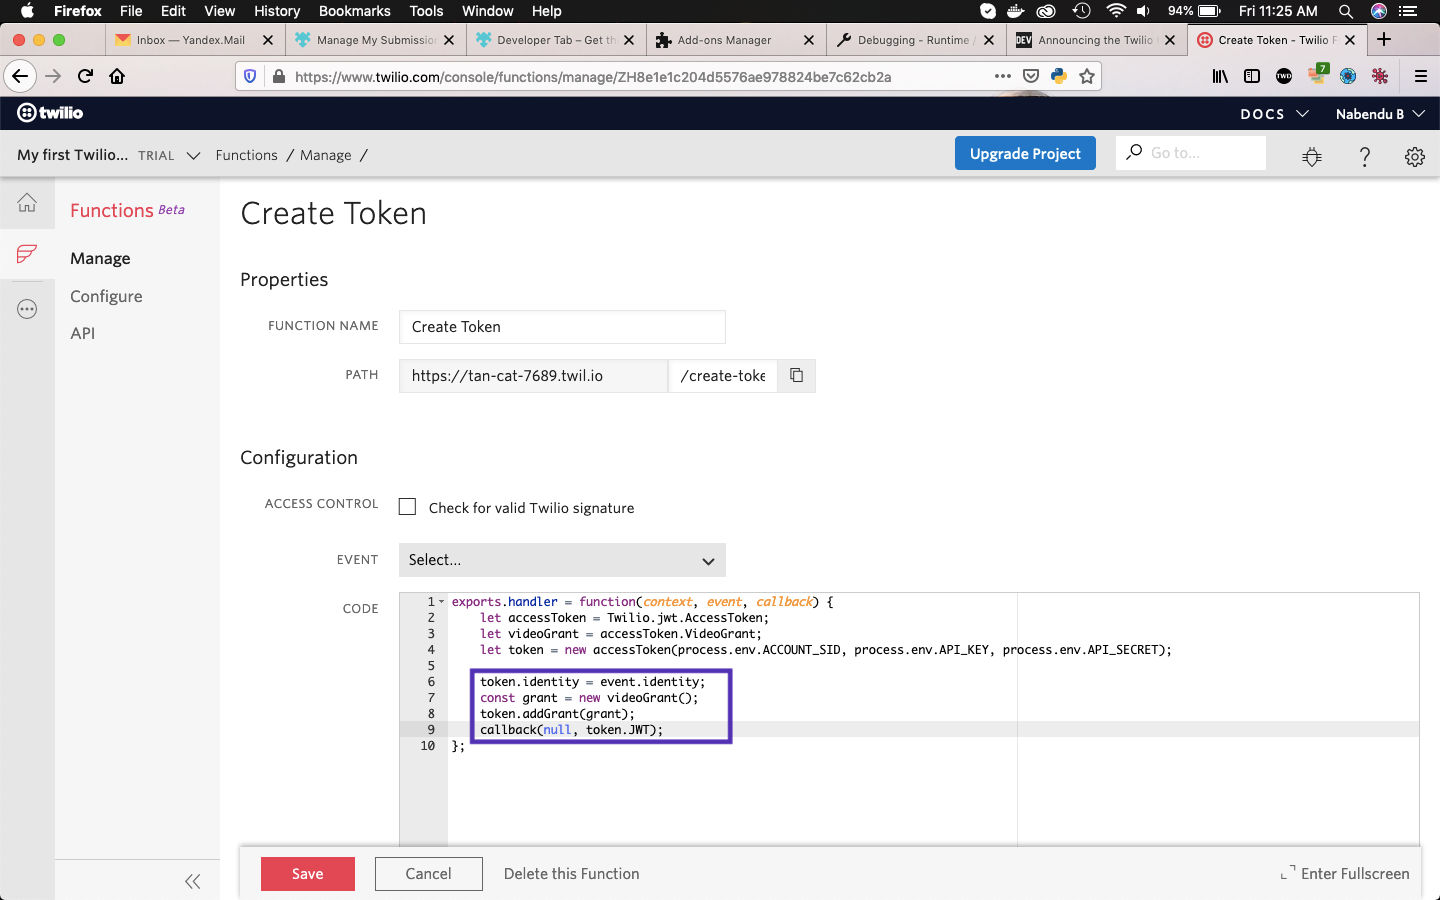 function
We will continue with this function in the next part.
You can also find the code for this project in this github link.