HTML Crash Course for Beginners - 3
by Nabendu Biswas / July 16th, 2020
#html #beginners #webdev
Series: HTML-Basics
Welcome to part-3 of the series. We will continue learning about more HTML tags. But before that let’s learn about Tag Attributes.
Tag Attributes
All tags have attributes, infact when we learn CSS we will add either class or id attribute to a tag. They provide additional information about a tag and are required in some tags like the anchor tag, we understood in the previous part. The anchor tag have a required attribute href and an additional attribute target.
 Tag Attribute
List Tag
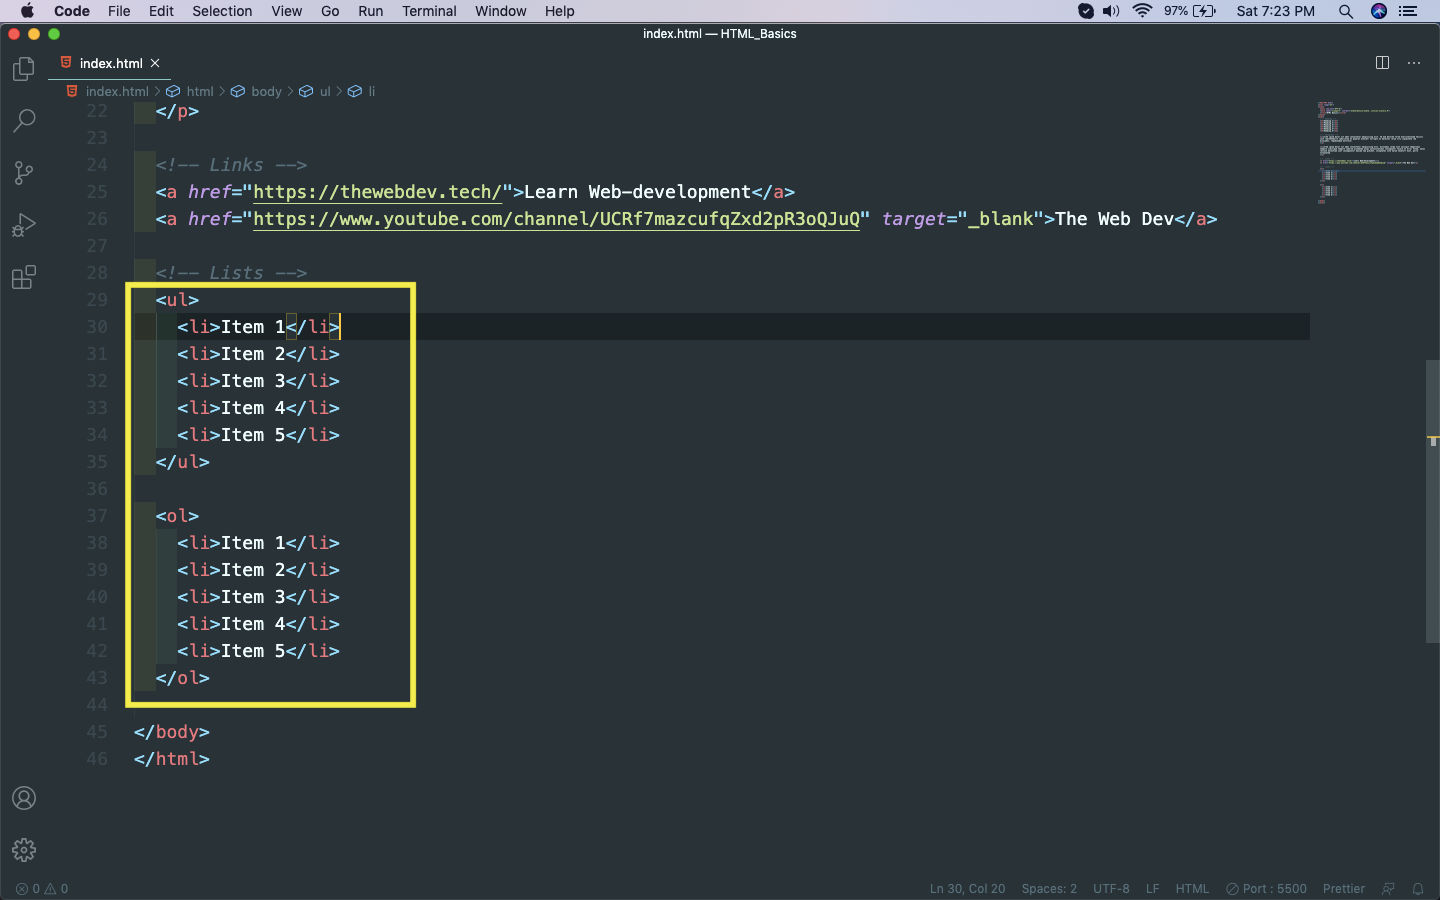
Now, we will learn about list tags. They are used to display list on the web-page. We have two types of list unordered lists(<ul>) and ordered lists(<ol>). As the name suggest ordered list is a numbered list and unordered list is not.
Each list also have list items(<li>), which shows each item in a list. Below is the example of both type of list.
 Lists
Lists
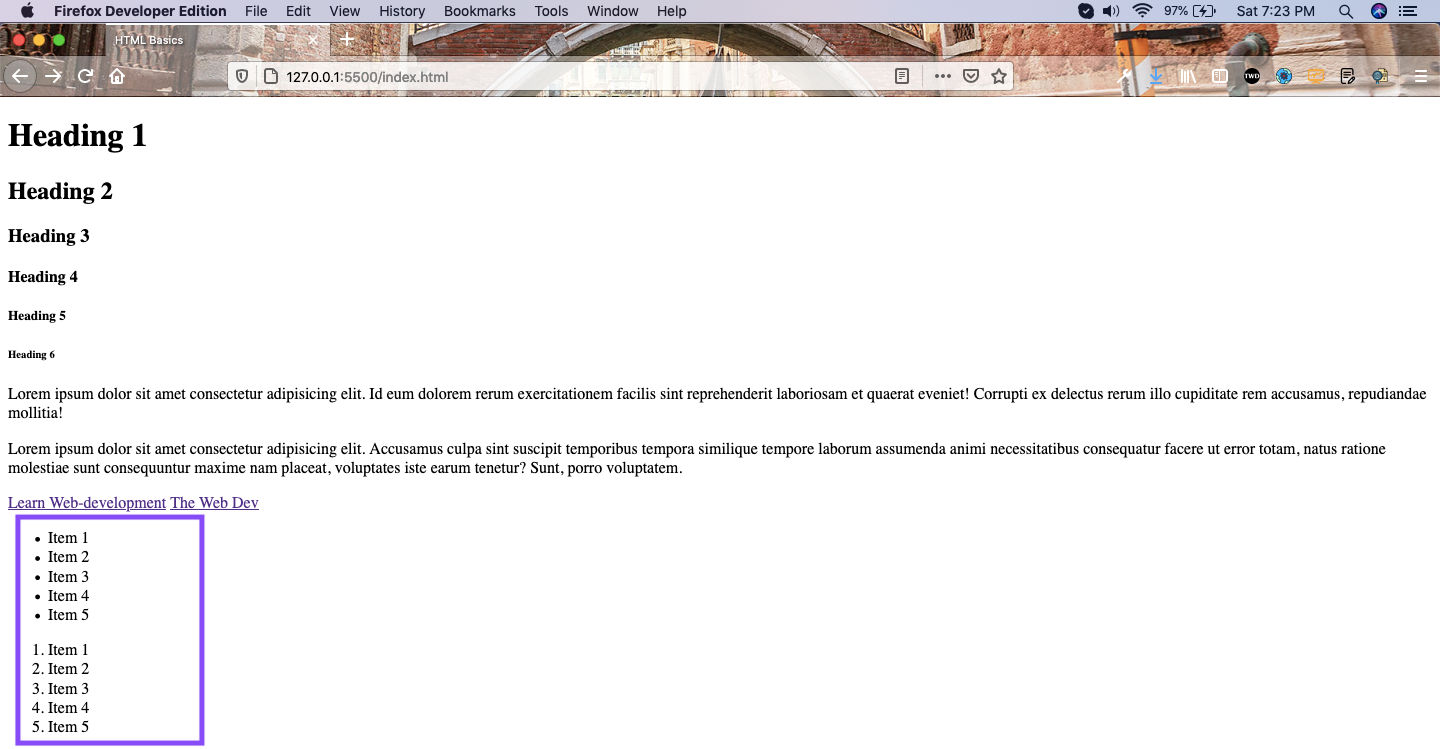
And it will show like below in web-page.
 Web-page
Table Tags
Now, we will learn about table tags. There are a lot of tags to form a table. First everything is wrapped in a <table> tag. After that we have two sections — Table head(<thead>) and Table body(<tbody>).
Inside both table head and table body we have table row(<tr>). But inside the table head’s table row, we put table header(<th>) and inside table body’s table row we put table data(<td>).
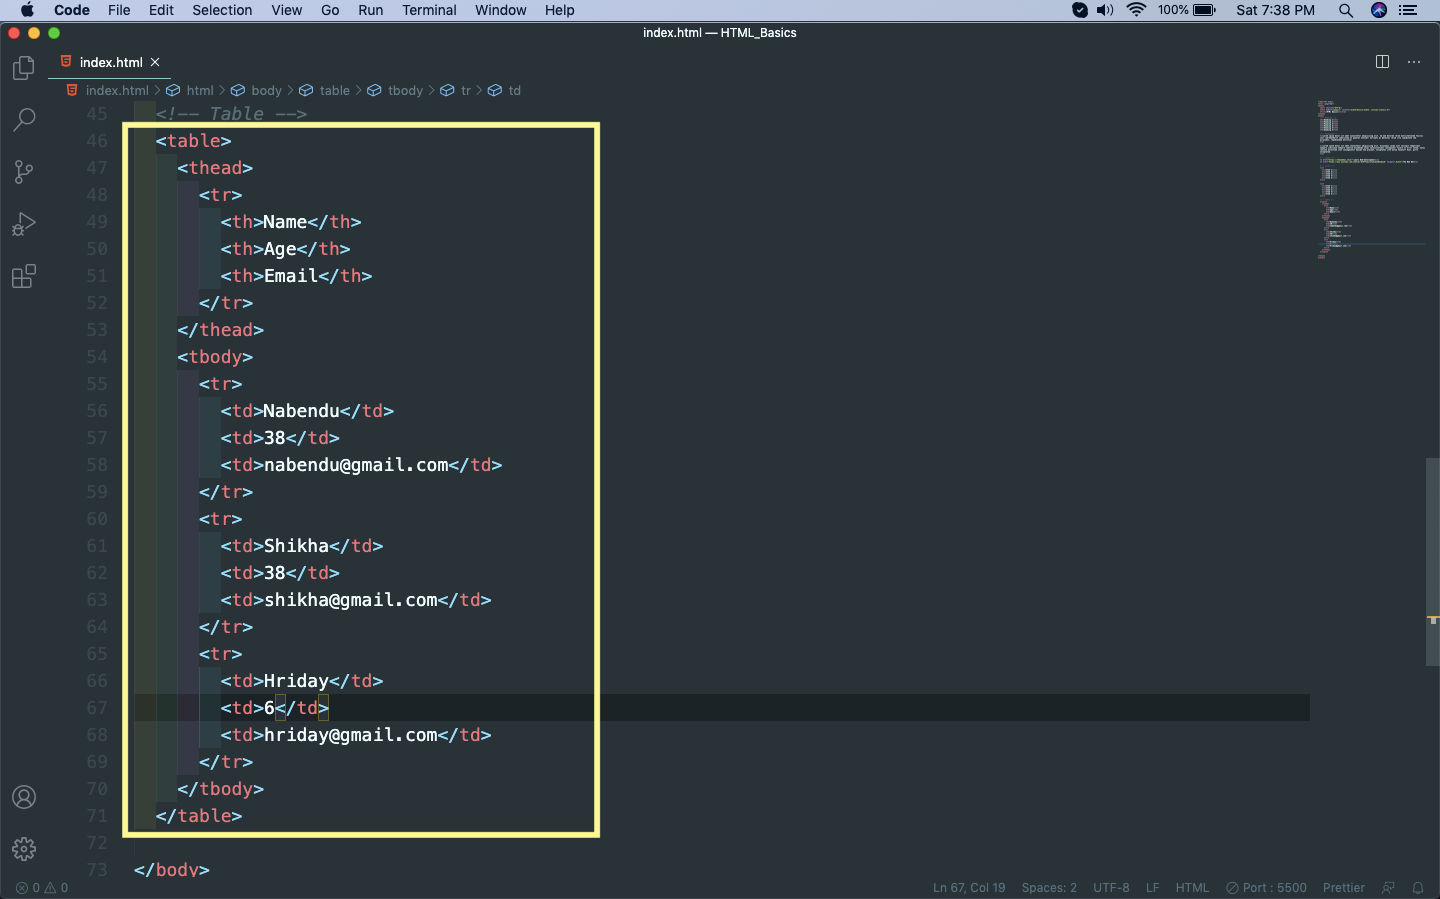 Table Tag
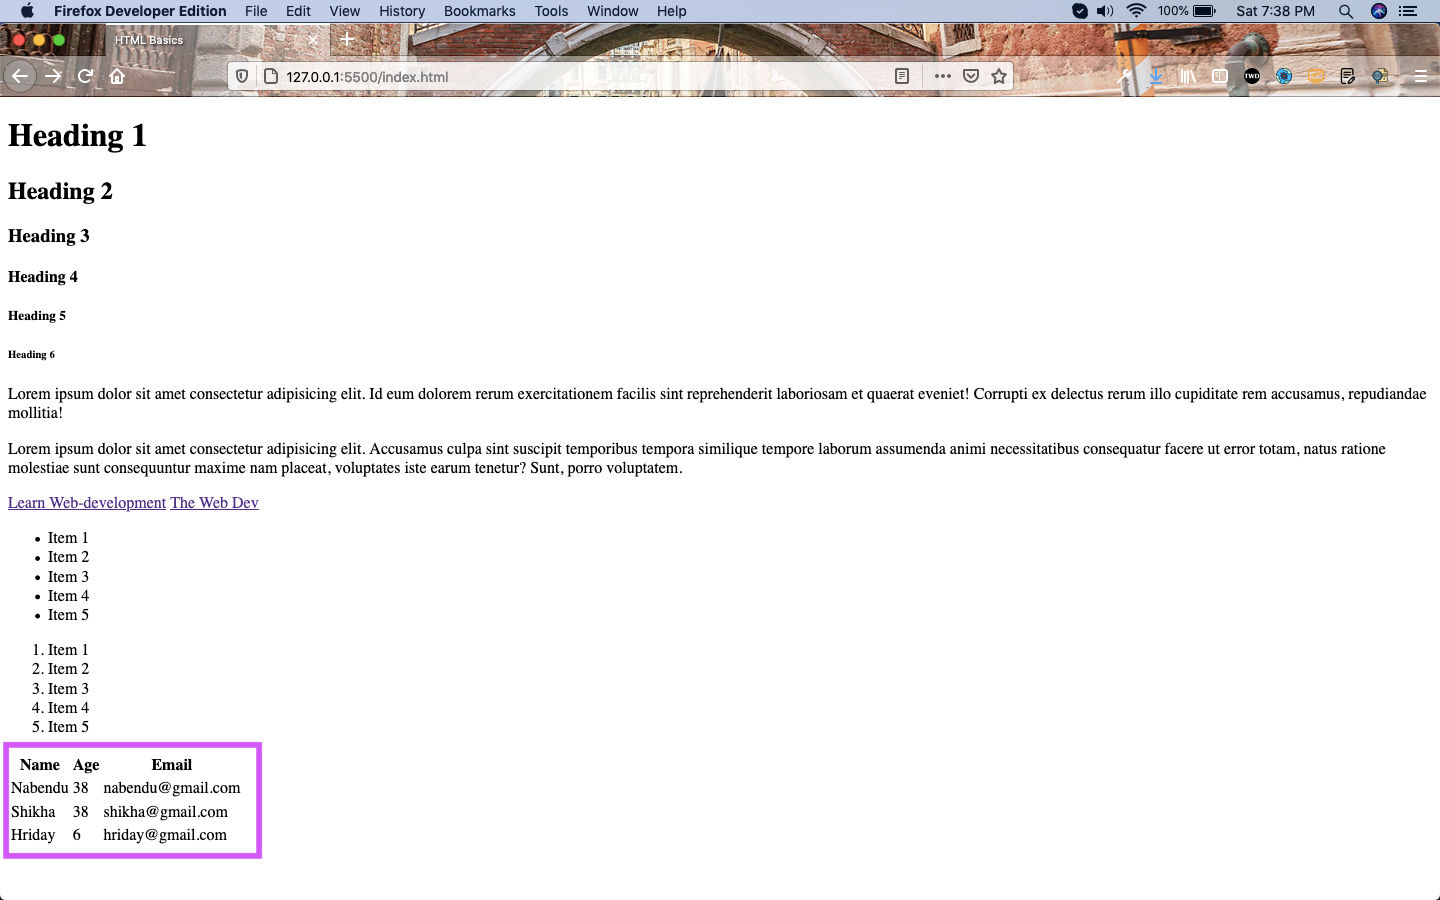
Now, it will be much more clear when we see the table in the browser. This table is without any CSS and very ugly, but even with the basics the th is differentiated with the td.
 Table
Table
Form Tags
Now, we will look into one of the most important tag, which is the Form tag. It is on of the most widely used tag on most sites, as every site have a Contact Page, where a user enter Name, Age and other details.
But before the <form> tag, we will quickly look into two other tags because our web-page was having less space between each section. We can easily do it through CSS, but here we are learning pure HTML so we will concentrate on it.
The first tag is break row(<br>), which as the name suggests creates an empty row. The next tag is horizontal rule(<hr>), which creates a horizontal line on the web-page. Notice how both tags don’t have a closing tag, as they are self-closing.
We are also creating a basic form after that. It have tow fields — one is a text field and other is a number field, which are given by the input tag(<input>). Now, the input tag have many different type of attributes which changes it’s functionality.
Each input tag is associated with a label tag, which is used to give any text to it.
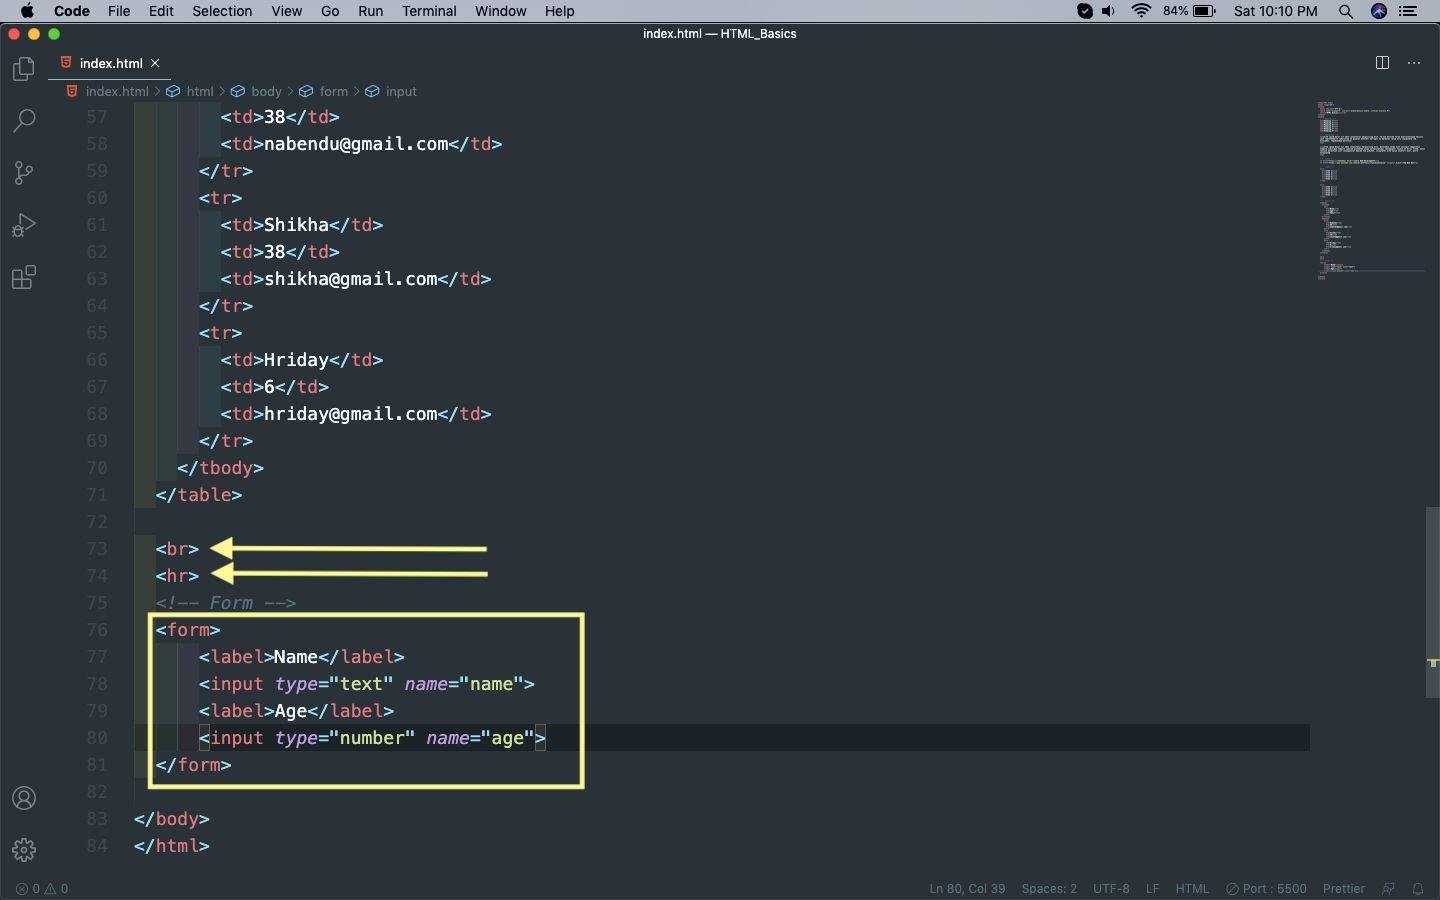 br, hr and form
Now, our web-page with the br, hr and form tag looks like below.
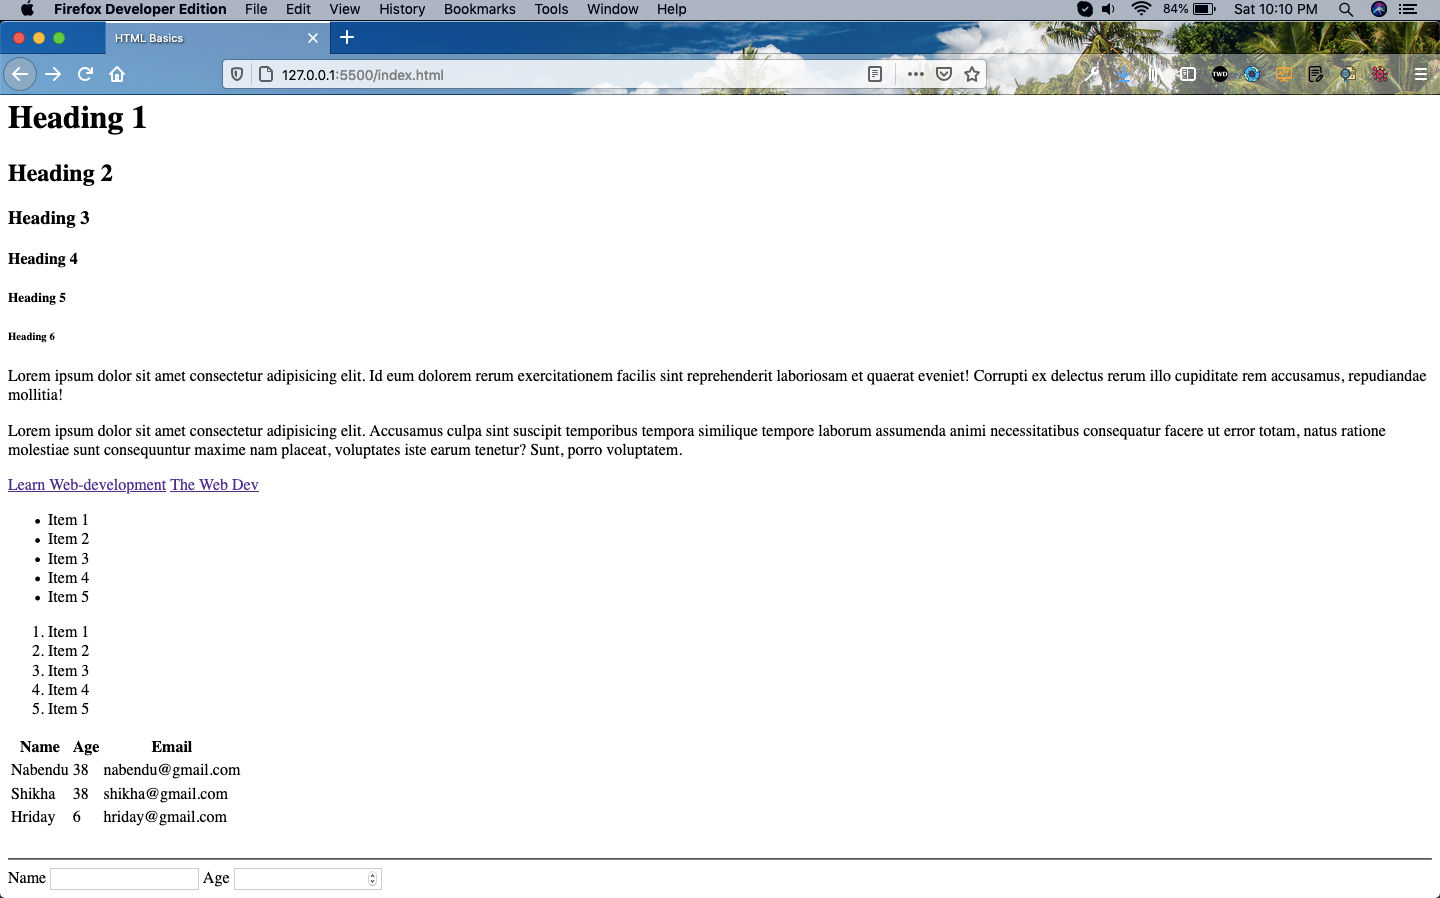 br, hr and form
Because the input tag is an inline block, so both of them are appearing on the same line. We want both of them on a different line, so to do that we will use another tag which is just called the div tag. You will see this tag present in most HTML page, but it doesn’t mean anything but only serves a purpose i.e. it is a row level element.
So, we will wrap the two pairs of label and input in one of them and they will appear in different lines. Also, adding a <br> between them to add some more space.
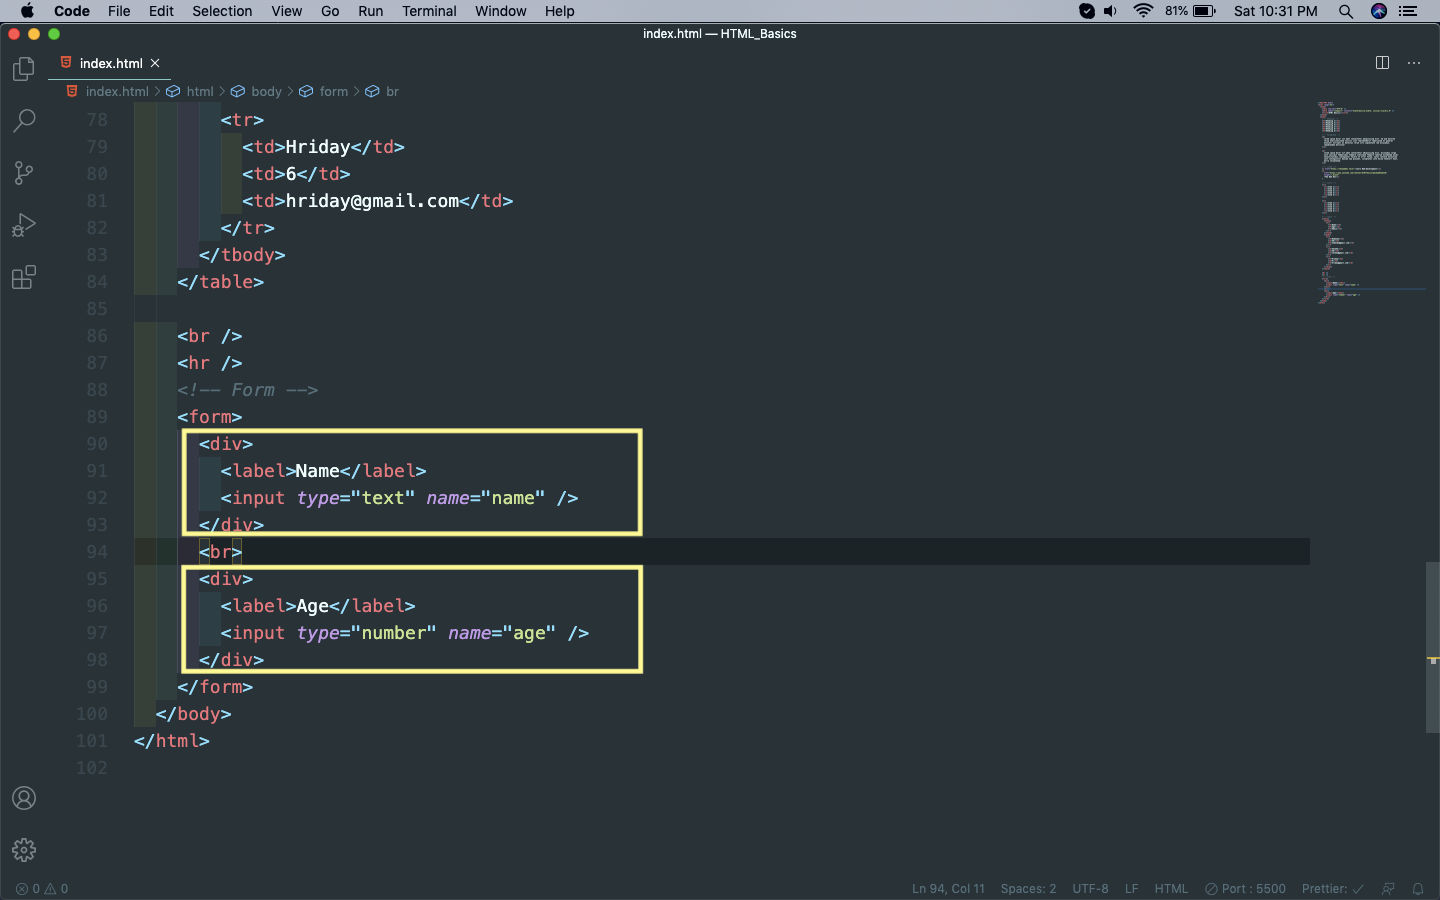 div tag
Next, we will learn about the textarea tag, which is almost like the <input type=”text” /> tag. But it have more area to type. And the next tag will be select tag, which is used to have option in dropdown to select.
Below is the code for both of them.
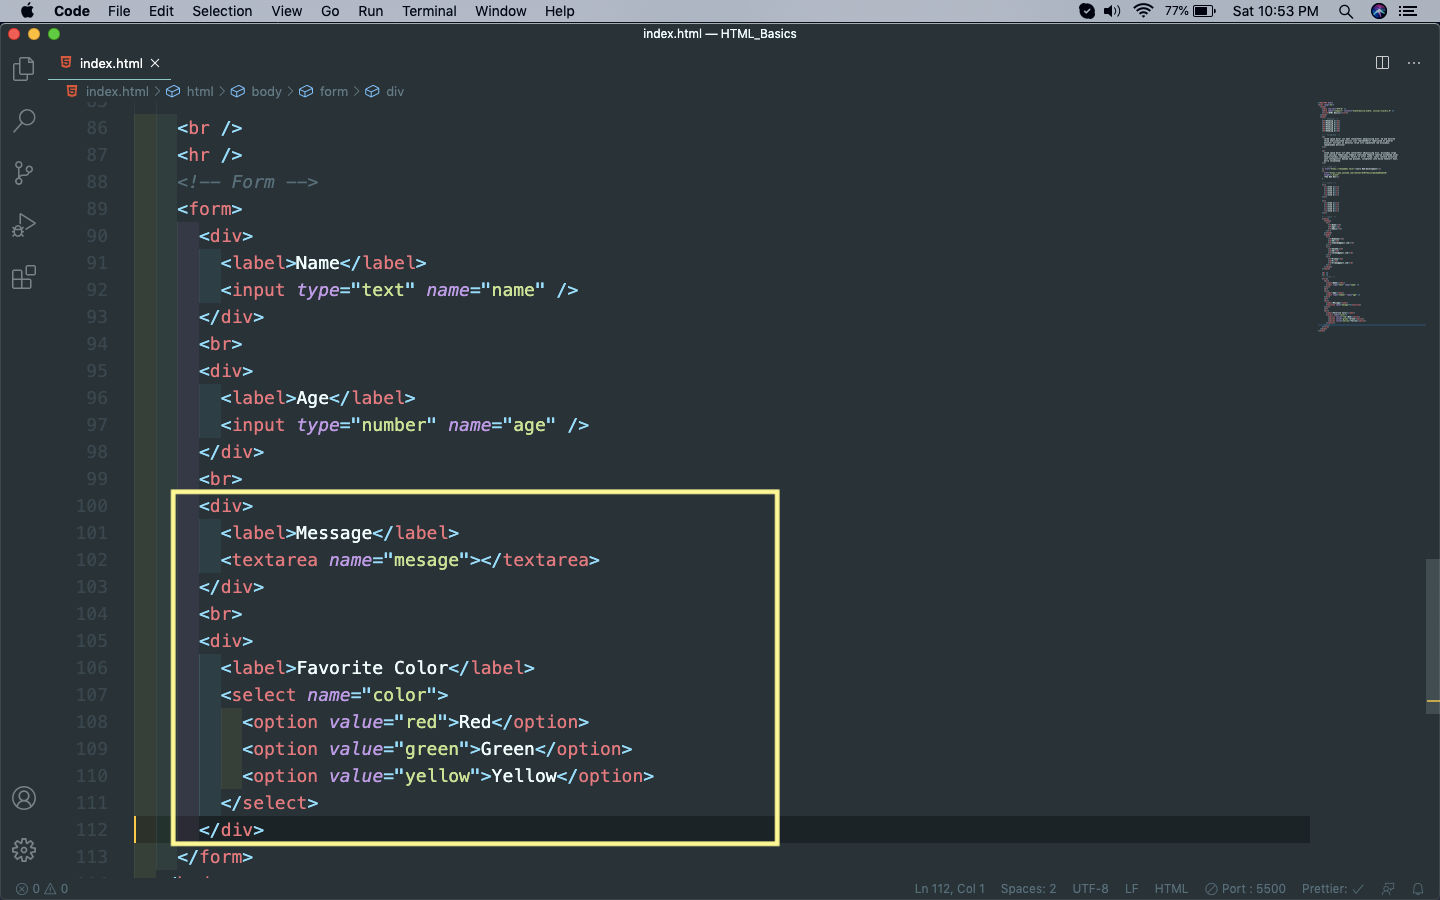 Textarea and select
It will result in the below on the web-page.
 Textarea and select
There are lots more tags to complete in form, which you can find in the final part.