Create a Line Through Effect with JavaScript
by Nabendu Biswas / September 15th, 2020
#javascript #beginners #webdev
Series: JS-Projects
In this post, we are going to create an amazing line through effect, with help of CSS and lots of JavaScript.
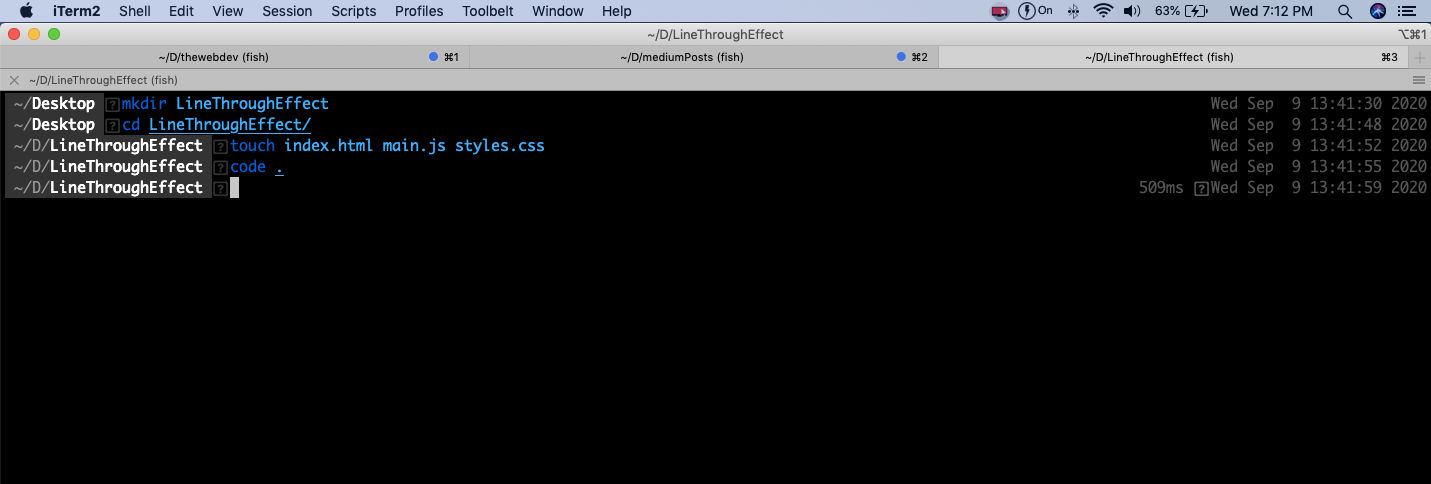
So, head over to your terminal and create a folder LineThroughEffect. Create three files -index.html, main.js and styles.css inside it. We are also opening the files in VS Code.
 VS Code
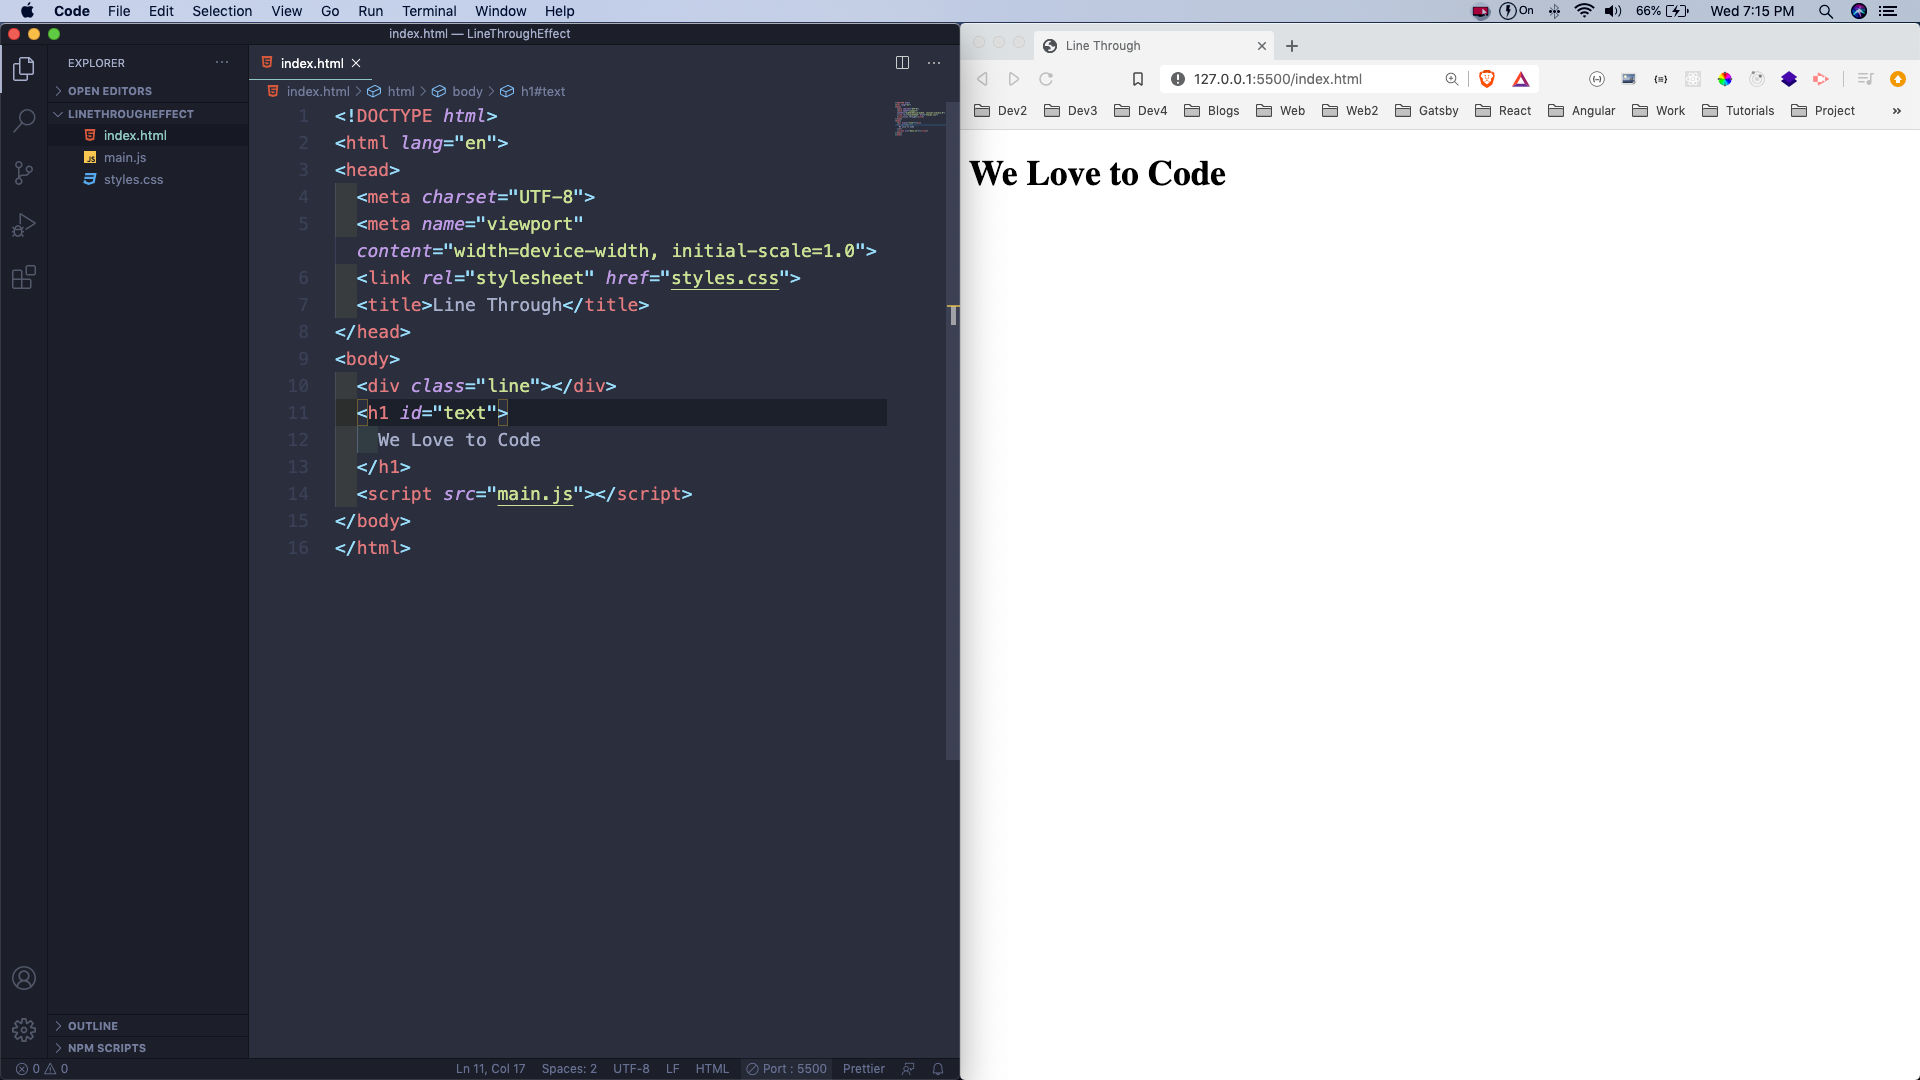
Now, we will add the basics html in index.html and also link both css and js files. We have very little html in this project, with div with id of line and an h1 with an id of text.
 index.html
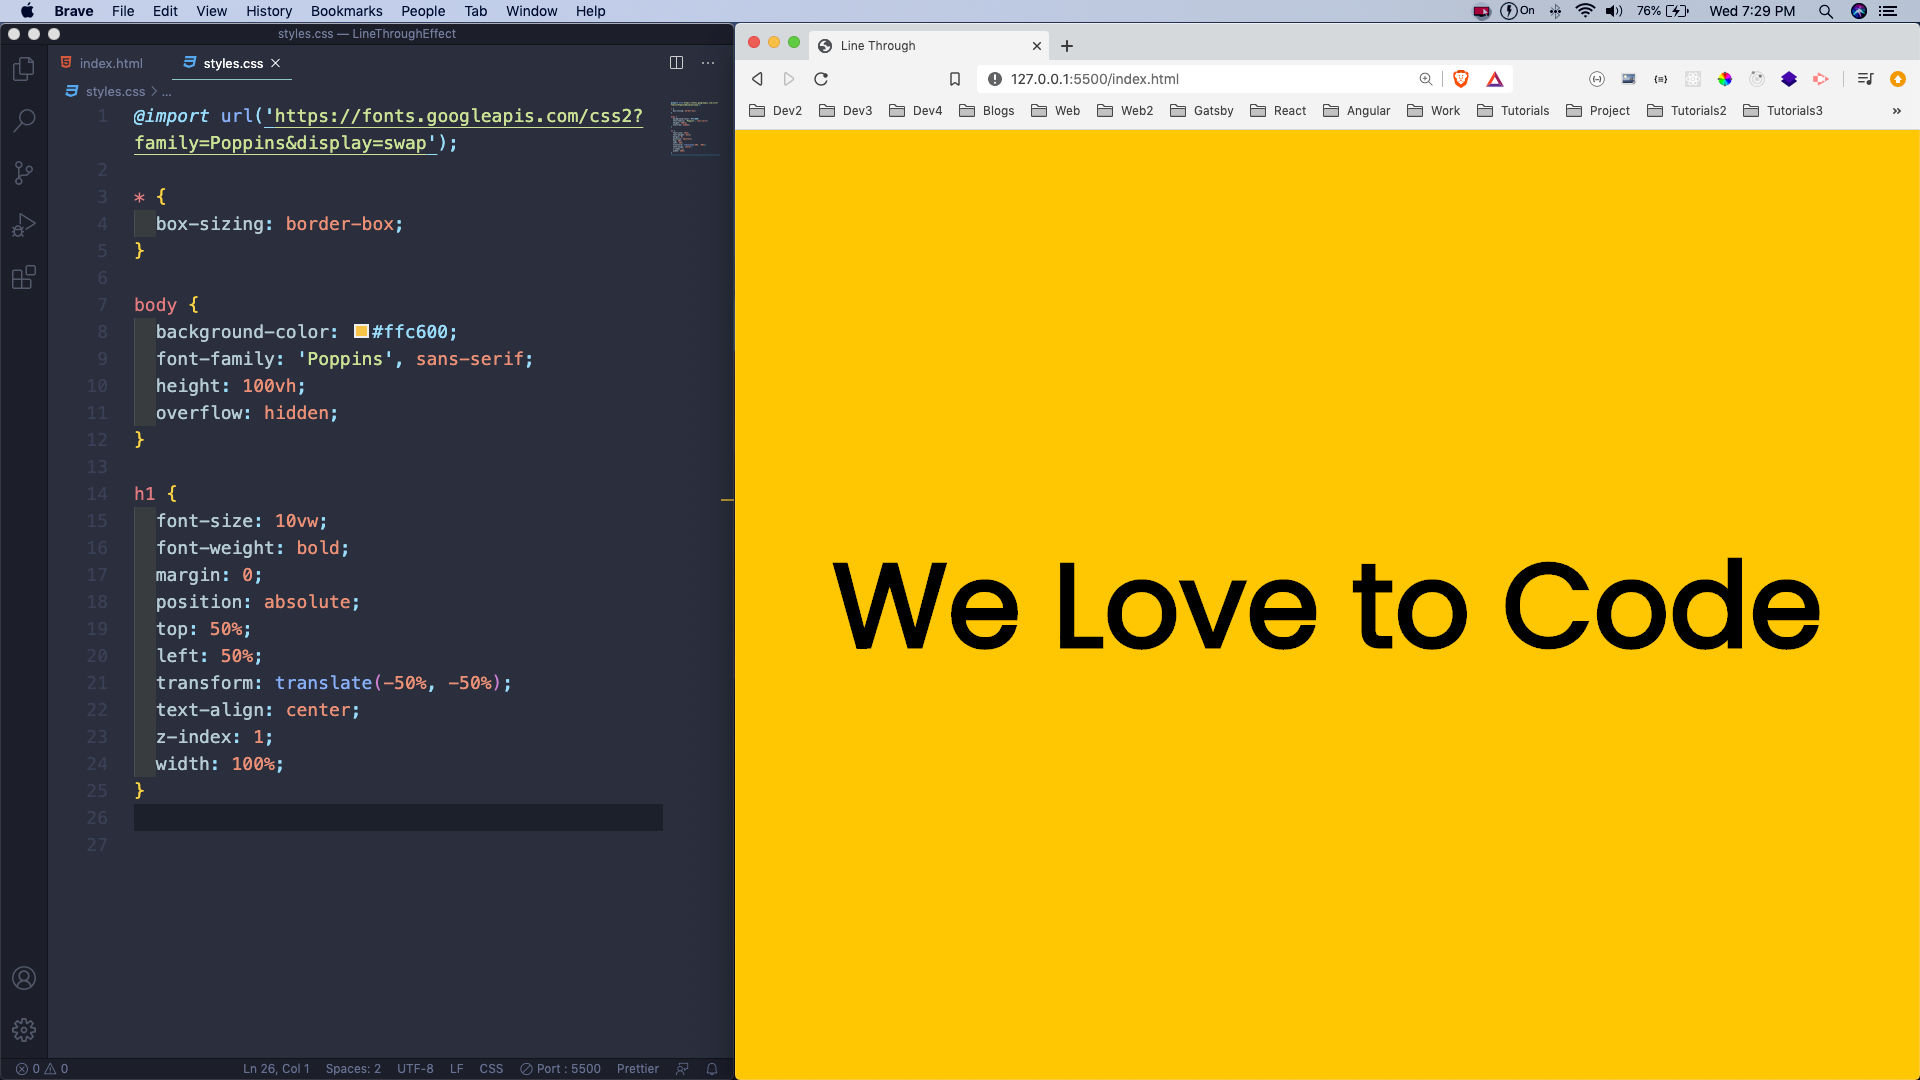
Now, head over to styles.css and add the basic styles for body and h1. We are also centering the h1 and increasing its size.
 styles.css
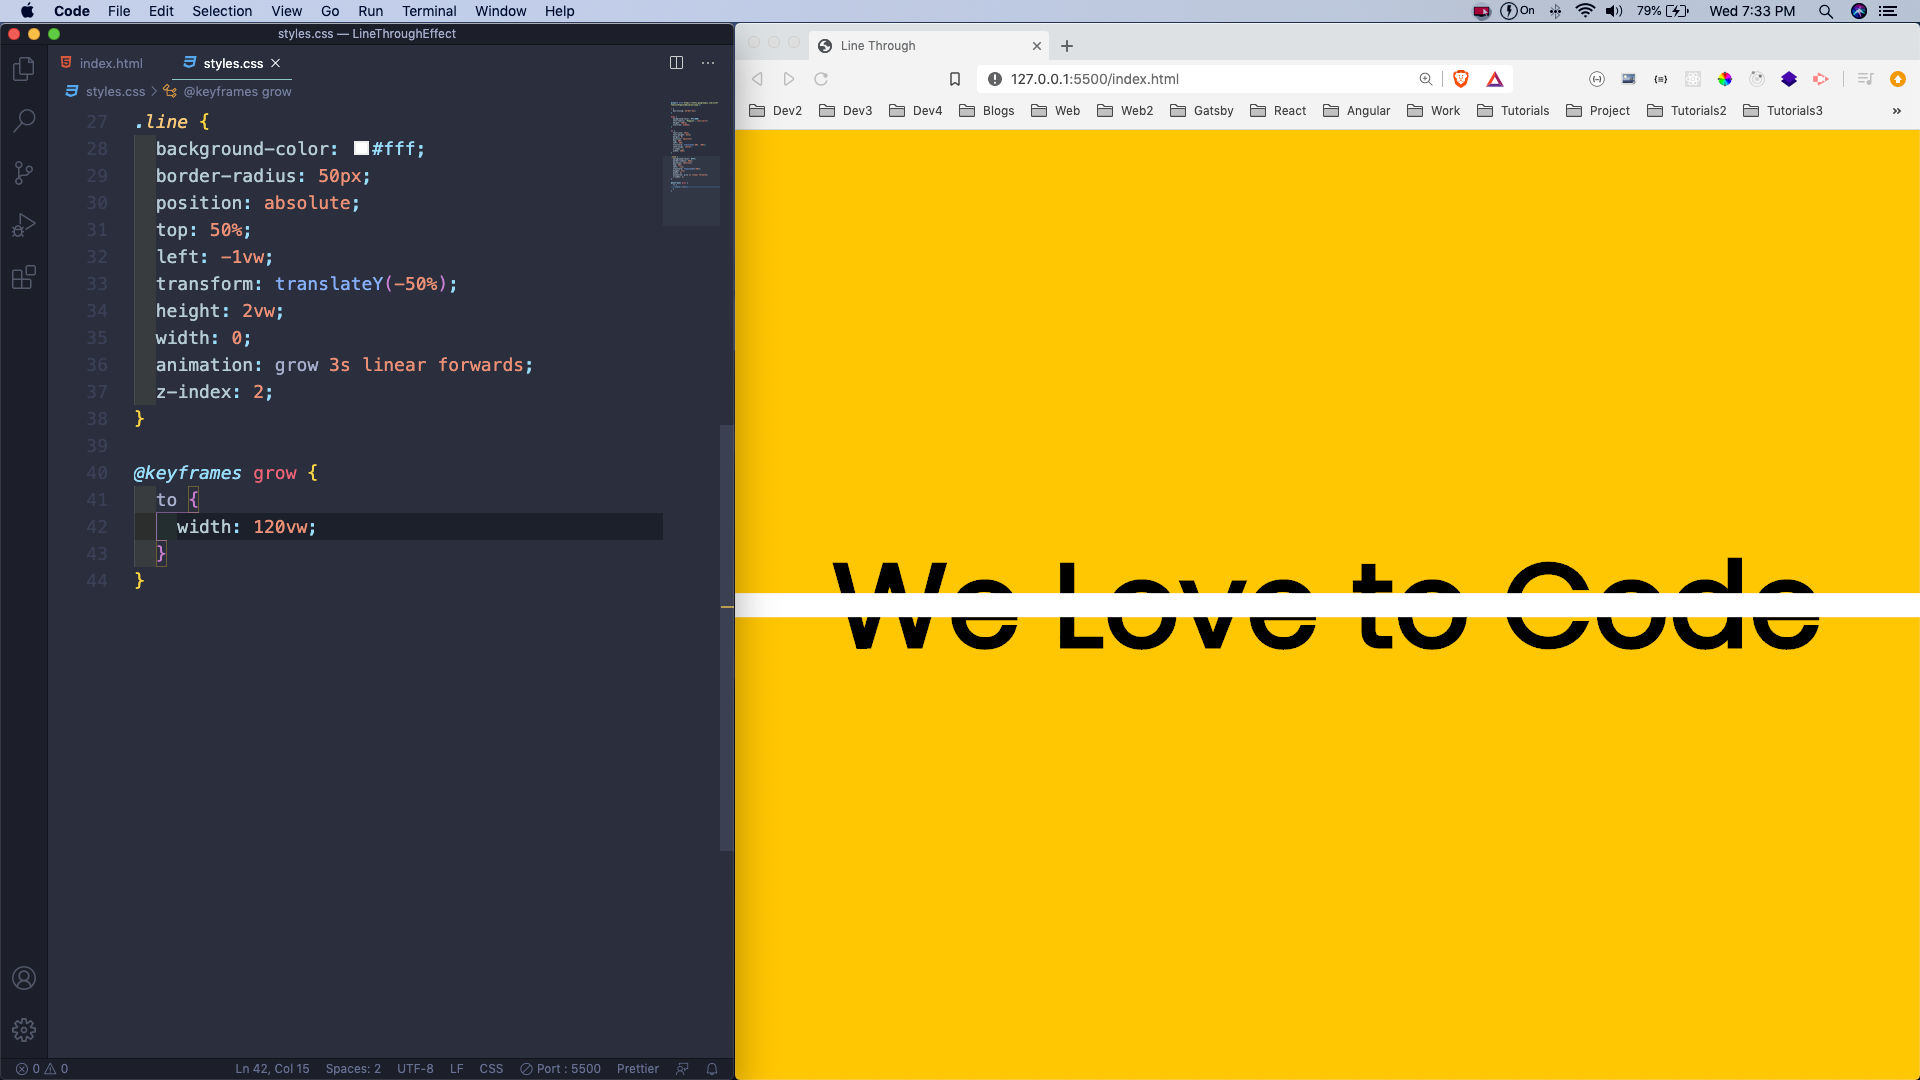
Next, we will add the code for the line. It has an animation and moves from left to right. Also, notice that it is over the h1 since the z-index is 2.
 line
line
Now, it’s time to move to main.js. Here, we are splitting our text first with the split() function. After that we are creating a new h1 and updating its innerHTML and appending it to the dom. We are looping through the textArr and passing it in span.
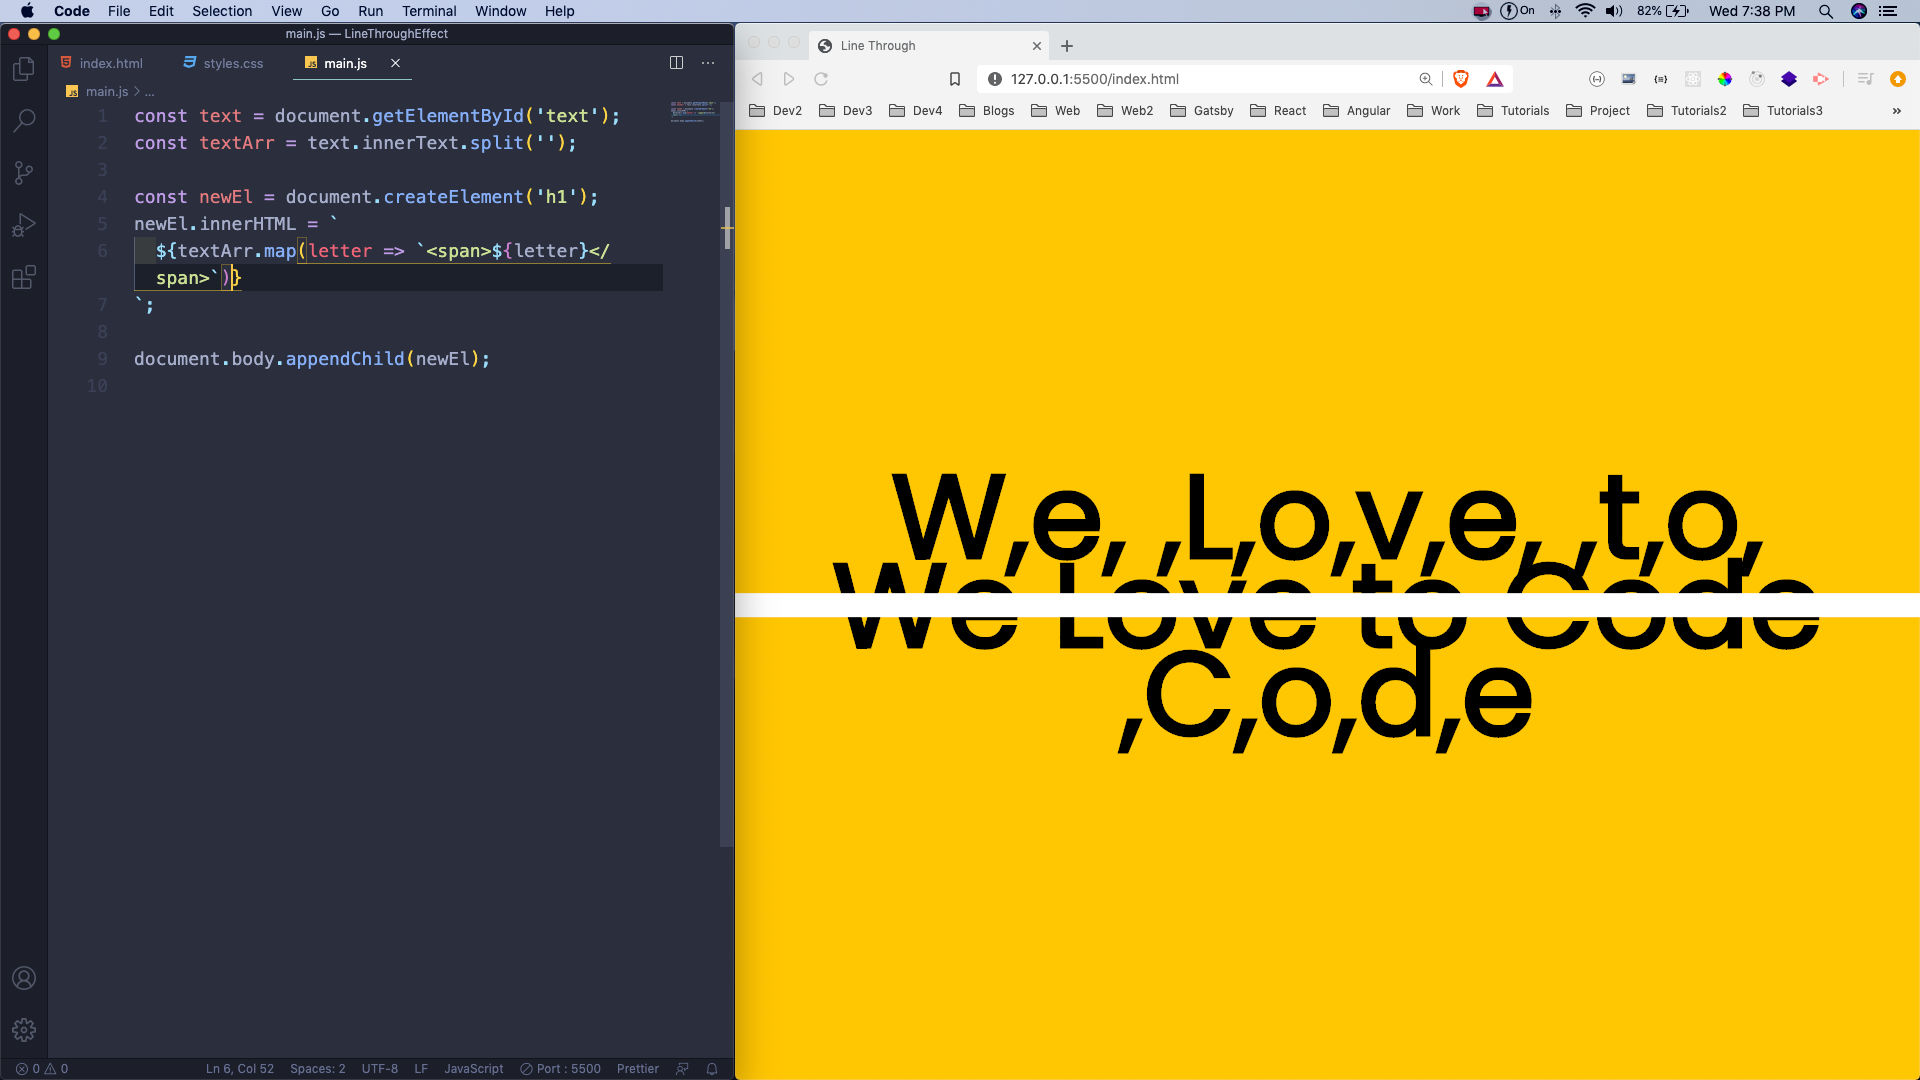 main.js
Now, we will join the array and our new h1, will be over the old h1. We are next adding a class overlay to it.
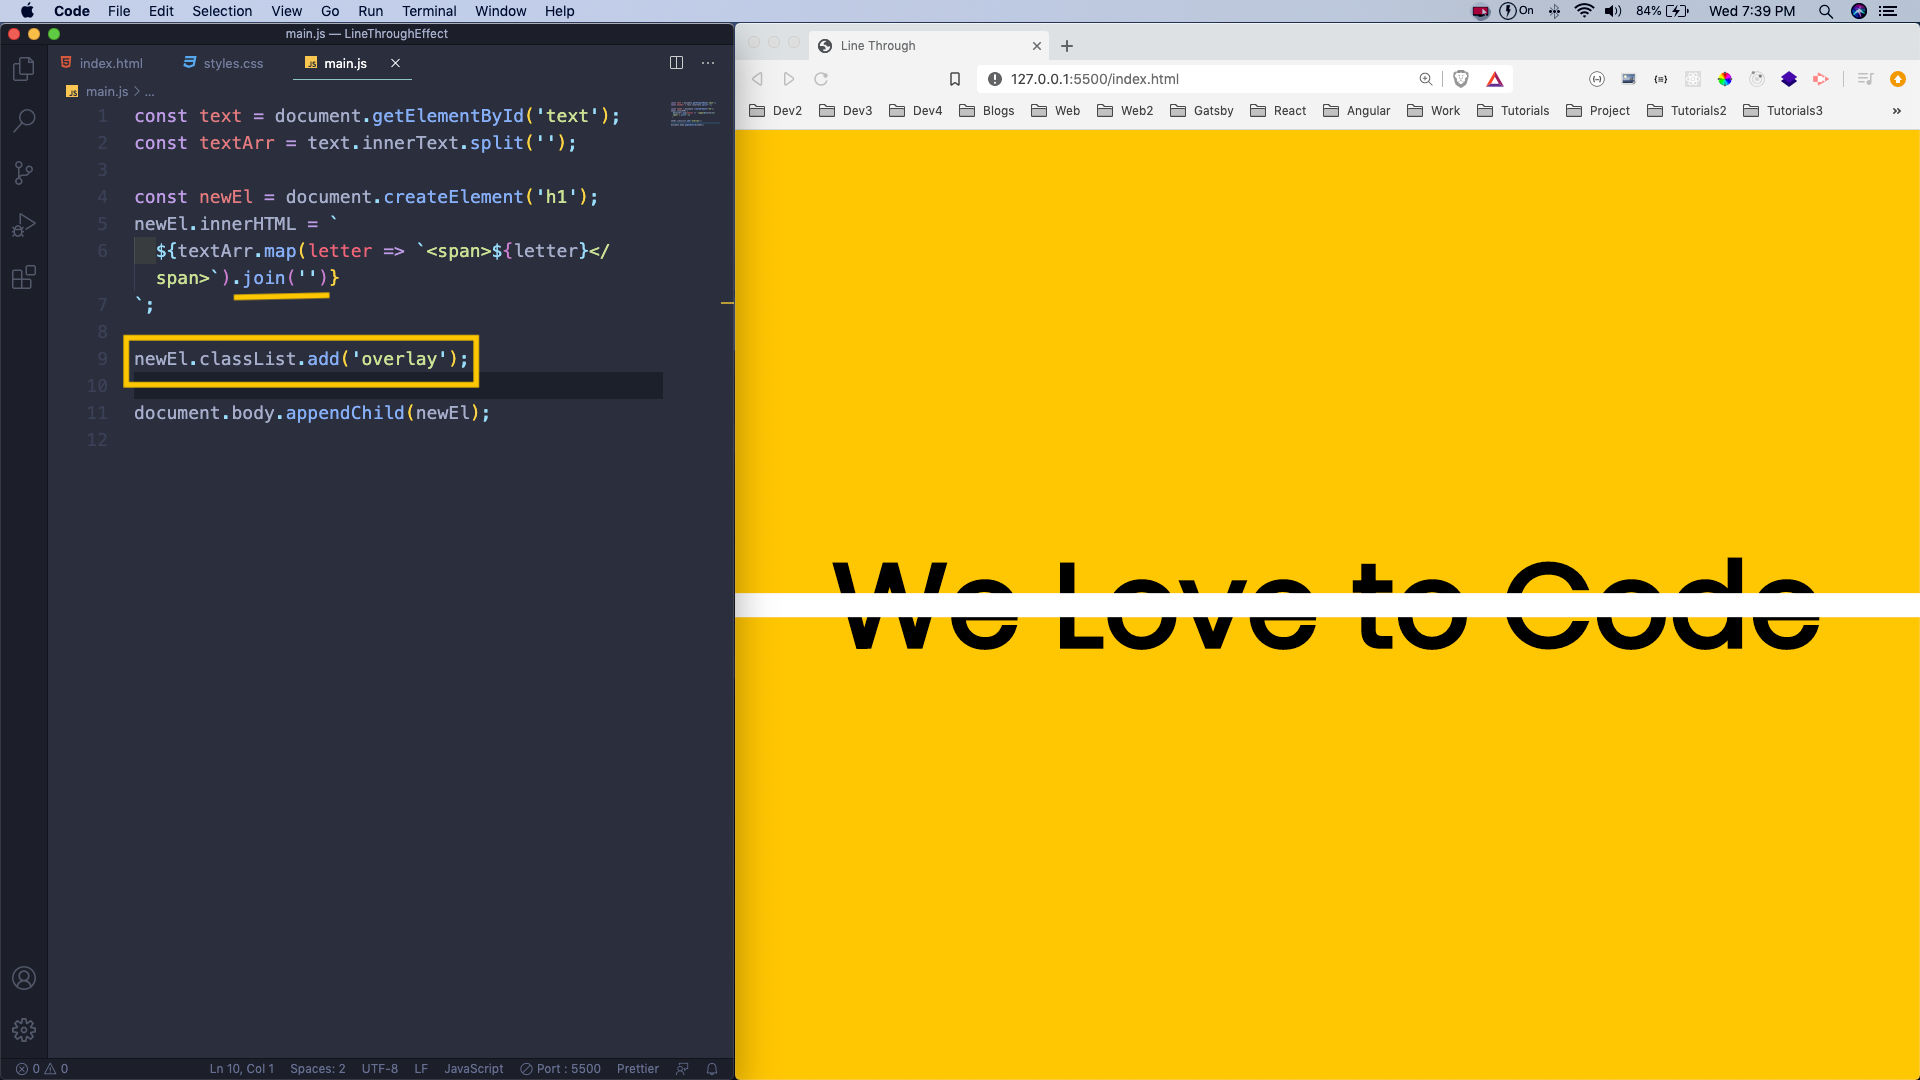 overlay
Now, go back to the styles.css and create a class of overlay and give it a z-index of 2. Now, the line seems to be behind the text. But it is actually sand-witched between both h1.
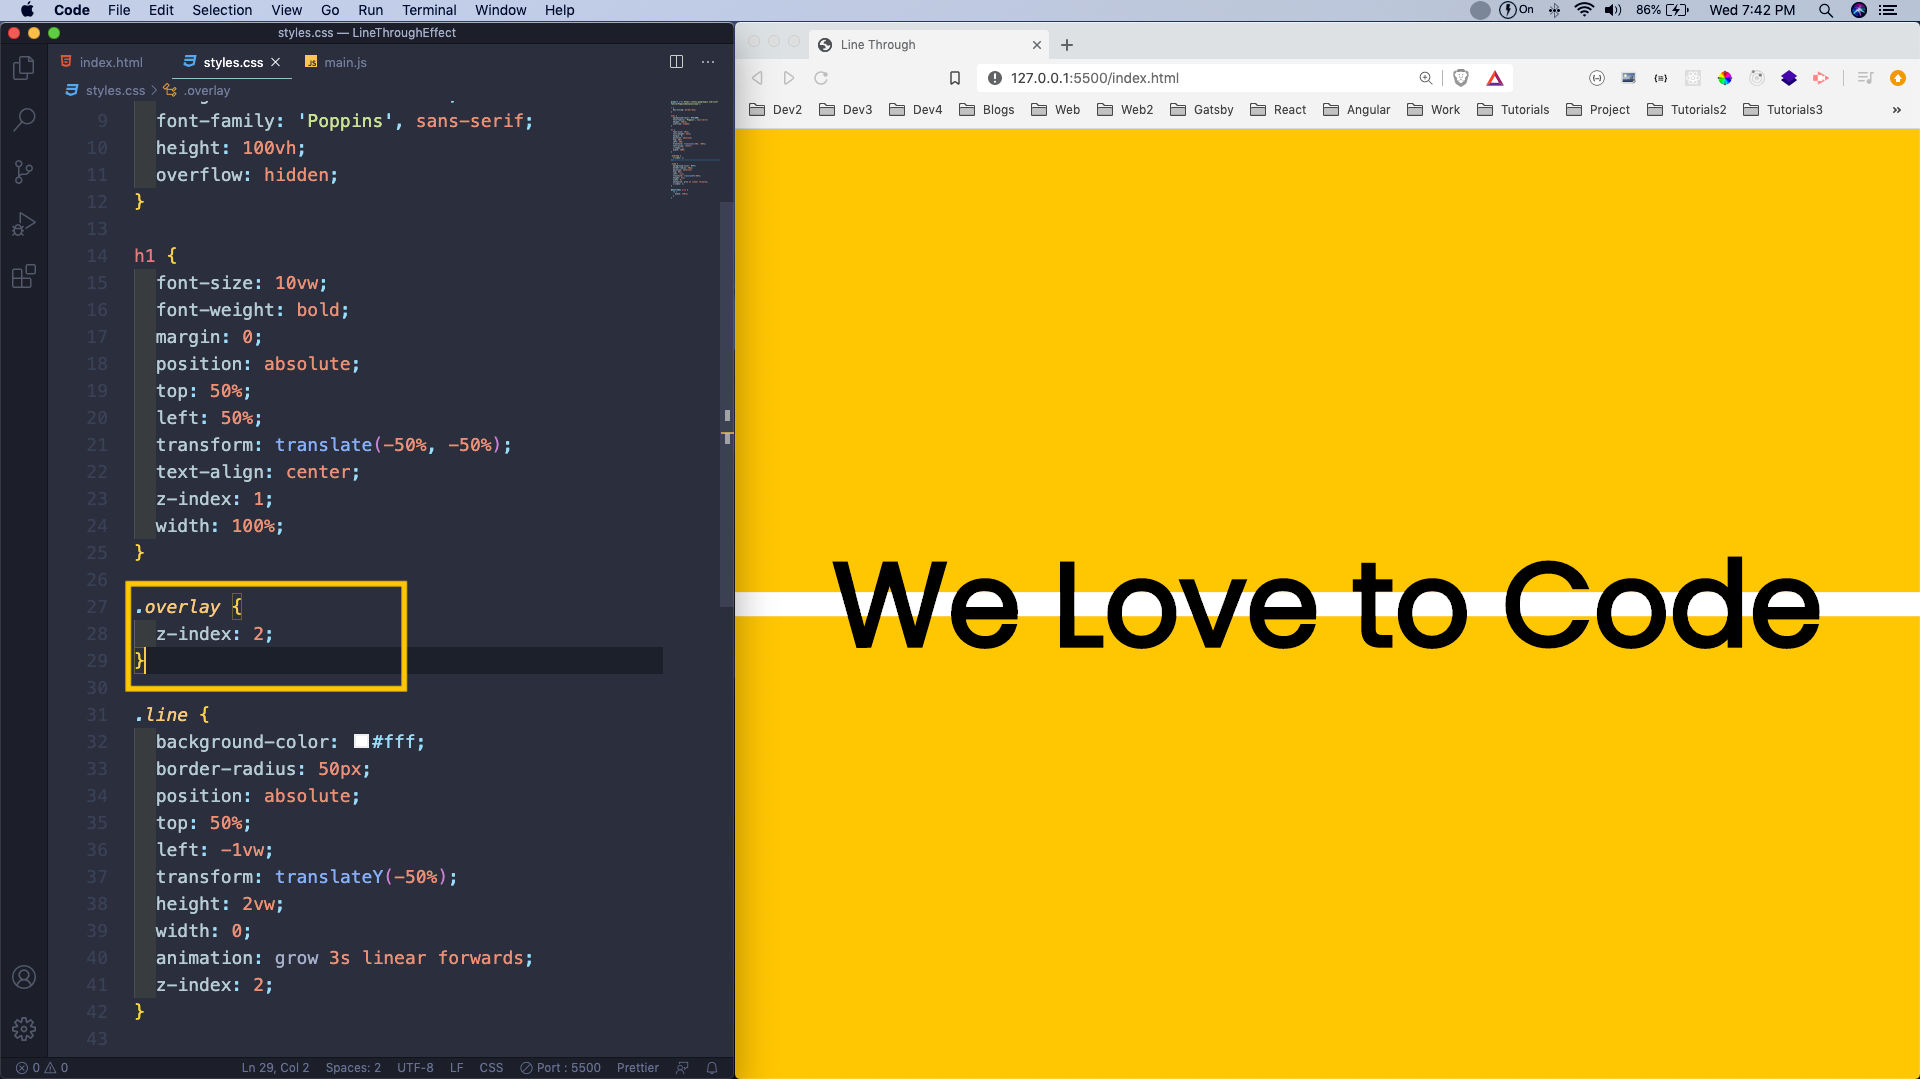 overlay
Now, back in main.js, we are adding a style to the span. Here, we are calling a function randomVisibility().
Inside the function randomVisibility(), we are using Math.random() to generate random numbers between 0 and 1. So, half of the time the visibility will be hidden. In those cases our created h1 with overlay will be hidden, but the other h1 will be there. So, it will show as if the white line is over it.
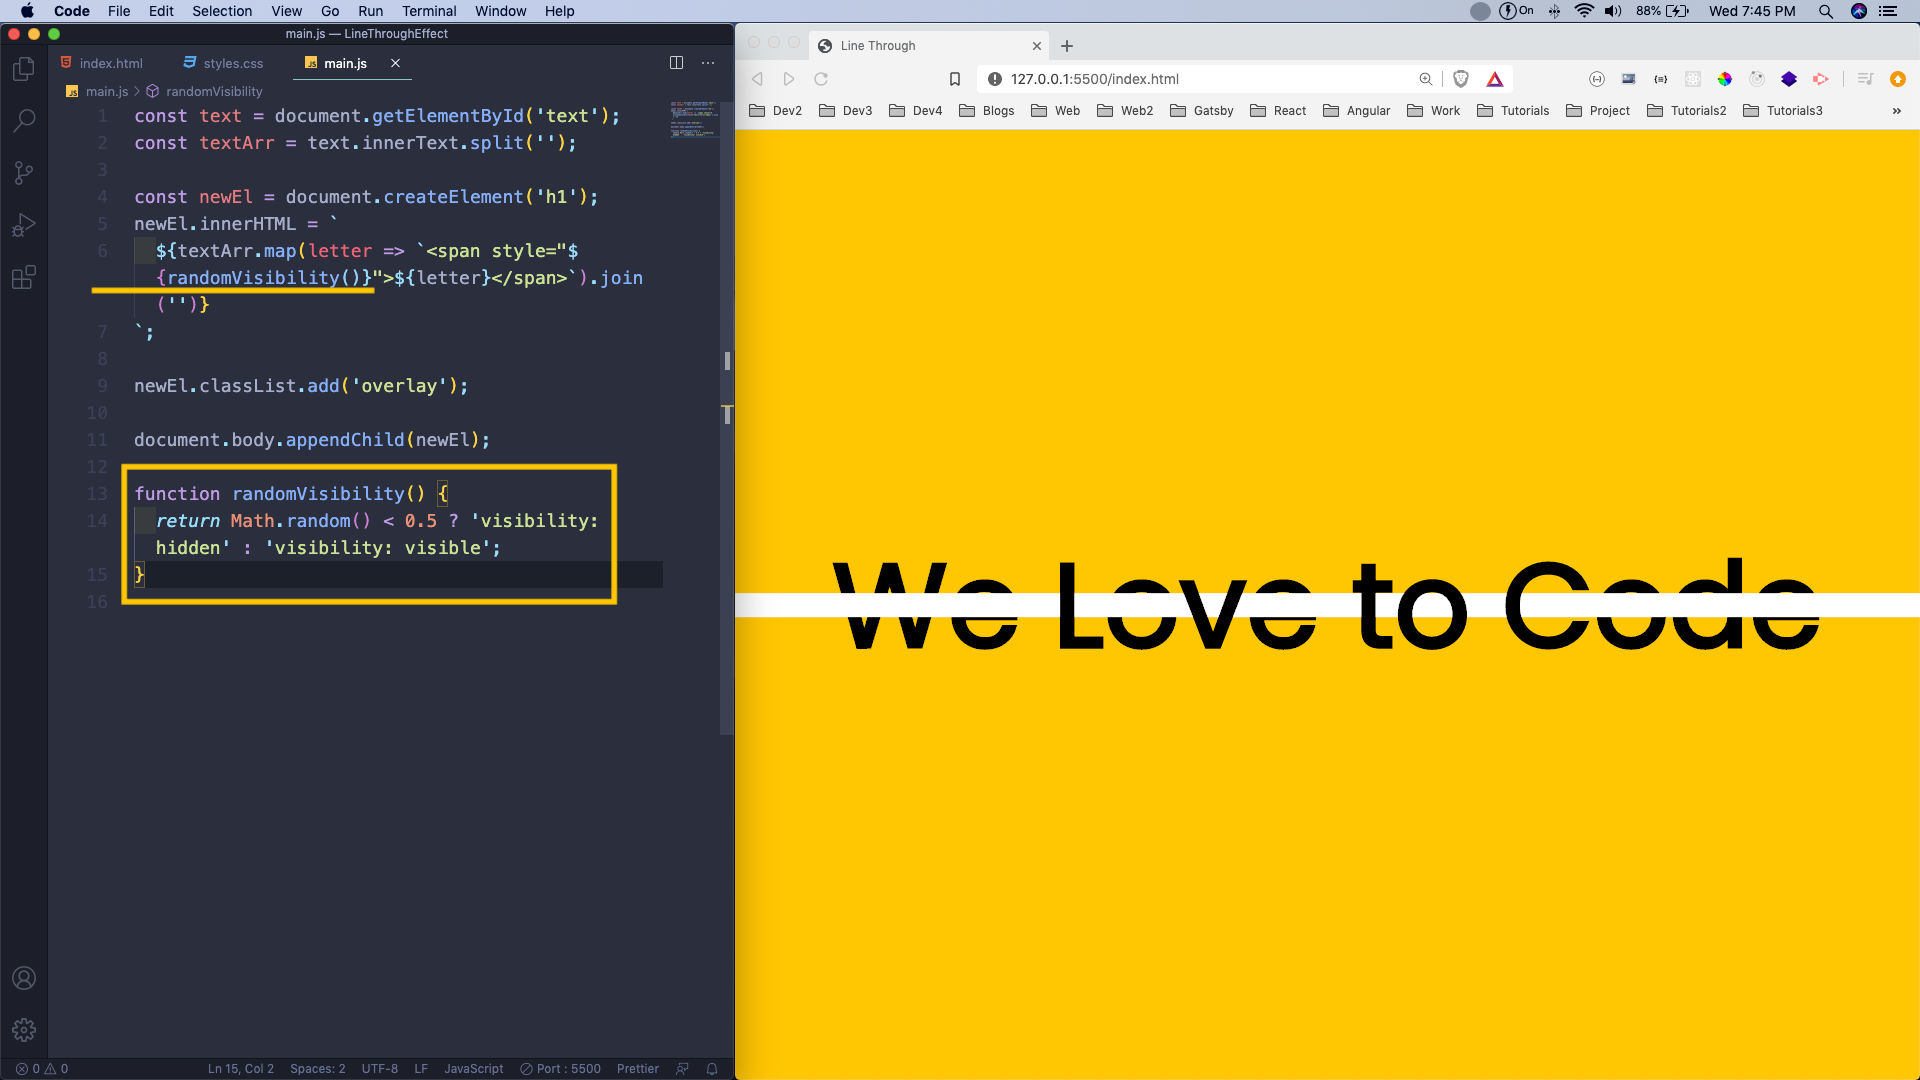 visibility: hidden
It can be better watched in the below gif.
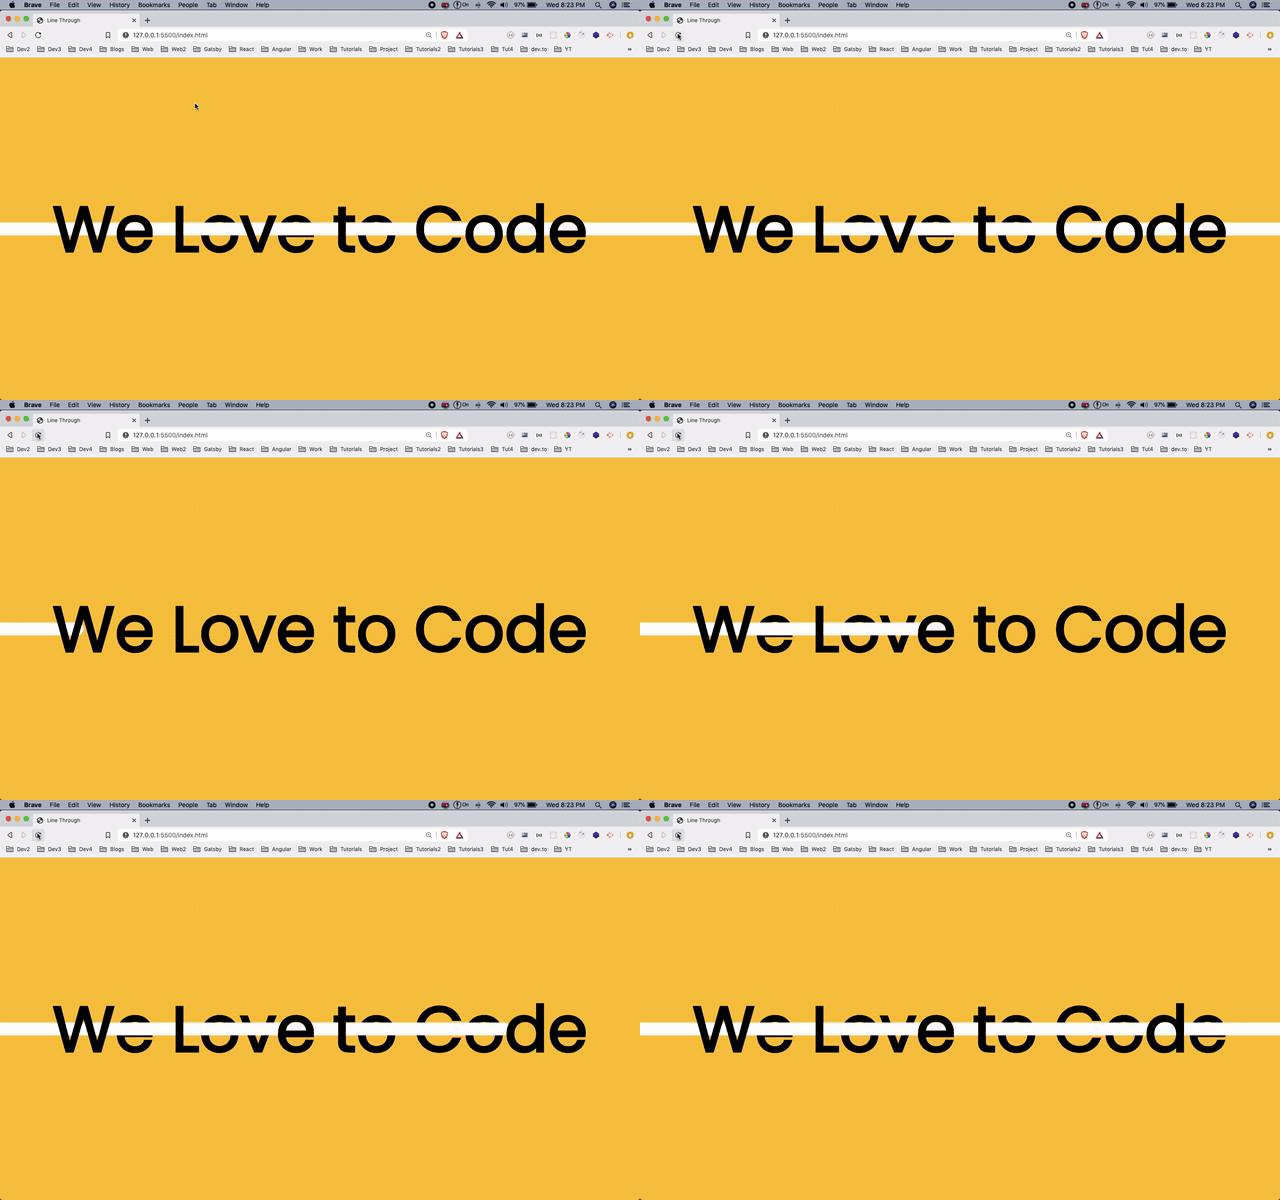 Gif
Gif
This completes our small project. You can find the code for the same in this github repo.