Create a Password Generator in JS
by Nabendu Biswas / November 21st, 2020
#javascript #beginners #webdev
Series: JS-Projects
The next project which we will do is to generate password using vanilla JavaScript.
So, open your terminal and create a folder PasswordGenerator. Inside the folder create three files index.html, main.js and styles.css. We are also opening the code in VS Code. As usual, you do these tasks manually.
 PasswordGenerator
After that head over to index.html and create the basic skeleton. We are also having a container class containing everything. I have also started the project in Live Server, so our changes will be updated whenever we update something.
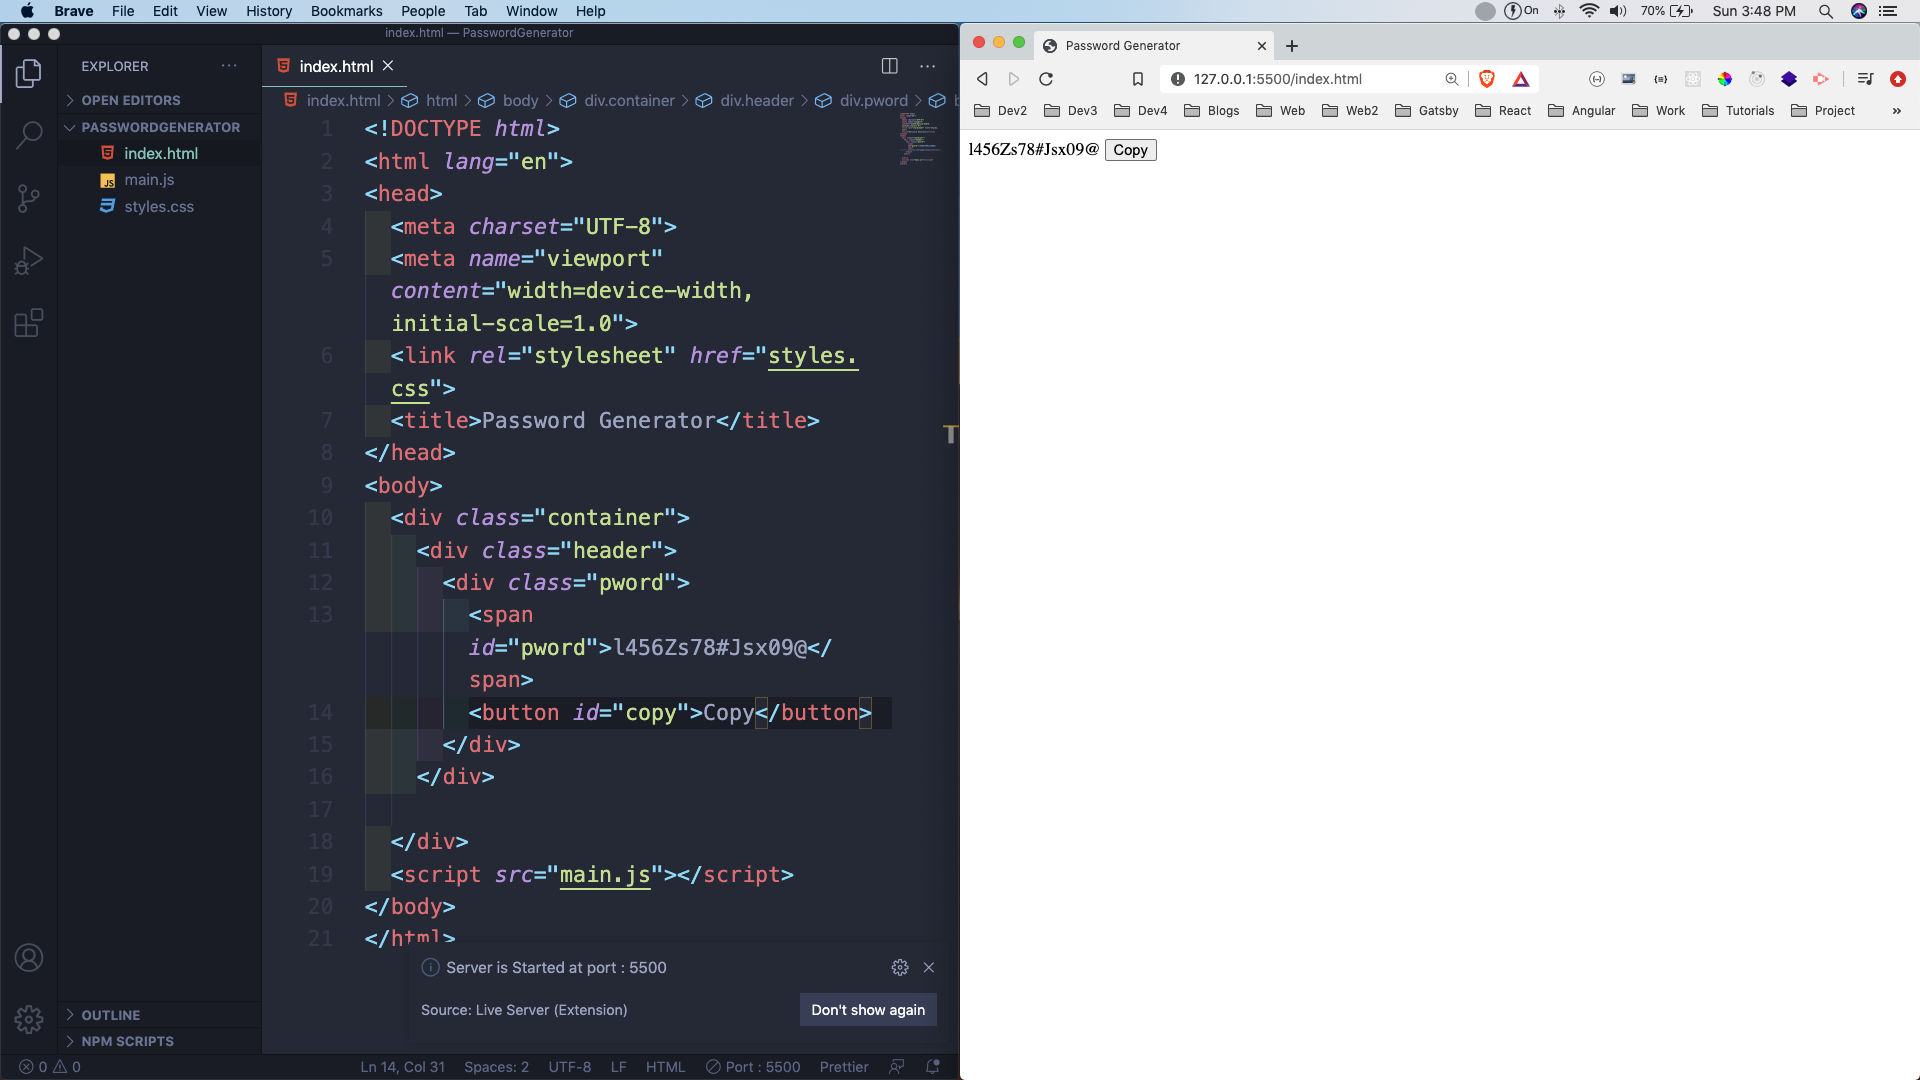 index.html
After that we will complete our index.html file by adding the remaining html. Here, we are having five input fields and one button.
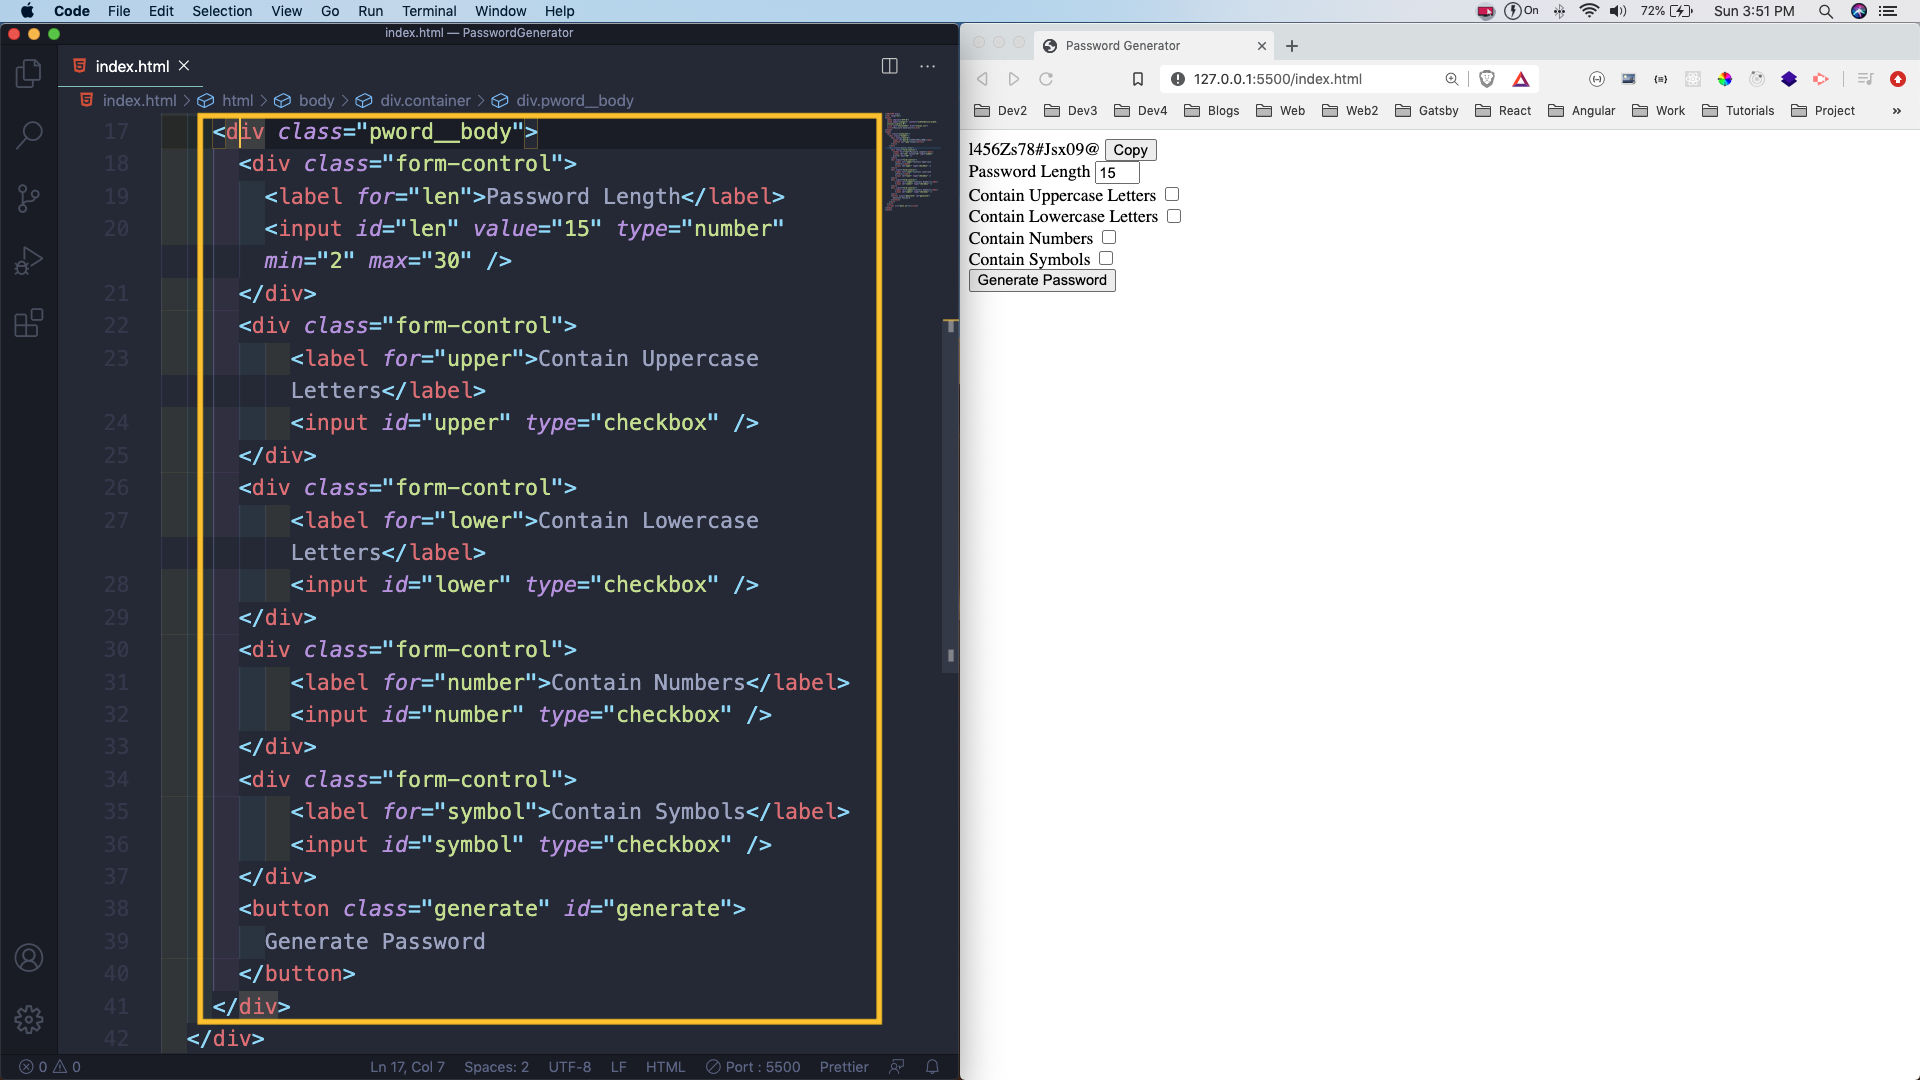 index.html
Now, it’s time to style them. So, open your styles.css and add the basic code for the body, container and header.
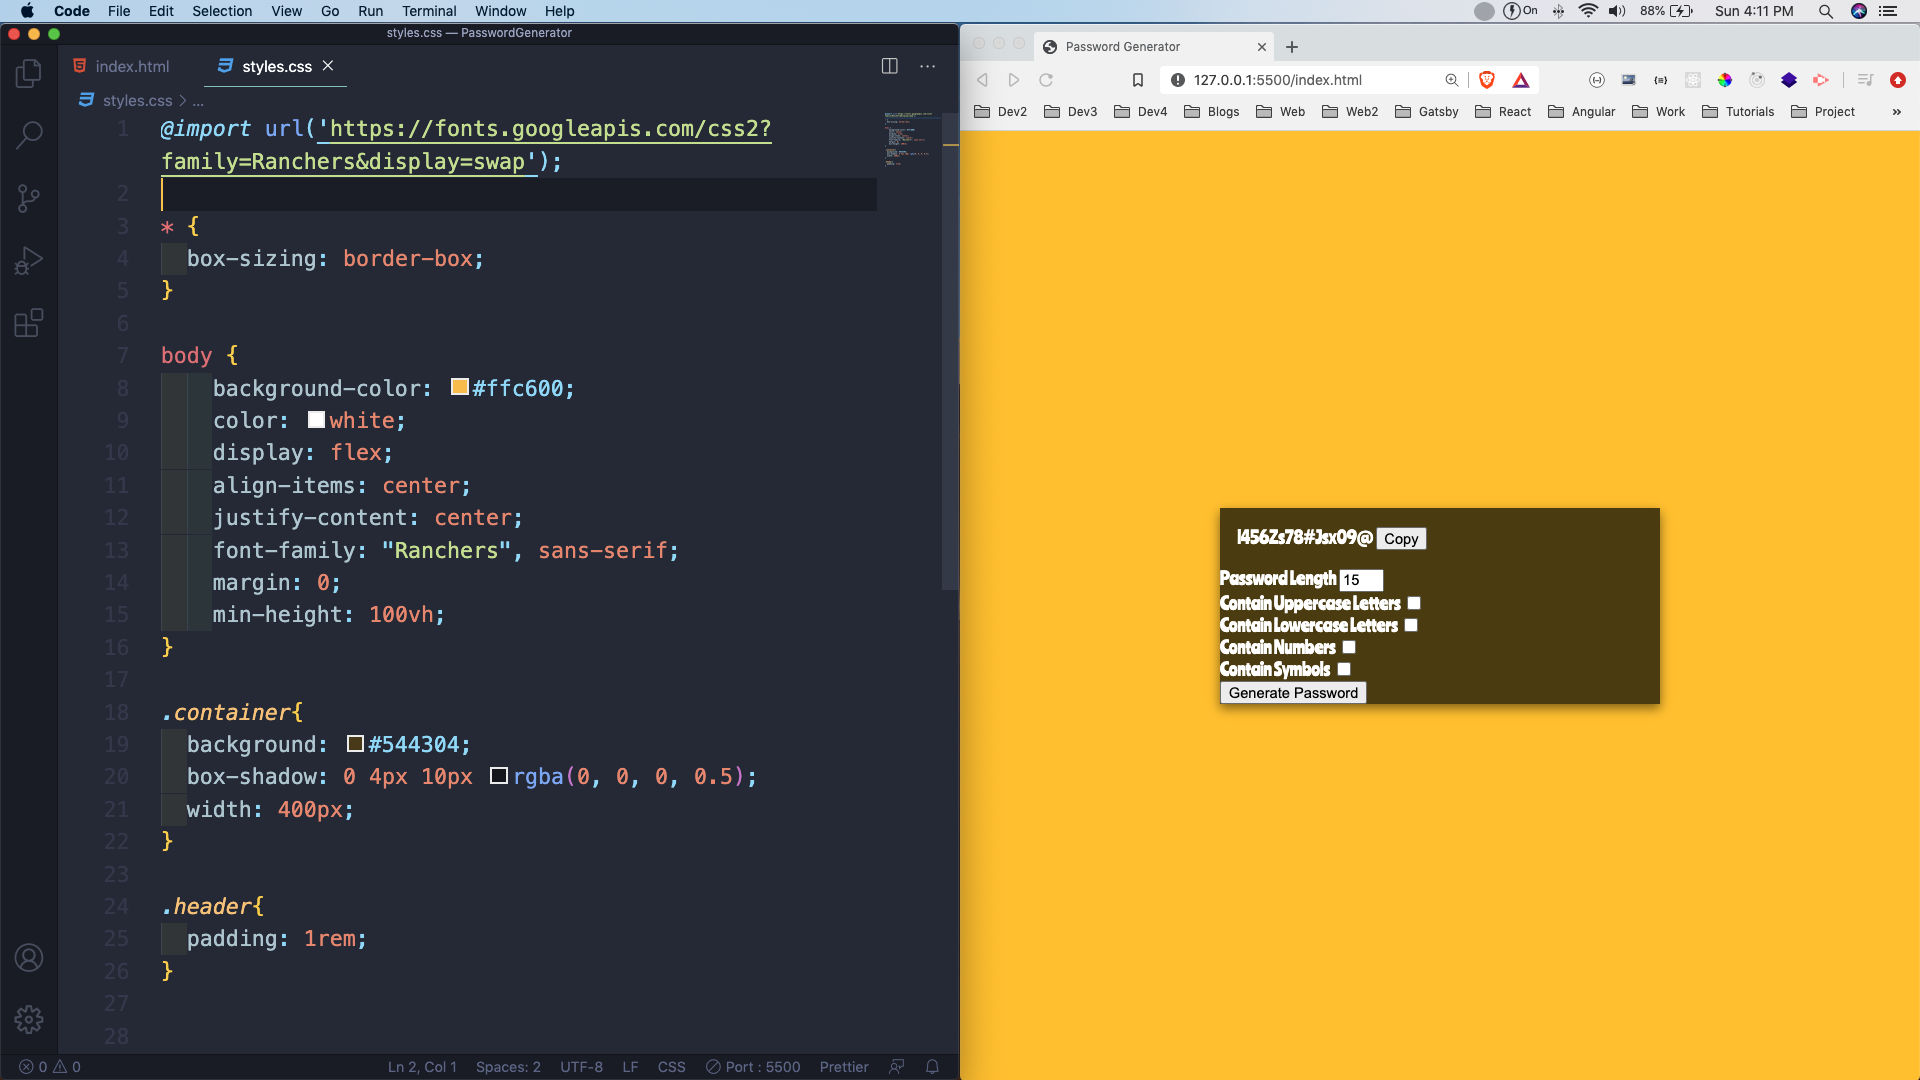 styles.css
Next, we will write the code for the div containing our password and the copy button. We have made the button to shift to top right and appear only once, we hover over it.
 styles.css
Now, we will complete our styles.css by adding padding for the pword__body class. We are also styling the form-control and the generate button.
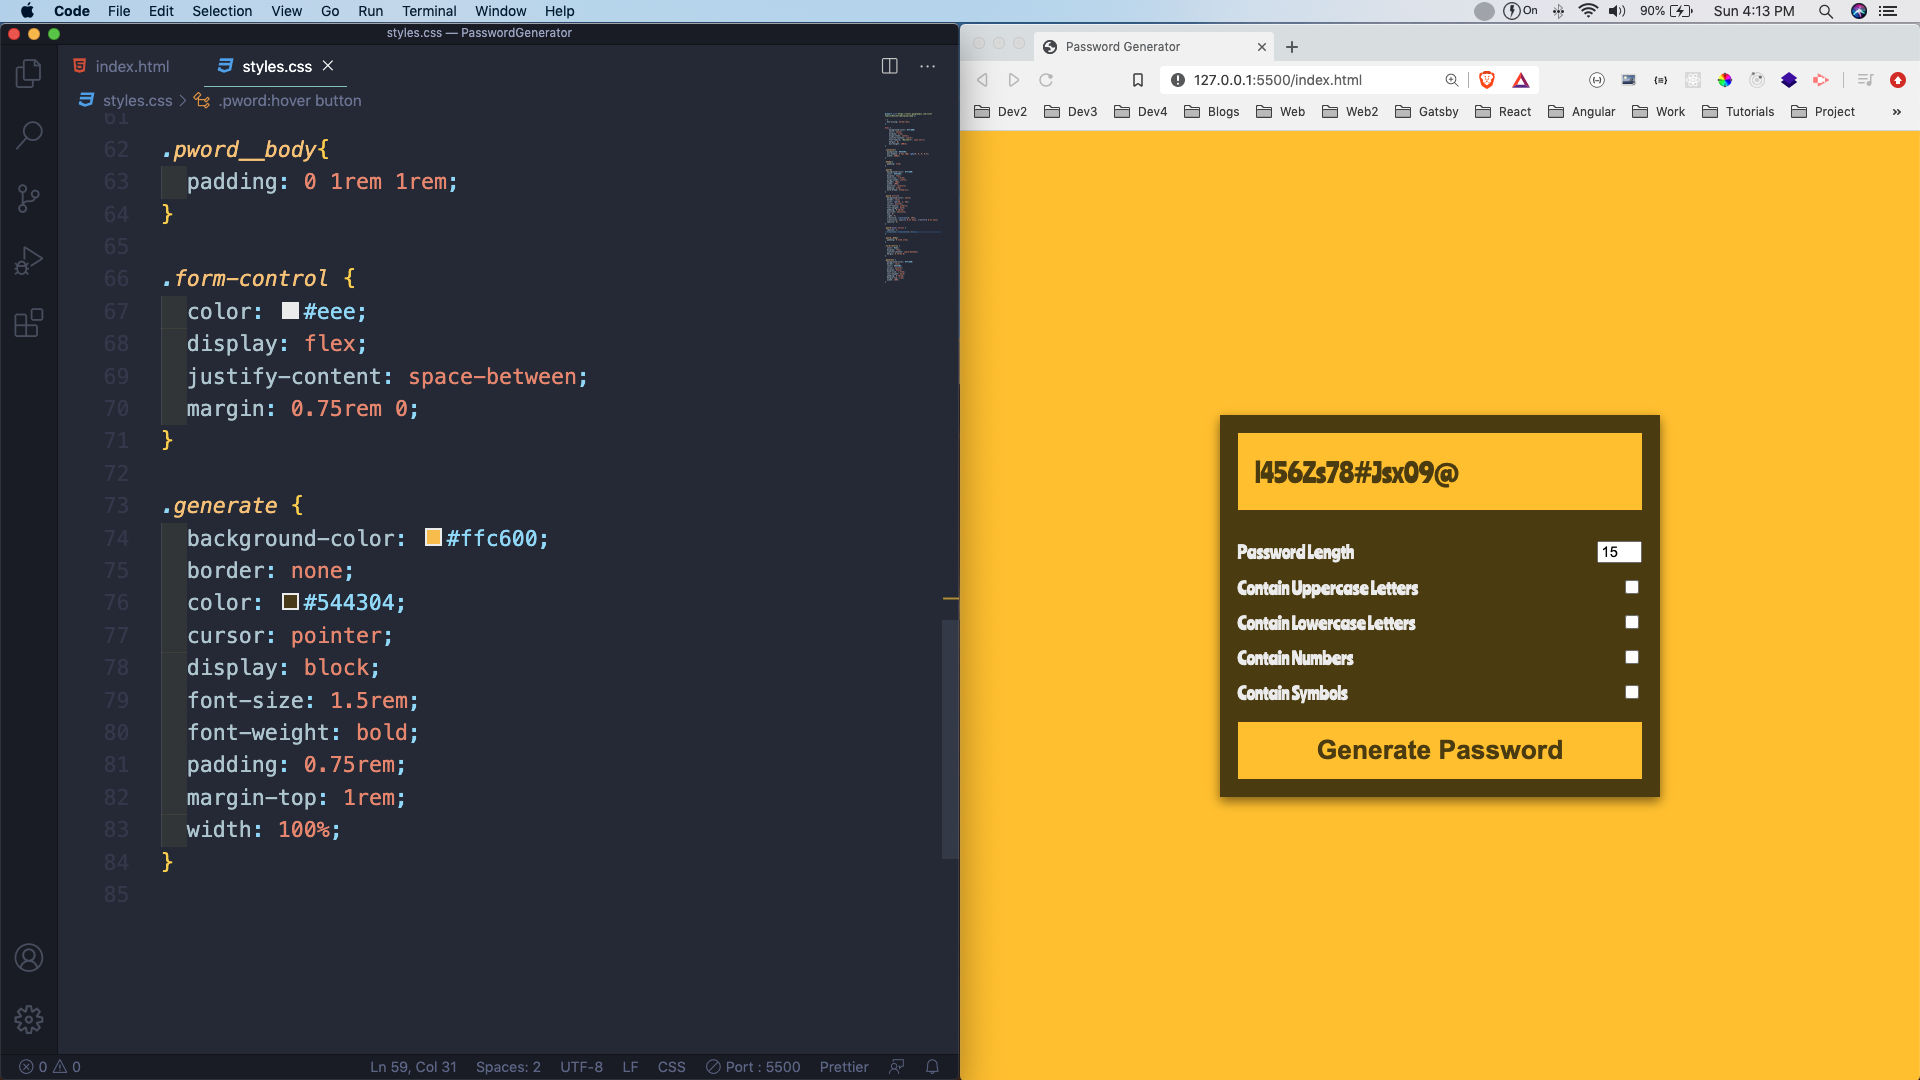 styles.css
Now, we will start to write our logic to generate the password. So, in the main.js we are first selecting all the elements. We are storing all the upper-case, lower-case, numbers and symbols in variables.
Then we have four function, on calling them we will get the random thing. Also, doing a console.log to show the same.
 main.js
Now, we will first create a generatePassword() function. We are calling it once we click on the Generate Password button, through the event listener at line 56.
Inside the generatePassword() function, we are first getting the length enter by the user or the default 15. We are then looping the number of times through a for loop and calling the generateX() function, each time. We are appending the item, which are receiving in the password variable.
Now inside the generateX() function, we are first declaring an empty array xs. After that we are checking whether the checkboxes are checked. If any of the checkbox are checked, we are calling the respective function and pushing its value to xs array.
Now, if all the boxes are checked we will get any random array like [“H”, ”i”, “9”, “^”] and at line 53, we are selecting one of it and returning back. Like maybe H from this case.
After, we come out of the for loop in generatePassword() function, we are just changing the innerText of span pword and we will get our password.
 main.js
Now, the only thing is remaining is the ability to copy to clipboard. The logic can be found in this awesome blog.
We are adding an event listener to our Copy button. We need a textarea for this logic, so we are creating one and assigning the value of our password field to it.
Then we are using textarea.select() to select the content of the textarea. We are also using the document.execCommand(“copy”) to copy the content of textarea to clipboard.
We are removing the textarea after that and also showing an alert.
 main.js
There is one thing which i forgot to add in the project and that is a title for the project. So, head over to your index.html and add it as below.
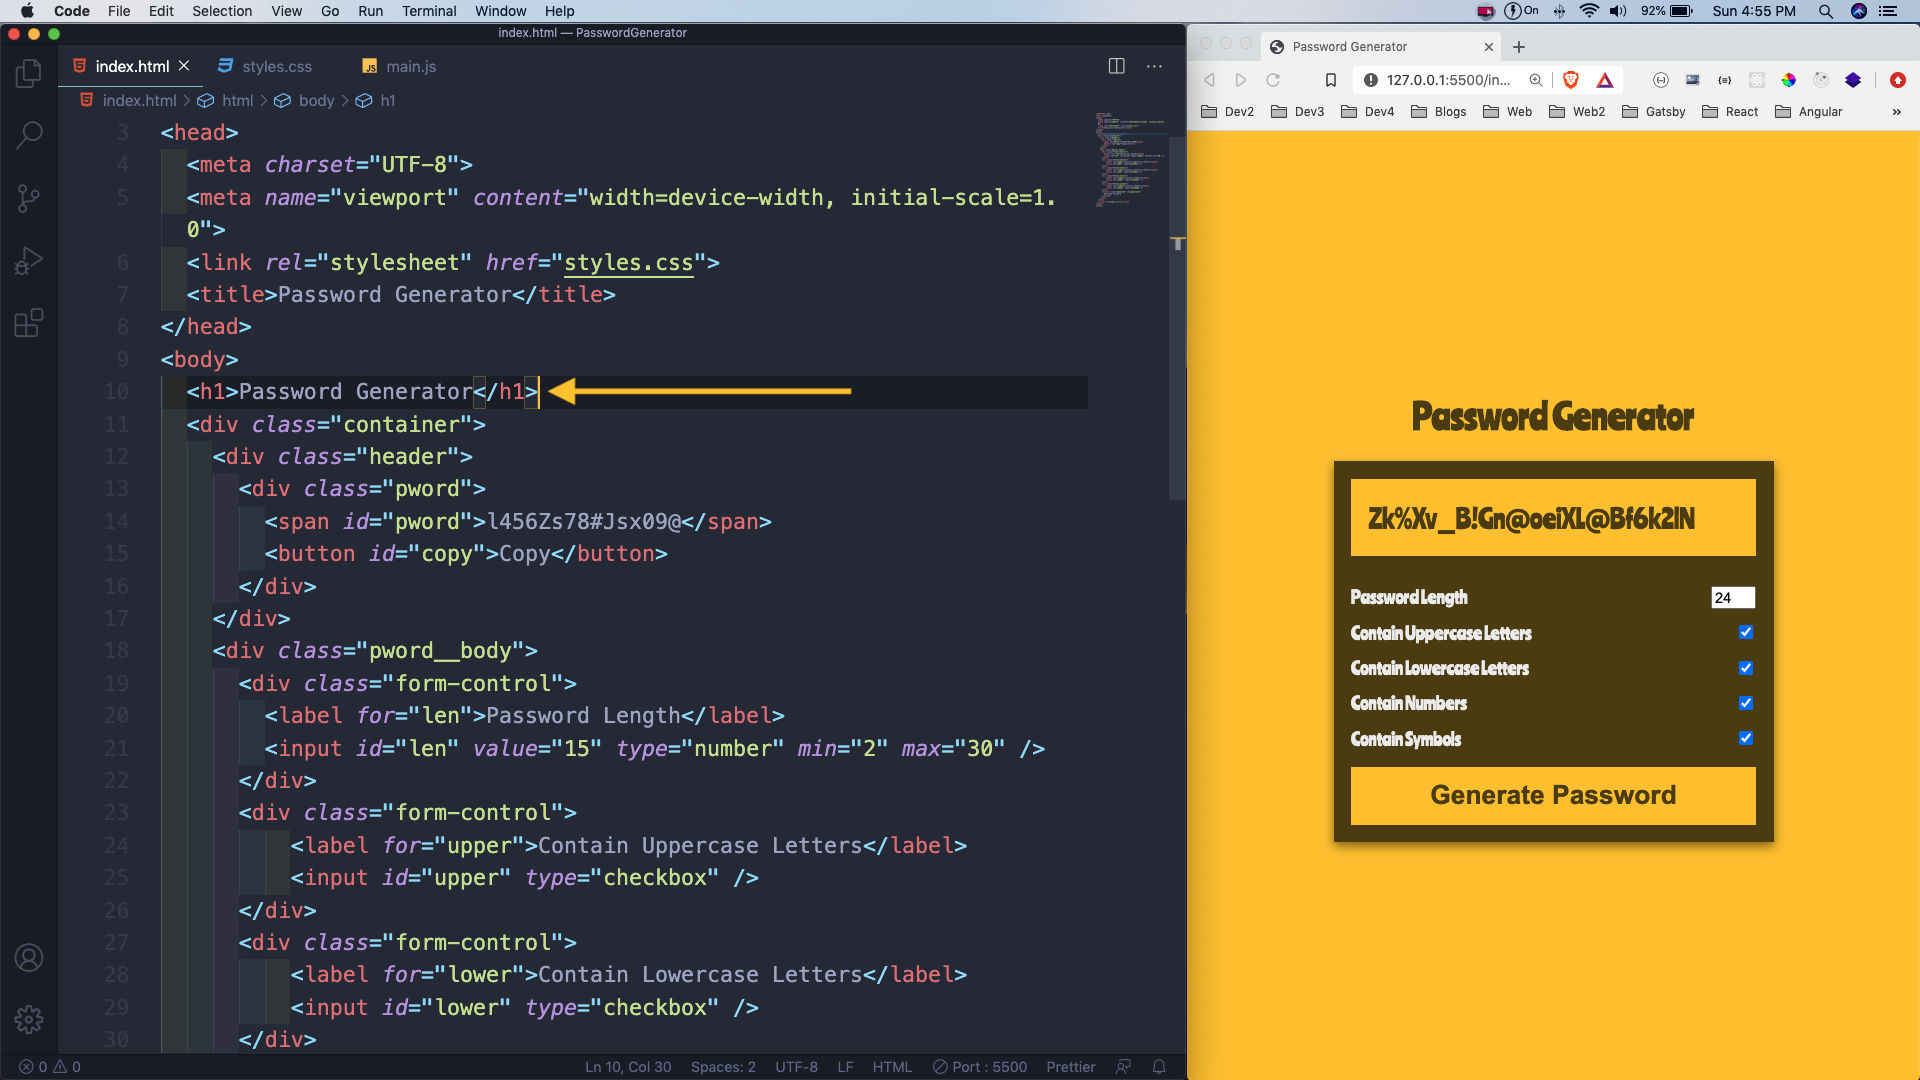 index.html
We are also updating the same in styles.css and also changing the background-color of the password field.
 styles.css
This completes our project. You can find the code for the same in this github repo.