Simple Item List Project with JavaScript DOM
by Nabendu Biswas / September 12th, 2020
#javascript #beginners #webdev
Series: JS-Projects
We had learned the basics of DOM in the previous series. We are going to create a Simple Item list project in this post, with our learning of JavaScript DOM.
The code for the same can be found here. So, go ahead and copy the HTML in your codepen or any other editor. We will get the website without any styling.
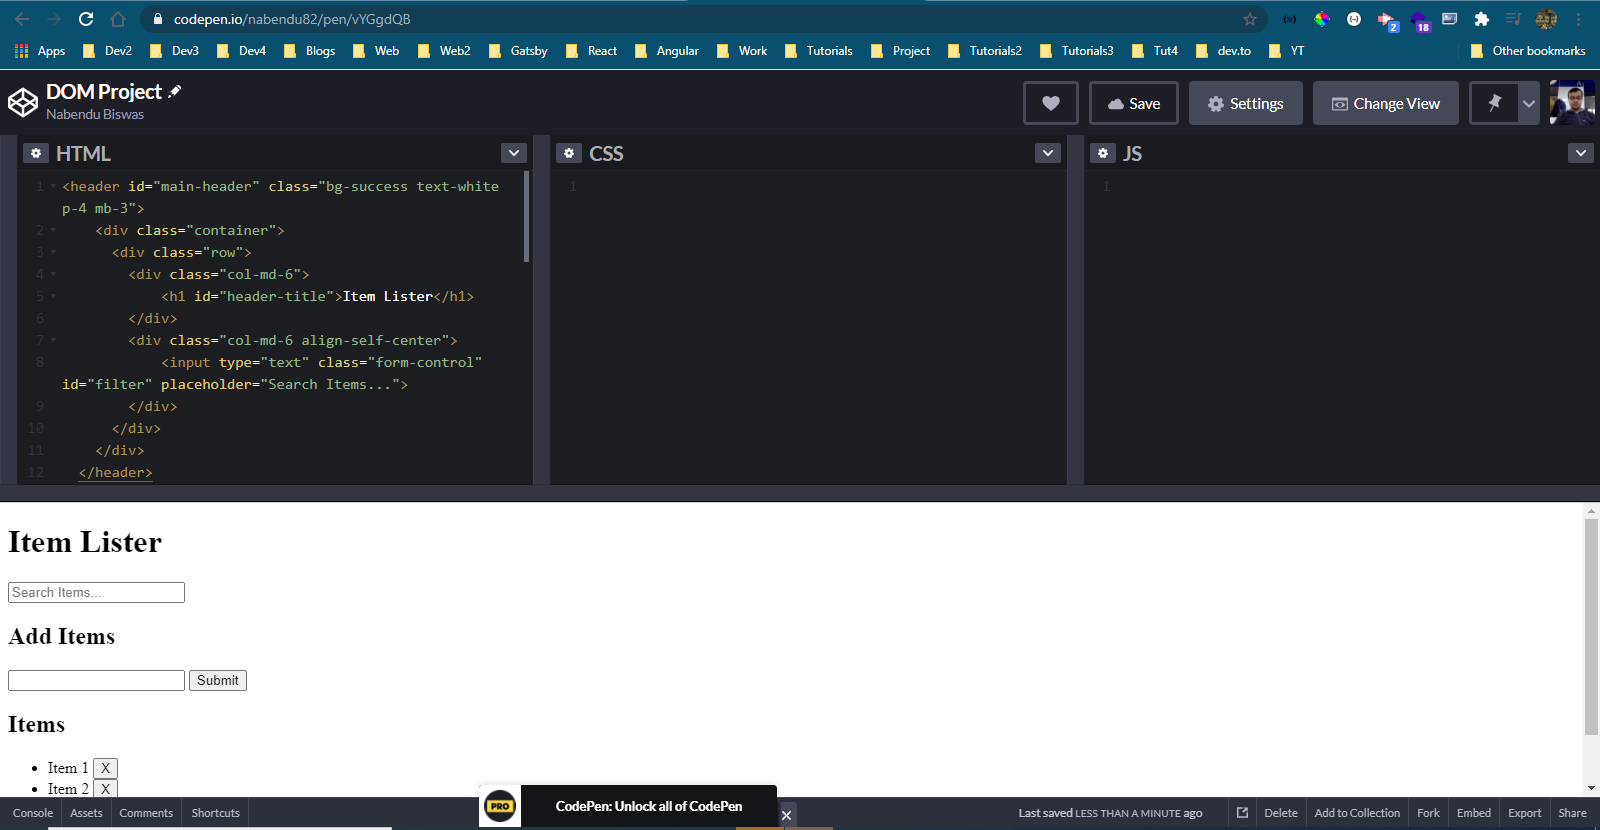 Basic HTML
We are going to use bootstrap for this project. Click on the Settings icon beside the CSS, which will open a pop-up. In the pop-up’s search bar type bootstrap and select Twitter-bootstrap. It will load the cdn for the 4.5 version(or more) automatically. Click on Save & Close button.
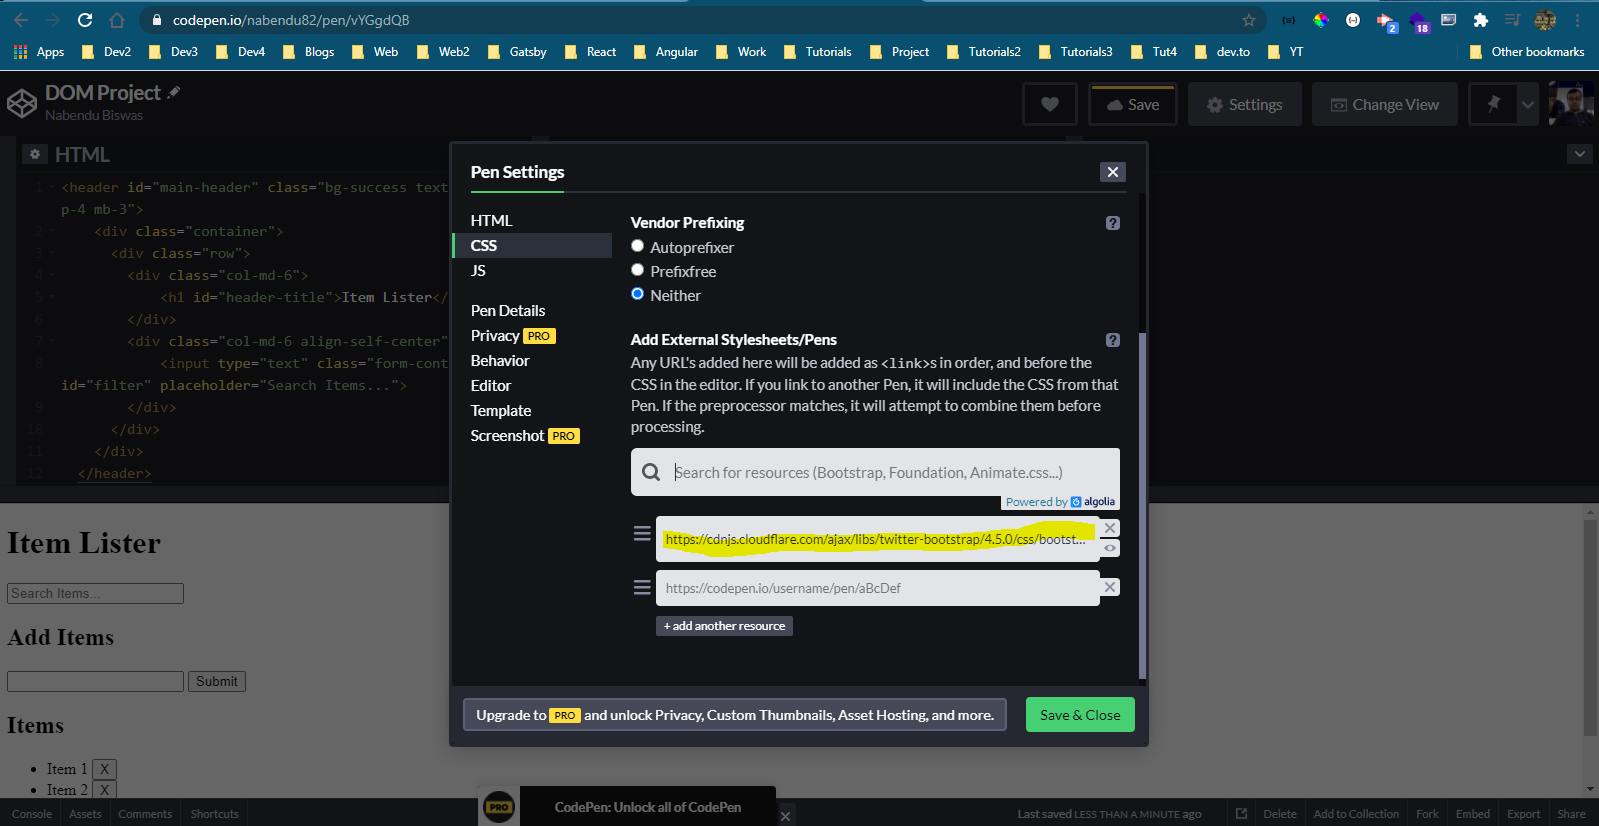 Bootstrap
Now, our project will have all the styles. When working with codepen, i generally have the editor, with required languages open in one screen like below. As we require only the HTML and JS in this project, i had minimized the CSS tab.
Also, clicked on the Change View to open the Full Page View in another window.
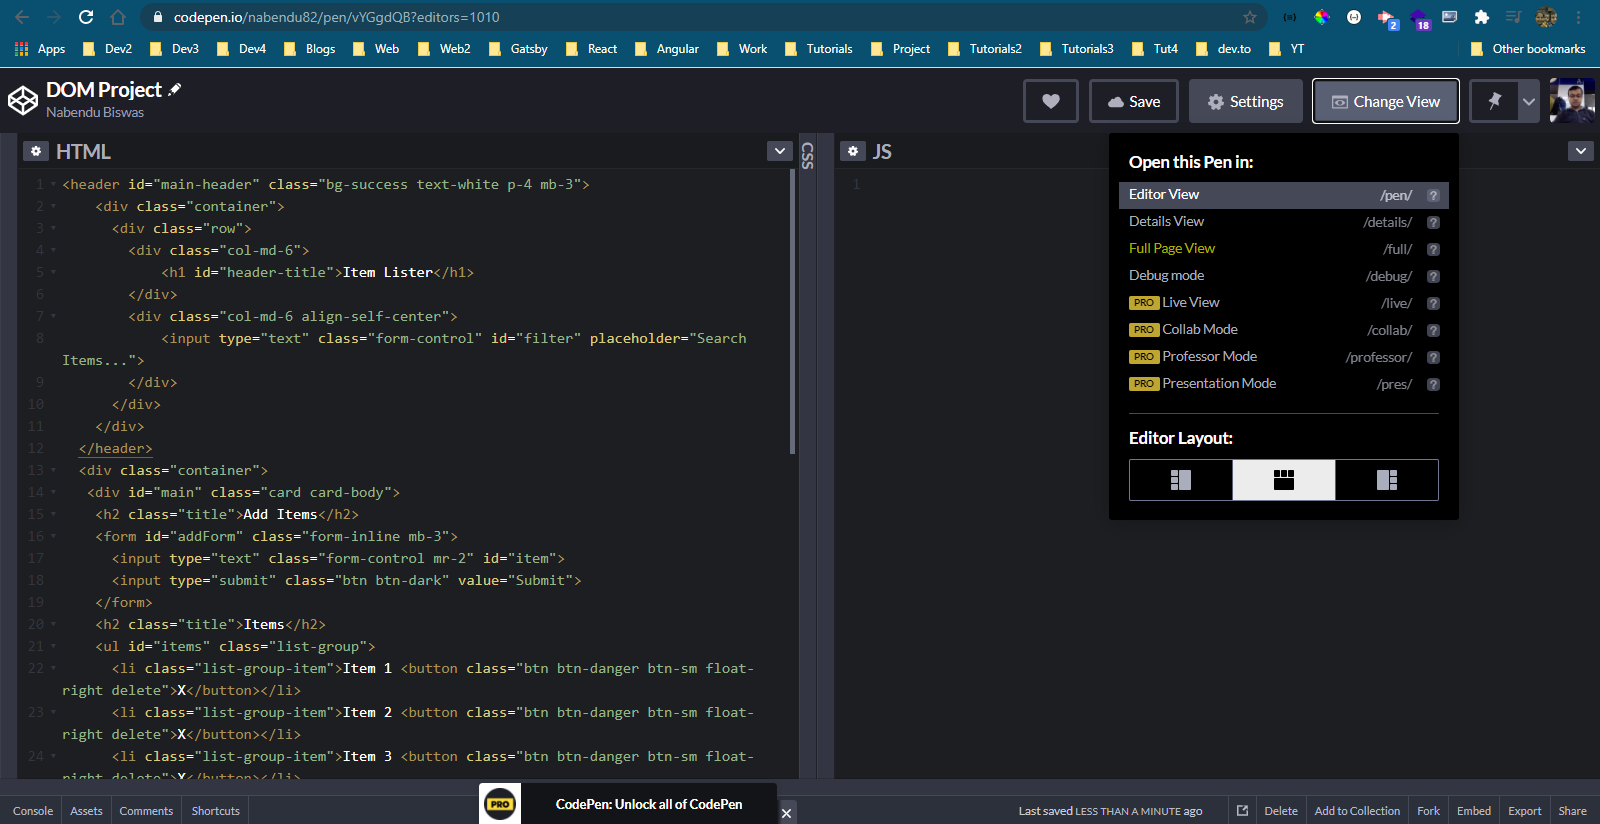 HTML and JS
The Full Page View shows like below.
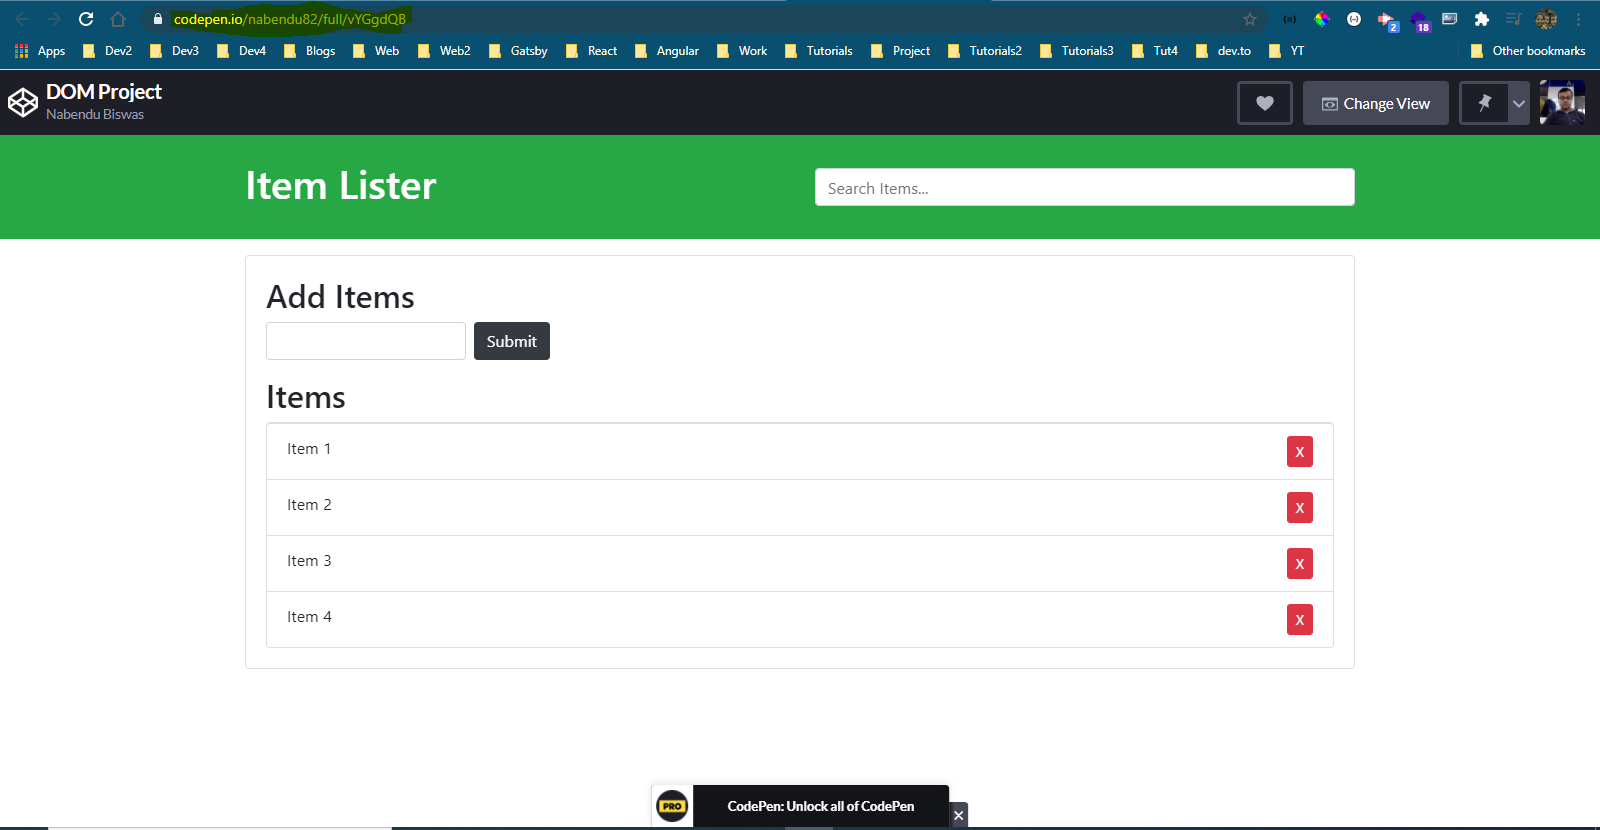 Full Page View
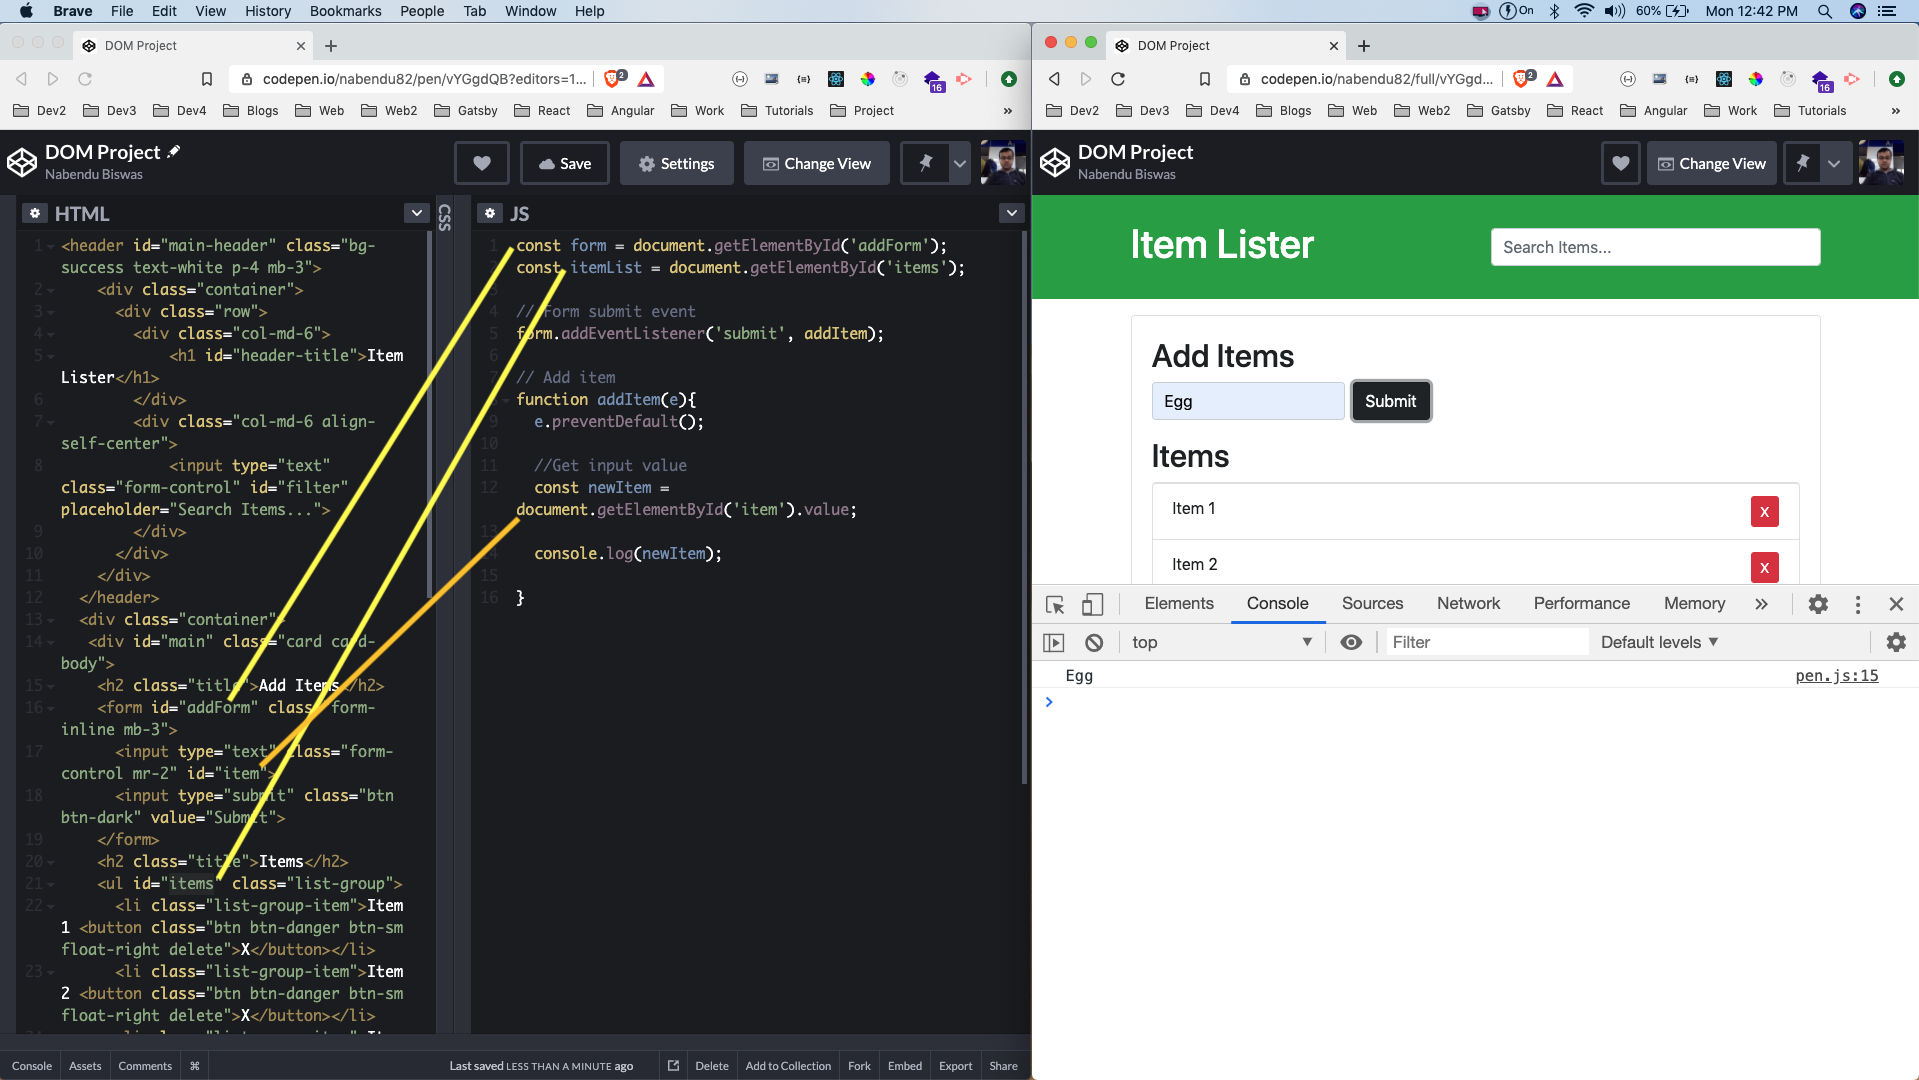
We will first add the logic to Add Items. We are first selecting the form and the ul by getElementById. After that we are adding an event listener to the submit button, which calls a function addItem.
Inside the addItem we are first preventing the default behaviour, which is submit of the form. We are then getting the value of the input box and console logging it.
So, when you write an item in the input box and click on submit, you will get the value in the console.
 Add Items
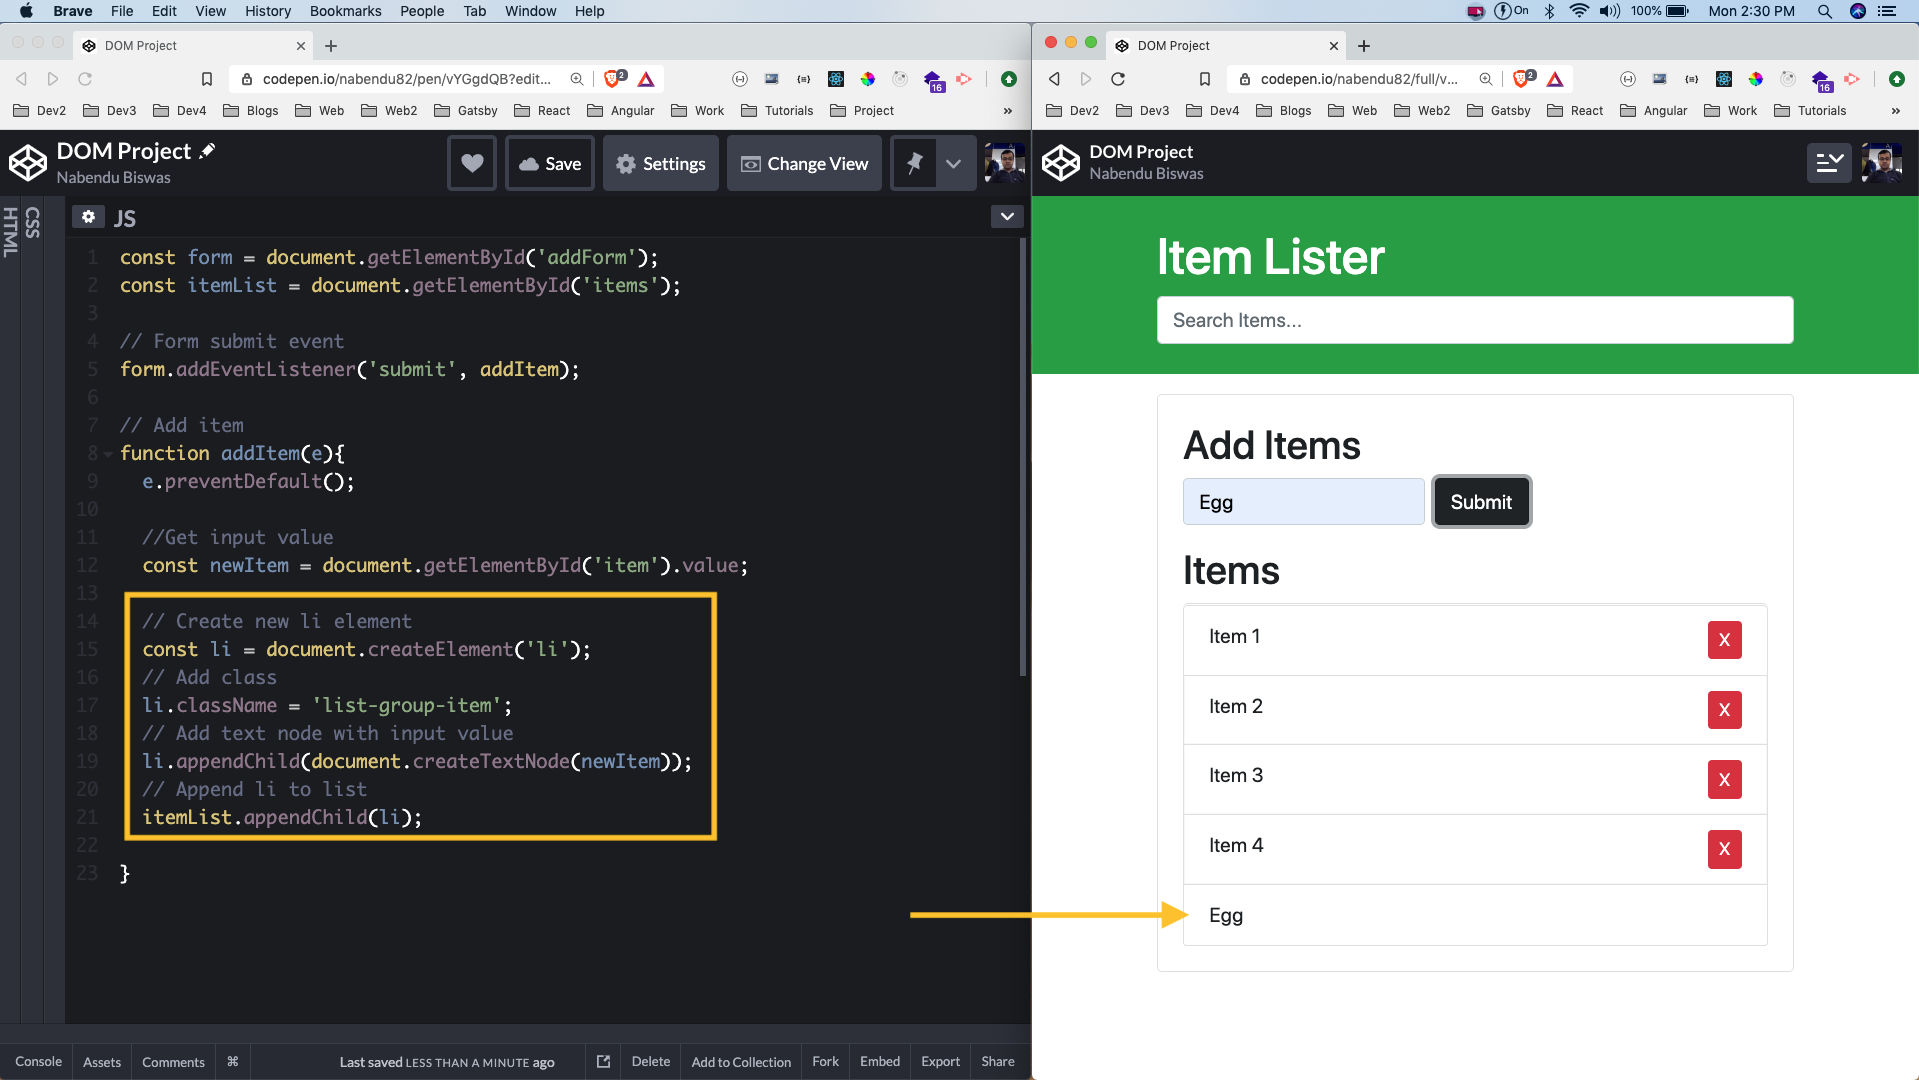
We will next add the entered value in the list. We are creating a new li element with createElement. After that adding a class list-group-item because it is used by bootstrap to style our li.
Now, when we submit our item will show at the end of the list.
 Submit
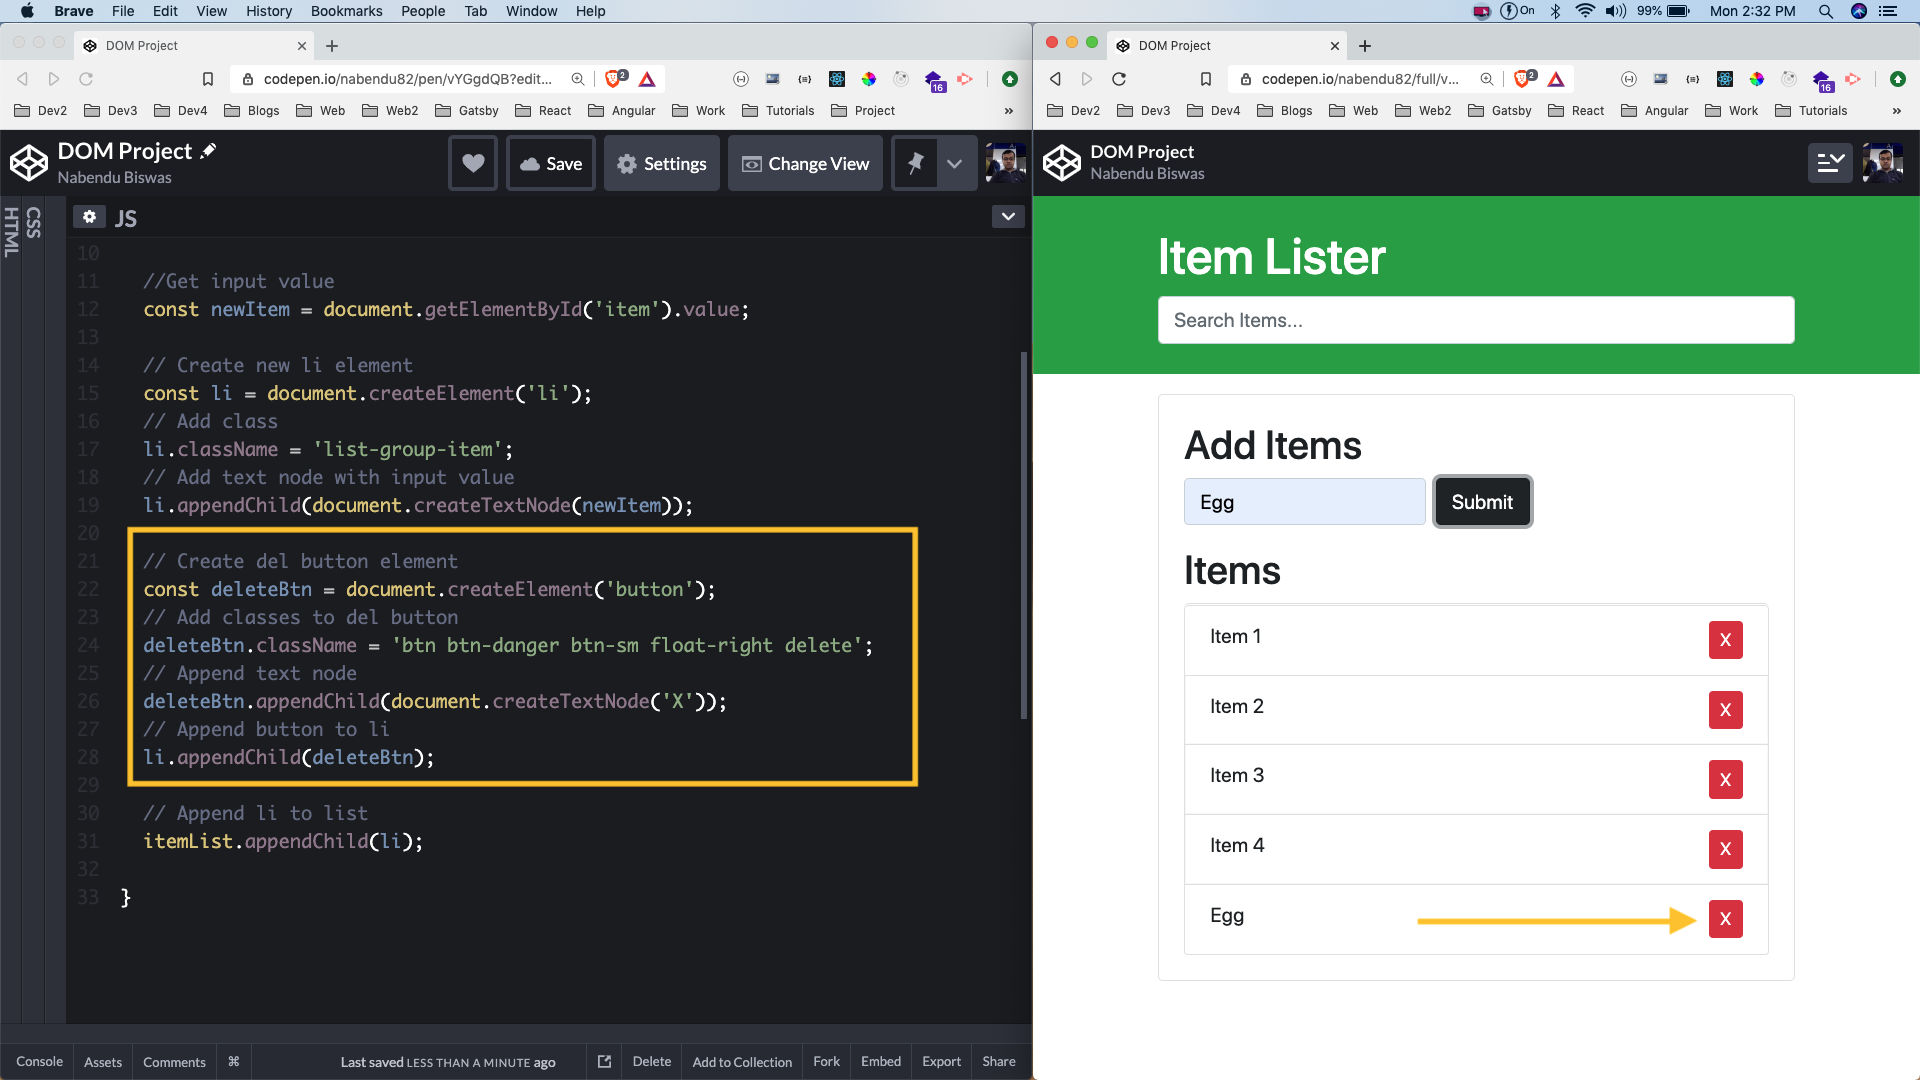
Next, we will show the delete button. We are creating a button first with createElement. After that adding the required bootstrap classes, which we can get from the html.
After that creating an X and appending it to the button, which in turn is appended to the li.
 Delete button
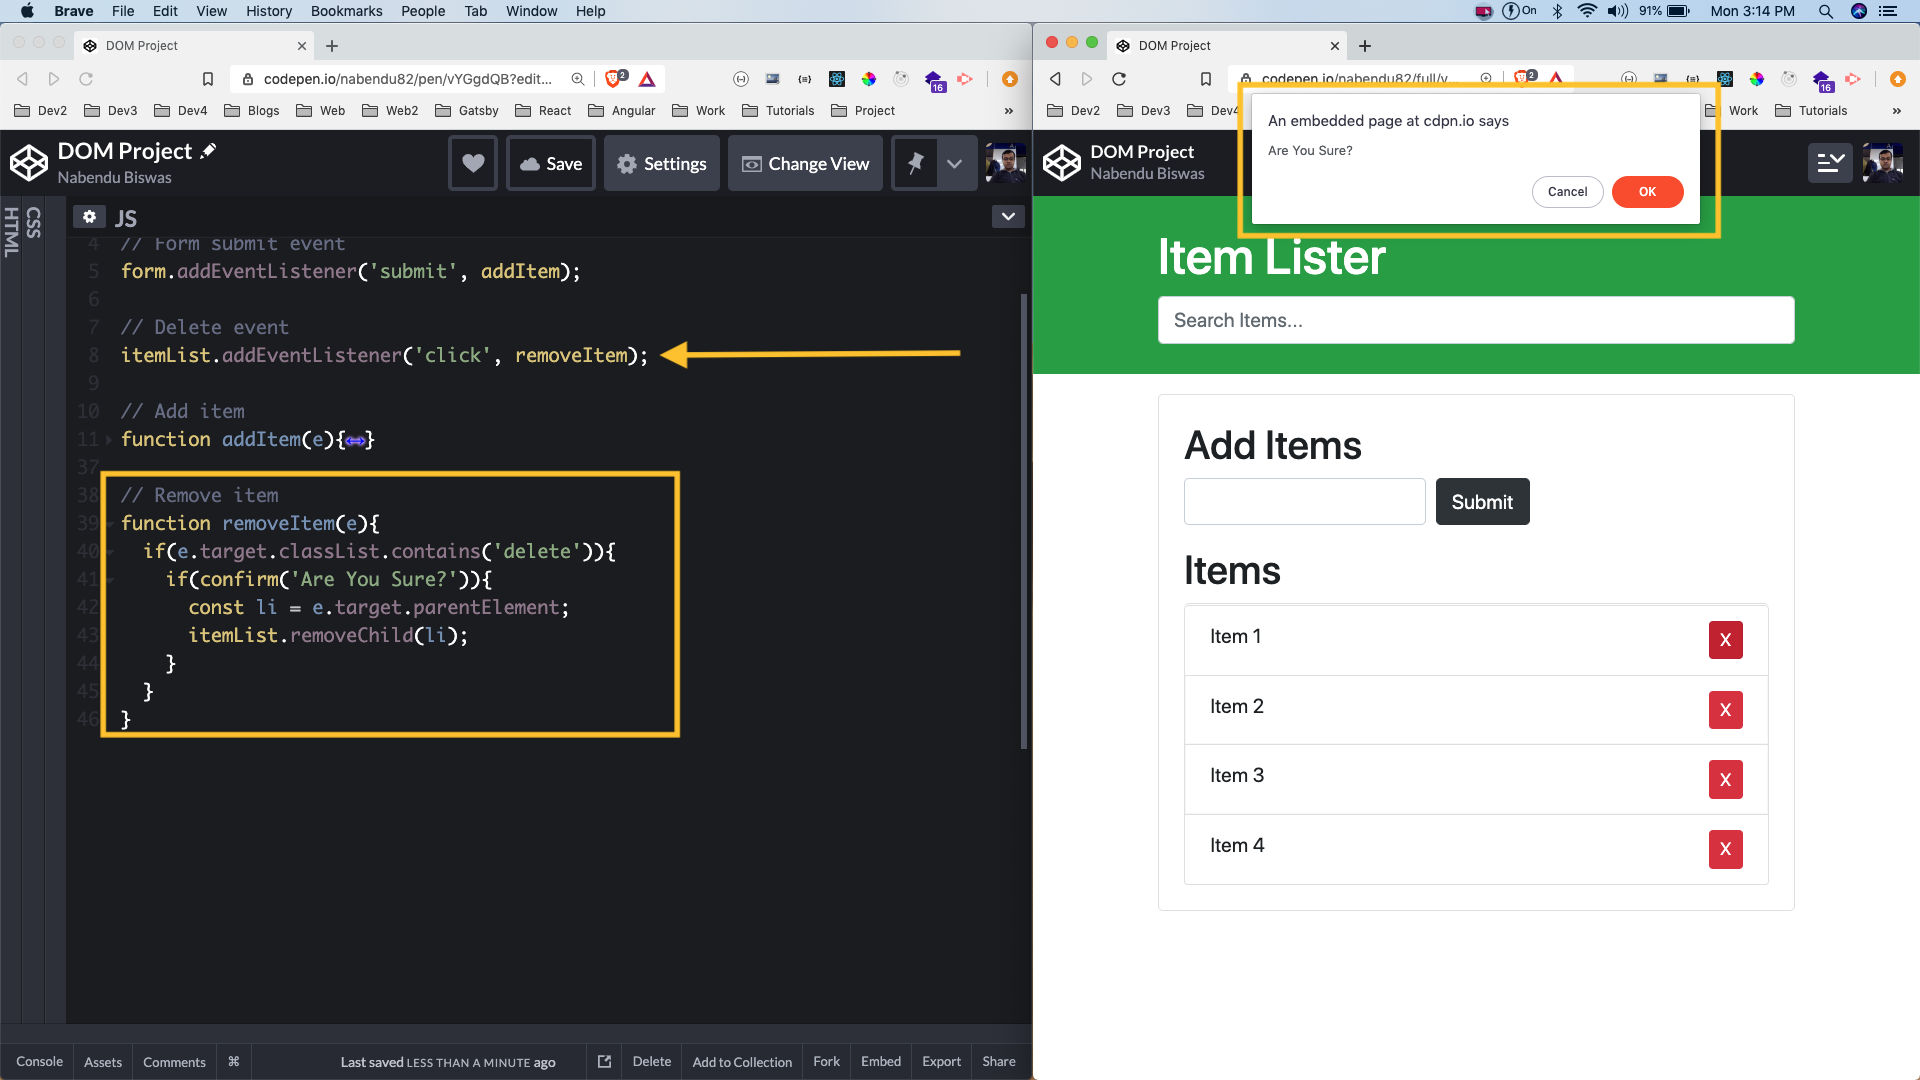
Next, we will add the logic for the delete button. Here, we are creating an event listener on the ul itemList. So, when someone clicks on the delete button the function removeItem will be fired.
Inside it we are first checking whether the button was clicked and not anywhere else by the user with e.target.classList.contains(‘delete’).
After that we are just showing a confirm box. If the user clicks on OK, then we are first selecting the parent element which is an li. After that removing it from the itemList.
 Delete Logic
Next, we will add the filter logic in the search box. Here, we are first getting the search box with the id filter. After that we are adding an event listener to it with keyup. Now, whenever we type something in the search box and the key is up, the function filterItems is fired.
Here, we are first converting the text to lowercase. After that we are getting all the items. Now the items are HTMLElements, so we have to convert it into an array before using forEach. We are doing the same with the help of spread operator by […items].
Inside the forEach we are first getting the textContent. After that we are checking whether the text is in the itemName with includes(). If it is there, we are displaying it and if not there then we are making the display to none.
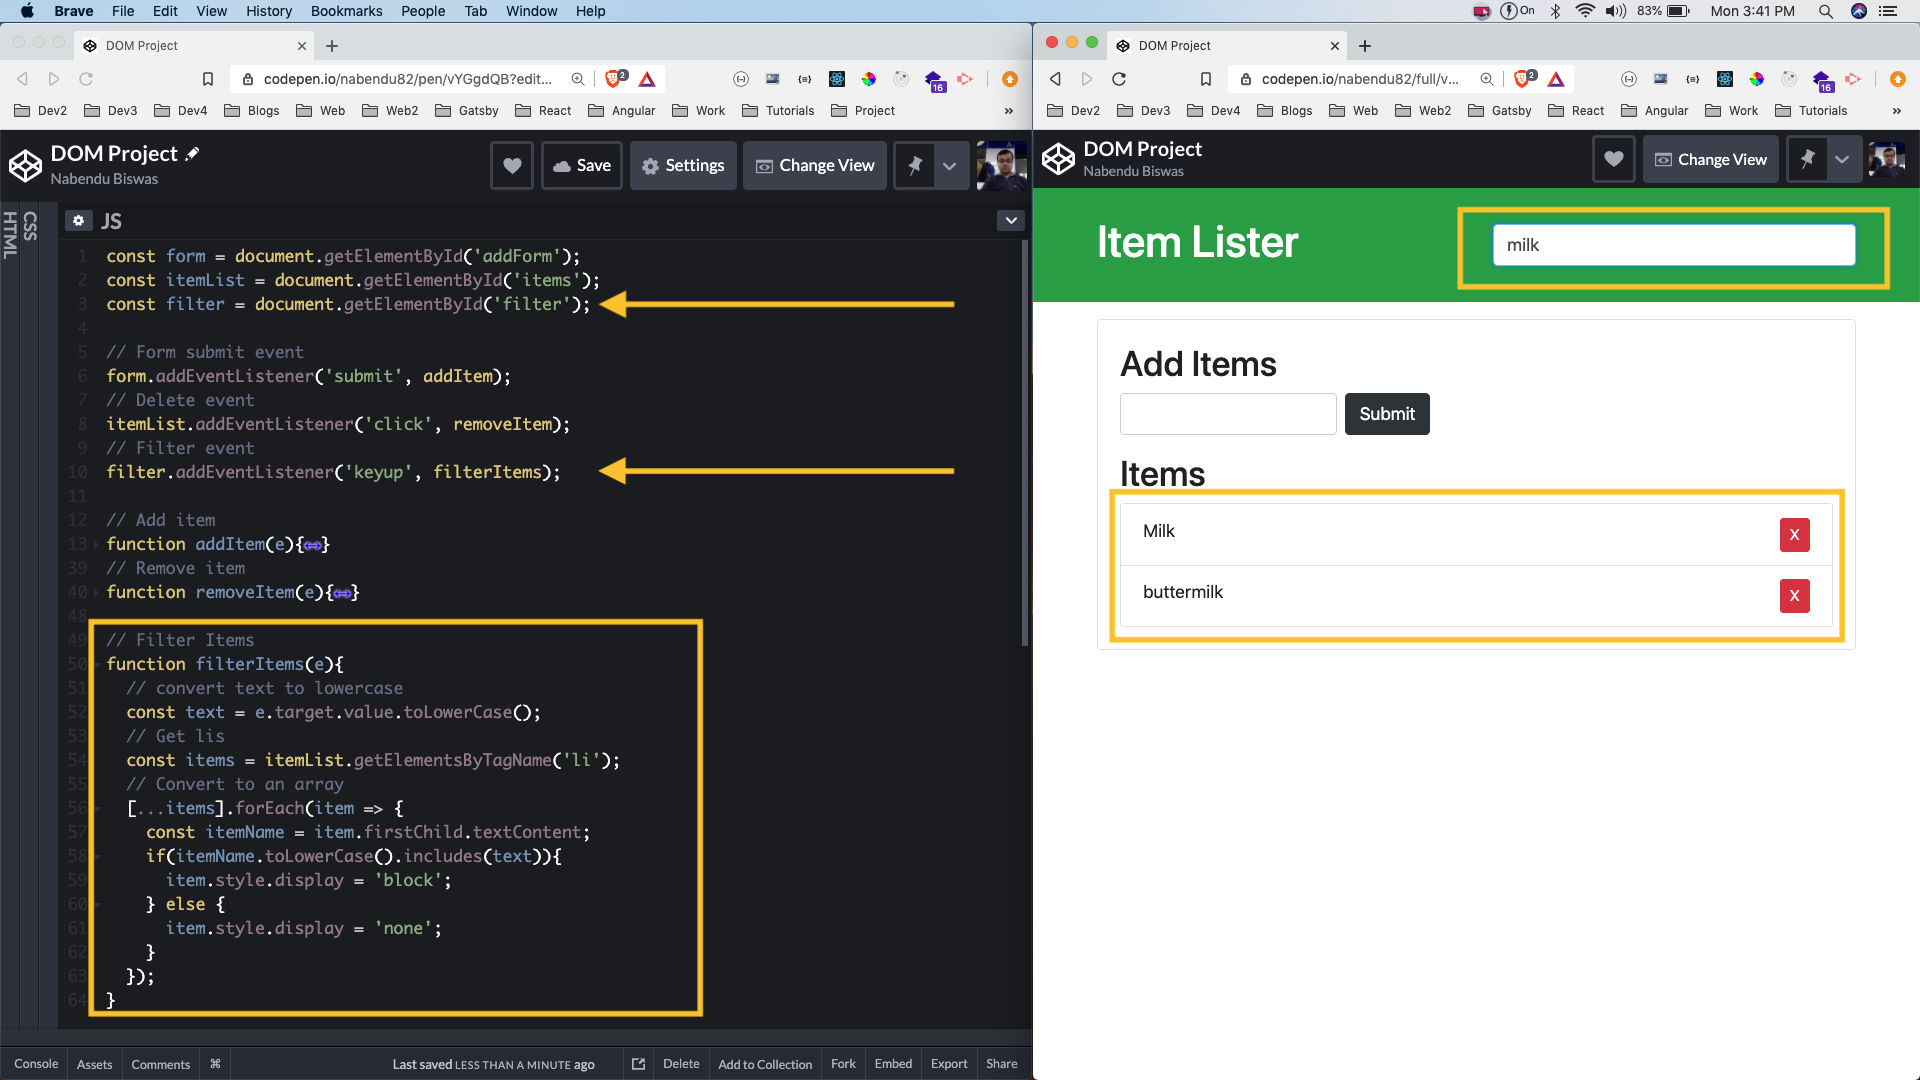 Filter logic
This completes our project. You can find the code for the same in this codepen.