Create an animated landing page with Tailwind CSS
by Nabendu Biswas / July 31st, 2021
#tailwind #css #webdev
In this project we are going to build a beautiful tailwind CSS site. This site again will be created using only HTML and CSS and no framework. This site will also have cool animation effect.
The installation of tailwind is a long process and covered earlier in my earlier post. Please refer it to get tailwind CSS setup in your project. After the installation, in the index.html file, add the basic code by ! and tab. After that also add the link for the style sheet. We have also added an h1 text, for the testing.
After that, right-click and then click on Open with Live Server link.
 Animated Site
Now, the code will open in http://127.0.0.1:5500/public/index.html
 Animated Site
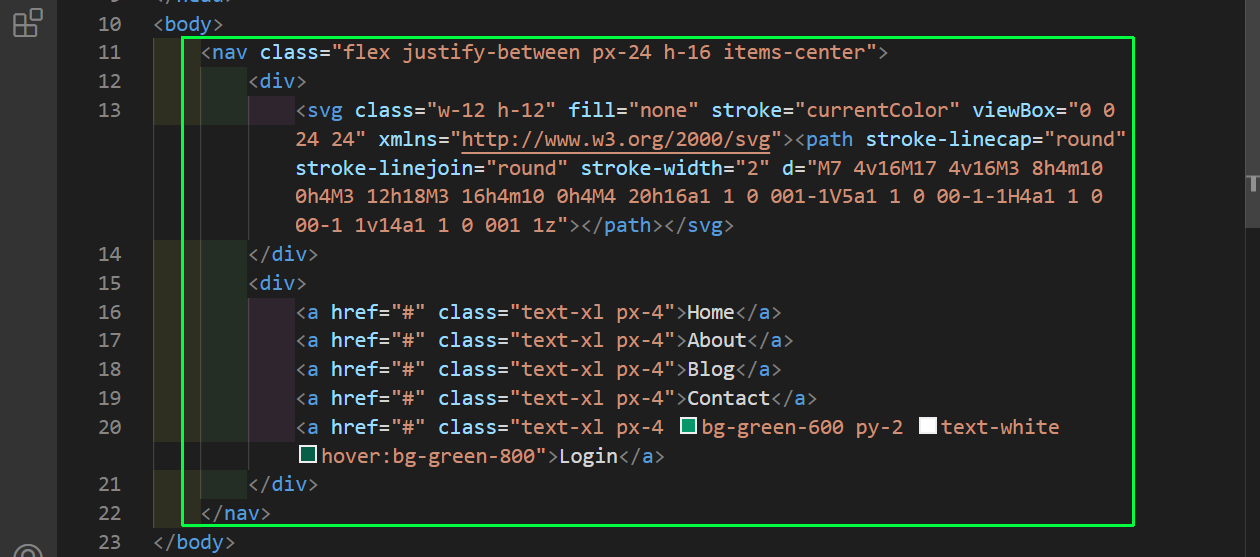
We will create our navigation bar first. So, inside a nav, we will have two divs. One will contain an icon and the other our menu items. We are again taking the icon svg from the awesome site https://heroicons.dev/. The only thing which we have changed is the class size to w-12 and h-12. The classes have been taken from the awesome documentation of tailwind site. They means as below.
    flex - makes children flex items
    justify-between - justify-content: space-between;
    items-center - align-items: center;
    h-16 - height: 4rem;
    px-24 - padding-left: 6rem; padding-right: 6rem;
    px-4 - padding-left: 1rem; padding-right: 1rem;
    text-xl - font-size: 1.25rem; line-height: 1.75rem;
    text-white - text color white
    bg-green-600 - background-color: rgba(5, 150, 105, 1);
 Animated Site
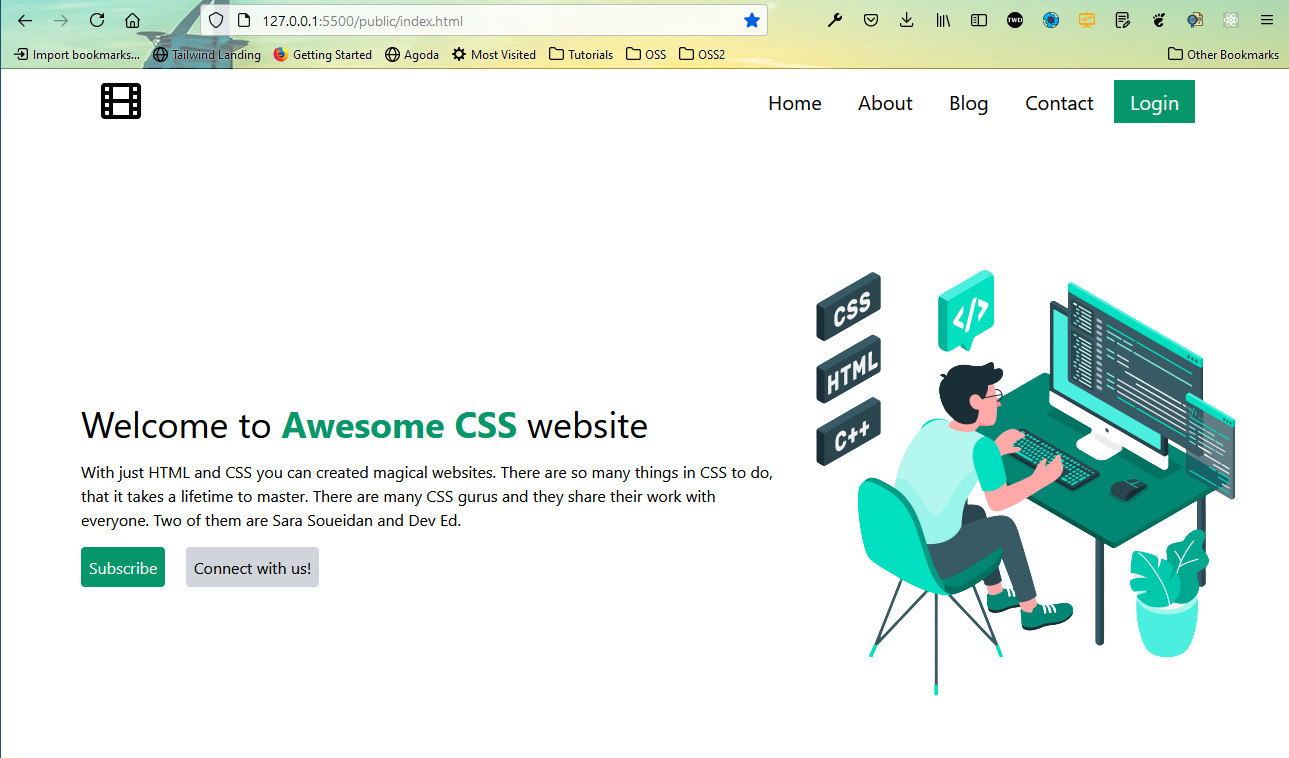
And our Navbar is complete and showing beautifully.
 Animated Site
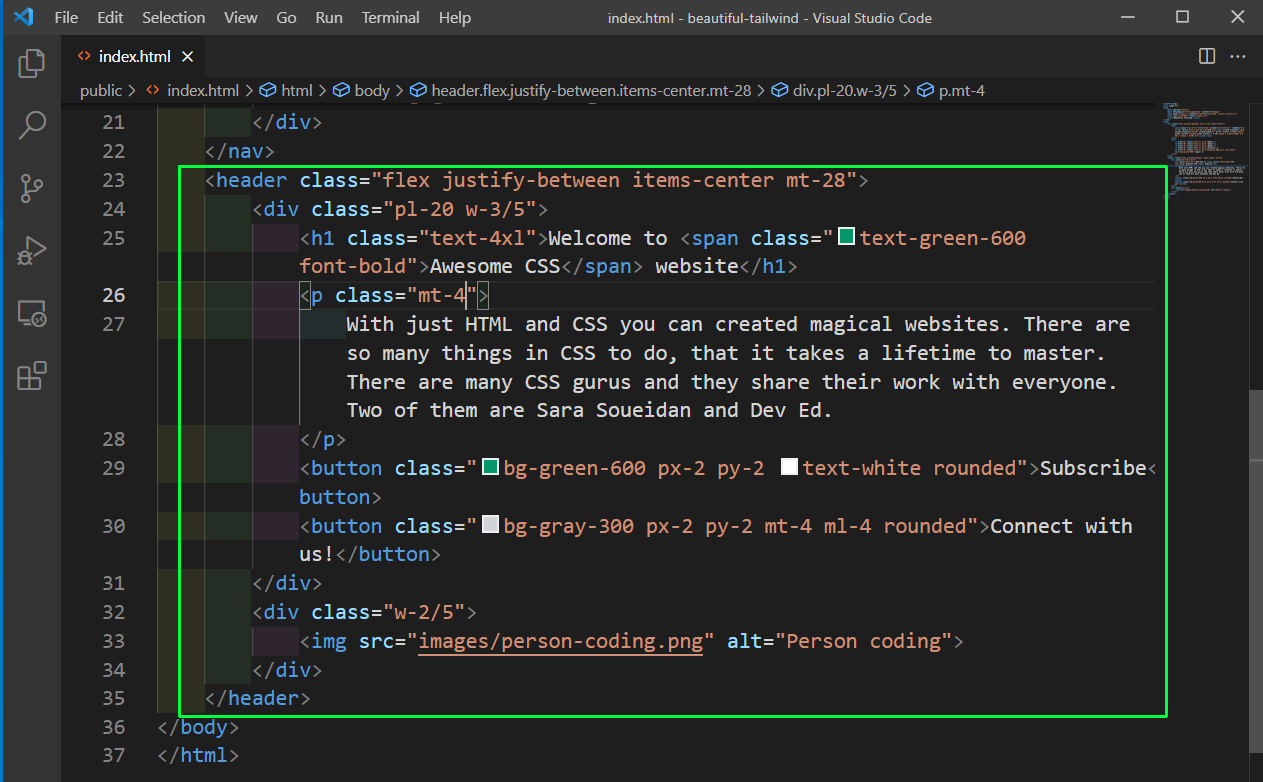
Now, we will create our header component, which will include our body. Here, inside a header tag, we have two divs. One contains the left part, which have a h1, p and two buttons. The right half contains a vector image, which i have placed in the images folder. You can get free vector images from this site https://www.freepik.com/ The tailwind classes used for this part are mentioned below.
flex, justify-between, items-center - explained before
mt-28 - margin-top: 7rem;
mt-4 - margin-top: 1rem;
ml-4 - margin-left: 1rem;
pl-20 - padding-left: 5rem;
px-2 - padding-left: 0.5rem; padding-right: 0.5rem;
py-2 - padding-top: 0.5rem; padding-bottom: 0.5rem;
rounded - border-radius: 0.25rem;
text-4xl - font-size: 1.25rem; line-height: 1.75rem;
bg-green-600 - background-color: rgba(5, 150, 105, 1);
w-3/5 - width: 60%;
w-2/5 - width: 40%;
 Animated Site
Now, our site is almost complete with a beautiful body.
 Animated Site
Now, we will integrate animation in our site, which we will use from https://animate.style/
For using the animation first include this stylesheet inside your head.
<link rel="stylesheet" href="https://cdnjs.cloudflare.com/ajax/libs/animate.css/4.1.1/animate.min.css" />
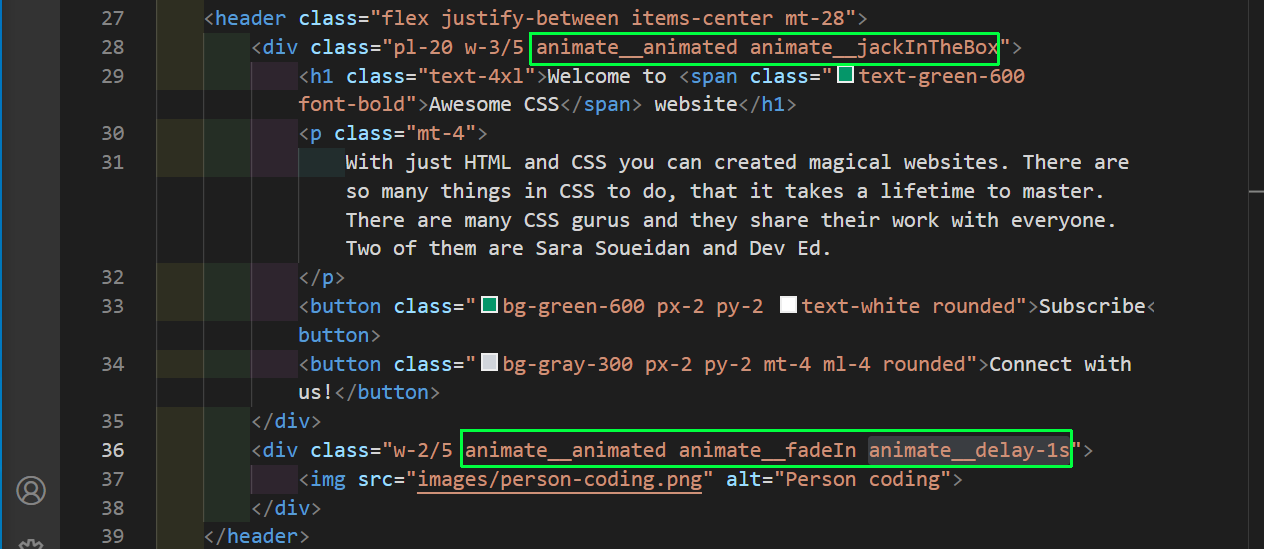
After that as per documentation, we need to add the base class of animate__animated to the element, which we want to animate. Beside this the other class, which tells about the animation and can be taken from the site. If we have two animations on our site, we can also delay one of them by adding animate__delay-1s to it. In our site, we are animating both the left and the right side.
 Animated Site
Our small animation project is complete and working as below.
 Animated Site