Build a flutter app with login functionality
by Nabendu Biswas / April 16th, 2021
#flutter #beginners #dart
Series: Flutter
I this post we are going to make a simple flutter app and will learn the basics of routing and login. We will also learn, how to make API requests in flutter.
So, open up a terminal and create a new flutter app using the below command.
flutter create login_api_app
After that cd into the folder and open the code in VSCode. I have also connected my physical device to my computer via USB.
On running the app from Run ->Start without debugging , i will get the basic app running on my phone.
The basic app will be shown on my phone. Now, we will update the basic app and add a folder pages inside lib folder and create a file home_page.dart in it.
Put the below content in it. Here, we are creating a Stateful widget and then inside a Scaffold giving a background color to the app. After that creating an AppBar and a floating action button.
import 'package:flutter/material.dart';

class HomePage extends StatefulWidget {
    @override
    _HomePageState createState() => _HomePageState();
}

class _HomePageState extends State<HomePage> {
    @override
    Widget build(BuildContext context) {
        return Scaffold(
        backgroundColor: Colors.grey[200],
        appBar: AppBar(title: Text("Simple App")),
        body: Center(
            child: Padding(
            padding: const EdgeInsets.all(16.0),
            )
        ),
        floatingActionButton: FloatingActionButton(
            onPressed: () {
            setState(() {});
            },
            child: Icon(Icons.send_rounded),
        ),
        );
    }
}
Now, replace the main.dart with below content. Here, we are just calling the HomePage()
import 'package:flutter/material.dart';
import 'package:login_api_app/pages/home_page.dart';void main() {
    runApp(MaterialApp(
        home: HomePage(),
        theme: ThemeData(primarySwatch: Colors.orange)
    ));
}
Now, we will do API request to the amazing free jsonplaceholder endpoint, which will give as array of objects containing some data. We are interested in the id, title and thumbnailUrl only here.
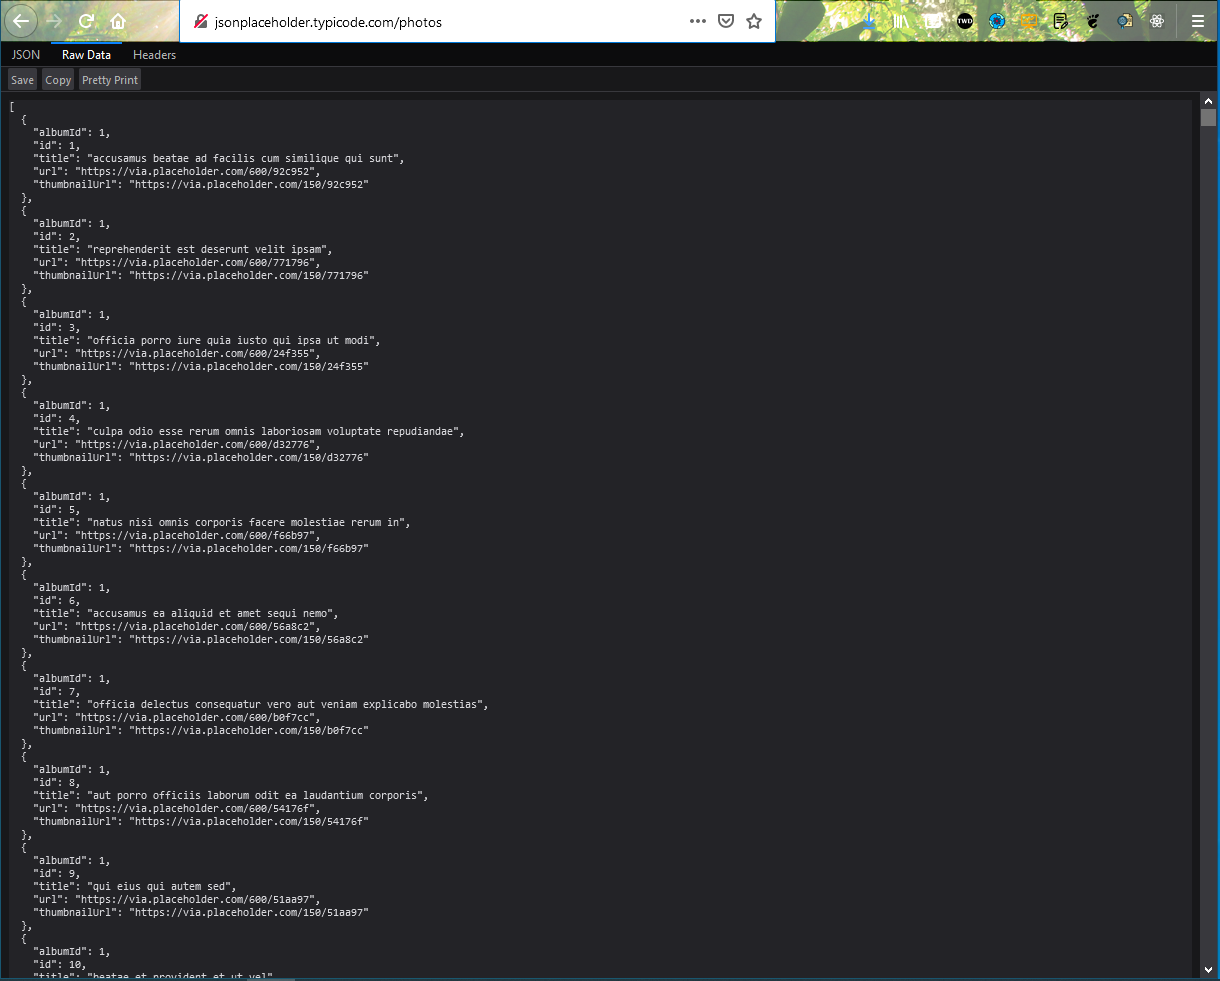 jsonplaceholder
Next, to use API in our flutter code, we need to install a package called http from pub.dev. As per the installation instruction here , we need to add http with current version in pubspec.yaml at flutter level. As told earlier the tab should be exactly at flutter level. As we hit Save, this package will be installed.
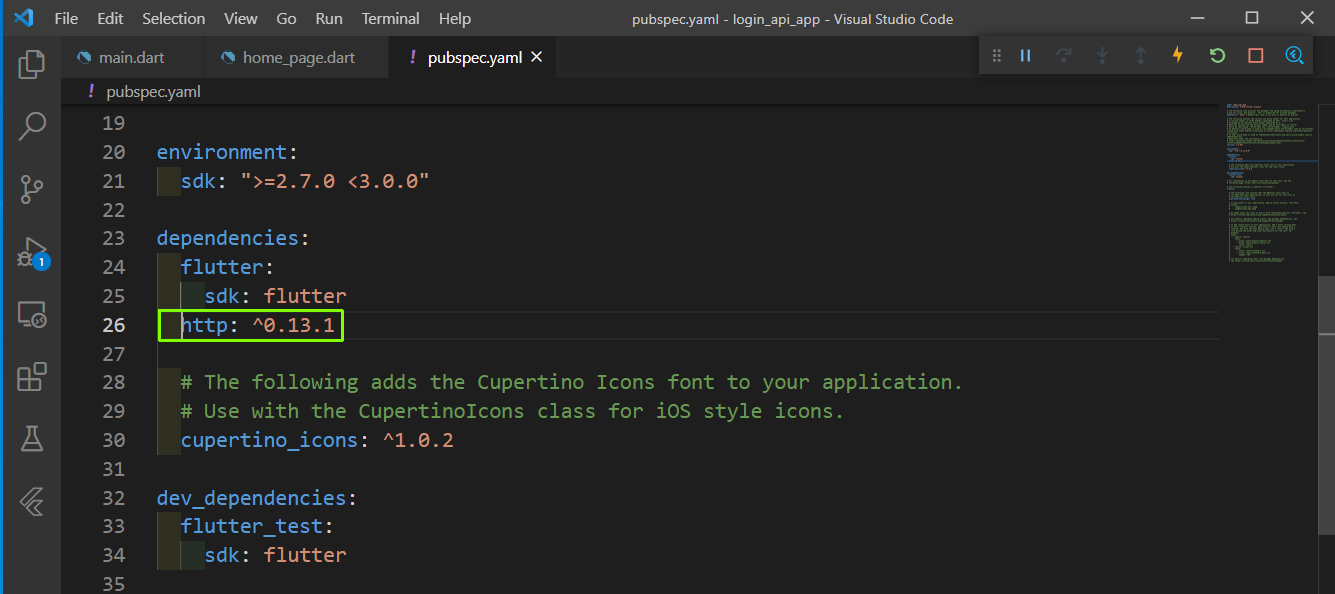 pubspec.yaml
Our basic app till now, looks like below.
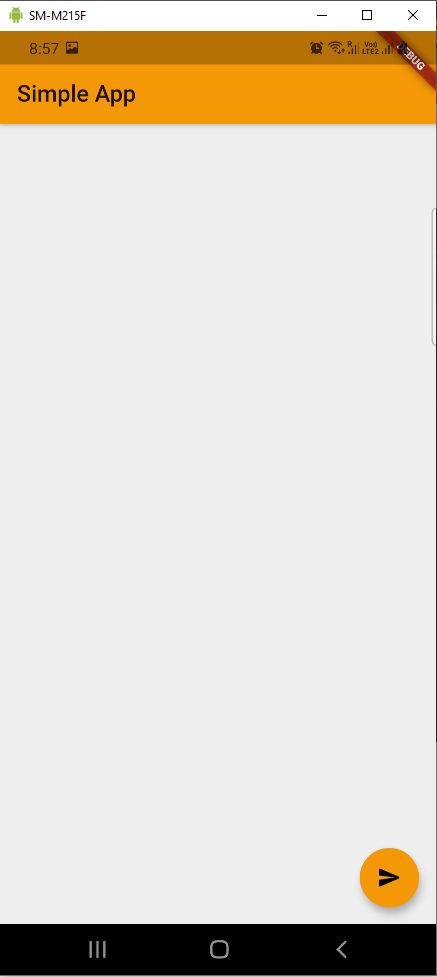 Awesome
Now, we will first import two packages at the top of our home_page.dart file.
import 'dart:convert';
import 'package:http/http.dart' as http;
Now, inside our class we will first add the url in the Uri. After that we are calling a function fetchData from inside initState().
Inside the fetchData() function, we are using http package to hit the api endpoint, through a get API call. After that we need to use jsonDecode to decode our data. We are also using setState() in our function, so that everything is re-rendered.
Now, inside the Widget’s body use a ternary operator to show a empty container if we get the data, or a circular progress bar otherwise.
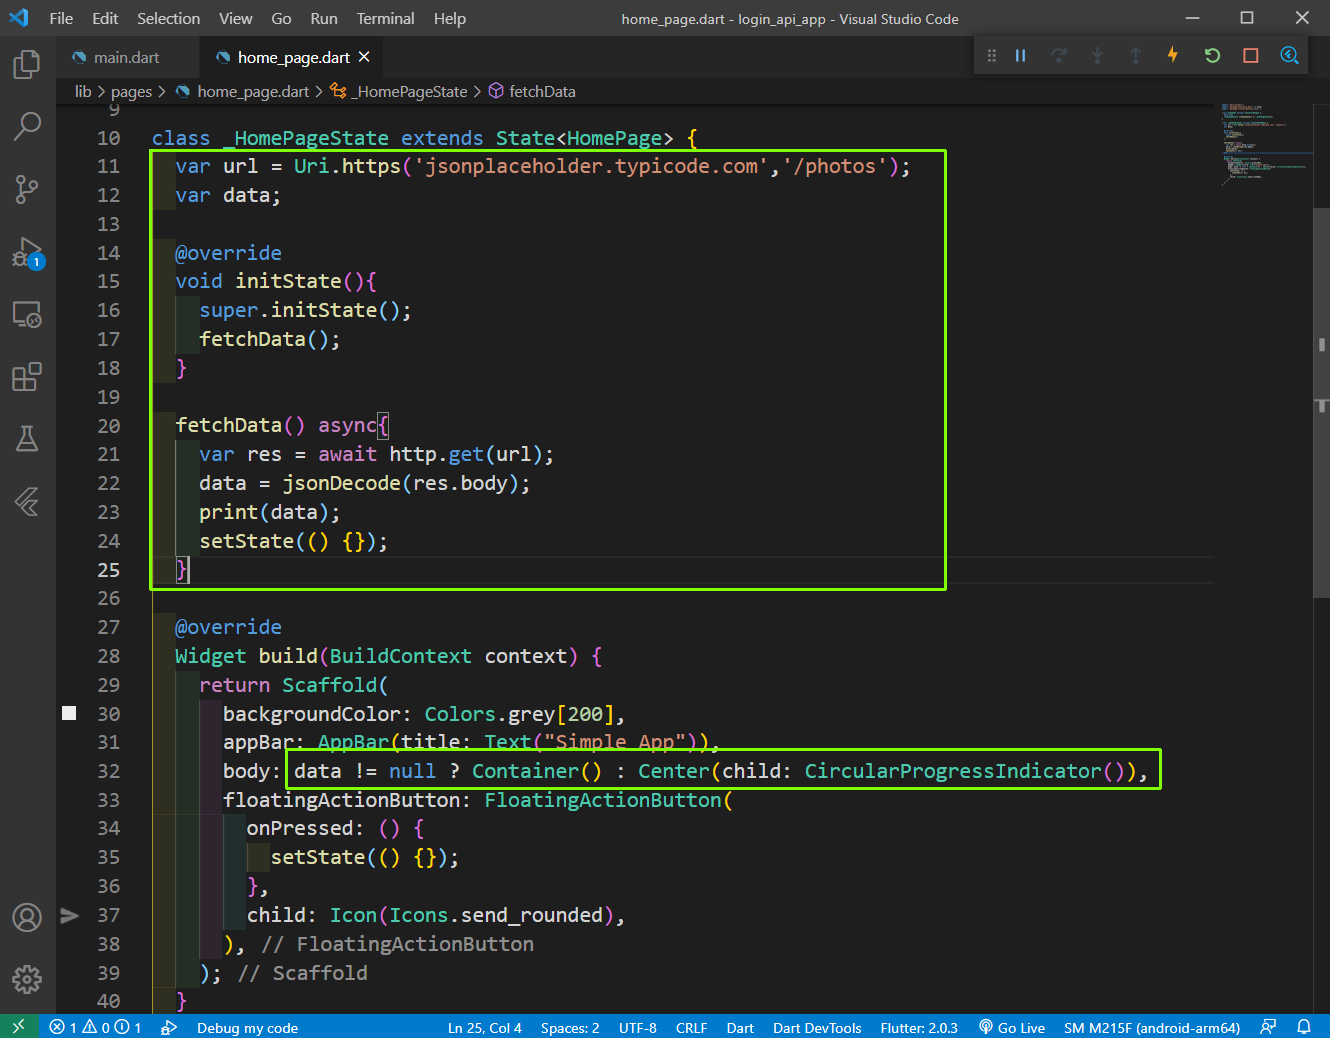 home_page.dart
Now, we need to reload our app by clicking the reload button at the top right of VSCode. Now, open the Debug Console by Ctrl + J and you will see the data from the api endpoint.
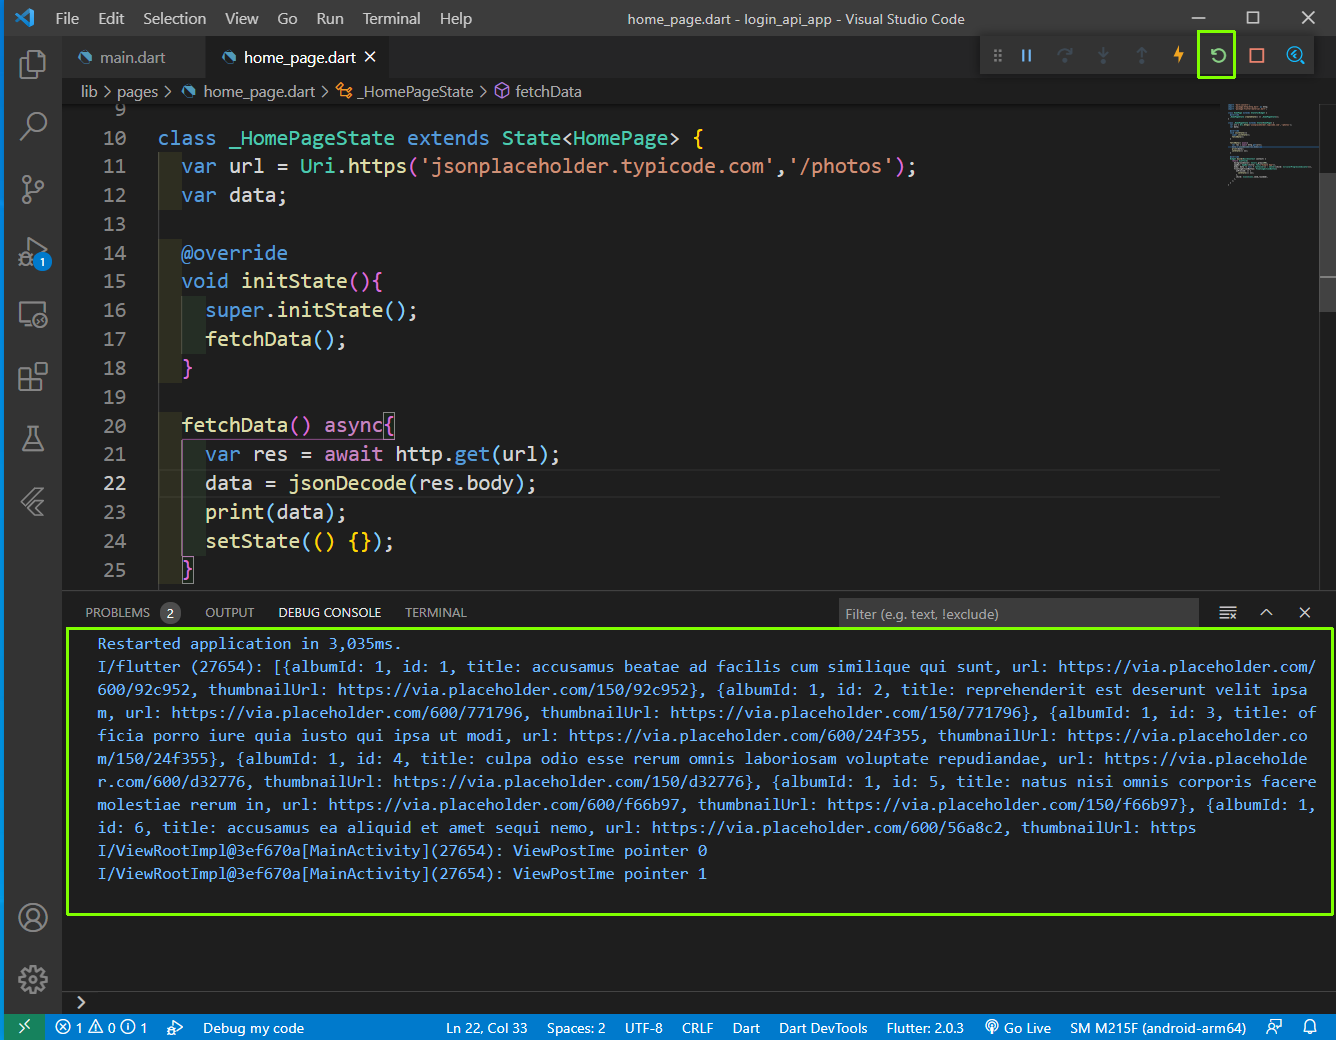 data
data
Now, we want to show the data and we will use the ListView for it. We are passing the context inside the ListTile and showing the title, id and url inside title, subtitle and leading respectively.
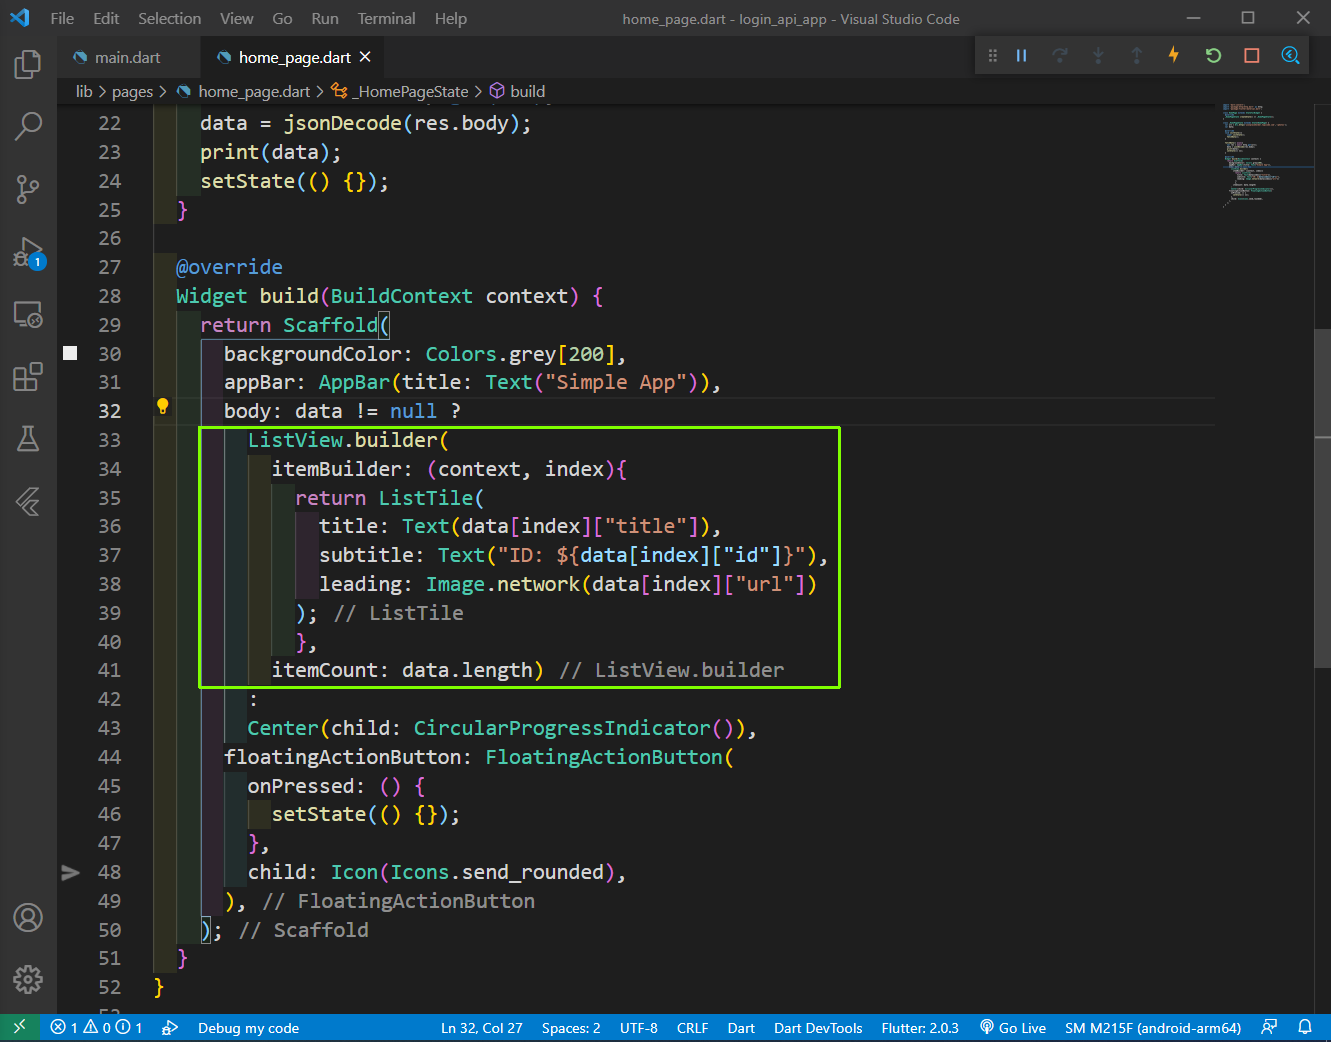 title
title
Now, our networking is complete and we are getting to see a beautiful app.
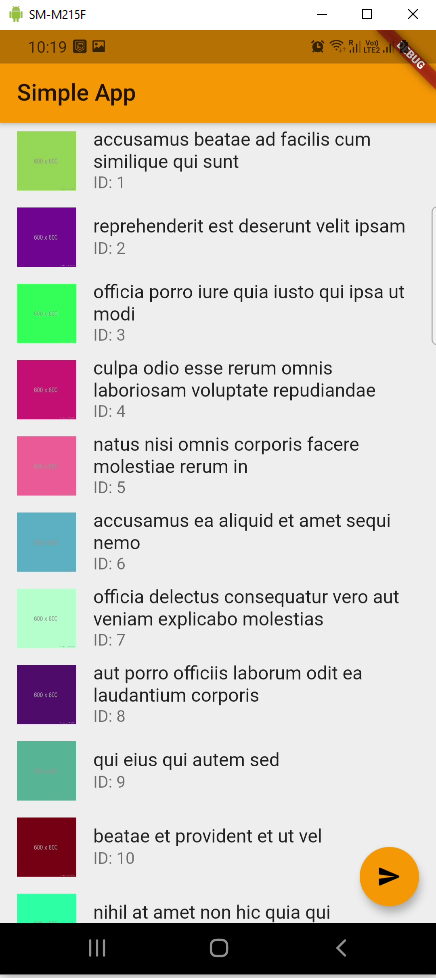 App
App
Now, we add Login functionality to our app. So, create a new file login_page.dart inside the pages folder.
Inside it we are creating a Stateful widget. After that we are using Scaffold containing an AppBar and SingleChildScrollView.
Inside the SingleChildScrollView, we have a Form containing a Text field for username and password. Also, we have an ElevatedButton after that.
import 'package:flutter/material.dart';

class LoginPage extends StatefulWidget {
    @override
    _LoginPageState createState() => _LoginPageState();
}

class _LoginPageState extends State<LoginPage> {
    final formKey = GlobalKey<FormState>();
    final _usernameController = TextEditingController();
    final _passwordController = TextEditingController();

    @override
    Widget build(BuildContext context) {
        return Scaffold(
        appBar: AppBar(title: Text("Login Page")),
        body: SingleChildScrollView(
            child: Form(
                key: formKey,
                child: Center(
                child: Card(
                    child: Padding(
                    padding: const EdgeInsets.all(16.0),
                    child: Column(
                        children: <Widget>[
                        TextFormField(
                            controller: _usernameController,
                            keyboardType: TextInputType.emailAddress,
                            decoration: InputDecoration(hintText: "Enter email", labelText: "Username"),
                        ),
                        SizedBox(height: 20),
                        TextFormField(
                            controller: _passwordController,
                            keyboardType: TextInputType.text,
                            obscureText: true,
                            decoration: InputDecoration(hintText: "Enter password", labelText: "Password"),
                        ),
                        SizedBox(height: 20),
                        ElevatedButton(
                            onPressed: () {},
                            child: Text('Sign In'),
                            style: ElevatedButton.styleFrom(
                            primary: Colors.orange,
                            textStyle: TextStyle(
                                fontSize: 15,
                                fontWeight: FontWeight.bold
                            )
                            )
                        )
                        ]
                    ),
                    ),
                ),
                ),
            )
        )
        );
    }
}
We will have Navigation soon, but to show this Login Page temporarily we will replace the HomePage with it in main.dart.
Also, we are removing the debug mode which is shown in every flutter app.
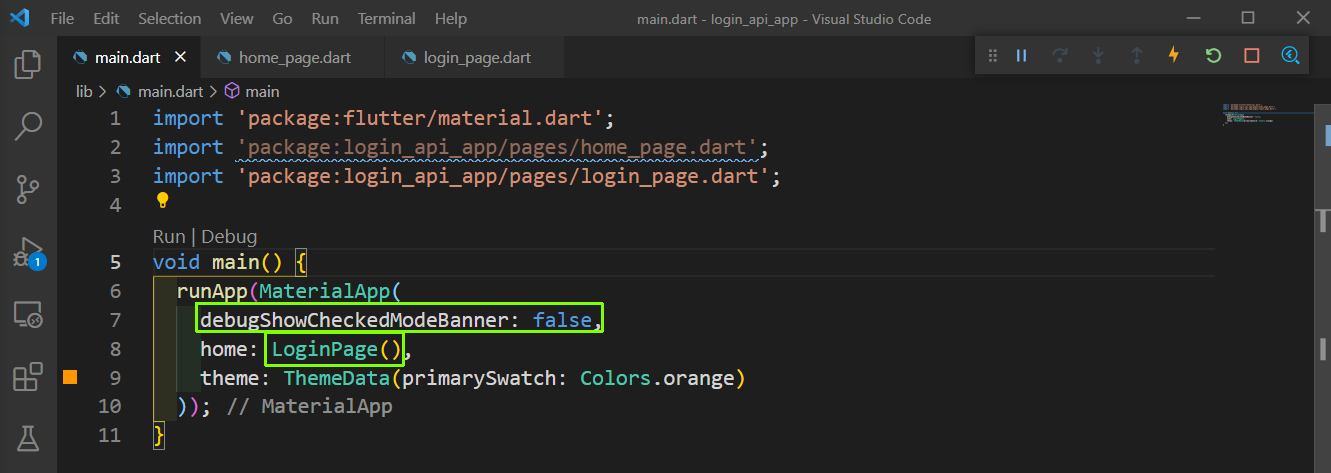 main.dart
Now, our app will look like below.
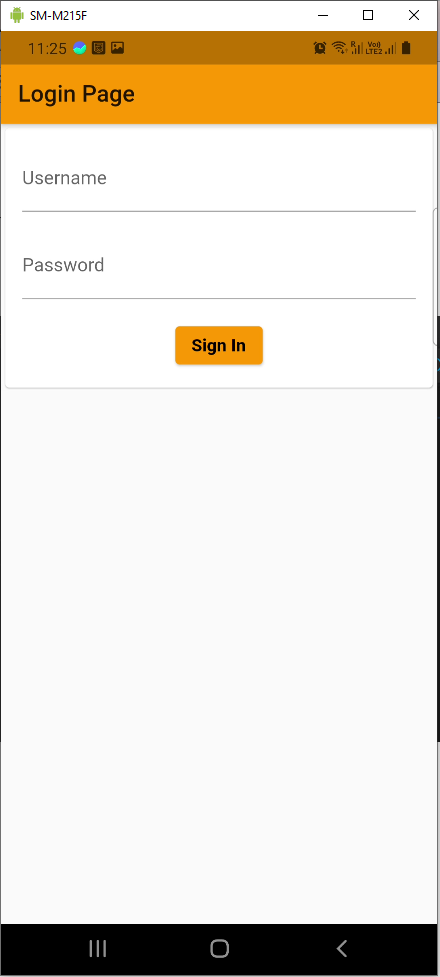 Current App
Now, we want to show a background image in our app. So, create a folder assets and add a image in it. After that in pubspec.yaml remove the comment of assets and update it as below to take all images from assets folder.
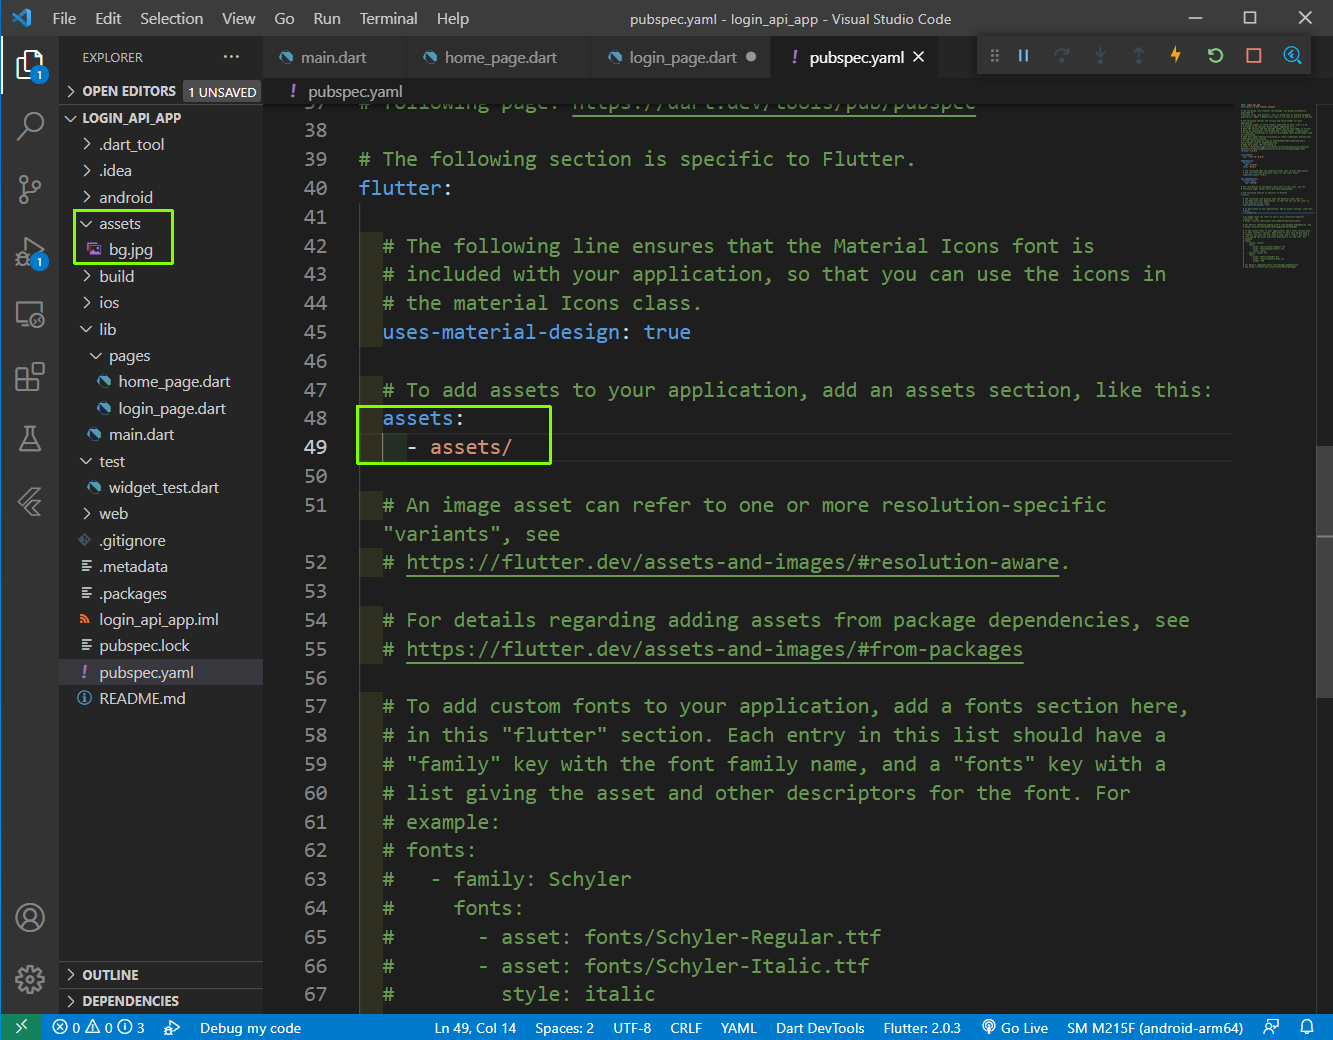 pubspec.yaml
After then in login_page.dart cut the code for SingleChildScrollView and keep it aside. After that create a Stack for the body and create a children widget containing the image path. We are giving a bit of opacity to it.
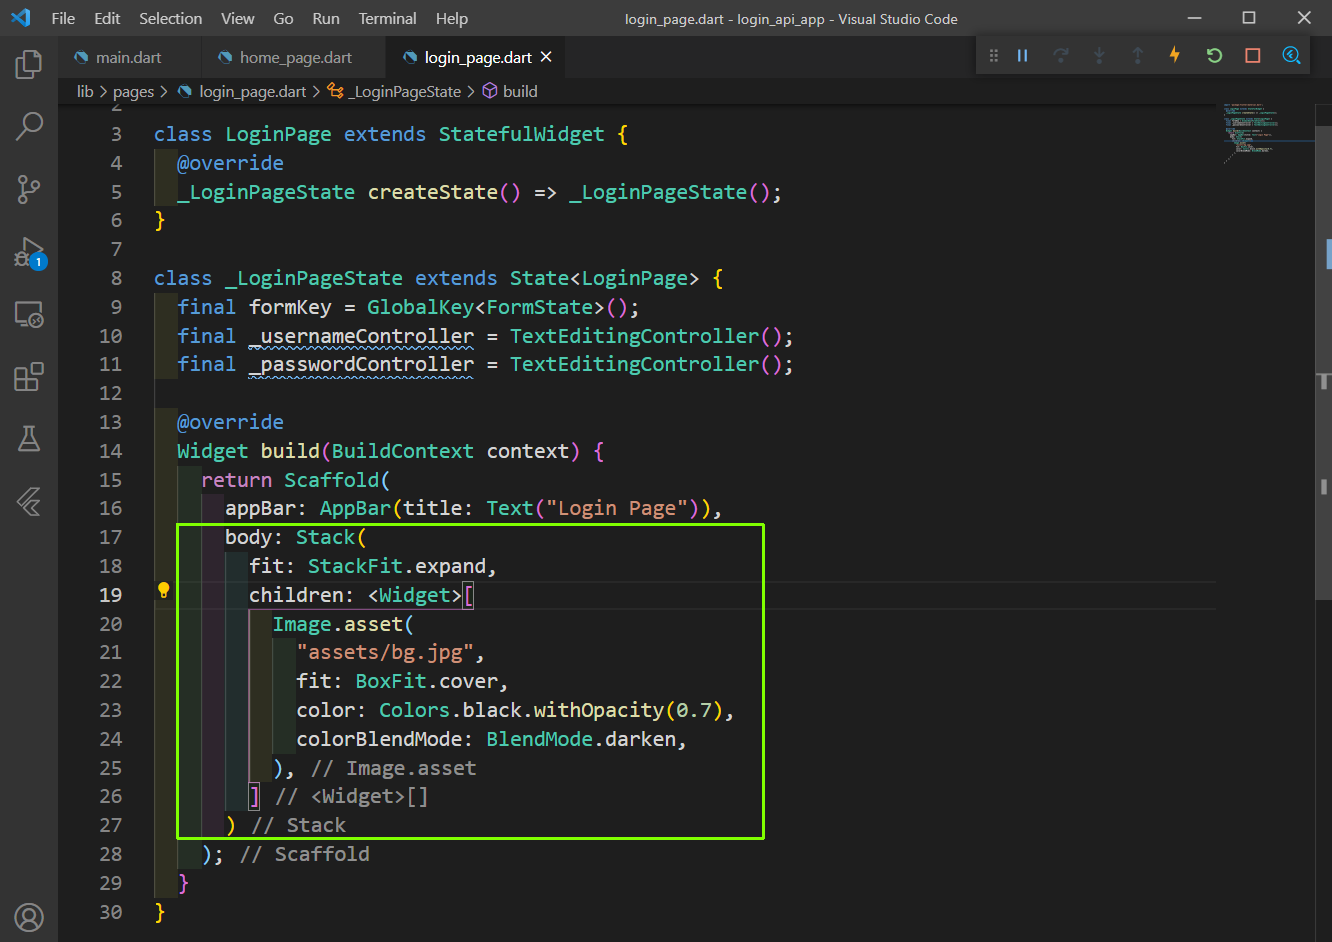 login_page.dart
After that we have put back the SingleChildScrollView as a children.
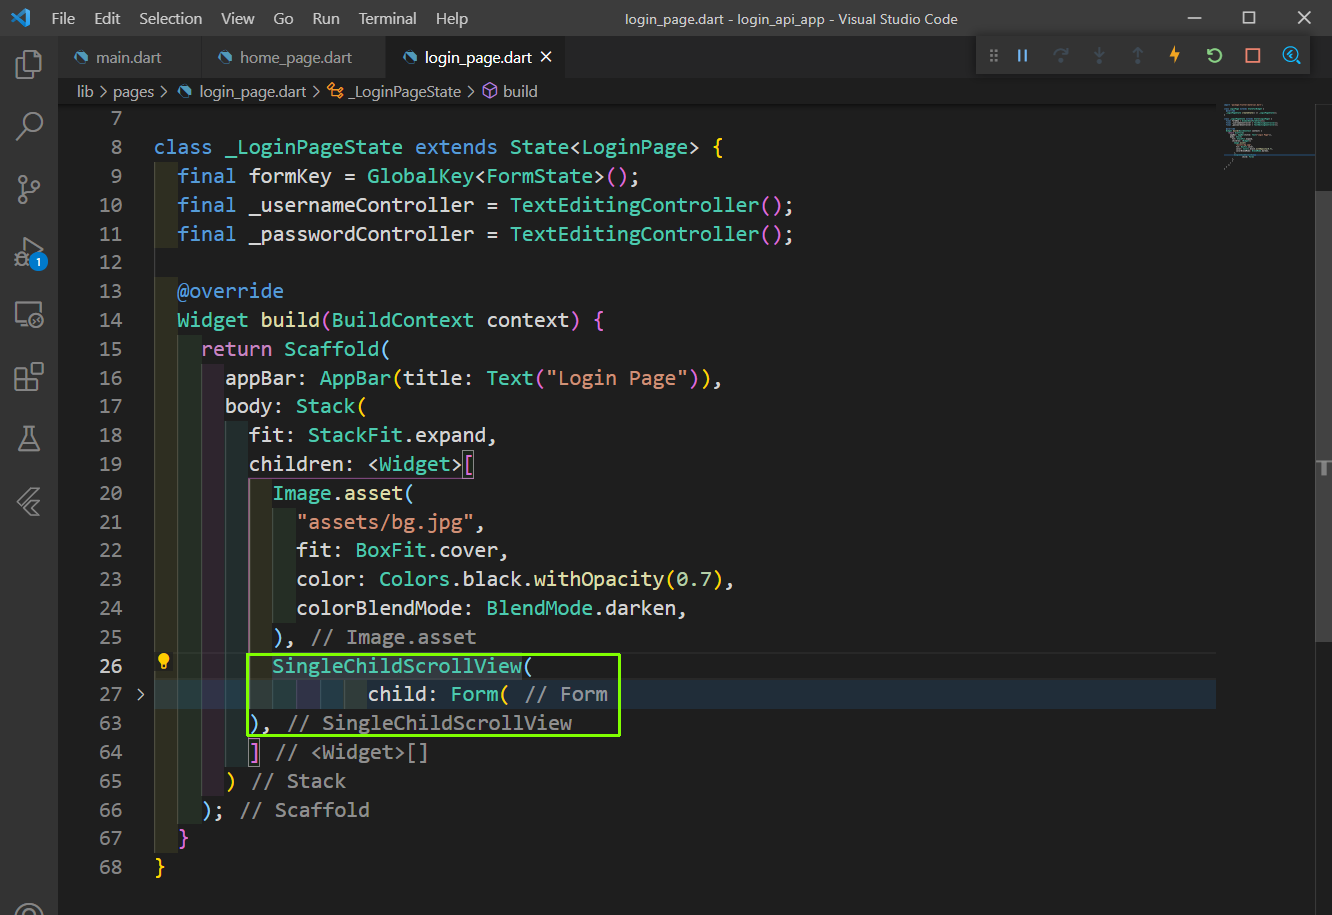 SingleChildScrollView
After that click on the SingleChildScrollView and then the Yellow bulb in the same line. After that in dropdown click on Wrap with Padding and after that click on Padding and follow the same procedure to Wrap with Center.
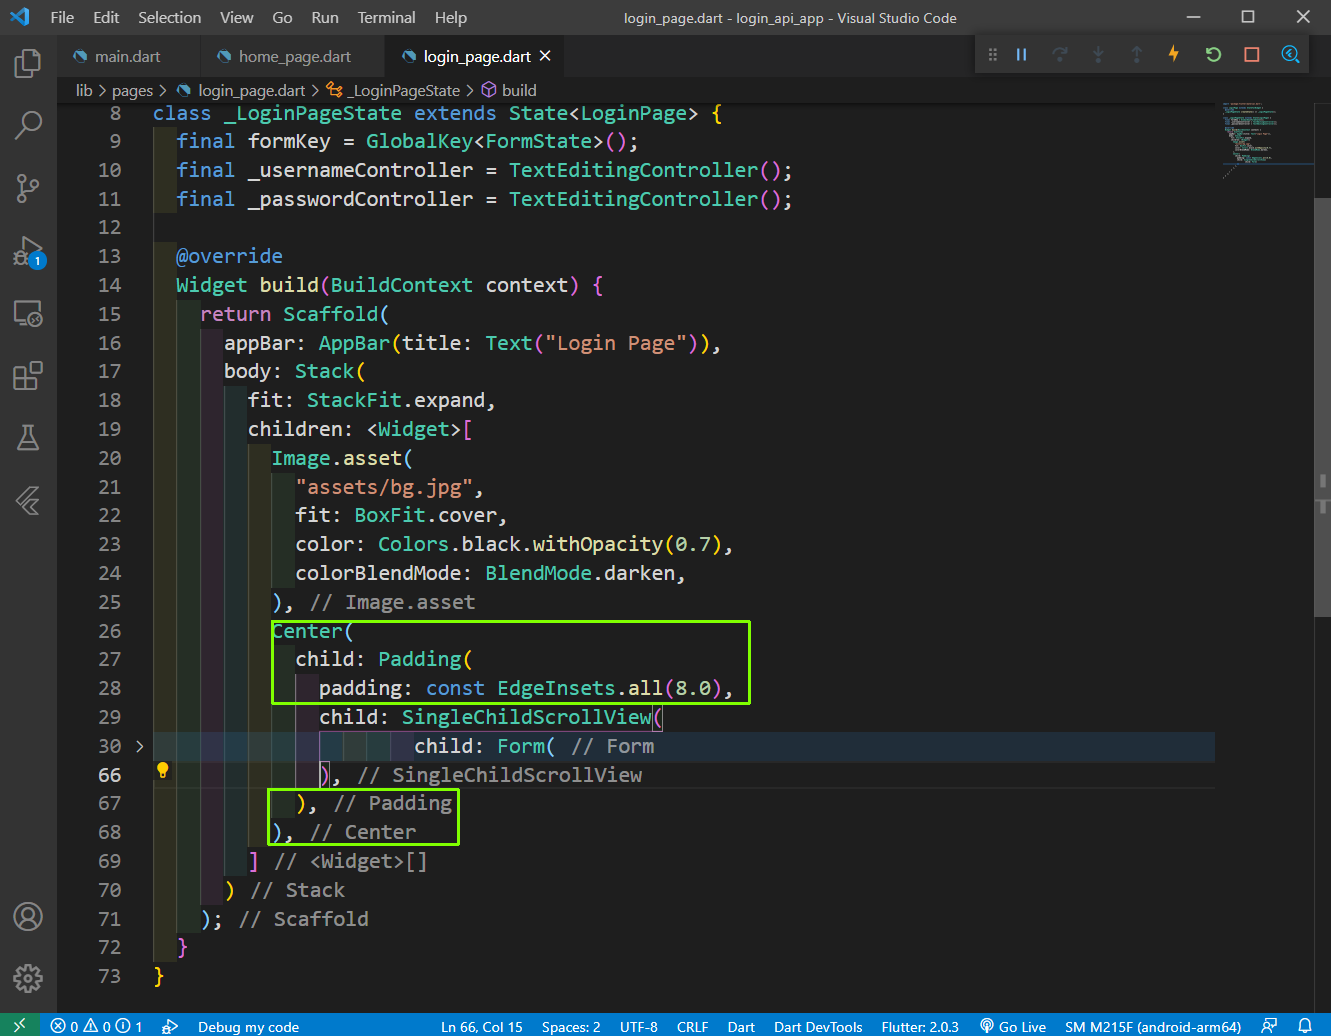 Center
Now, our login page is complete and it is looking beautiful.
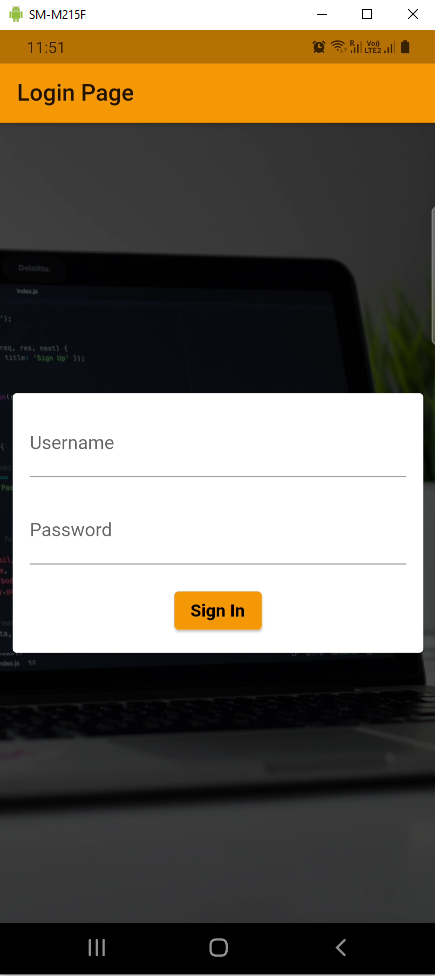 Login
Login
Now, we will do our routing we will first add a route name in login_page.dart file, inside the class LoginPage.
class LoginPage extends StatefulWidget {
    static const String routeName = "/login";

    @override
    _LoginPageState createState() => _LoginPageState();
}
Next, we are also adding a route for home_page.dart inside the class HomePage.
class HomePage extends StatefulWidget {
    static const String routeName = "/home";

    @override
    _HomePageState createState() => _HomePageState();
}
Now, in the login_page.dart we are adding the Navigator.pushNamed() in the button’s onpressed event, which will take us to the HomePage()
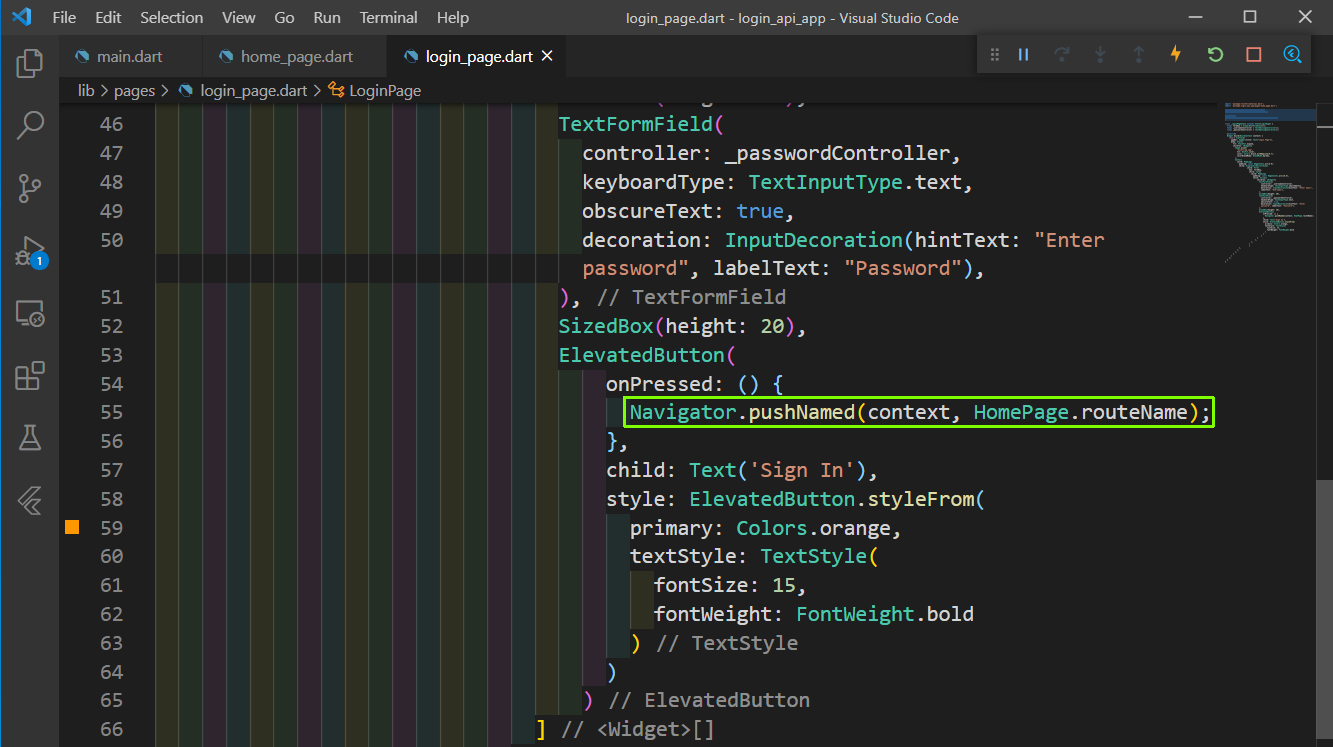 login_page.dart
Also, in the home_page.dart we are adding a widget to add an icon to logout of the app. It’s onpressed event will use Navigator.pop(context).
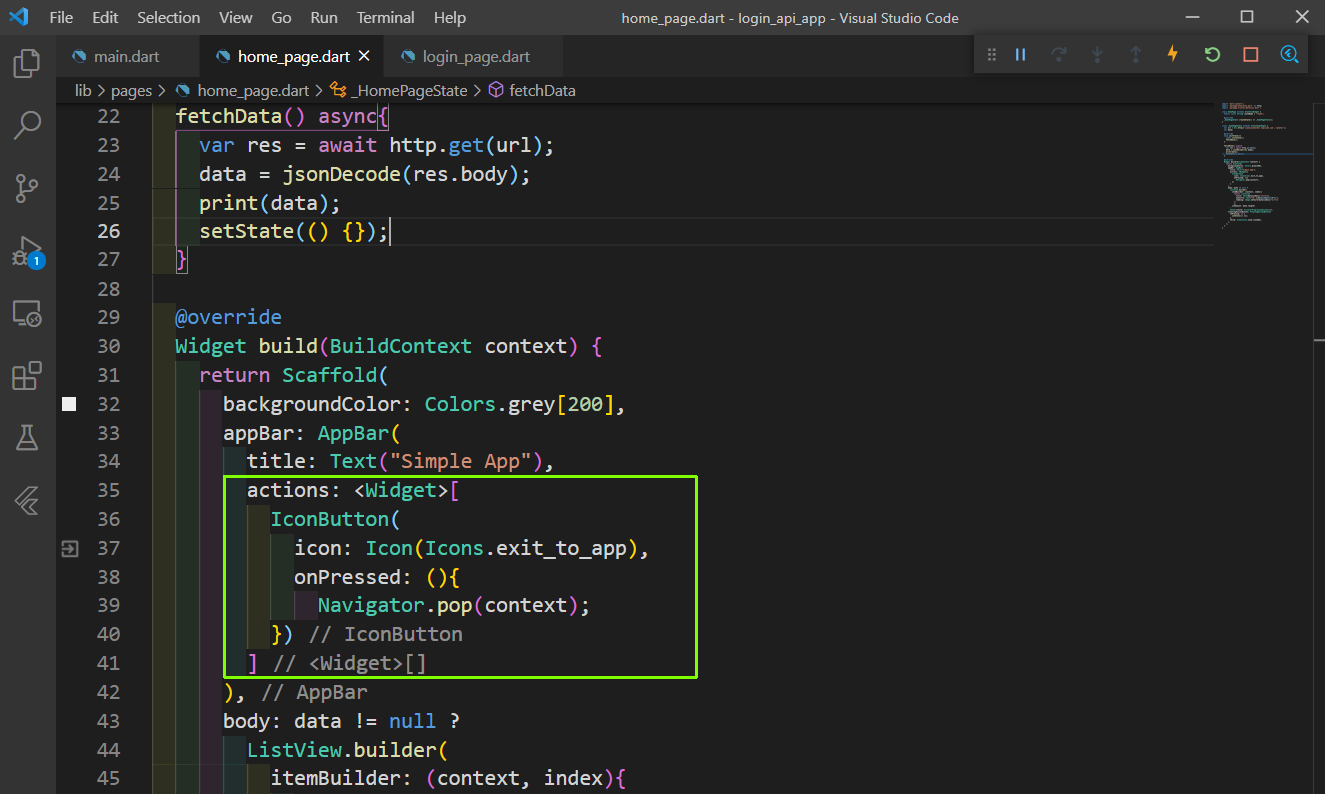 home_page.dart
Lastly in the main.dart file, we will add the routes for LoginPage and HomePage.
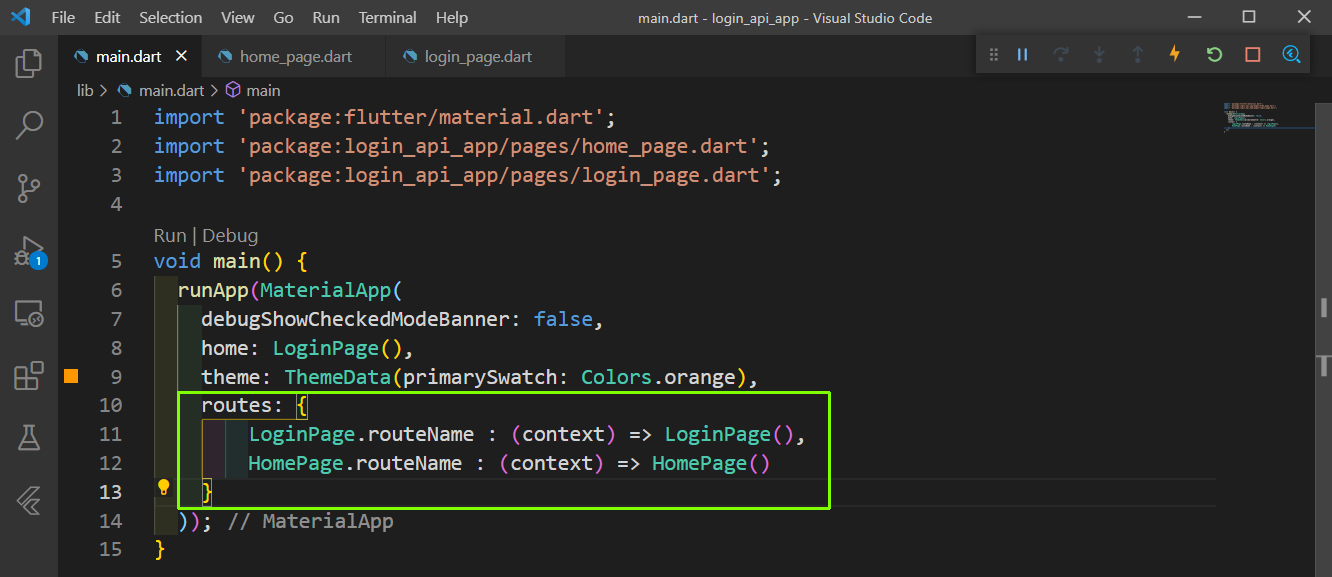 main.dart
Now, our app is complete and on Logging in, we will be taken to the homepage.
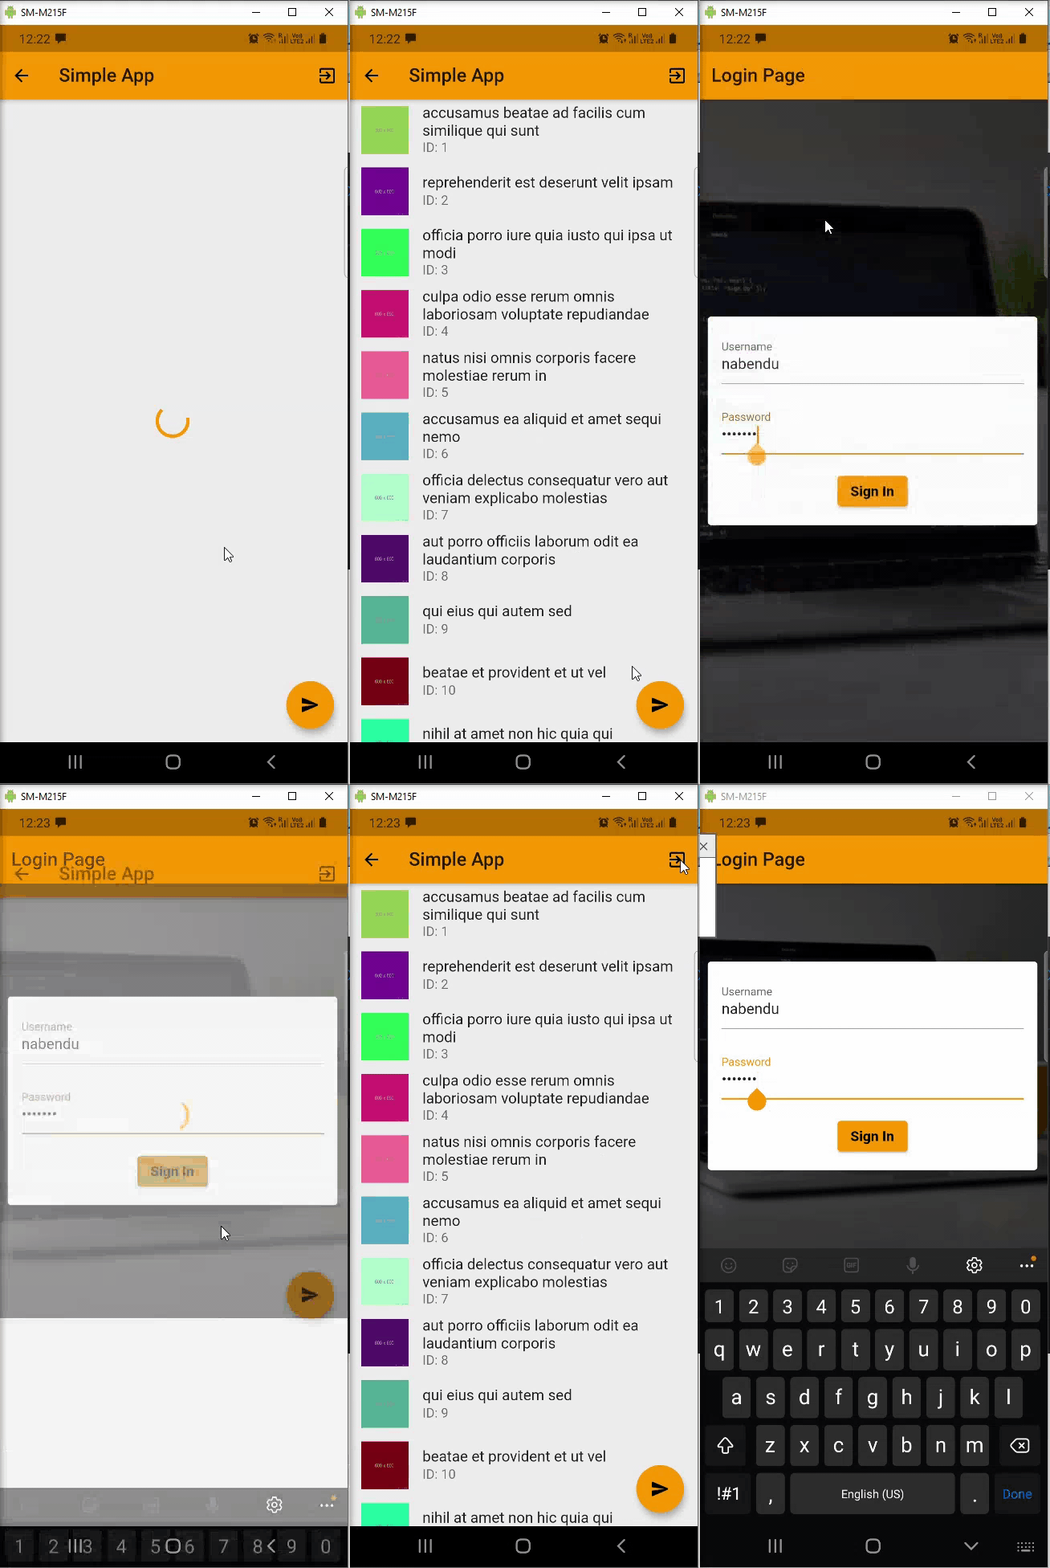 App working
The code for the same can be found in this github repo.