Build a News App with Next.js
by Nabendu Biswas / April 25th, 2021
#nextjs #react #beginners
Series: NextJS
After completing the crash course in the previous blog, it time to create an app with Next.js. So, we will create a News app with Next.js, which will fetch data from the News API.
Now, to create a Next.js app we need to use the below command, inside any folder. The only requirement, is that Node.js and npm should be installed on the machine.
npx create-next-app next-news
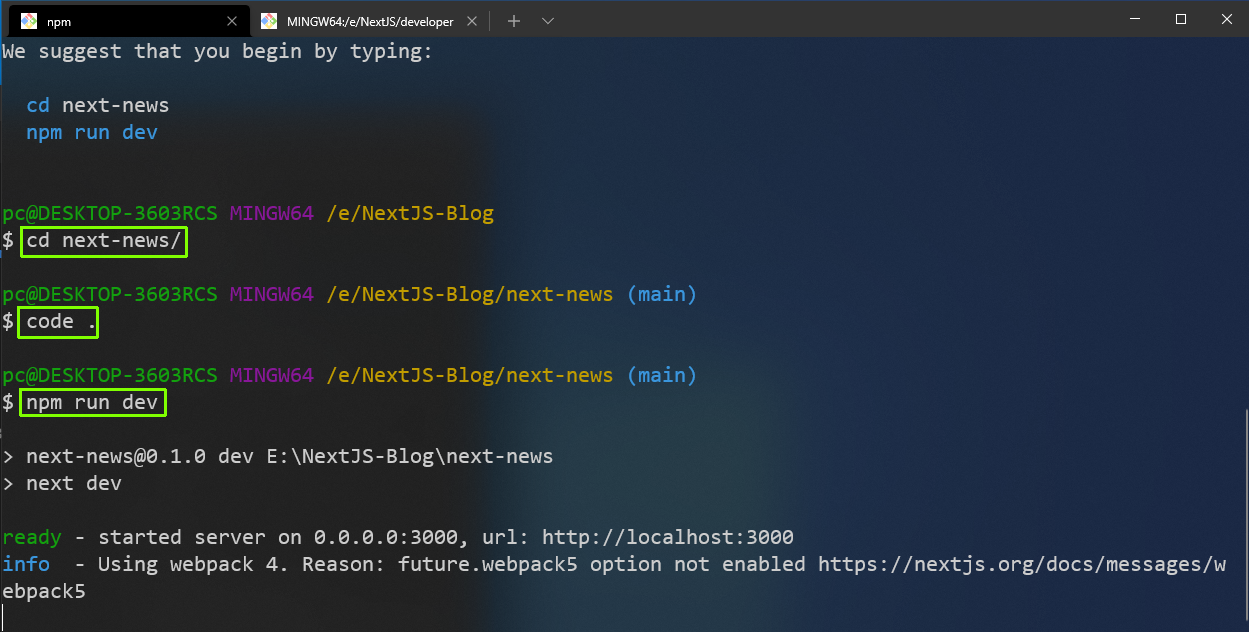
Now, as per the instructions change to the newly created folder. I have also opened the project in VSCode. After that run npm run dev to start the project.
 next app
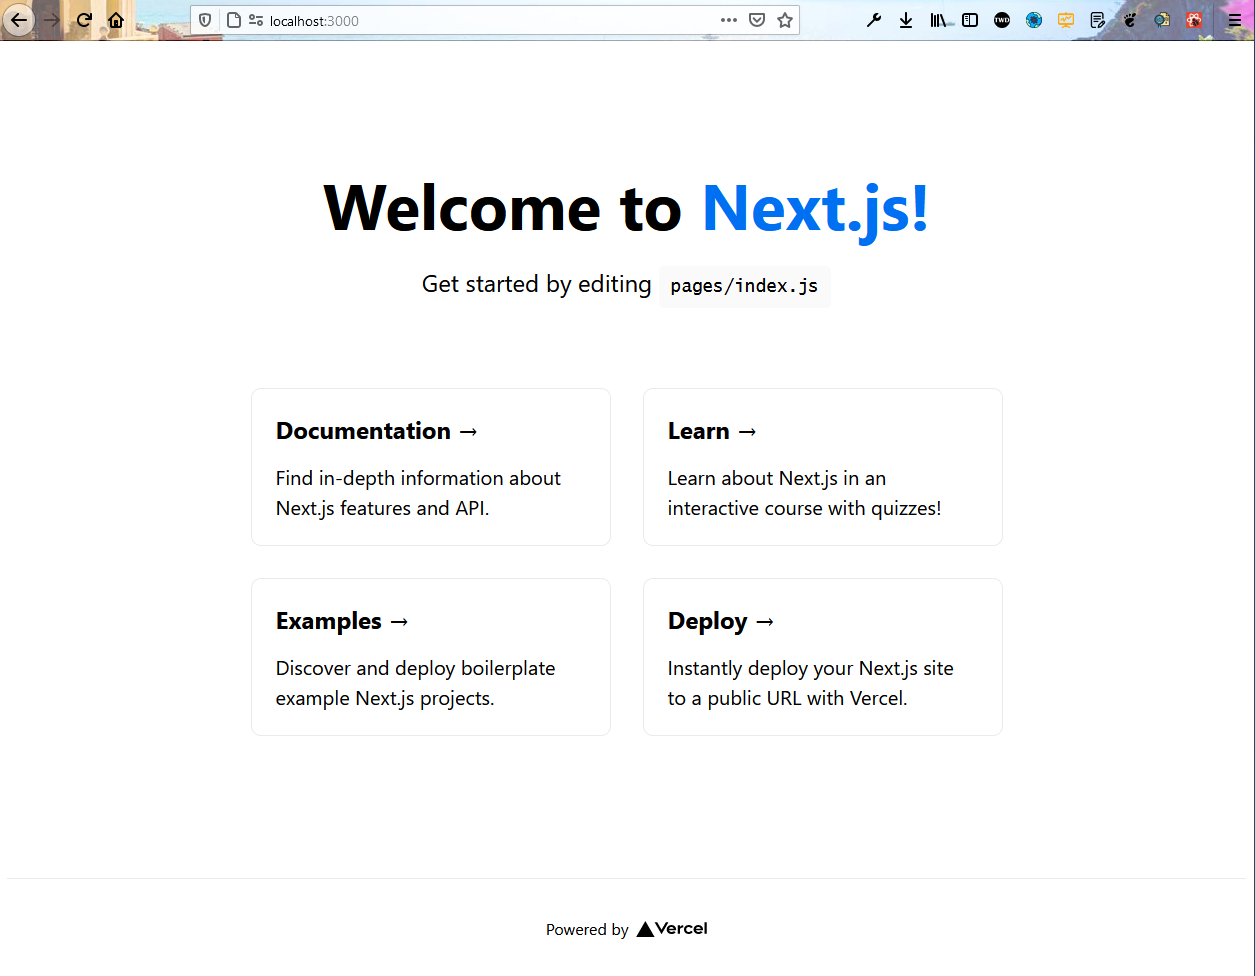
Now, the Next app will start on http://localhost:3000/ and we will se this default page.
 localhost
This page is coming from index.js file in the pages folder. Remove everything from there and put the below content in it.
    import Head from 'next/head'
    import styles from '../styles/Home.module.css'

    export default function Home() {
        return (
            <>
            <h1>Hello World</h1>
            </>
        )
    }
Now, in localhost only our title and the h1 is been shown.
 Hello World
Now, we will start with a new page. So, create a file dom.js inside the pages folder. Here, we have a simple component showing a h1 tag for Developer of the month.
After that we are using getServerSideProps to hit an API endpoint, which i created using My JSON server to get the data. As in the earlier crash course, it is very easy to get the props from a NextJS app and get the access in the same component. Here, we are getting the developer from the API and using it in our component.
    const DOM = ({ developer }) => {
        console.log(developer)

    return (
            <div className='page-container'>
                <div>
                    <h1>Developer of the month</h1>
                </div>
            </div>
        )
    }

    export const getServerSideProps = async () => {
        const apiResponse = await fetch(
            'https://my-json-server.typicode.com/nabendu82/news-next/devOfMonth',
        );
        const developer = await apiResponse.json();

    return {
            props: {
                developer,
            },
        };
    };

    export default DOM
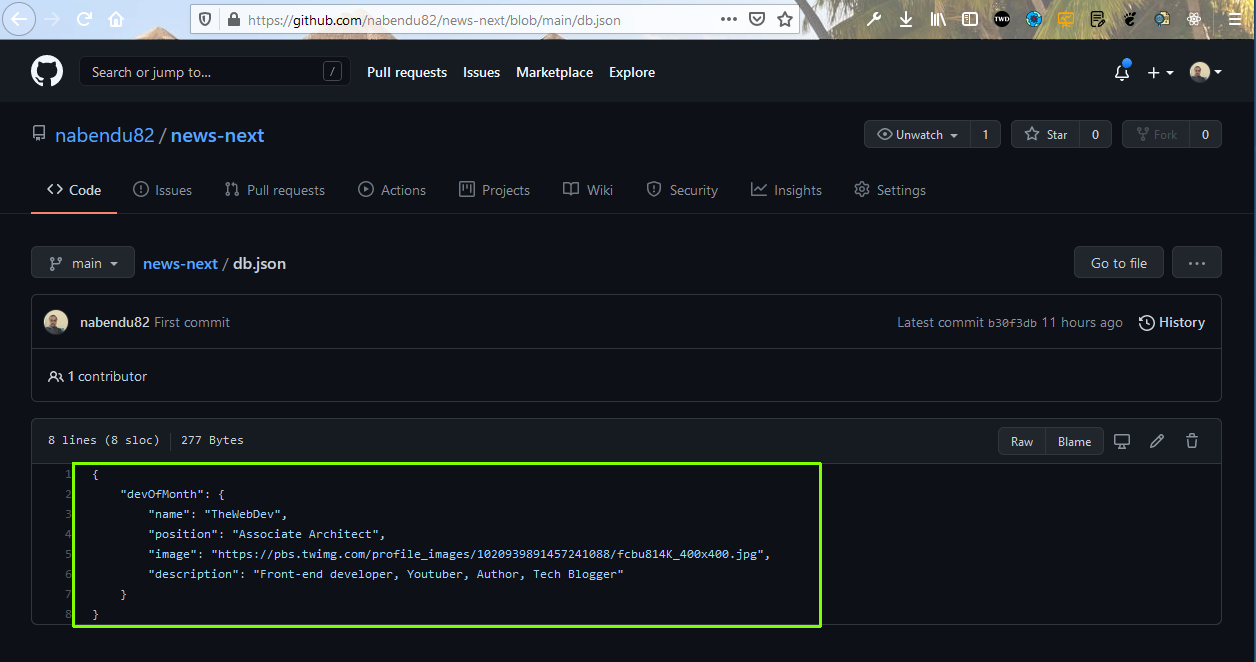
Now, it is very simple to create a API endpoint using My JSON server. We need to create a db.json and put in any of our GitHub repo. I have put it in news-next repo and below is the structure.
 news-next
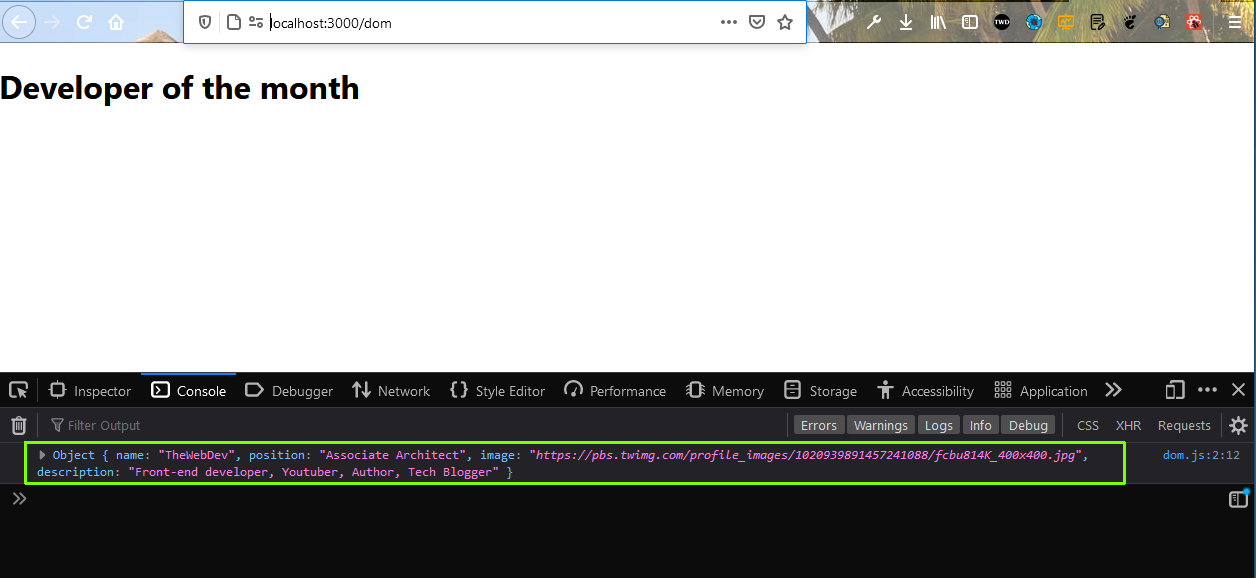
Now, go to http://localhost:3000/dom and also open the console and you will see the data coming from the API endpoint.
 Developer
Now, we will show the information which we received from the api. So, in dom.js file, we are first adding the style file. Inside the return, we are showing name, position, image and description with various classes.
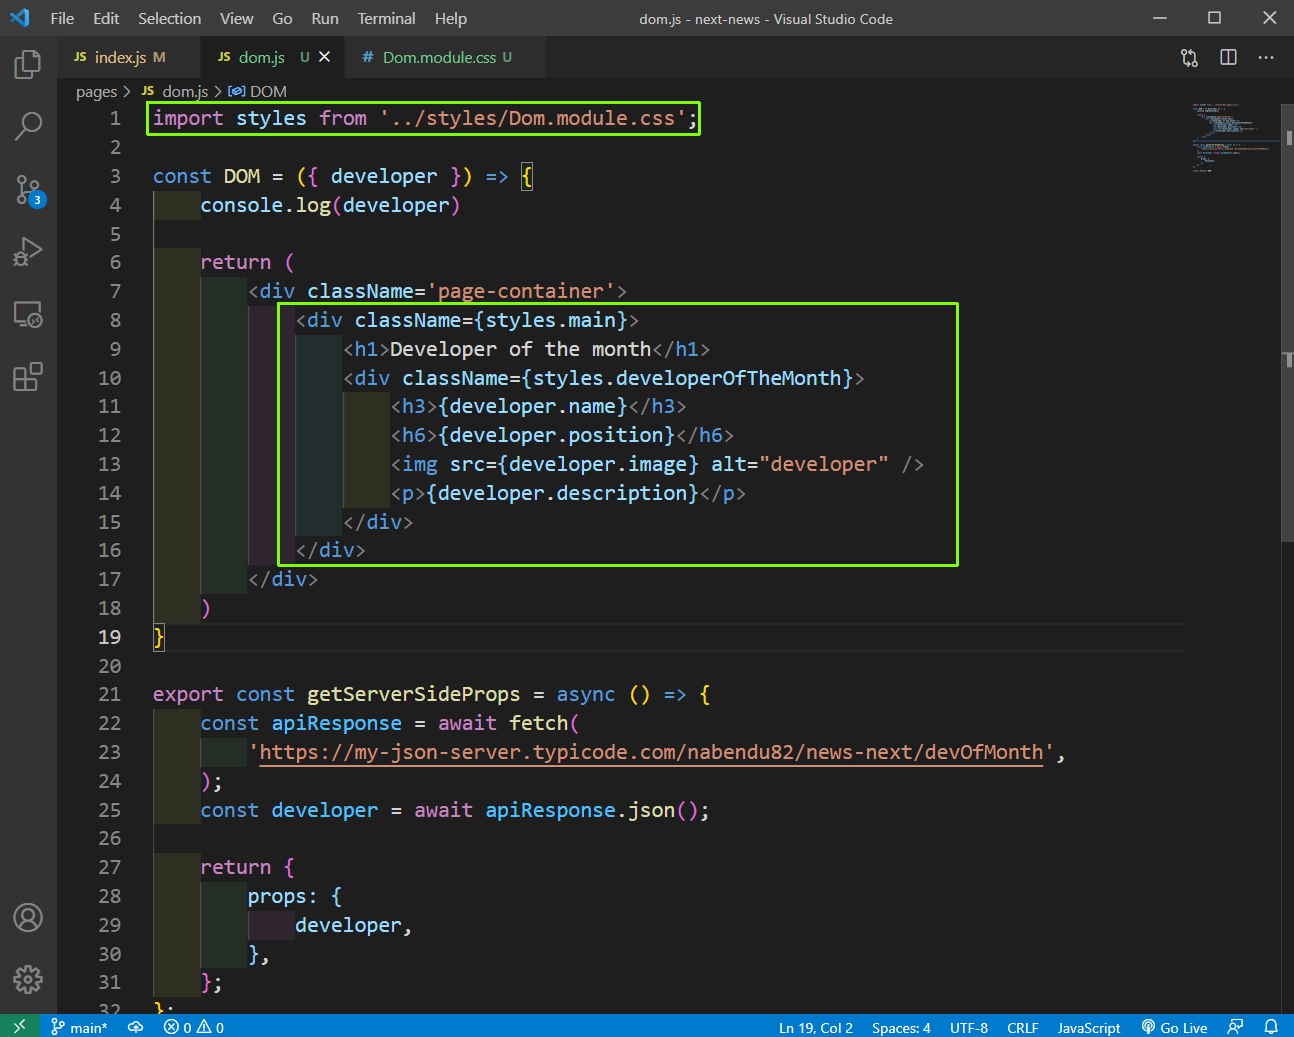 dom.js
Now, in styles folder add Dom.module.css and add the below content in it.
    .main {
        flex: 1;
        display: flex;
        align-items: center;
        flex-direction: column;
        margin-top: 50px;
    }

    .developerOfTheMonth {
        text-align: center;
    }

    .developerOfTheMonth img {
        width: 250px;
        border-radius: 100%;
    }
Also, at the bottom of globals.css add the below css.
    .page-container {
        display: flex;
        height: 100vh;
        flex-direction: column;
    }
Now, our DOM page looks like below in localhost.
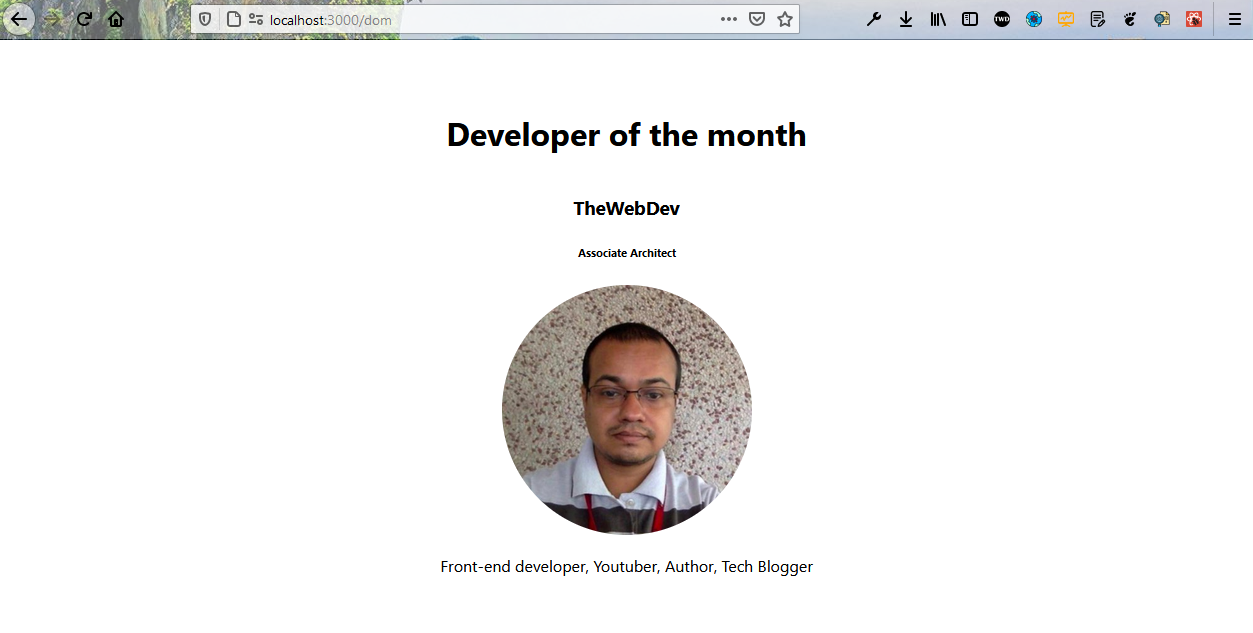 localhost
Now, we will create a Navbar for our app. So, create a components folder in the root directory and a Navbar.js file inside it. Put the below content in it.
Here, we are using useRouter from next router and then using it creating various routes. Clicking on different links will take to different paths. The last onw is directly opening my twitter account.
    import { useRouter } from 'next/router';
    import styles from '../styles/Navbar.module.css';

    const Navbar = () => {
        const router = useRouter();

    return (
            <div className={styles.main}>
                <div onClick={() => router.push('/')}>Home</div>
                <div onClick={() => router.push('/feed/1')}>Feed</div>
                <div onClick={() => router.push('/dom')}>DOM</div>
                <div onClick={() => (window.location.href = 'https://twitter.com/nabendu82')}>Twitter</div>
            </div>
        )
    }

    export default Navbar
Now, create the styles for it in Navbar.module.css in the styles folder.
    .main {
        width: 100%;
        height: 50px;
        display: flex;
        justify-content: center;
    }

    .main div {
        margin: 25px;
        cursor: pointer;
    }

    .main div:hover {
        color: rgb(168, 168, 168);
    }
We need this Navbar component in all pages. So, it’s better to create a Layout component. So, create a file Layout.js inside the components folder and add the below content in it. We are also taking the common div of page-container, which wraps all of our pages.
    import Navbar from "./Navbar"

    const Layout = ({ children }) => {
        return (
            <div className='page-container'>
                <Navbar />
                {children}
            </div>
        )
    }

    export default Layout
Now, there is a file _app.js which wraps around all of our pages. So, if we want to implement a general layout in all of our pages, we will use it. We have wrapped Components with Layout component in it.
    import Layout from '../components/Layout'
    import '../styles/globals.css'

    function MyApp({ Component, pageProps }) {
        return (
            <Layout>
            <Component {...pageProps} />
            </Layout>
        )
    }

    export default MyApp
Now, we will setup our home page. So, go to index.js file and change it with below content.
    import styles from '../styles/Home.module.css'

    export default function Home() {
        return (
            <div className={styles.main}>
                <h1 className={styles.title}><span>News</span> App</h1>
                <p className={styles.description}>Your one stop shop for the latest news articles</p>
            </div>
        )
    }
Now, replace the content of Home.module.css with below content.
    .main {
        flex: 1;
        display: flex;
        align-items: center;
        flex-direction: column;
        justify-content: center;
    }

    .title a,
    .title span {
        color: #0070f3;
        text-decoration: none;
    }

    .title {
        margin: 0;
        line-height: 1.15;
        font-size: 4rem;
    }

    .title,
    .description {
        text-align: center;
    }

    .description {
        line-height: 1.5;
        font-size: 1.5rem;
    }
Now, our home page is also complete and looks like below, with the working navbar.
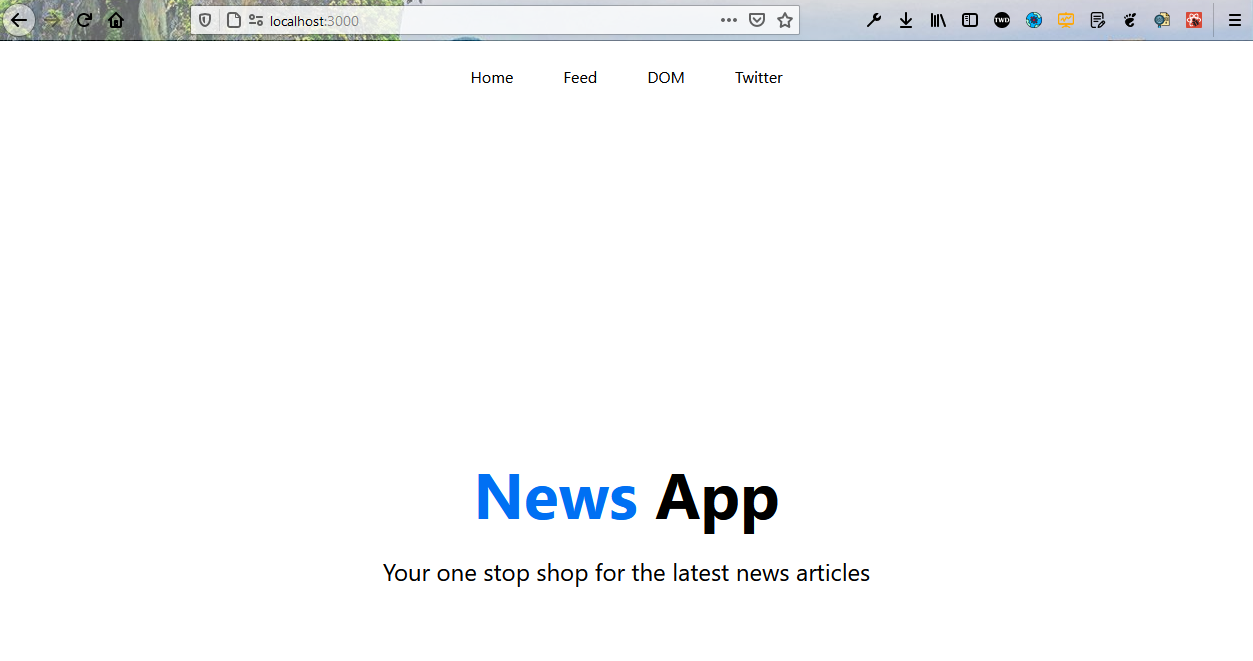 Home Page
Also, remove the div with page-container from dom.js file, because we have moved the logic to Layout.js file.
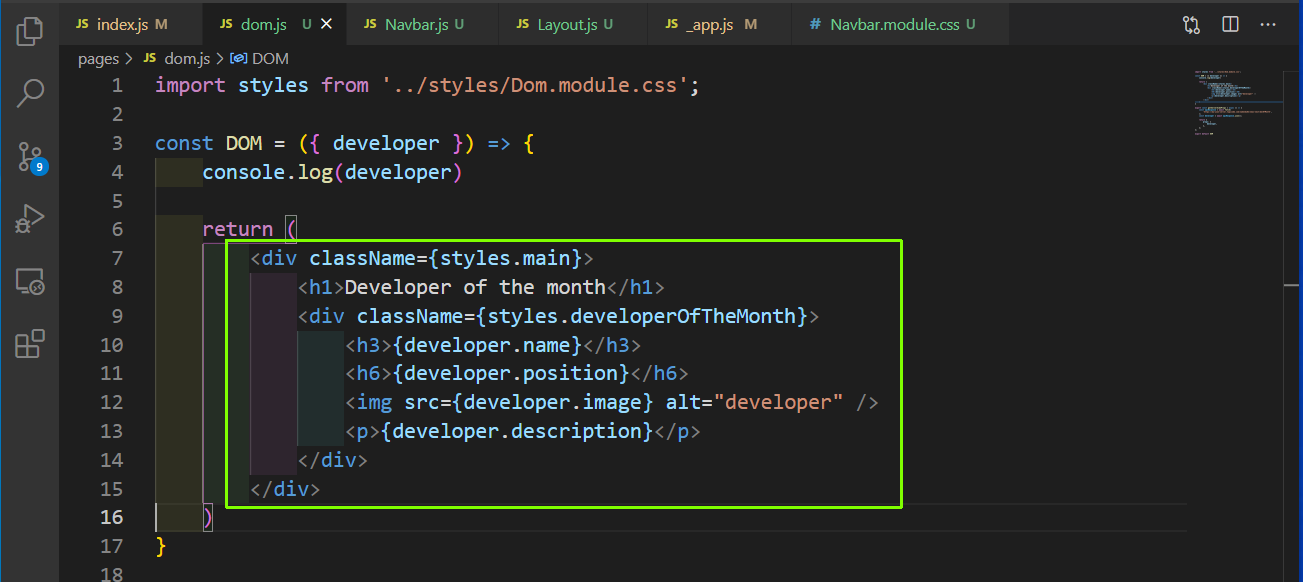 dom.js
Now, we are going to work on the feed page which is the most important page, because it’s a news app.
Now, this page is different then other page because it changes depending on a parameter. So, instead of creating a file we will create a folder called feed inside pages folder. Inside it we will create a new file [id].js and because of these square brackets it’s a dynamic route.
Put the below content in it now. Here, in our Feed we will get the articles, pageNumber from our api call. Now, inside the getServerSideProps we can get the pageNumber by pageContext.query.id, which is nothing but the number at the end of url like http://localhost:3000/feed/1
First we are checking whether the pageNumber is valid and making the props as empty articles of pageNumber as 1.
After that we are doing the API call with the newsapi, with our pageNumber. In the news api we also need to give our private API keys, so we will pass it through an environment variable.
As with fetch we need to do the second await to get the data, we do that and then assign the data to articles variable. After that we return the props.
    export const Feed = ({ articles, pageNumber }) => {
        console.log({ articles, pageNumber })
        return (<>Hello World</>)
    }

    export const getServerSideProps = async pageContext => {
        const pageNumber = pageContext.query.id;

    if (!pageNumber || pageNumber <div 1 || pageNumber > 5) {
            return {
                props: {
                    articles: [],
                    pageNumber: 1,
                },
            };
        }

    const apiResponse = await fetch(
            `https://newsapi.org/v2/top-headlines?country=us&pageSize=5&page=${pageNumber}`,
            {
                headers: {
                    Authorization: `Bearer ${process.env.NEXT_PUBLIC_NEWS_KEY}`,
                },
            },
        );

        const json = await apiResponse.json();
        const { articles } = json;

    return {
            props: {
                articles,
                pageNumber: Number.parseInt(pageNumber),
            },
        };
    };

    export default Feed;
Now, first go to newsapi.org and register. After that you can get your api keys by clicking on Get API Key button.
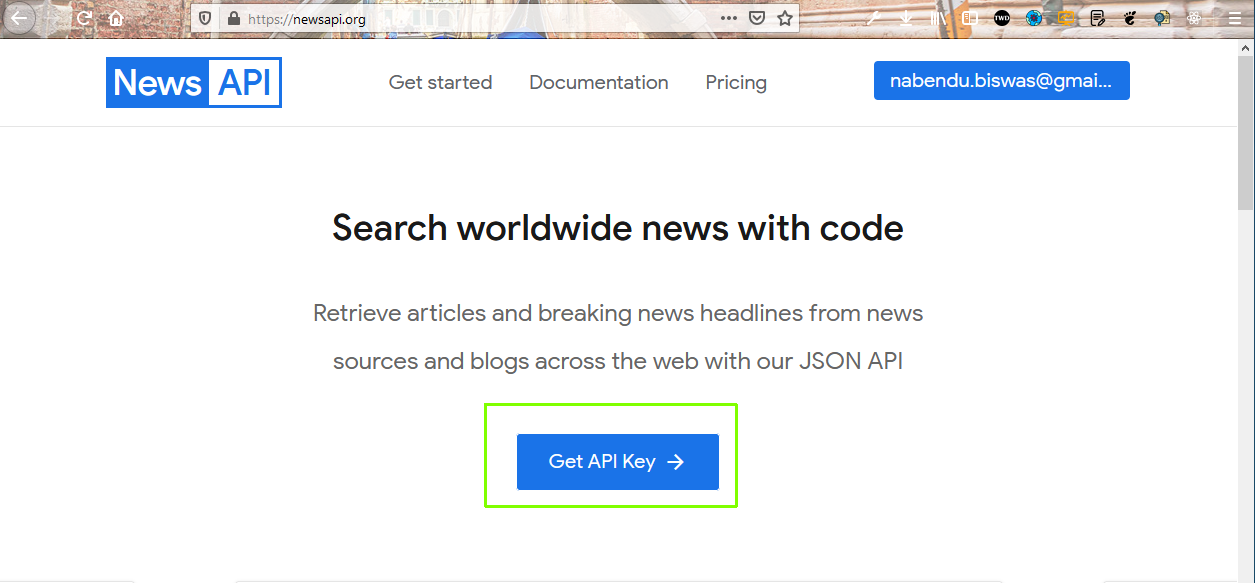 Api keys
Next, go to the .gitignore file and add the .env file, so that it is not added in our github.
 .gitignore
Now, inside the root directory create .env file and put your api key in it.
 .env
.env
Now, restart your server and refresh the localhost and we will see the data coming from the newsapi.
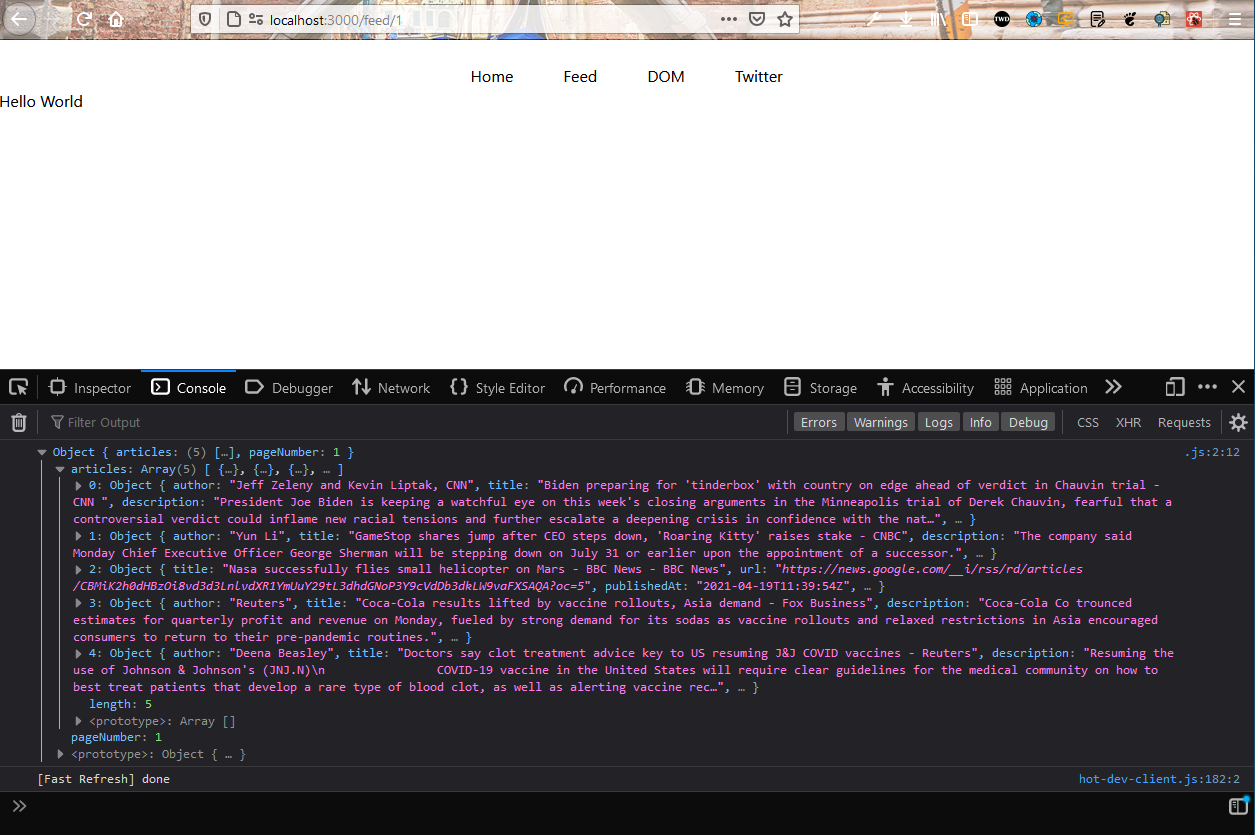 feed
feed
Now, we will add our html to show the articles. But before that add the styles for the same in Feed.module.css in the stylesfolder.
    .main {
        display: flex;
        margin-top: 50px;
        align-items: center;
        flex-direction: column;
    }
    .post {
        width: 500px;
        margin-bottom: 25px;
        padding-bottom: 25px;
        border-bottom: 1px solid black;
    }
    .post img {
        width: 100%;
    }
    .post h1 {
        font-size: 16px;
        cursor: pointer;
        text-align: center;
    }
    .paginator {
        width: 100%;
        display: flex;
        justify-content: center;
    }
    .paginator div {
        margin: 25px;
    }
    .paginator .active {
        cursor: pointer;
    }
    .paginator .disabled {
        cursor: not-allowed;
        color: rgb(179, 179, 179);
    }
Back in [id].js file, we are importing the styles and then inside the return statement. Here, we are showing the article heading, description and image within a div after mapping through array of articles.
![[id].js](https://res.cloudinary.com/dxkxvfo2o/image/upload/v1619846545/Next/next-news/14_mkxnhp.png) [id].js
[id].js
Now, if we go to the feed page in localhost, we will see our nicely styles news. On click of the healine, we will also be taken to the news artile on the orignal site.
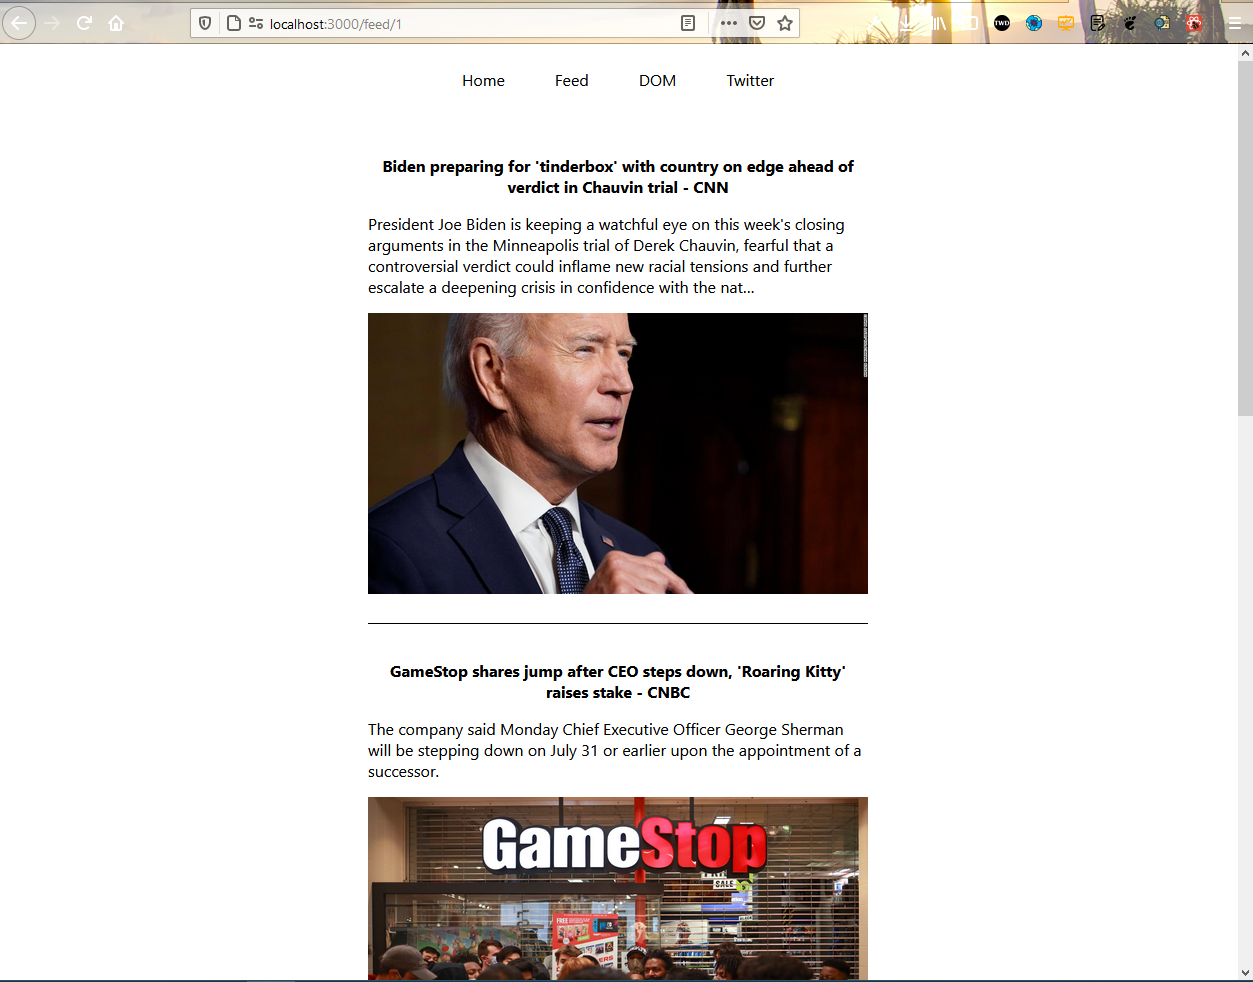 localhost
Now, we want to show a paginator also so that we can go to the five pages, which our api is fetching. So, we will add a div with paginator class, below our articles.
We are also using the router to push to the next or the previous page on the click of respectative div. We are also disabling the Next Page on page 5 and Previous Page on page 1.
![[id].js](https://res.cloudinary.com/dxkxvfo2o/image/upload/v1619846545/Next/next-news/16_pdgwem.png) [id].js
[id].js
Now, our paginator is also working properly and this completes our app.
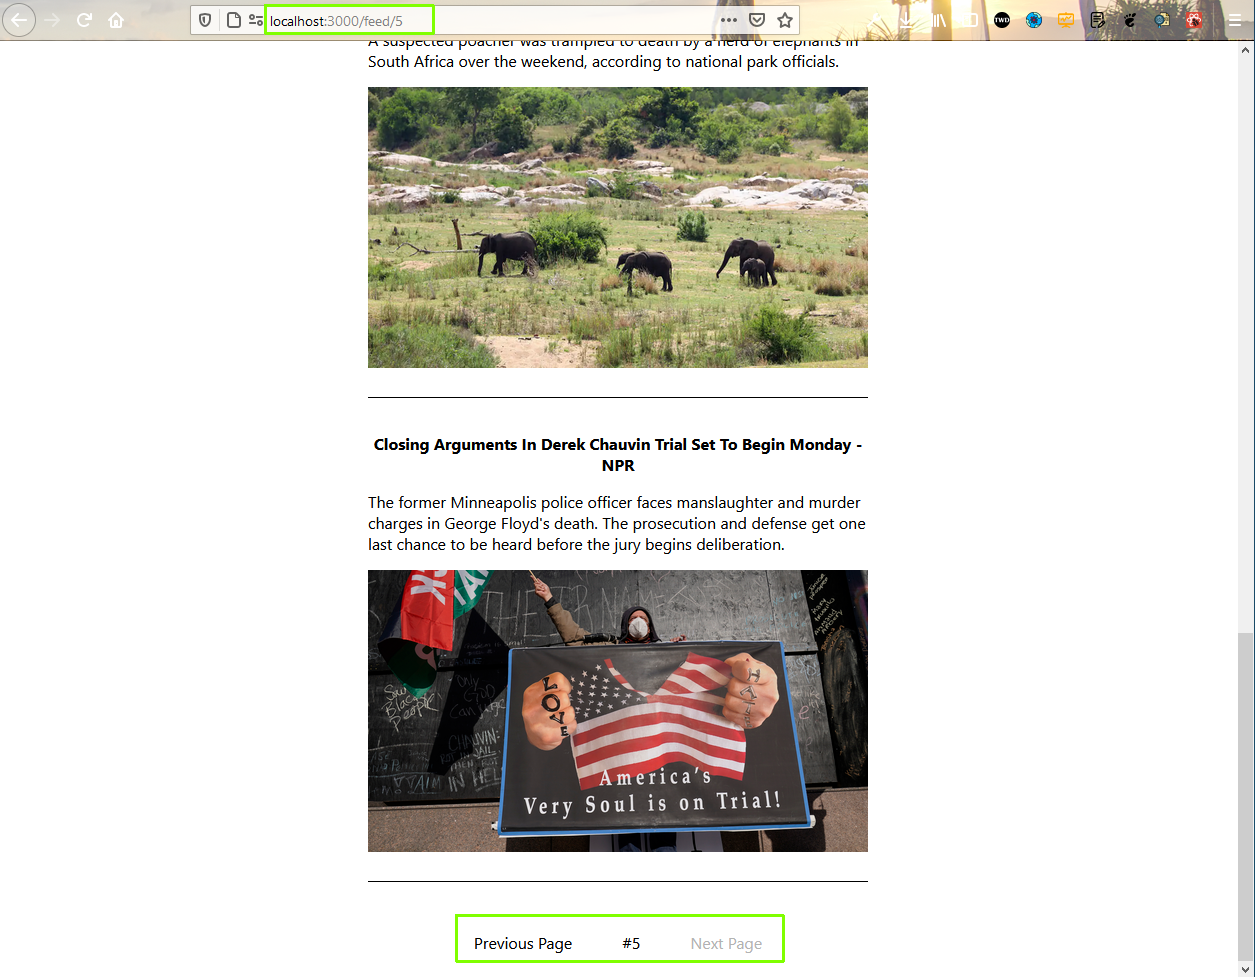 App complete
Now, we will deploy our app through vercel, who are also the creator of NextJS. But for that we need to push our project to github.
Before pushing i have also created a db.json in the root directory and added the below content in it.
    {
        "devOfMonth": {
            "name": "TheWebDev",
            "position": "Associate Architect",
            "image": "https://pbs.twimg.com/profile_images/1020939891457241088/fcbu814K_400x400.jpg",
            "description": "Front-end developer, Youtuber, Author, Tech Blogger"
        }
    }
So, we also need to update the path in dom.js after pushing to github.
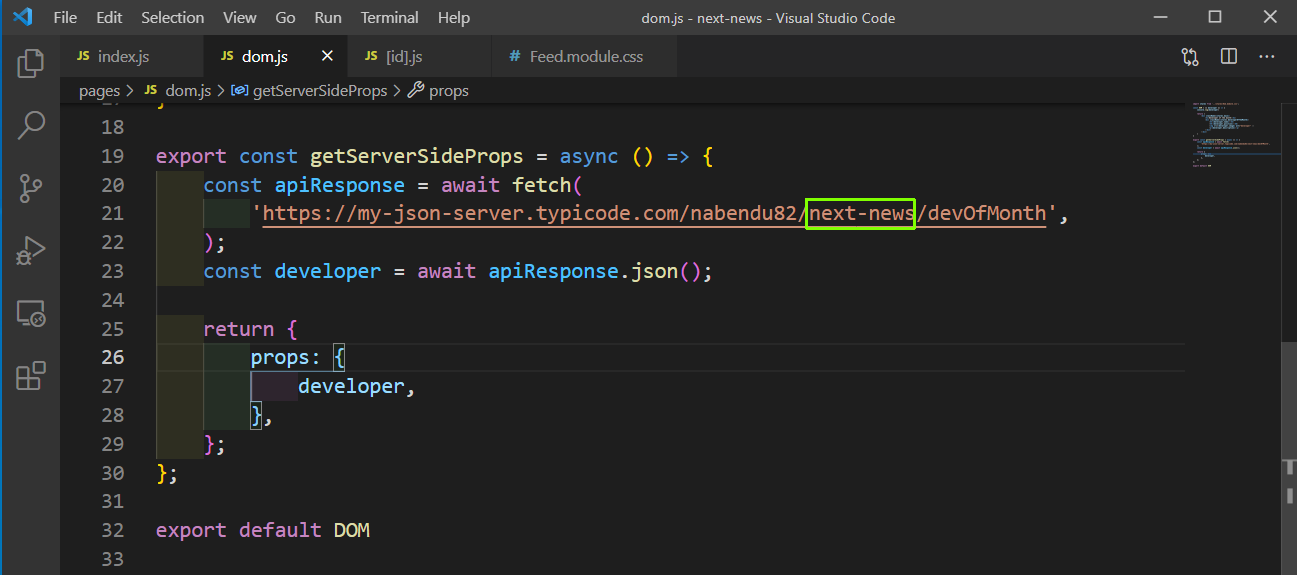 dom.js
Now, go to https://vercel.com and signup with your github. In the dashboard, click on New Project button.
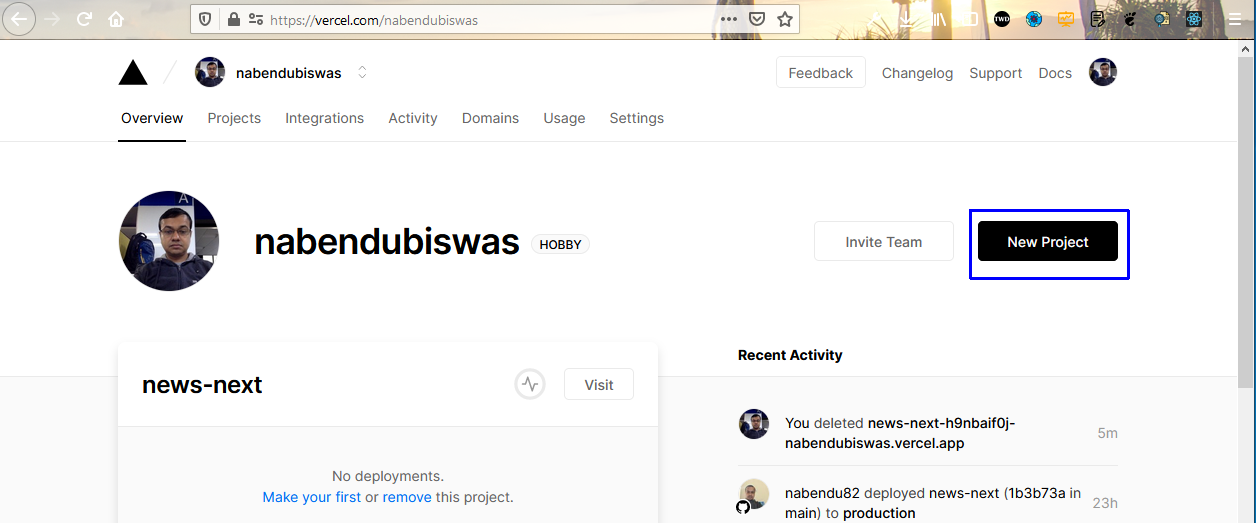 vercel
After that in the next page, click on the dropdown and then Add Github Org or Account link.
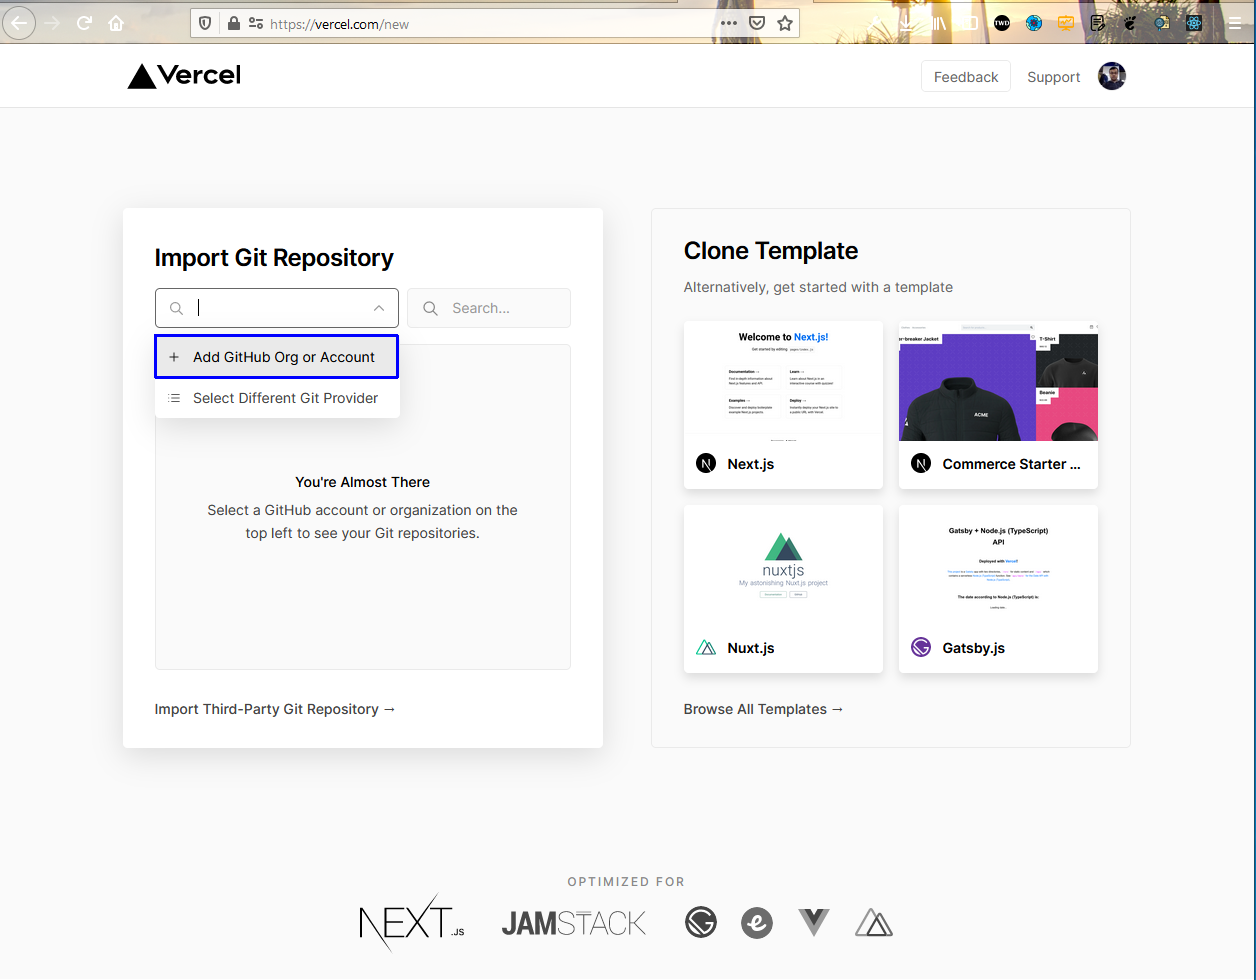 Add Github
Then a pop-up will come and here choose your personal github account.
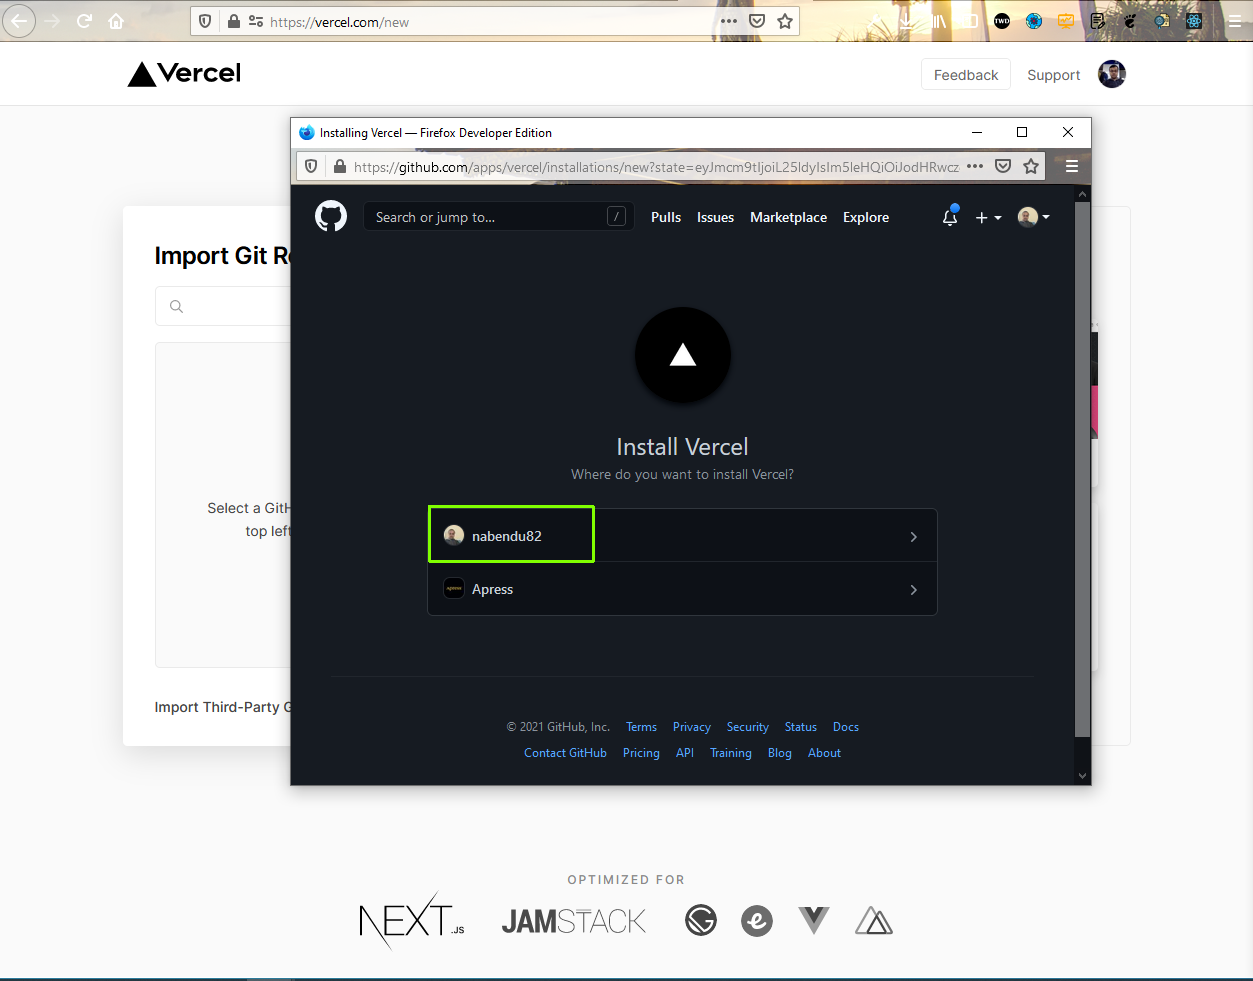 Personal account
In the next pop-up click on the Only select repositories radio button and then in select the repository in which you have put this project.
Scroll down and click on Install button.
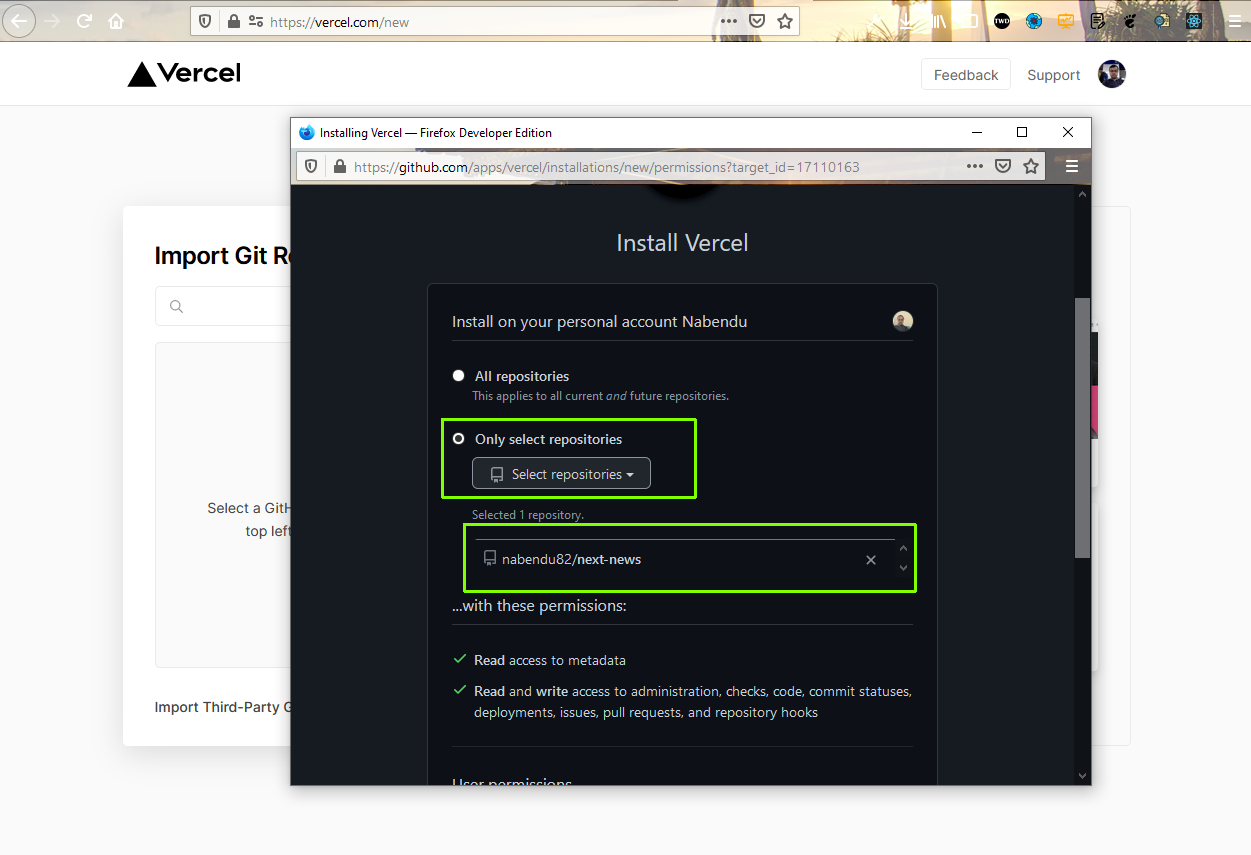 Select repository
Now, you will be taken back to the original page. Here, you will see the repository and click on the Import button.
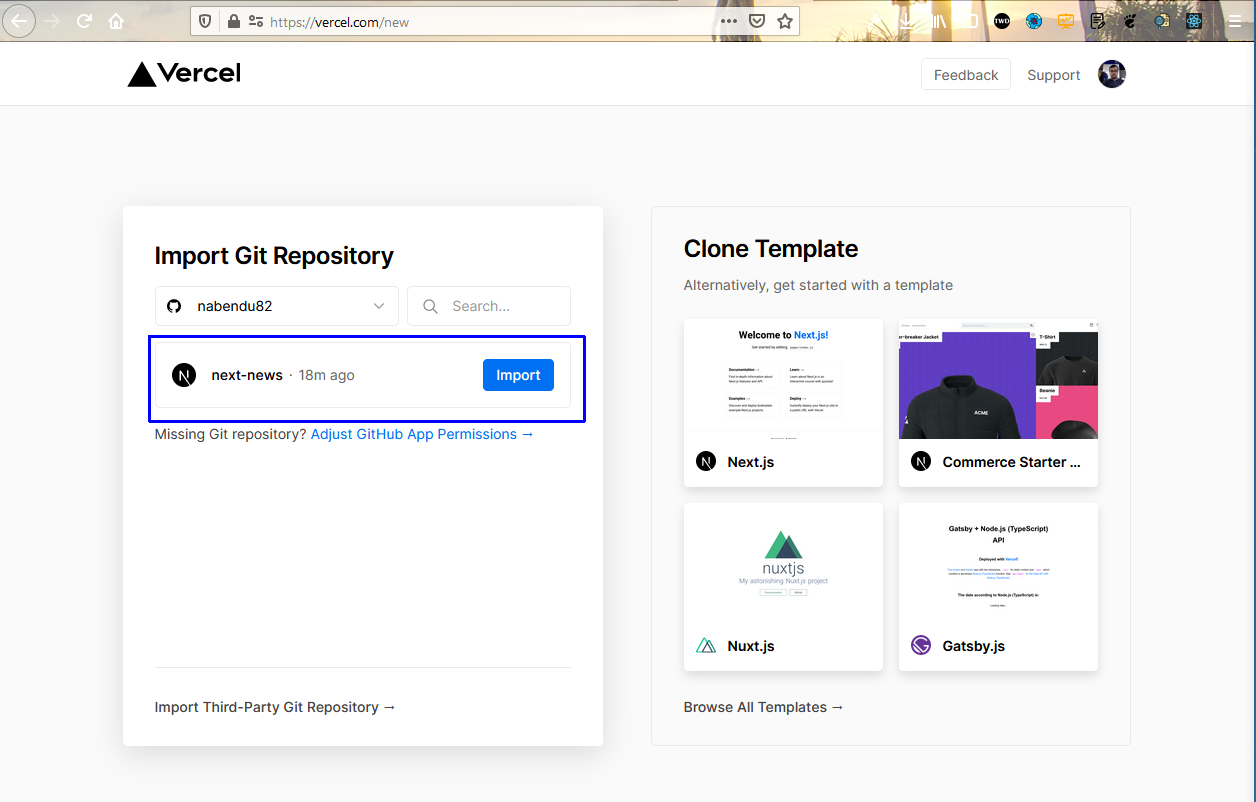 Import
In the next page, select the personal account as it’s free.
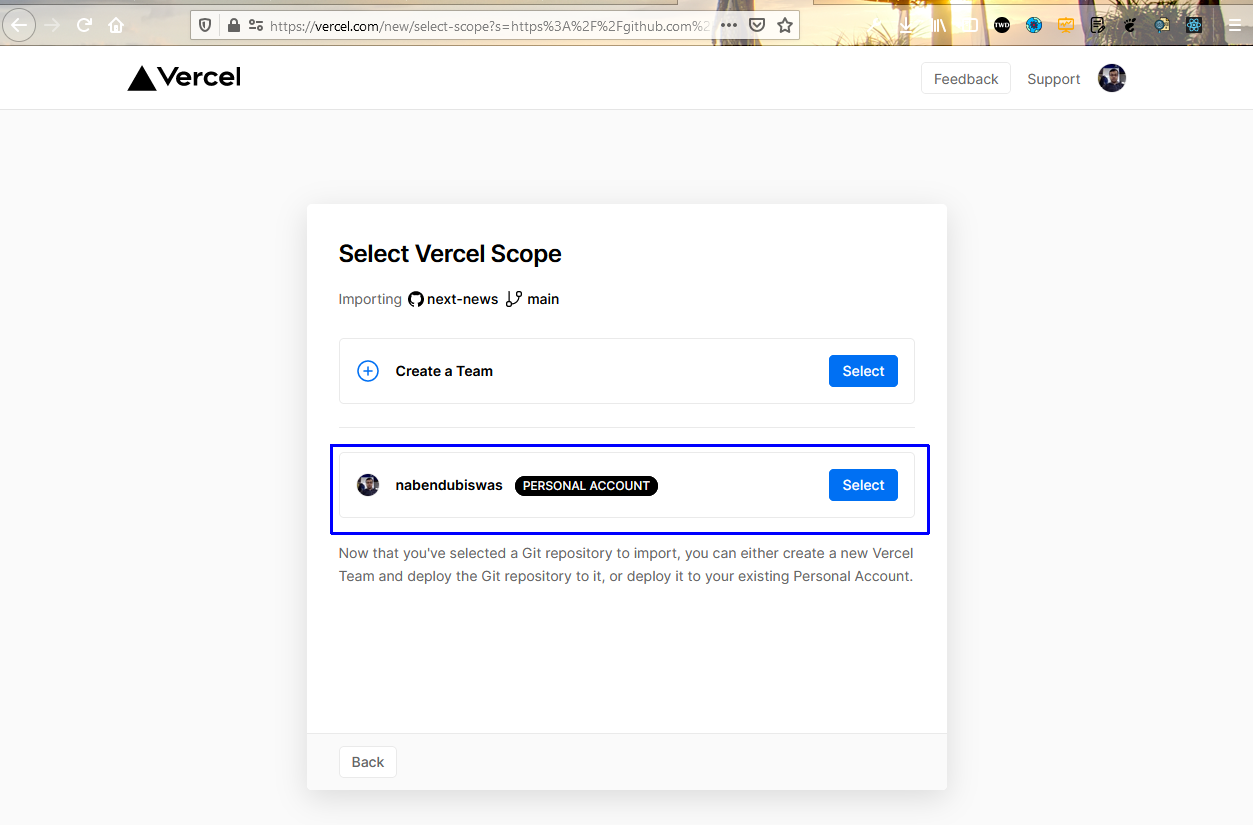 Personal account
In the next page, click on the environment variable and put your API keys. After that click on the Add button and then Deploybutton.
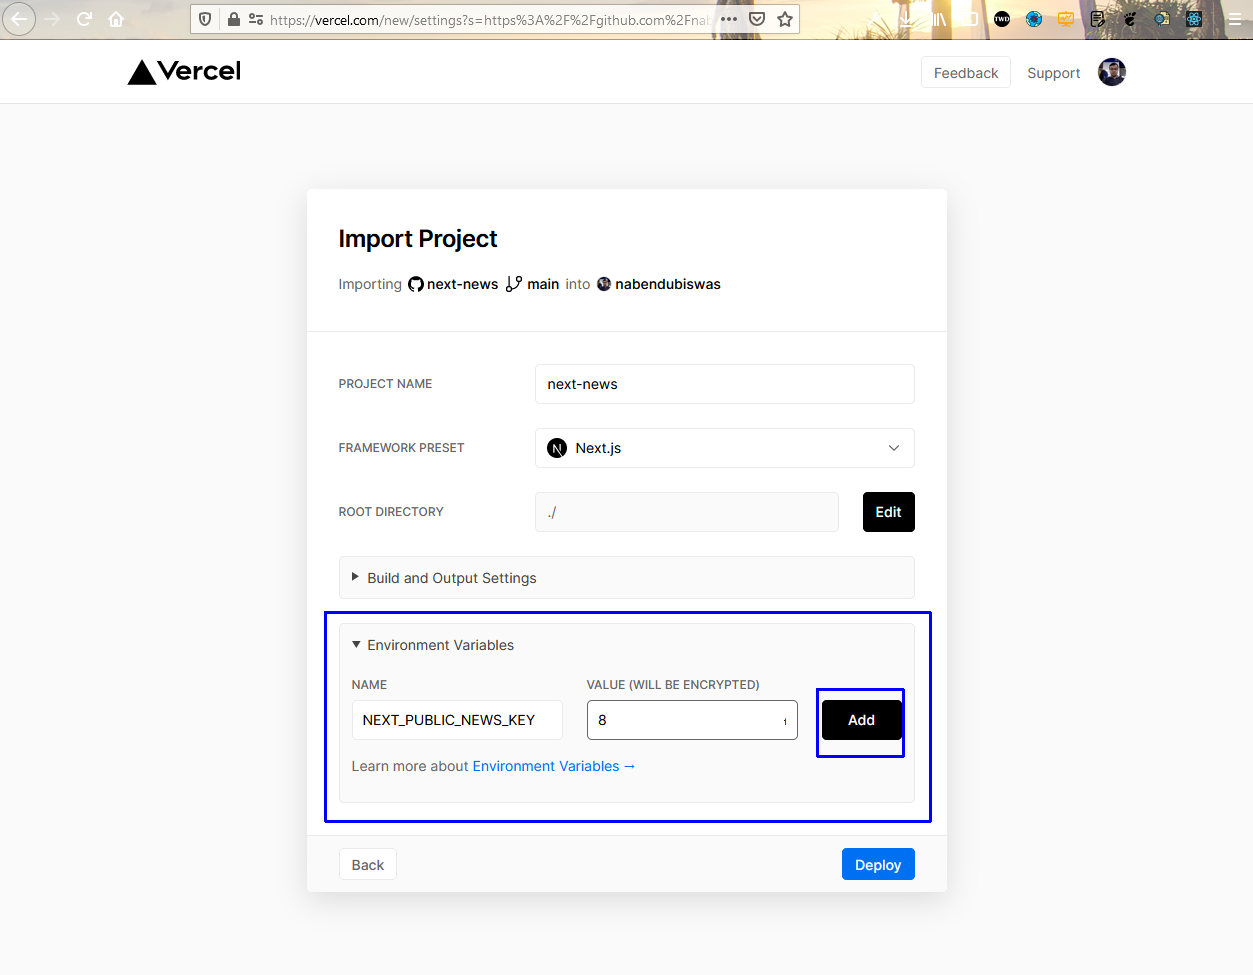 API keys
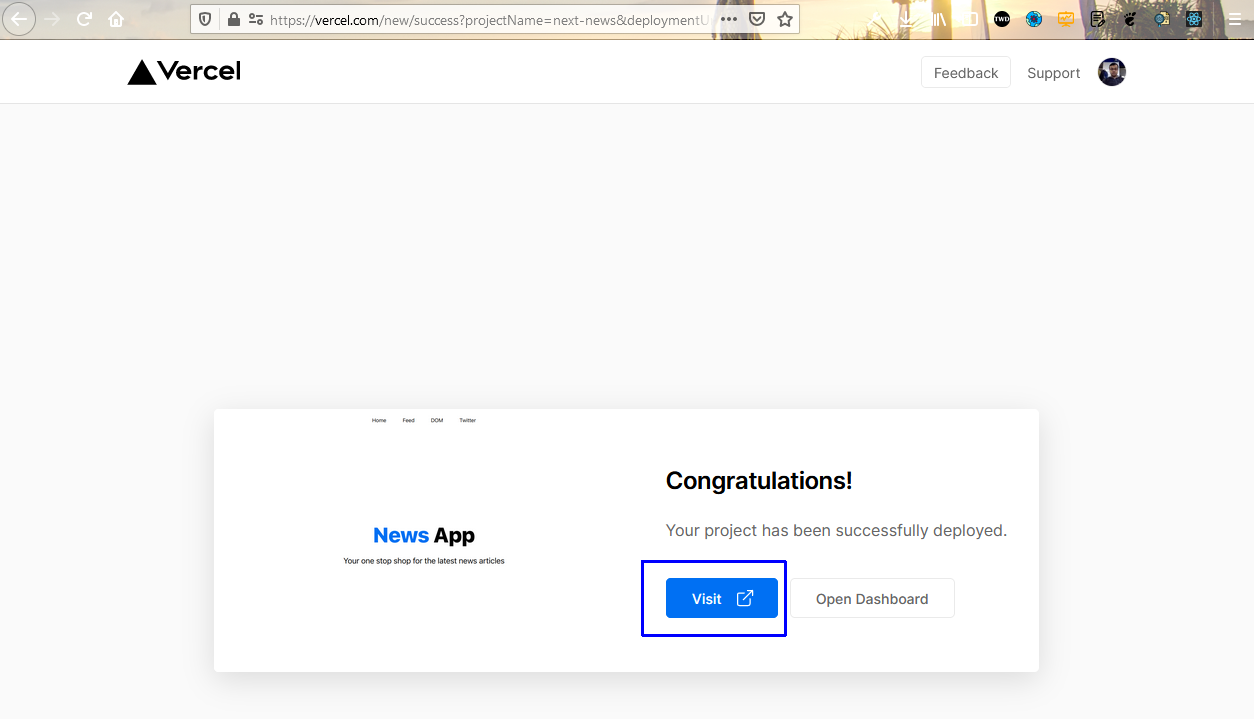
After that if the deployment is sucessful you will be taken to this page. Click on the Visit button.
 Visit
Visit
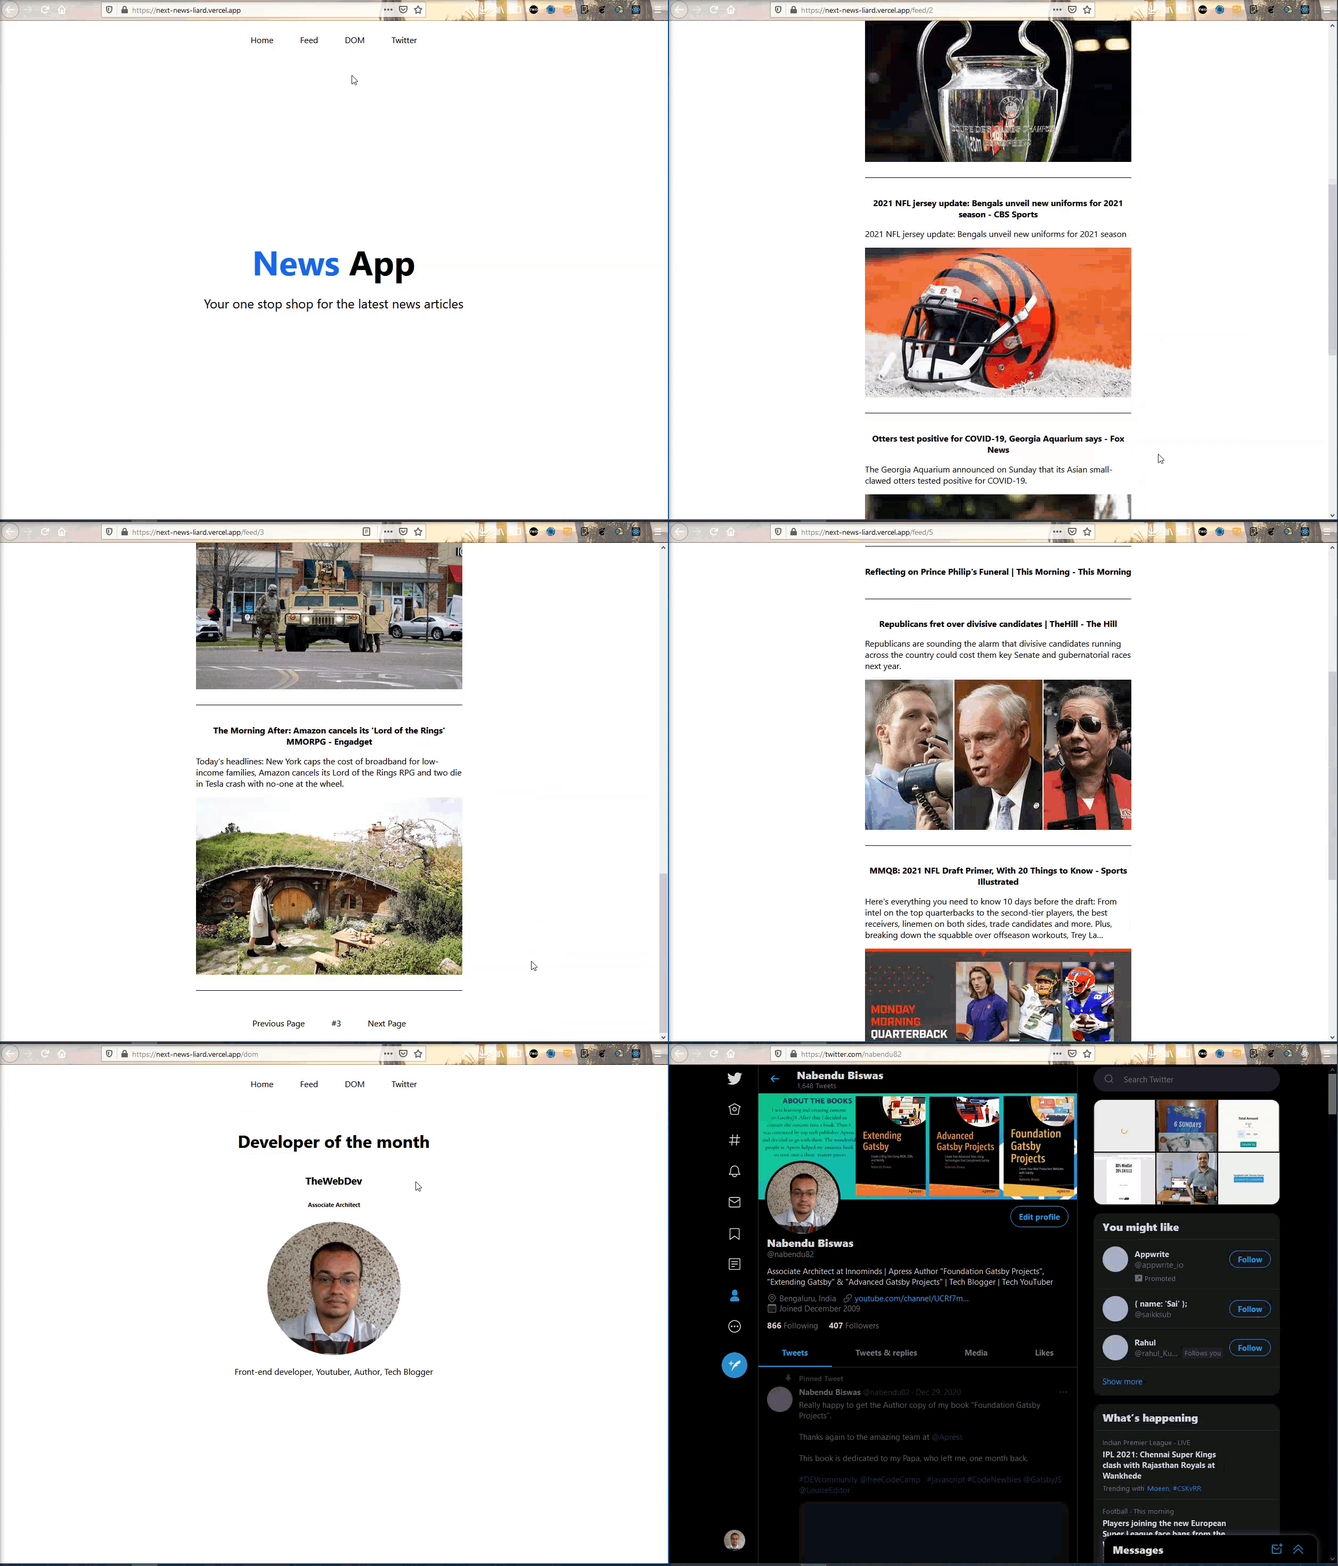
Our app is sucessfully deployed and working well.
 Working fine
You can find the github for this project here.