Build a Photoshop Clone using React
by Nabendu Biswas / November 27th, 2020
#javascript #beginners #React
Series: React-Projects
Welcome to a simple React JS project, where we are going to build a simple photo editor, like photoshop using React and CSS Filters.
So, fire up your terminal and create a new react app photo-editor-react with the below command.
 photo-editor-react
After that npm start to start your project at localhost:3000. We will remove the boilerplate code and the unnecessary files. So, in App.js remove everything and only keep the following code.
 App.js
Then in index.js also remove the import to index.css file, as we are going to use our own css.
 index.js
Next, we will create a components folder and inside it Slider.js file. Create a simple functional component in it. We are having a simple range input with some className in it.
 Slider.js
Now, update the App.js with the basic html code. We are also including the Slider component.
 App.js
Now, when we go to localhost we can see the below web-app.
 localhost
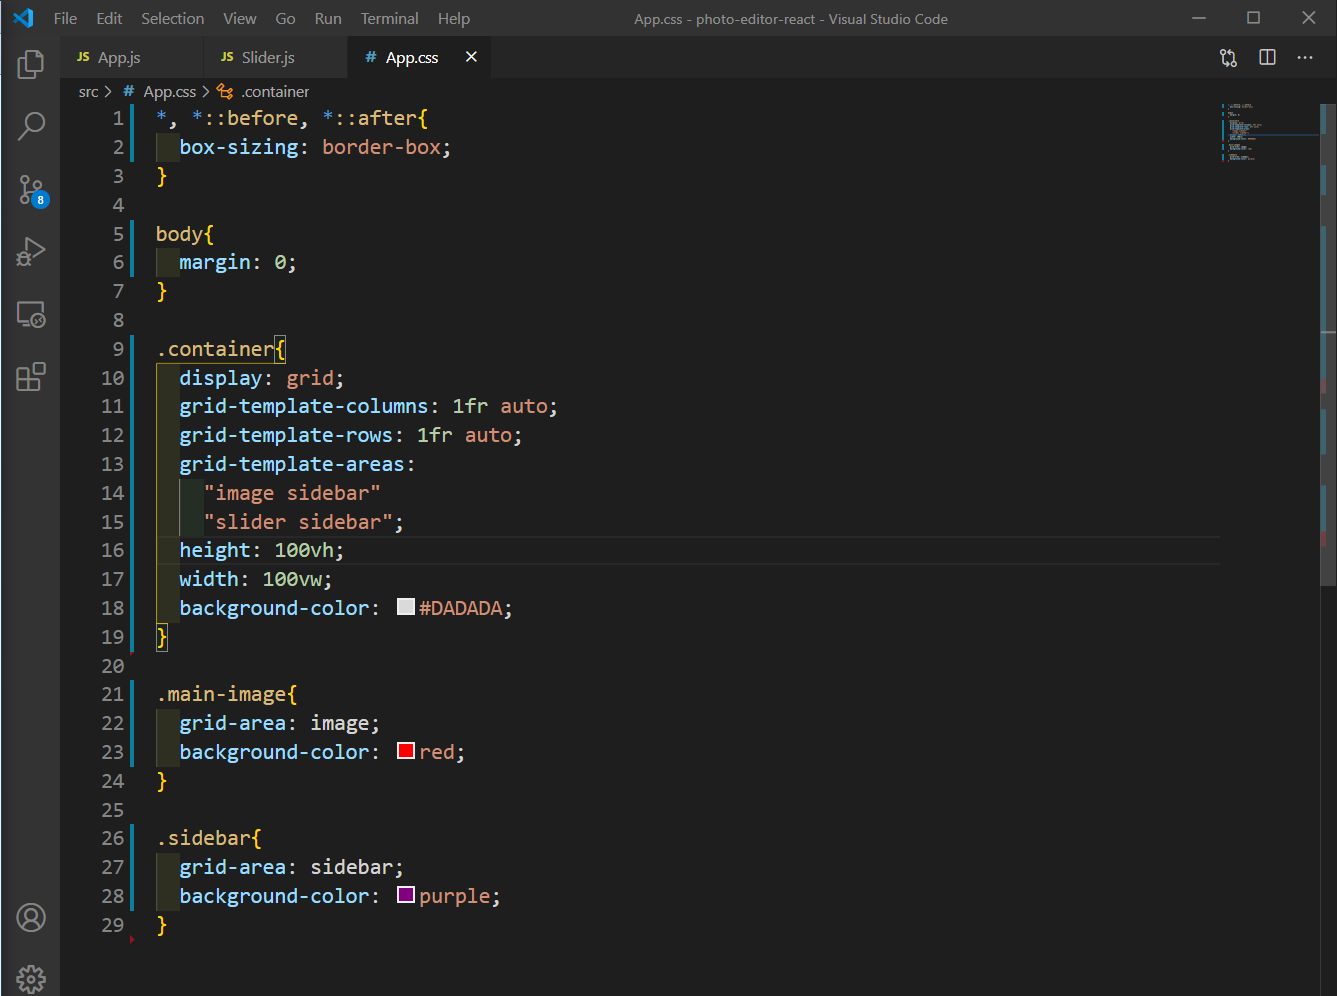
Now, we will start putting the style in App.css file. Here, after the basic reset we are making the root container a grid. We are also using the concept of grid-template-areas to put different part in different areas.
 App.css
Now, when we go to localhost we can see the below web-app.
 localhost
We will next show a background-image from unsplash in main-image and also centering it. We are also styling the slider-container and slider.
 App.css
Now, when we go to localhost we can see the below web-app.
 localhost
Create a new file SidebarItem.js inside the components folder and put a button inside it.
 SidebarItem.js
Now, include the SidebarItem in the App.js file. This will be used to show the buttons.
 App.js
Now, we will update the styles in App.css file for sidebar and add styles for sidebar-item.
 App.css
It will now look like below in localhost.
 localhost
Now, we are going to add logic to the application. Add the below in App.js file , where, we will create an array of object DEFAULT_OPTIONS. Here, we will place all filter options like brightness, contrast, saturate, grayscale, sepia, hue-rotate, blur.
    const DEFAULT_OPTIONS = [
      {
        name: 'Brightness',
        property: 'brightness',
        value: 100,
        range: {
          min: 0,
          max: 200
        },
        unit: '%'
      },
      {
        name: 'Contrast',
        property: 'contrast',
        value: 100,
        range: {
          min: 0,
          max: 200
        },
        unit: '%'
      },
      {
        name: 'Saturation',
        property: 'saturate',
        value: 100,
        range: {
          min: 0,
          max: 200
        },
        unit: '%'
      },
      {
        name: 'Grayscale',
        property: 'grayscale',
        value: 100,
        range: {
          min: 0,
          max: 100
        },
        unit: '%'
      },
      {
        name: 'Sepia',
        property: 'sepia',
        value: 100,
        range: {
          min: 0,
          max: 100
        },
        unit: '%'
      },
      {
        name: 'Hue Rotate',
        property: 'hue-rotate',
        value: 0,
        range: {
          min: 0,
          max: 360
        },
        unit: 'deg'
      },
      {
        name: 'Blur',
        property: 'blur',
        value: 0,
        range: {
          min: 0,
          max: 20
        },
        unit: 'px'
      }
    ]
Next, in App.js we will use useState to set optionsto DEFAULT_OPTIONS. We will also loop through the options and pass the name to individual SidebarItem element.
 App.js
Next, we will use that prop in our SidebarItem.js to show the name.
 SidebarItem.js
Next, back in App.js we will have another state variable selectedIndex, which is used to get the correct filter option through selectedOption. Next, we are also passing it to the SidebarItem component for active prop.
 App.js
We are then going to use active in SidebarItem, where we are going to add active to className if it is passed.
 SidebarItem.js
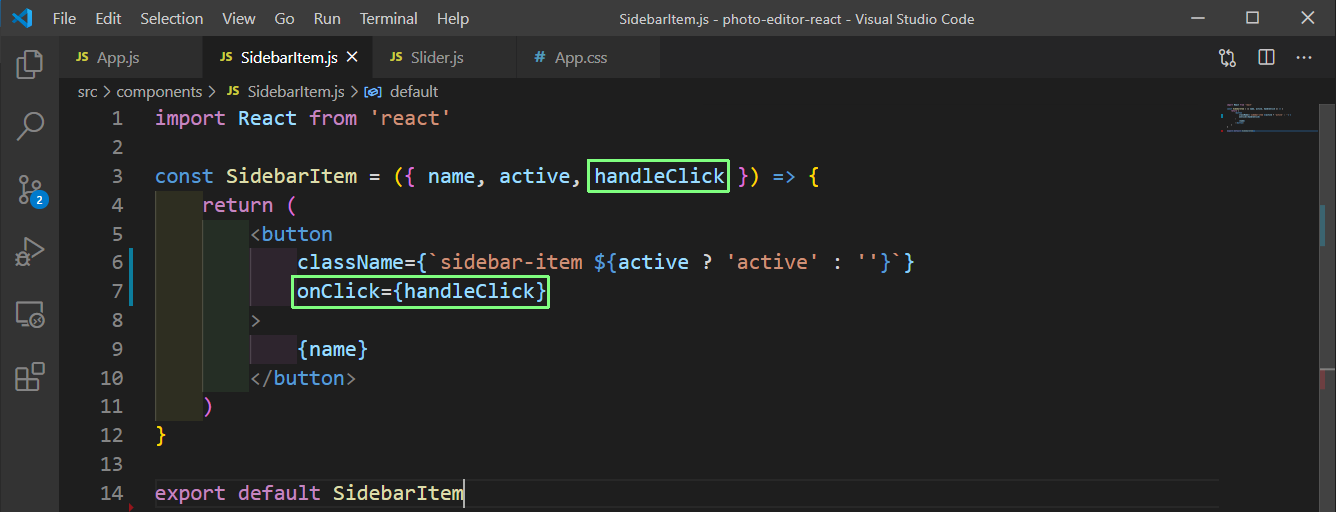
We now want to change the active property depending on the click of button. For that we will add a handleClick function in the button’s onClick handler.
 SidebarItem.js
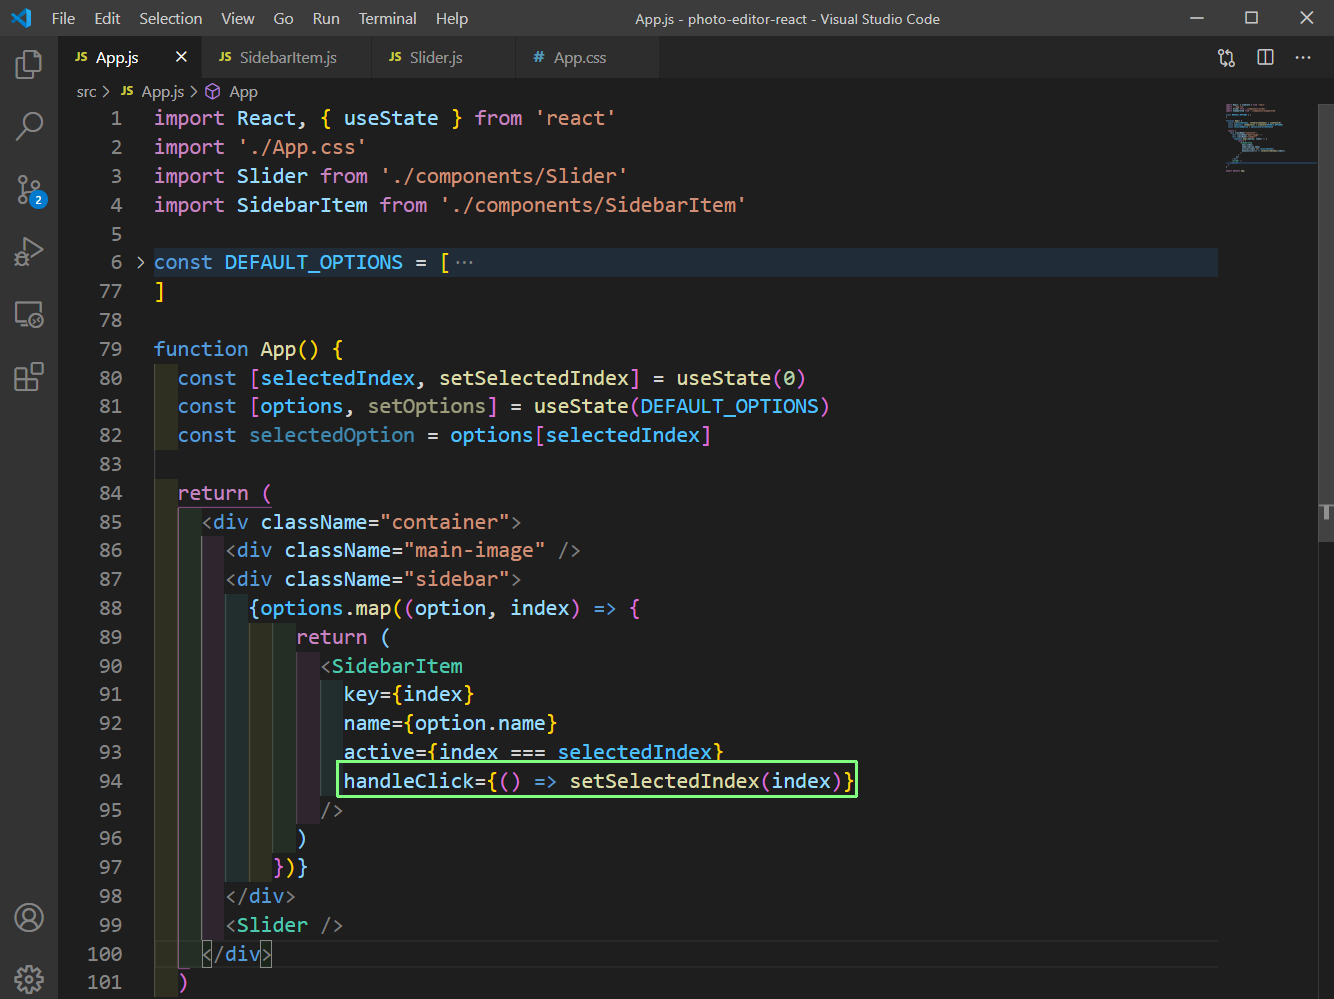
Back in App.js we will add the handleClick handler, which will change the setSelectedIndex to the index.
 App.js
Now, our active is working properly and the button is getting selected on the click of the button.
 Selected
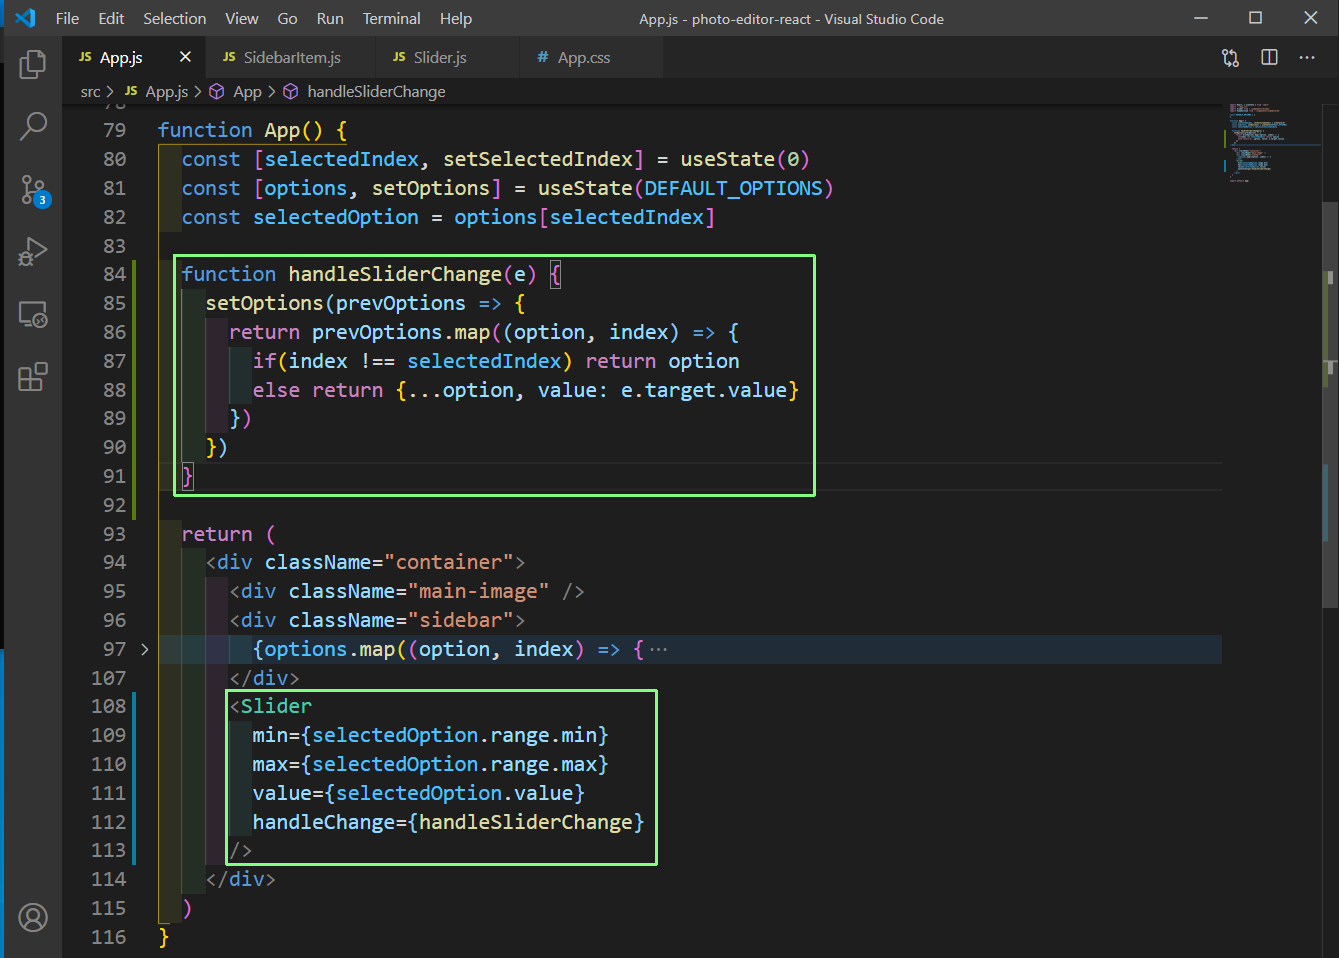
The next thing is to make our Slider correspond to the active value. So, in App.js in the Slider first add min, max, value and handleChange prop. After that we will create the handleSliderChange function.
Here, we are returing all option and only changing the selected option value.
 App.js
Next, we will use these props in Slider.js file.
 Slider.js
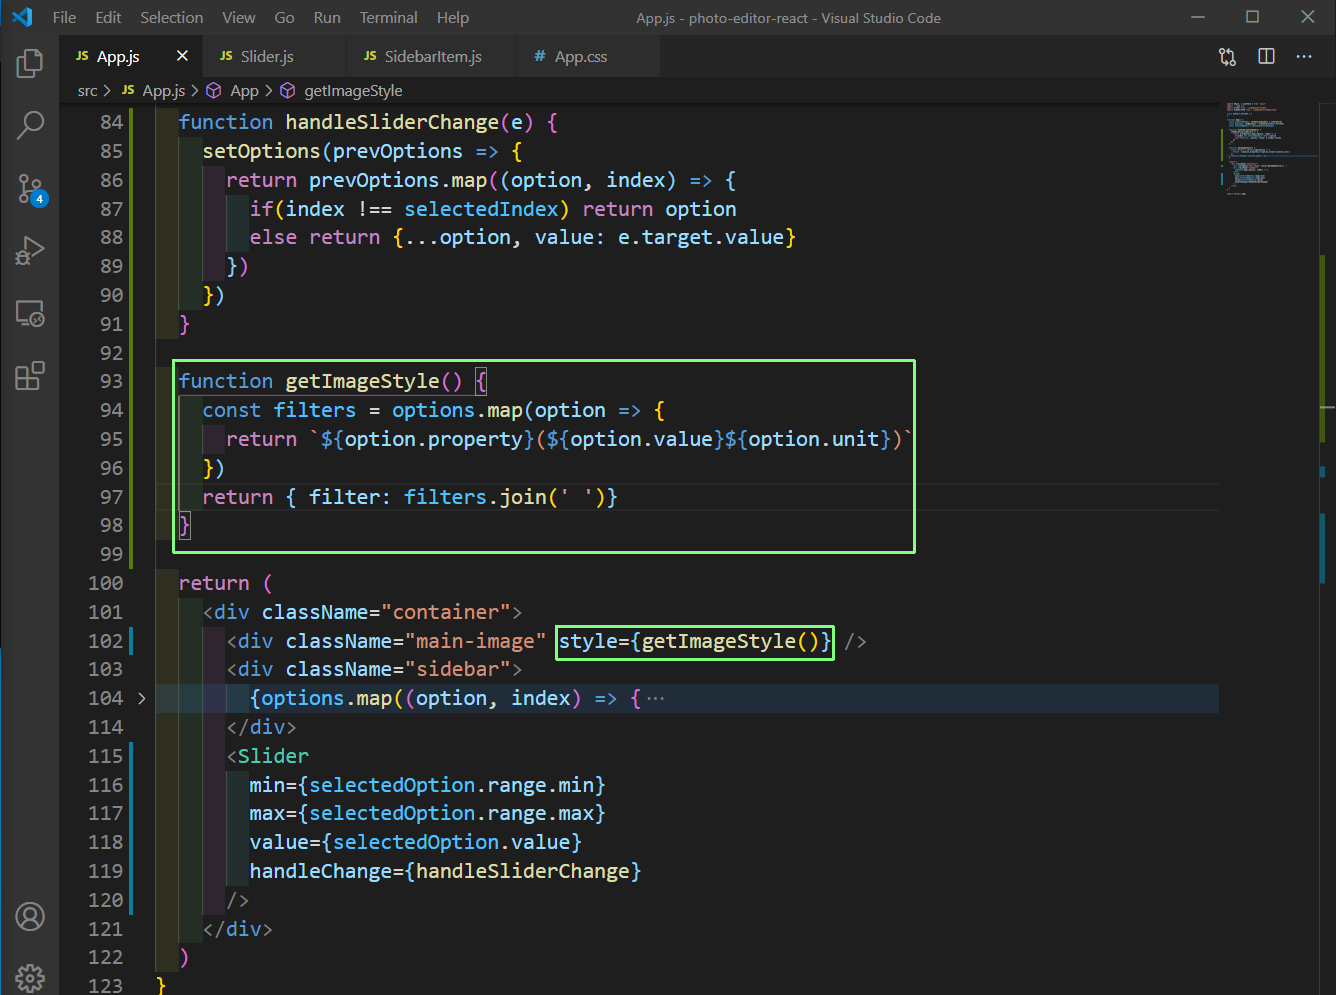
Now, we will change the style for our image and for that we will change the style depending on the getImageStyle().
Here, we are mapping through the options array and changing it’s property, value and unit. After that we are joining the array using join.
 App.js
And this will complete our App and we will be able to change all filter properties of the image, using the slider.
 Completed
This completes our little photo editor. You can find the code for the same in thisgithub repo.