In this post we are going to create the Pricing component with toggle from Frontend mentor.
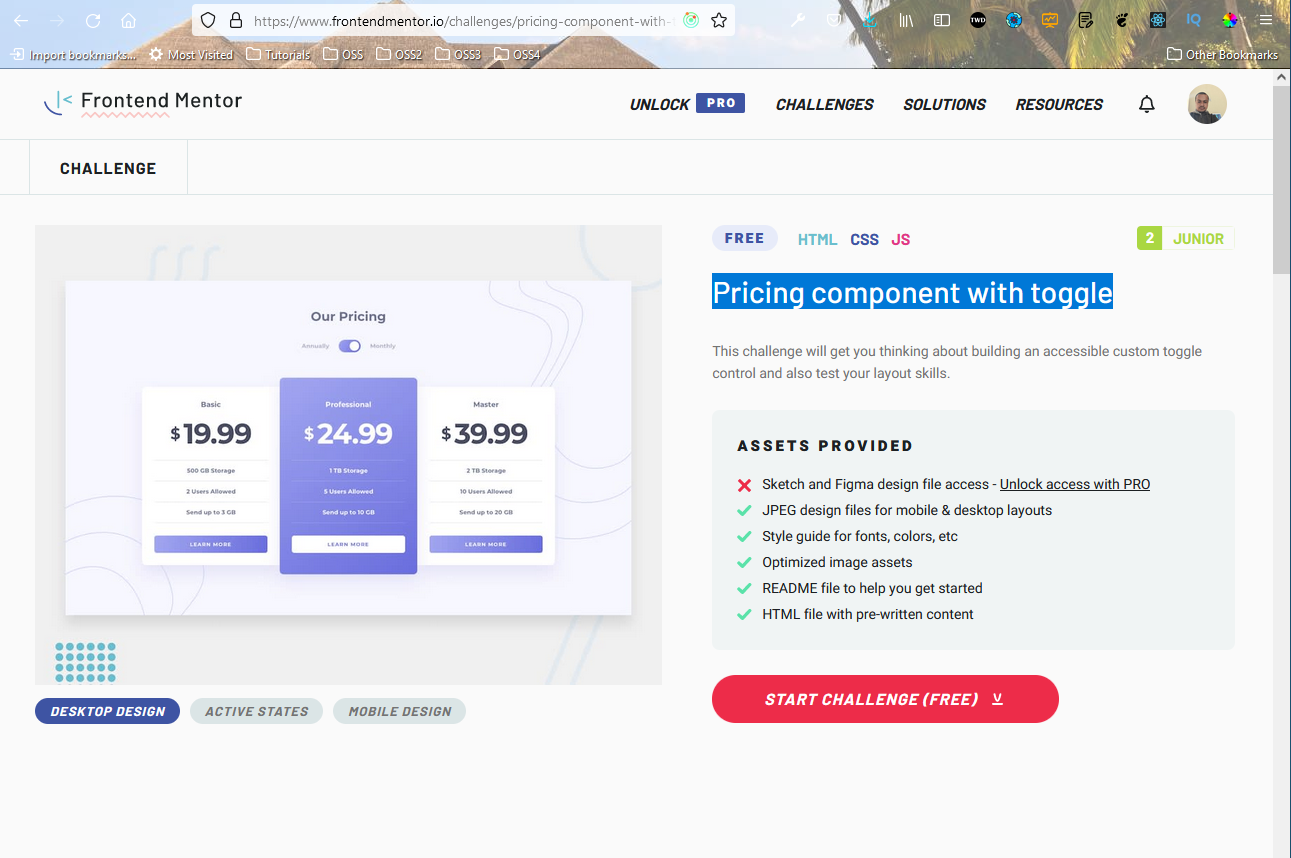 Pricing component
After downloading the resources, I had extracted the zip file and copied it in the Frontend-mentor-challenges folder. After that opened the index.html file with Live Server.
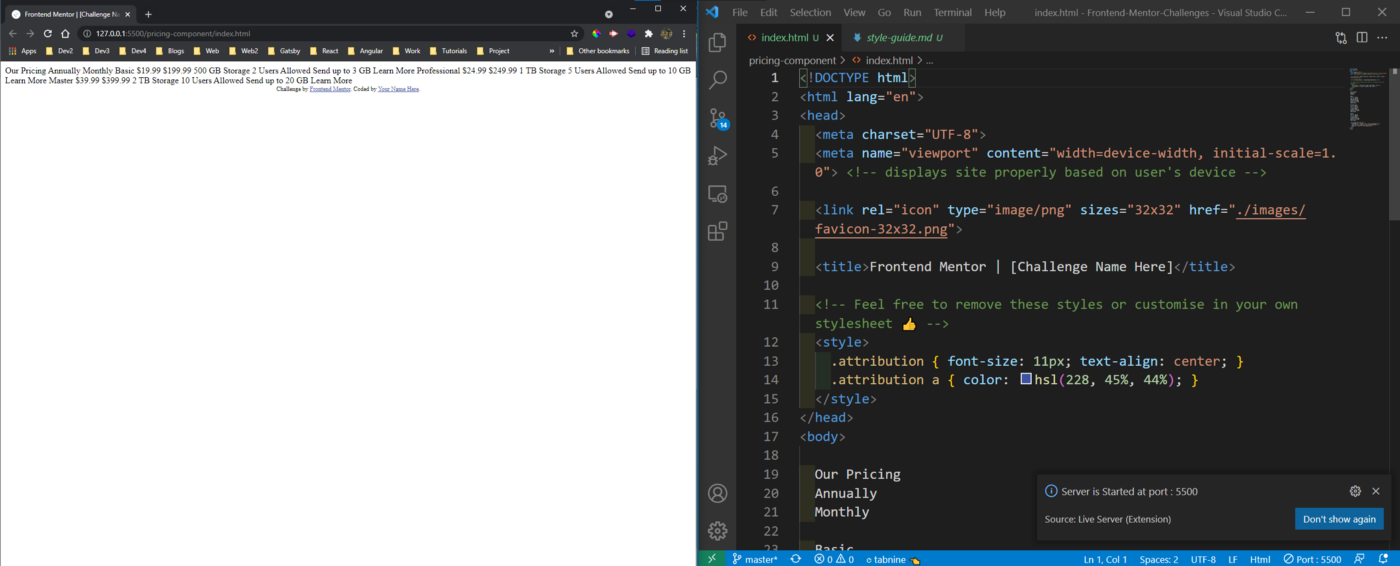 index.html
Next, we will be removing the unnecessary things from the index.html file and adding the structure.
<!DOCTYPE html>
<html lang="en">
<head>
<meta charset="UTF-8">
<meta name="viewport" content="width=device-width, initial-scale=1.0">
<link rel="icon" type="image/png" sizes="32x32" href="./images/favicon-32x32.png">
<title>Frontend Mentor | Price Component</title>
<link rel="stylesheet" href="style.css" />
<script src="main.js" defer></script>
</head>
<body>
<div class="container">
<h1>Our Pricing</h1>
<div class="toggle-container">
<span>Annually</span>
<span>
<input type="checkbox" name="toggle" id="toggle" unchecked />
<label for="toggle">
<div class="ball"></div>
</label>
</span>
<span>Monthly</span>
</div>
<div id="flexy" class="flex">
<div class="price-box">
<h4>Basic</h4>
<p>
<span class="monthly">
$19.99
</span>
</p>
<ul>
<li>500 GB Storage</li>
<li>2 Users Allowed</li>
<li>Send up to 3 GB</li>
</ul>
<button>Learn More</button>
</div>
<div class="price-box price-box-premium">
<h4>Professional</h4>
<p>
<span class="monthly">
$24.99
</span>
</p>
<ul>
<li>1 TB Storage</li>
<li>5 Users Allowed</li>
<li>Send up to 10 GB</li>
</ul>
<button>Learn More</button>
</div>
<div class="price-box">
<h4>Master</h4>
<p>
<span class="monthly">
$39.99
</span>
</p>
<ul>
<li>2 TB Storage</li>
<li>10 Users Allowed</li>
<li>Send up to 20 GB</li>
</ul>
<button>Learn More</button>
</div>
</div>
</div>
</body>
</html>
Now, we will start with our styles in the new style.css file. We will set the basic styling first, which will contain the general styles.
@import url('https://fonts.googleapis.com/css?family=Montserrat:700&display=swap');
* {
 box-sizing: border-box;
}
body {
 background-color: hsl(240, 78%, 98%);
 color: hsl(232, 13%, 33%);
 display: flex;
 align-items: center;
 justify-content: center;
 font-family: 'Montserrat', sans-serif;
 text-align: center;
 min-height: 100vh;
}
.container {
 margin: auto;
 max-width: 100%;
 width: 1200px;
}
.flex {
 display: flex;
 align-items: center;
 justify-content: center;
}
h1 {
 color: hsl(233, 13%, 49%);
}
.toggle-container {
 color: hsl(234, 14%, 74%);
 margin-bottom: 40px;
}
Now, our project is looking much better.
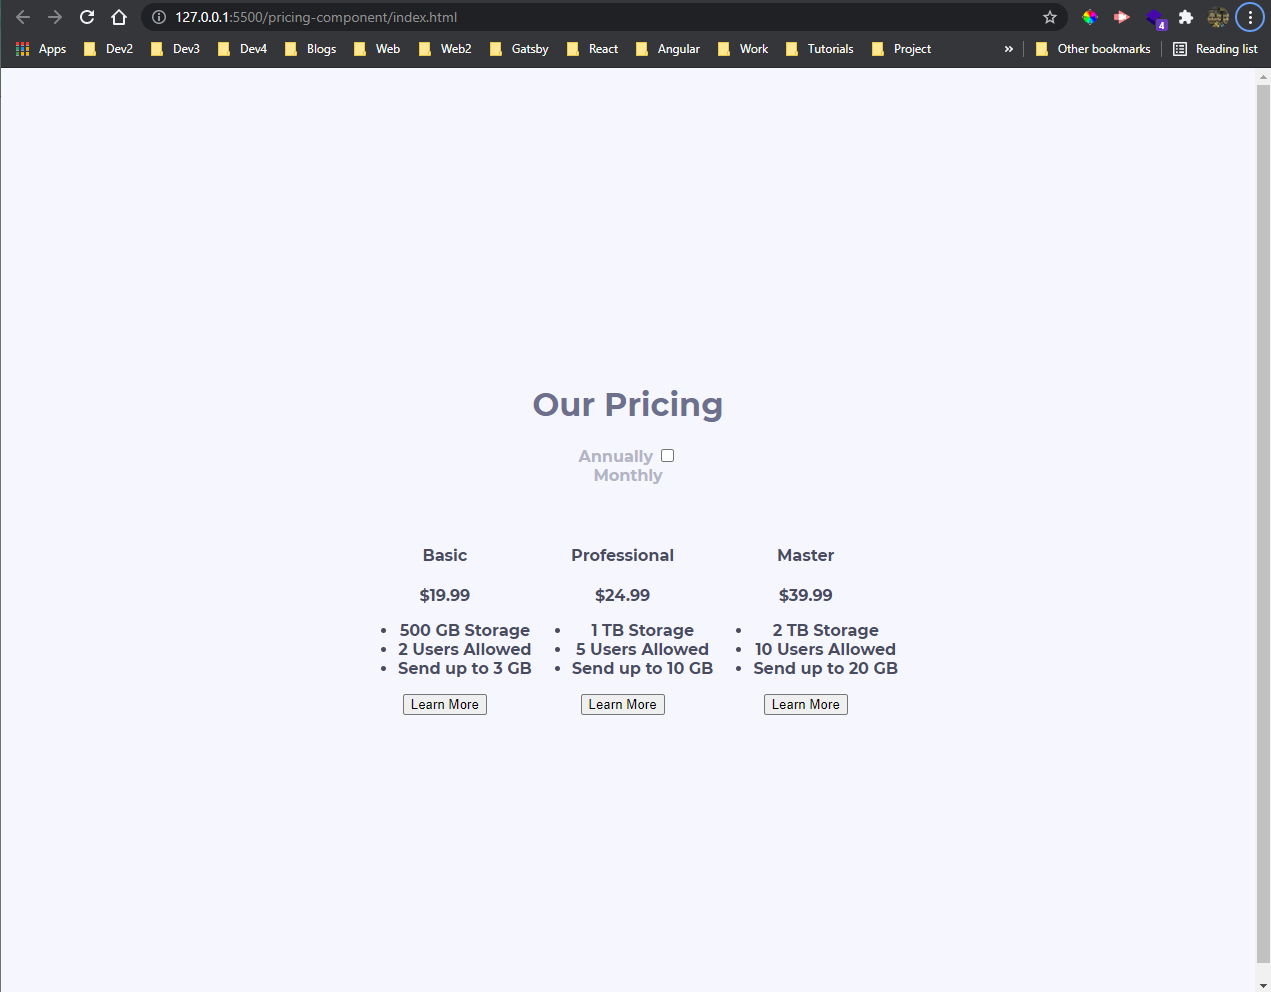 Our Pricing
Now, we will put the rest of the styles for price-box and buttons.
.price-box {
 background-color: #fff;
 border-radius: 10px;
 box-shadow: 0 5px 10px rgba(0, 0, 0, 0.1);
 color: hsl(233, 13%, 49%);
 padding: 30px;
 margin: 10px;
}
.price-box h4 {
 margin: 0;
}
.price-box p {
 color: hsl(232, 13%, 33%);
 font-size: 4em;
 margin: 15px 0;
 width: 250px;
}
.price-box ul {
 border-top: 1px solid hsl(234, 14%, 74%);
 padding: 0;
 list-style-type: none;
}
.price-box ul li {
 border-bottom: 1px solid hsl(234, 14%, 74%);
 font-size: 14px;
 padding: 15px 0;
}
.price-box button {
 background-image: linear-gradient(
  to right,
  hsl(236, 72%, 79%),
  hsl(237, 63%, 64%)
 );
 border: none;
 border-radius: 5px;
 color: #fff;
 font-family: 'Montserrat', sans-serif;
 letter-spacing: 2px;
 padding: 15px;
 margin-top: 10px;
 width: 100%;
 text-transform: uppercase;
}
Now, our project is looking much better and is almost complete.
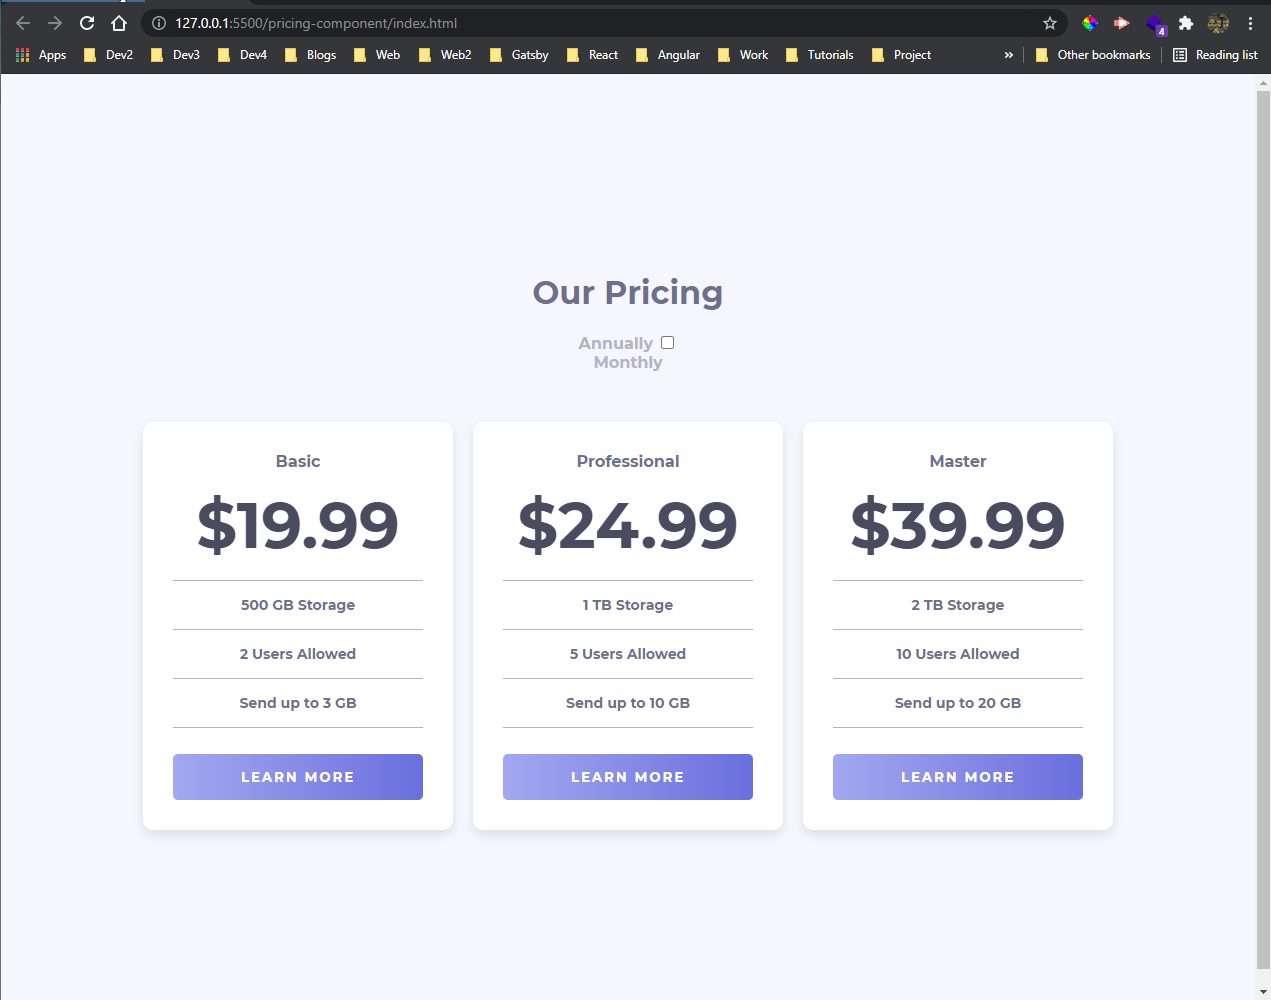 Almost Done
It’s time to style the premium middle box, with different styles.
.price-box.price-box-premium {
 background-image: linear-gradient(
  to right,
  hsl(236, 72%, 79%),
  hsl(237, 63%, 64%)
 );
 color: #fff;
transform: scale(1.15);
}
.price-box.price-box-premium > * {
 transform: scale(0.869);
}
.price-box.price-box-premium button {
 background-image: none;
 background-color: #fff;
 color: hsl(237, 63%, 64%);
}
.price-box.price-box-premium ul,
.price-box.price-box-premium ul li {
 border-color: #f0f0f0;
}
.price-box.price-box-premium p {
 color: #fff;
}
Now, our premium box is looking awesome.
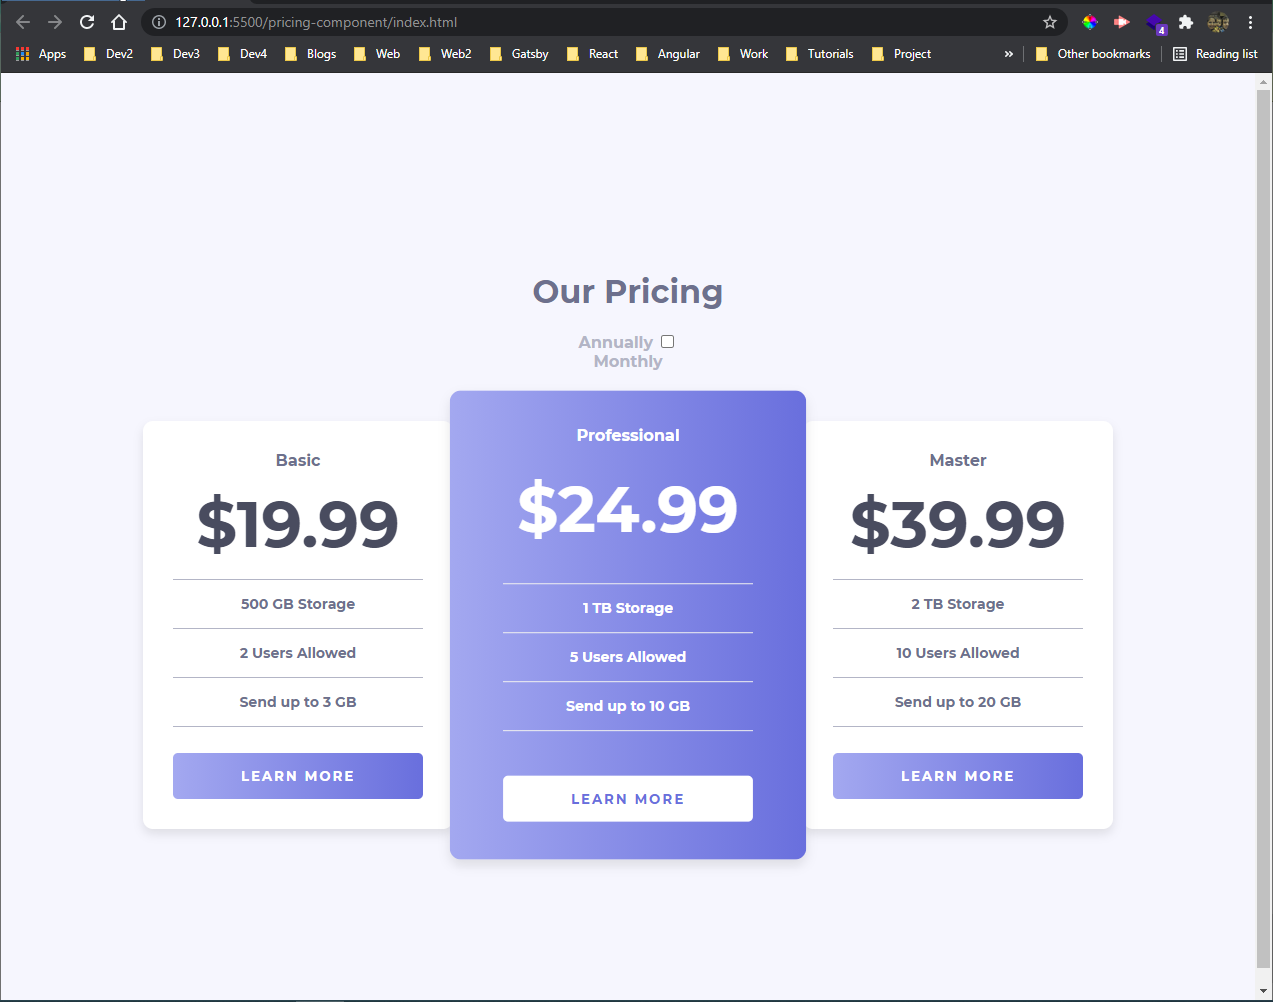 Premium Box
Now, we will add the background patterns. Add the below code after the body in style.css file.
body::before {
 content: '';
 background-image: url('./images/bg-top.svg');
 background-repeat: no-repeat;
 background-position: top right;
 position: absolute;
 top: 0;
 right: 0;
 height: 100%;
 width: 100%;
 z-index: -1;
}
body::after {
 content: '';
 background-image: url('./images/bg-bottom.svg');
 background-repeat: no-repeat;
 background-position: bottom left;
 position: absolute;
 bottom: 0;
 left: 0;
 height: 100%;
 width: 100%;
 z-index: -1;
}
Now, the background patterns are looking good.
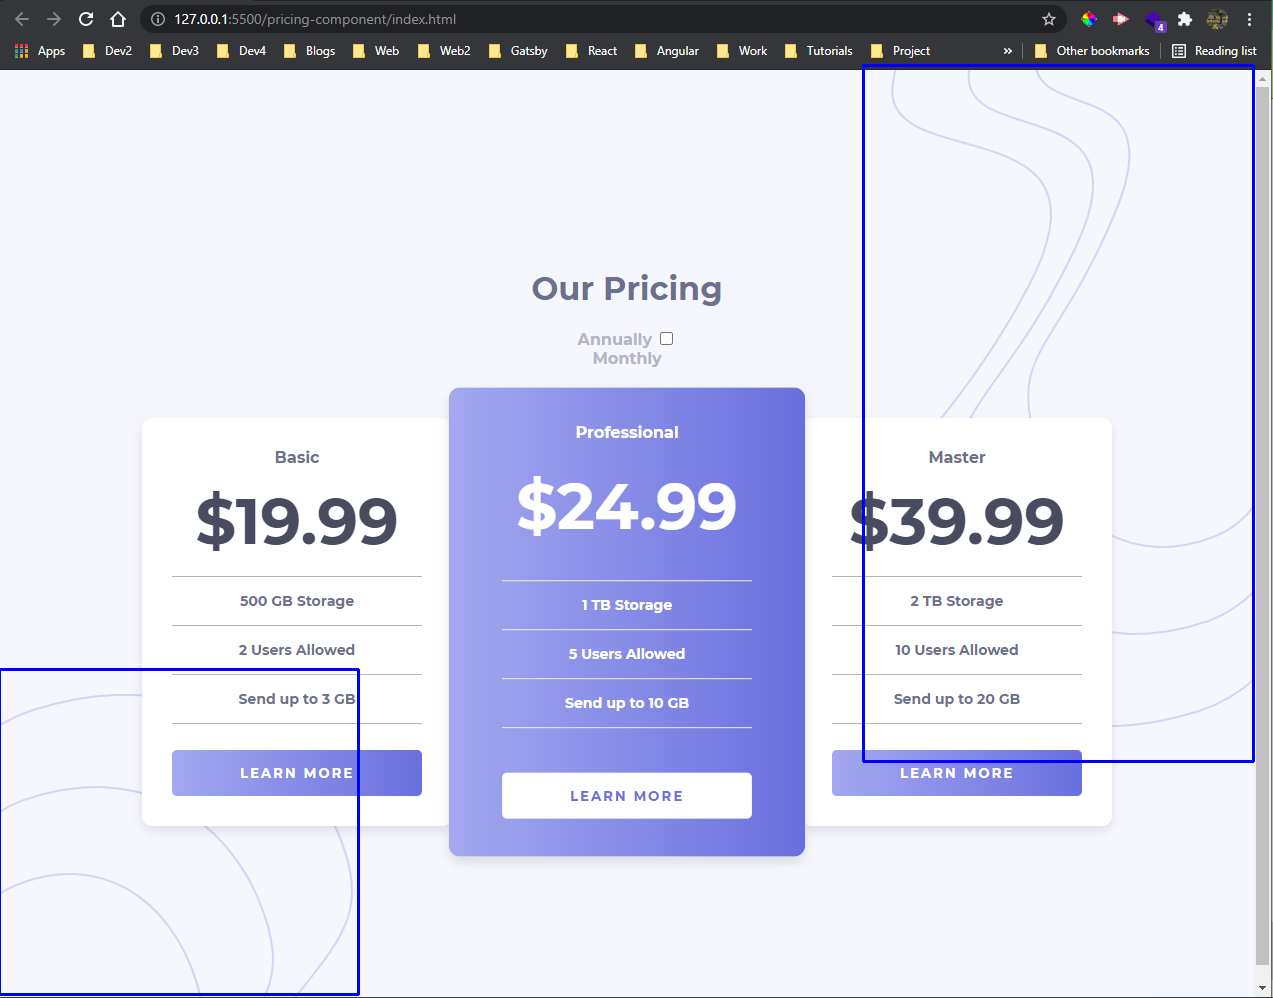 Background pattern
Now, we will do the toggle button, but let’s first add the HTML for annually in our index.html file.
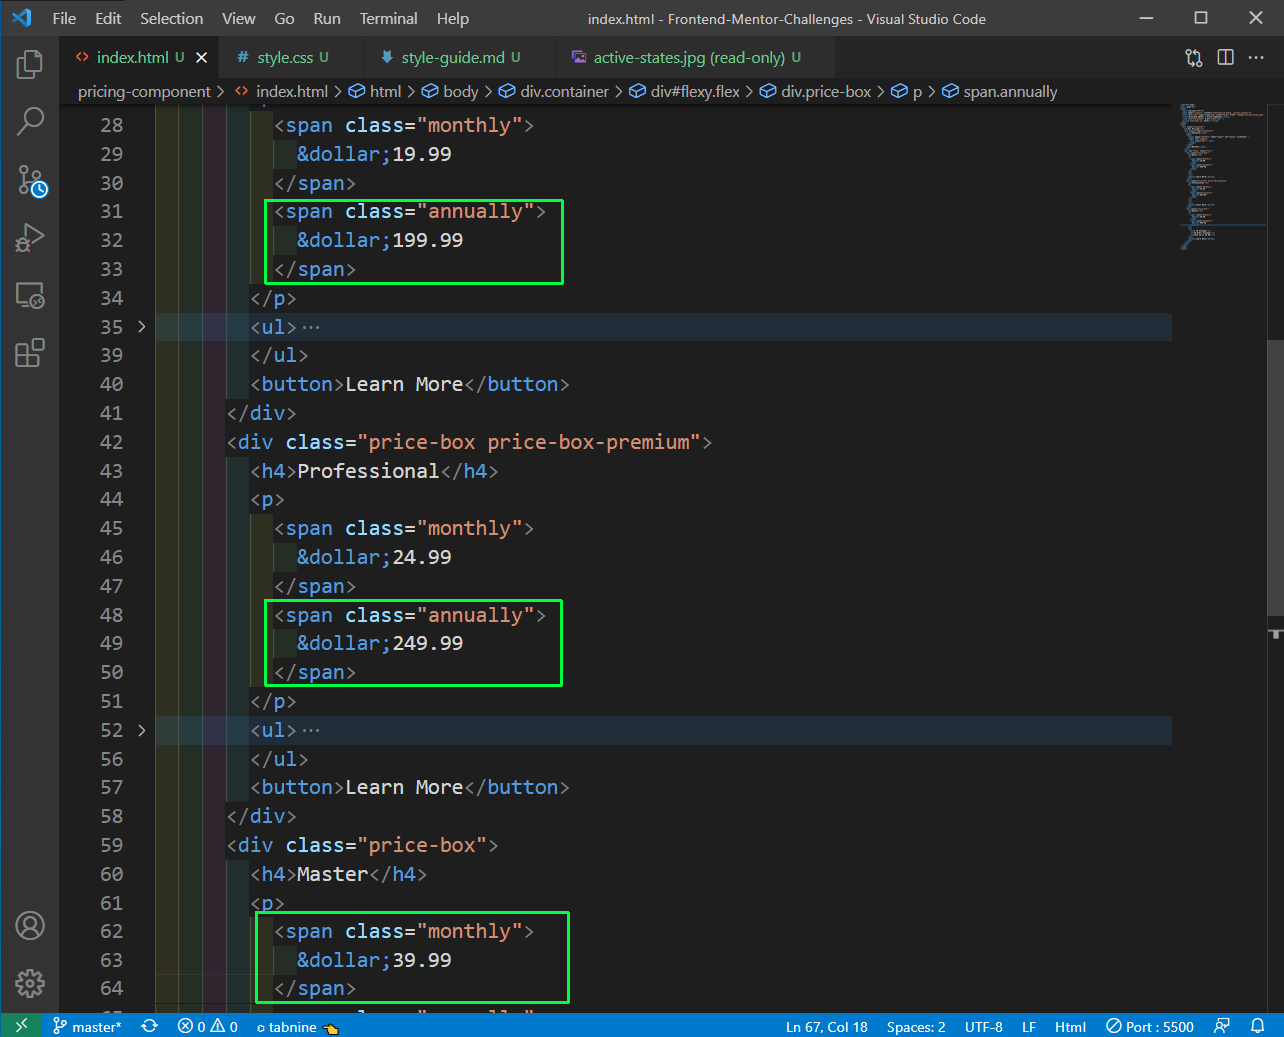 index.html
After that in style.css file add styles for monthly and annually, which we are going to control from javascript.
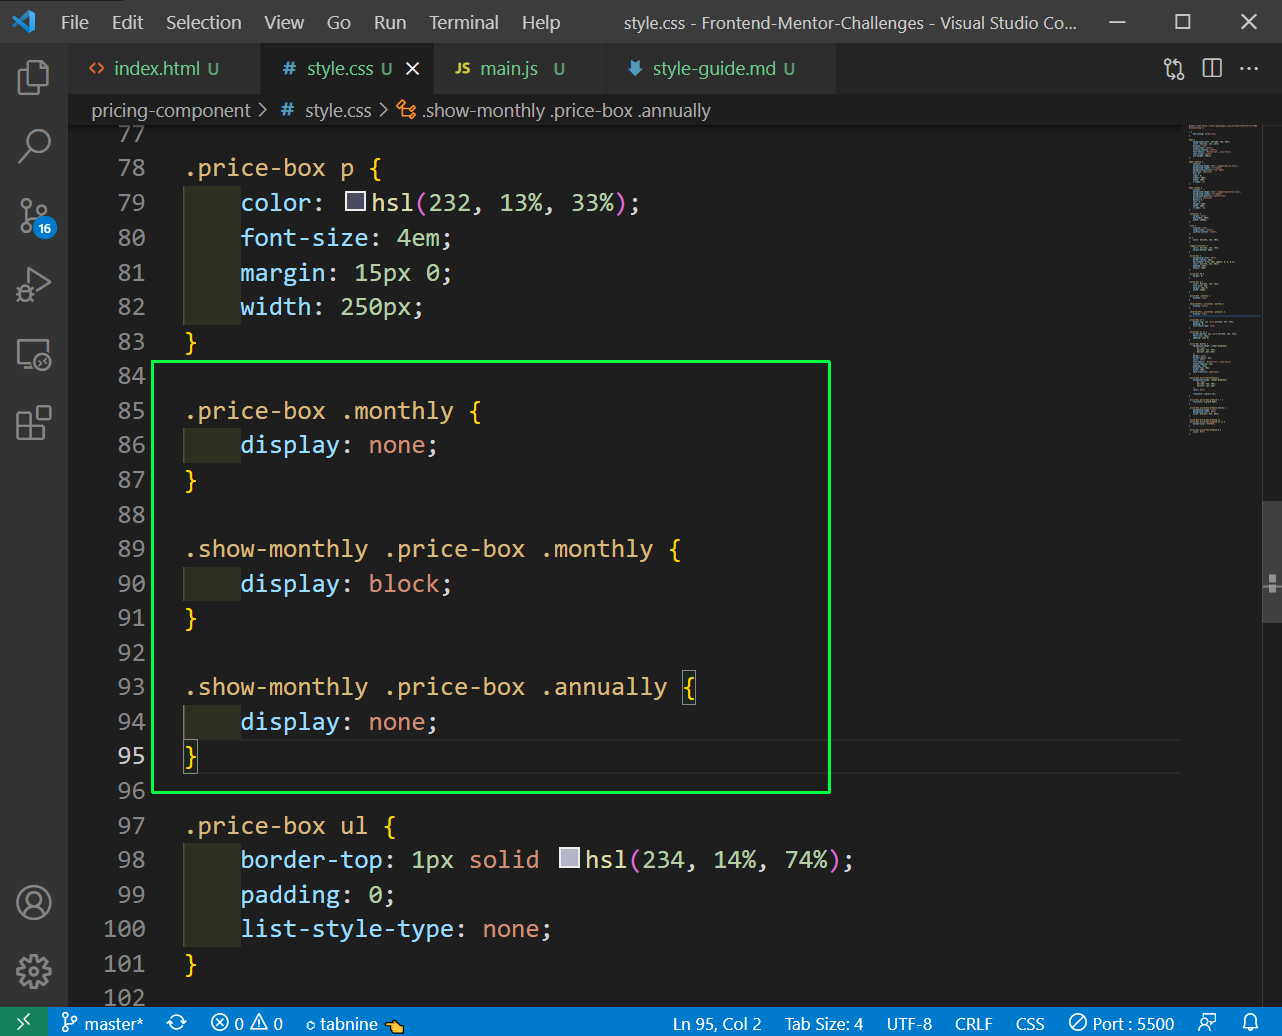 style.css
In the main.js file just add the event listener to add and remove the class show-monthly, once the user click on the checkbox.
const toggle = document.getElementById('toggle');
const flexy = document.getElementById('flexy');
toggle.addEventListener('change', e => {
 flexy.classList.toggle('show-monthly');
});
Now, our checkbox functionality is working fine and showing us the annual and monthly fees.
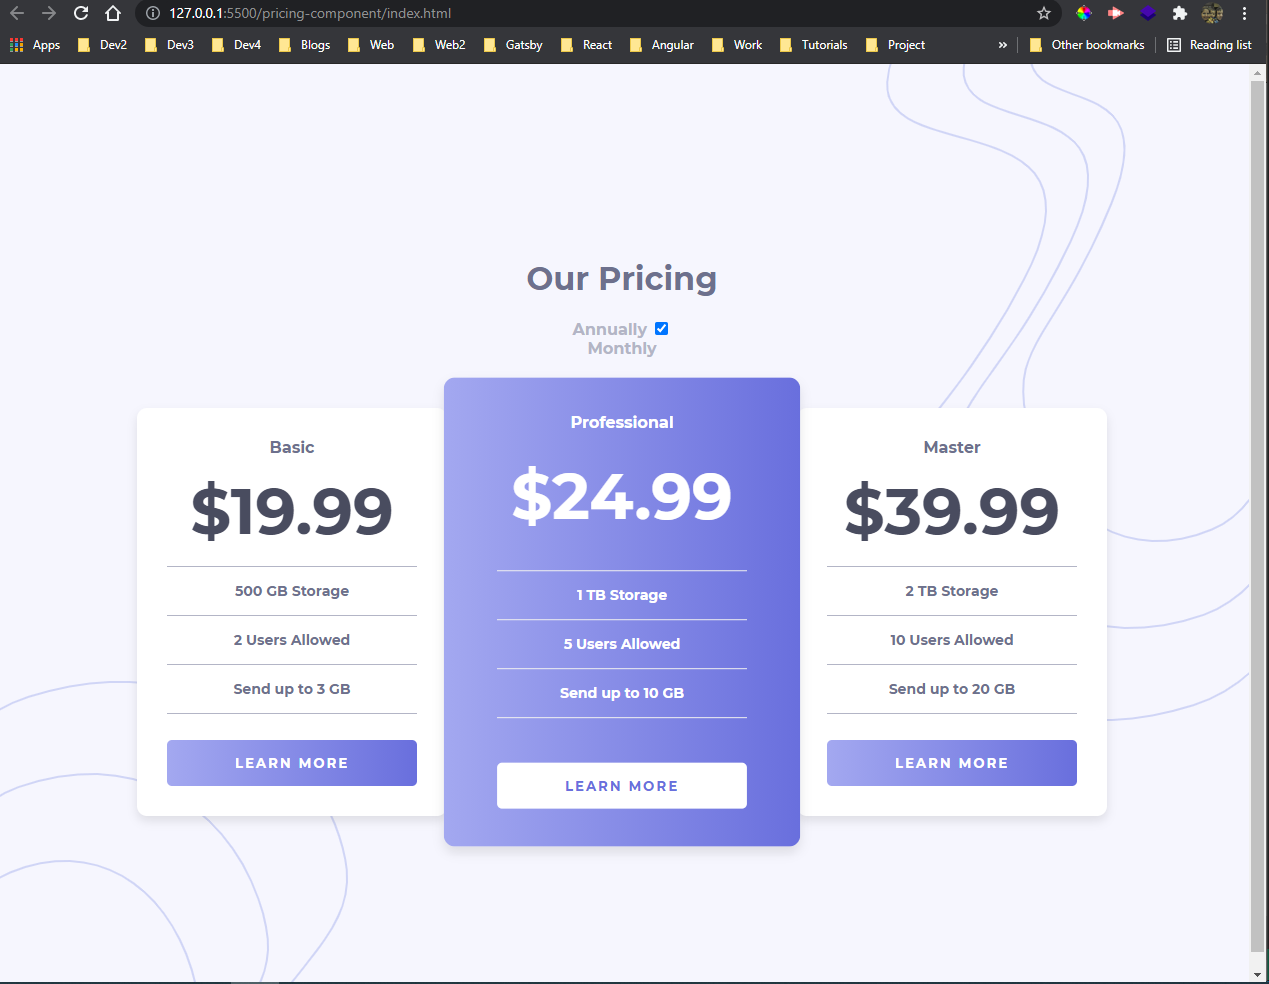 Annual or monthly
We will now use the pill toggle instead of the the checkbox, as per the design.
.toggle-container {
 display: flex;
 align-items: center;
 justify-content: center;
}
.toggle-container label {
 background-image: linear-gradient(
  to right,
  hsl(236, 72%, 79%),
  hsl(237, 63%, 64%)
 );
 border-radius: 50px;
 cursor: pointer;
 display: inline-block;
 margin: 0 10px;
 position: relative;
 height: 30px;
 width: 60px;
}
.toggle-container label .ball {
 background-color: #fff;
 border-radius: 50%;
 position: absolute;
 top: 2.5px;
 left: 2.5px;
 height: 25px;
 width: 25px;
 transition: transform 0.4s ease;
}
.toggle-container input {
 position: absolute;
 left: -9999px;
}
.toggle-container input:checked + label .ball {
 transform: translateX(30px);
}
And now the toggle looks great and also works great in our app.
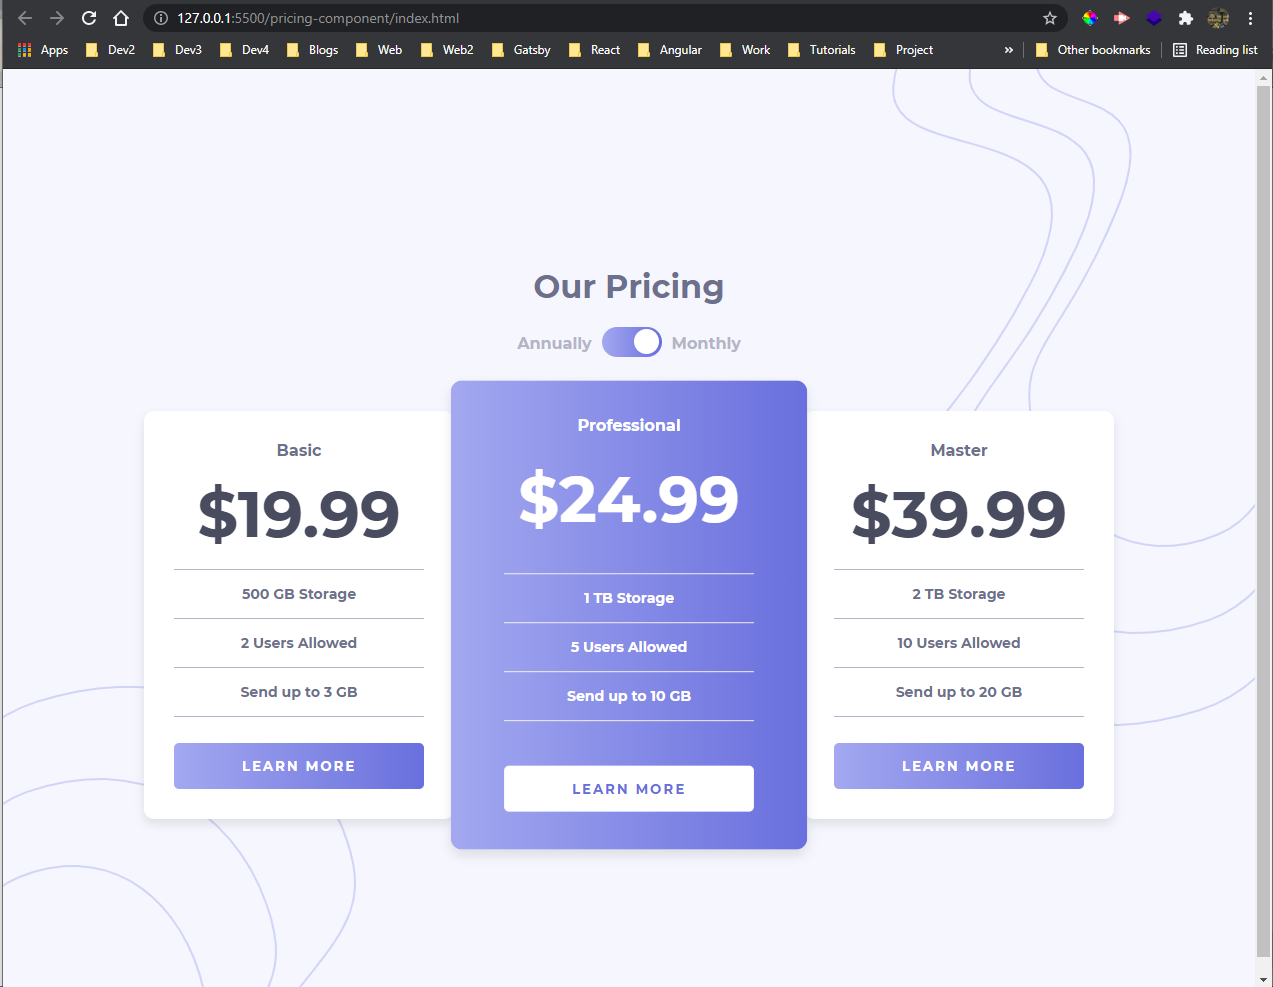 The Toggle
Next, we will make our app responsive by using little media query.
@media screen and (max-width: 768px) {
 .flex {
  flex-direction: column;
 }
.price-box.price-box-premium {
  transform: scale(1);
 }
.price-box.price-box-premium > * {
  transform: scale(1);
 }
}
Now, our app is perfect and looking great in both screens. You can find the code for the same here.
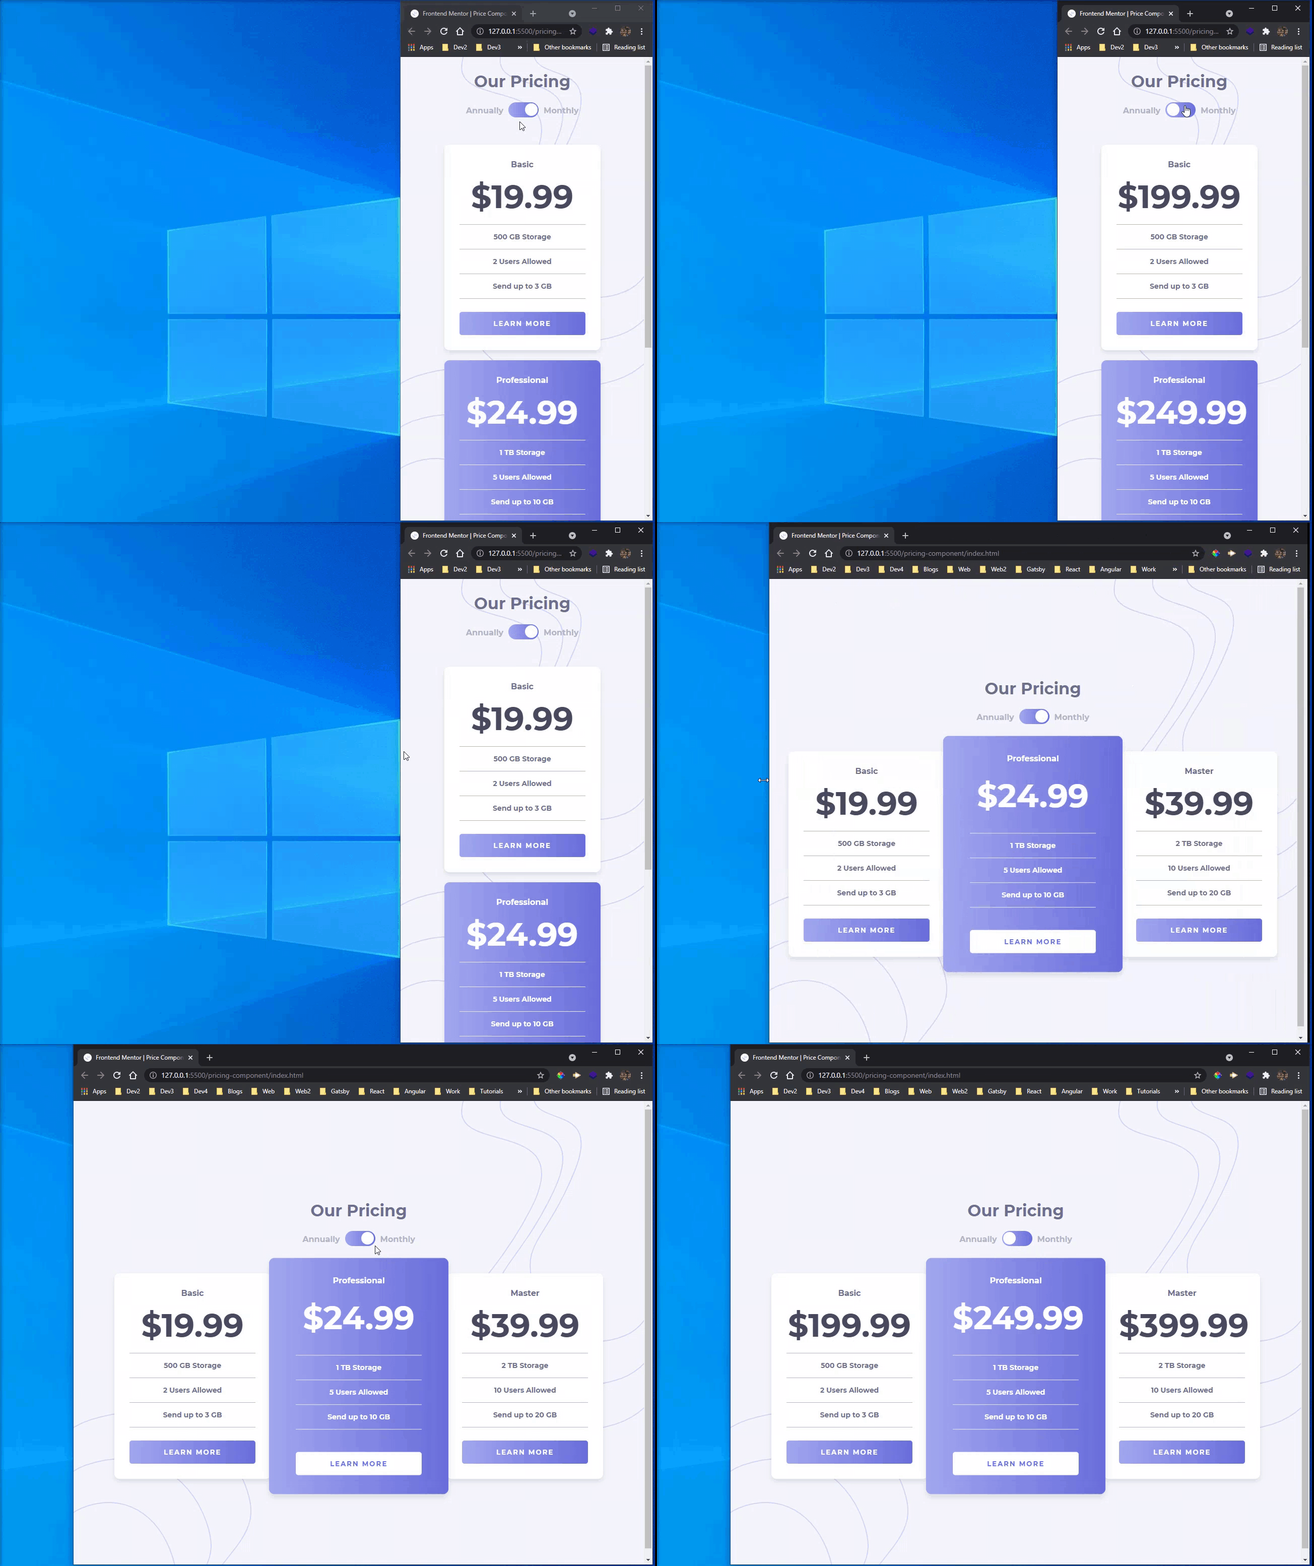 Pricing