ReactJS Tutorial for Beginners -10
by Nabendu Biswas / October 20th, 2020
#javascript #beginners #react
Series: React-Basics
Welcome to part-10 of the series. We will learn to style React form handling in this part.
Controlled Components
React form element are also called controlled components because, they are fully controlled by React. The concept is a bit complex then regular form elements.
Here, we have a simple input type text and the value of it is a state variable email. Now, initially it is empty string. We also have an onChange handler, which get’s triggered when the user types anything in the input box. It triggers the function changeEmailHandler().
Inside the function changeEmailHandler(), we are get the value of the user typing in event.target.value. So, we are using setState to update the state variable email.
Now, whenever we use setState it re-renders the component. So, the input box will be rendered again with the new value of email state.
 Controlled Component
Example in Code
Create a new file DemoForm.js inside components folder. Here, we have created a input text field inside a form tag.
The input boxes are generally used with there corresponding label and they have a same for id pair. Note, that the label have an htmlFor instead of a regular for, which is a requirement in react or else will throw a warning.
We have a state variable username in the constructor, which is initialized to empty string. After that in the input we have assigned state variable username to the value.
 DemoForm.js
Now, we will include this component DemoForm in App.js
 App.js
Now, when we move to localhost, we can see the input box. But if we try to type anything in it, nothing will be shown.
 localhost
We are not getting anything, because we have to complete the second part of code in DemoForm.js file, which is handling the onChange event.
Here, we are calling a function handleUserChange, in the onChange event. Inside the function we are using setState to reset the username variable to event.target.value.
Now, type in the text box and you will be able to do so.
 DemoForm.js
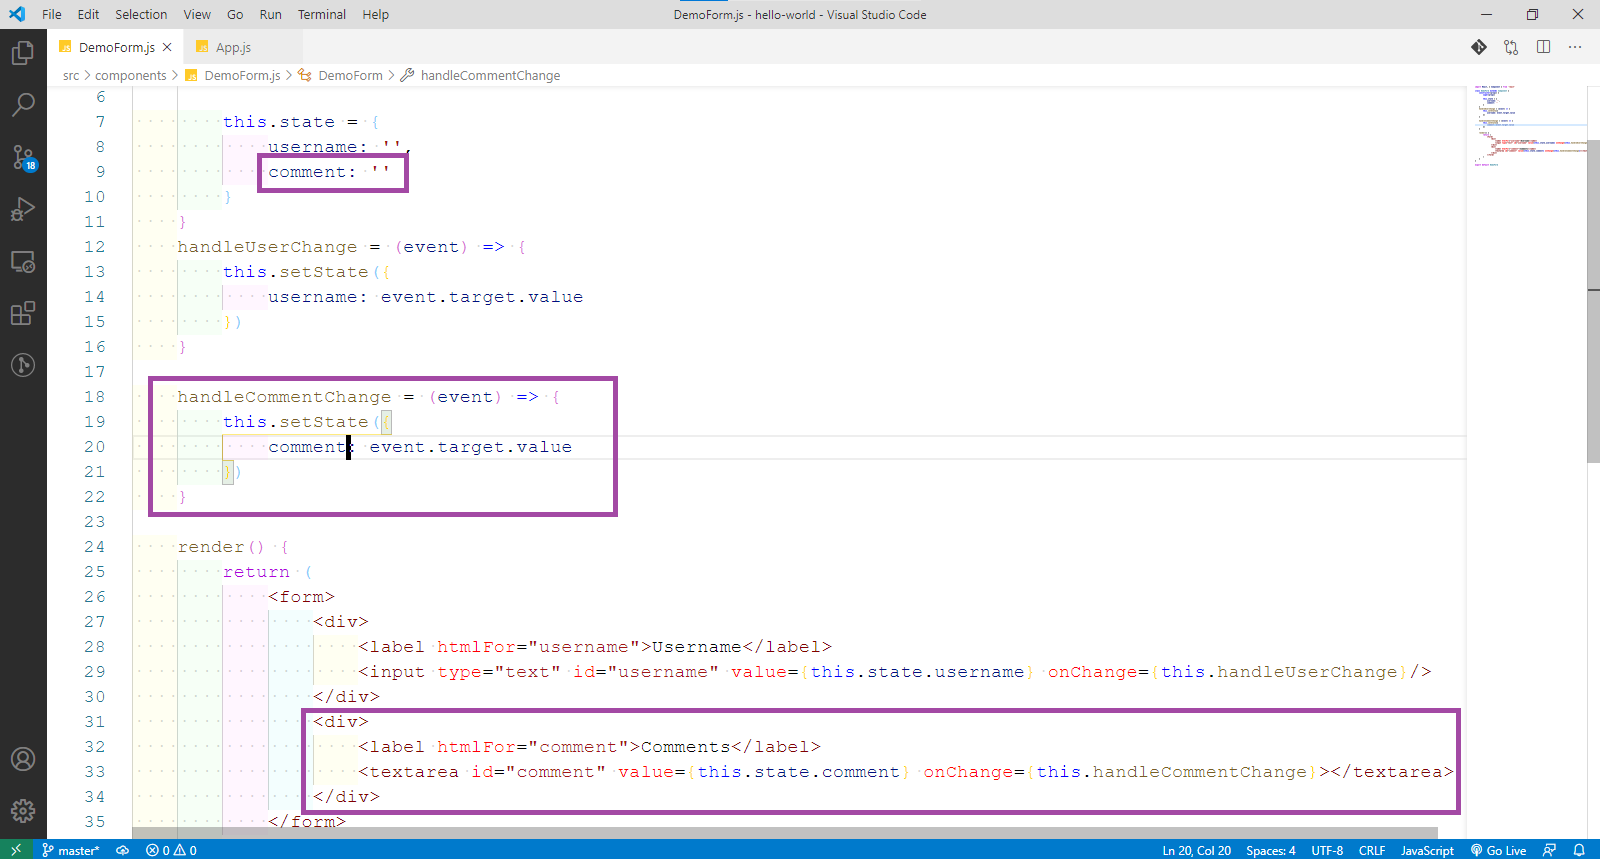
Next, we will create textarea and use the same type of code again. We have to first add in it the constructor initial state declaration.
After that the value will be equal to the state variable and then we will change it through setState, in the onChange handler’s function handleCommentChange().
Now, we will be able to type in the textarea in our form.
 DemoForm.js
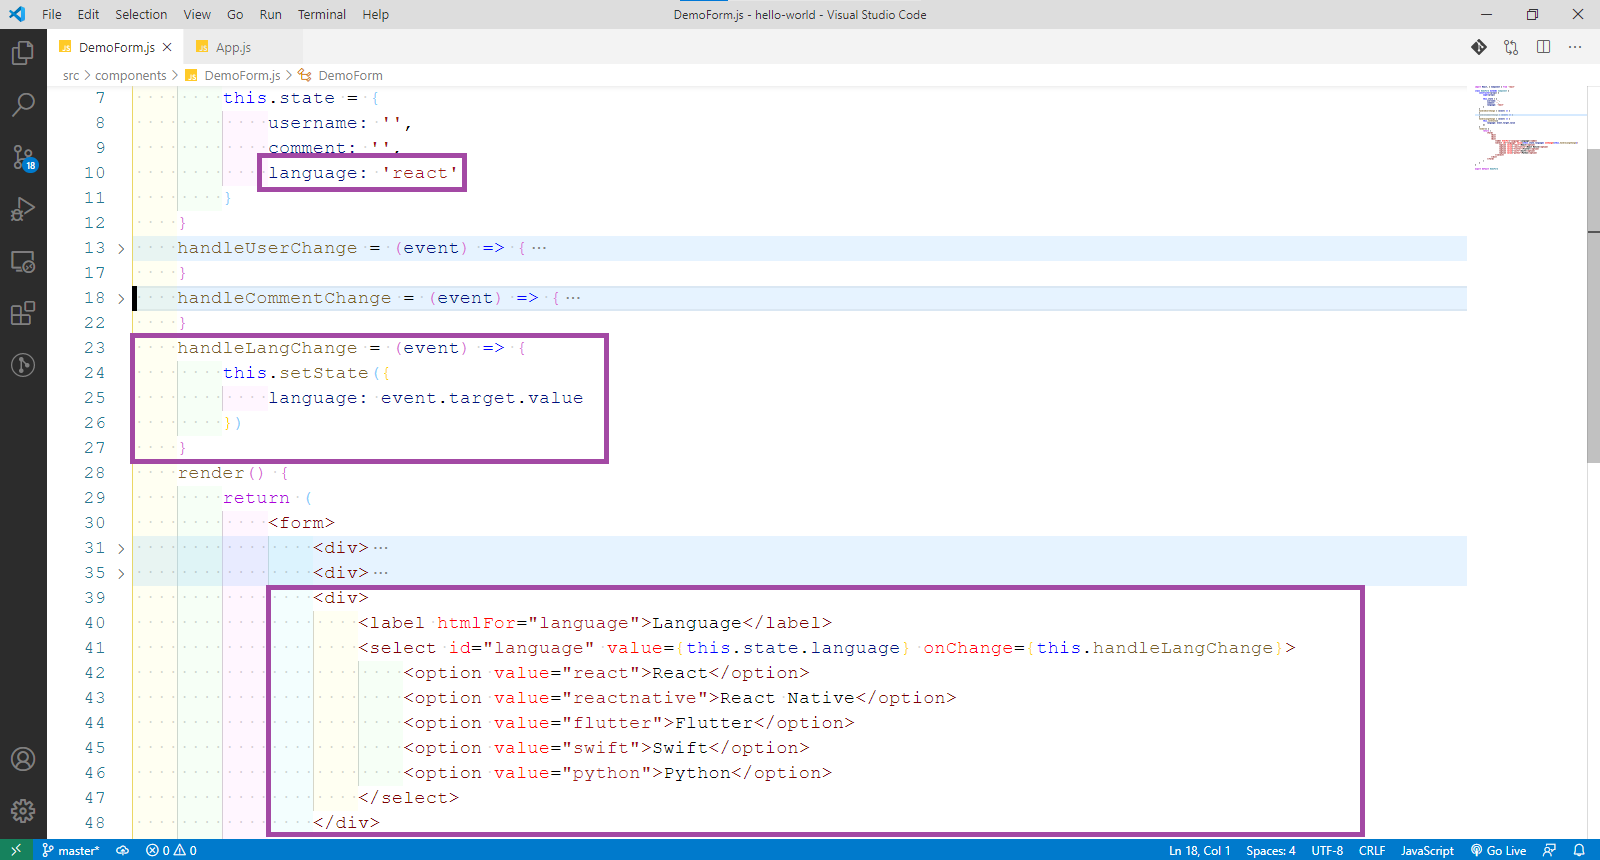
Next, we will add a dropdown menu to the form. The code will be almost same, except the different syntax for a select.
Also, notice that we are giving an initial value of react instead of empty string. This is the value we have specified inside the option in select.
 DemoForm.js
Now, in localhost all three of them are editable.
 localhost
Now, we will learn to submit the form data entered by the user. We have a button with type=”submit”, so we can use the onSubmit event handler on the form.
Now, when the user clicks or press enter the handleSubmit() function will run. Here, we are first preventing the default behavious of HTML form, which is to refersh the browser.
After that we are console logging the the data enter by the user, with the help of state. In a real scenario, we would have been sending this data to a backend API.
 DemoForm.js
Now, goto localhost and enter the data. After that open the console and click on the submit button. You will see the data been shown in the browser console.
 localhost
This completes part-10 of the series.