ReactJS Tutorial for Beginners -18
by Nabendu Biswas / October 28th, 2020
#javascript #beginners #react
Series: React-Basics
Welcome to final of the series. We will learn to do http request in this part.
React and HTTP
React doesn’t have any http capabilities, because it is just a library which is concerned with state and props to display the UI. But, we can add almost any functionalities to react with the use of external libraries.
We can use library like axios or the in-build fetch api to do http requests. The logic for the same can be understood from the below diagram.
Here, our application is sending request to the http library, which then handles all logic to communicate with the server and getting the data back. Our react application then with the help of props and state display the data.
 Web request
The Code
We will create a new project for this part. So, head over to your terminal and create a new project with the below command.
npx create-react-app react-http
I am creating it with our React-Basics folder, which also contains the hello-world project in which we had done work till now.
 React command
After the project is created, we need to goto the react-http folder and run the command npm start. Our new project is now been shown on localhost.
 New Project
HTTP Get
We are first going to do a GET request to an API endpoint. We are going to use the awesome fake api end point of json placeholder https://jsonplaceholder.typicode.com/posts , which gives us a list of 100 posts. It will give as an array of objects.
 API Endpoint
We will now open our code in VS code and render a new component PostList, which we are soon going to create.
 PostList
Next, create a folder components inside src and create a file PostList.js inside it. It’s a simple class based component, in which we have an state of posts.
Next, we will be using the in-built fetch api(in browser), to call our api endpoint. We are using the latest syntax of async-await to fetch the data in the componentDidMount() lifecycle hook. The api endpoint will return a promise and we need to await for it. The fetch api requires another await on res.json() and we will get our data containing 100 posts from the server.
 PostList.js
Now, we just need to set the state posts to the received posts variable. Now, in our render(), we are first destructuring the posts. After that we are checking if the posts is there by posts && posts.length and then mapping through it to show the title in the browser.
 title
title
HTTP Post
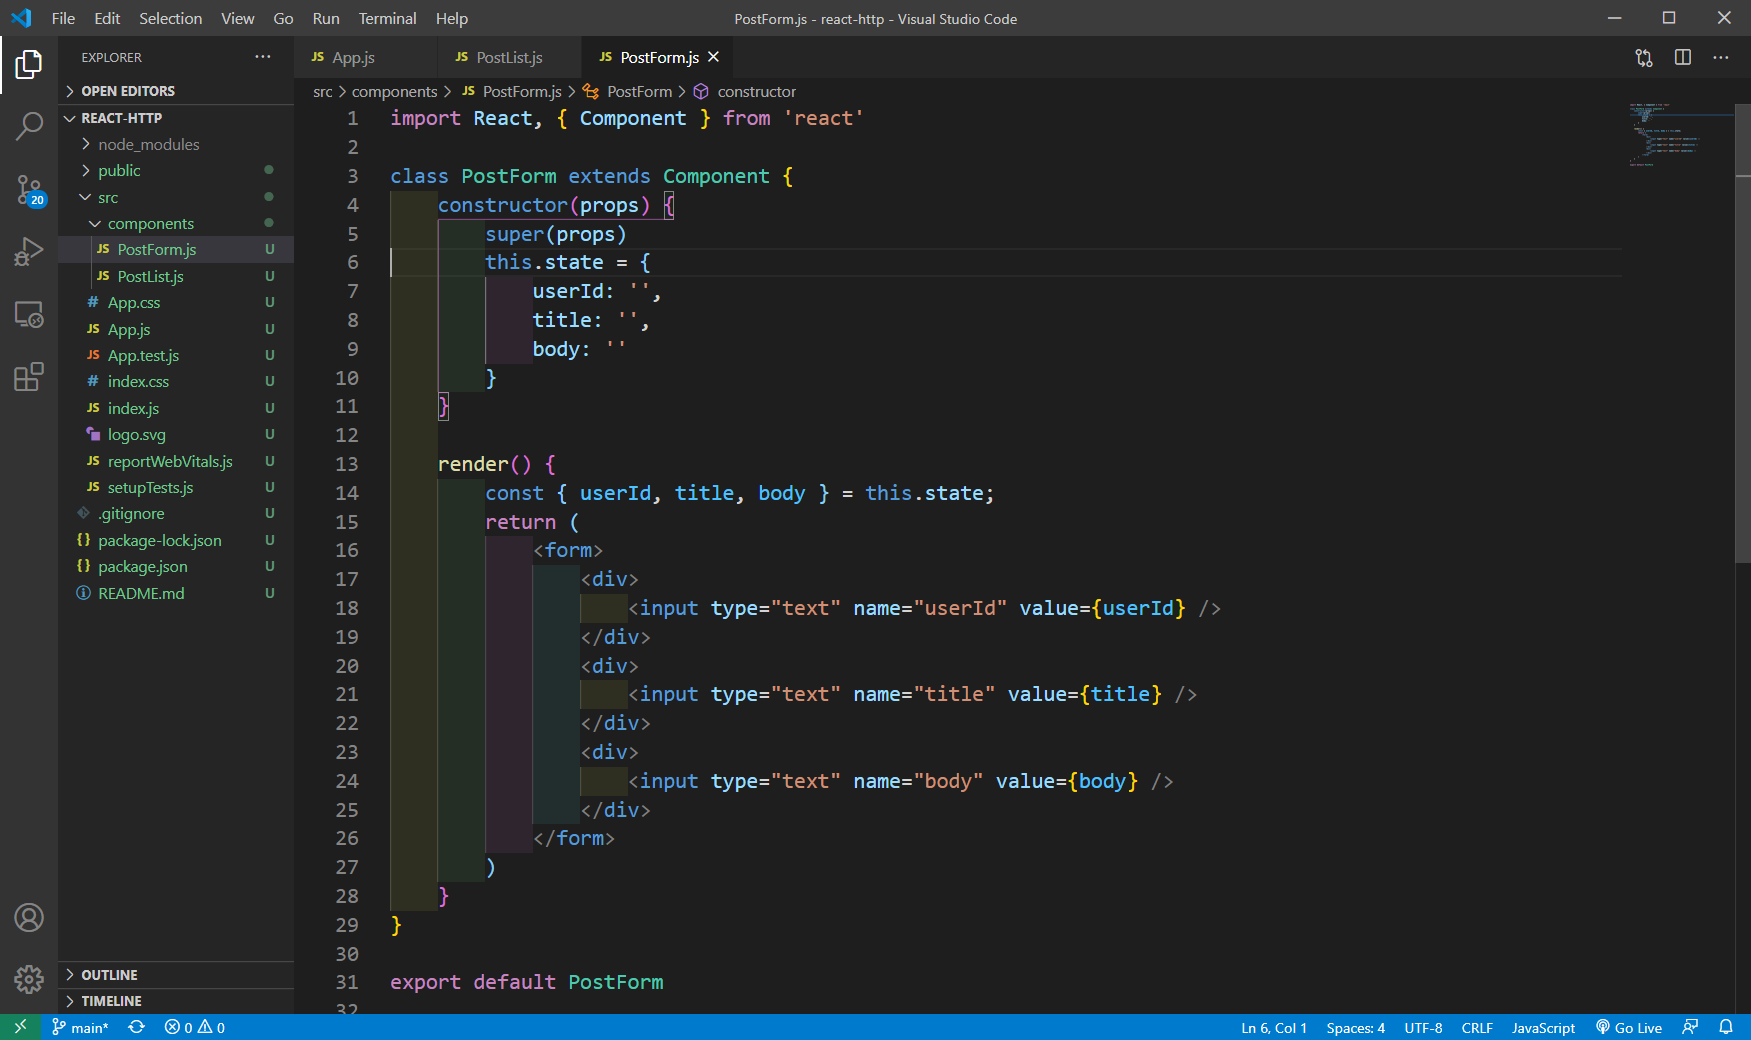
For the Post request to the same jsonplaceholder, we need to send userid, title and body to it. So, let’s go ahead and create a file PostForm.js inside the components folder.
We are creating a form and within it, three input boxes. We are also creating three state variables userId, title and body and assigning to the value.
 PostForm.js
Next, we will add an onChange handler to all our input. In the handleChange function, we are using computed properties. The computed properties, helps us to dynamically use the name. You can read more about it here.
We have also added a button and onSubmit handler in the form.
 handleChange
Next, we will add this to our App.js and it will be shown in the browser.
 App.js
Now, we will add the logic to do a Post request in the handleSubmit(). Now, the POST have more code then our GET in fetch api. We have to pass a settings object here, which contains method, headers and body. The method, headers are mostly similar to the code, but we mainly pass the data in the body. Here, we are stringify the state.
We are then doing the fetch call similar to the get part, but with the additional parameter of settings. We also have an optional try-catch statement wrapping the awaits. It is generally recommended and could have been used in the GET part also. They catches any error if happen to the API call.
Now, when we enter the data in the input boxes and Submit, it get’s submits to our endpoint successfully and we get back the data.
 handleSubmit
This completes final of the series. See you soon Redux tutorials.
You can also find the code for the same in github repo, here.