ReactJS Tutorial for Beginners -4
by Nabendu Biswas / October 14th, 2020
#javascript #beginners #react
Series: React-Basics
Welcome to part-4 of the series. We will learn about JSX first in the series.
JSX
JavaScript XML(JSX) is an extension to the JavaScript language syntax. Some feature are -
- Write XML like code for elements and components.
- JSX tags have a tag name, attributes and children.
- JSX is not a necessity to write React application.
- JSX makes your react code simpler and elegant.
- JSX ultimately transpiles to pure JavaScript which is understood by the browsers.
Component with JSX
We have been creating component in the previous part with JSX and we will again create one more with it.
We are creating a simple functional component Hello, with a div and h1 tag.
 Hello.js
After that we will show the component Hello in the App.js file. We are also commenting out the components created in earlier parts.
 App.js
Now, it will show the component in our http://localhost:3000/
 localhost
Component without JSX
We will now convert the same Hello component to be used without the JSX. React provide us with React.createElement to do that.
So, it takes three parameters — one is the tag which is div in our case, the next is null and the third is the element inside it. For us it is the h1, so we are again using the React.createElement
 Hello.js
The second null parameter is the key value pair, which specifies the id or the class attached to the element. I have also added the equivalent code in the commented out JSX code.
 Hello.js
Now, if we inspect our element we can see both the id and the class. You might have notice that we used className instead of class, because in JavaScript class is a reserved keyword. So, in React we use className, which gets converts into class in the DOM.
 id and class
So, with the above the problem with is obvious. Our component have two elements, but most React components have more then 10 elements. So, we have to nest them one inside the other and the code gets complicated soon.
JSX differences
As we have seen the difference with class in JSX. There are some more differences with JSX and we will learn more about them later.
class -> className
for -> htmlFor
Property naming convention are camelCase.
onclick-> onClick
tabindex-> tabIndex
Props in ReactJS
We will learn about the concept of props in React. Till now all our components have been very static and we have not seen the use of component reusability.
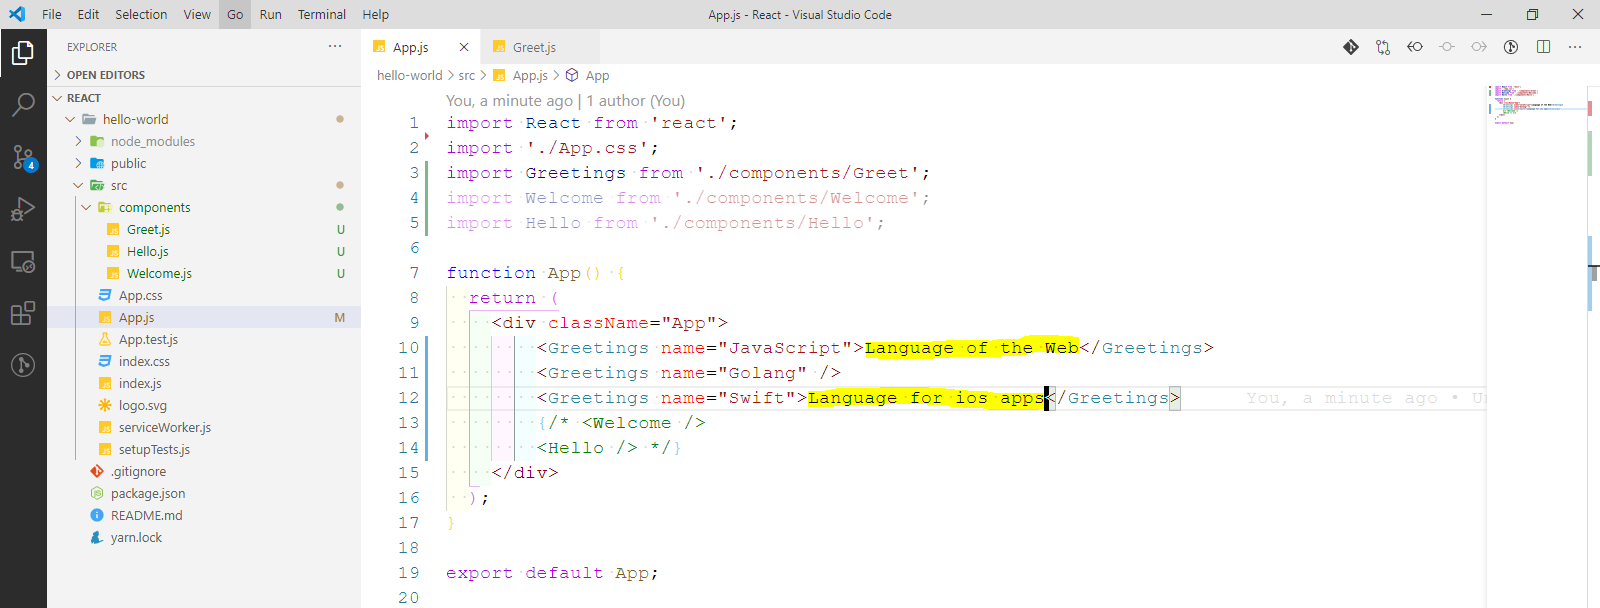
Props are passed as attributes to components. In the App.js we are calling the Greetings component three times and each time with a different attribute.
 App.js
Next, we will move to Greet.js to use the props. First we need to pass the props keyword as parameter. Next, just doing console log to check the value of props. After that in the return statement we are using it by props.name. Notice the curly bracket wrapping it, they are to evaluate the JSX expression.
 Greet.js
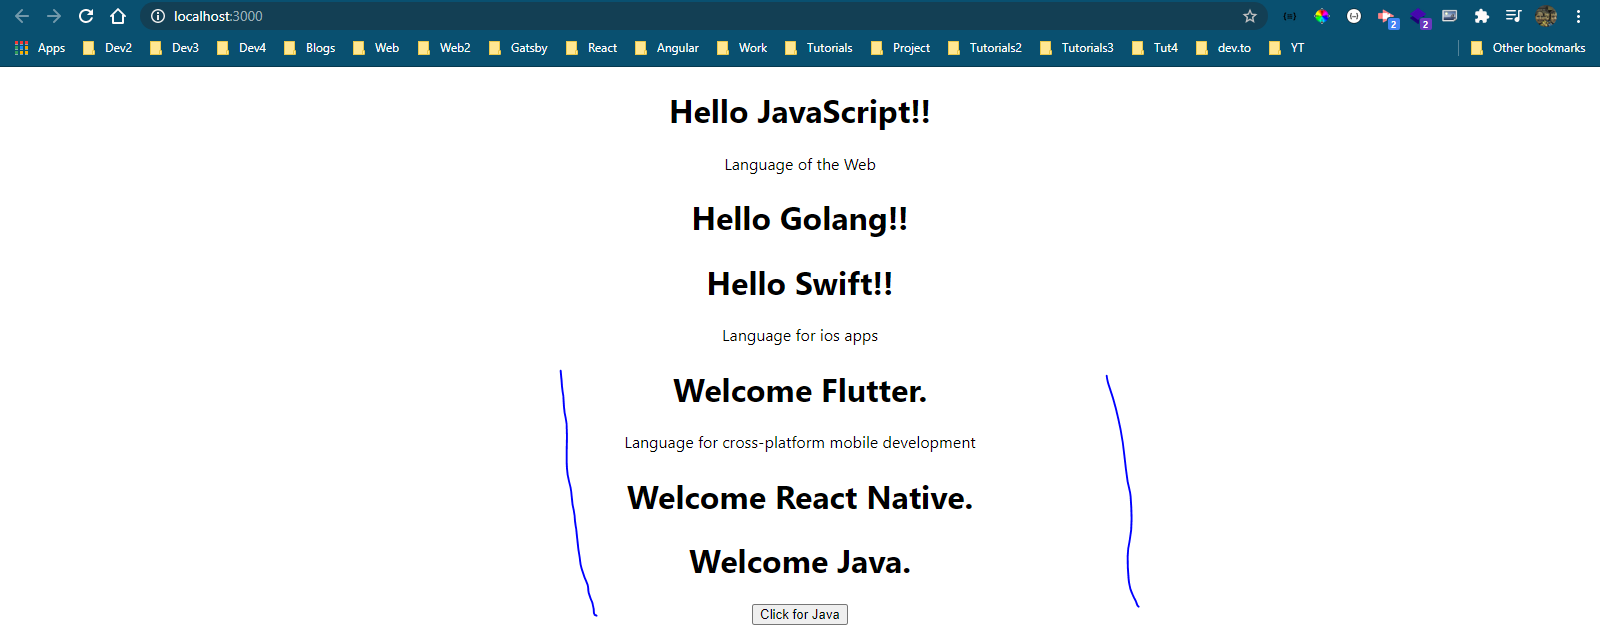
Now, in our http://localhost:3000/ we can see three different props which were passed from App.js to Greet.js. Also, the console shows the props object.
 localhost
We have another type of props called children. They are specified within the opening and closing brackets of the component as shown below.
 props
props
Now, in our Greet.js, we are using it within a paragraph tag as props.children. Also, notice that the h1 and the p tag are wrapped in a pair of empty tag. This is know as React fragment as React needs the same tag as start and end. We could equally use a div tag in it’s place.
 Greet.js
It will show as below in localhost.
 localhost
Next, we will use props within a class component. The passing of attribute from App.js is similar to a functional component.
 App.js
But in Welcome.js, we will use the props with the this keyword. Also, notice that we have used div instead of a fragment here.
 this
this
It is showing perfectly in localhost.
 localhost
This completes part-4 of the series.