React Redux tutorials for beginners- 4
by Nabendu Biswas / January 8th, 2021
#react #beginners #redux
Series: Redux-Tutorials
Welcome to part-4 of the series. We will learn about the concept of middleware in this part.
Middleware
Let’s learn about middleware now. Some points about them are -
It is the suggested way to extend Redux with custom functionality.
It provides a third party point between dispatching an action and the moment it reaches the reducer.
We can use middleware for logging, crash reporting, performing asynchronous tasks, etc.
The first redux middleware, which we are going to use is redux-logger. It is a simple middleware used to log all the states of a redux application.
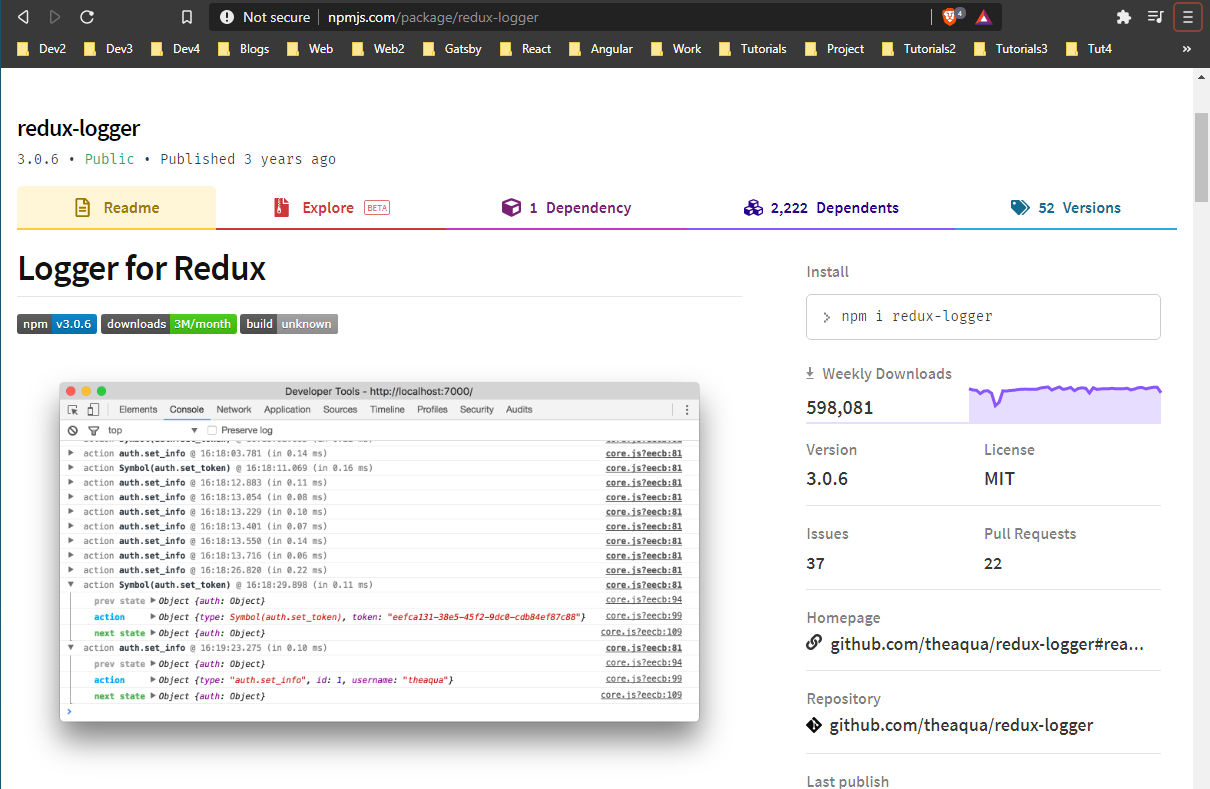 Redux logger
So, to install the package we need to go to our terminal and do a npm install redux-logger.
 redux-logger
Now, we will include it in our application by the mentioned import statements below. The applymiddleware is provided to us by redux.
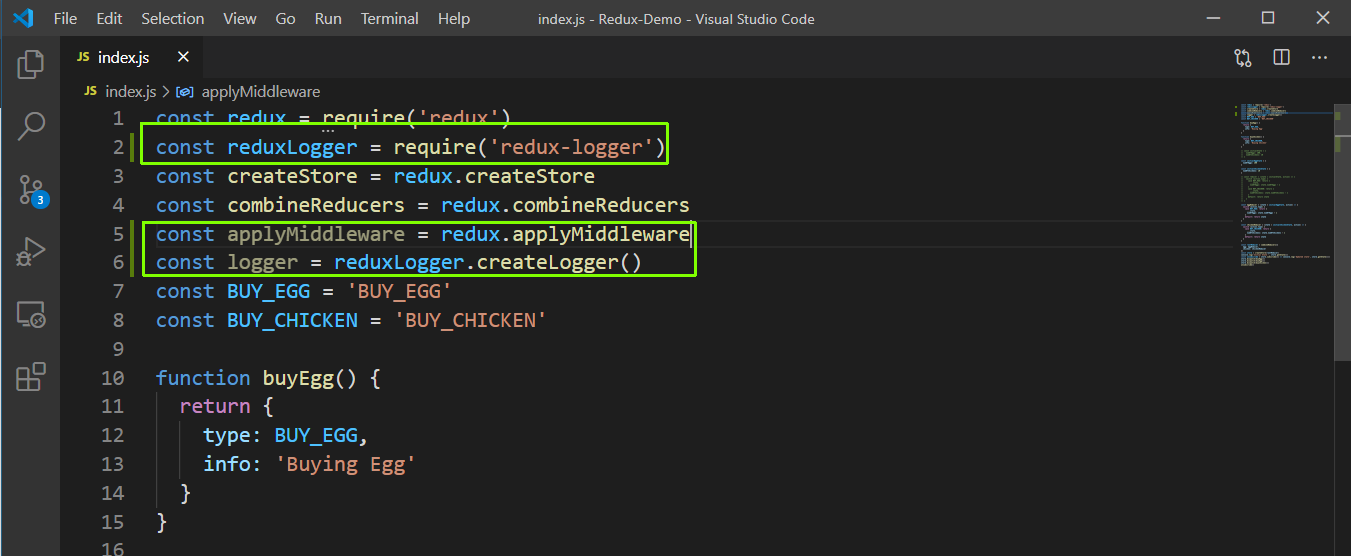 middleware
Now, to use this middleware we have to add it to the store. We are giving a second parameter to createStore() and using it there.
The redux-logger middleware creates logs, so we are removing the console log in subscribe method at line 77.
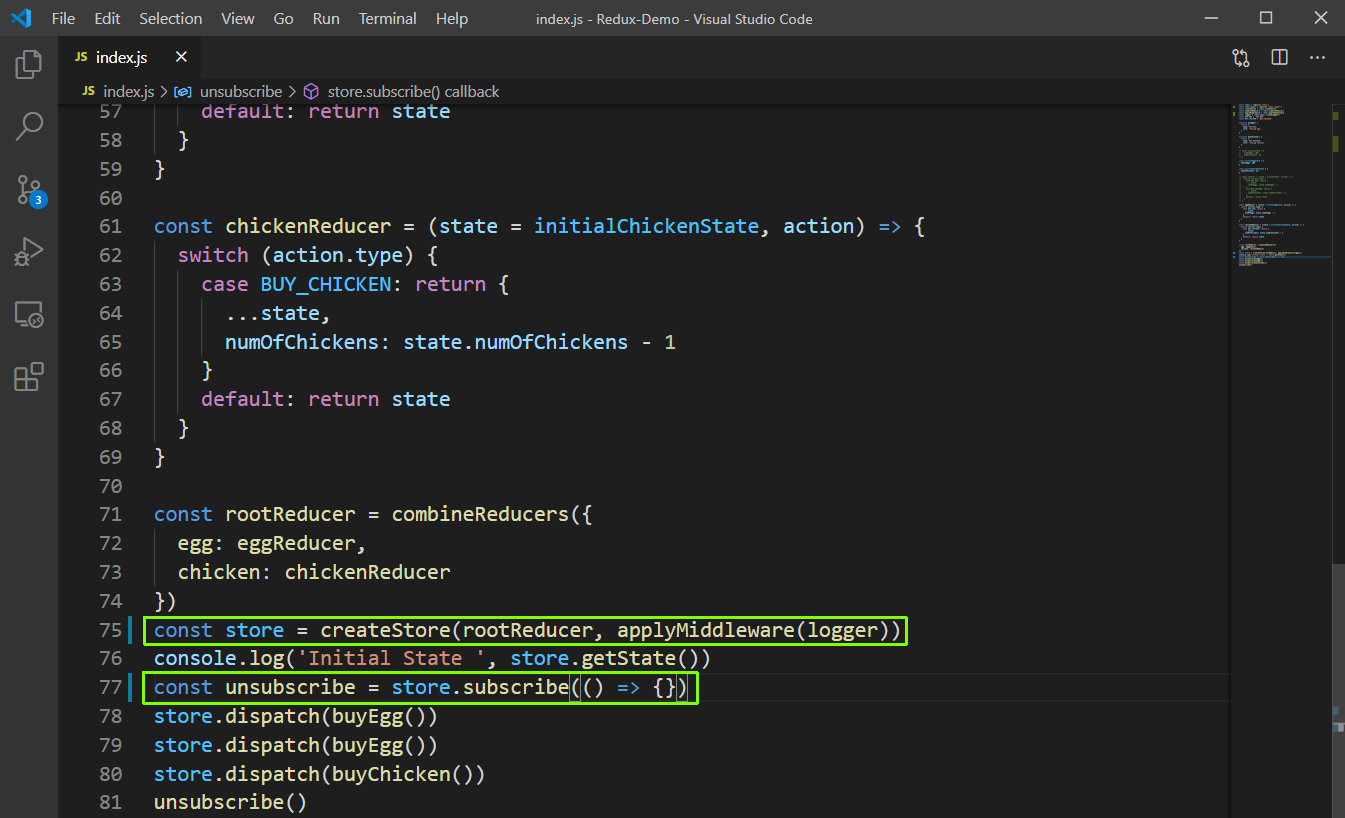 redux-logger
Now, when we do node index from the terminal we can get the logs from redux-logger middleware.
 redux logs
Async Actions
We have till now look only into synchronous actions, but in real world applications we do a lot of api calls to get the data. Now these actions are created asynchronous, because it involves getting the data from the server and some 1–2 sec. But we don’t want our application to stop for the time. You can read more about it in my earlier blog post here.
We will create an application to do the api call and display the data. Create a new file asyncActions.js. We are first creating an initialState object, with loading, users and error key-value pair.
Next, we are creating our three constants for request, success and failure.
 asyncActions.js
Now, the next thing which we will create is action creator. Our application will have three action creators- First one fetchUsersRequest, to send the request to the api endpoint for the users data. Second, one fetchUsersSuccess, we receive from the api endpoint in case of success and the third one fetchUsersFailure, we receive in the case of a failure.
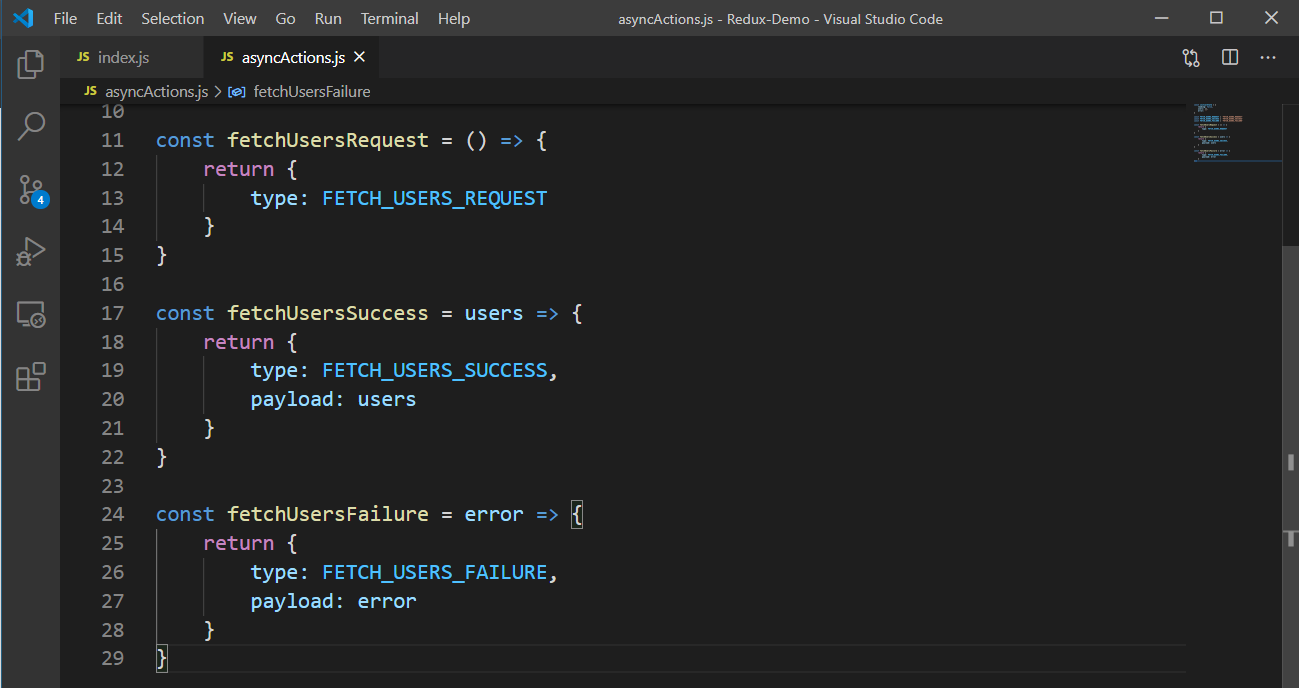 action creators
Now, we will define our reducer function which will have a two parameters, default value of initial state and an action. Based on the action type, we need to return a new state. We are using switch statement for this.
We are checking all our three cases here. When the api call is been made the FETCH_USERS_REQUEST, reducer is executed. Here, we are copying the state and setting the loading as true. We are doing this to show the spinner in most React project.
When the FETCH_USERS_SUCCESS, reducer is executed we are making the loading as false and also making the users equal to the payload which we will receive from the api.
If the api call fails, the FETCH_USERS_FAILURE will be executed. Here, we are making the loading as false and the users as an empty array. Also, we are updating the error state, which we are going to receive from the api.
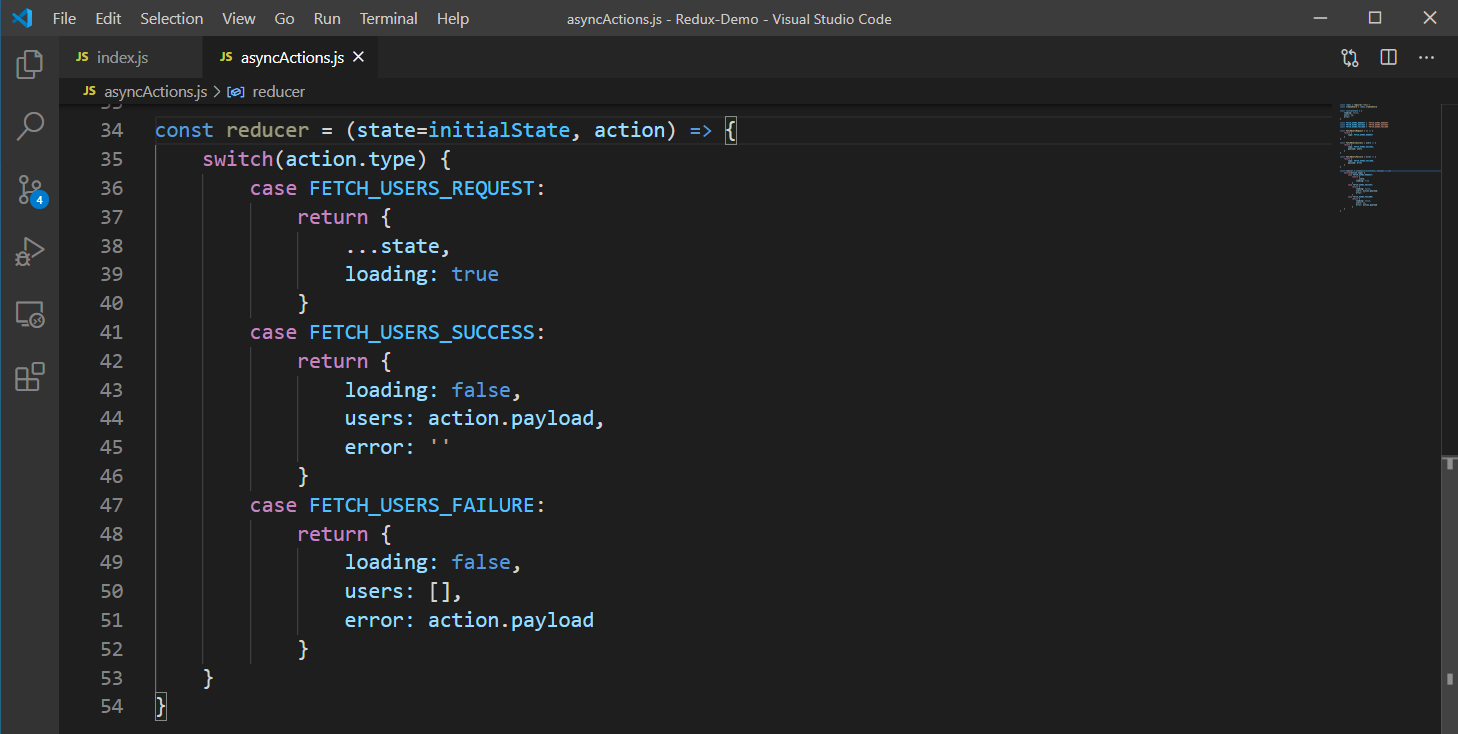 reducer
Now, the final step is to create our redux store. Here, we are first importing the required functions. After that in the createStore passing the reducer.
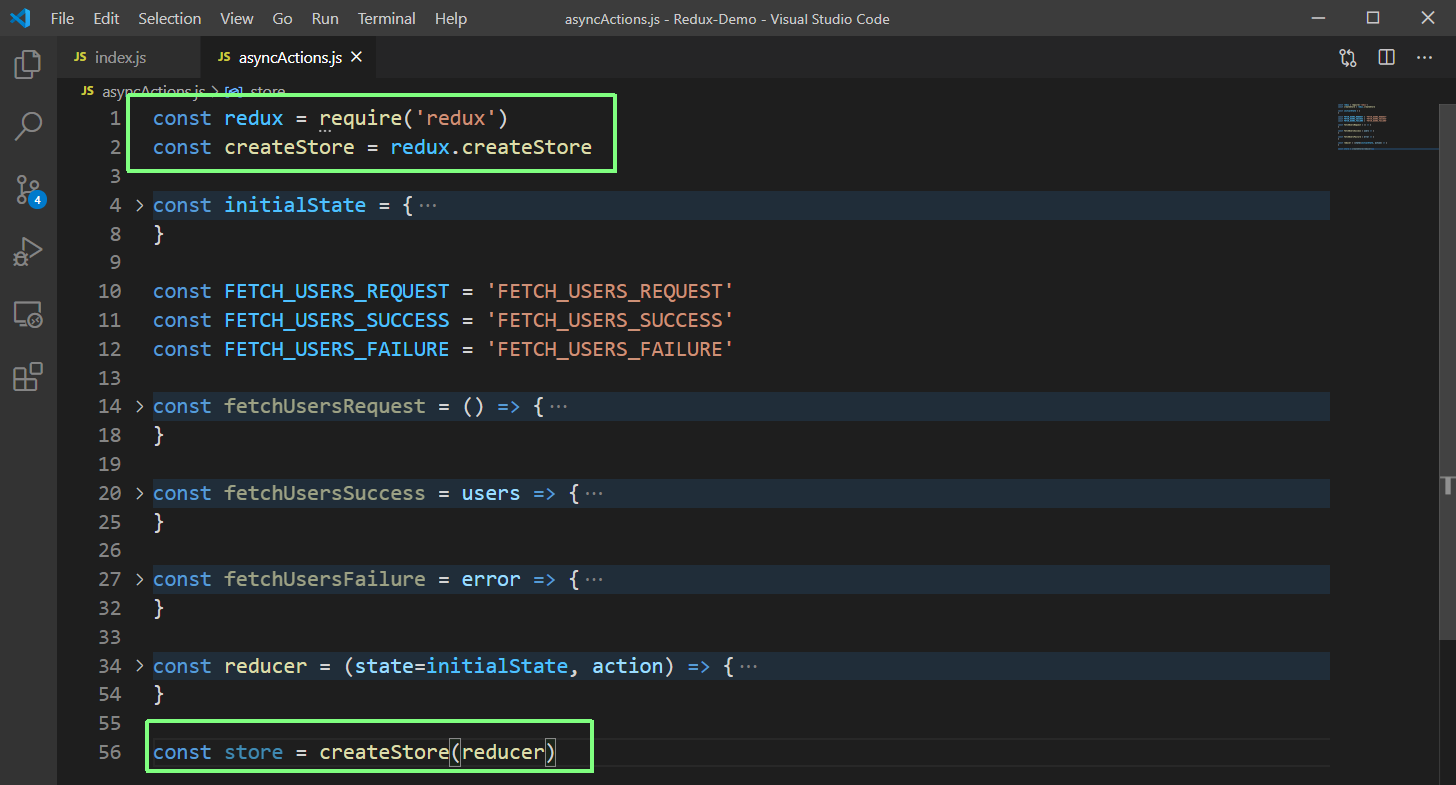 store
store
Now, we need to do the api call. For doing the api call, we will use two packages — axios and redux-thunk.
Axios is like fetch api and is used to make the api call. redux-thunk is the middleware and is used to define the async action creator.
So, head over to terminal to install these npm packages, with this below command.
npm install --save axios redux-thunk
 npm install
We are first importing them at the top and then using the thunk middleware in the createStore function.
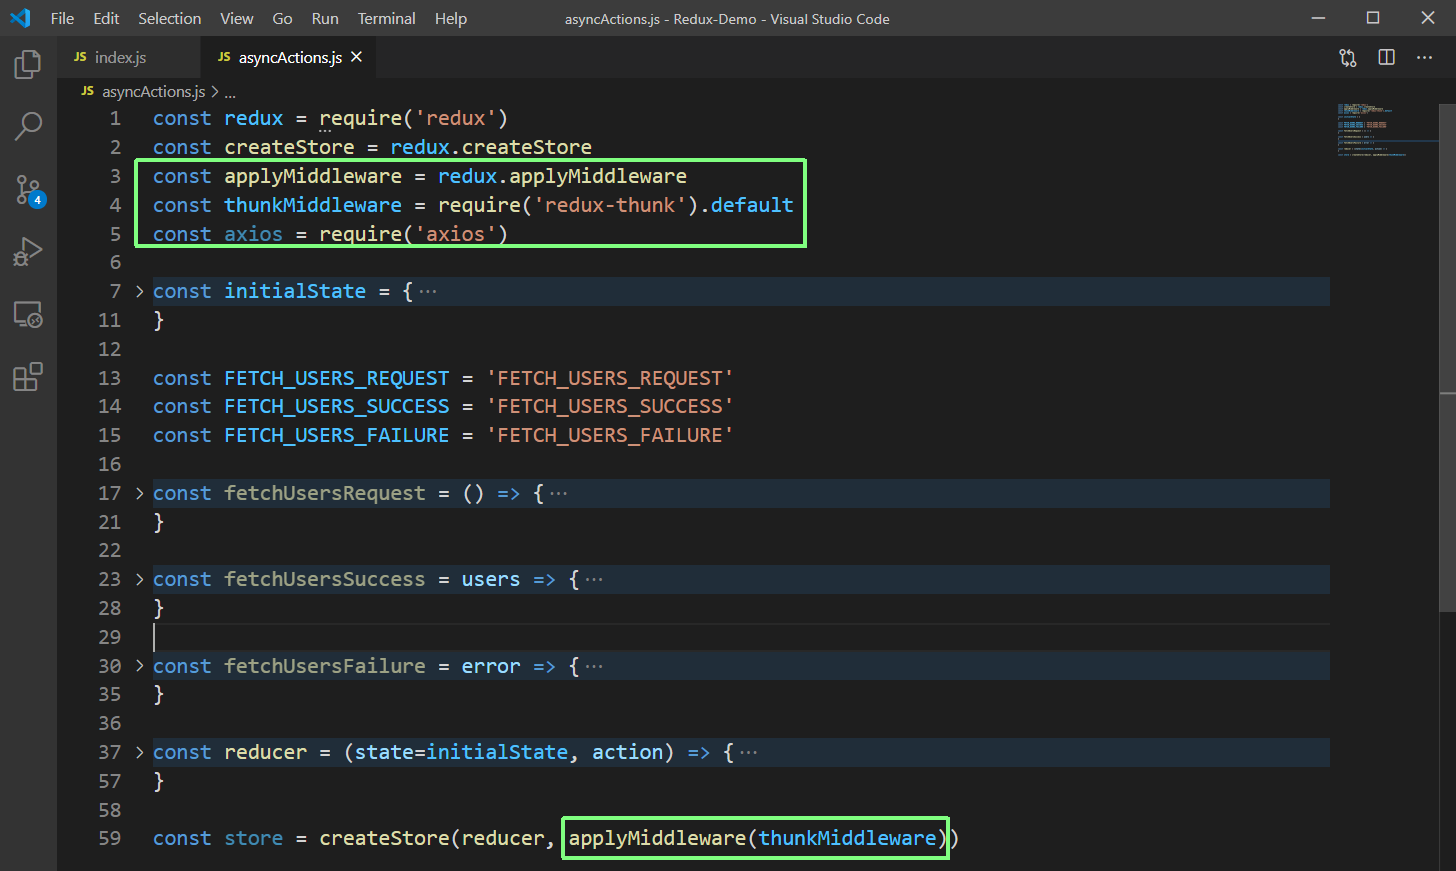 thunk middleware
Now, we will make the api call. We will create a function fetchUsers(), in which we are returning a function with dispatch. Inside it we are first dispatching our action creator fetchUsersRequest(), which will in-turn also execute our reducer case FETCH_USERS_REQUEST. Next, we are doing the api call, with help of axios to our jsonplaceholder endpoint.
In the case of success, we are extracting the name of the user by mapping through the returned array of object. We are then dispatching this data to our action creator fetchUsersSuccess(), which will call the reducer FETCH_USERS_SUCCESS and make the users state equal to the payload.
Now, when we run the command node asyncActions.js from the terminal, we will see the whole process in action for the success of the api. We will also see the ten users returned from our api endpoint.
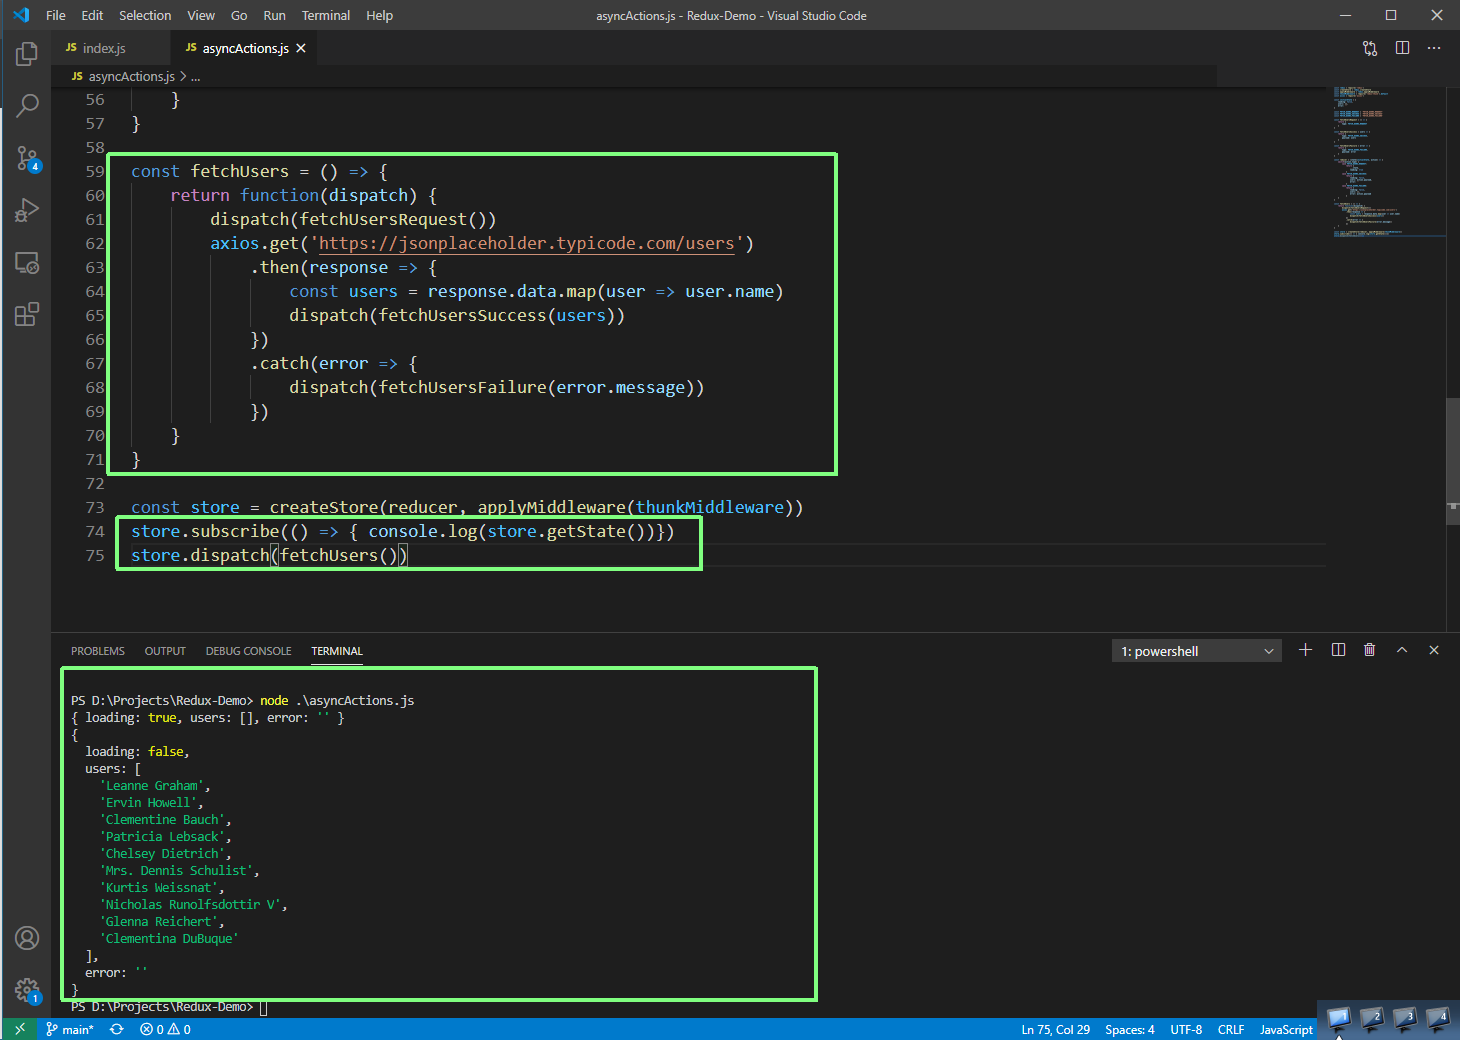 Success
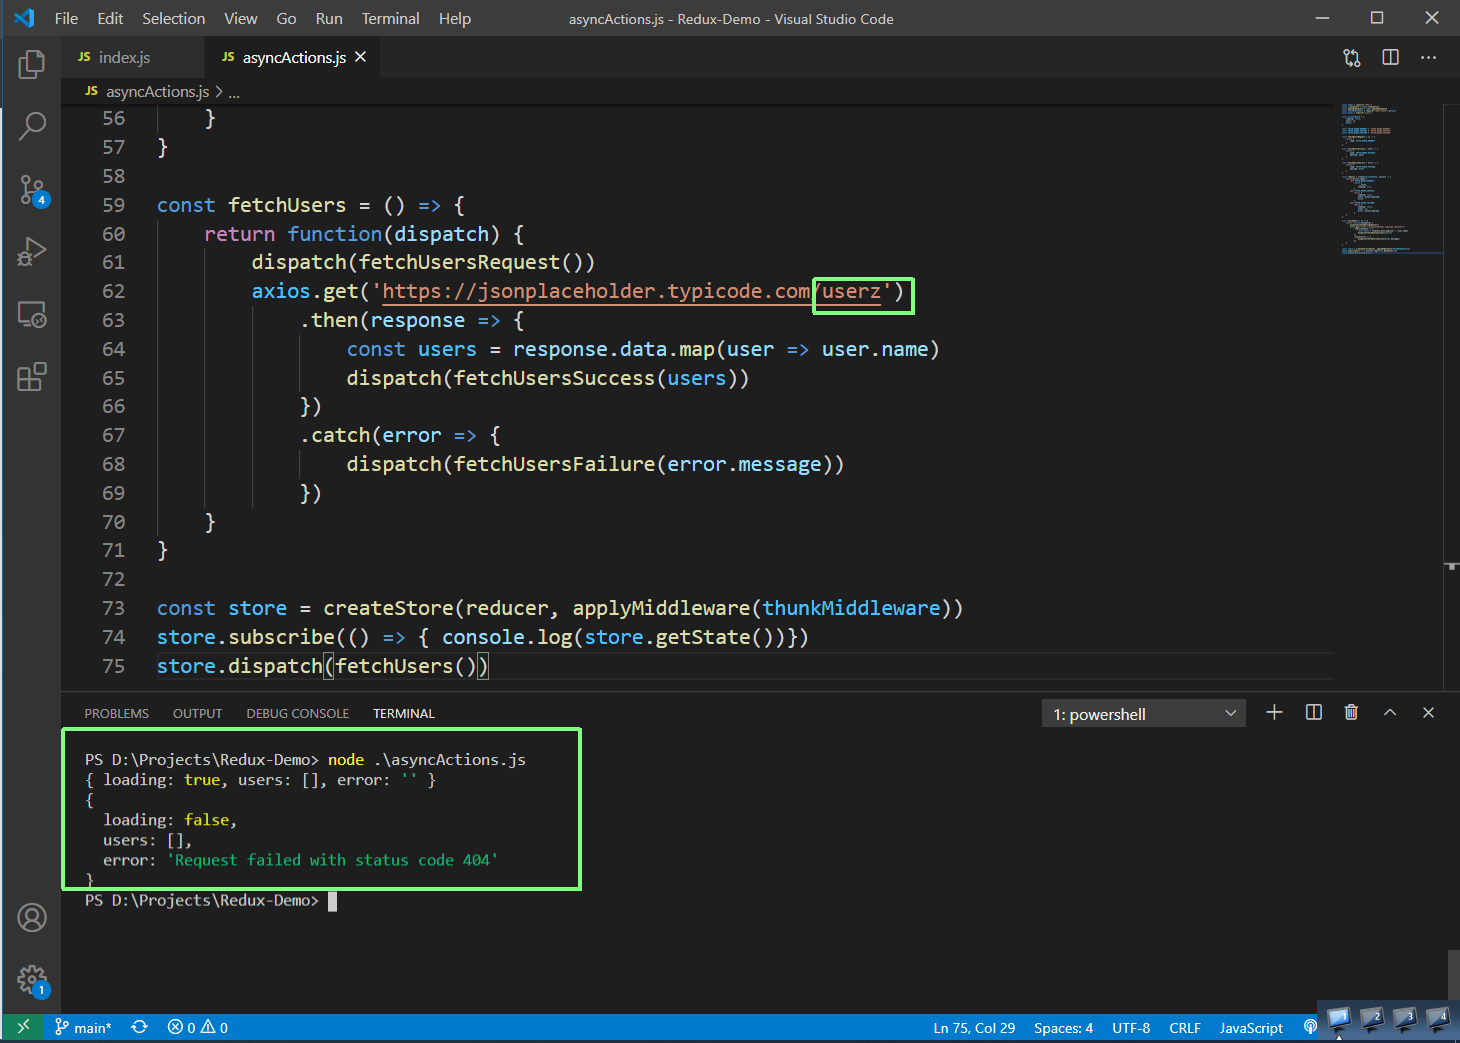
Now, we will make the api call fail, by giving wrong endpoint and running the node asyncActions.js from the terminal again.
Here, we will see the whole process for the failure, in which the catch part of the axios runs. We are dispatching the action creator fetchUsersFailure() here, which will run the reducer case FETCH_USERS_FAILURE and fill the error string.
 error
error
This completes part-4 of the series.
You can find code till here in this github repo.