Build a simple React website with Tailwind CSS
by Nabendu Biswas / September 16th, 2021
#css #tailwind #react
In this post we will build a simple ReactJS app with Tailwind CSS and in this process will learn to add Tailwind CSS to our app.
So, open your terminal and create a new ReactJS application by using the command below.
npx create-react-app tailwindcss-reactjs
Now, as per the instructions, change to the newly created folder. I have also opened the project in VS Code.
 Open
Open
Now, tailwind CSS installation process is different for every platform and we will follow the React one at https://tailwindcss.com/docs/guides/create-react-app
So, first we need to install the below packages in our project with Dev dependencies.
npm install -D tailwindcss@npm:@tailwindcss/postcss7-compat postcss@^7 autoprefixer@^9
Next, we need to install another dependency.
npm install @craco/craco
Next, in package.json we need to update three scripts as shown below.
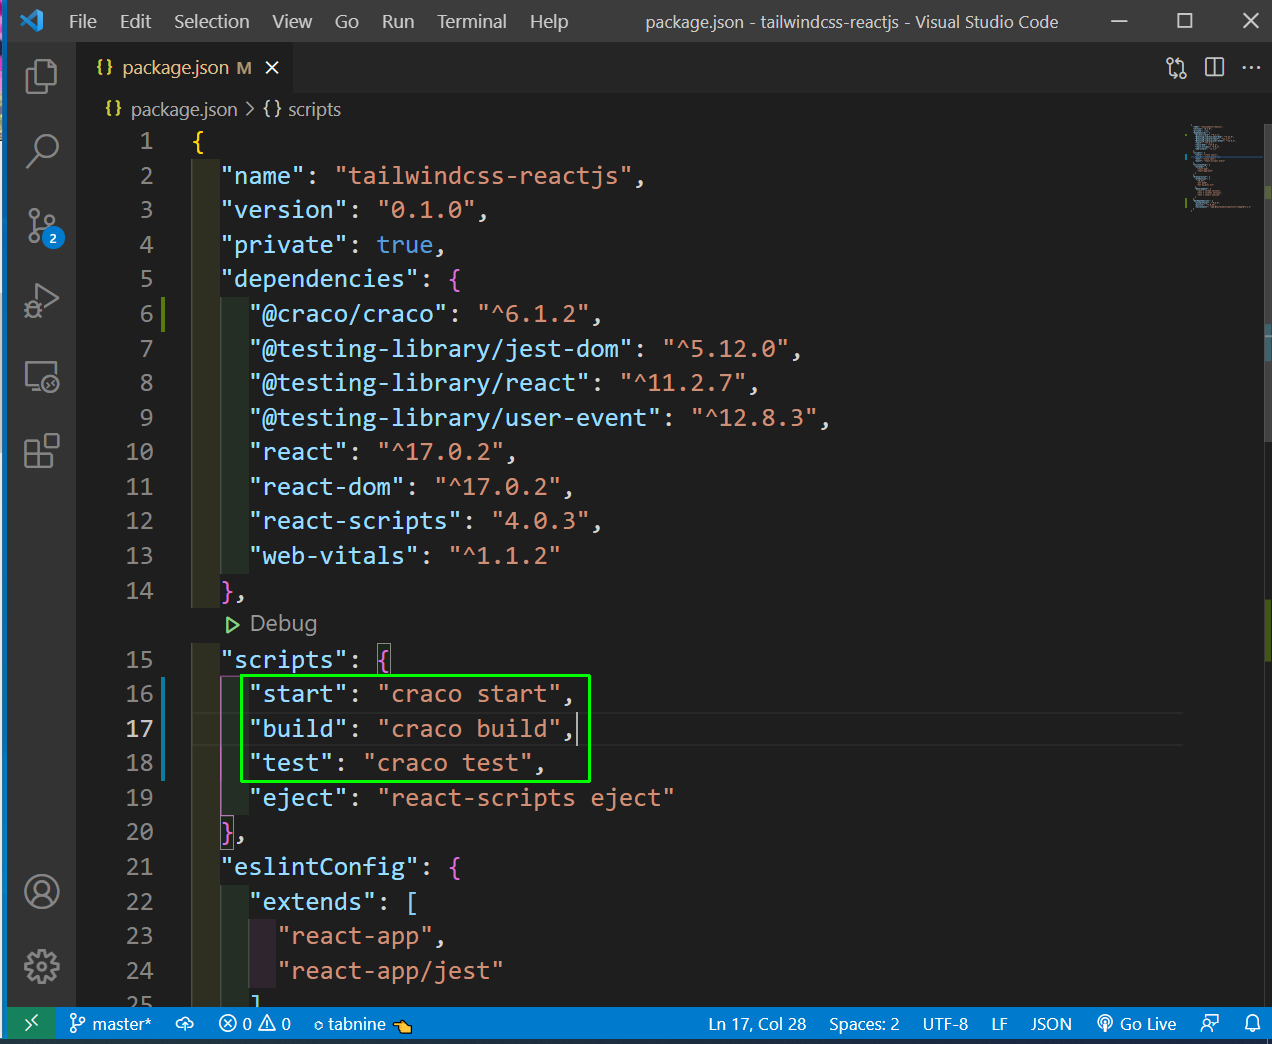 package.json
Next, we need to create a file craco.config.js in the root directory and add the below content in it.
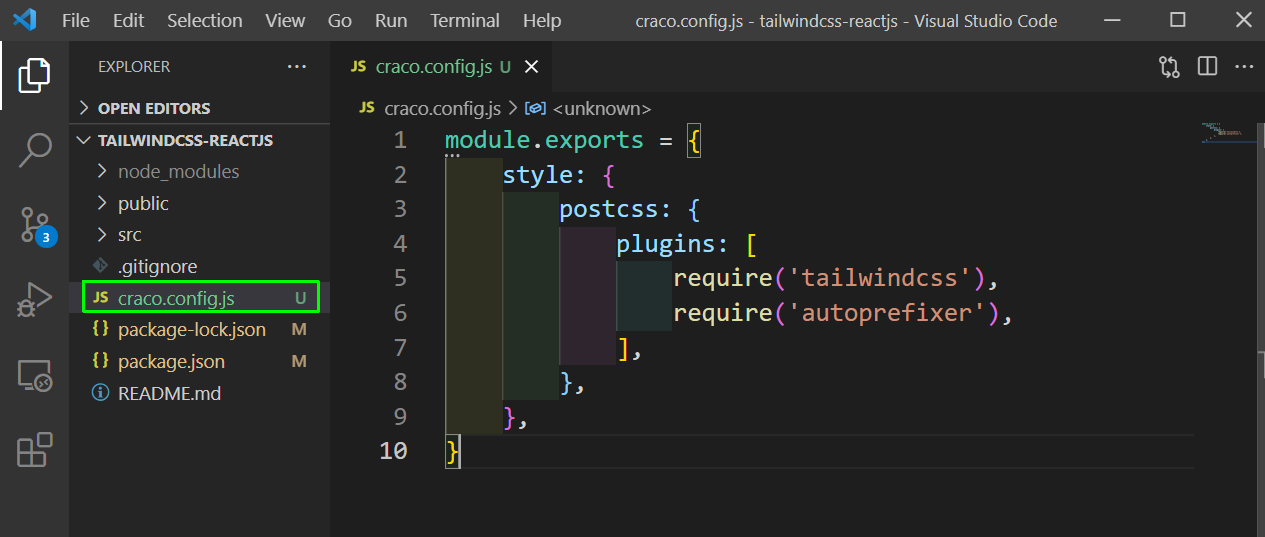 craco.config.js
Next, to generate tailwind.config.js file, we need to run the below command.
npx tailwindcss init
I was getting error with autofixer and found the solution in this stackoverflow link.
Now, again as per there documentation we need to update a line in the newly created tailwind.config.js file.
 tailwind.config.js
Then in the index.css file, we need to replace the old content, with the below mentioned content.
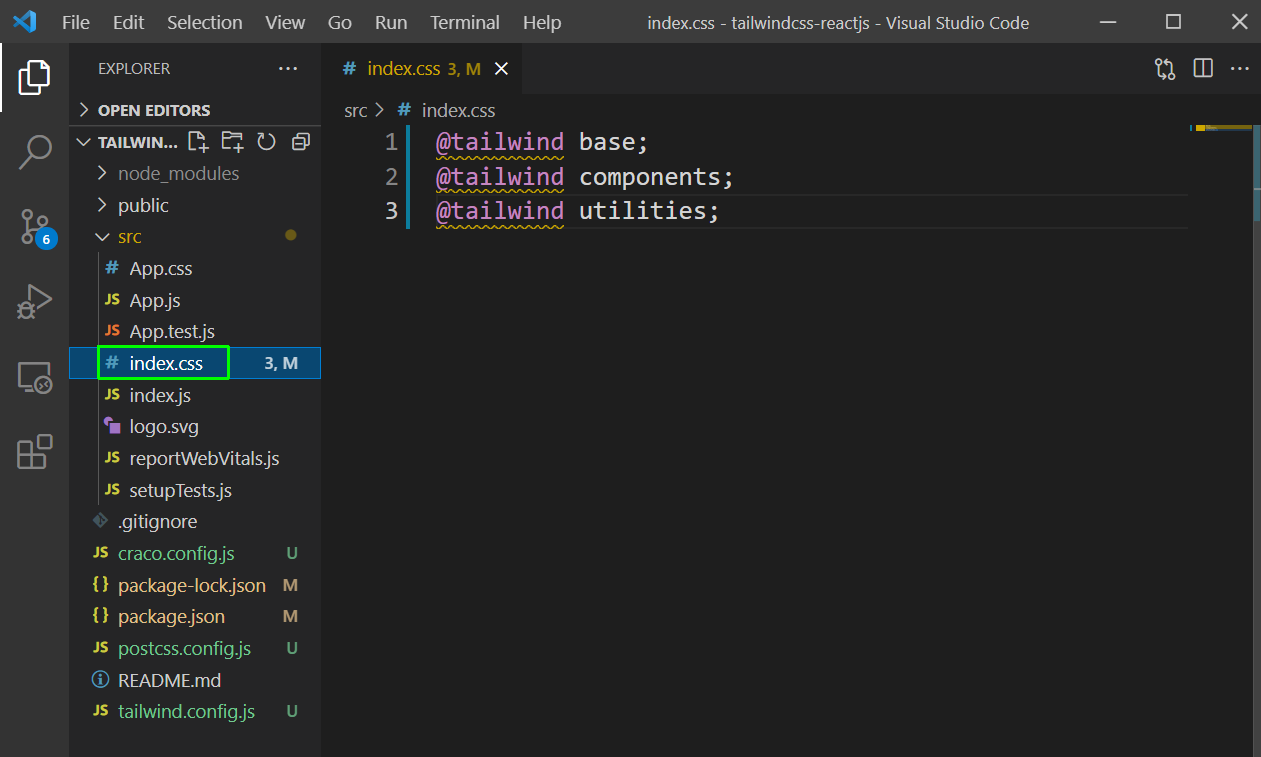 index.css
Finally, we can start our React App by running npm start and if everything is right, we will get below in http://localhost:3000/
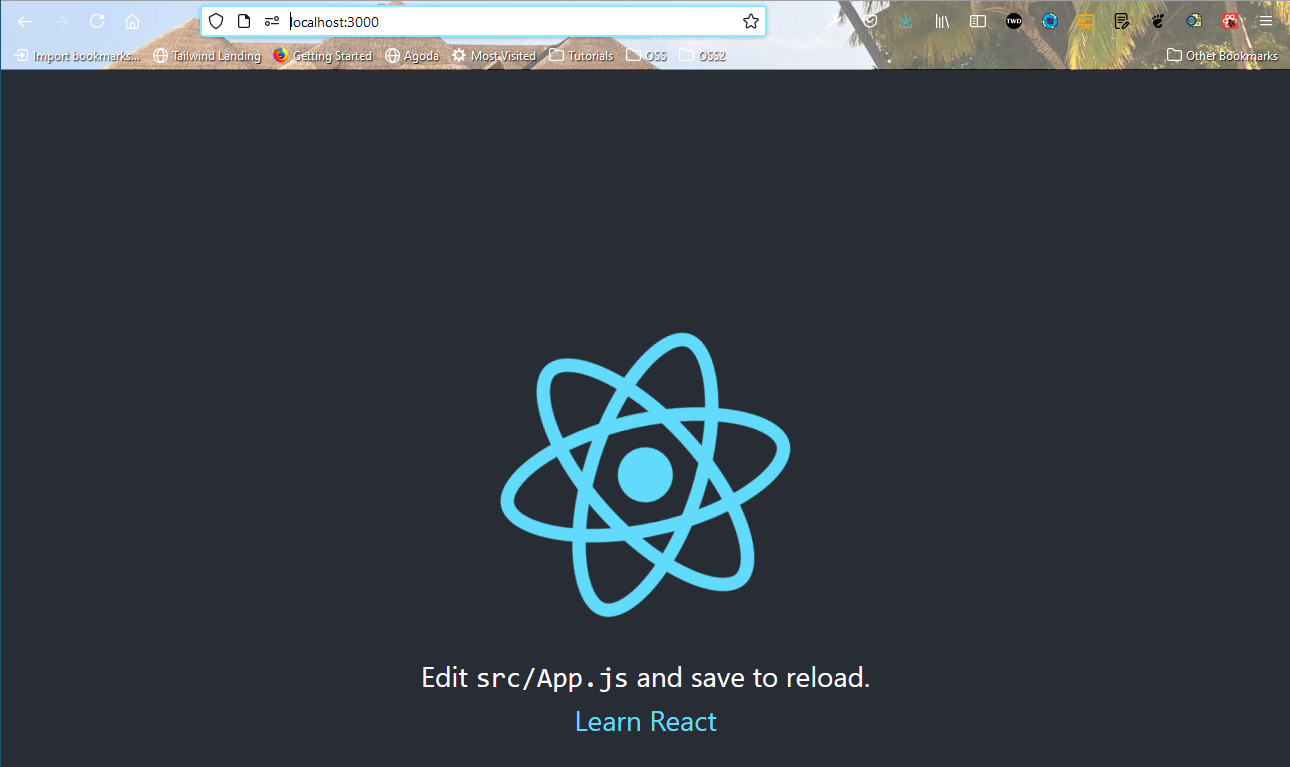 npm start
Now, create a components folder inside the src folder. Inside it create five files- Content.js, Dropdown.js, Footer.js, Hero.js and Navbar.js.
Now, before moving forward we will install React router in our project. I have installed the same from Integrated terminal in VS Code. After that imported it in index.js file and wrapped the App with the Router.
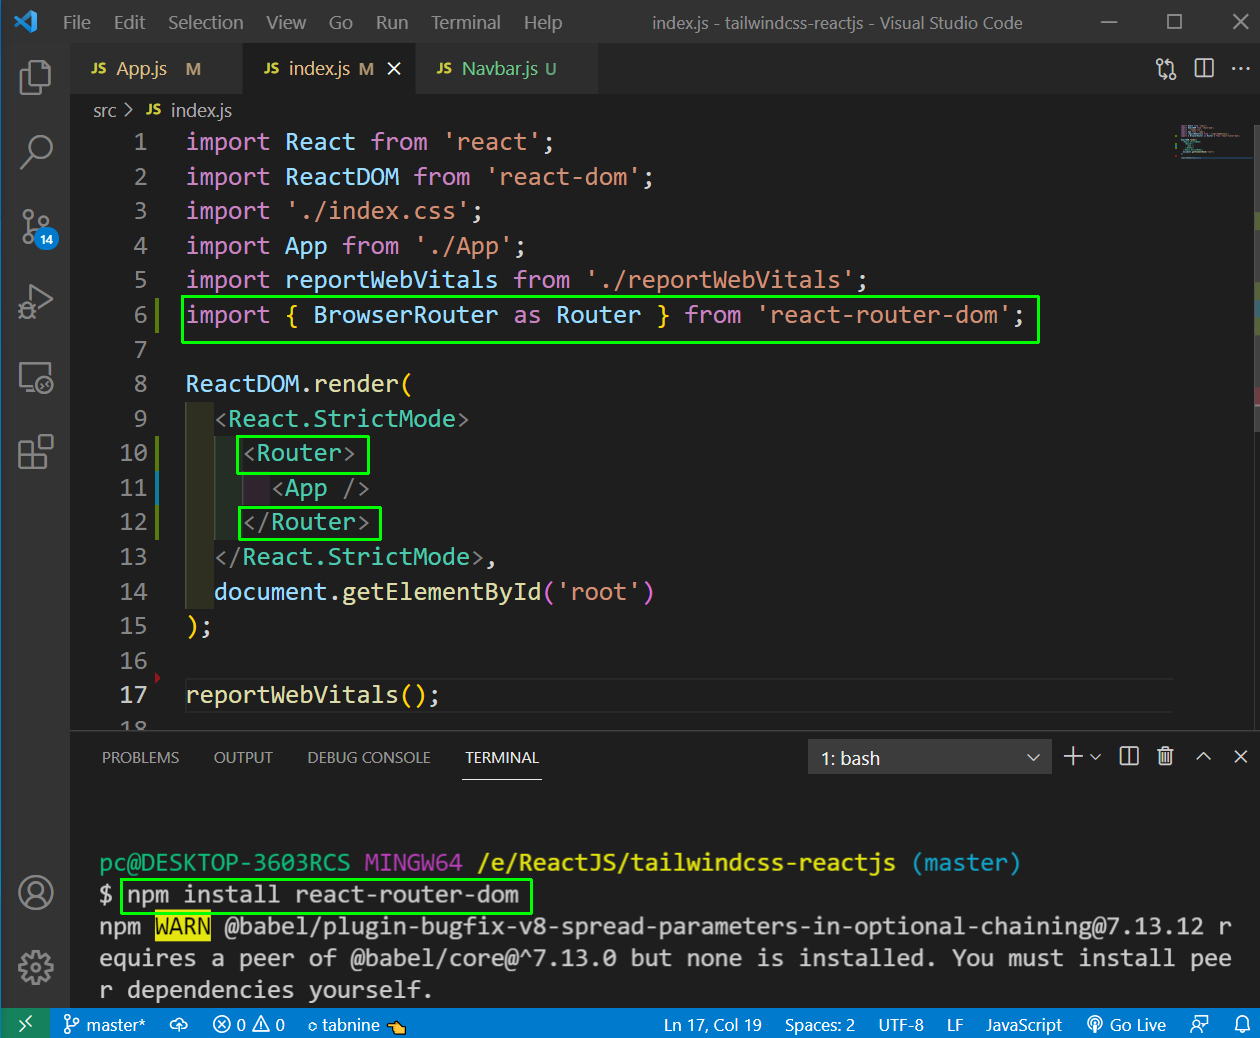 index.js
Now, remove everything from App.js file and add the below content in it.
import Navbar from './components/Navbar';

function App() {
  return (
    <>
      <Navbar />
    </>
  );
}

export default App;
Now, we will start to work on our Navbar.js file. We will be using an icon here, which we are taking from the https://heroicons.dev/?query=menu link. One thing to do for React is to click the Code icon at top right first, and then click on the Menu icon. By this it will be copied as svg.
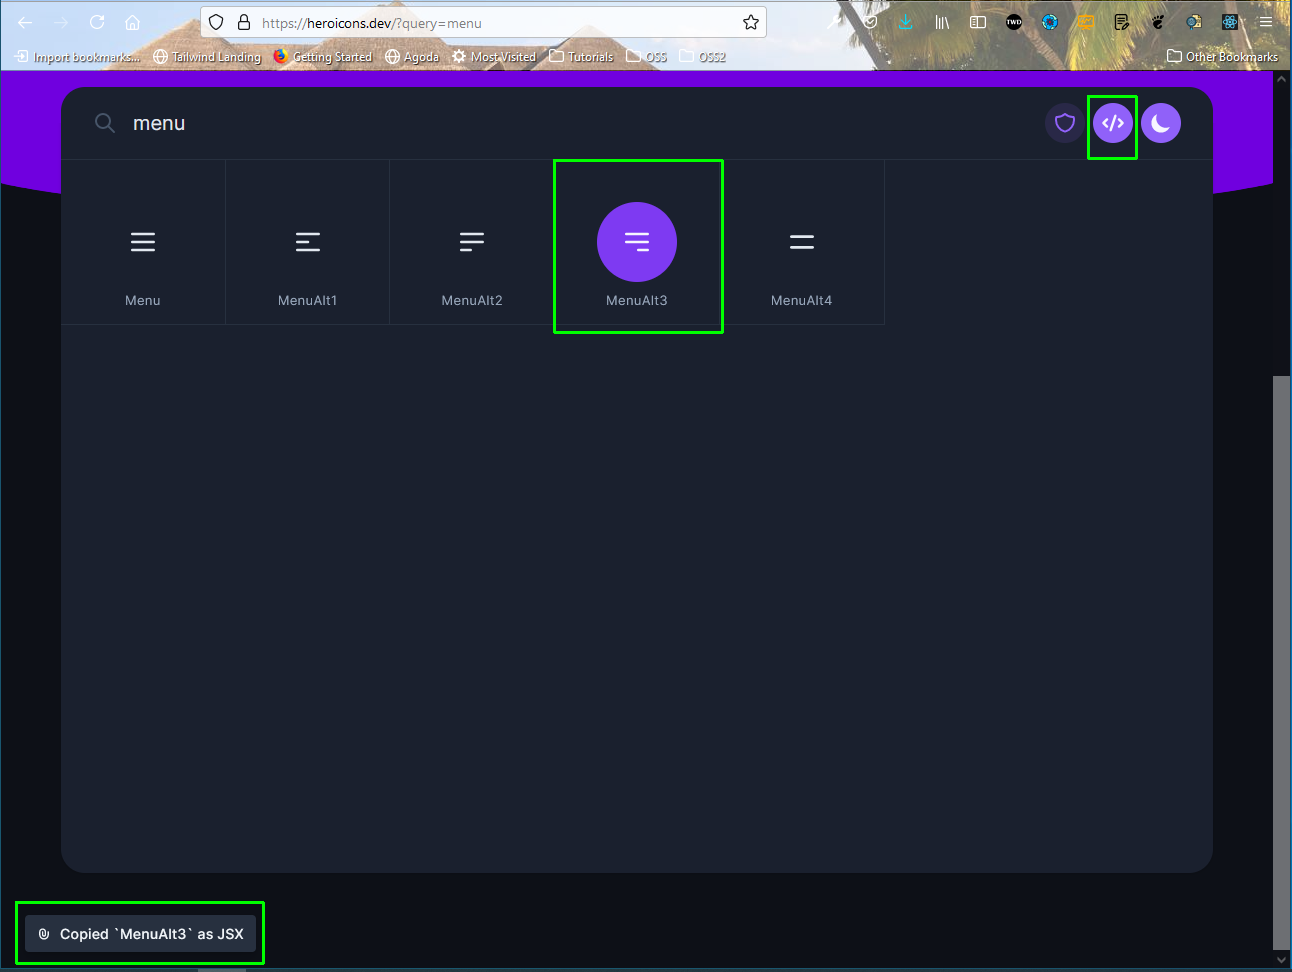 heroicons
Now, we will add the code for the simple Navbar, in the Navbar.js file. Here, we are showing the Menu which we have copied from Heroicons in the mobile view and the Menu with Links in the desktop view.
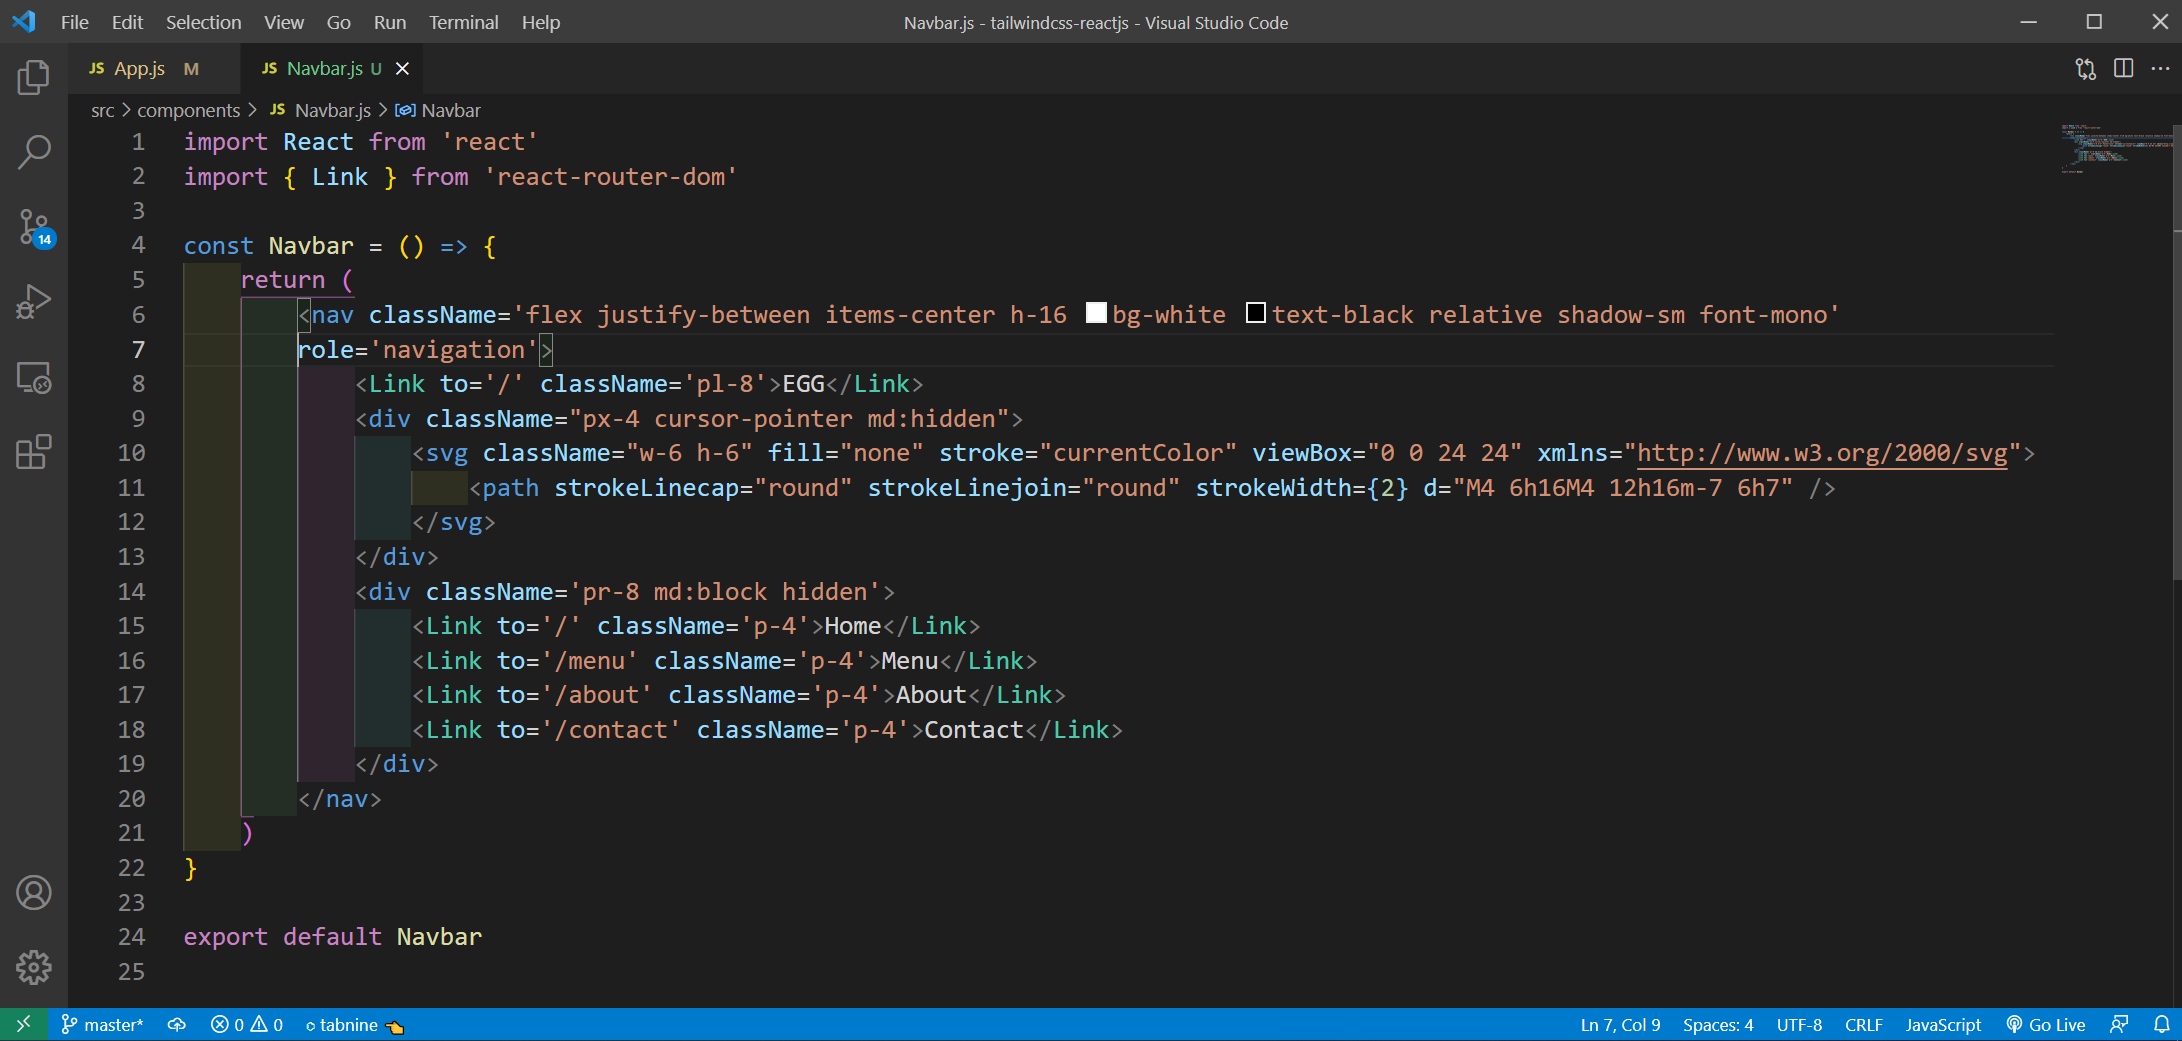 Navbar.js
Now, our menu in desktop view is as below.
 Desktop view
And the menu in Mobile view is as below.
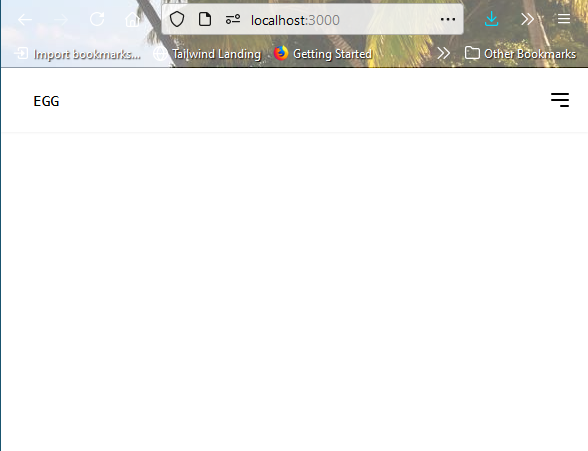 Mobile view
Now, we will create the Hero section and again we will use an awesome icon from Heroicons in it. Search for cart and select the second icon by clicking on it.
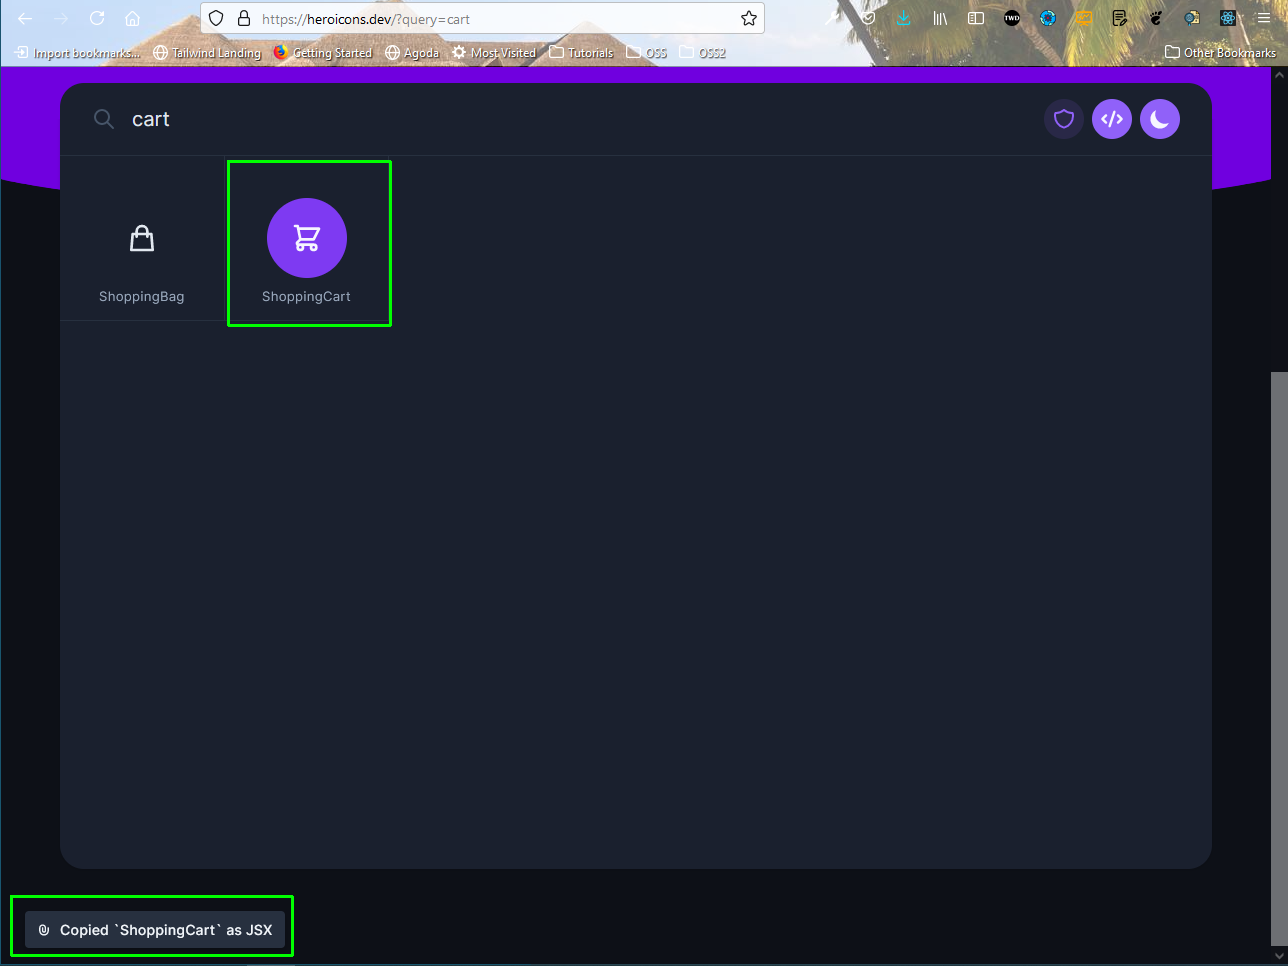 Cart
Cart
Now, with this icon we will create our Hero.js. It’s is again a simple component, with a big EGGMATIC text, which is of different sizes on different screen.
Next, we have our Order Now button containing the cart icon. Also, notice that we are using animate-bounce from tailwind css, which adds nice animation to the button.
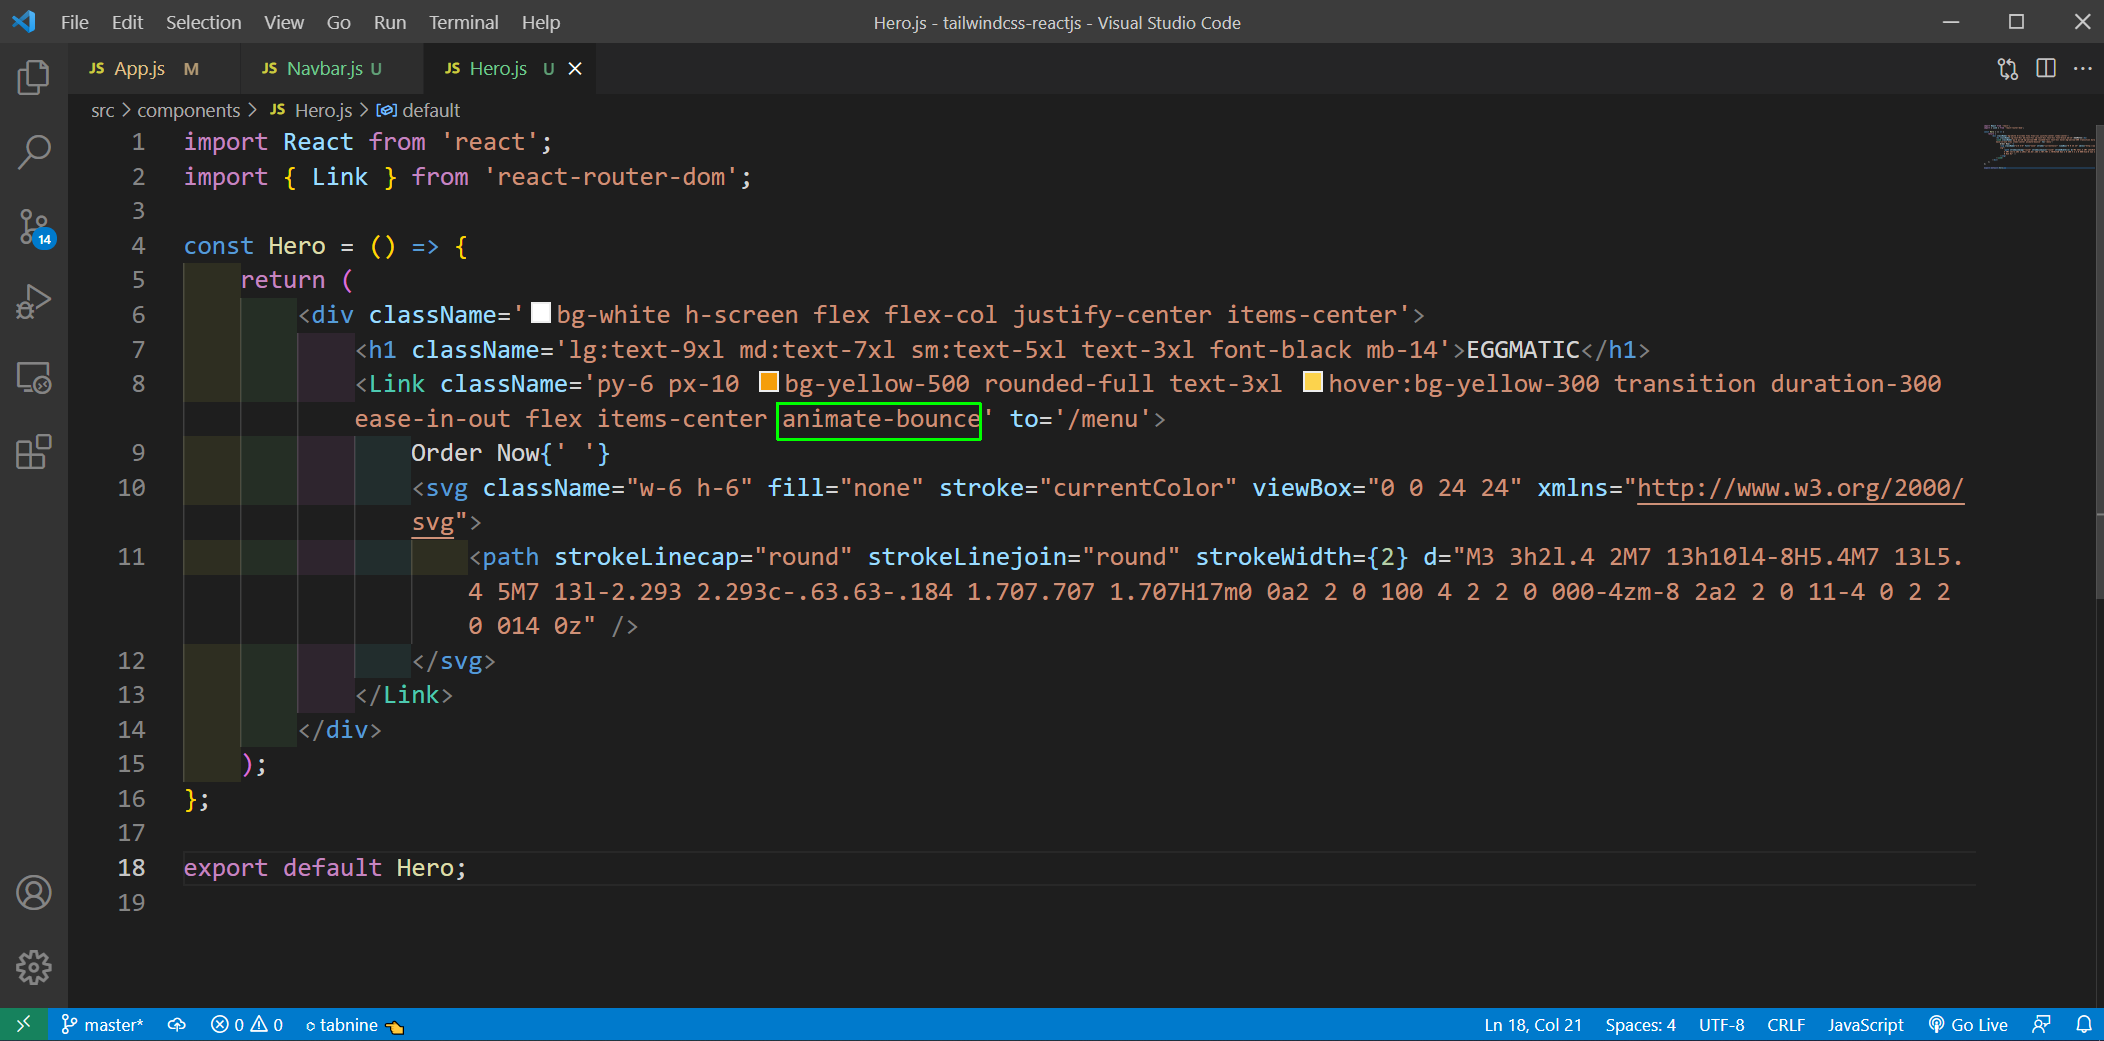 Hero.js
Now, our app look like below in Desktop screens.
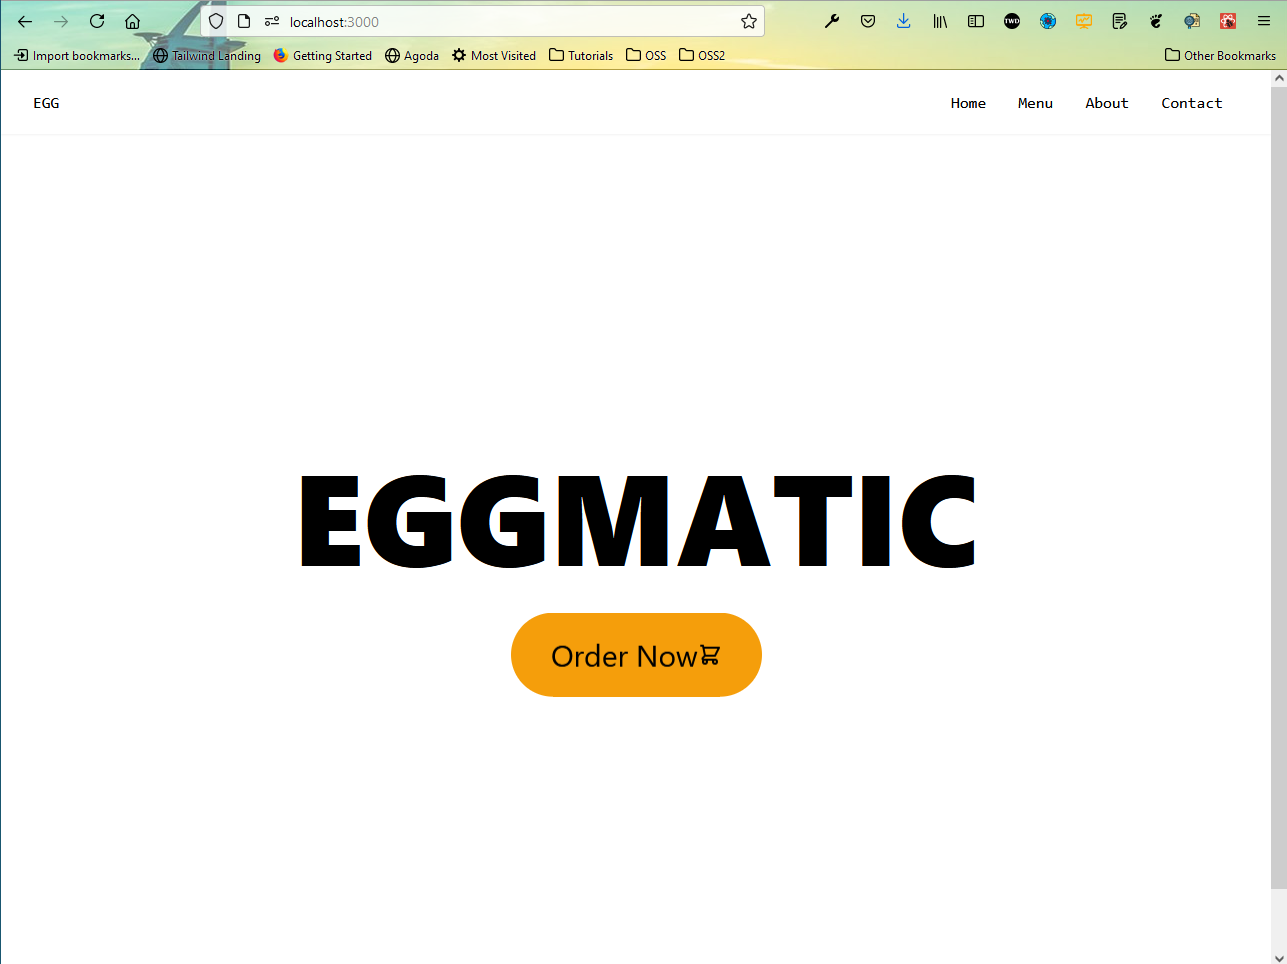 Desktop
Now, we will show the content in our project. For this create an images folder inside src and put two vertical egg dishes pictures in it. I have taken them from unsplash.com.
Now, in our Content.js file add the below content. Notice the menu-card and the center-content classes. They are the common classes, for which styles are taken from index.css file.
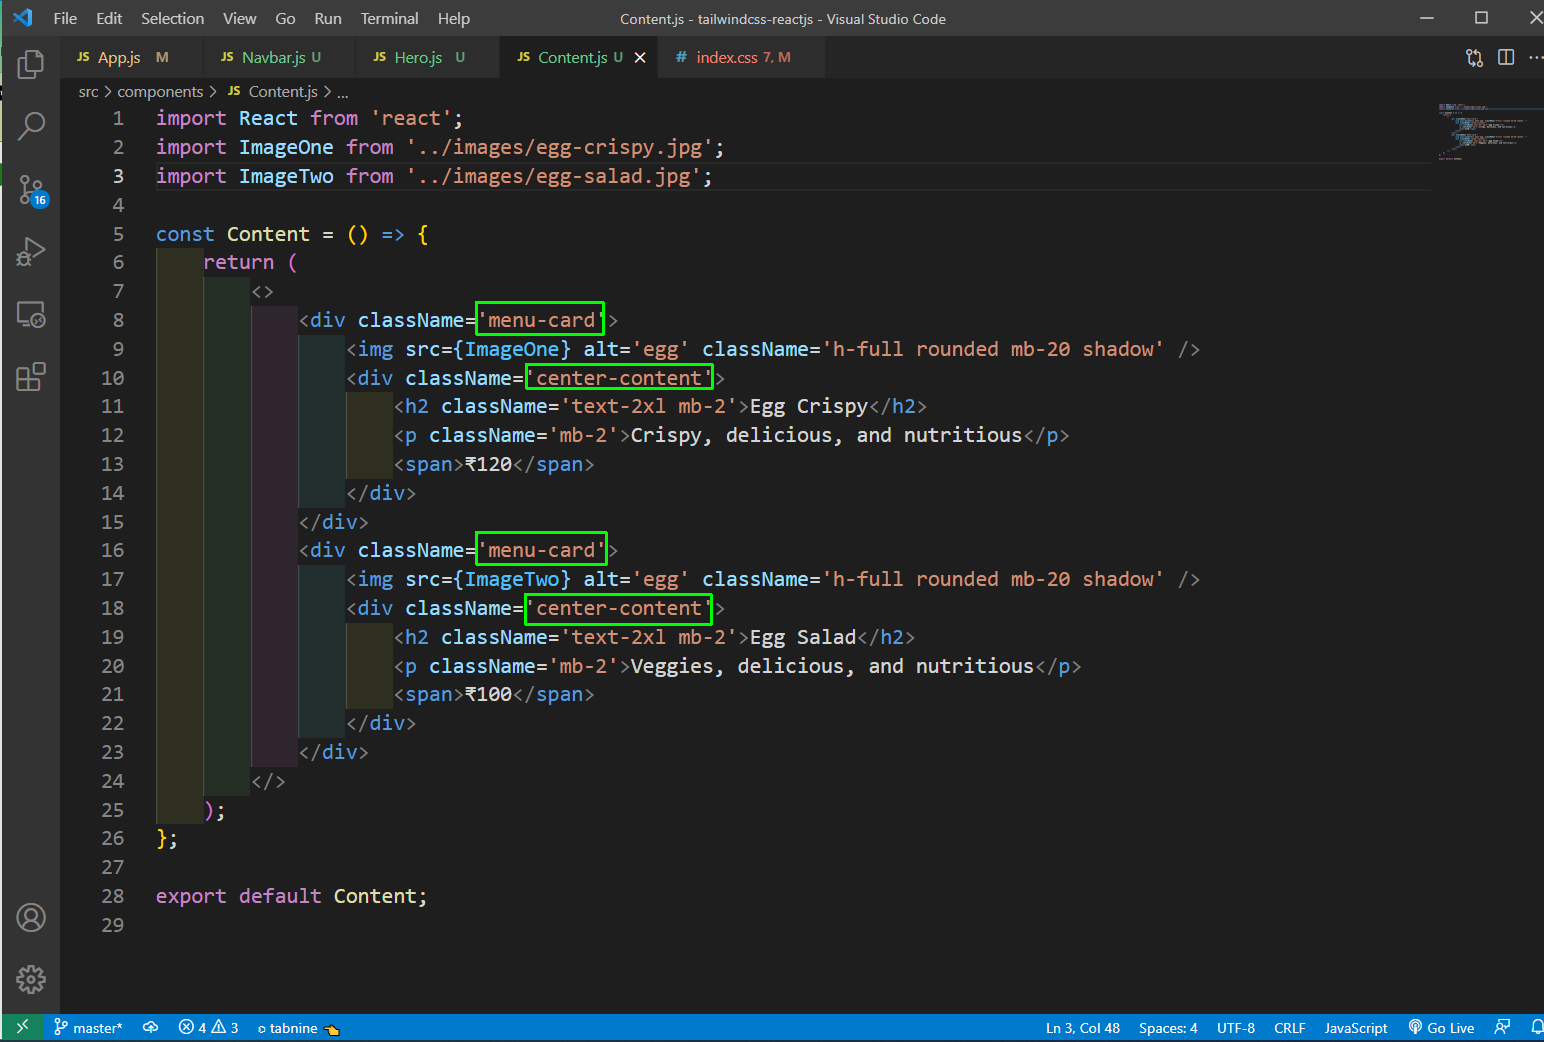 Content.js
Now in the index.css file, we will add the tailwind css classes and will refer to the menu-card and the center-content classes. Notice, the use of apply for using common classes.
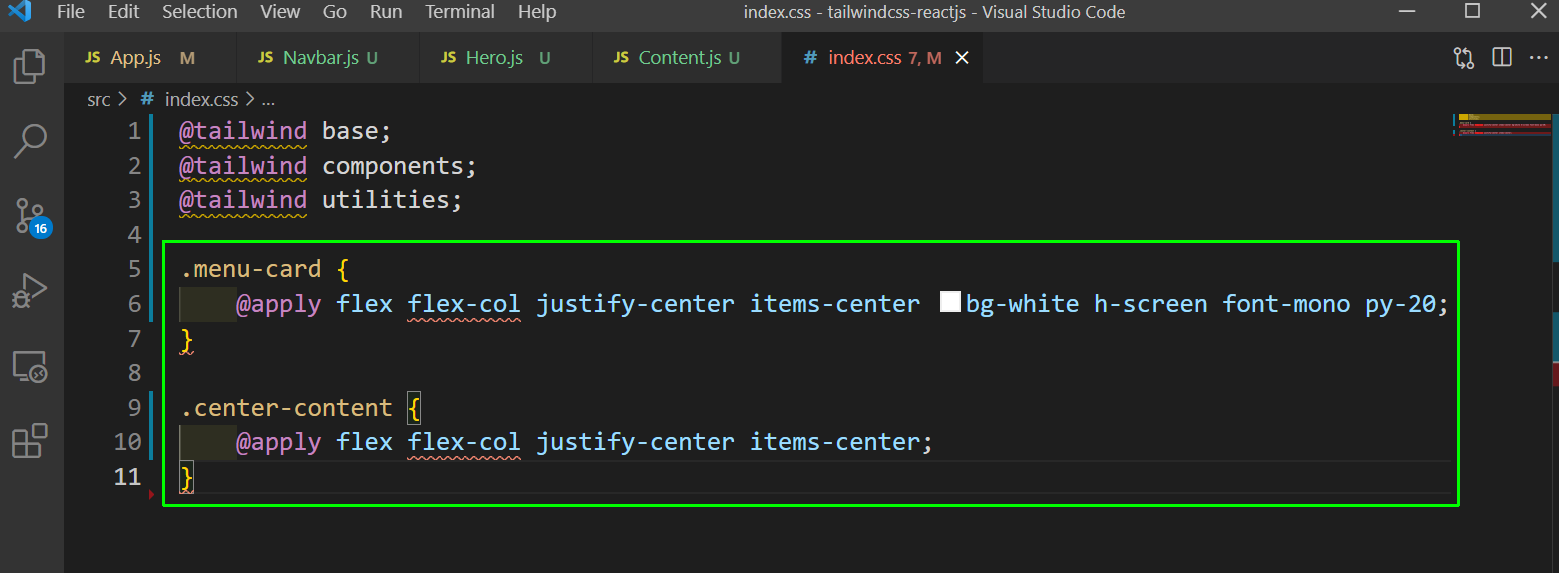 index.css
Now, add the Content component in App.js file.
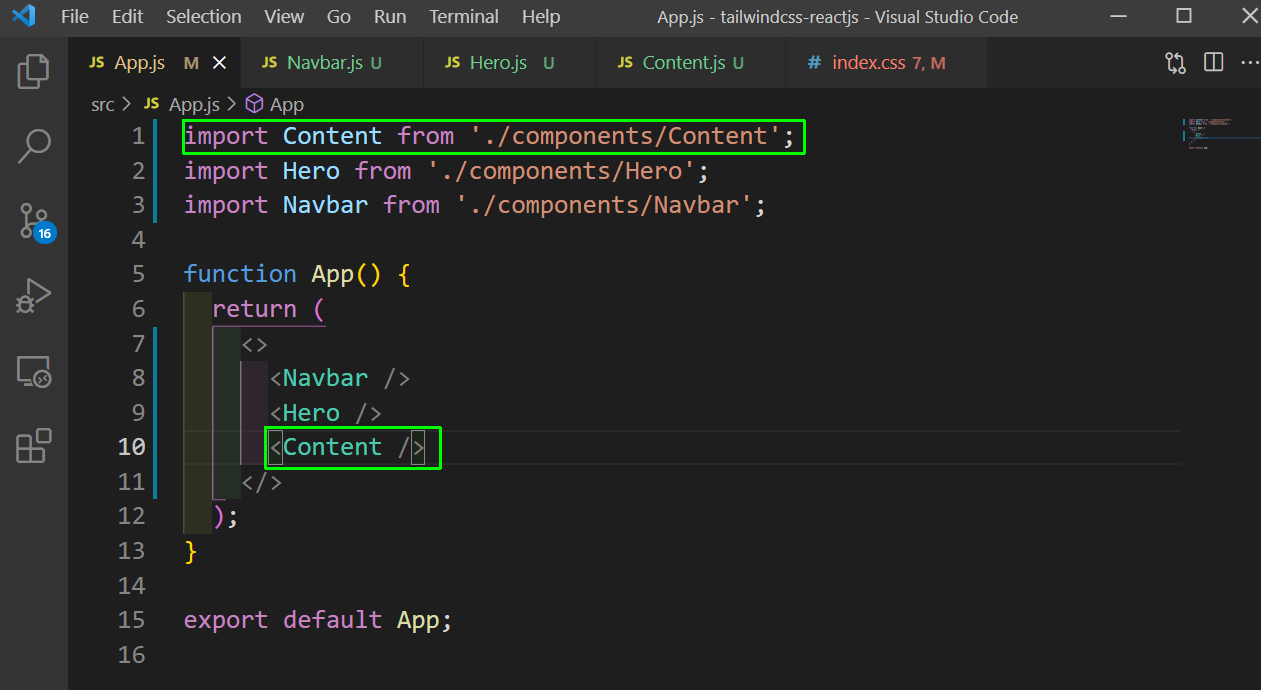 App.js
Now, our Content component will show nice on both view. Below is the Mobile view.
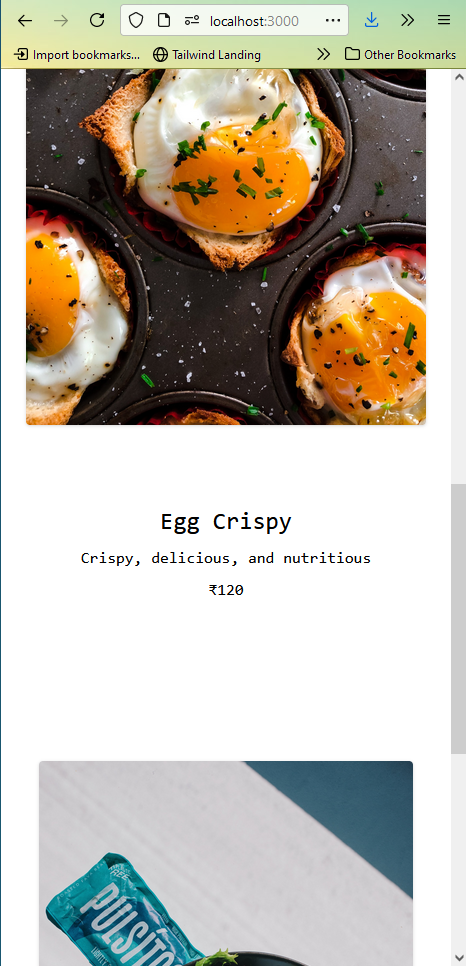 Mobile View
Now, we will create a simple footer component. Add the below in Footer.js file.
import React from 'react';

const Footer = () => {
    return (
        <div className='flex justify-center items-center h-16 bg-black text-white'>
        <p>Copyright © 2021 EGGMATIC All rights reserved.</p>
        </div>
    );
};

export default Footer;
Also add the Footer component in App.js file.
 App.js
Now, the footer component is showing perfectly.
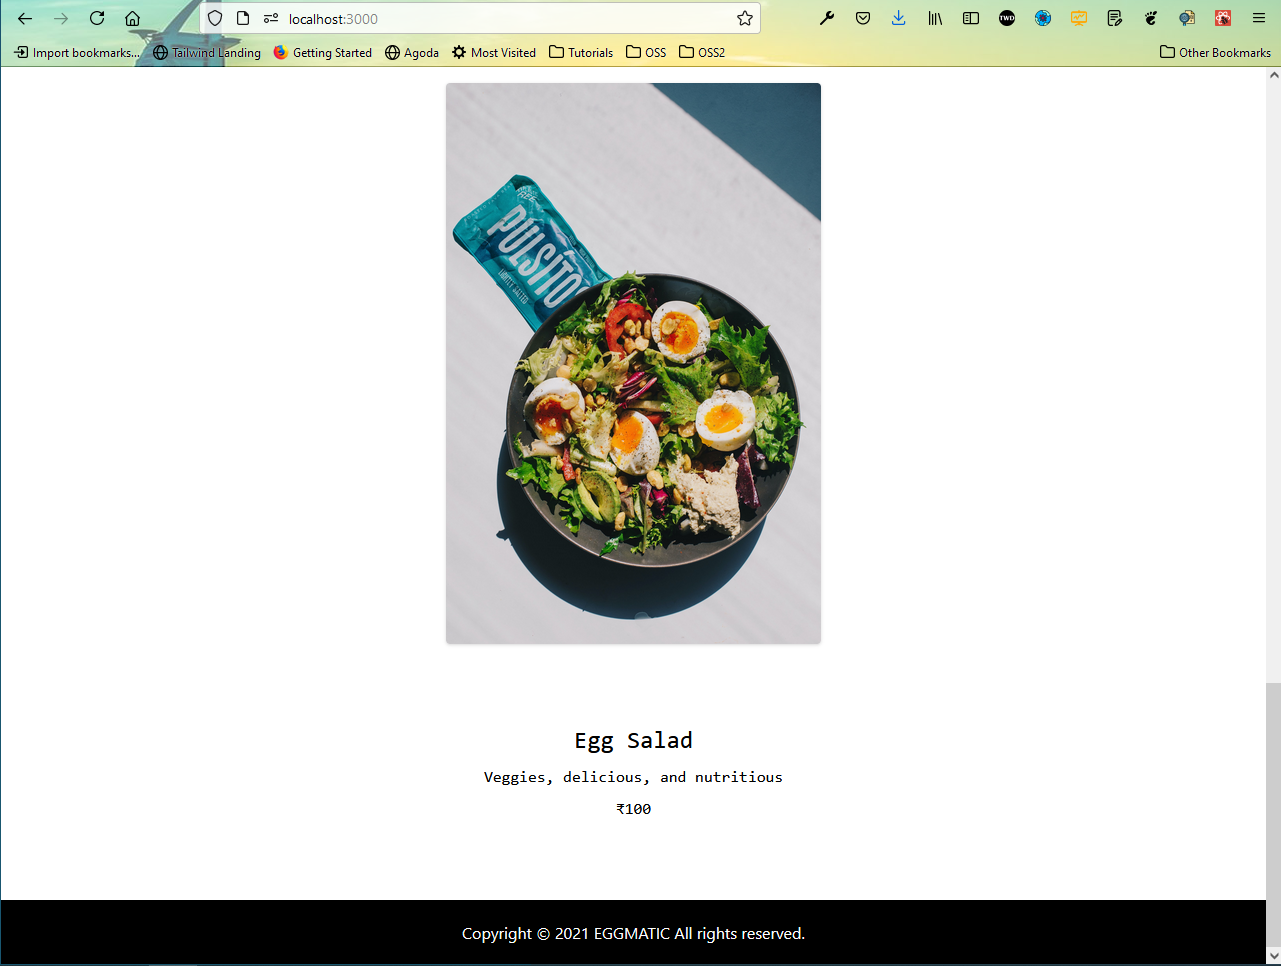 Nice footer
This completes our simple ReactJS app with Tailwind CSS. You can find the code for the same in this github repo.