React Tutorials - A beginners Guide - 5
by Rajat Negi / July 24th, 2020
#react #beginners #javascript
Series: React-tutorials
Rendering content conditionally
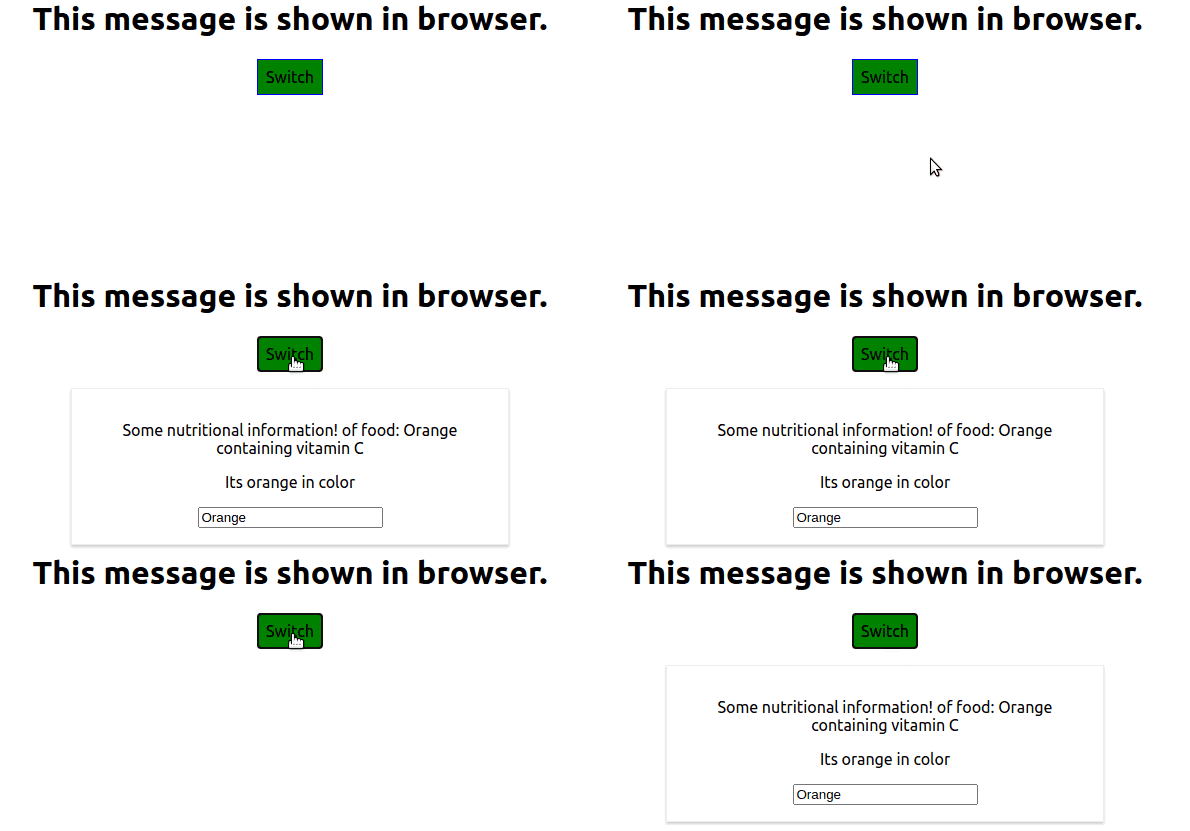
Let we want to output our food components conditionally. For this, we make use of our switch button. With this button, the contents of our component will be shown or hidden. Clearly we can make use of conditions here. We want to change our state using setState. To have this toggle feature we will put the component block in curly braces so that we can write our conditional js code. Also, we create a event handler: toggleFoodHandler() to toggle between visibility. We add a new property to our state showFoods. By default, it will be false or component will be invisible. The event handler will toggle this property every time.
To make sure the components are only visible when showFoods is true, we use ternary operator.
changes:
state = {
food :[
{name: 'Orange', vitamin: 'C'},
{name: 'Banana', vitamin: 'B6'},
{name: 'Lemon', vitamin: 'C'}
],
+ showFoods: false
}

+ toggleFoodHandler = () => {
+ const doesShow = this.state.showFoods;
+ this.setState({showFoods: !doesShow});
+ }

//inside render()
+ {
+ this.state.showFoods ?
+ <div>
<Food
name={this.state.food[0].name}
vitamin={this.state.food[0].vitamin}>Its orange in color</Food>
+ </div> : null
+ }
Output:

Handling Dynamic content the js way
Using the ternary operator is not the optimal way of executing a conditional situation. Now we will try to execute the same thing using a different approach which is much cleaner than before. Our Switch button is basically changing our state (toggling showFoods). Because of this our render function is triggered. Inside render we create a variable foods which will contain the content to be toggled. i.e it will either contain null or the JSX we defined before.
We pass {foods} inside return() as reference.
code change:
// inside render()
+ let foods = null;

+ if(this.state.showFoods)
+ {
+ foods =(
<div>
<Food
name={this.state.food[0].name}
vitamin={this.state.food[0].vitamin}>Its orange in color</Food>
</div>
);
+ }
return (
<div className="App">
<h1>This message is shown in browser. </h1>
<button
style = {style}
onClick={this.toggleFoodHandler}>Switch </button>
+ {foods}
</div>
);
The output will be same as before.
Outputting lists
Now so far we have hardcoded the way we are extracting values from state. We can instead make use of lists. For this we have to convert our array of objects in state into valid JSX. Vanilla js just has the right thing for this. We can make use of map() method. Our map() method will take an arrow function as parameter. This arrow function returns JSX and map then forms an array of components.
+ let foods = null;

+ if(this.state.showFoods)
+ {
+ foods =(
+ <div>
+ {this.state.food.map(food=>{
+ return <Food
+ name={food.name}
+ vitamin={food.vitamin}/>
+ })}
+ </div>

- <div>
- <Food
- name={this.state.food[0].name}
- vitamin={this.state.food[0].vitamin}>Its orange in color</Food>
- </div>
Lists and State
Let's add another functionality of manipulating our state array. This time we will try to access array elements using index. We already had onClick={props.click} in Food.js, before it was used along with switchNameHandler and when a component was clicked setState was called. Let's delete this handler and another called deleteFoodName. As the name suggests we will delete a component using this event.
Inside render(), we pass click property and assign it {this.deleteFoodHandler}. For this, to work we will also pass the index of the array to tell which element to delete. Note that in ES6, to pass more than one argument we need to keep them inside parenthesis.
Inside our event handler, deleteFoodHandler, we pass the index as argument. Create a variable that contains reference to our state array. Then to delete a value we use splice(). Finally we use setState to update the DOM.
Changes made:
+ deleteFoodHandler = (foodIndex) =>{
+ const foods = this.state.food;
+ foods.splice(foodIndex,1);
+ this.setState({food:foods});
+ }

// inside render()
foods =(
<div>
+ {this.state.food.map(( food , index)=>{
return <Food
+ click = {()=>this.deleteFoodHandler(index)}
name={food.name}
vitamin={food.vitamin}/>
})}
</div>
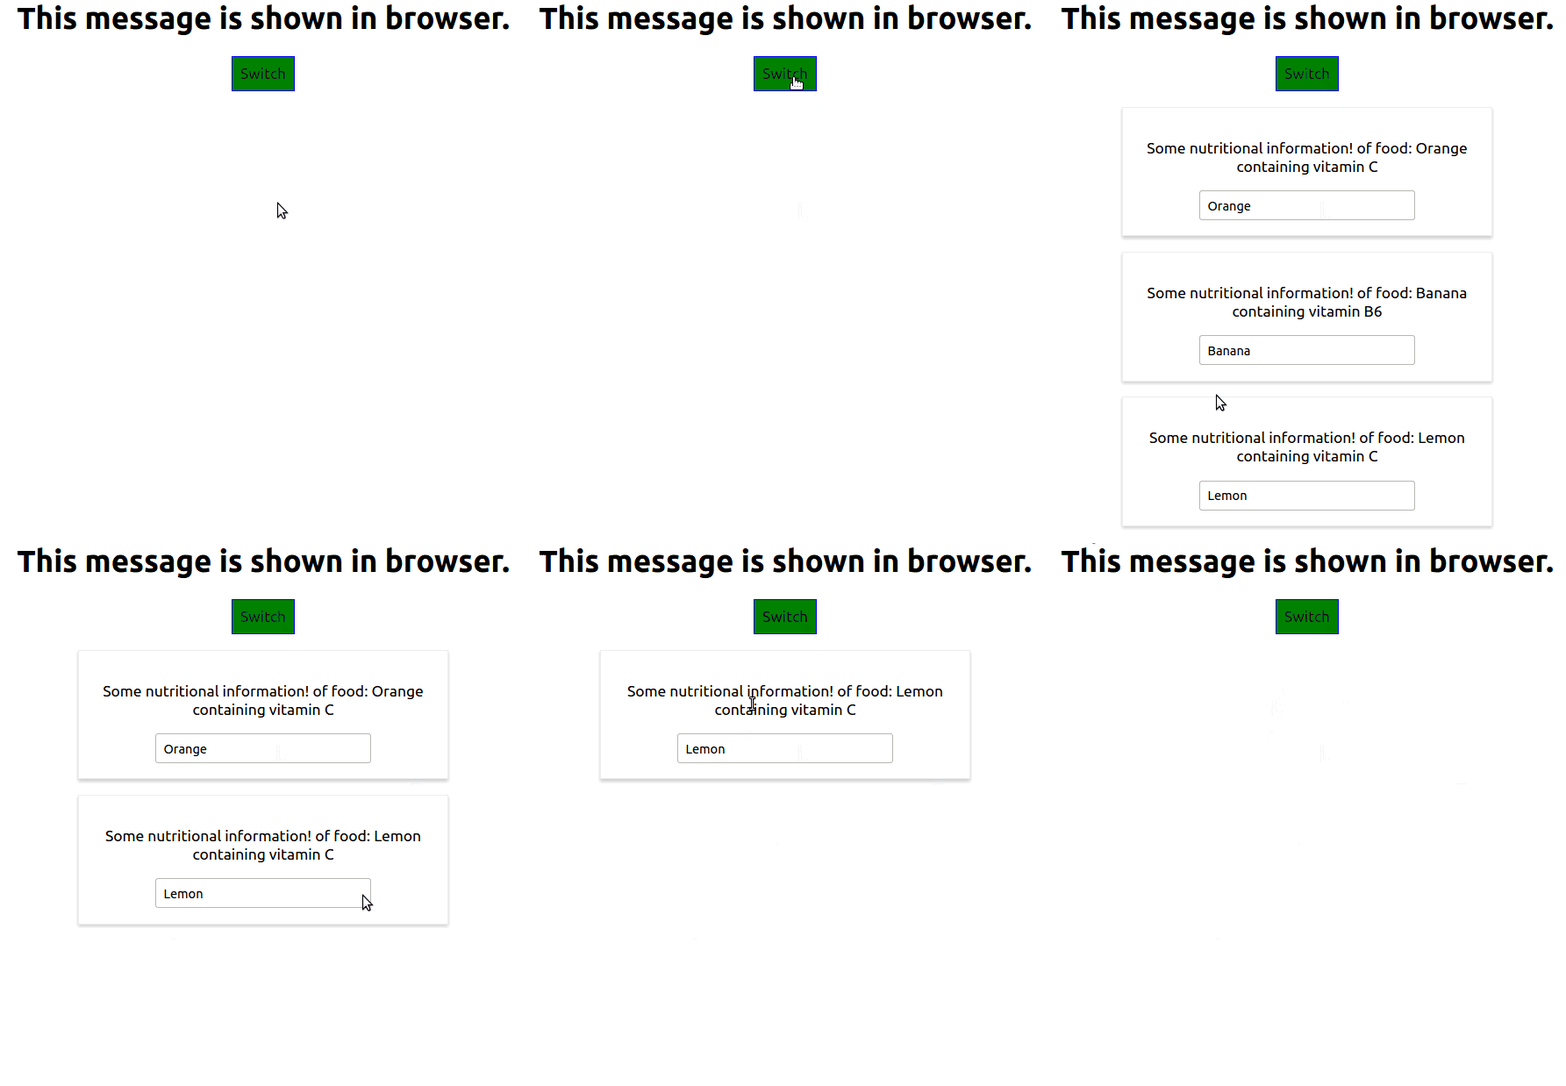
Output:

Note when a component is clicked it is deleted and hence disappears.
The code we used above has a little flaw. We were passing reference/pointer to our original values. But we should first pass a copy of the original values. In other words, we should update the state in immutable fashion. To do this we can use this.state.food.slice() or the ES6 spread operator as [...this.state.food].
Code change:
deleteFoodHandler = (foodIndex) =>{
+ // const foods = this.state.food.slice();
+ const foods = [...this.state.food];
foods.splice(foodIndex,1);
this.setState({food:foods});
}
Lists and keys
Until now we have been using lists without key value. However, key is an important property. And react expects us to give it. We can even see this in the inspector window, a warning about the same appears(if key isn't defined). React needs key to re-render out list and only those elements that are changed and not the whole list.
For key, we have to use something unique. We may use index for this. But upon deletion of a value the index of elements will also change. So index doesn't help here. Instead we make a id property in state and it is unique for each element.
state = {
food :[
+ {id : 'asf1', name: 'Orange', vitamin: 'C'},
+ {id : 'asf2', name: 'Banana', vitamin: 'B6'},
+ {id : 'asf3', name: 'Lemon', vitamin: 'C'}
],
showFoods: false
}

// inside render()
foods =(
<div>
{this.state.food.map(( food , index)=>{
return <Food
click = {()=>this.deleteFoodHandler(index)}
name={food.name}
vitamin={food.vitamin}
+ key = {food.id}/>
})}
</div>
The output remains same.
Flexible lists
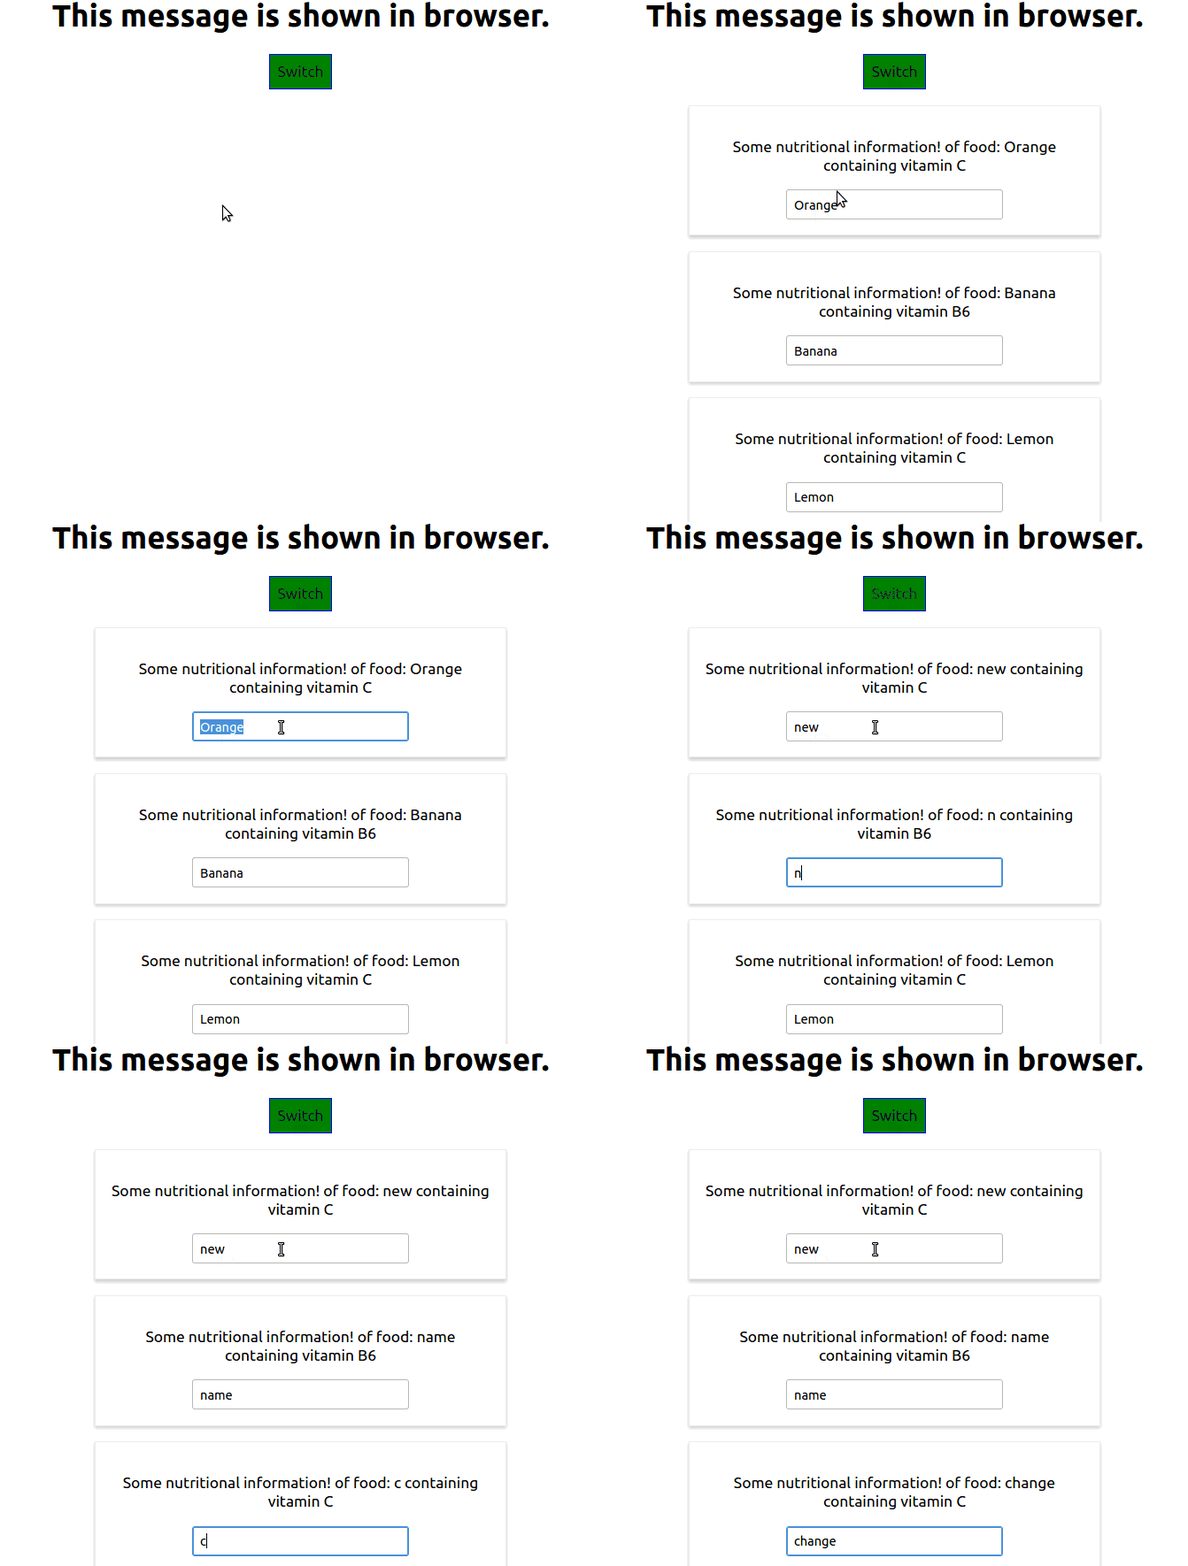
Previously, we used a onChange={props.changed} to change component name by editing the textfield. Lets try to execute it in more dynamic fashion. Firstly, in our map function we have to define changed = {(event) => this.nameChangedHandler(event, food.id).So, basically on changing a text-field's content and event will be triggered. Event returns a call to nameChangedHandler.
Now inside this handler, we basically have to take an instance(food) of the particular text-field or component. And also an instance(foods) of the entire state. Then store the changed value to foods. And finally copy this instance to the original state or do a setState. This entire process is again visualised below.

Code changed:
//App.js
+ nameChangedHandler = (event, id) => {
+ const foodIndex = this.state.food.findIndex(f=>{
+ return f.id === id;
+ });
+ const food = {
+ ...this.state.food[foodIndex] // ensure not mutating directly
+ };
+ food.name = event.target.value;
+ const foods = [...this.state.food];
+ foods[foodIndex] = food;
+ this.setState({
+ food : foods

- food :[
- {name: 'Orange', vitamin: 'C'},
- {name: event.target.value, vitamin: 'B6'},
- {name: 'Lemon', vitamin: 'C'}
- ]
});
}

// inside render()
if(this.state.showFoods)
{
foods =(
<div>
{this.state.food.map(( food , index)=>{
return <Food
click = {()=>this.deleteFoodHandler(index)}
name={food.name}
vitamin={food.vitamin}
key = {food.id}
+ changed = {(event) => this.nameChangedHandler(event, food.id)}/>
})}
</div>
);
}
Output:

What we learned
- handling data more dynamically using list
- using map() to map our js arrays' content into an array of JSX elements.