Simple iPhone Calculator App in React Native
by Nabendu Biswas / September 20th, 2019
#reactnative #react #webdev
Continuing with React Native the next app i am making is a simple iPhone calculator. This post is inspired by this video by Carl Spencer.
Let’s head over to a terminal and type expo init CalculatorReactNative
Press enter for blank in the selection.
 calc
calc
In the next screen, you can give the same name as the project. For my case it is CalculatorReactNative.
 ReactNative
Then change into the directory and do a npm start
 npm start
The project will be started by expo on a web-browser.
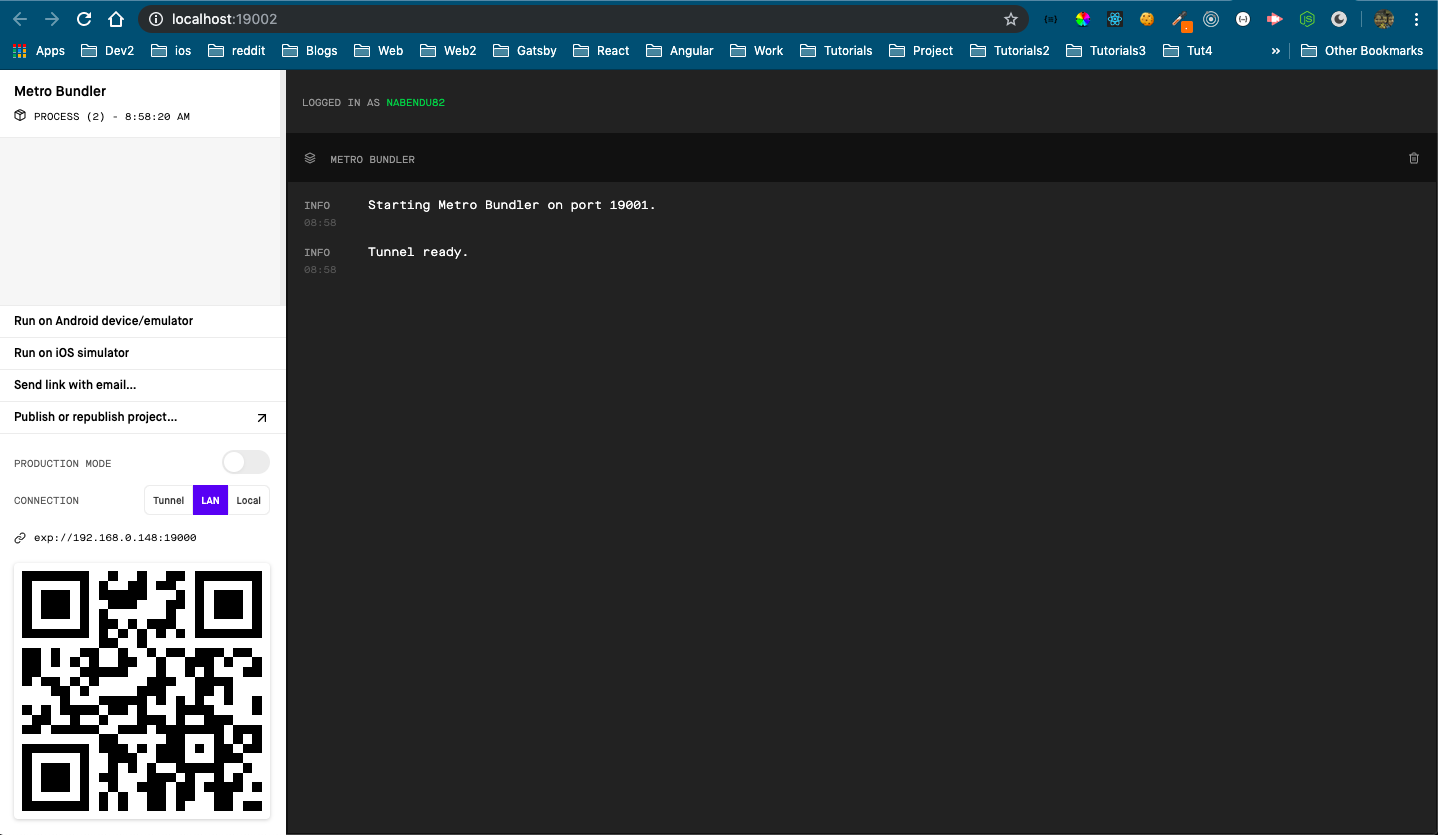 expo
expo
Next, open the project in VSCode and create a new folder App and a file index.js inside it. Copy all content from App.js to index.js and delete App.js
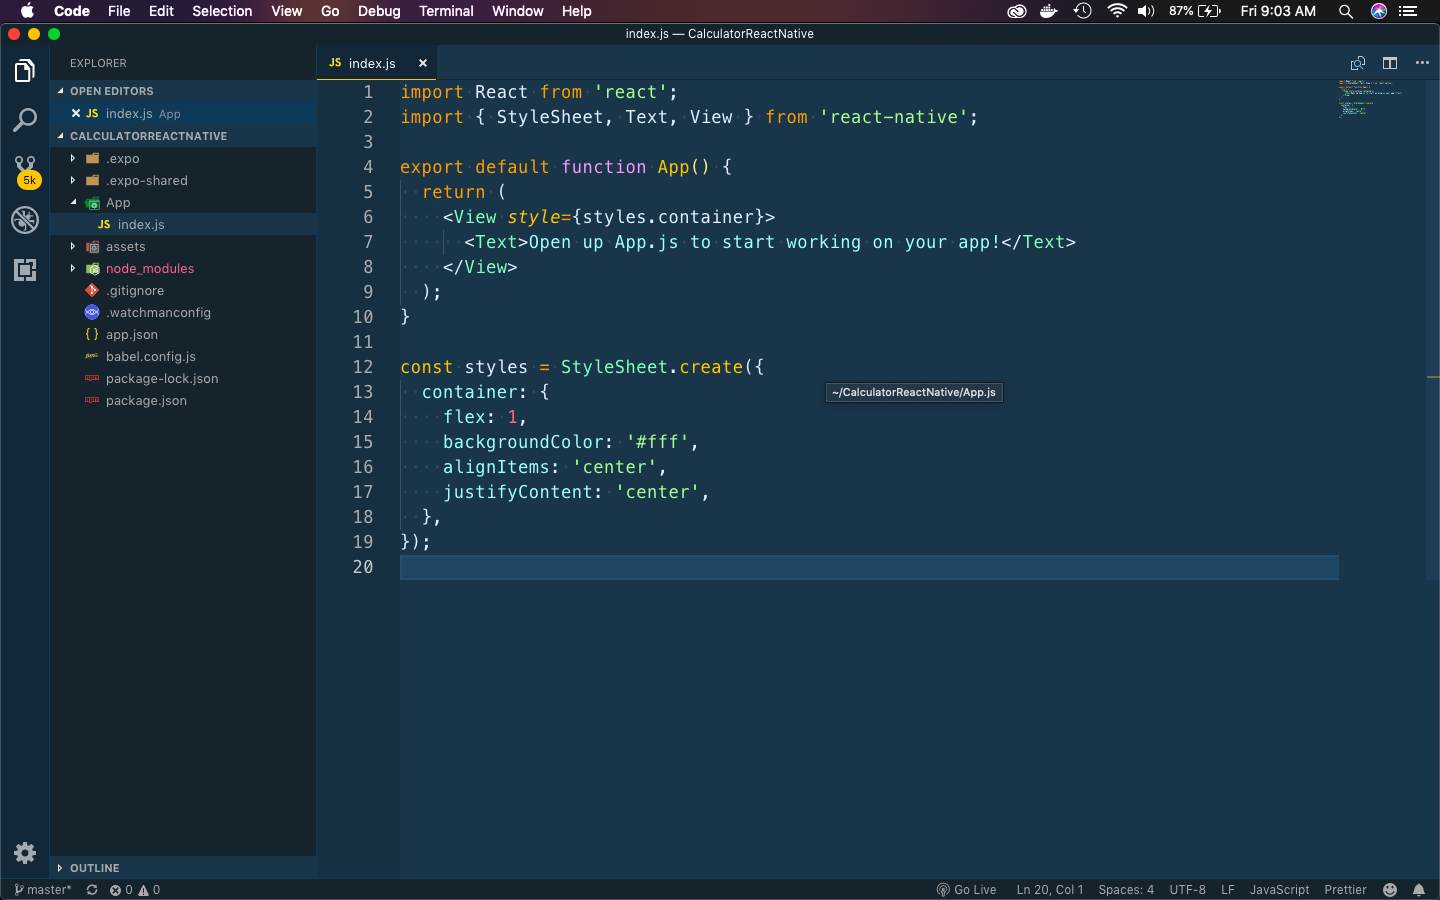 index.js
Next, open the App on a physical device. I had mentioned the steps in my blog for Restaurant Search app.
You can also open the app in the lap by configuring Android emulator. I have mentioned the steps in my previous blog to Setup Android Emulator on Mac.
Let’s put some basic code to display a button and change the default styling. The StatusBar and SafeAreaView are to avoid the notch in iphone X and other Android models with notch for camera.
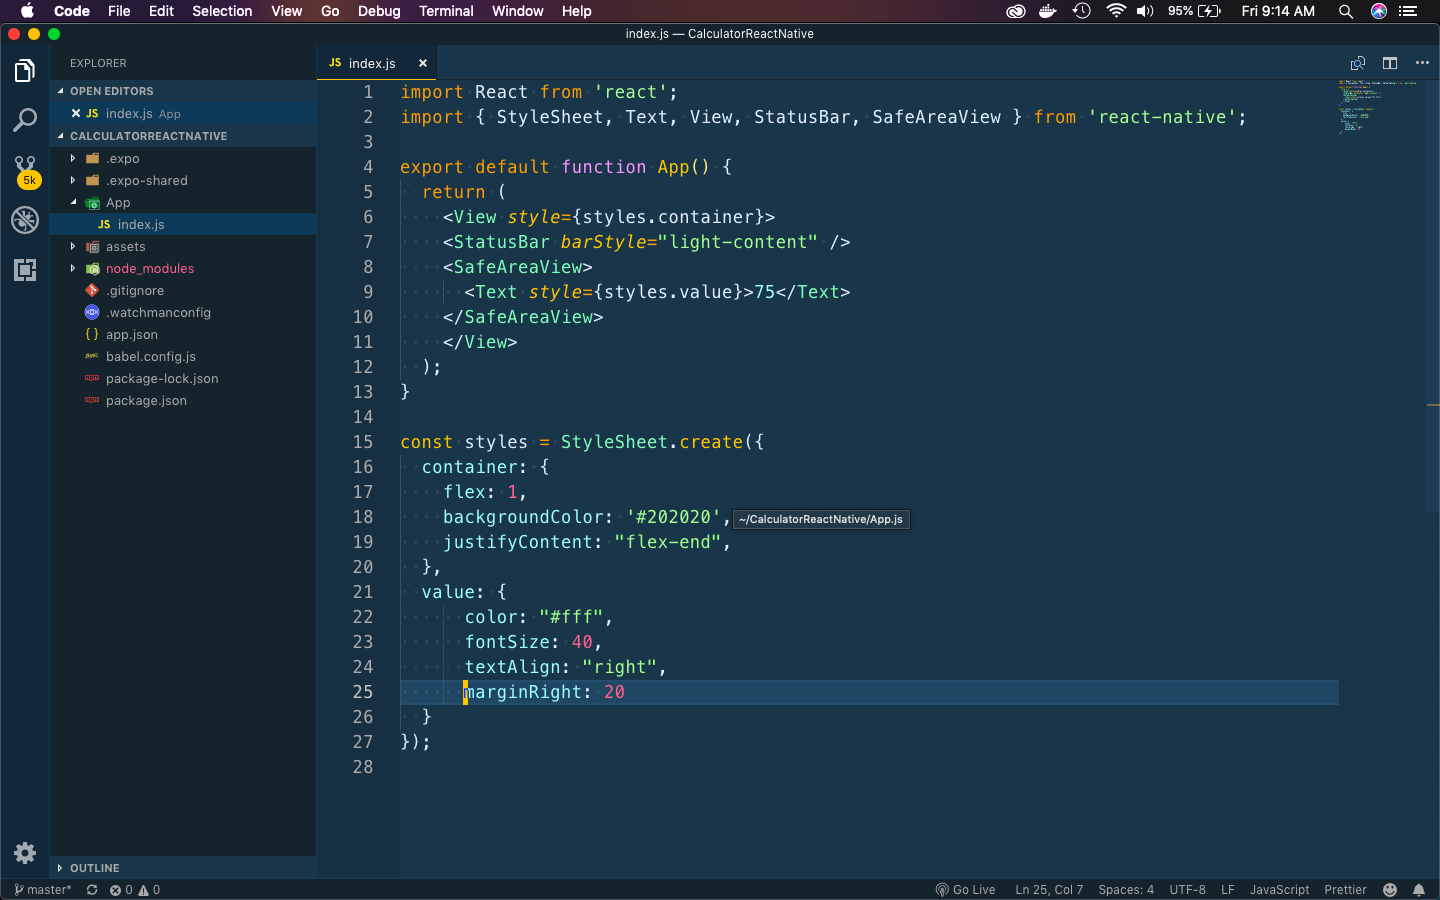 index.js
It will show as below on the physical android device.
 Physical
Next, create a folder components inside App and two files Row.js and Button.js inside it. In Row.js put the below, which will show any children passed to it.
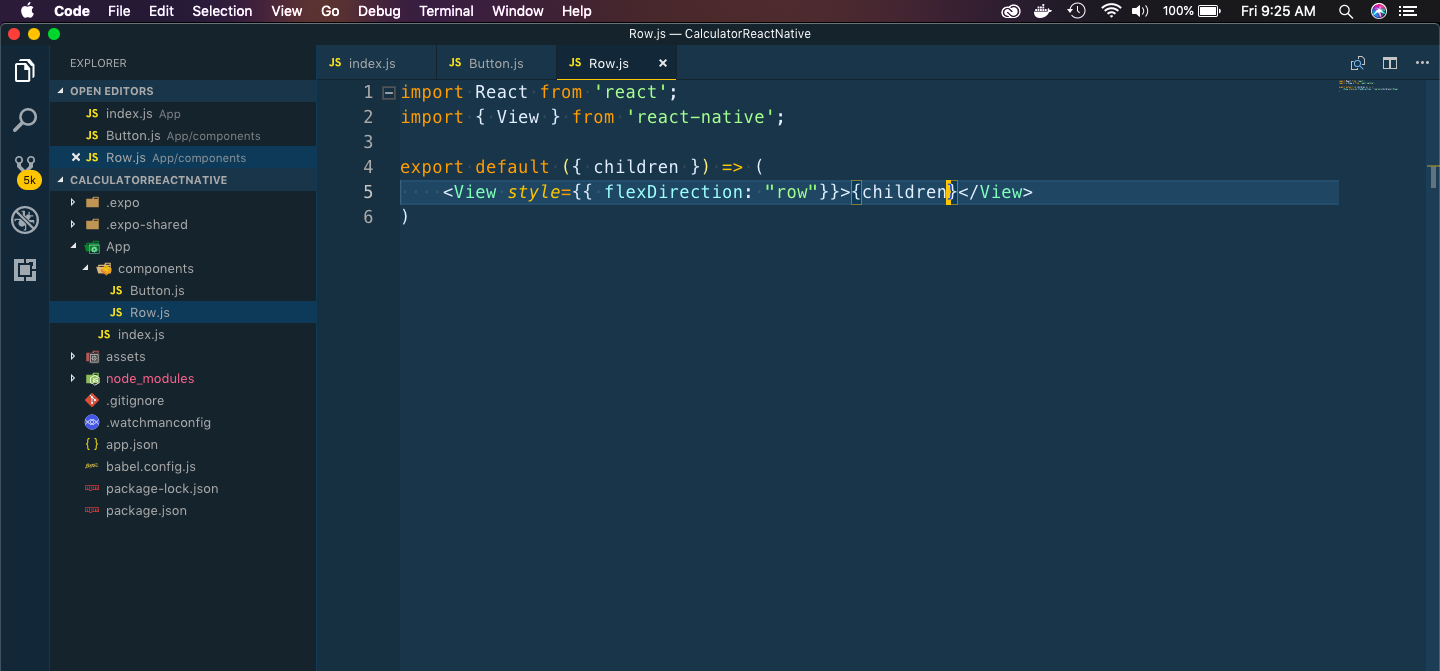 Row
Row
Next, let’s add some code in Button.js
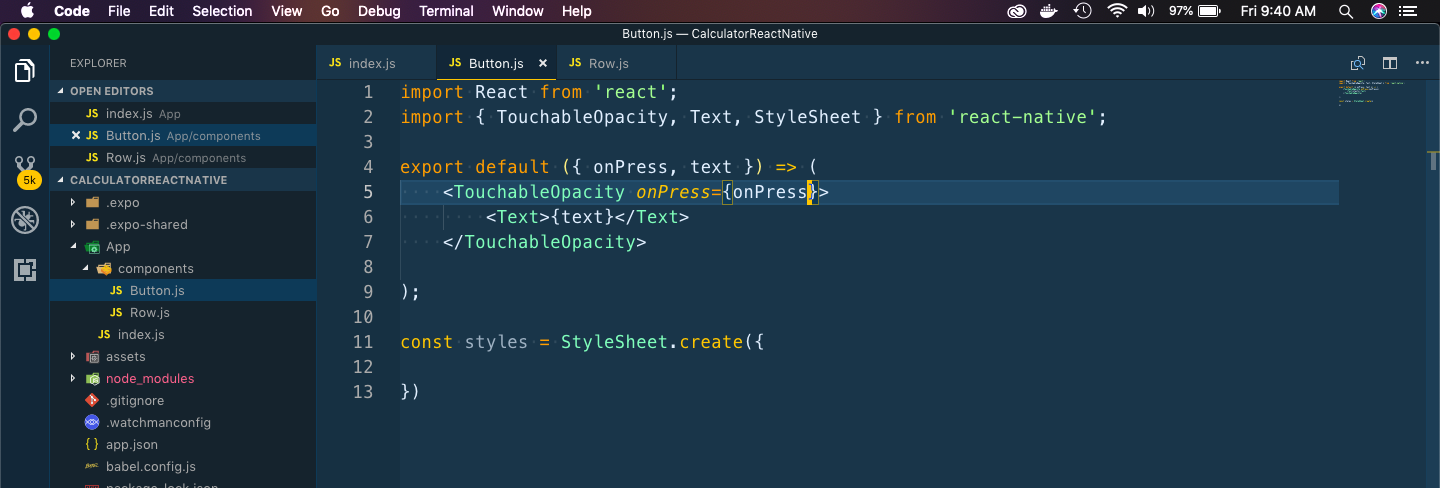 Button
Next, head over to index.js and import these two by -
    import Row from './components/Row';
    import Button from './components/Button';
Next add the layout of calculator buttons in it. We have 5 rows here, each having 4 buttons. Only the last row have 3 buttons.
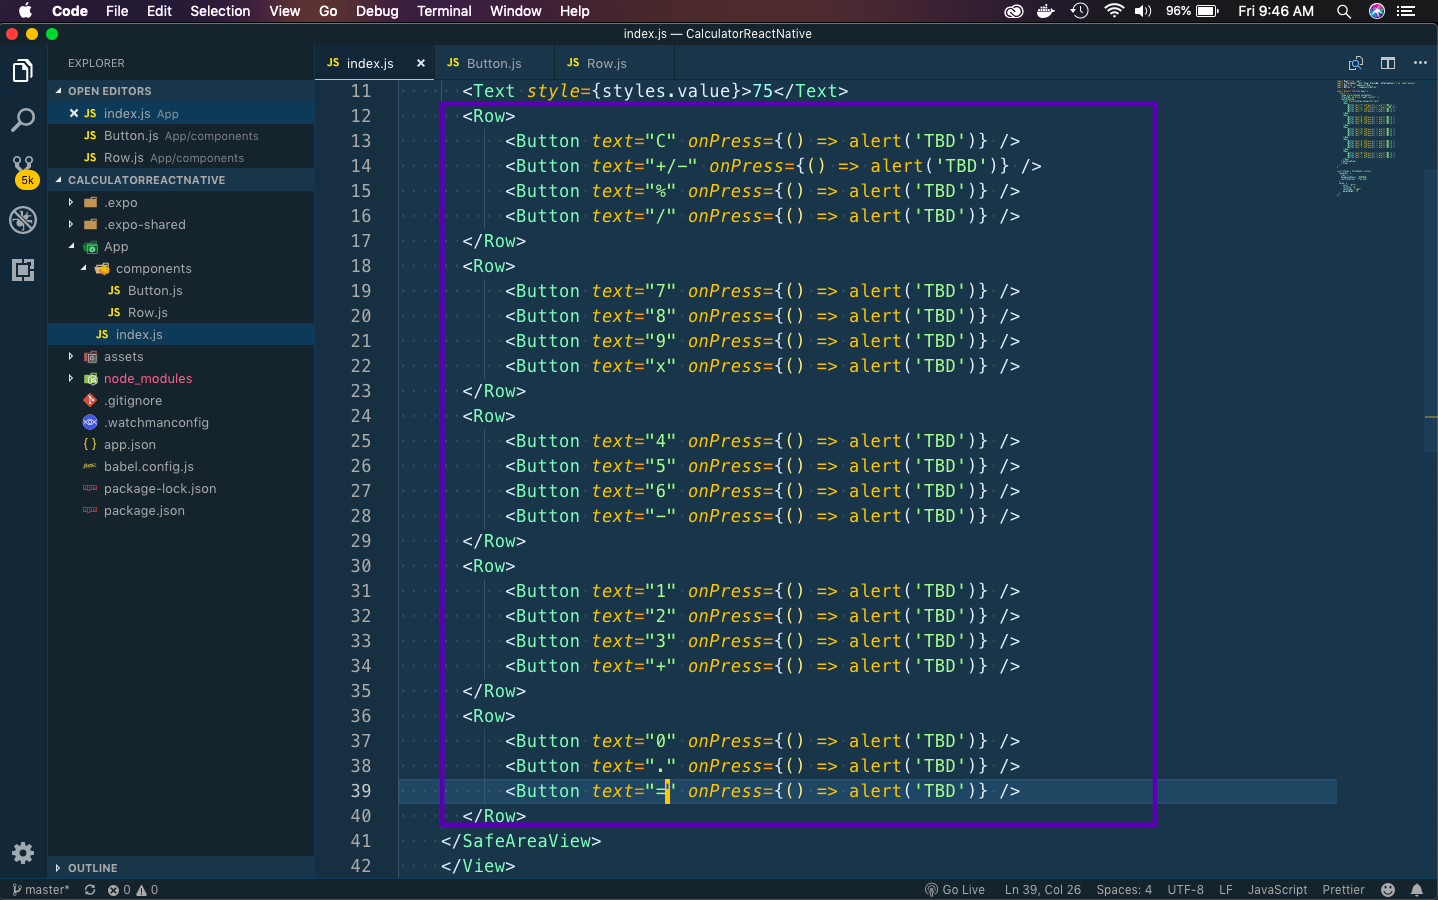 Calculator Basic layout
Next, we will add some styles to the button so that looks more like iphone calculator.
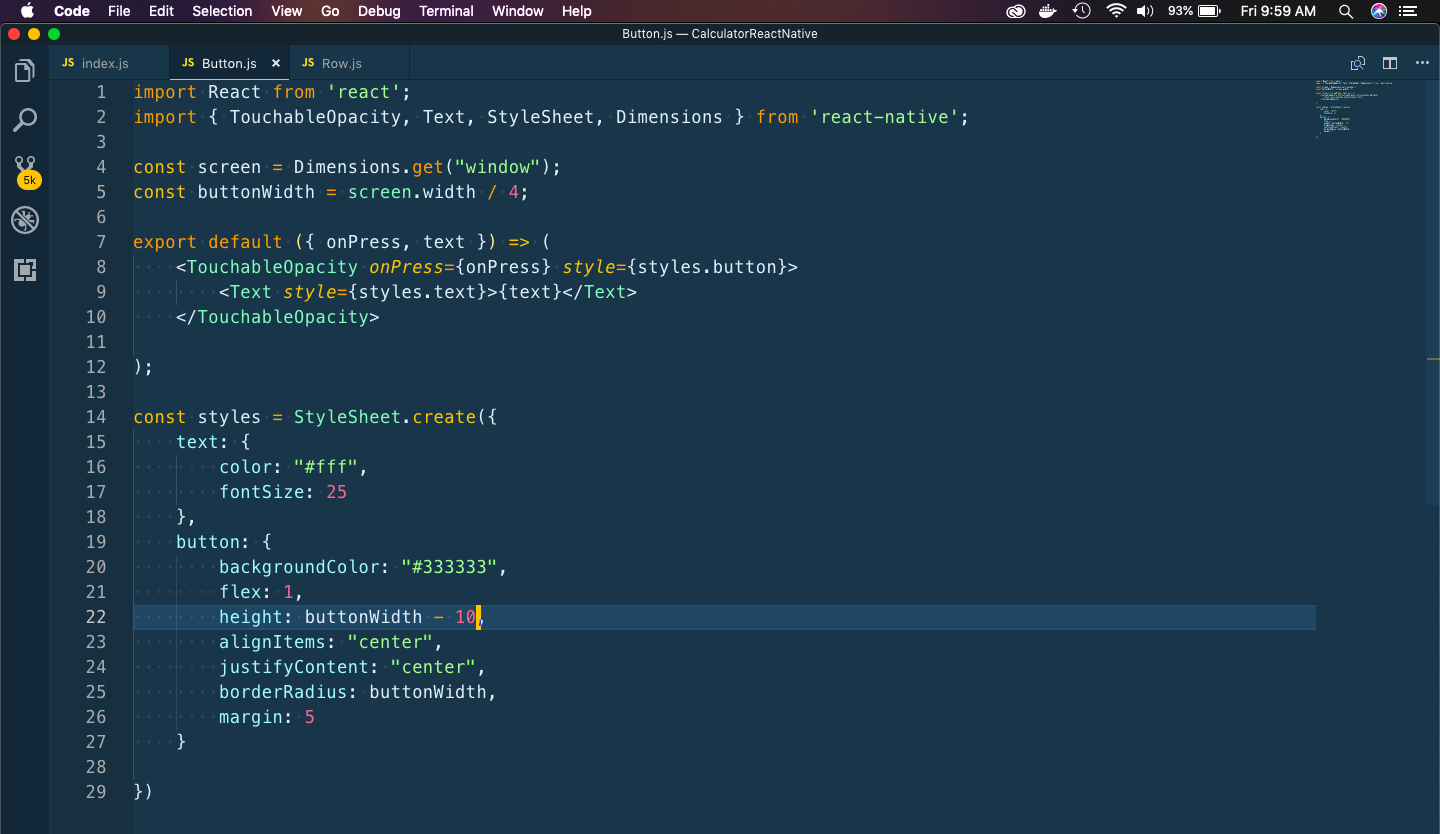 iphone calculator
It will show rounded buttons like below now.
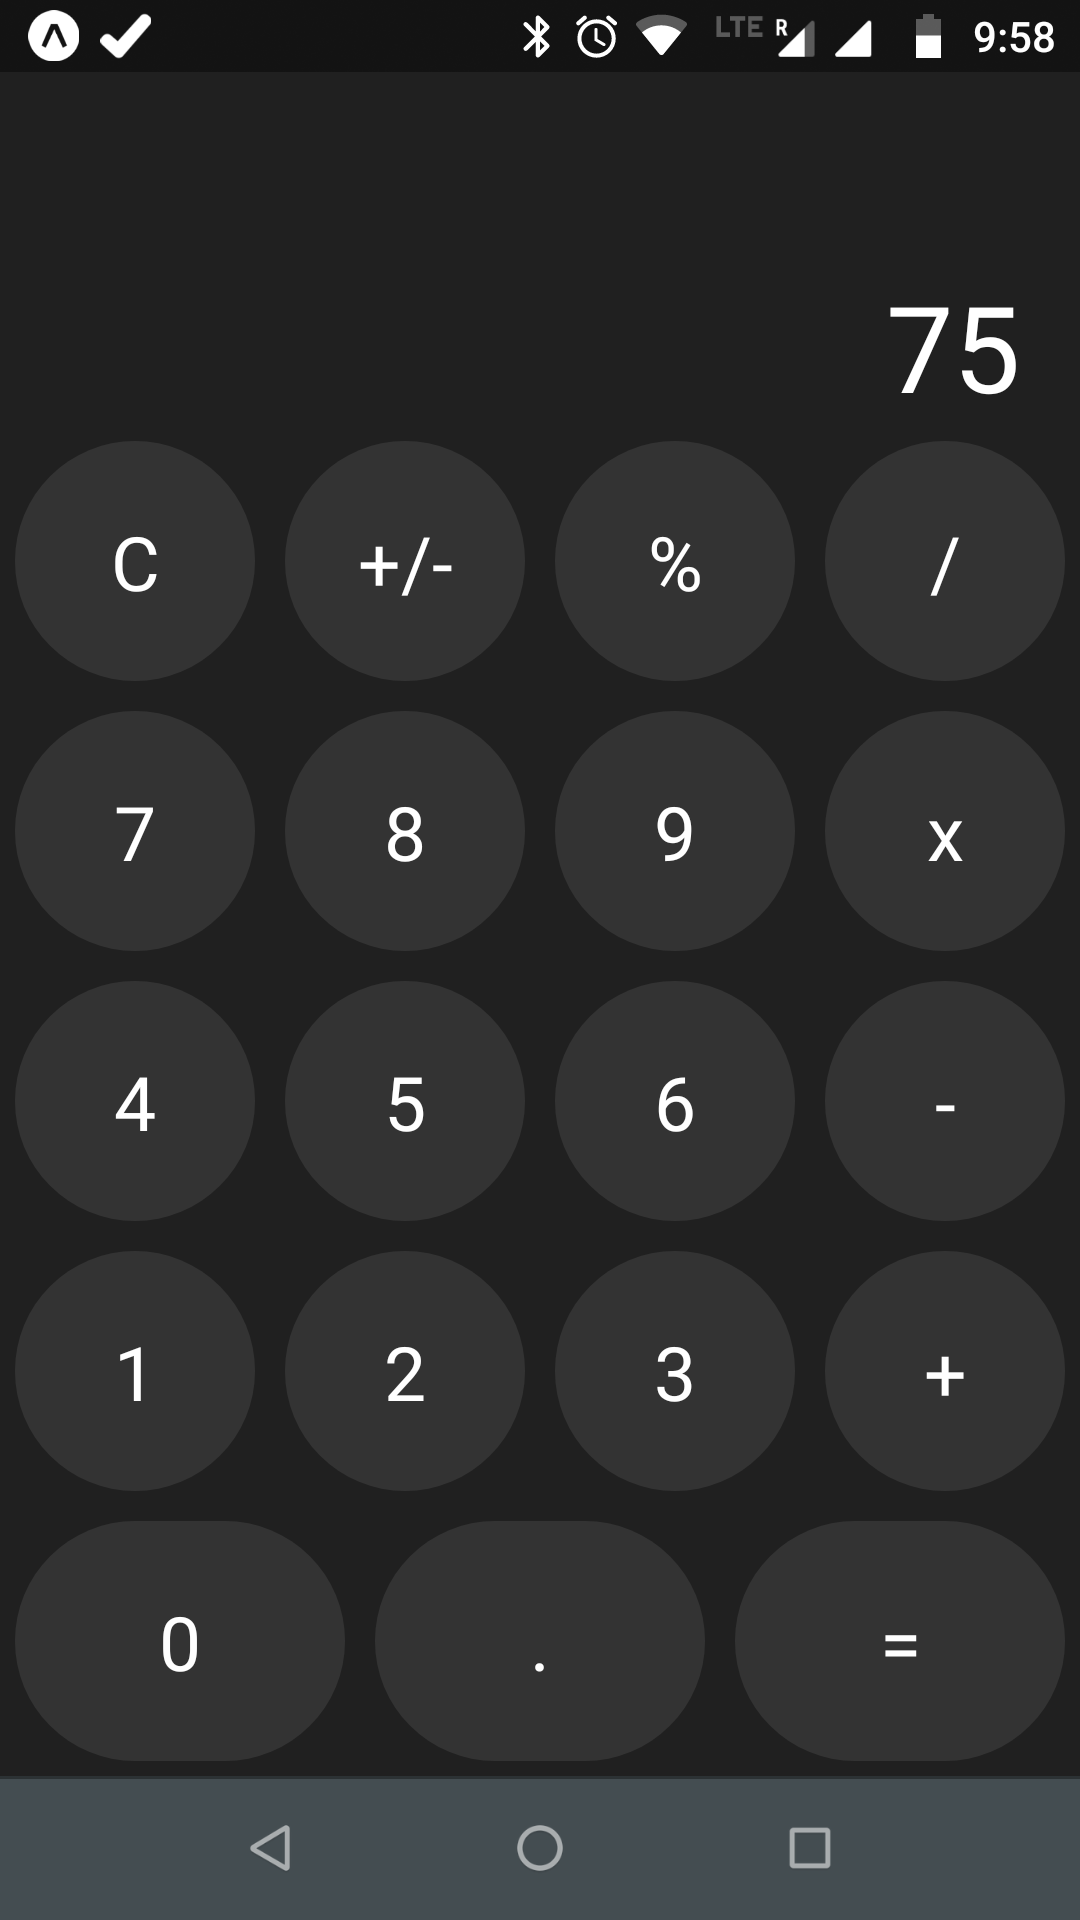 Rounded Button
Our last row have three buttons. In iPhone the 0 button takes half of the space and . and = takes the rest. We will fix the style for it next.
So, in button.js we will take an additional prop size. If it is equal to double, we are adding another style called buttonDouble to the button.
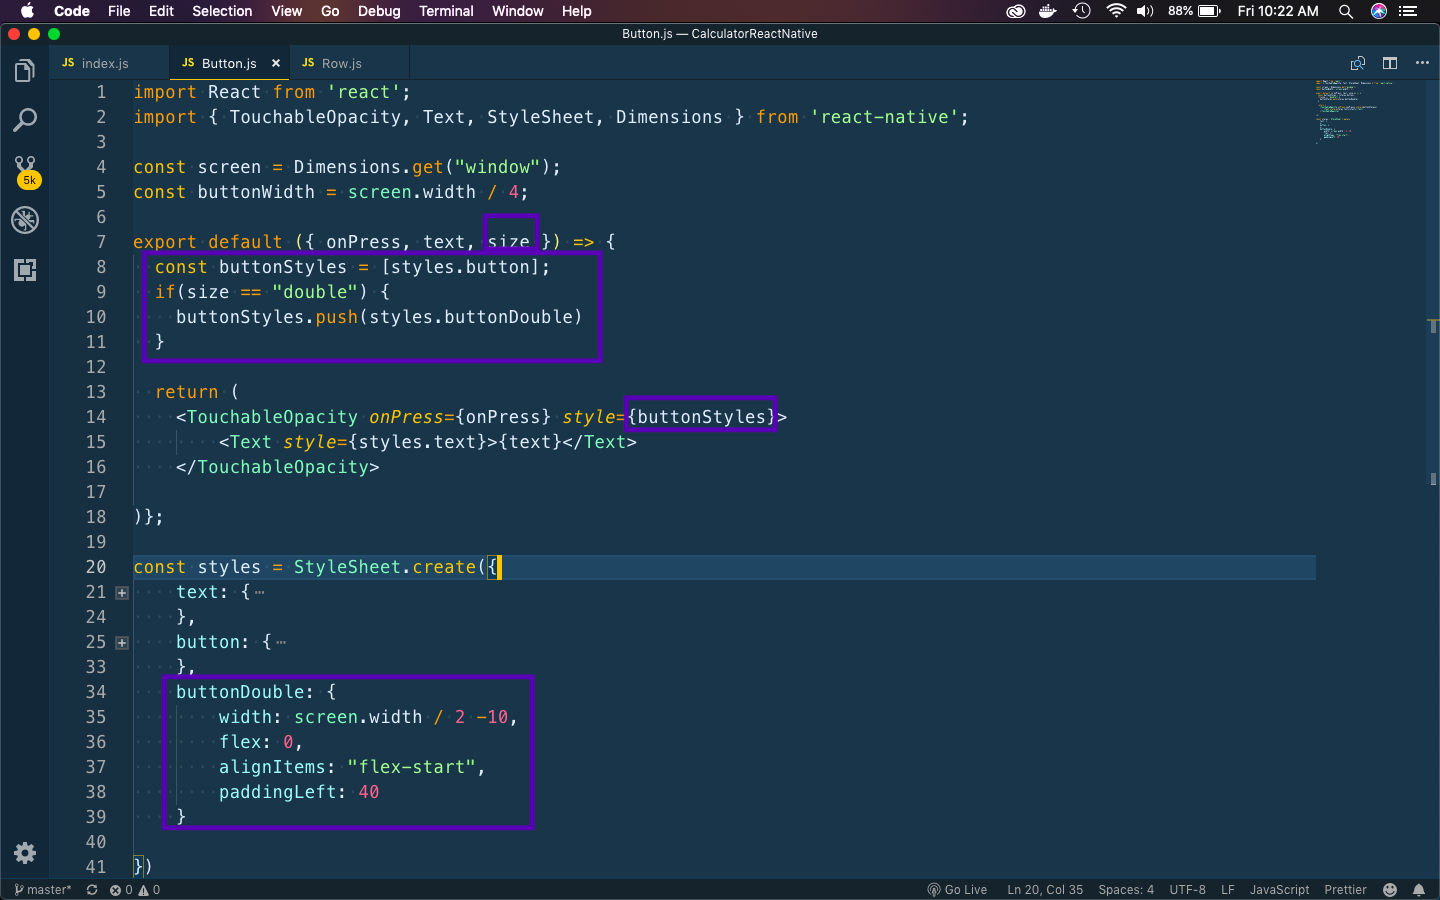 double
So, now move to index.js and add that prop to the Button 0 as below.
 size double
It will now show our Button 0 taking double space.
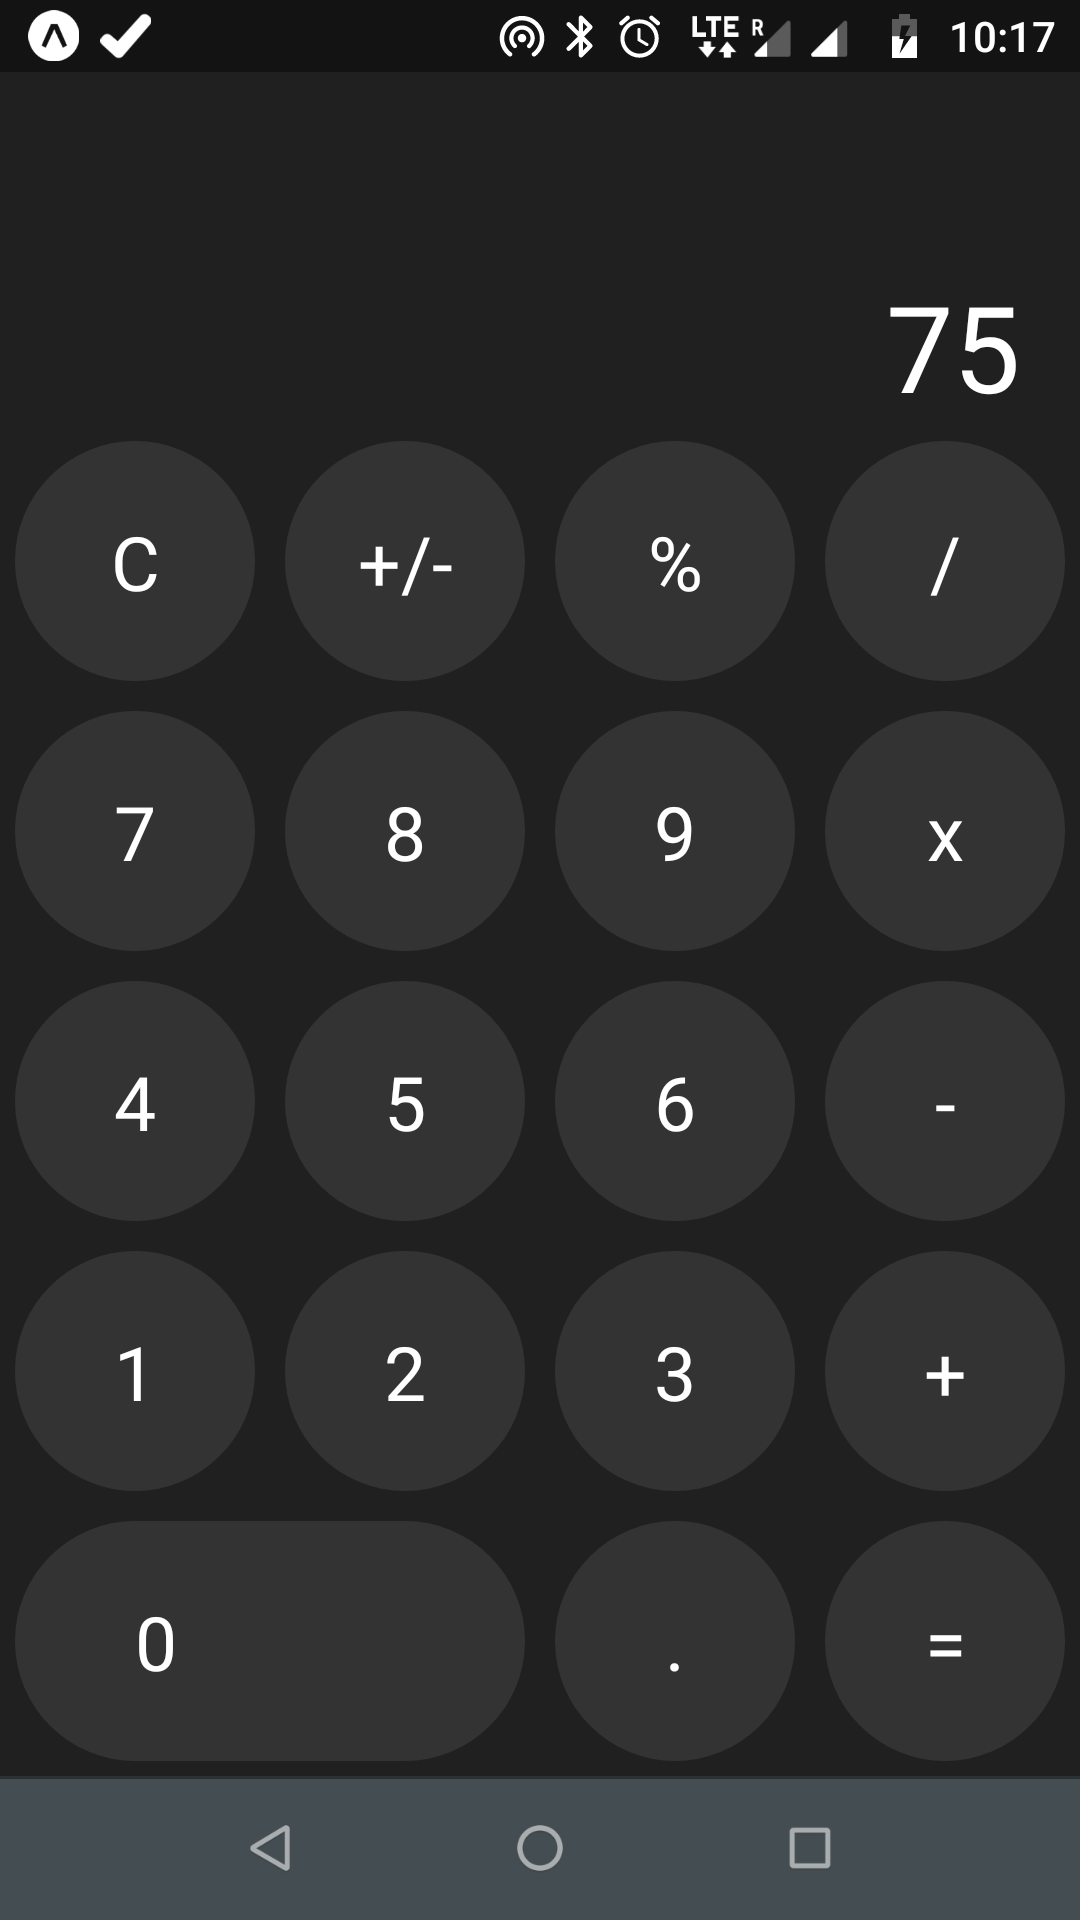 Button 0
Next, we will update colors of some of the buttons as in iPhone calculator. First let’s add a new prop for the buttons whose color will be updated in index.js
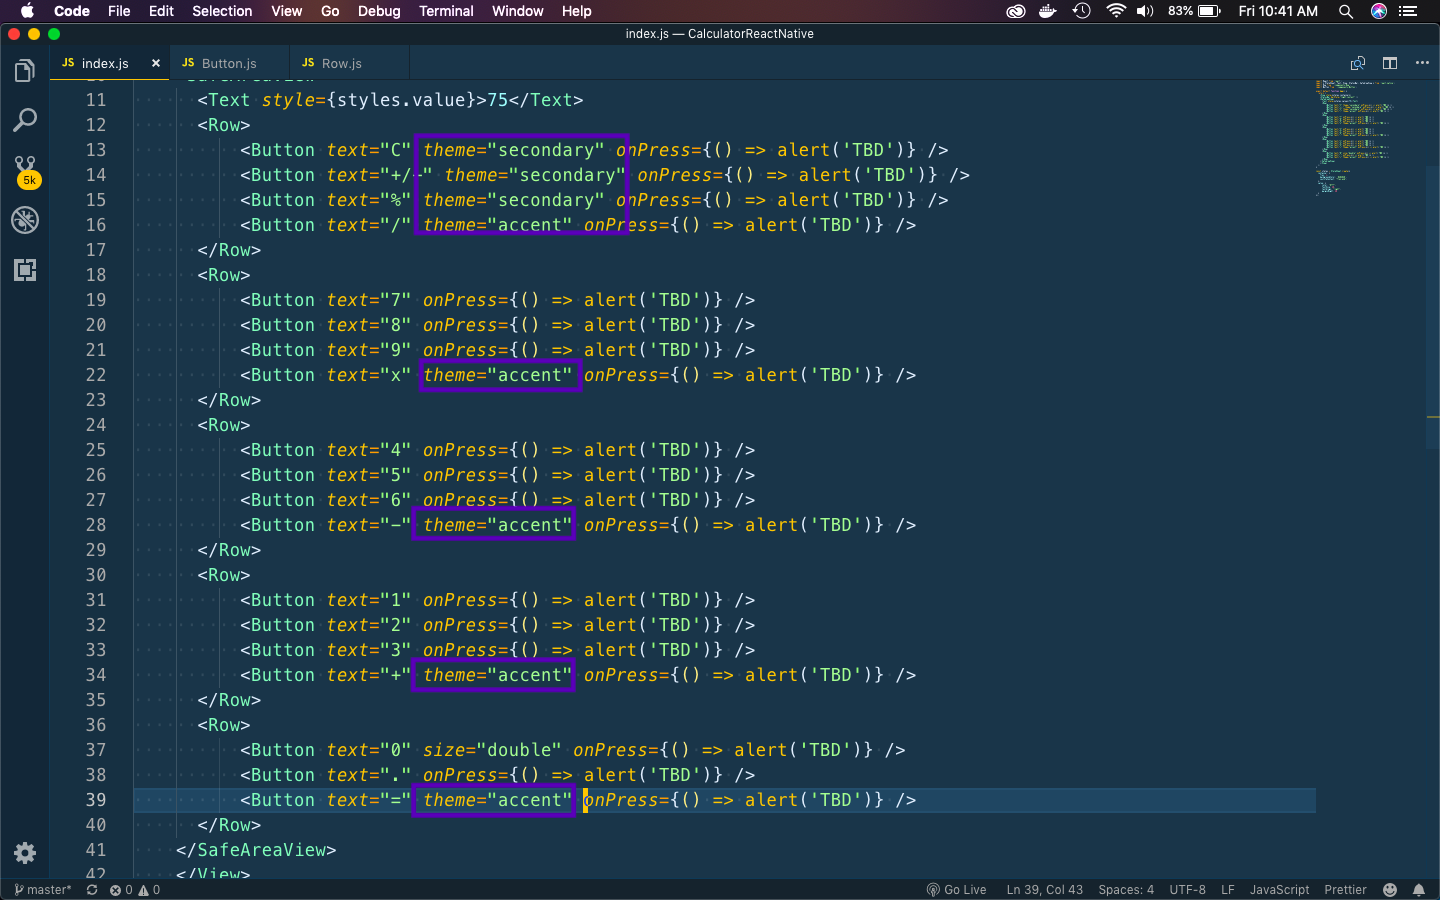 theme
theme
Next, we will update it in our Button.js
First let’s add the code for theme. We are also going to update the color of our secondary buttons, so we are creating textStyles.
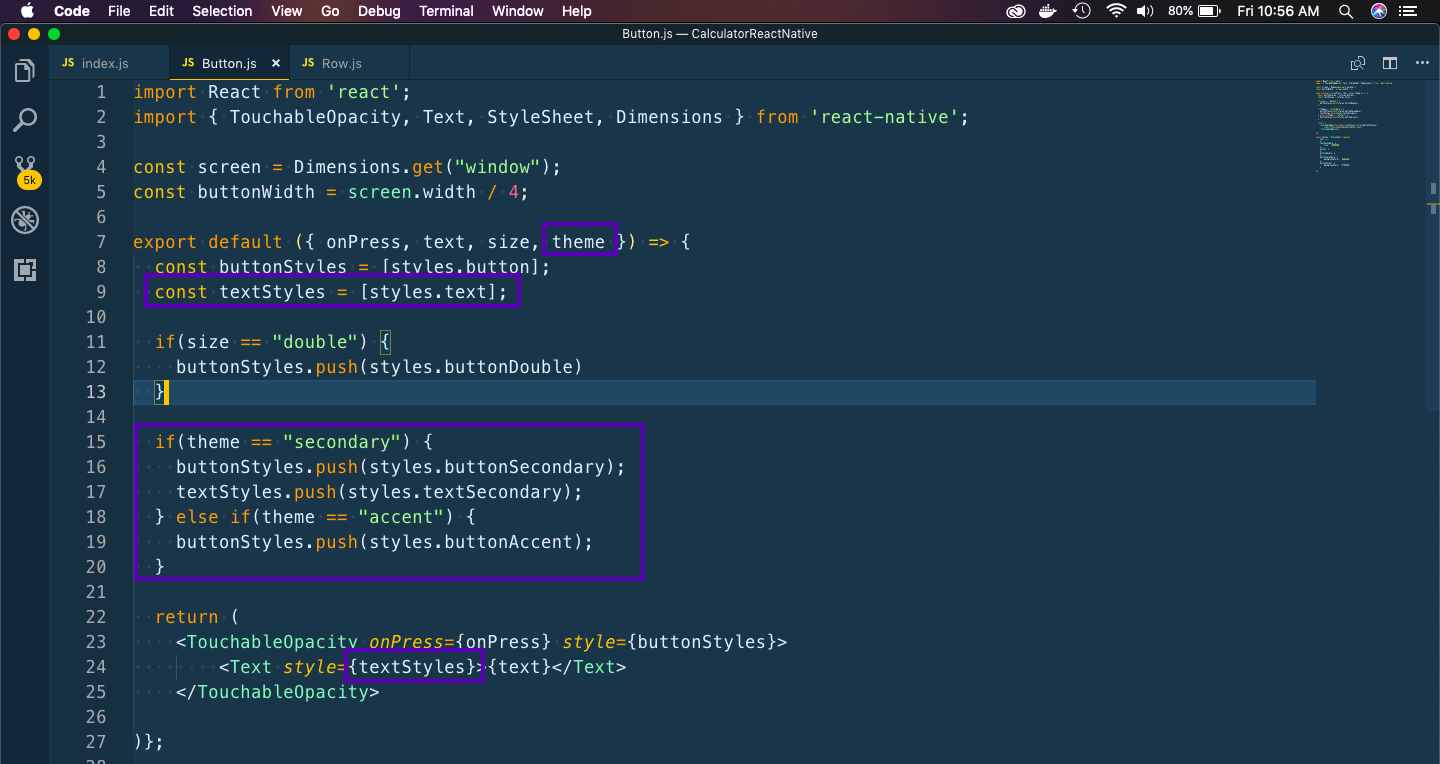 theme
theme
Now, let’s add styles for the themes and text.
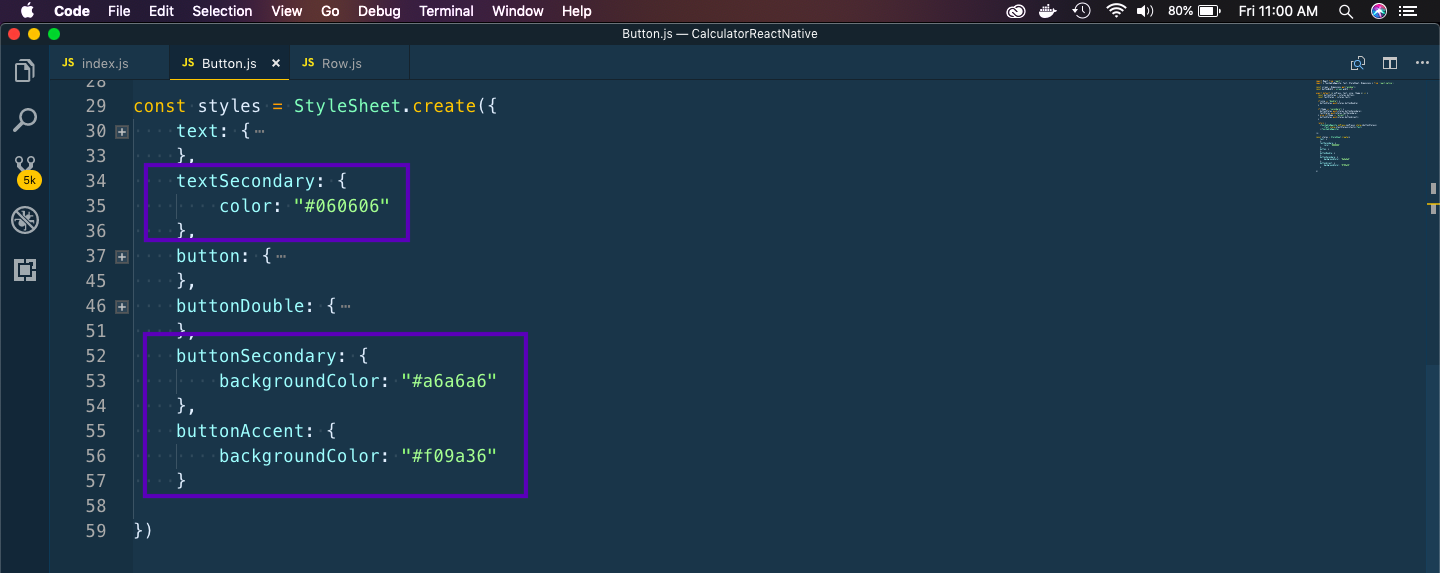 colors
Now, our App styling is complete and it is looking like the iPhone calculator.
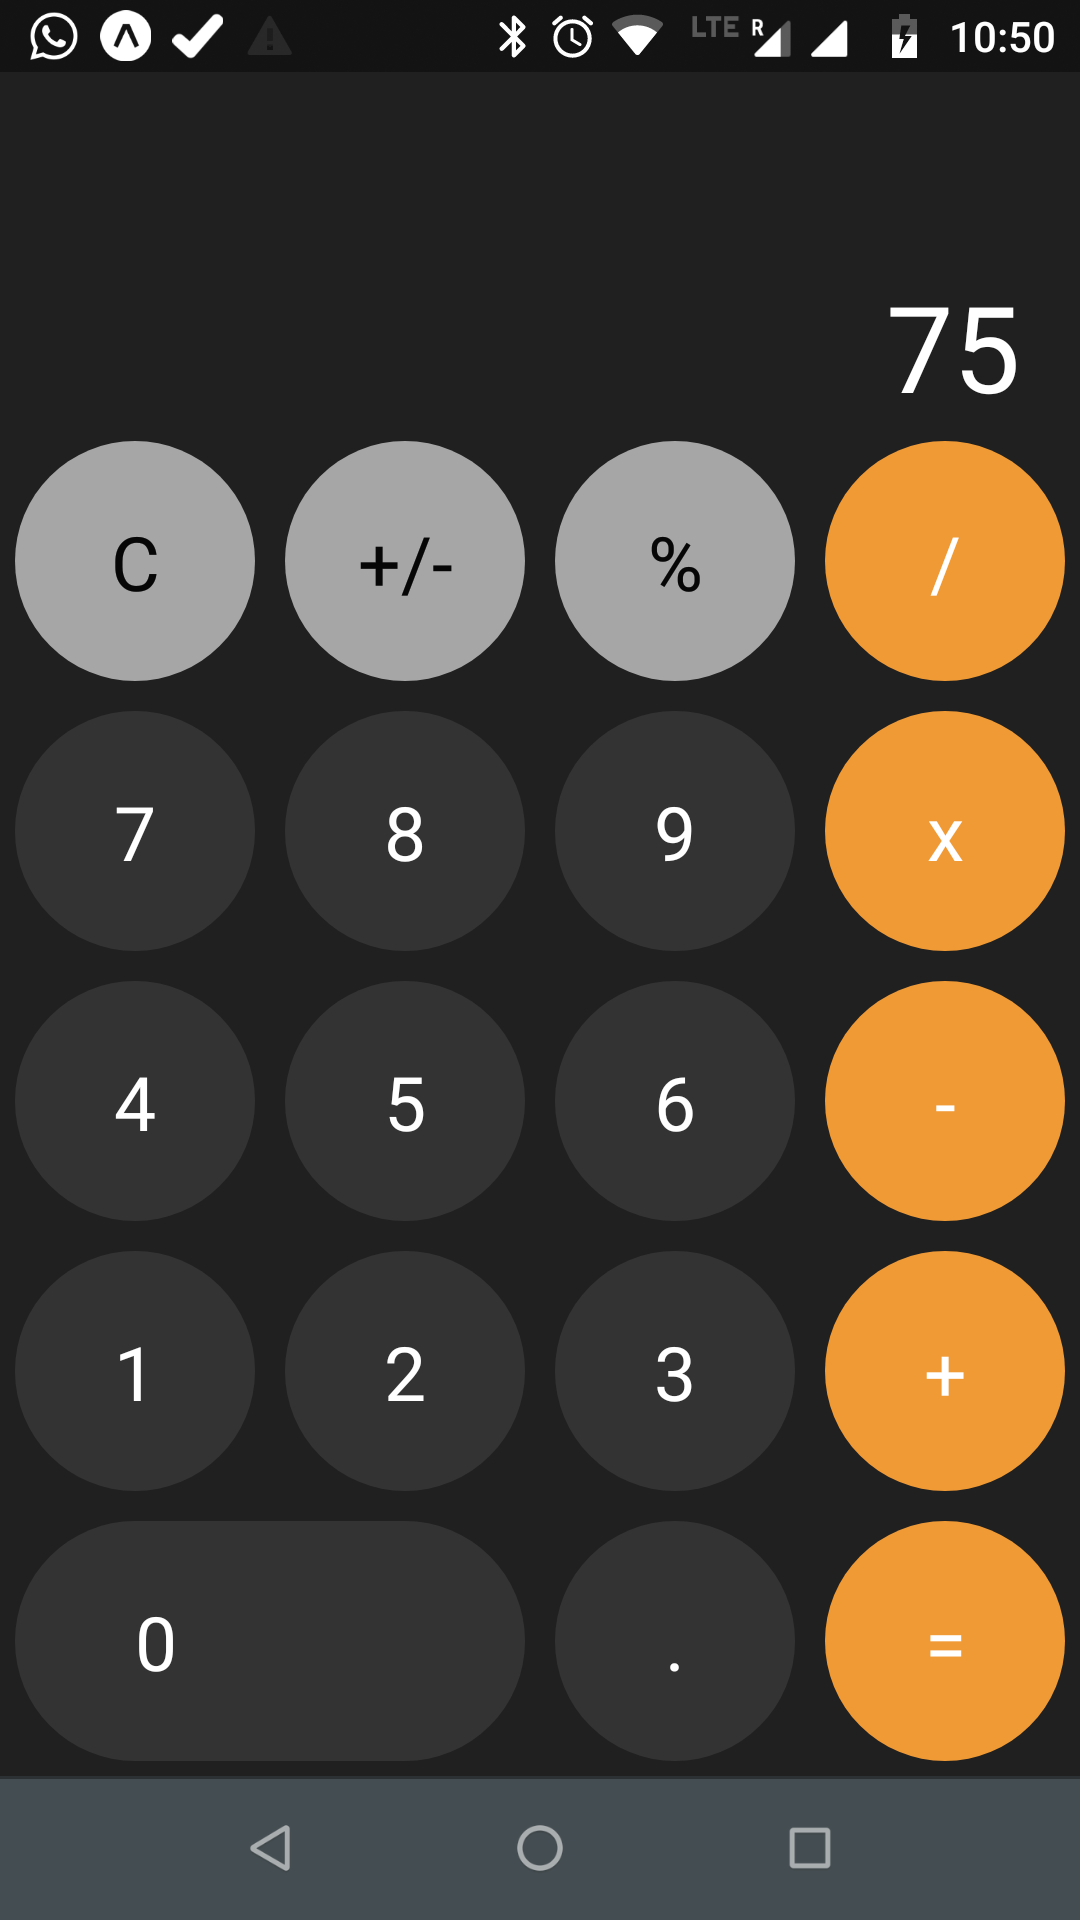 iPhone Calculator
Now, we will write the logic for calculator. We are using React hook for state management. For details on hooks go through my earlier post on hooks here.
First let’s call a function handleTap() for all buttons. It passes different parameters depending on the button.
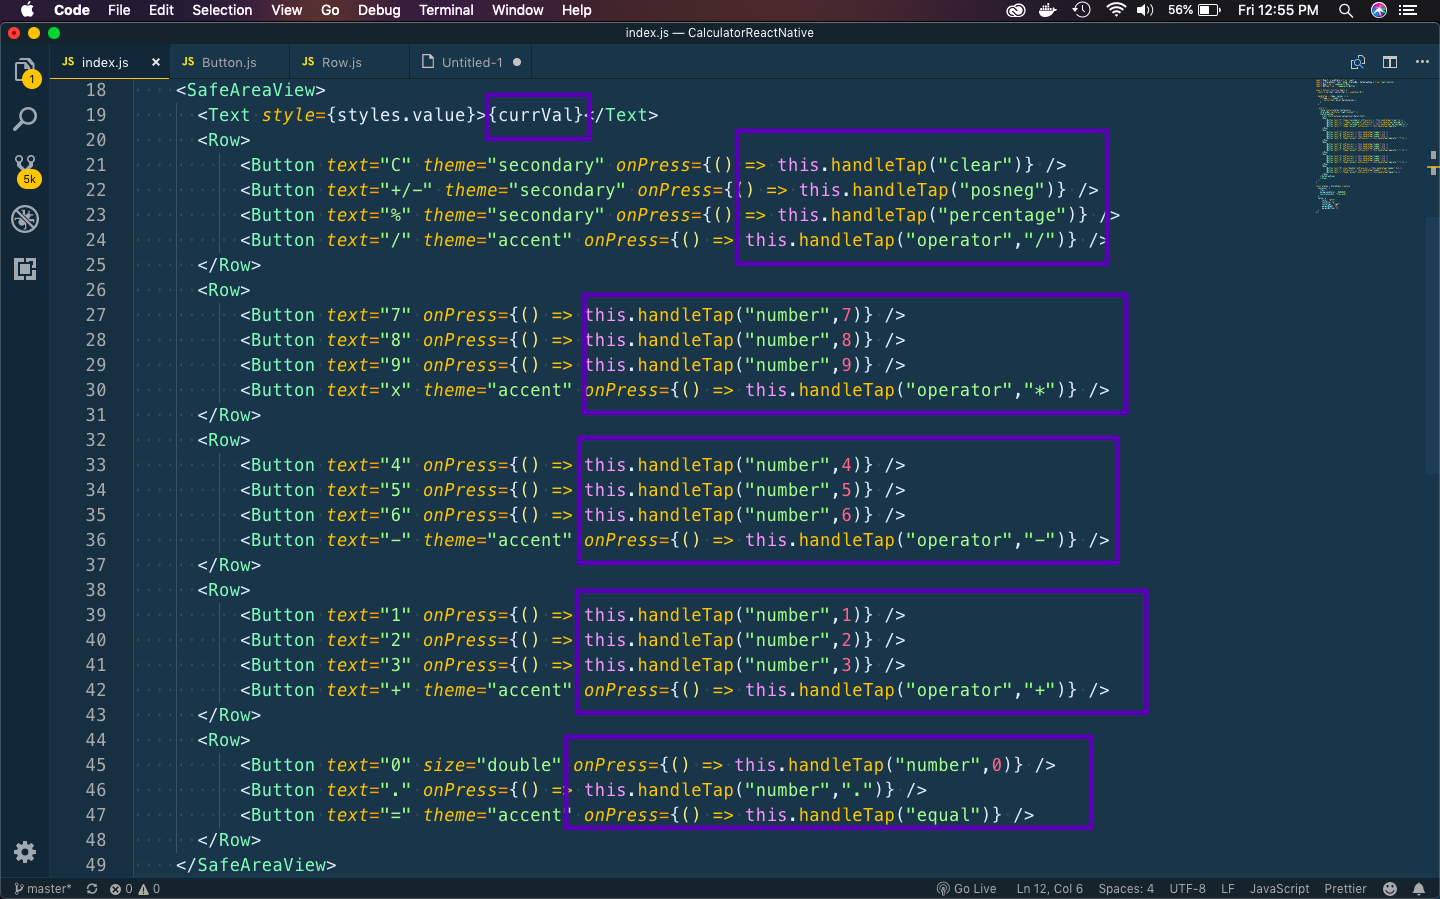 handleTap
Next, we will use the useState hook. We will declare a variable currVal and update it with setCurrVal. So, whenever the type is number we are updating the currVal with whatever the user input.
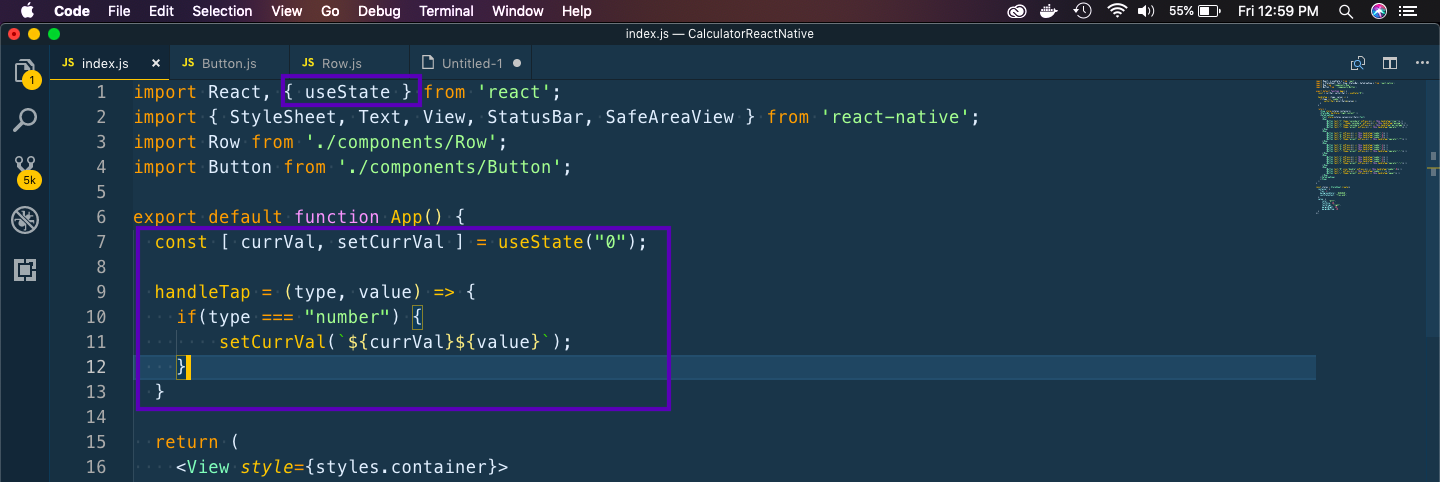 useState
Next, we will add logic for operator, clear, posneg, percentage. We have declared two additional state variables operator and prevVal.
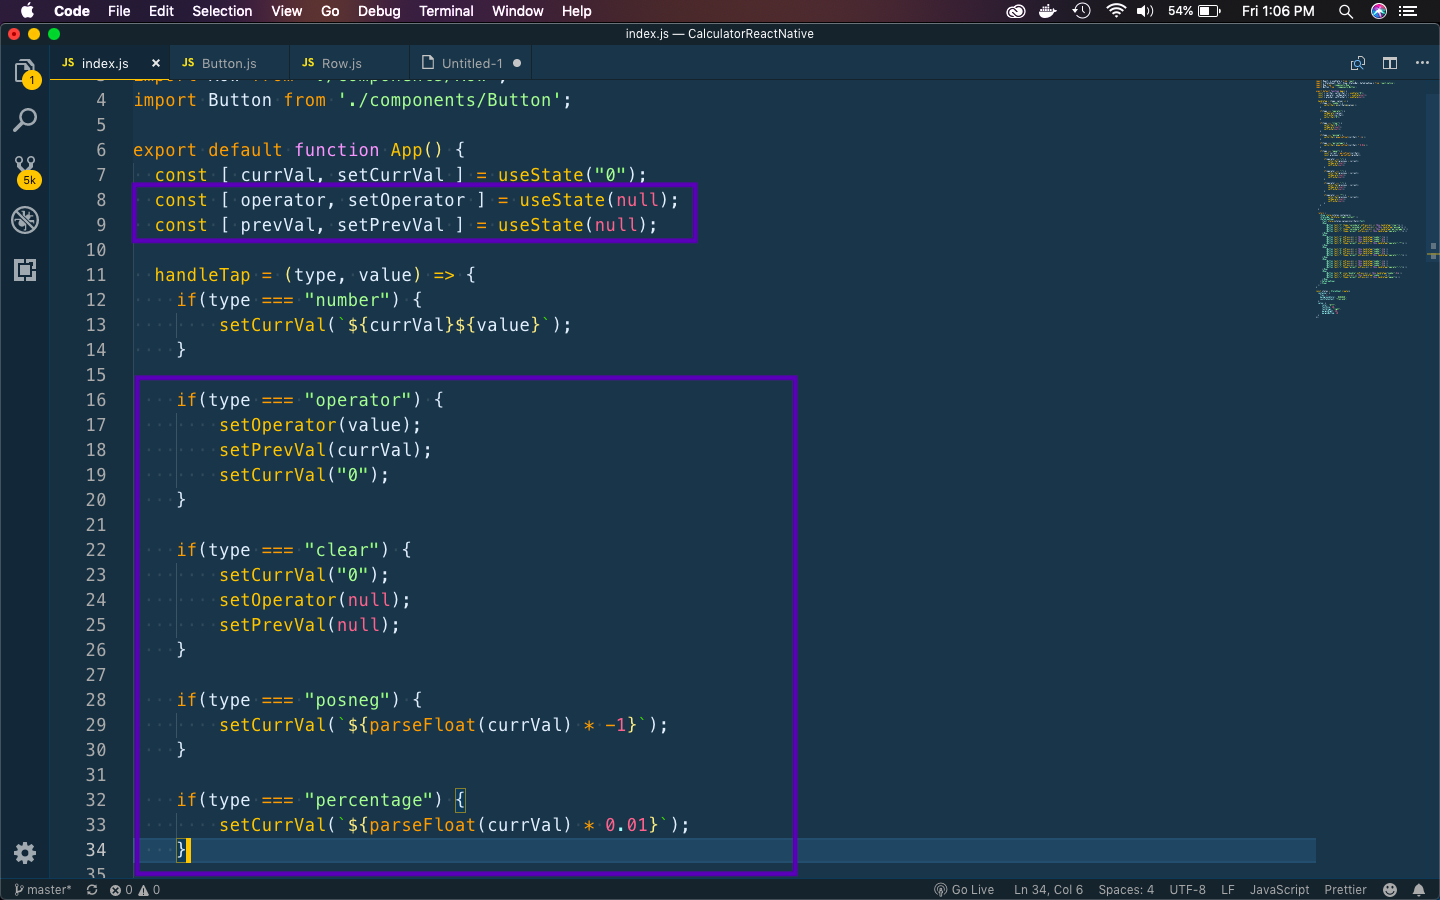 operator
Next, we will add the logic for equal. It will do calculation depending on operator.
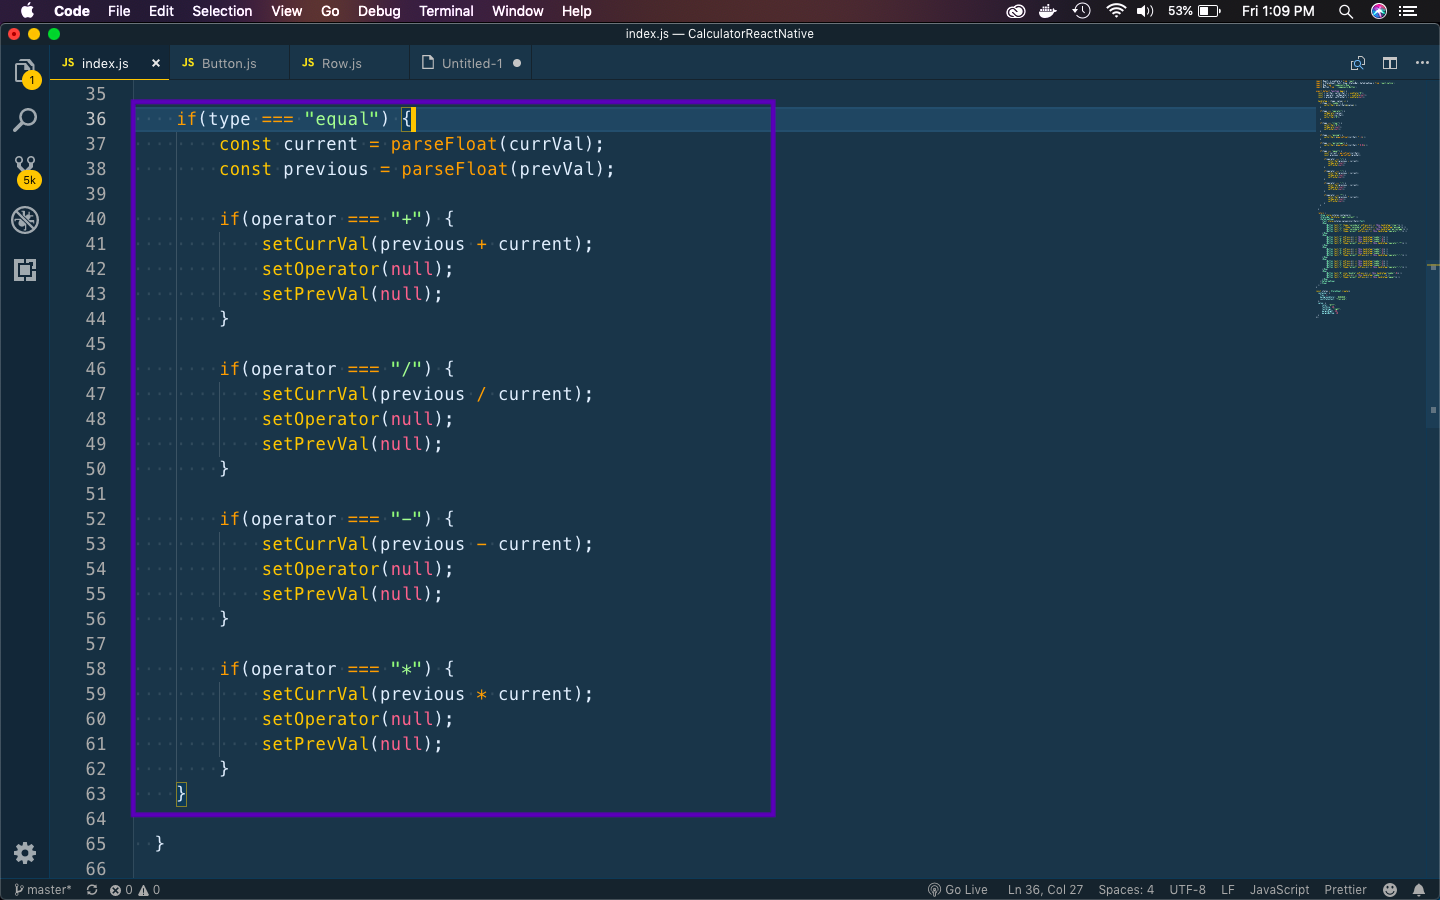 equal
equal
This completes our App. So, go ahead and play with it. You can find the code for the same in the link here.