React Native Simple App in 2 hours
by Nabendu Biswas / February 10th, 2021
#reactnative #react #webdev
I am mainly a ReactJS developer and worked on many enterprise level ReactJS project and also currently working on one of them. I have a lot of ReactJS stuff on my blog and youtube channel also.
But as all web-developer i also want to take my ReactJS skill to React Native and do some mobile development. I had build four React Native projects till date, out of which one was a freelance project and rest are on my blog. But did all of them 2 years back.
So, it’s time to relearn React native and build some projects again. The first thing which we need to do, when we start with React Native is to install expo. So, go ahead and install expo globally by the following npm command.
npm i -g expo-cli
You also need to install Expo Go app on your mobile device. More details of the installation can be found here.
After the installation, open the terminal and give the command expo init TeslaSimpleClone.
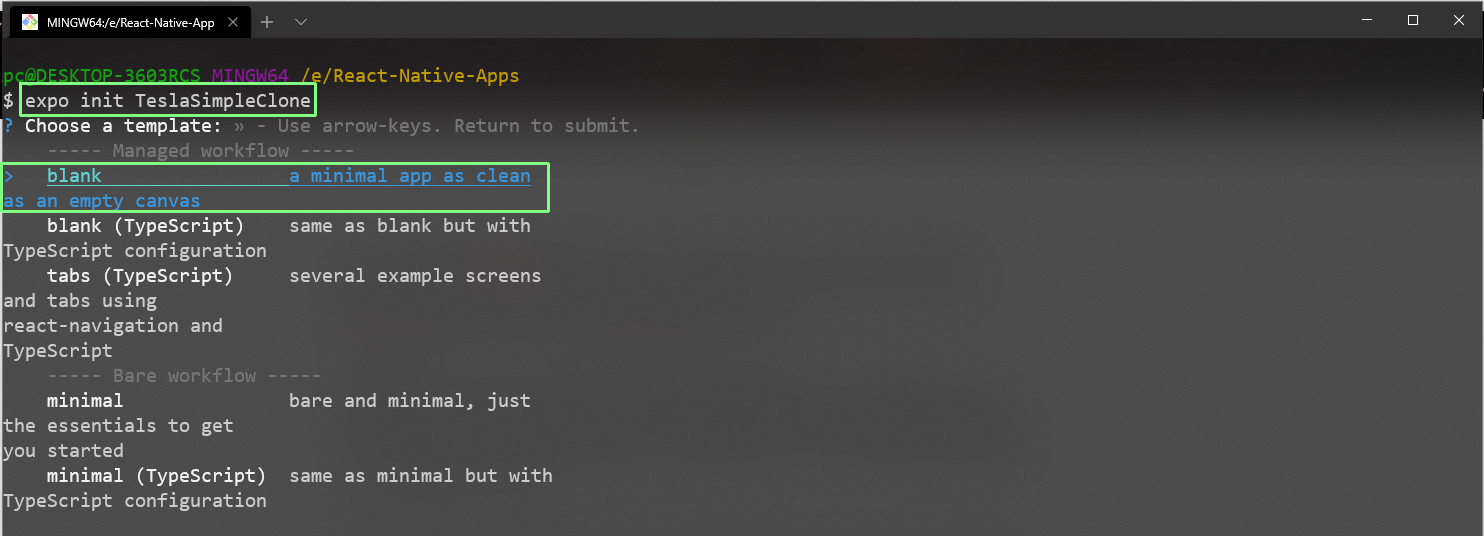 init
init
In this choose the blank option and click enter and it will start the installation.
 Installation
After the installation is done, we will get the instruction and we will cd to our folder. After that i had opened the code in VSCode and then ran npm start to start the project.
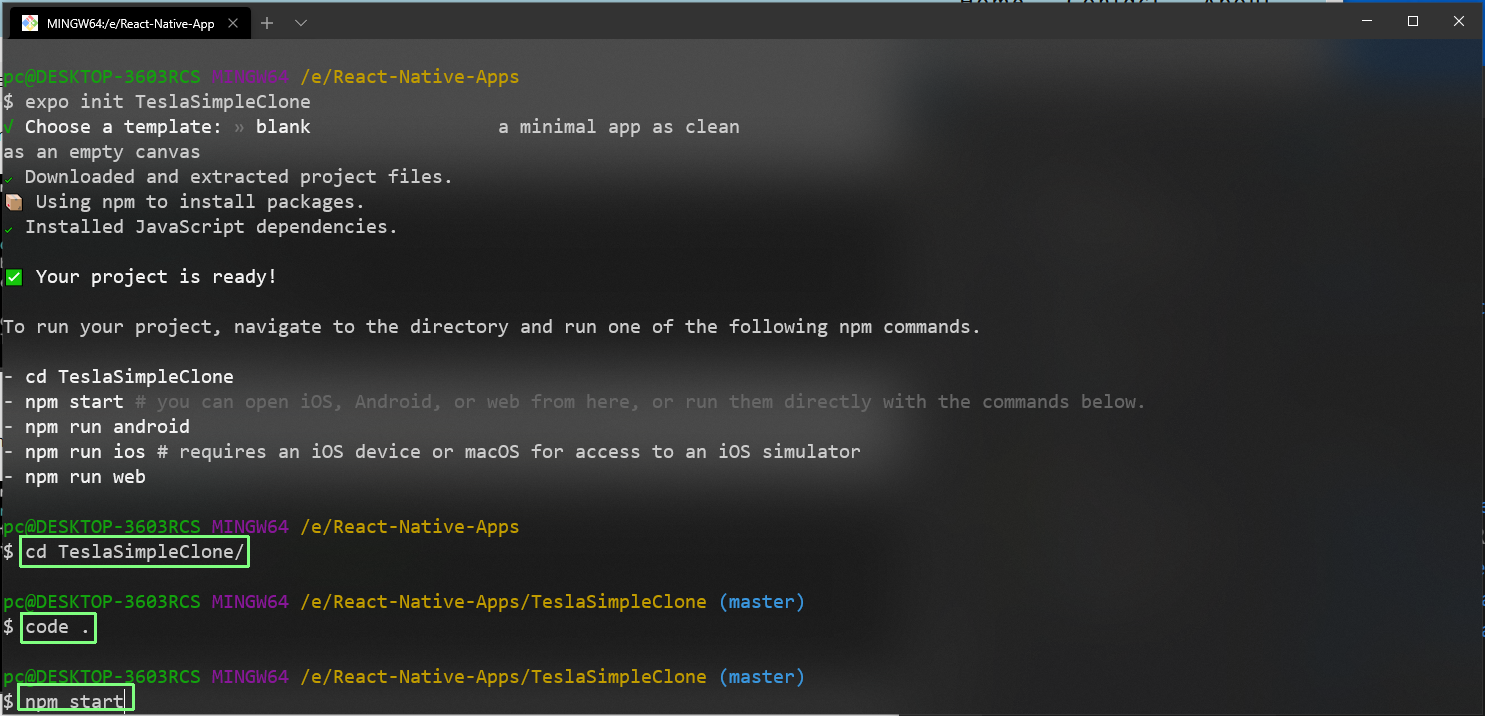 npm start
It will open the http://localhost:19002 / in browser.
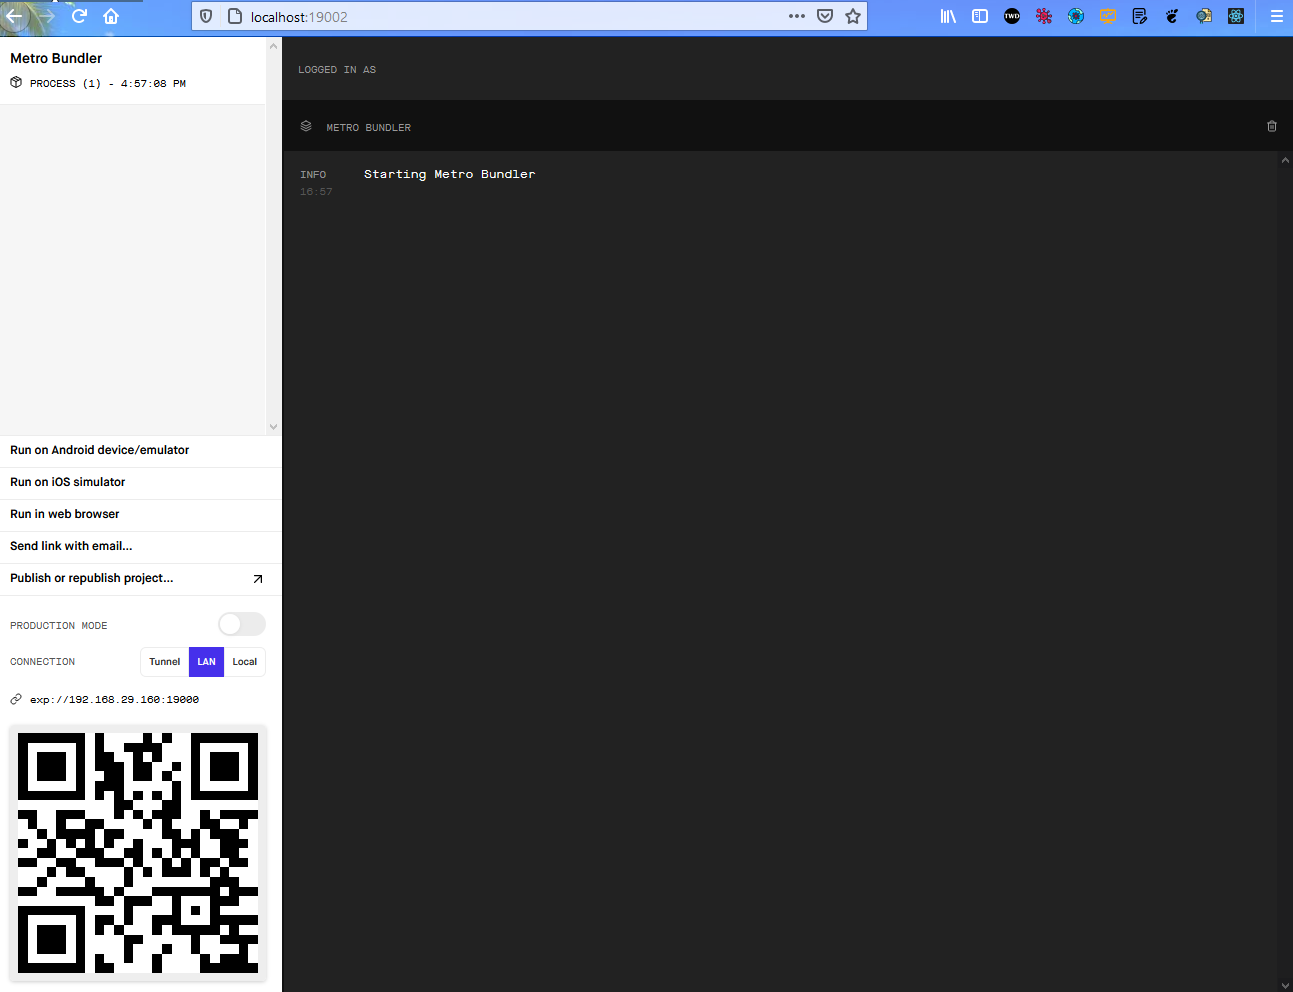 localhost
Now, i am running the output on a physical Android device. For running on a physical device, you need to head over to Play Store and install Expo Go.
Now, open the app on your phone. You will get the below screen.
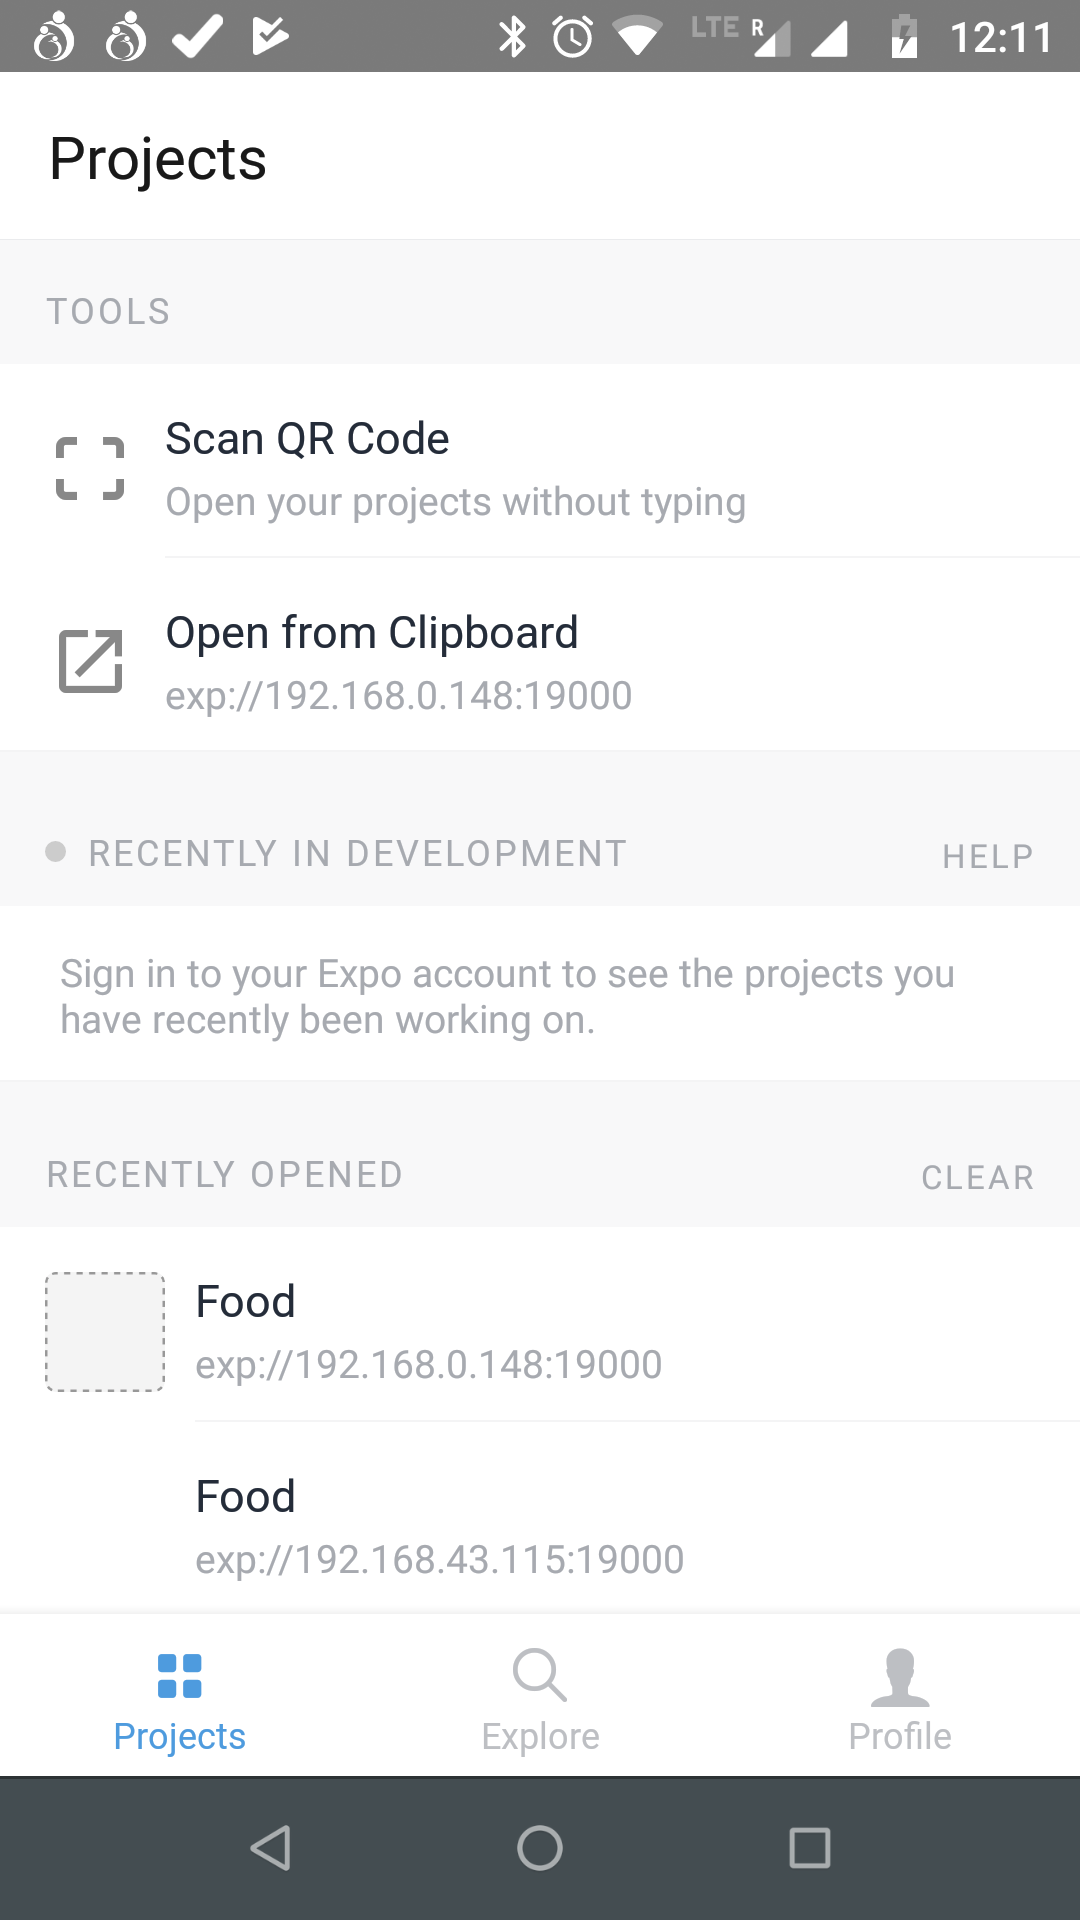 Expo App
Click on Scan QR Code, it will open Camera. Point it to the QR code in the browser and you will the below screen, after all installation is done.
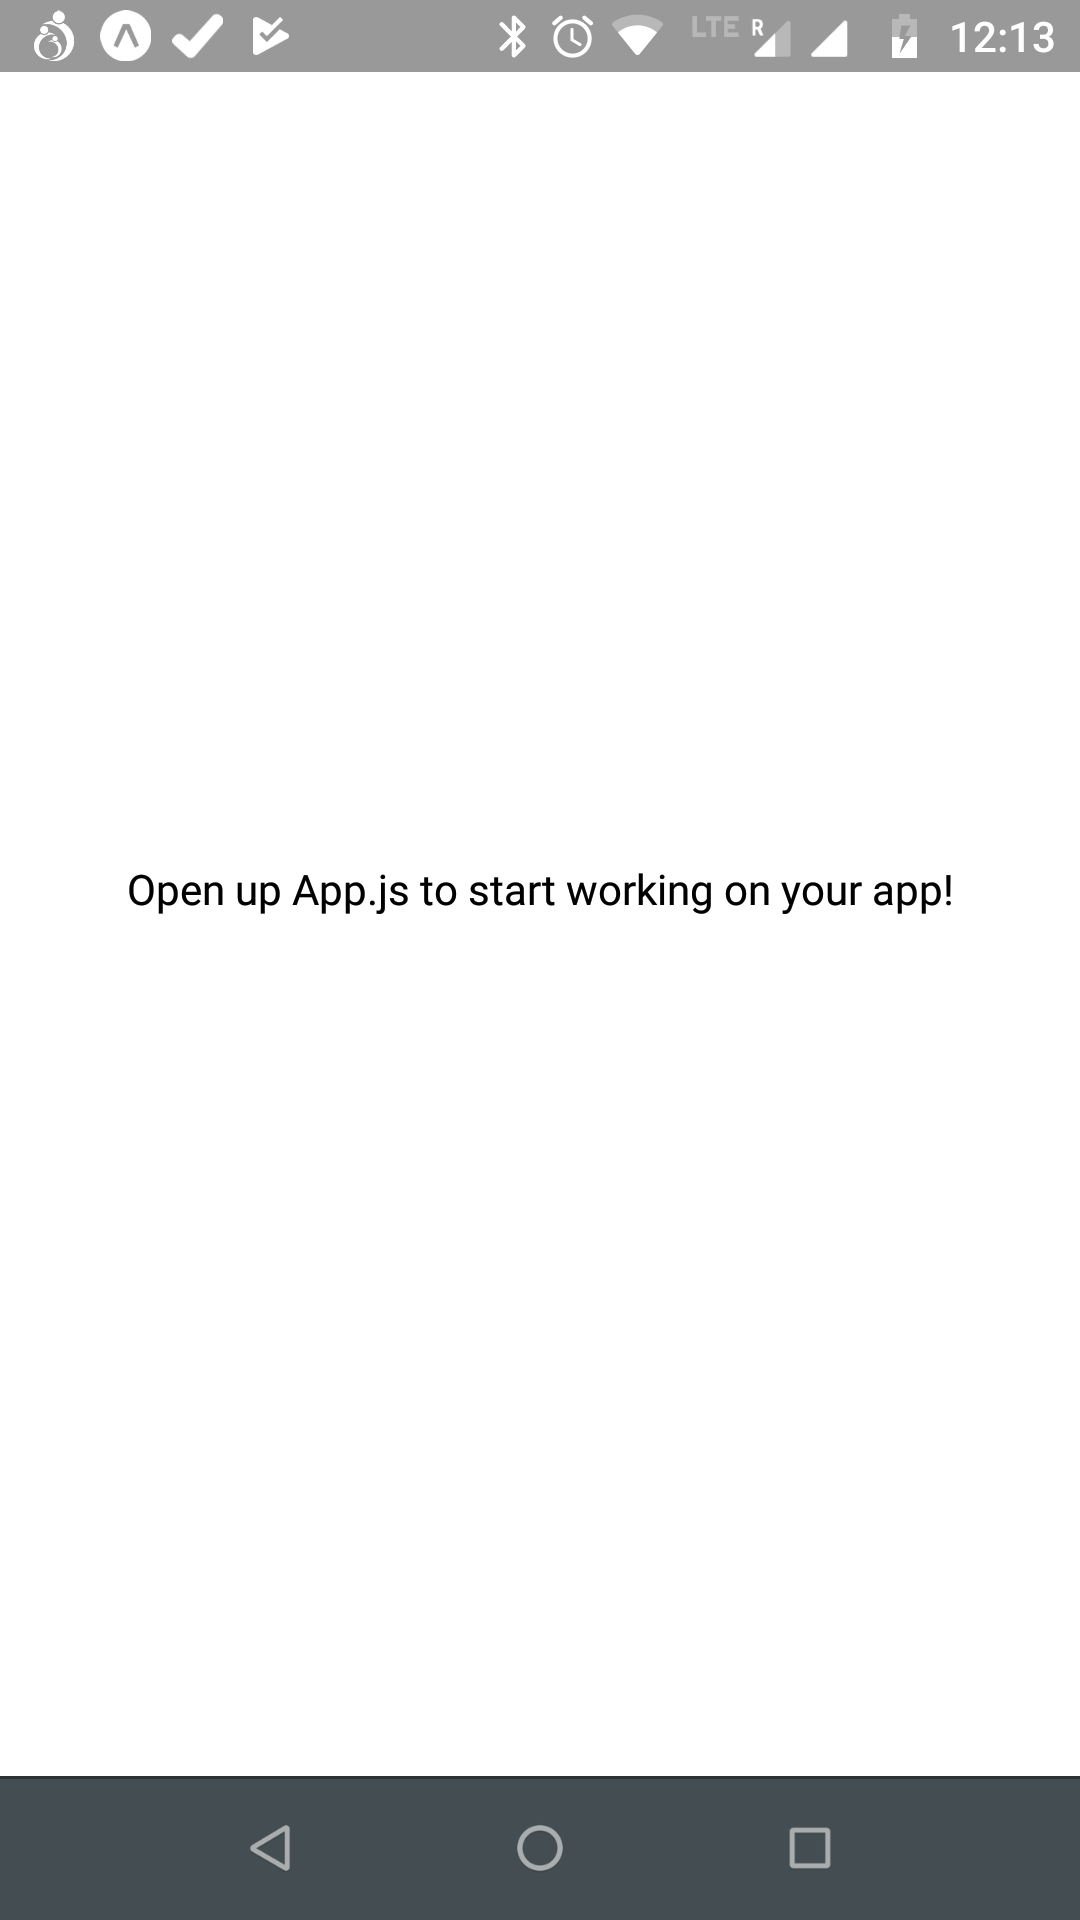 Initial App
Now, in App.js if we change the text to Hello World, it will reflect instantly in our connected mobile device.
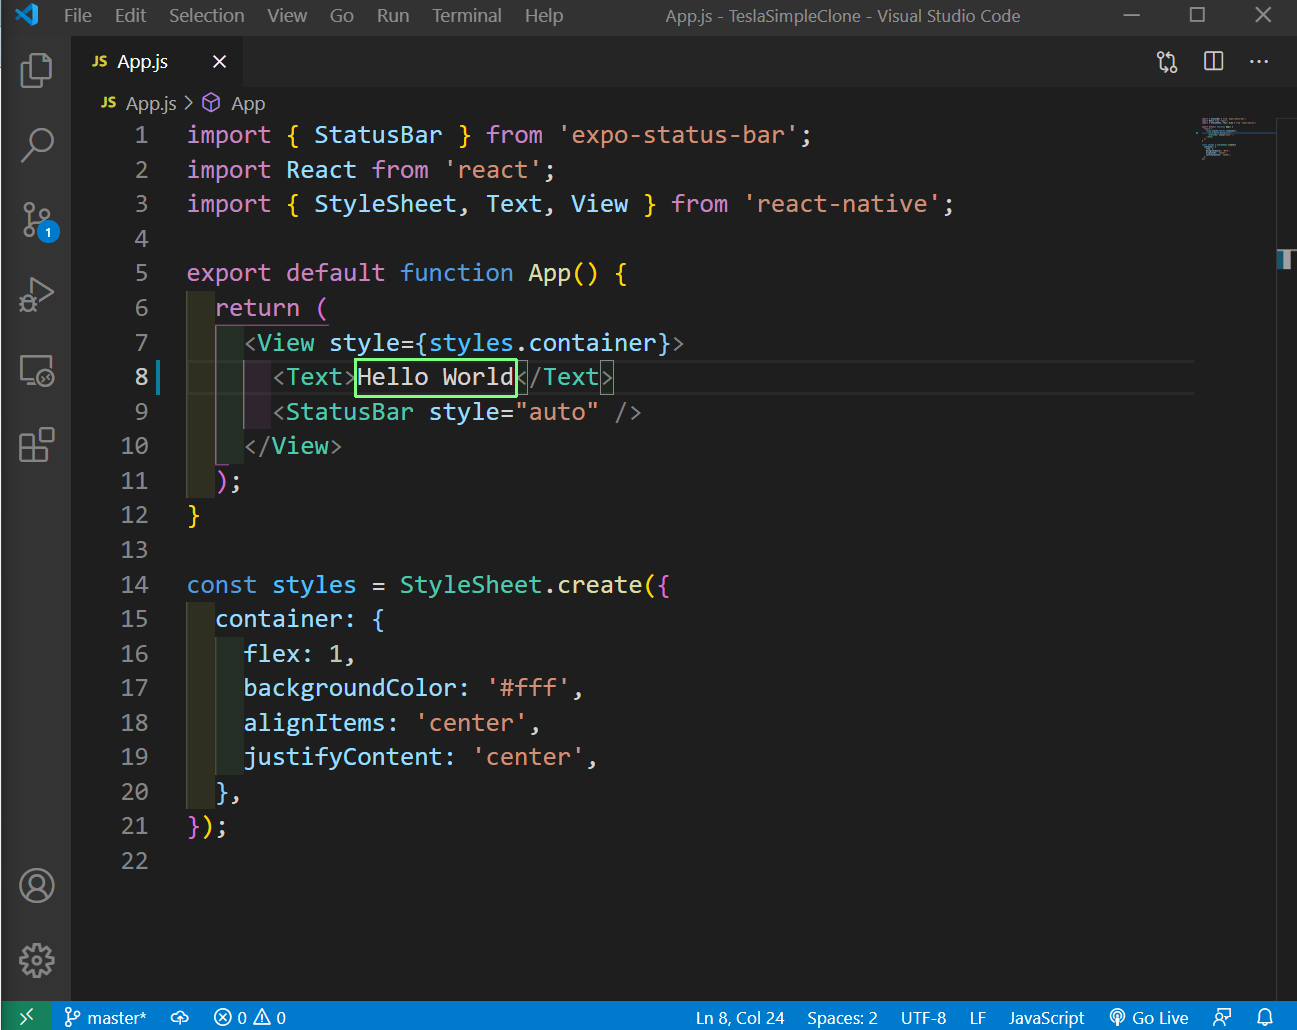 App.js
Now, in App.js we will create the code to show the title and subtitle. For this we will use View, which is like a div in ReactJS.
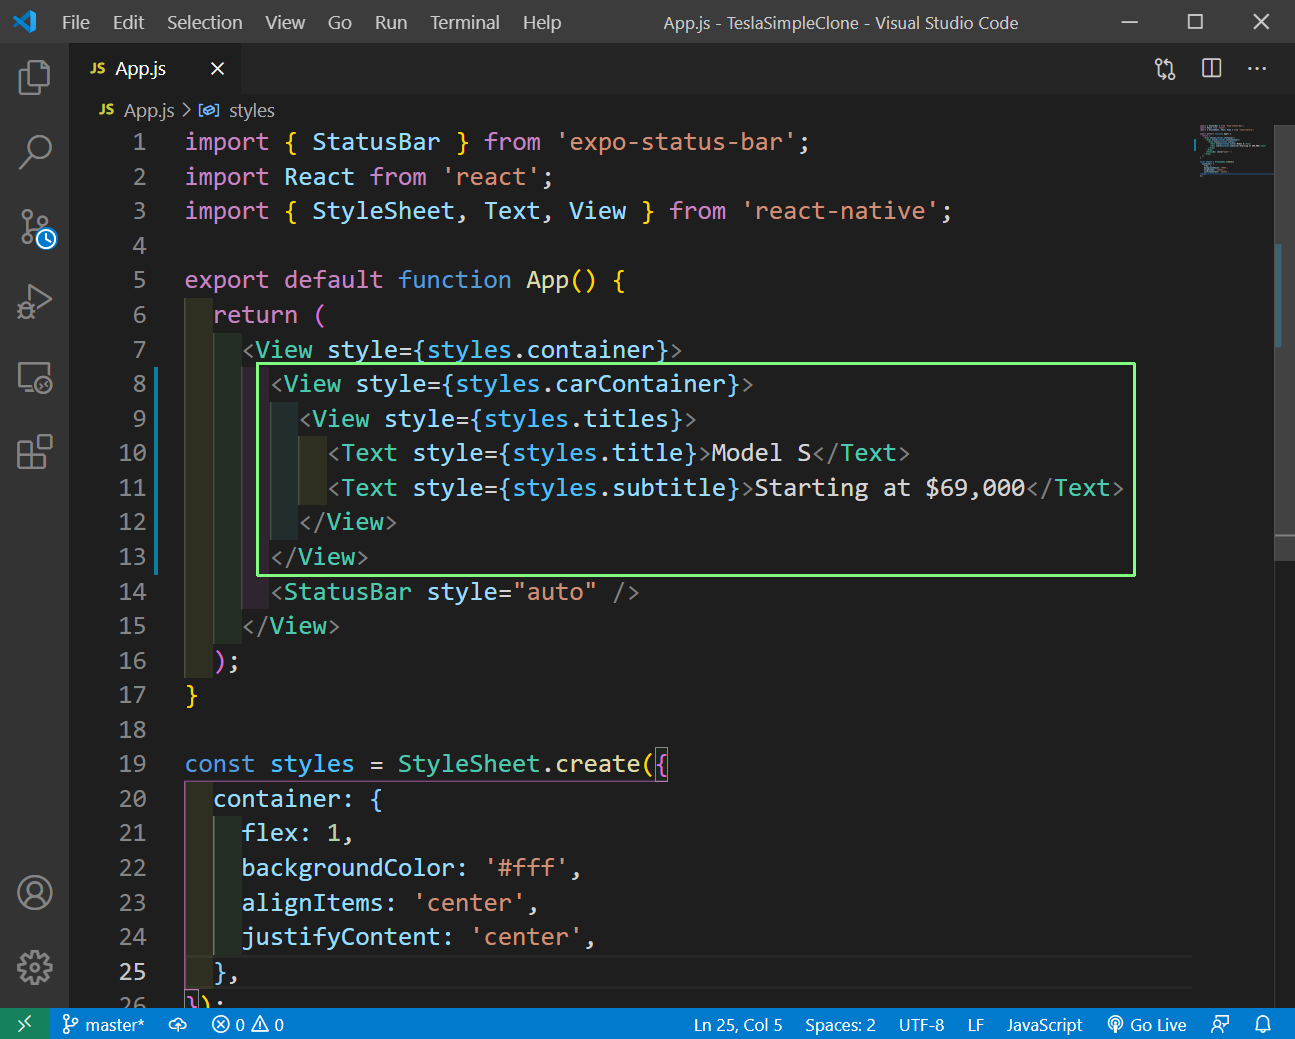 App.js
Next, we will add styles for all the classes we just created by adding them in styles in App.js only.
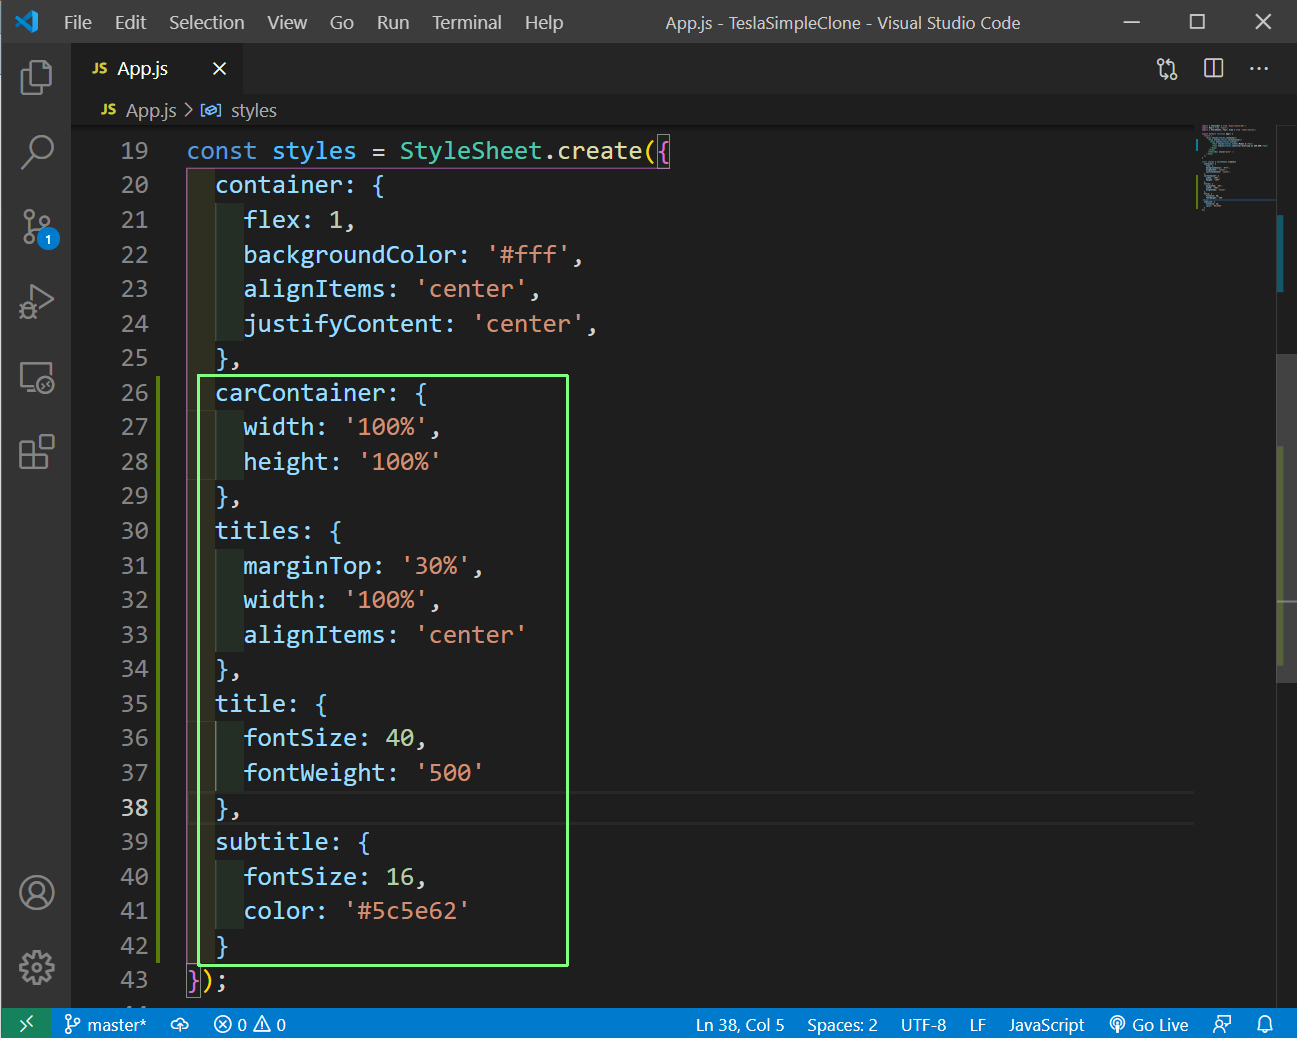 App.js
Now, in our mobile device we can see the title and subtitle.
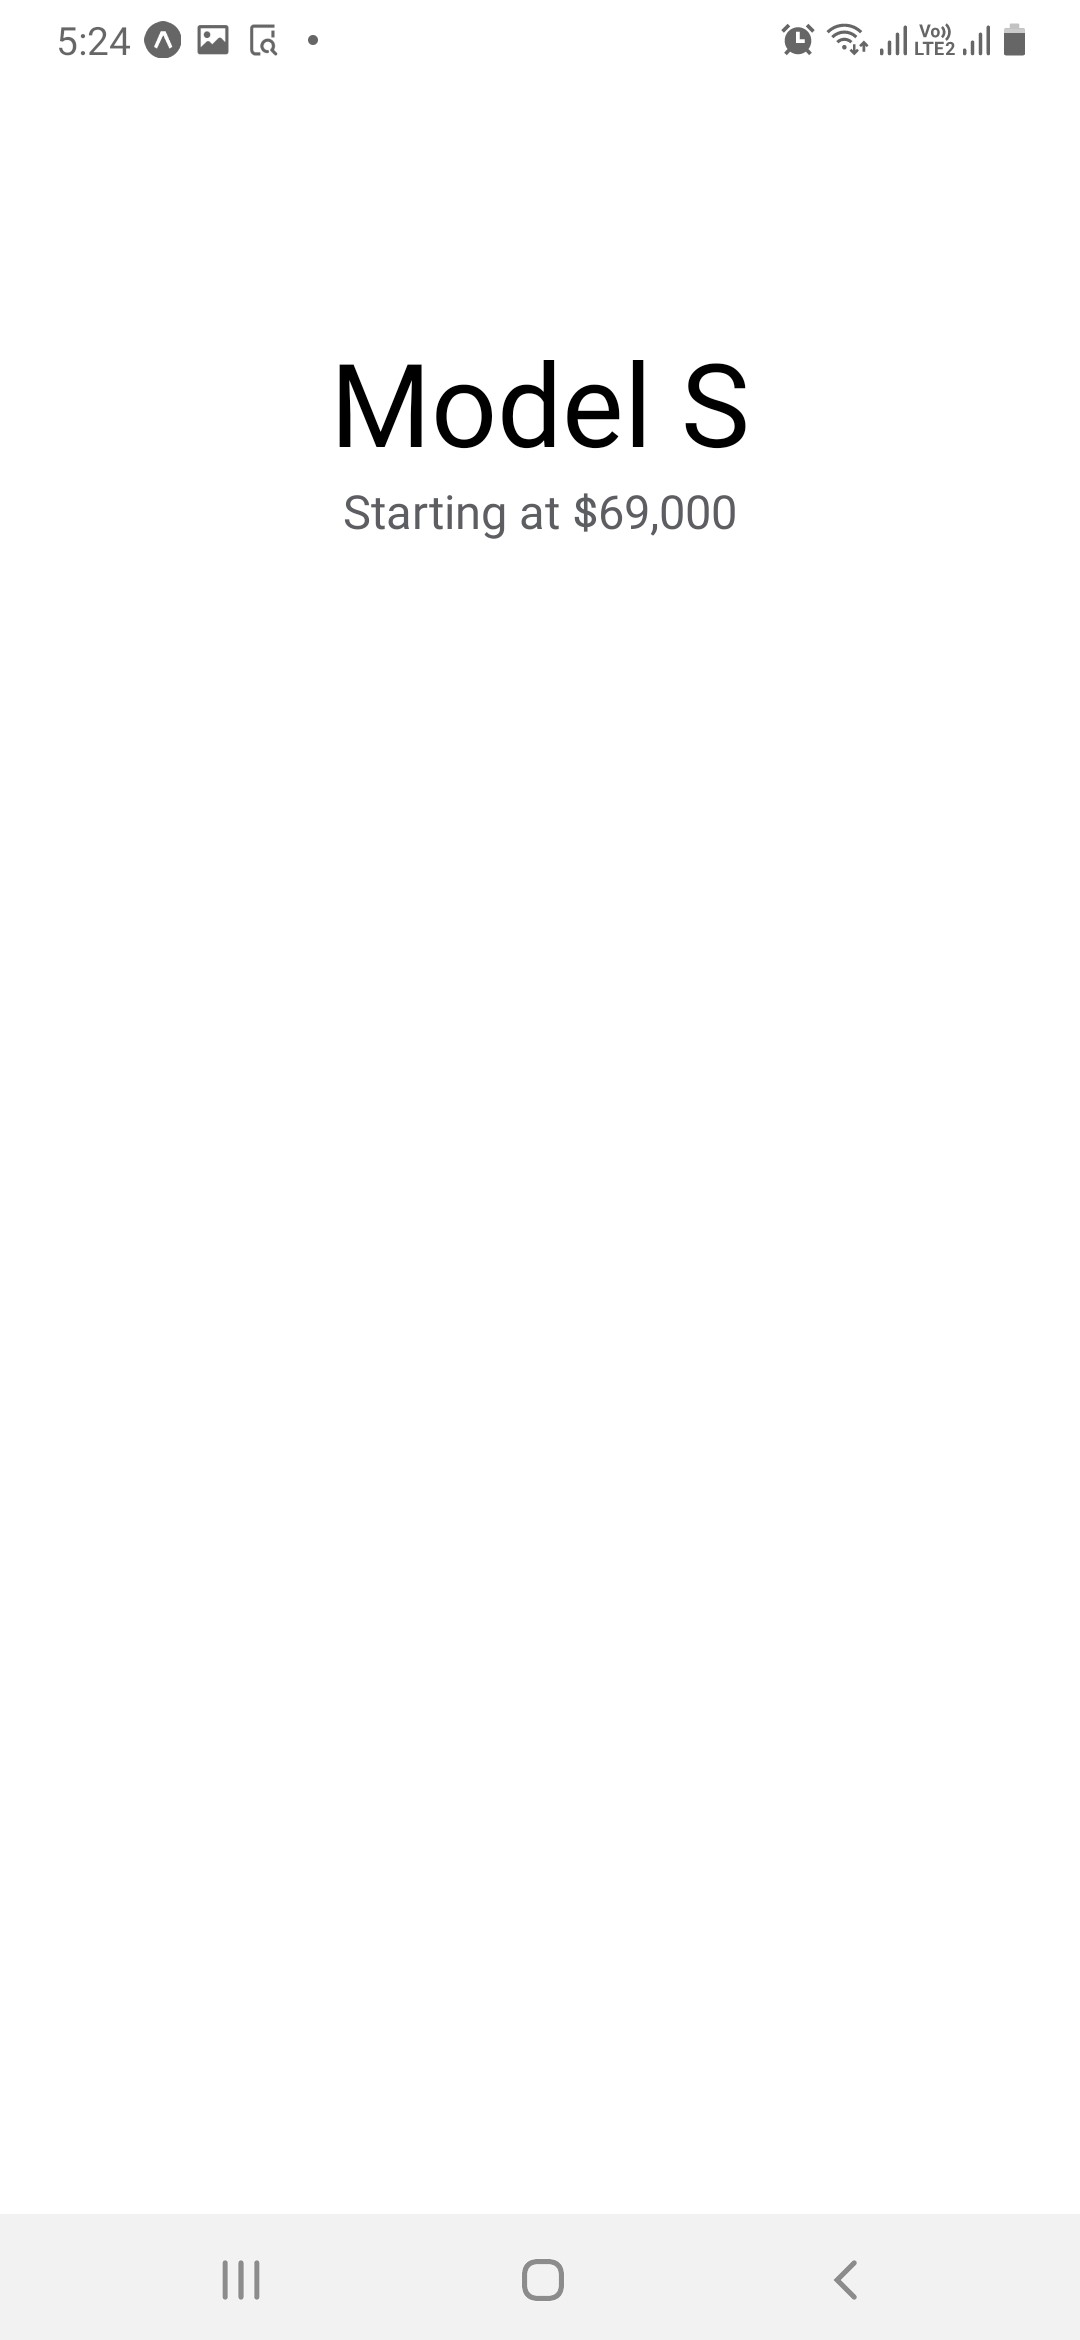 Updated
Next, take the images folder from the github link at the end of this post and ad it to the assets folder.
To show the background image, we will import ImageBackground from react-native first. After that in our project we need to use it and give the source.
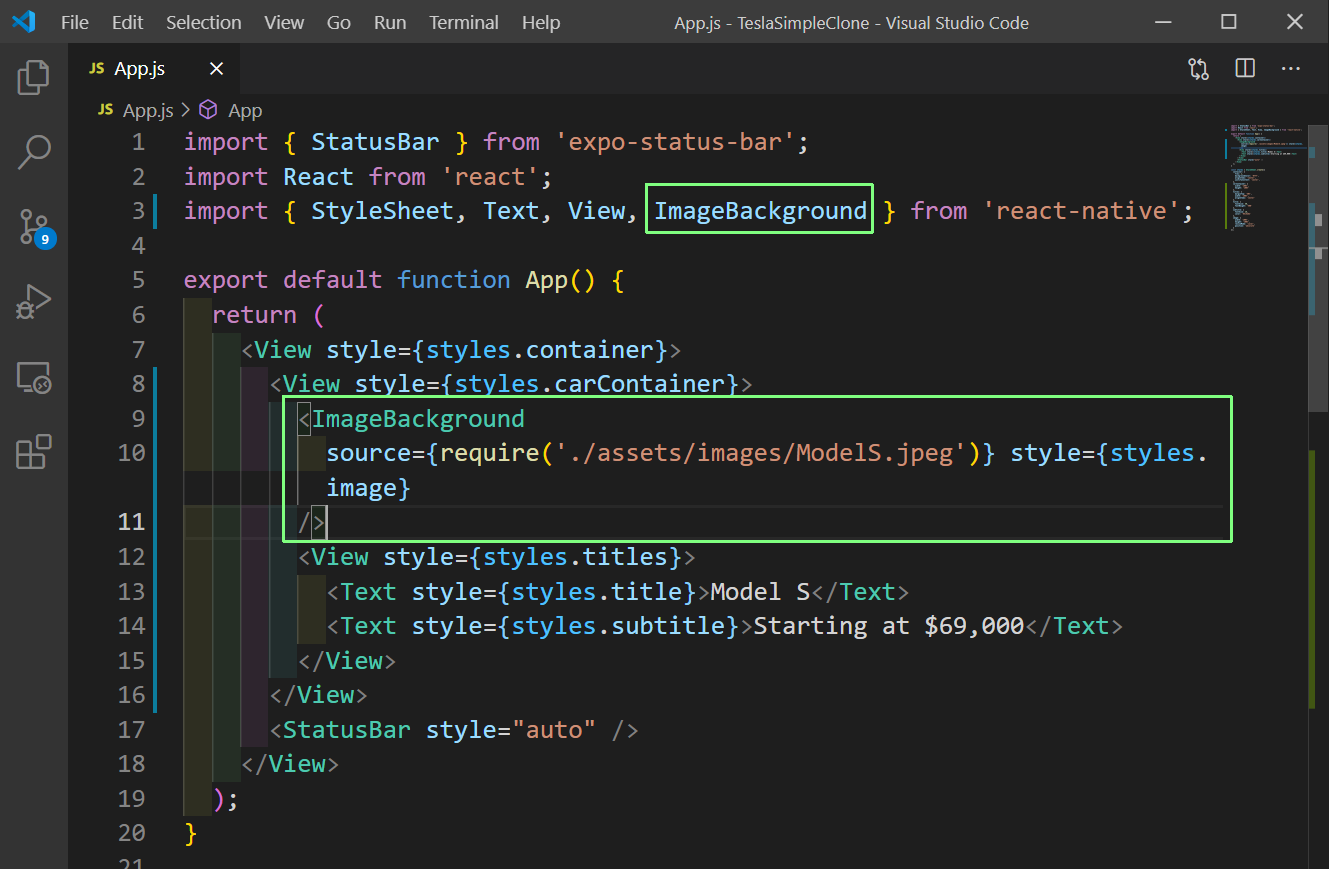 App.js
Next, we will add styles for the same in our styles in App.js only.
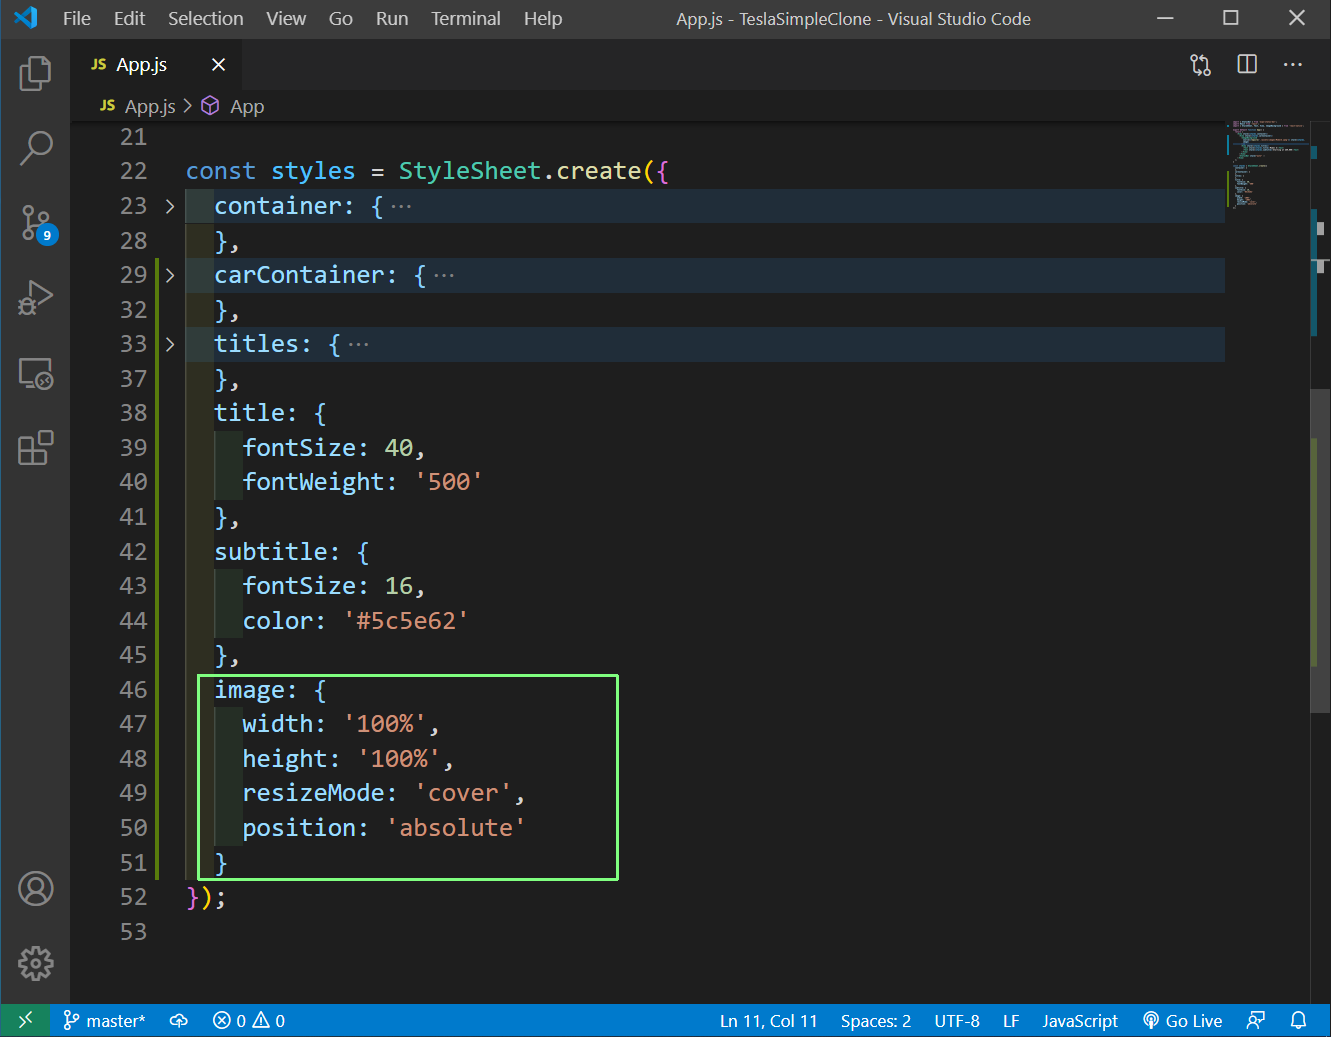 App.js
I have also clicked on Run in web browser and it will also show the app on localhost:19006. Beside this i have also open in my mobile phone, to get the exact dimensions.
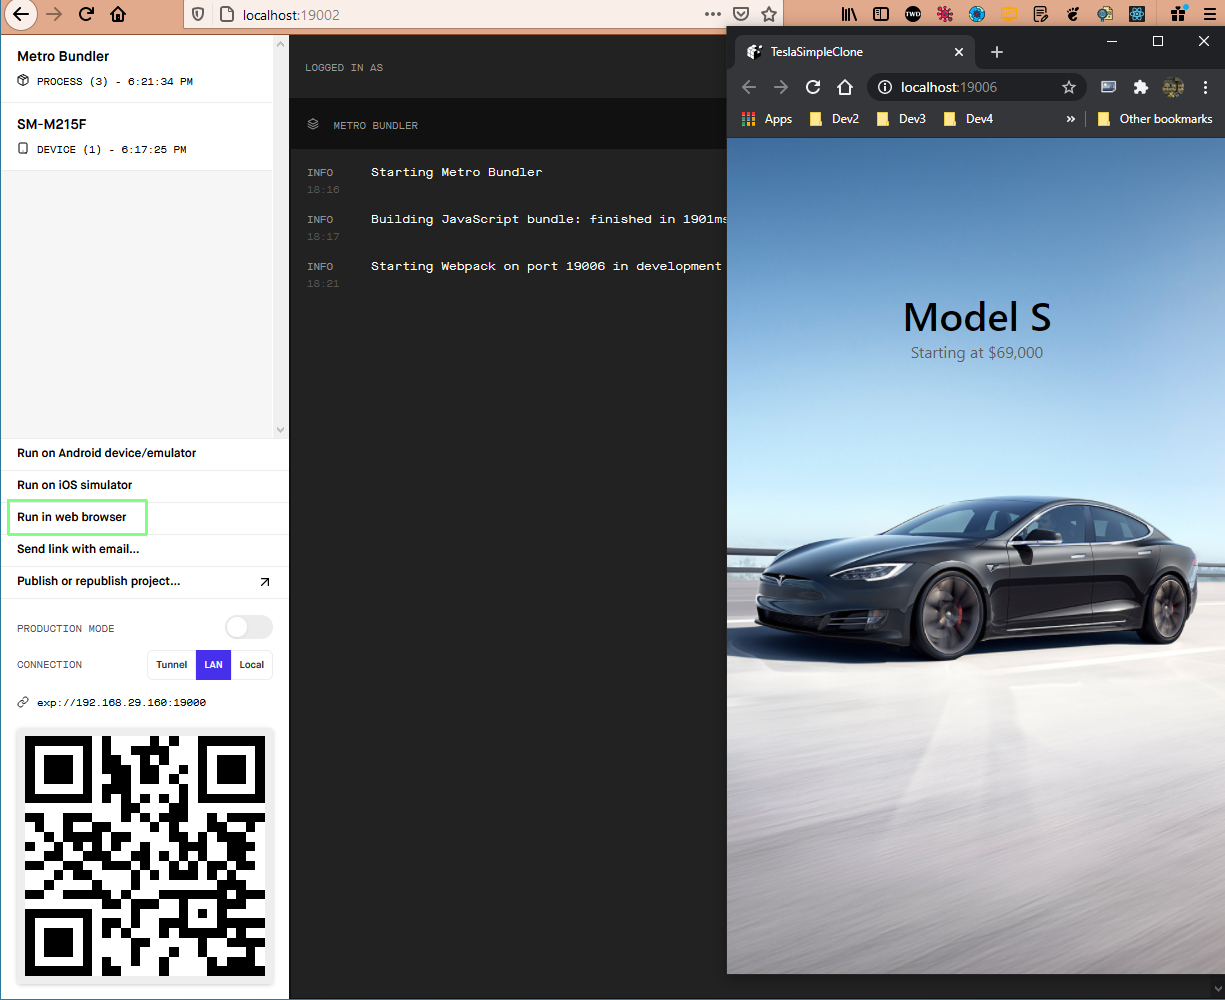 localhost
Now, we will optimize our code by moving details of the Car to a different component. So, create a folder components in the root directory and a file CarItem.js inside it. Now, we have moved all the jsx and styles inside it.
    import React from 'react'
    import { ImageBackground, StyleSheet, View, Text } from 'react-native'

    const CarItem = () => {
        return (
            <View style={styles.carContainer}>
                <ImageBackground
                    source={require('../assets/images/ModelS.jpeg')}
                    style={styles.image}
                />
                <View style={styles.titles}>
                    <Text style={styles.title}>Model S</Text>
                    <Text style={styles.subtitle}>Starting at $69,000</Text>
                </View>
            </View>
        )
    }

    const styles = StyleSheet.create({
        carContainer: {
            width: '100%',
            height: '100%'
        },
        titles: {
            marginTop: '30%',
            width: '100%',
            alignItems: 'center'
        },
        title: {
            fontSize: 40,
            fontWeight: '500'
        },
        subtitle: {
            fontSize: 16,
            color: '#5c5e62'
        },
        image: {
            width: '100%',
            height: '100%',
            resizeMode: 'cover',
            position: 'absolute'
        }
    })

    export default CarItem
Back, in App.js we had removed all code for the CarItem and imported the CarItem component in the file.
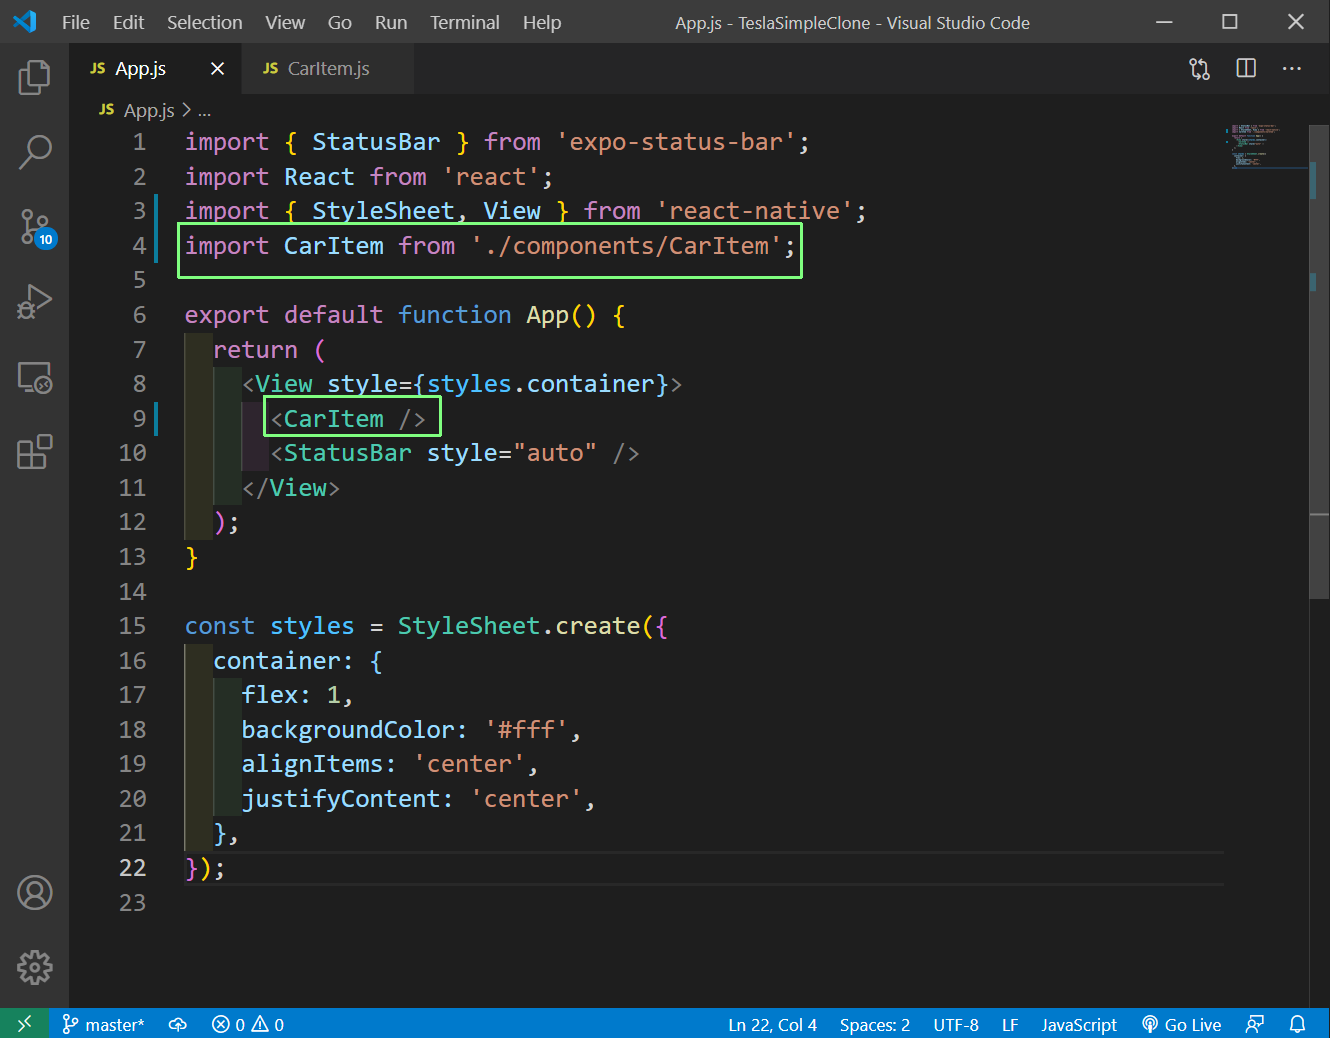 App.js
We will show two buttons in our App and both of them will be similar. The only difference will be background color and text. So, we will create a custom component StyledButton.js in the components folder for the same. The content for the same is below.
    import React from 'react'
    import { View, Text, StyleSheet, Pressable } from 'react-native'

    const StyledButton = () => {
        return (
            <View style={styles.container}>
                <Pressable
                    style={styles.button}
                    onPress={() => {
                        console.warn('Button Pressed')
                    }}
                >
                    <Text style={styles.text}>Custom Order</Text>
                </Pressable>
            </View>
        )
    }

    const styles = StyleSheet.create({
        container: {
            width: '100%',
            padding: 10,
        },
        button: {
            height: 40,
            borderRadius: 20,
            justifyContent: 'center',
            alignItems: 'center',
        },
        text: {
            fontSize: 12,
            fontWeight: '500',
            textTransform: 'uppercase',
        }
    })
    export default StyledButton
Now, we will include the component in CarItem.js file.
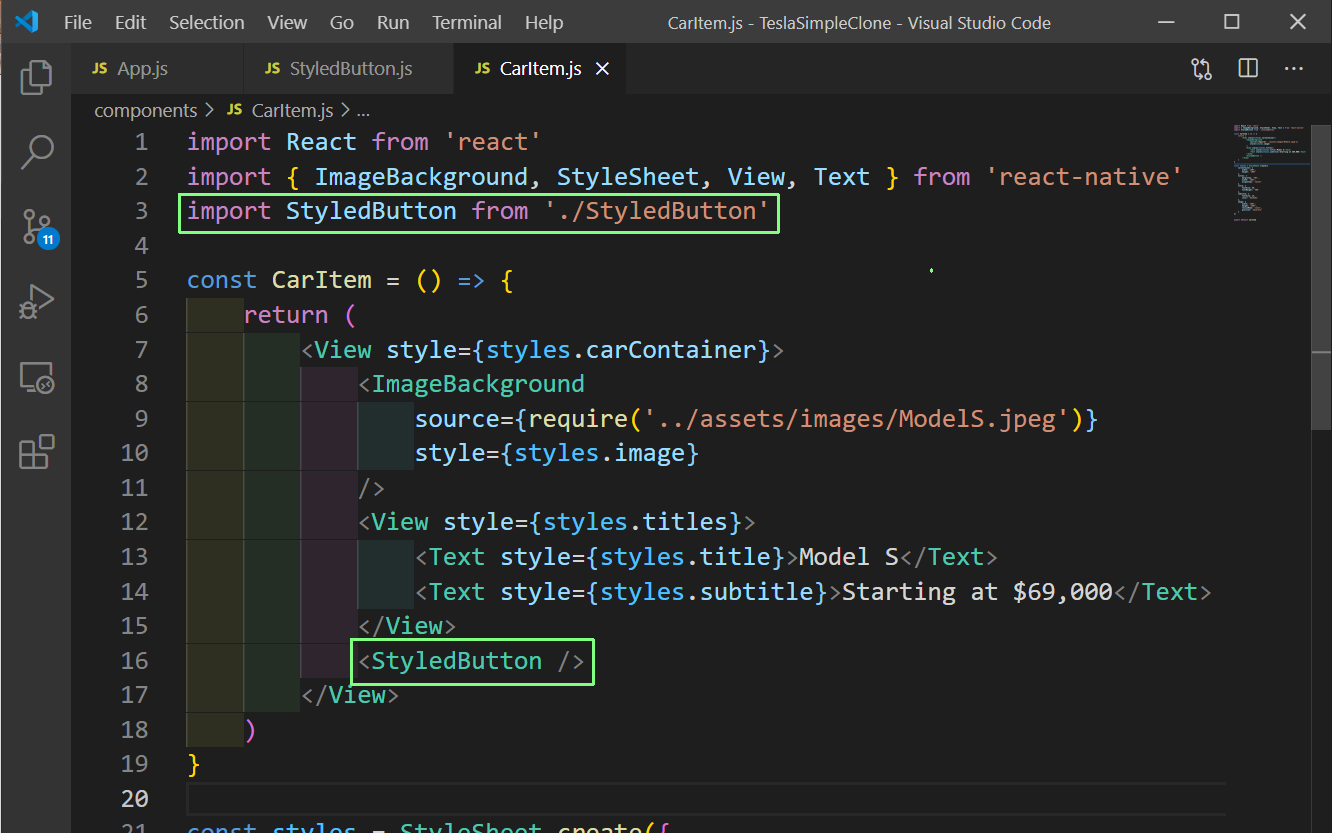 CarItem.js
And it will now show as below in our App.
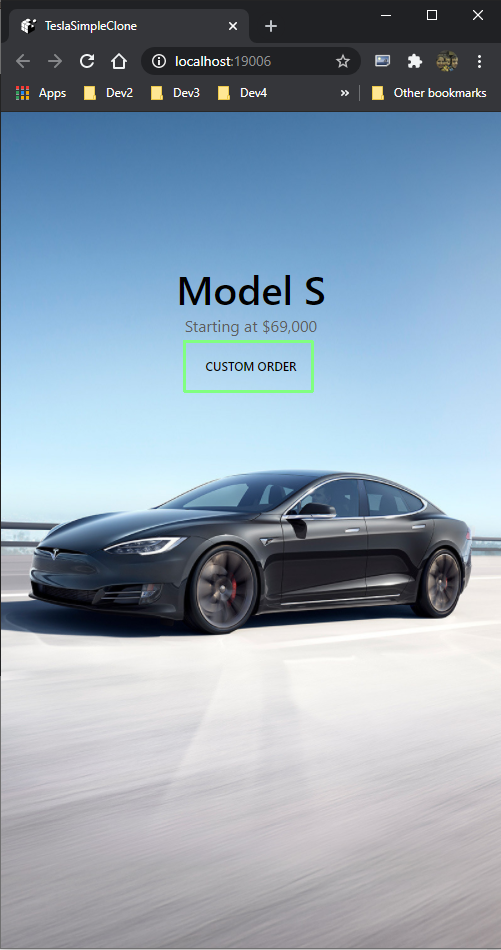 localhost
Now, we will pass custom props from CarItem.js for two buttons.
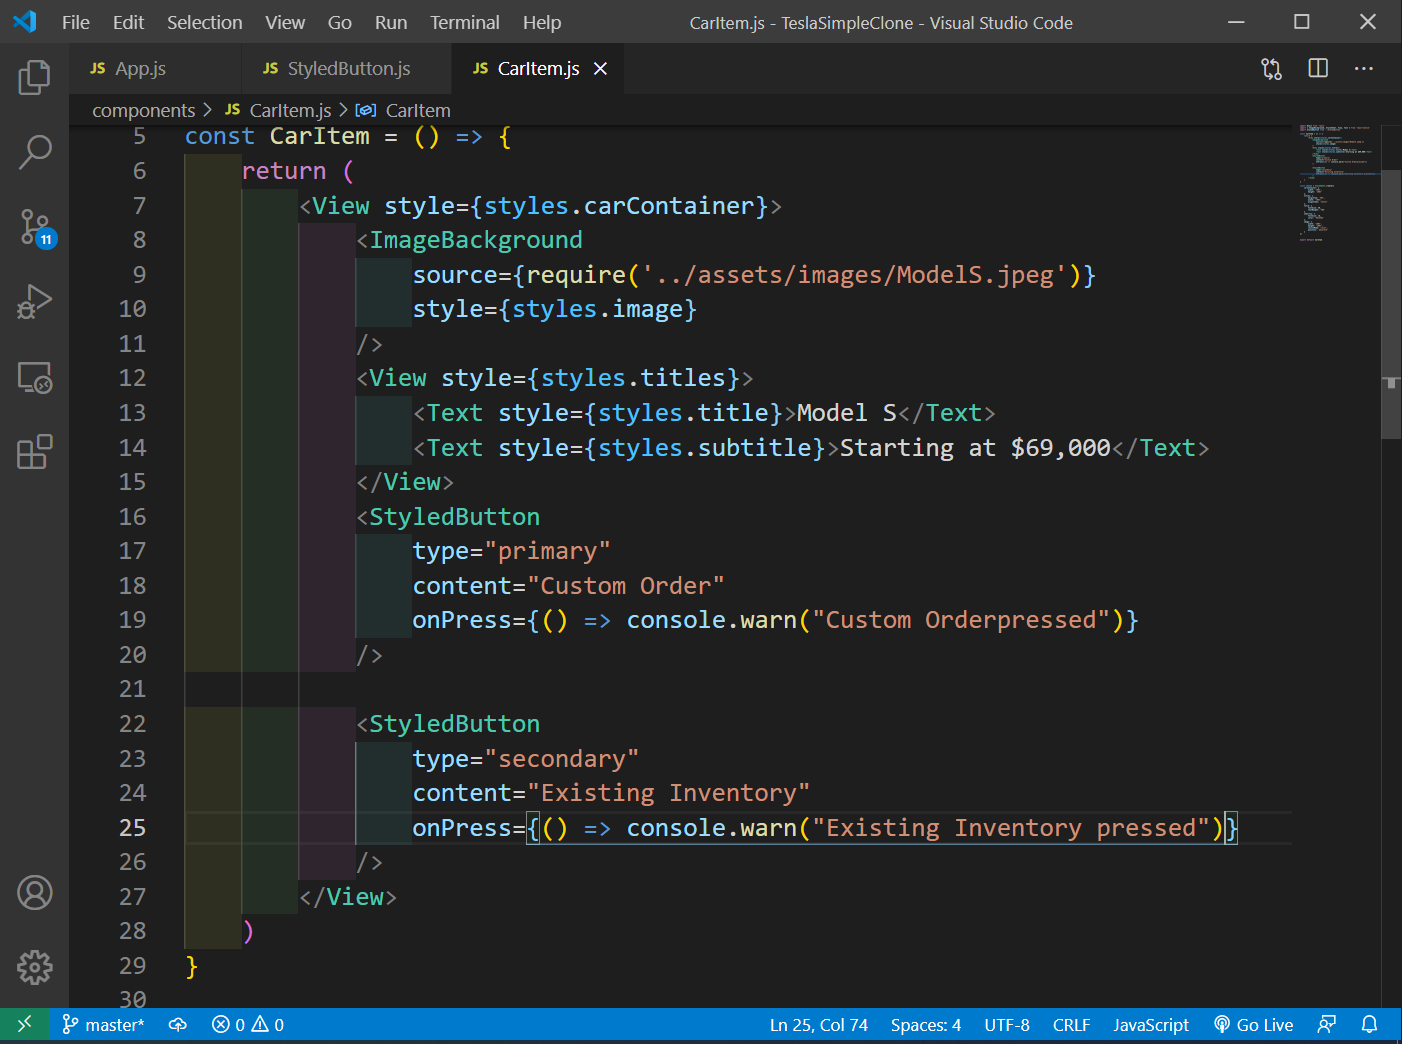 CarItem.js
Now, we will be using them in StyledButton.js file. Here, we are first destructuring the props.
After that depending on the type, giving a different background color and text color for the button. Also, notice that the styles for button and text in an array. This is done, because we want the earlier styles also to be applied in addition to the new styles.
We had also replaced the onPress and the content with the props.
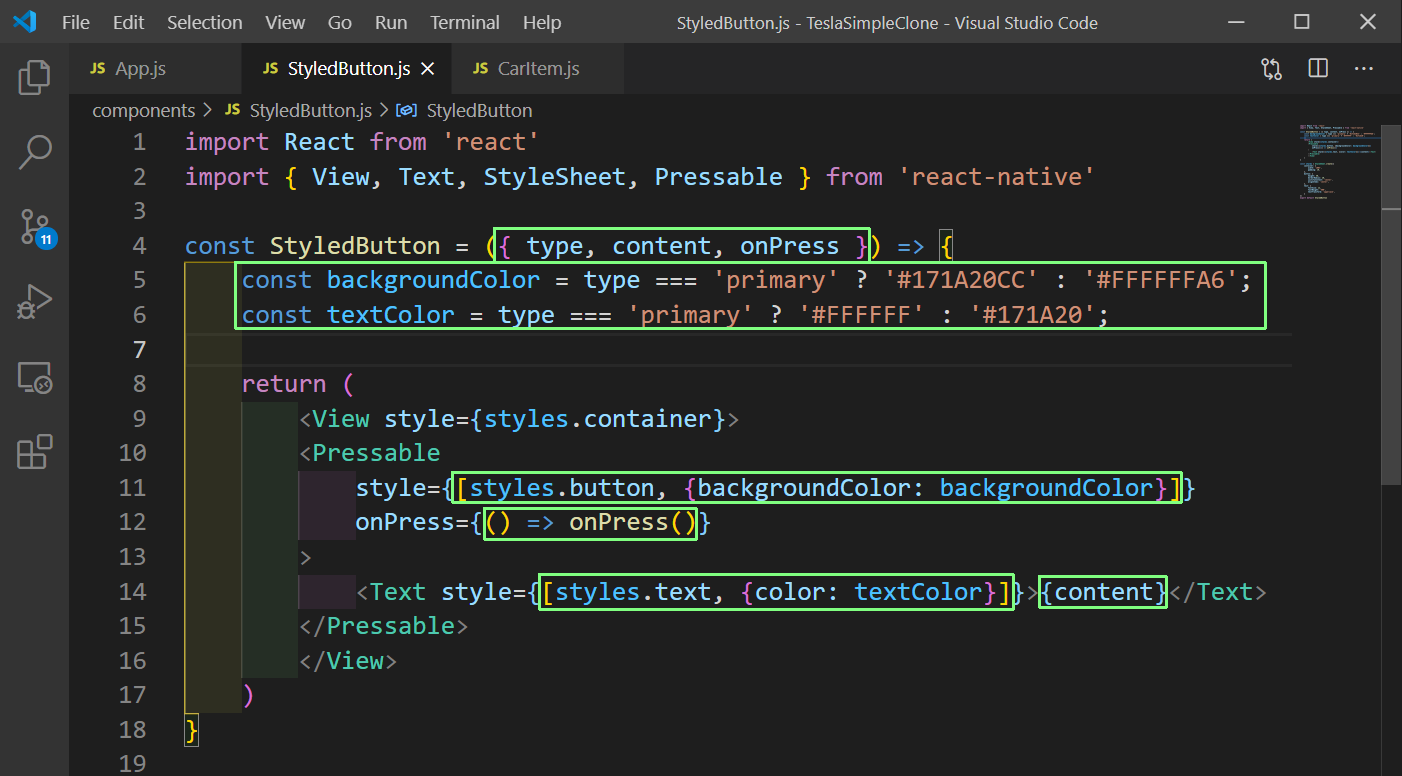 StyledButton.js
Now, in the expo on our phone, we can see different messages in press of different buttons.
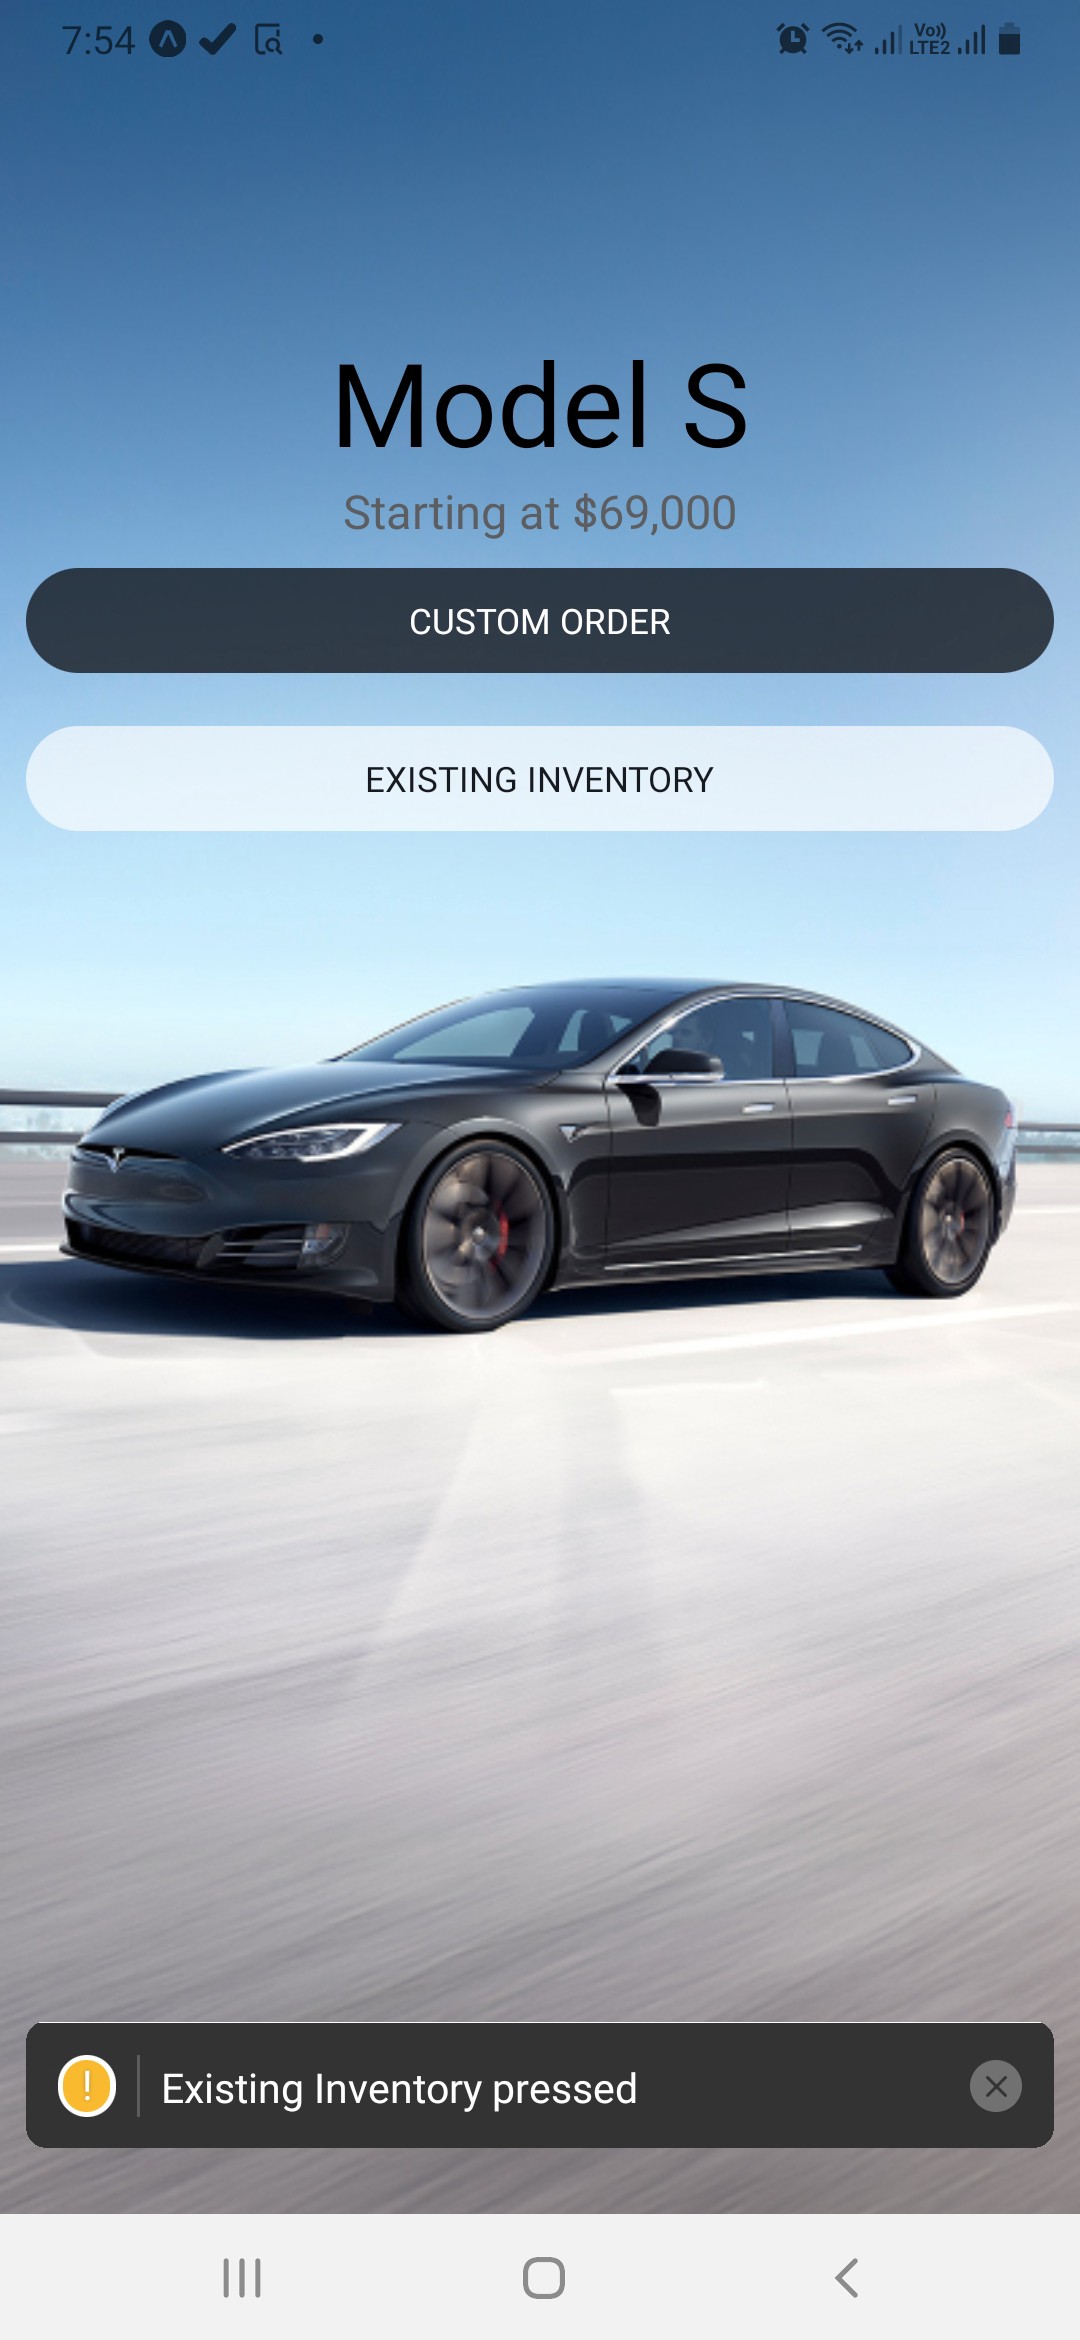 Different messages
The button are not at the correct position and we want them to be at the bottom of the screen. So, in CarItem.js wrap the two button in a View buttonsContainer.
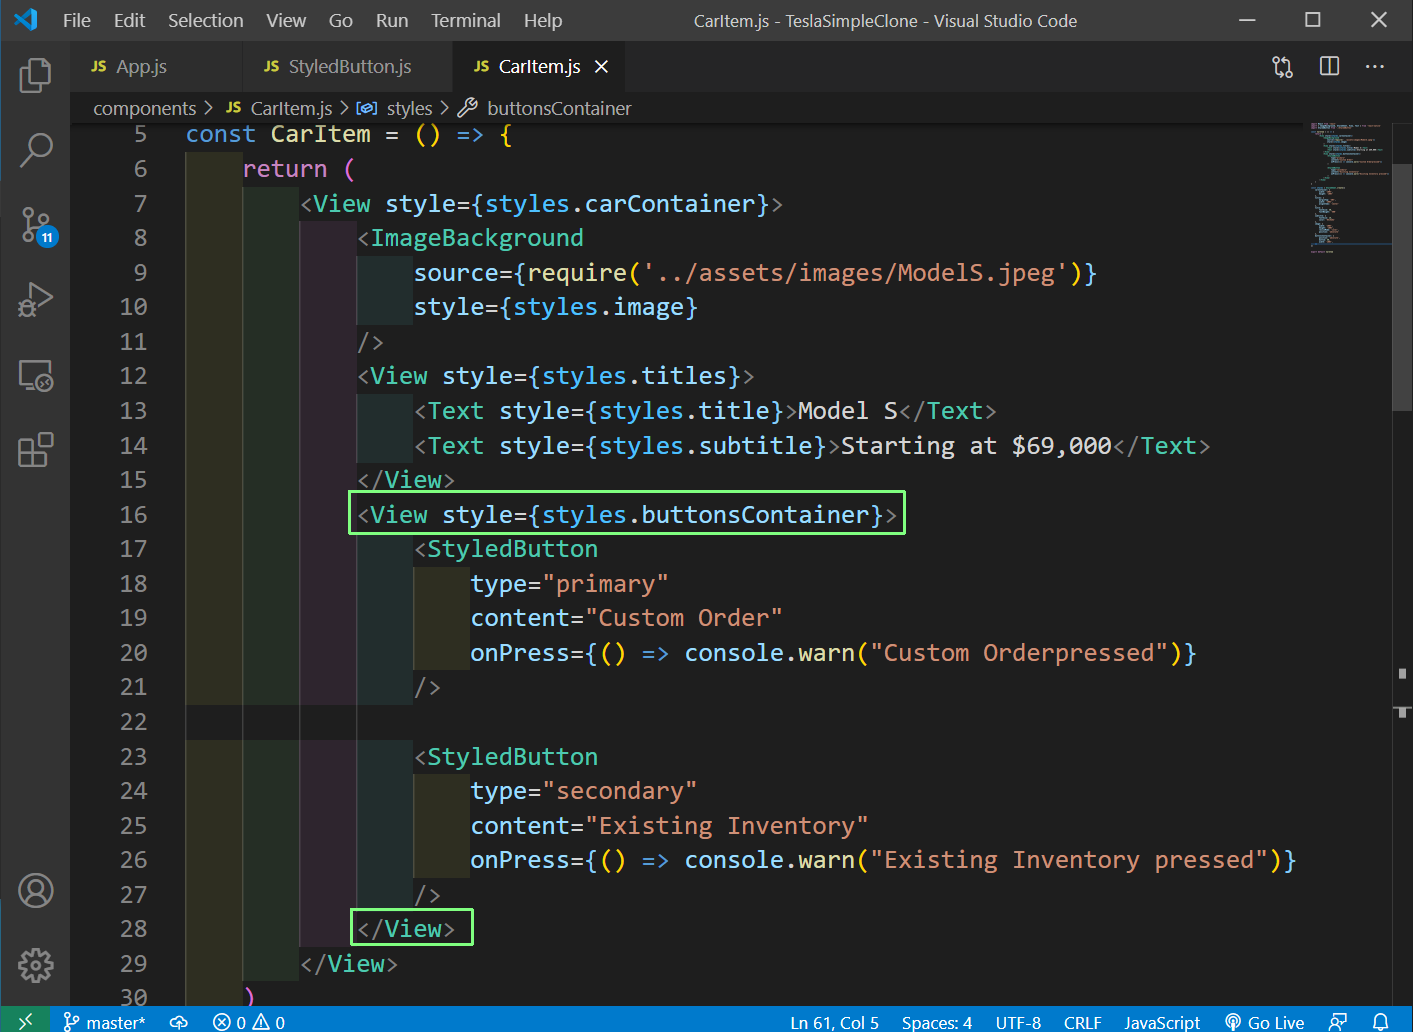 CarItem.js
Now, we will add the styles for buttonsContainer in the styles at the end of the CarItem.js file.
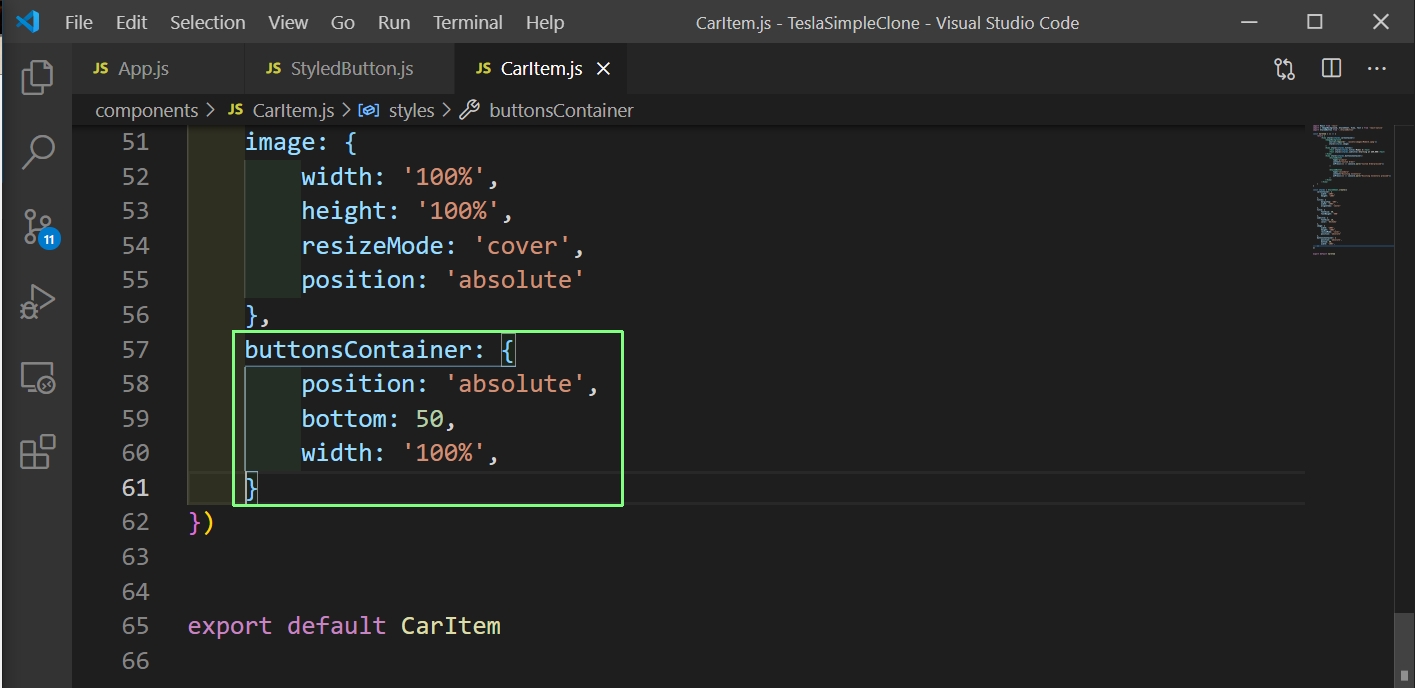 CarItem.js
Now, the buttons will be shown at the correct place.
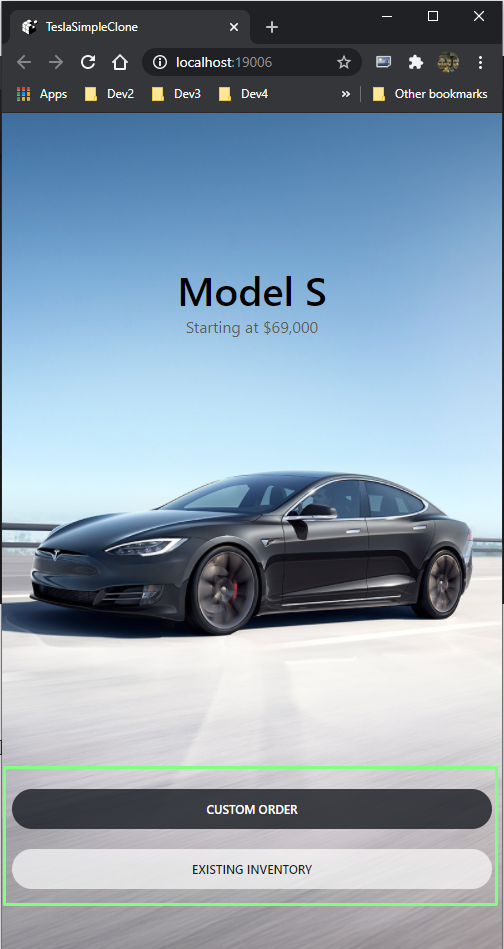 Correct place
Now, we want to show different cars which are scroll-able. For this we will first create a file cars.js in the root directory.
    export default [{
            name: 'Model S',
            tagline: 'Starting at $69,420',
            image: require('./assets/images/ModelS.jpeg'),
        },
        {
            name: 'Model 3',
            tagline: 'Order Online for',
            taglineCTA: 'Touchless Delivery',
            image: require('./assets/images/Model3.jpeg'),
        },
        {
            name: 'Model X',
            tagline: 'Order Online for',
            taglineCTA: 'Touchless Delivery',
            image: require('./assets/images/ModelX.jpeg'),
        },
        {
            name: 'Model Y',
            tagline: 'Order Online for',
            taglineCTA: 'Touchless Delivery',
            image: require('./assets/images/ModelY.jpeg'),
        }
    ];
Now, create a file CarsList.js inside the components folder. Here, we are using FlatList which is used commonly in react-native to show items in array of objects, which is from cars.js in thiscase.
Also, we are rendering each item with the CarItem and passing it as car props.
    import React from 'react'
    import { View, FlatList, StyleSheet } from 'react-native'
    import cars from '../cars'
    import CarItem from './CarItem'

    const CarsList = () => {
        return (
            <View style={styles.container}>
                <FlatList
                    data={cars}
                    renderItem={({item}) => <CarItem car={item} />}
                />
            </View>
        )
    }

    const styles = StyleSheet.create({
        container: {
            width: '100%',
        }
    });

    export default CarsList
Now, we need to use props in CarItem.js file. Here, we are getting name, tagline, taglineCTA, image from props.car and then using them.
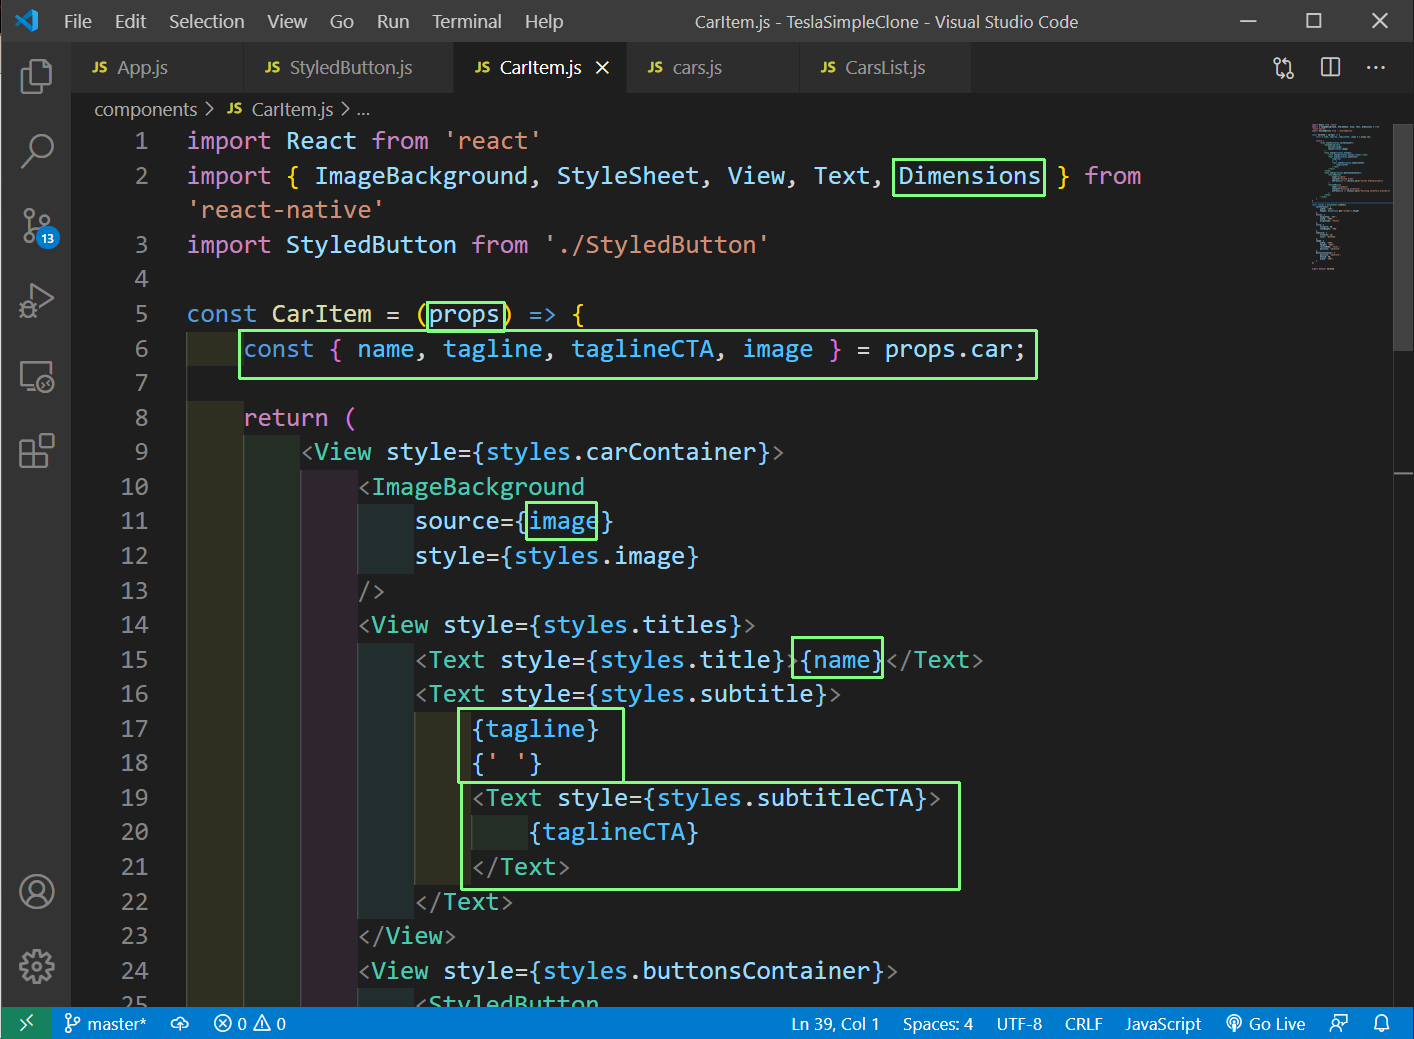 CarItem.js
We, also have to update some styles like the height is now now 100% but the height of the window and for this we have used the Dimensions from react-native.
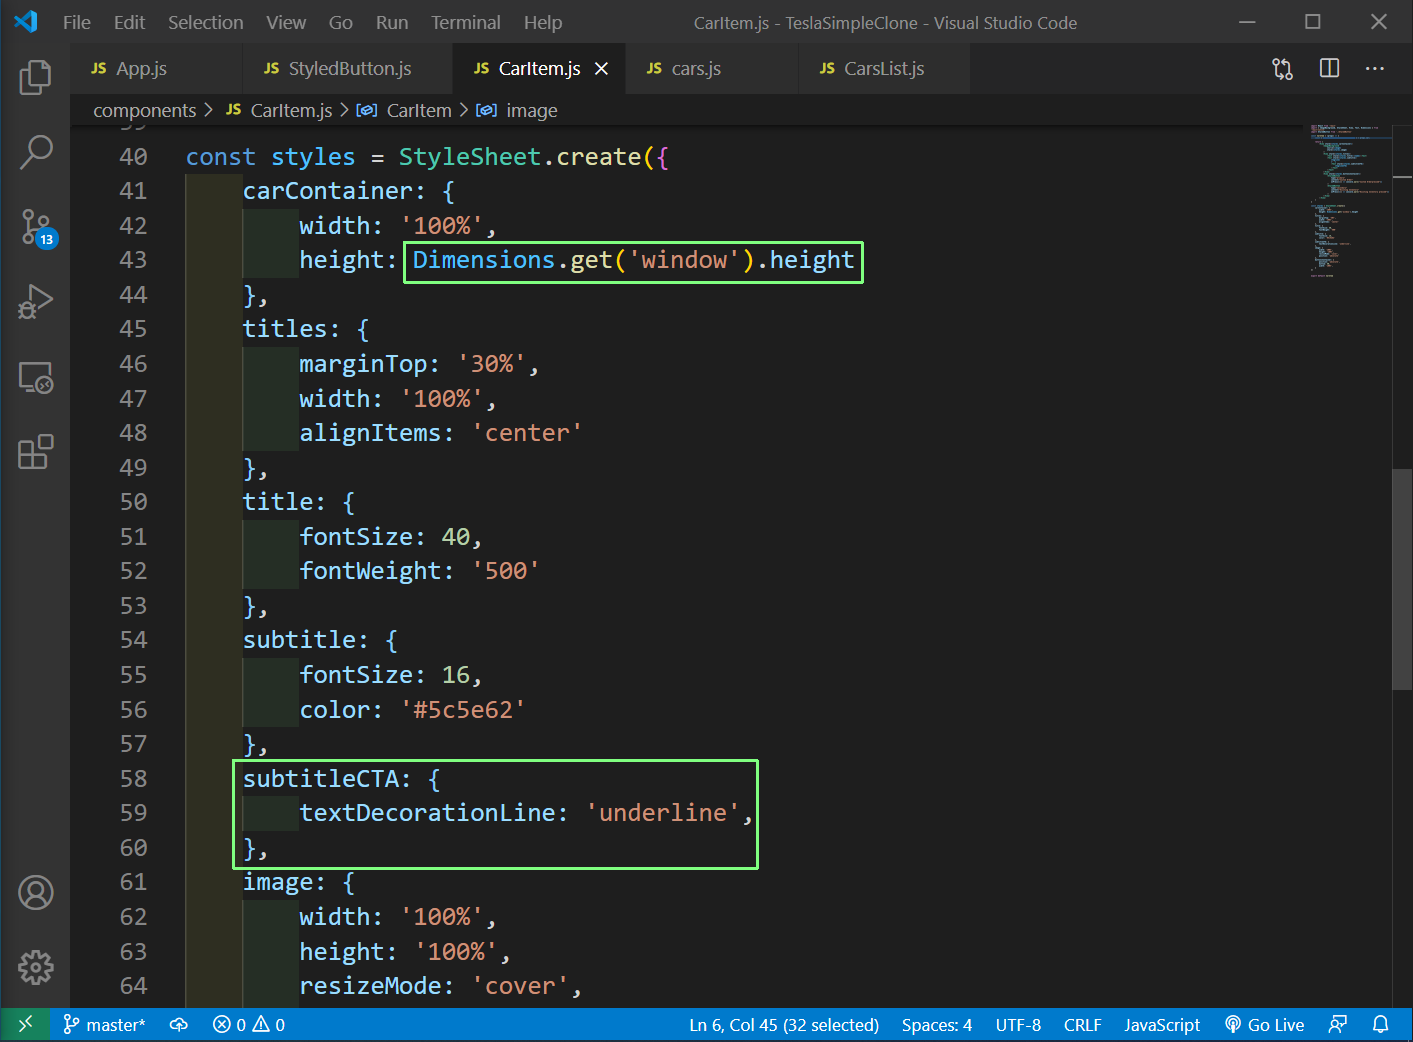 CarItem.js
We also now need to use CarsList instead of CarItem in App.js file.
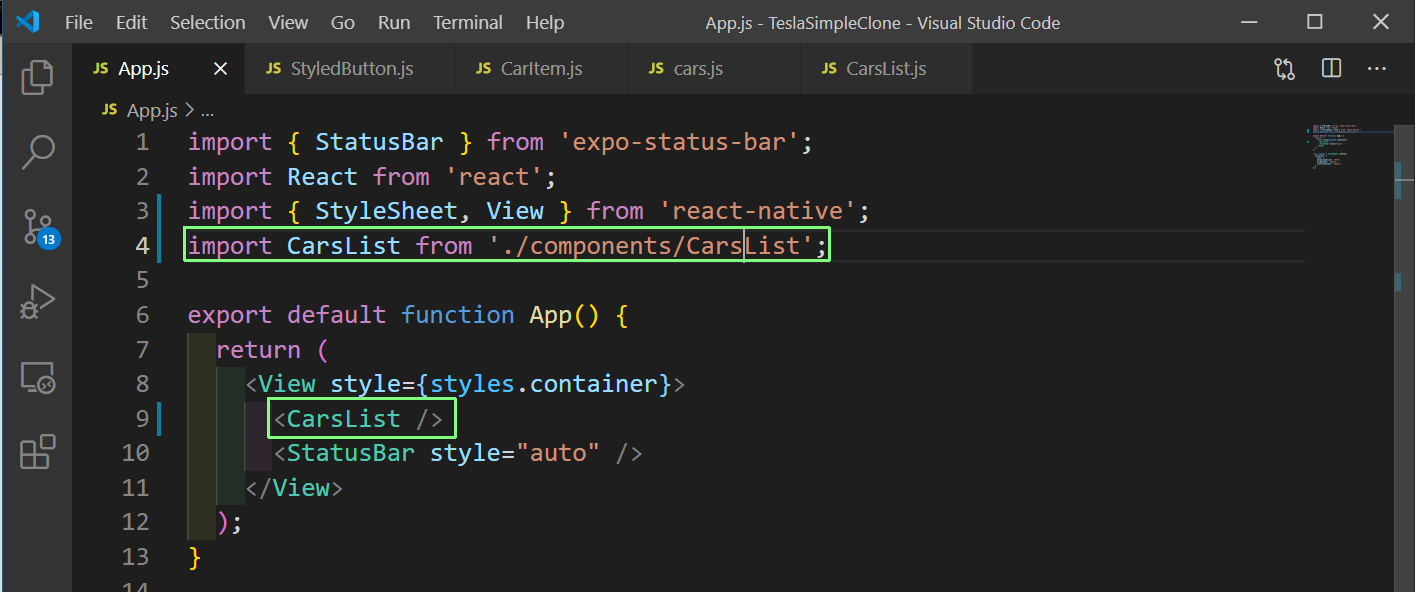 App.js
Now, in our app we can move through different cars by swipping but it is not smooth. For that we need to send a couple of props to FlatList in CarsList.js file.
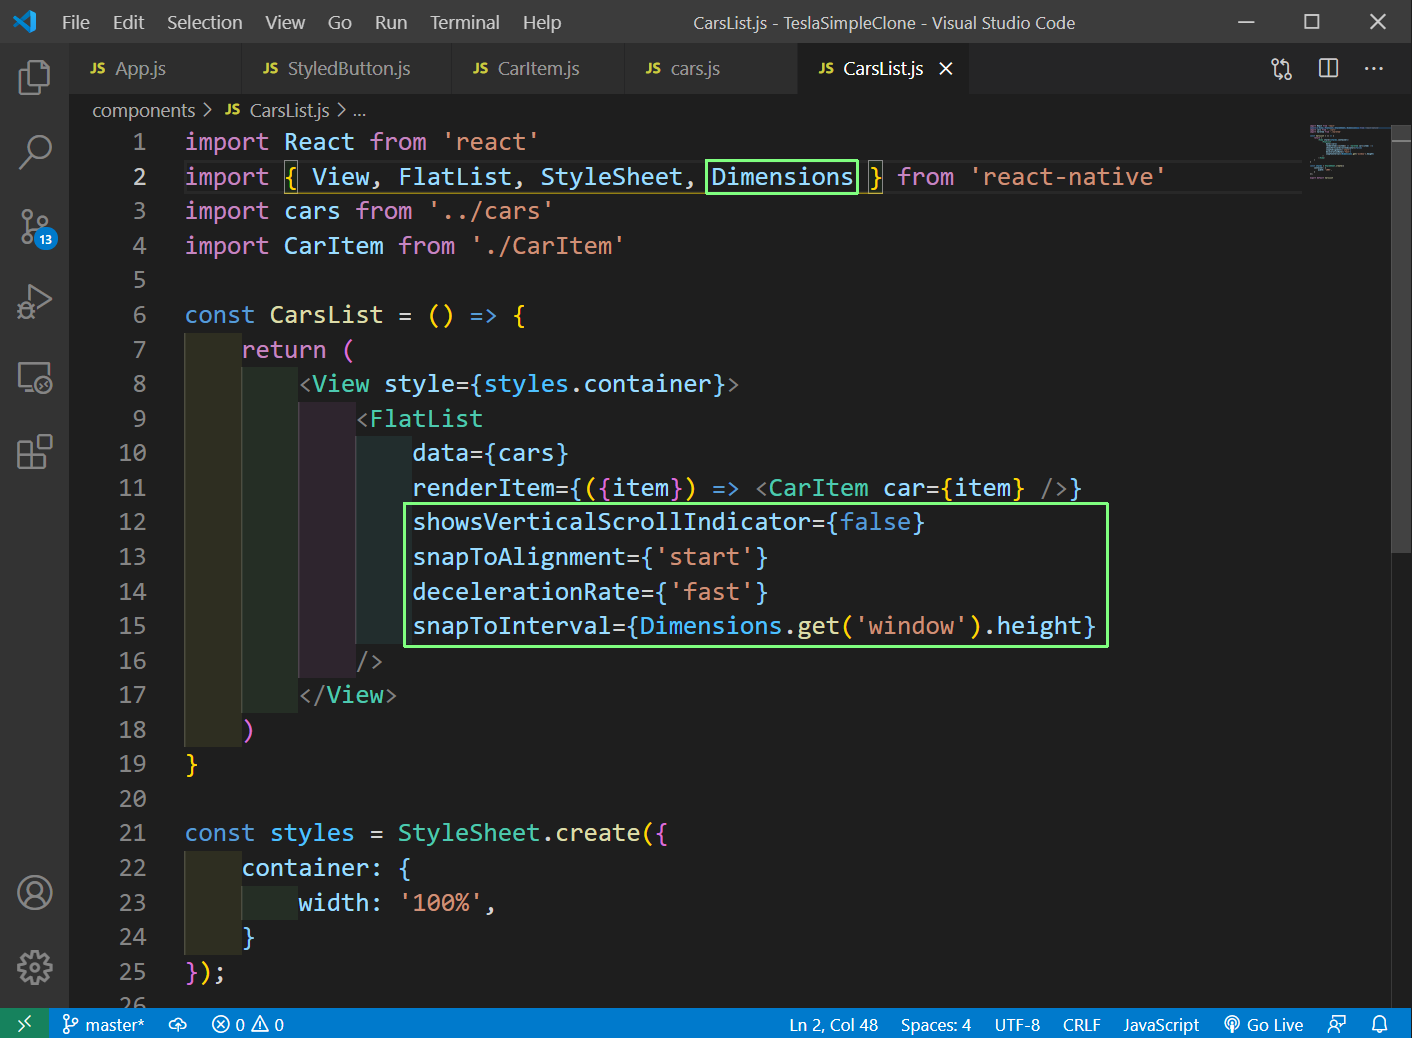 CarsList.js
Now, we also need to show a Header in our app. So, create a new file Header.js inside the components folder and add the below content in it.
    import React from 'react';
    import { View, Image, StyleSheet } from 'react-native';

    const Header = () => {
        return (
            <View style={styles.container}>
                <Image style={styles.logo} source={require('../assets/images/logo.png')} />
                <Image style={styles.menu} source={require('../assets/images/menu.png')} />
            </View>
        );
    };

    const styles = StyleSheet.create({
        container: {
            position: 'absolute',
            top: 50,
            zIndex: 100,
            flexDirection: 'row',
            justifyContent: 'space-between',
            width: '100%',
            paddingHorizontal: 20,
        },
        logo: {
            width: 100,
            height: 20,
            resizeMode: 'contain',
        },
        menu: {
            width: 25,
            height: 25,
            resizeMode: 'contain',
        }
    });

    export default Header;
Now, include Header in App.js file.
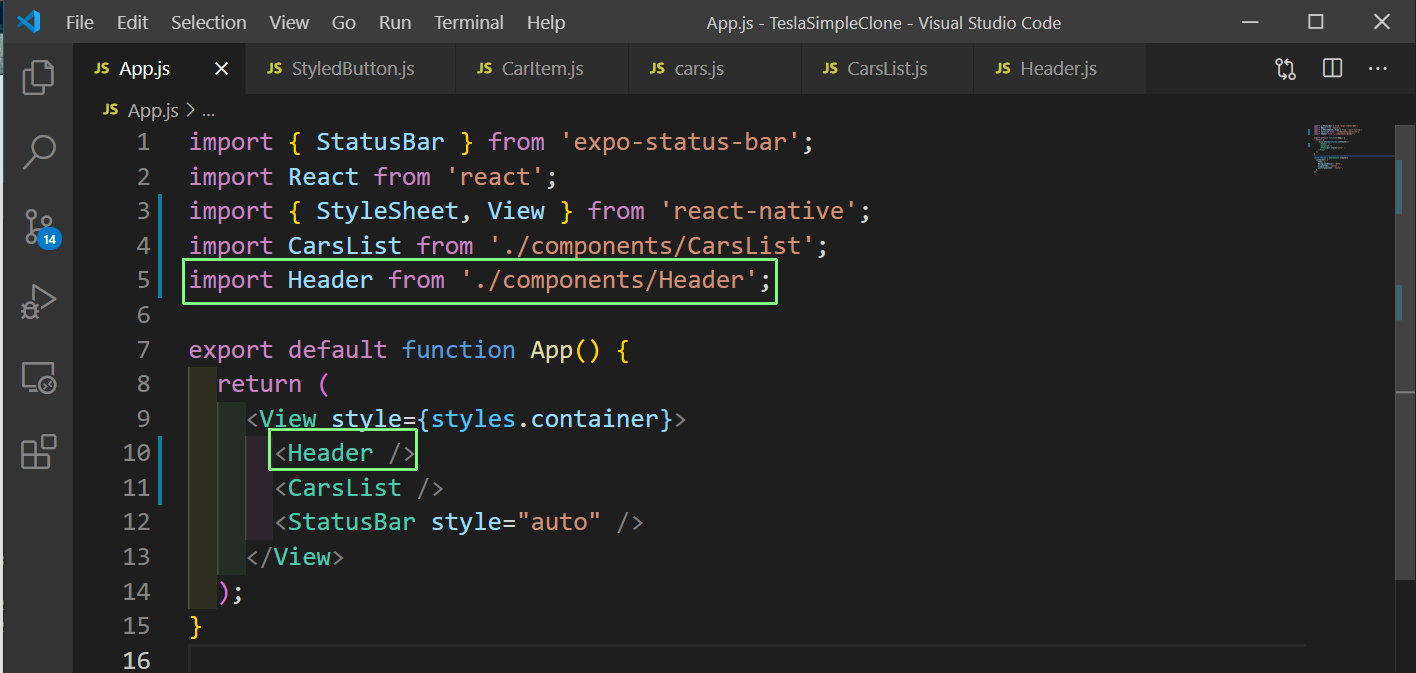 App.js
Now, we can see the complete app working in our device.
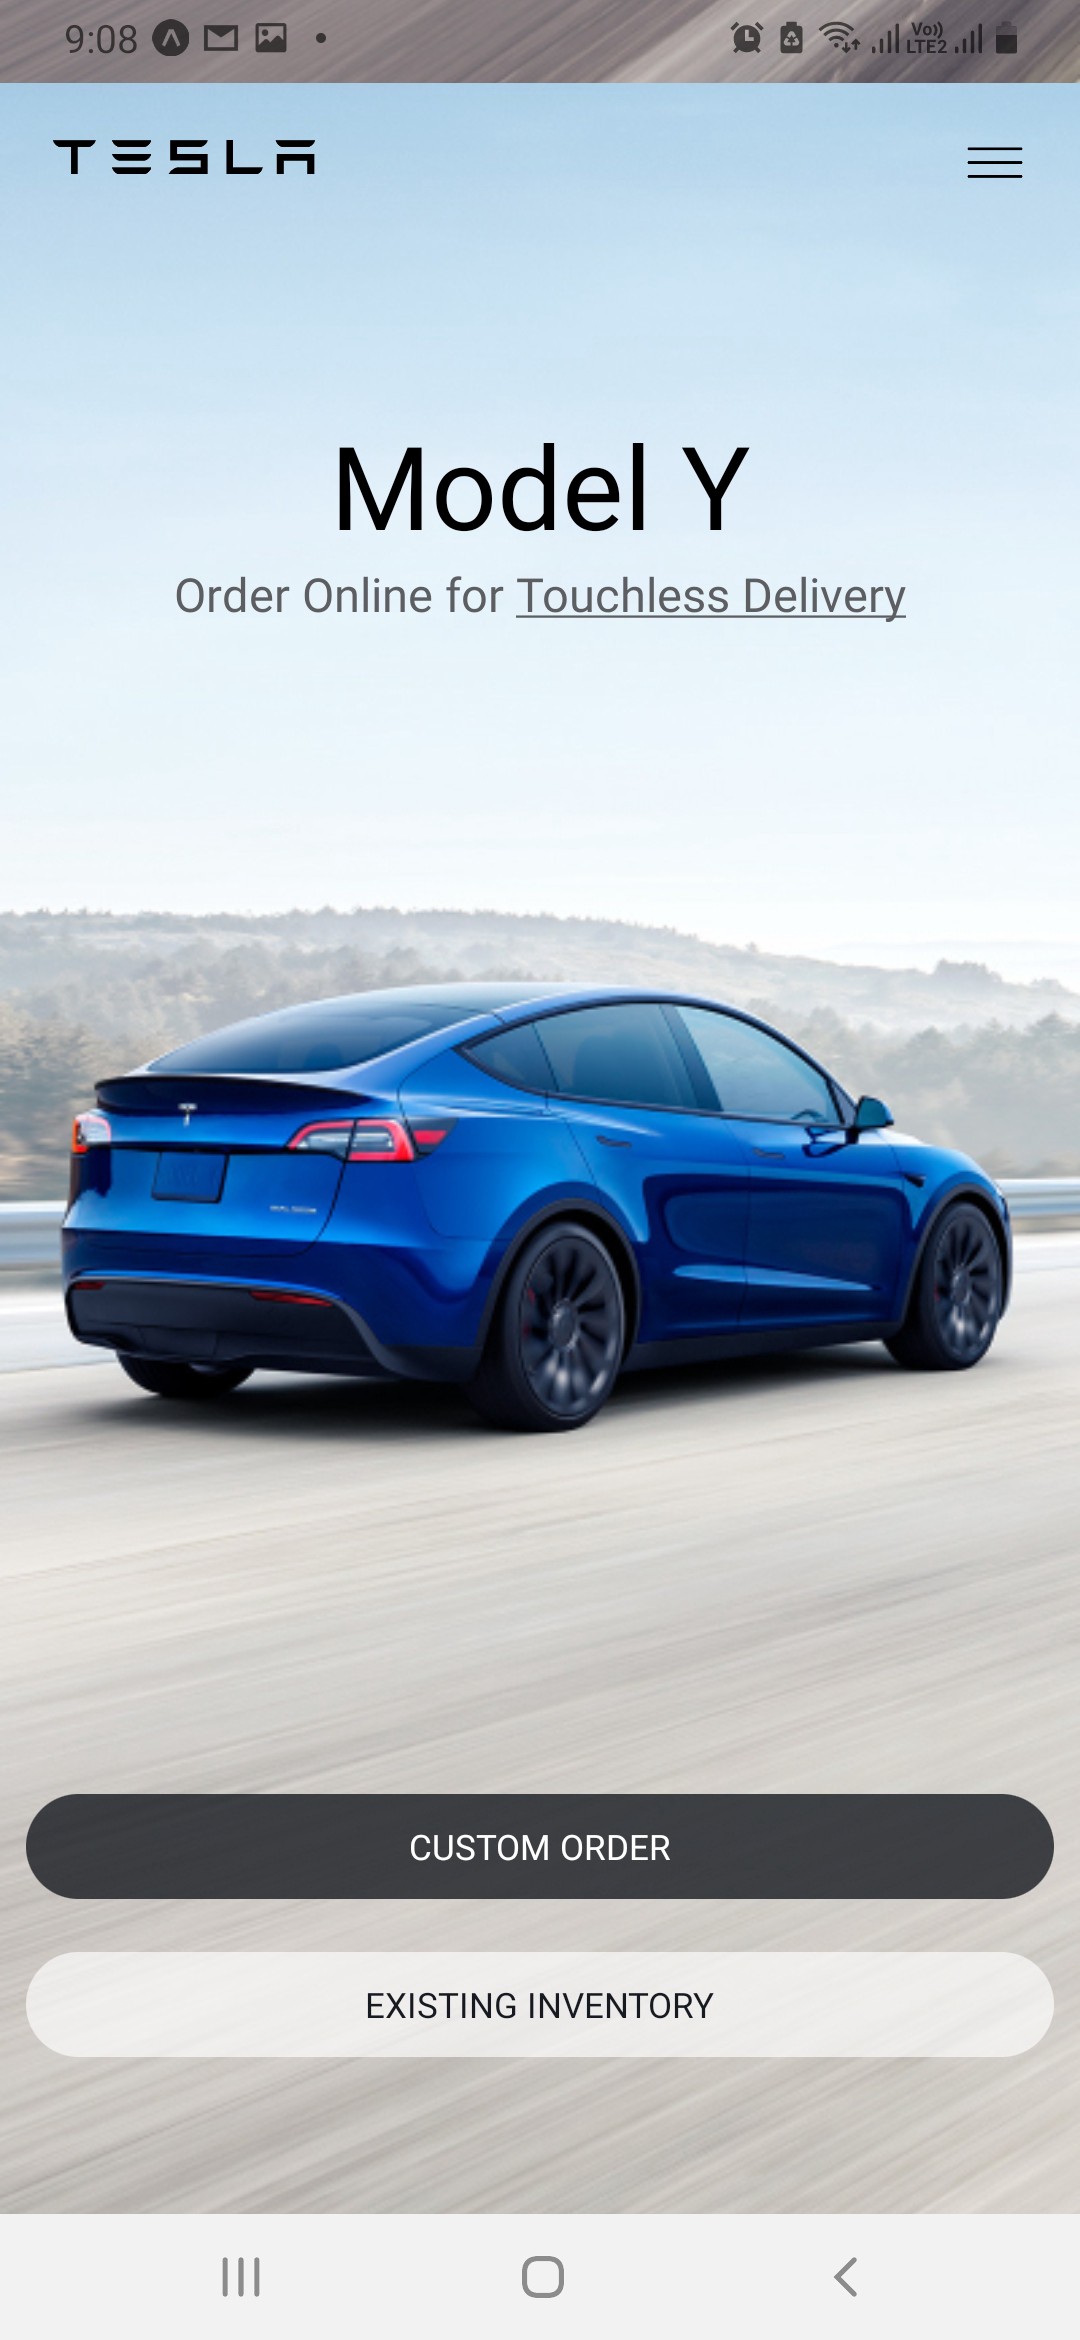 Complete app
This complete our simple app and the code for the same is in this github repo.