We are going to build Signal clone in React Native and for this we are going to use Expo and firebase for Database and authentication.
So, go ahead and install expo globally by the following npm command.
npm i -g expo-cli
You also need to install Expo Go app on your mobile device. More details of the installation can be found here.
After the installation, open the terminal and give the command expo init signal-clone-expo.
 expo init
In this choose the blank option and click enter and it will start the installation.
 installing
Since, our frontend site will also be hosted through firebase we will create the basic setting while this expo init creates our react-native app. So, go to firebase site and click on Go to console at the top right corner.
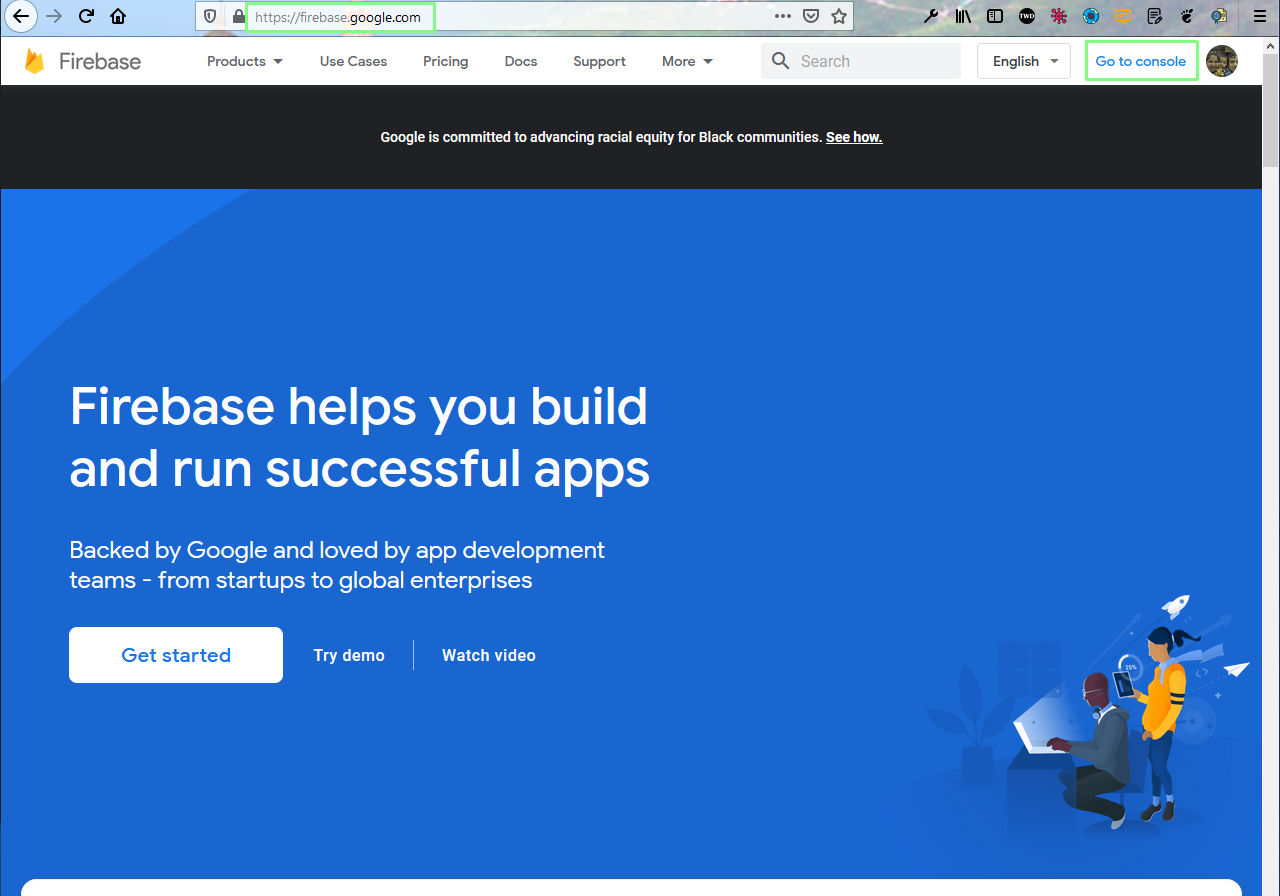 firebase site
Click on the Add project link in the page.
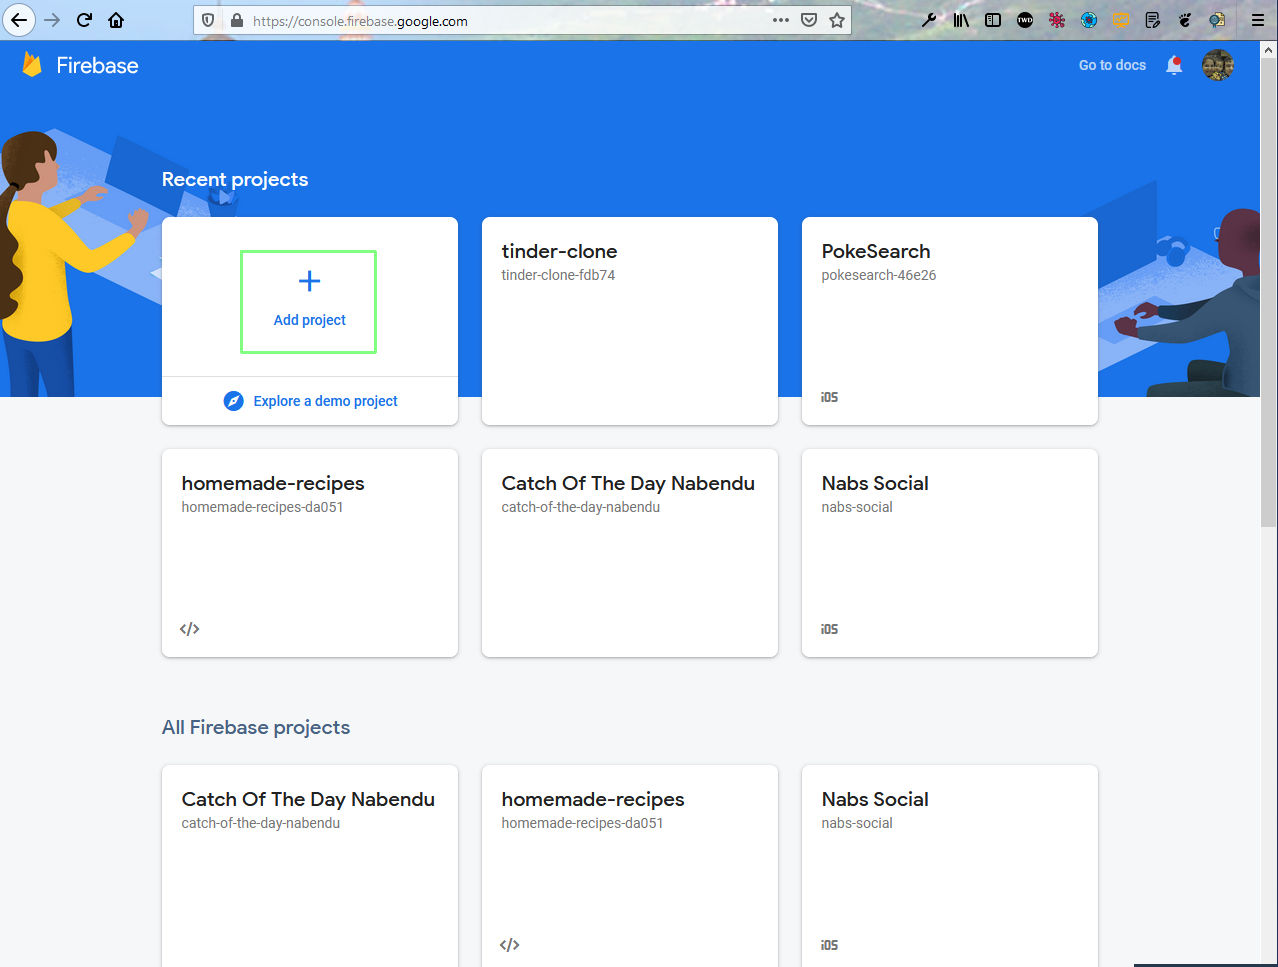 Add Project
Now, in this page give the project a name like signal-clone-expo and click on Continue button. In the next page click on the Create project button.
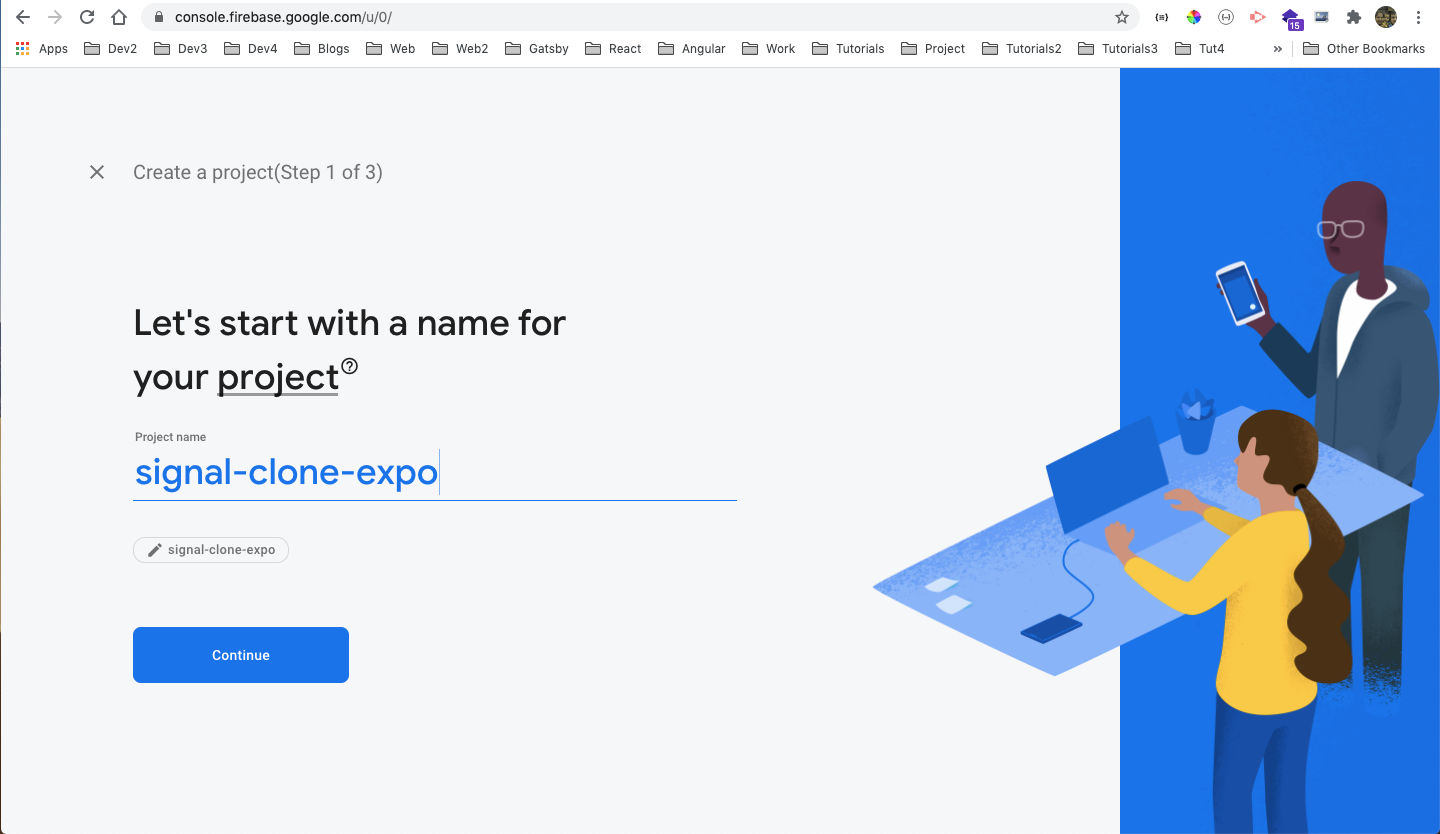 signal
In the next page click on the Create project button after disabling Analytics.
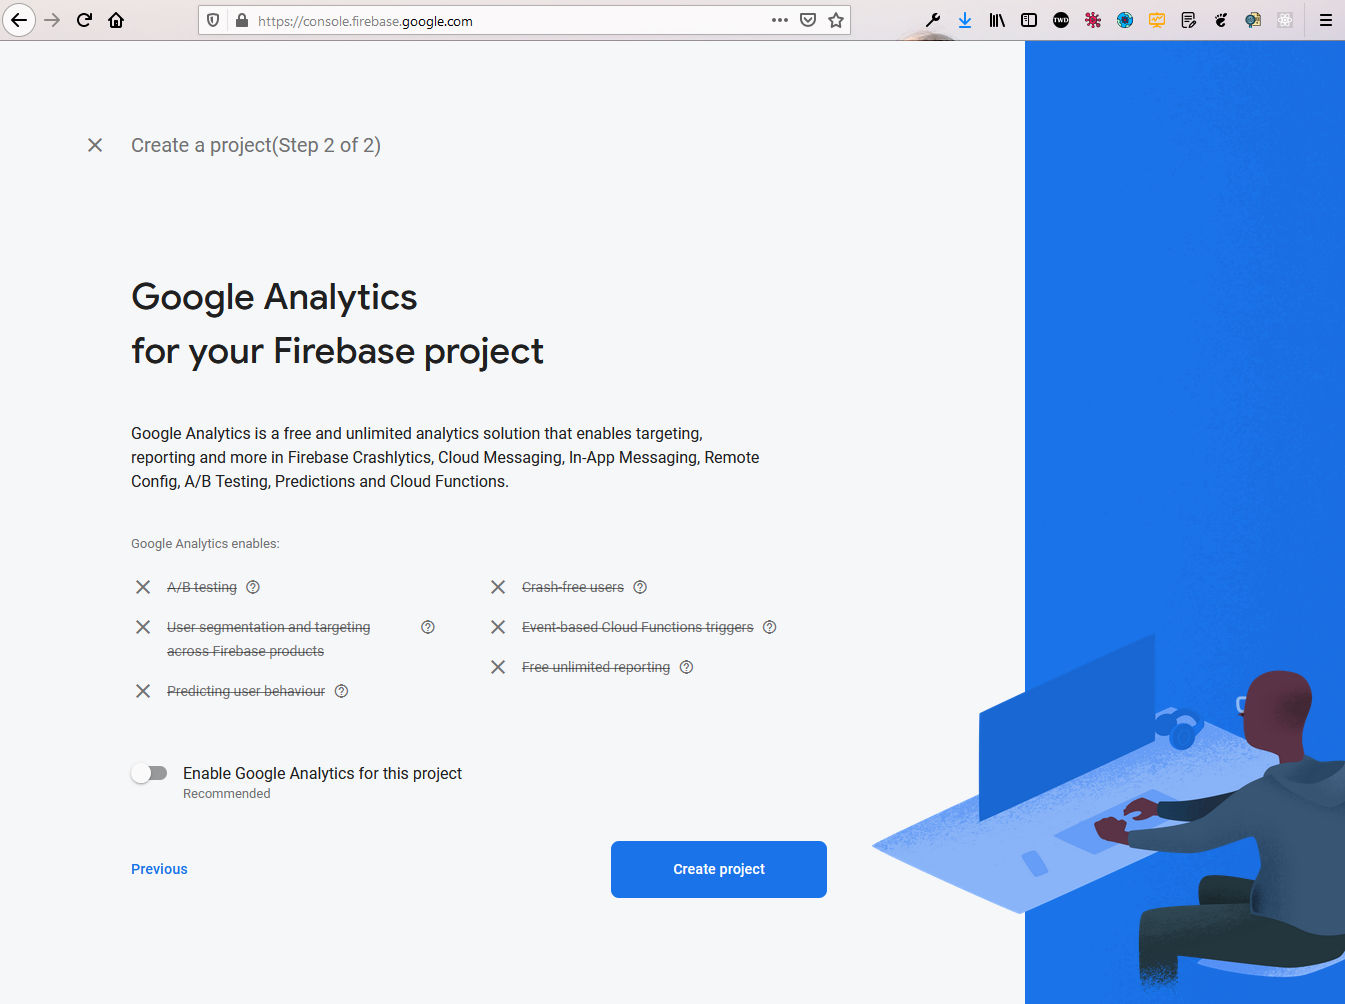 Create Project
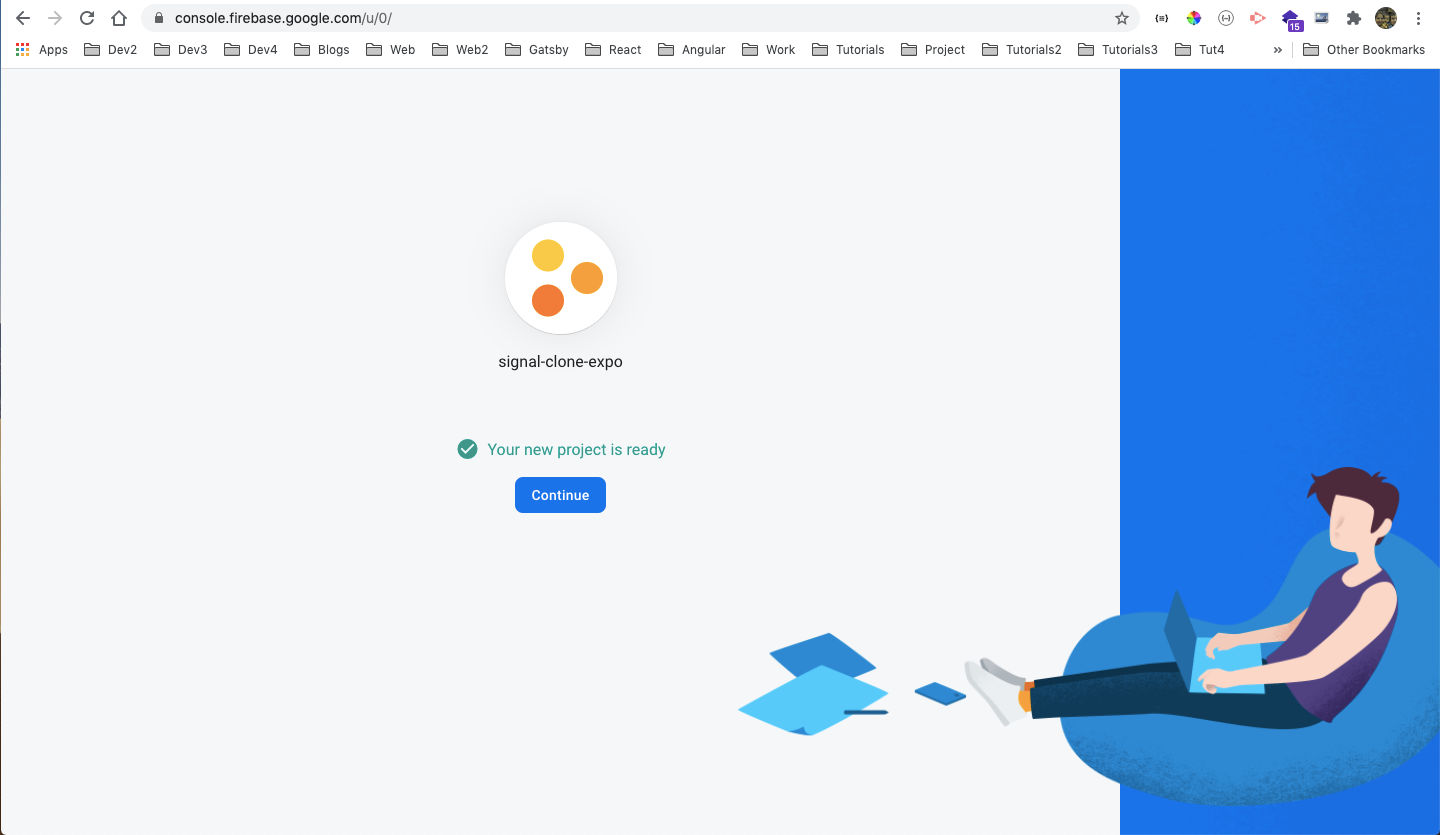
After, sometime we will get this screen. Here, we need to click on the Continue button.
 Continue
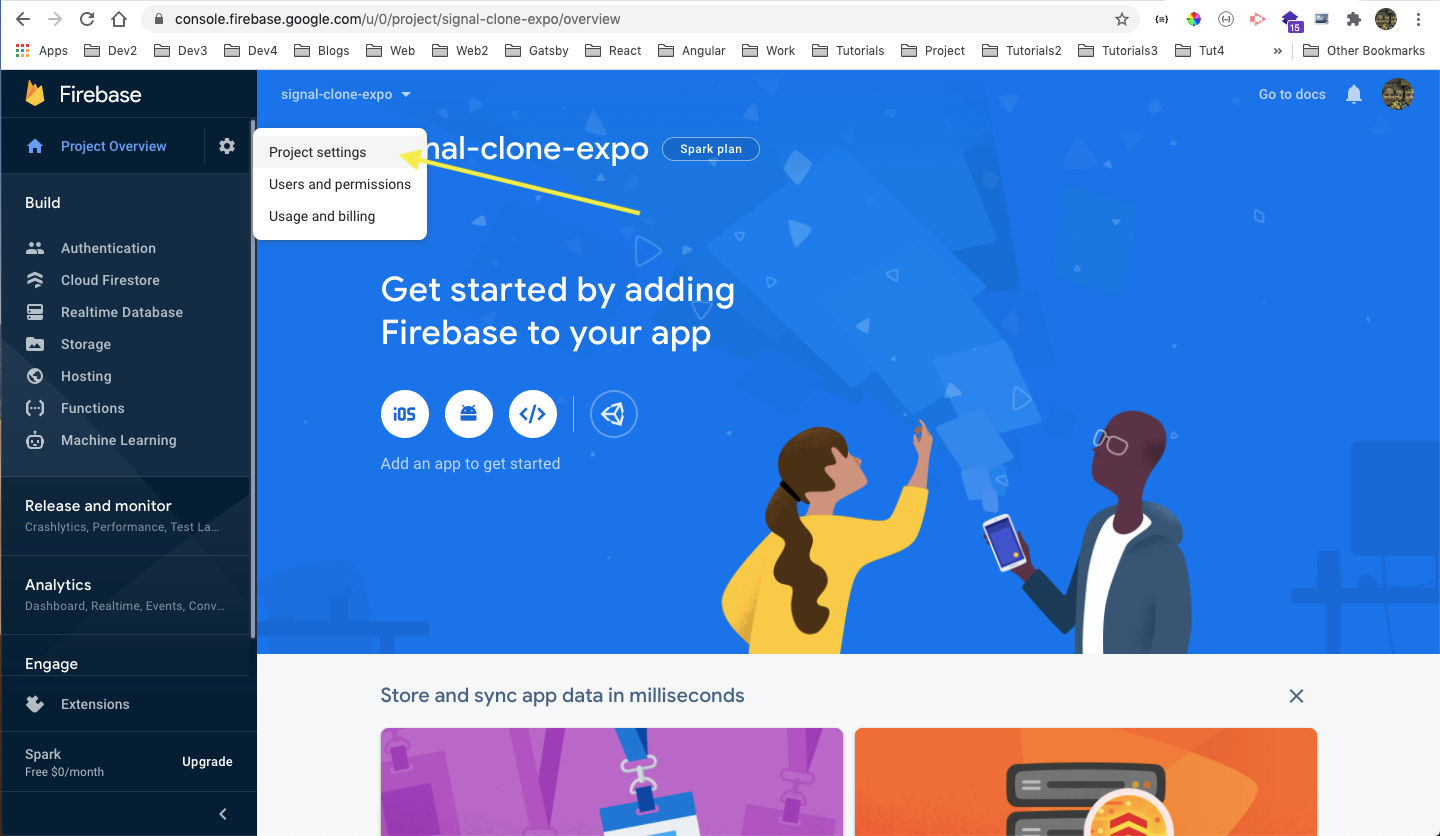
Now, click on the Settings icon on the top right corner of the screen. After that click on the Project settings button.
 signal-clone
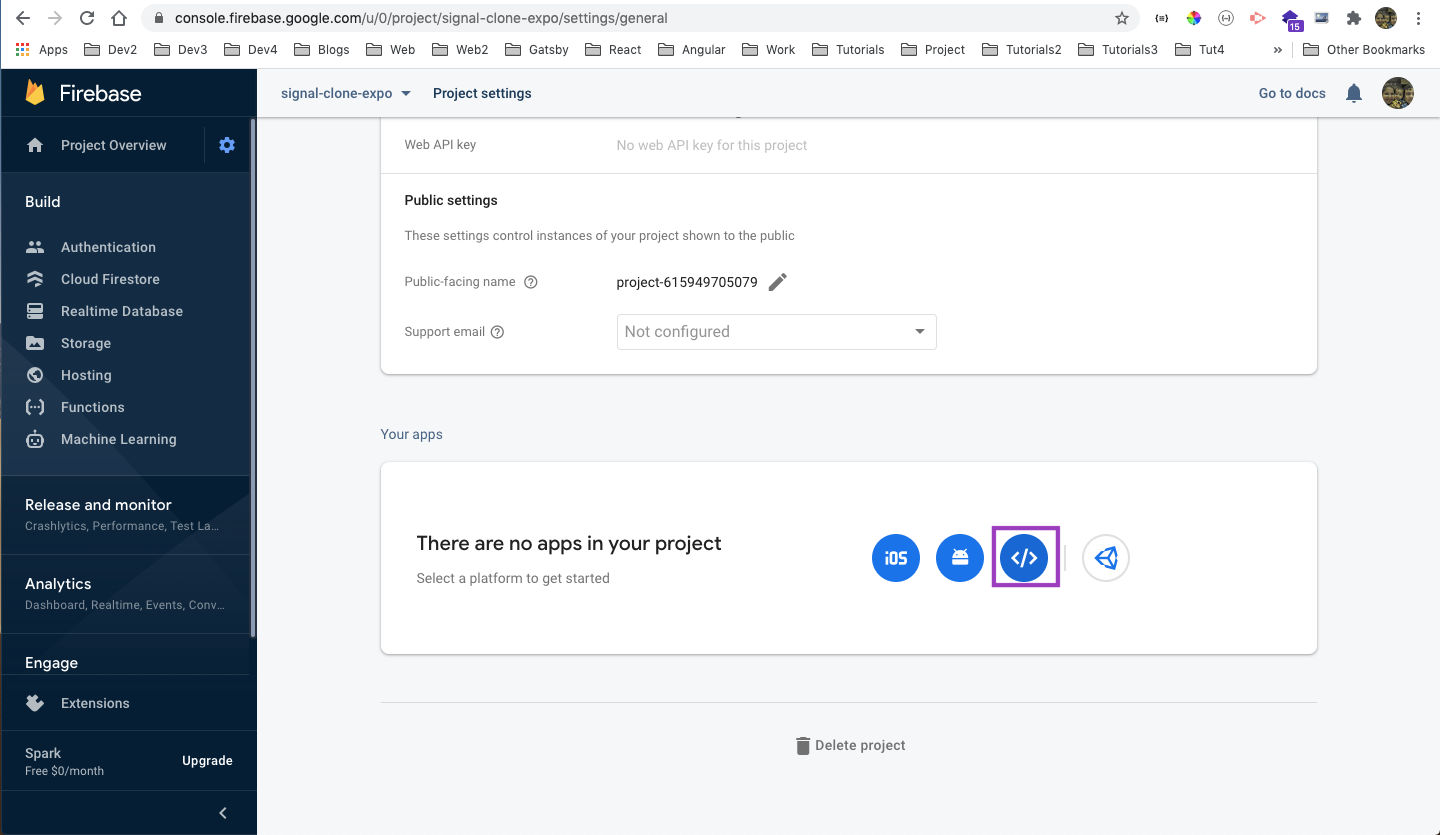
In the next page click on the web-icon on the bottom of the page.
 signal-clone
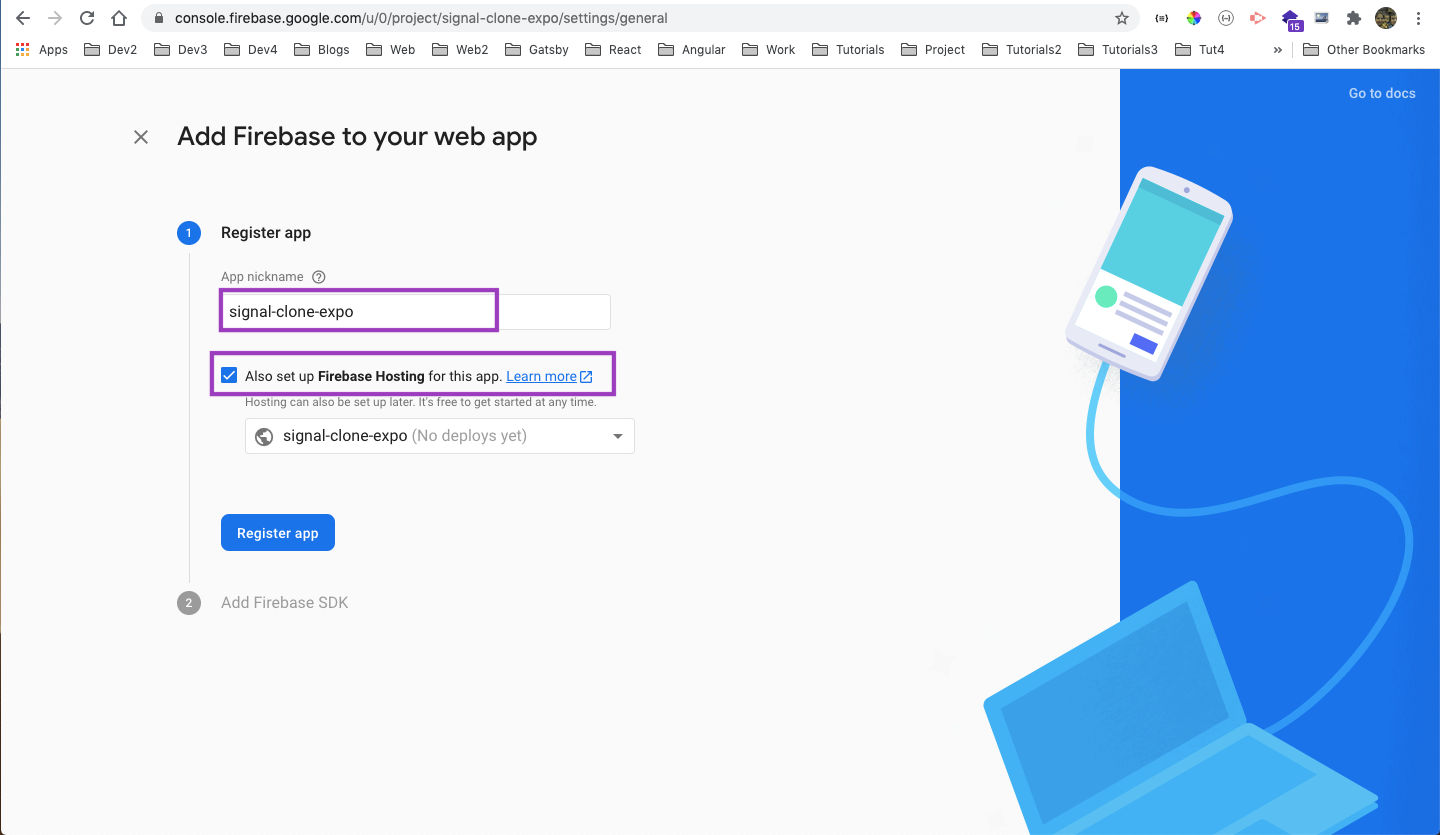
In the next page give the name same as the name of the app, which is signal-clone-expo in my case. Also, click on the checkbox for firebase hosting.
 signal-clone-expo
In the next page, just click the Next button.
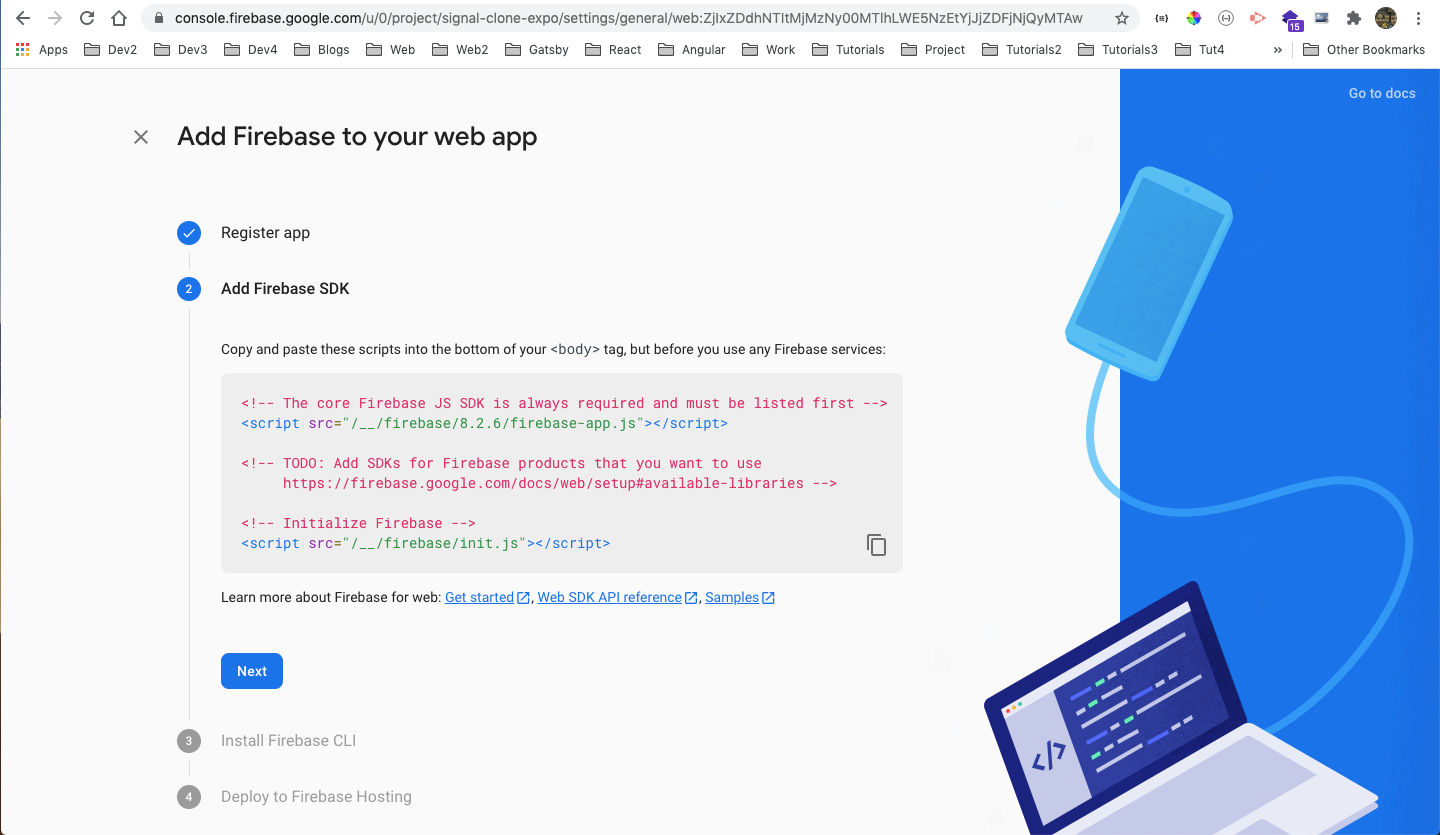 Next
Next
In the next page, it will give the command to install firebase-tools globally from the terminal. Since, i have already done it, i am not doing it again.
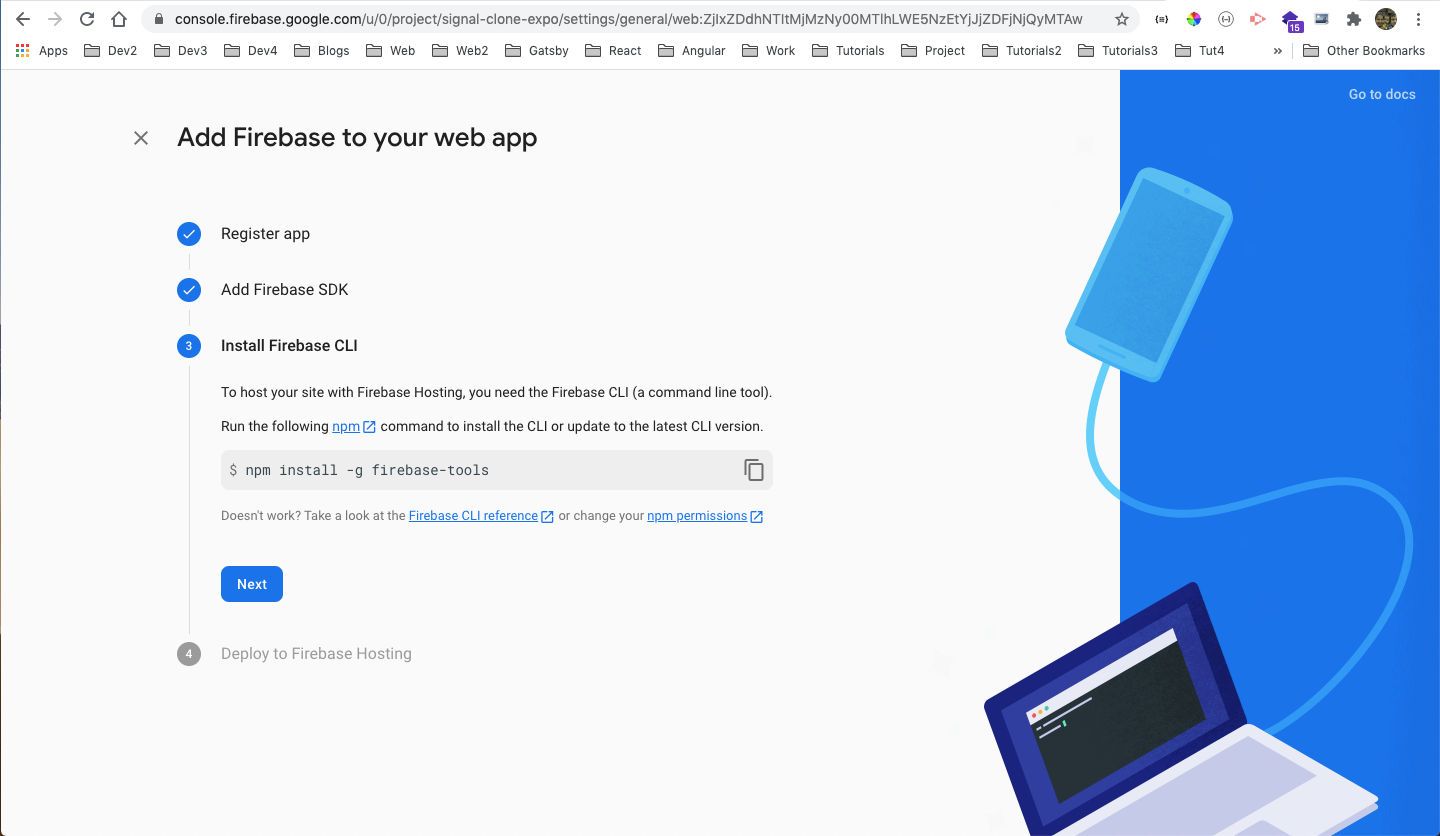 firebase-tools
Ignore the next set of commands as of now and click on Continue to console button.
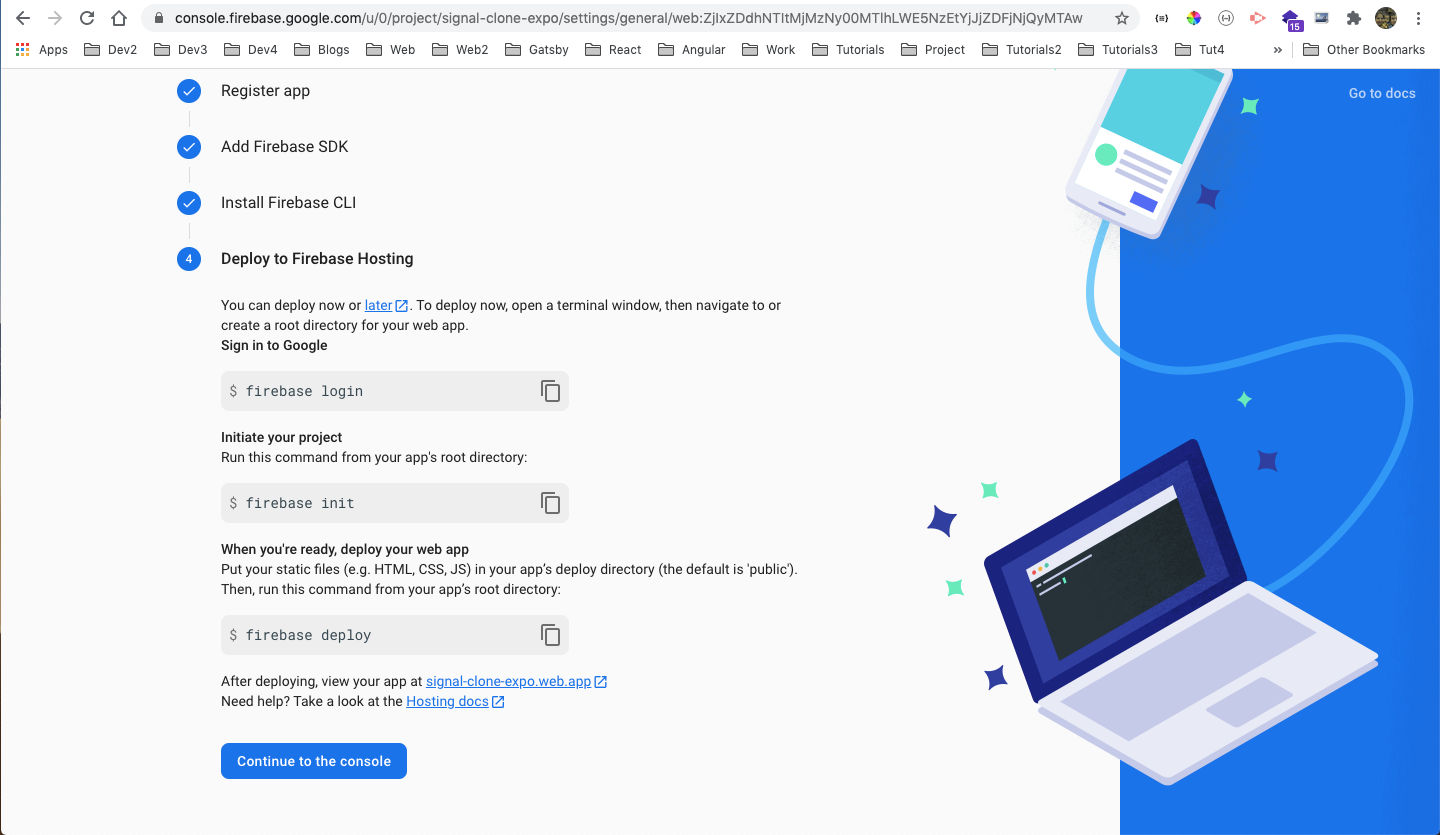 signal-clone-expo
Now, in the next page you need to scroll down and click on the Config radio button and then copy the whole data for the firebaseConfig.
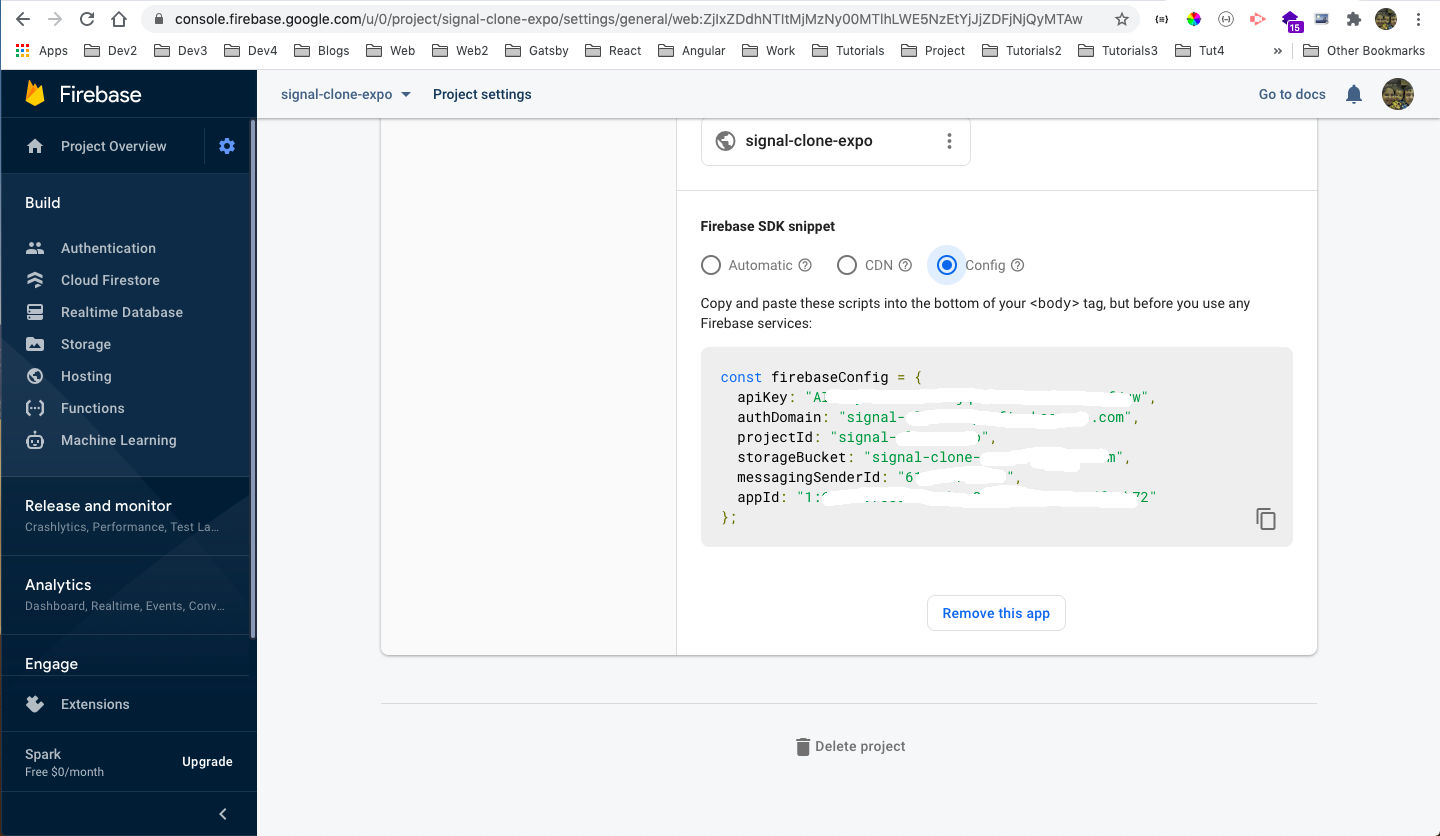 signal config
Now, open code in VSCode and create a file firebase.js inside the src folder and paste the content from above there.
const firebaseConfig = {
    apiKey: "Axxxxxxxxxxxxxxxxxxxxxxxxxxxxxxxxw",
    authDomain: "signal-xxxxxxxxxx.com",
    projectId: "signal-xxxxx-expo",
    storageBucket: "signal-xxxxxxxxxxxx.com",
    messagingSenderId: "6xxxxxxxxx9",
    appId: "1:6xxxxxxxxxxxxxxxxxxx72"
};
We need to run npm start to start the project, from the terminal.
 npm start
It will open the http://localhost:19002 / in browser.
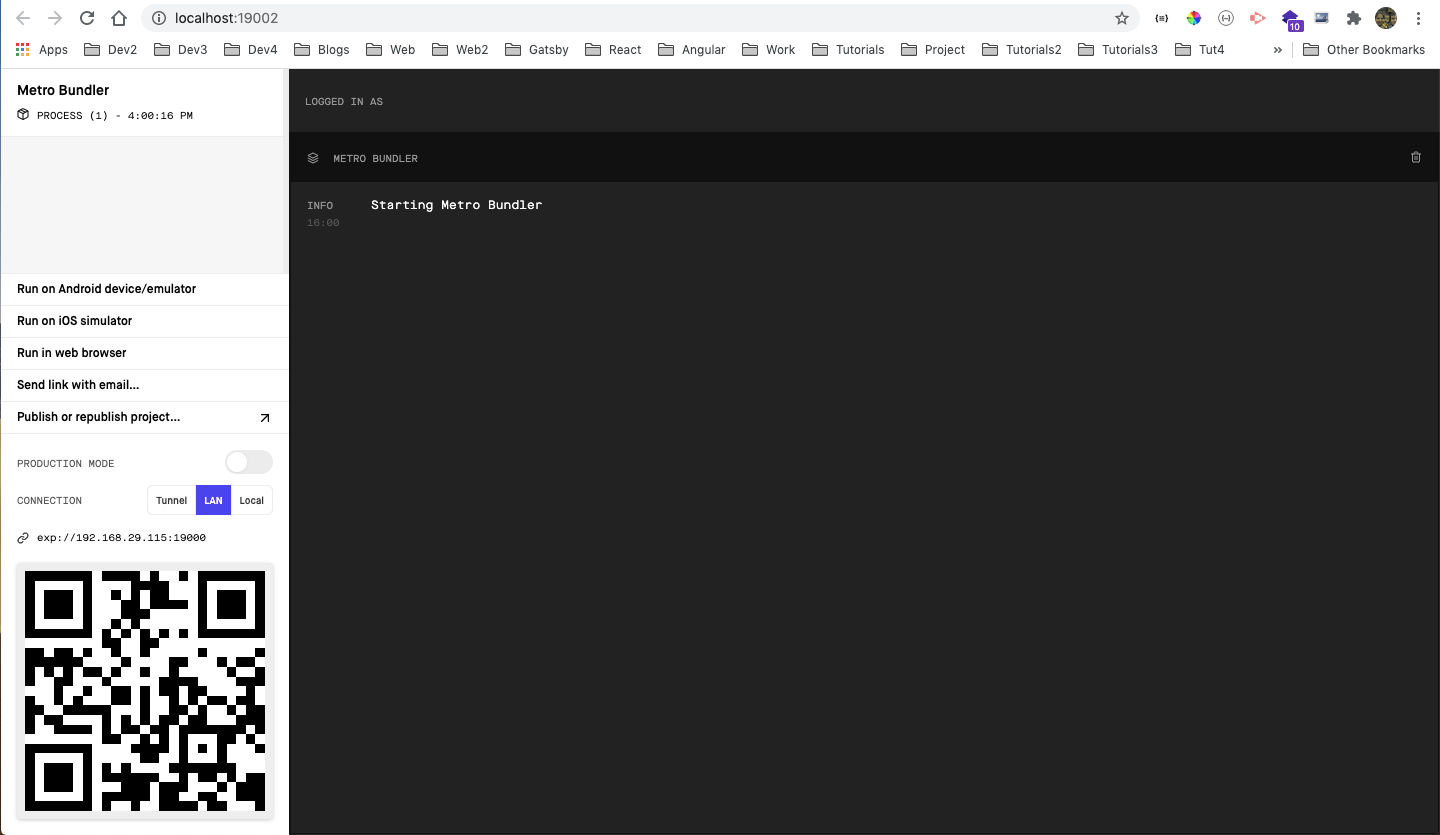 localhost
Now, i am running the output on a physical Android device. For running on a physical device, you need to head over to Play Store and install Expo Go.
Now, open the app on your phone. You will get the below screen.
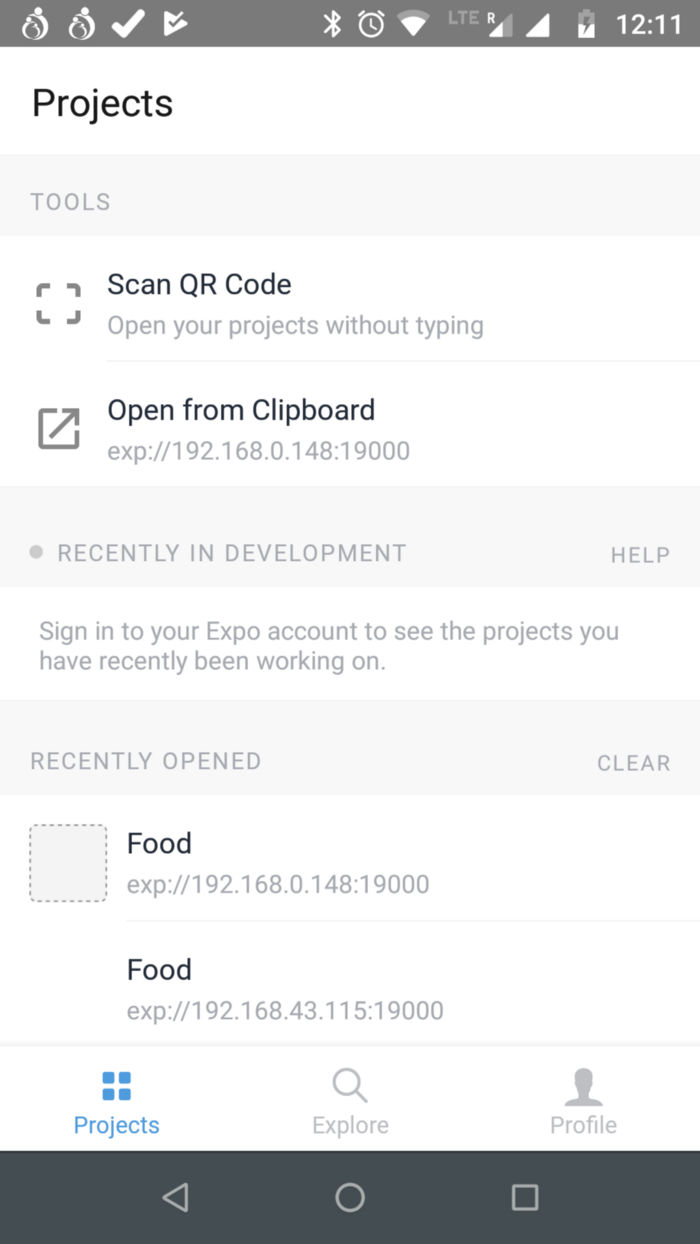 Expo App
Click on Scan QR Code, it will open Camera. Point it to the QR code in the browser and you will the below screen, after all installation is done.
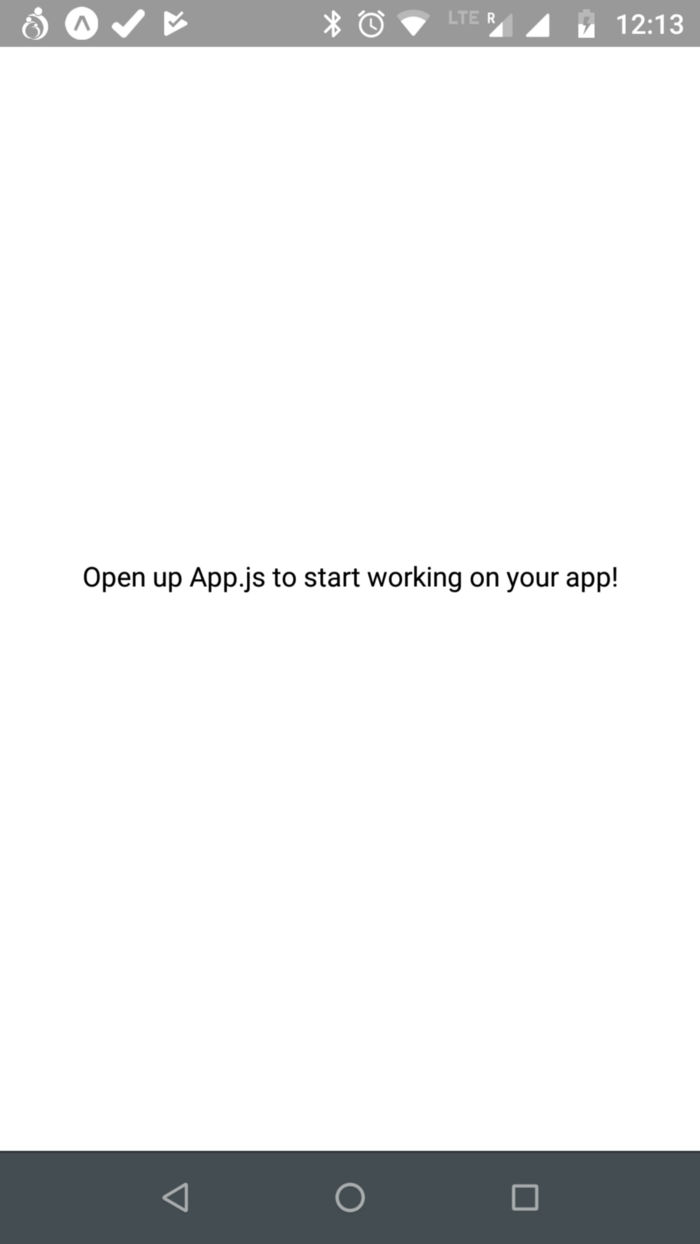 Initial App
We can also check the web-version of the app by clicking Run in web browser in http://localhost:19002/ and it will open the web-app in http://localhost:19006/
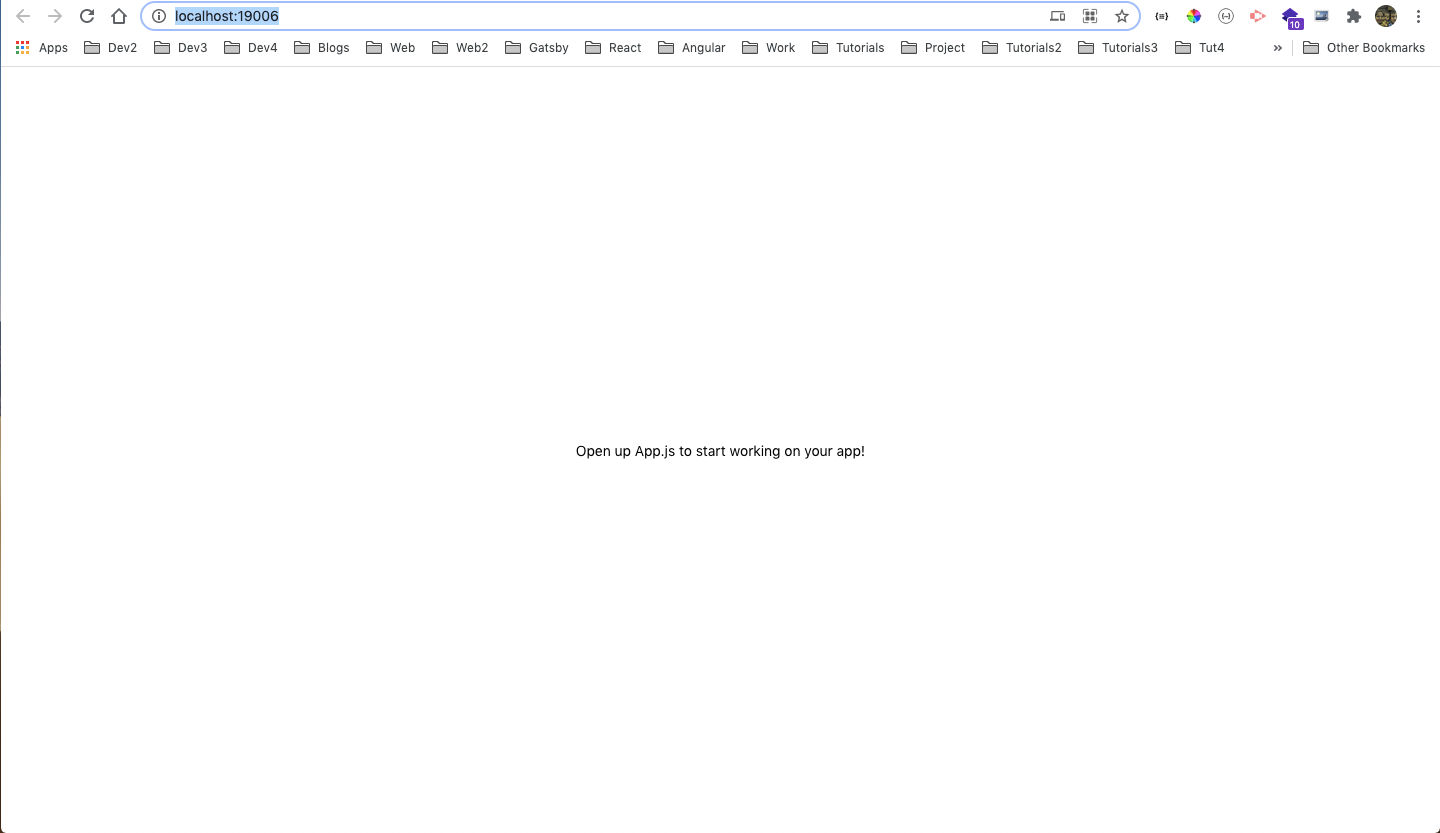 Web browser
Now, in App.js if we change the text to Signal Clone, it will reflect instantly in our connected mobile device and web-app.
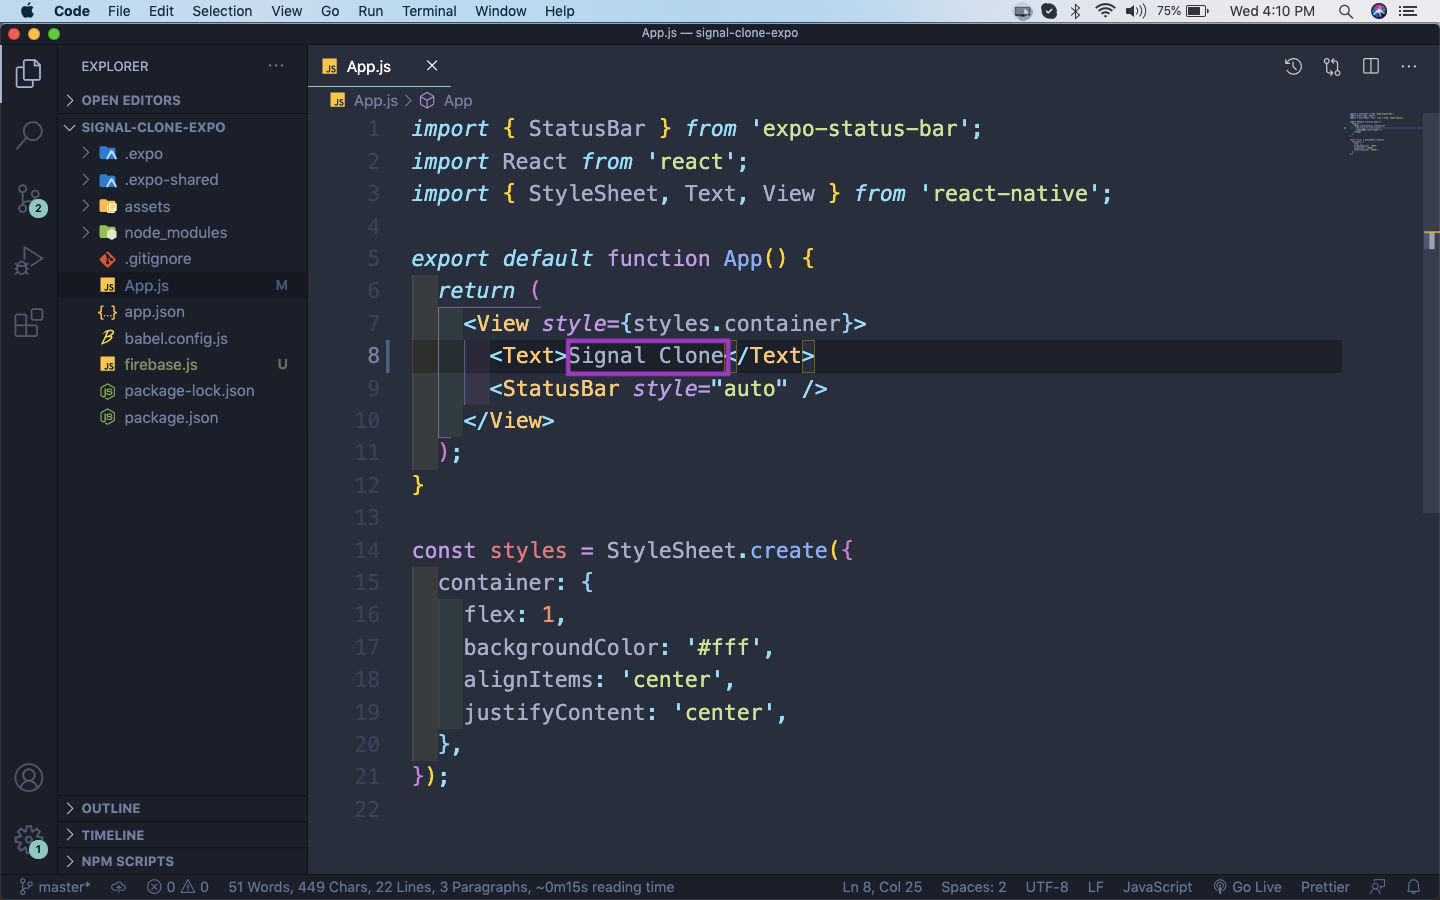 App.js
Now, we will use react navigation in our project, which is used for routing in react-native. It is similar to react-router, which is used for web. The docs for the same is here. As, per the documentation we have to npm install it.
 npm install
We also need to install below, because we are using expo.
expo install react-native-gesture-handler react-native-reanimated react-native-screens react-native-safe-area-context @react-native-community/masked-view
Next, we will do the necessary imports in App.js file and wrap our app with NavigationContainer.
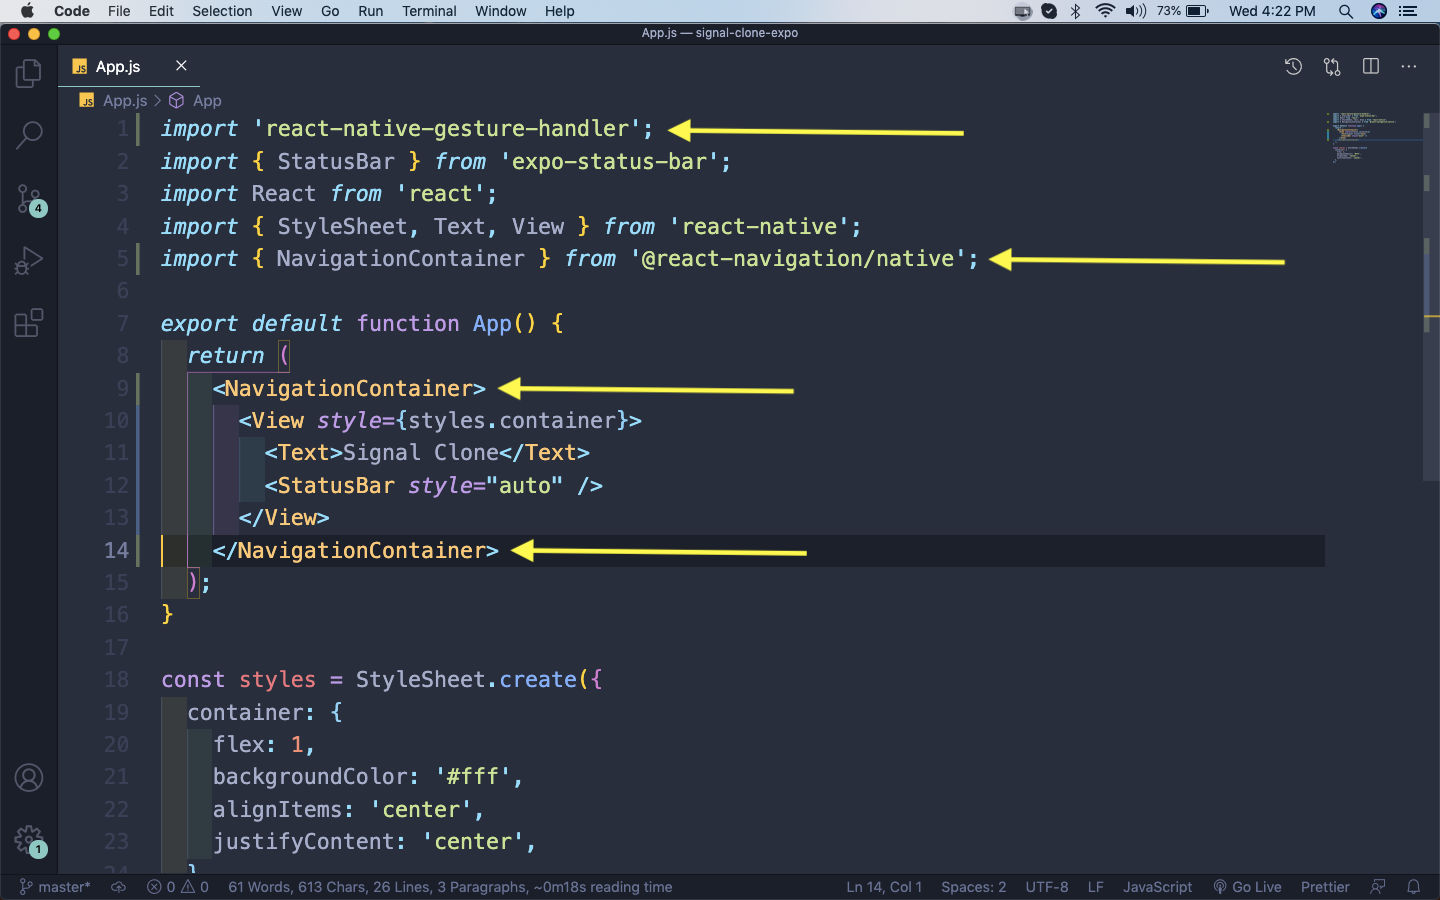 App.js
After this we need to install stack navigator in terminal.
npm install @react-navigation/stack
Now, it’s time to create the folder structure in our project. So, create a folder screens in the root directory and a file LoginScreen.js inside it. We have just put the basic code in it.
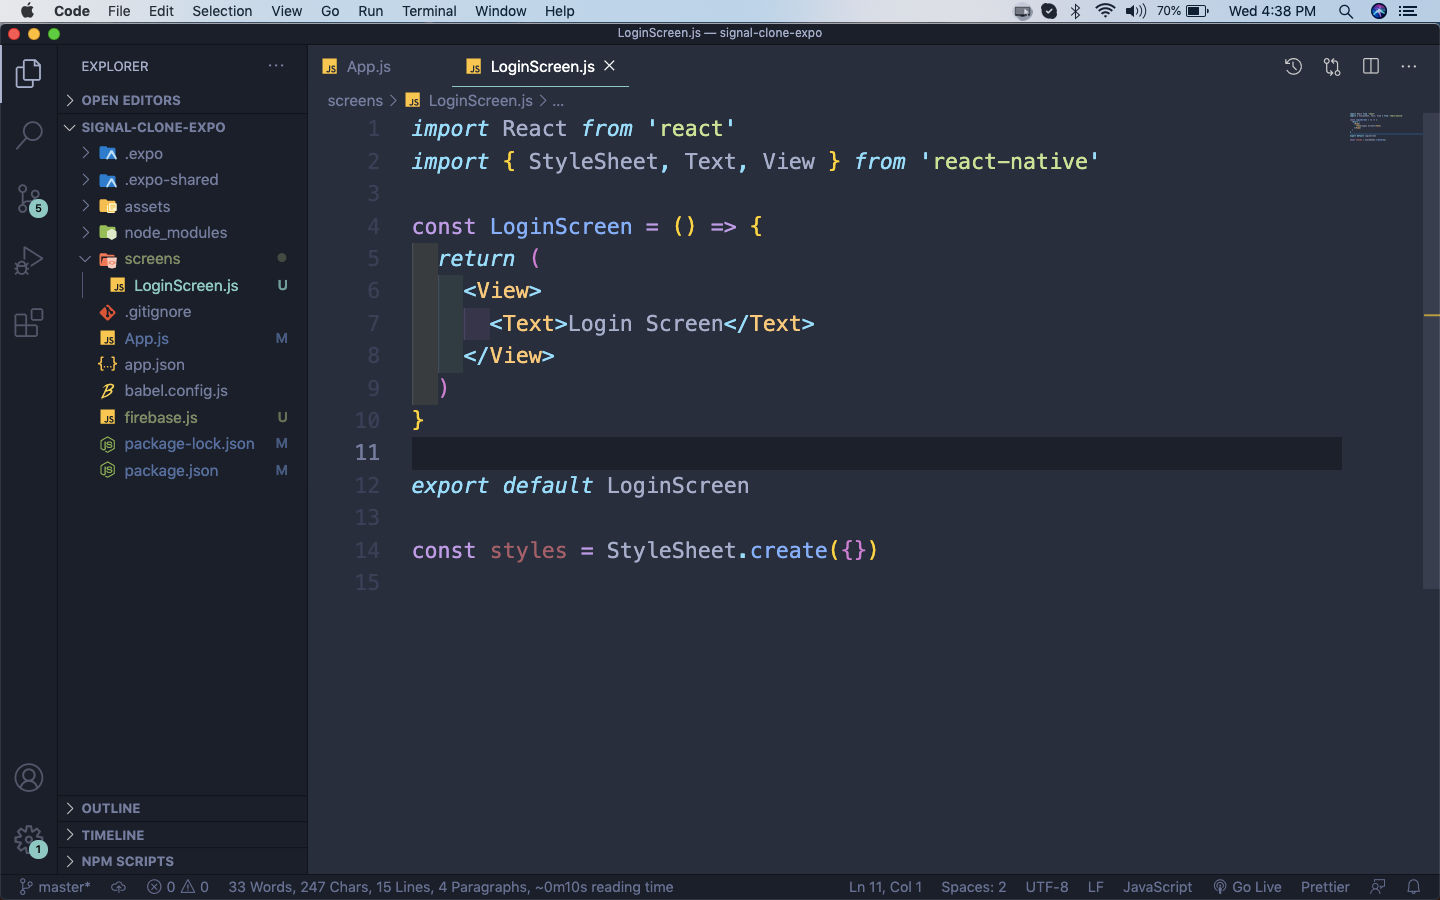 LoginScreen.js
Now, we will create a const Stack an assign it to createStackNavigator(). After that inside the NavigationContainer, we are wrapping everything with Stack.Navigator and after that in Stack.Screen, we will show our first screen ie LoginScreen.
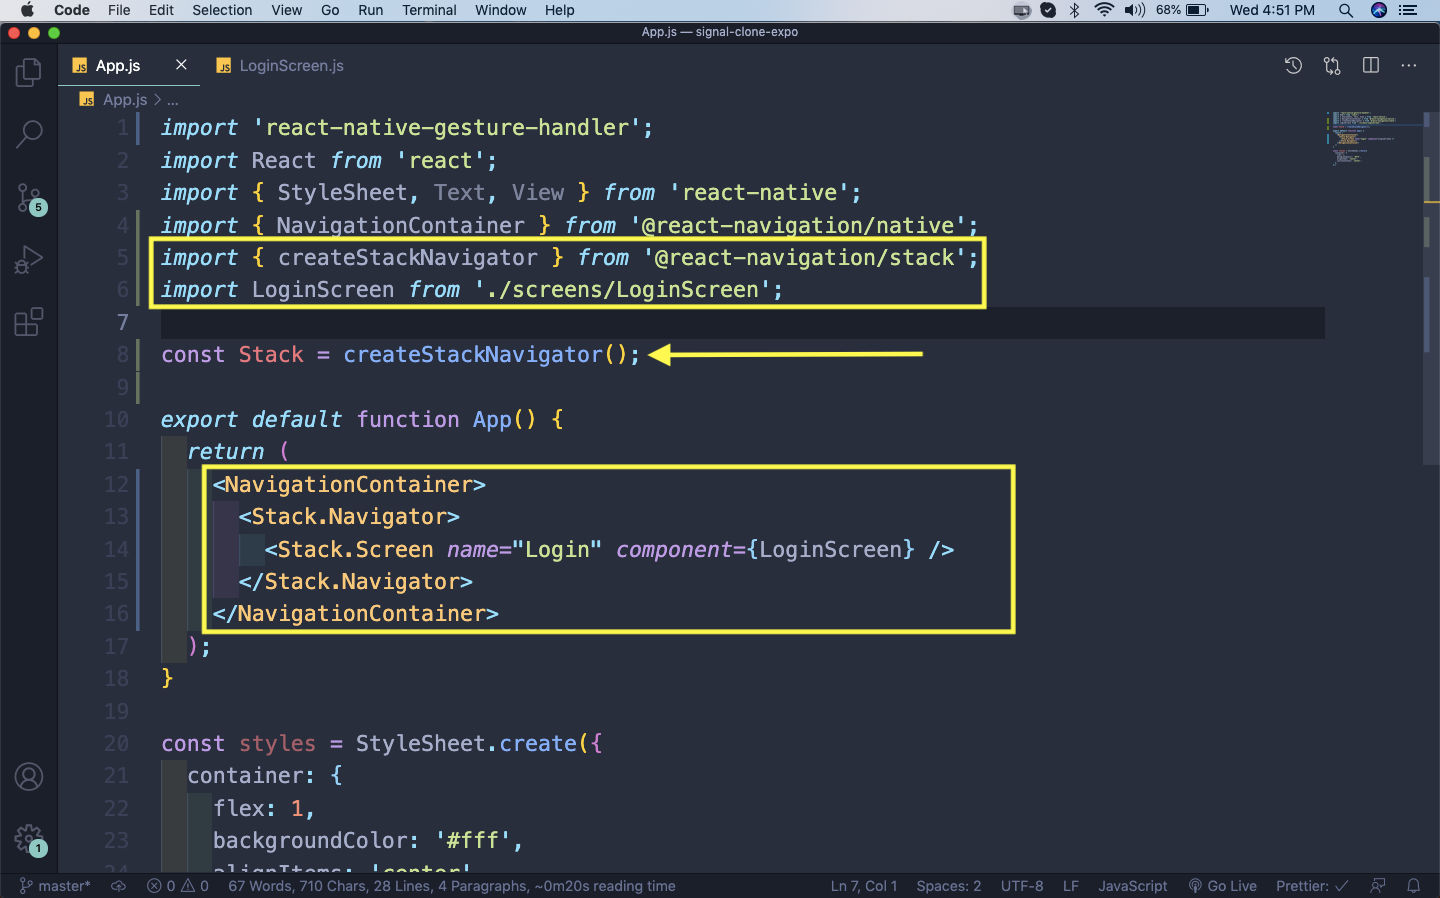 App.js
Now, in http://localhost:19006/ we can see the LoginScreen component.
 LoginScreen
Next, we will change the style for the screens and give it a blue color and white background. We are creating a screenOptions and giving it styles as below.
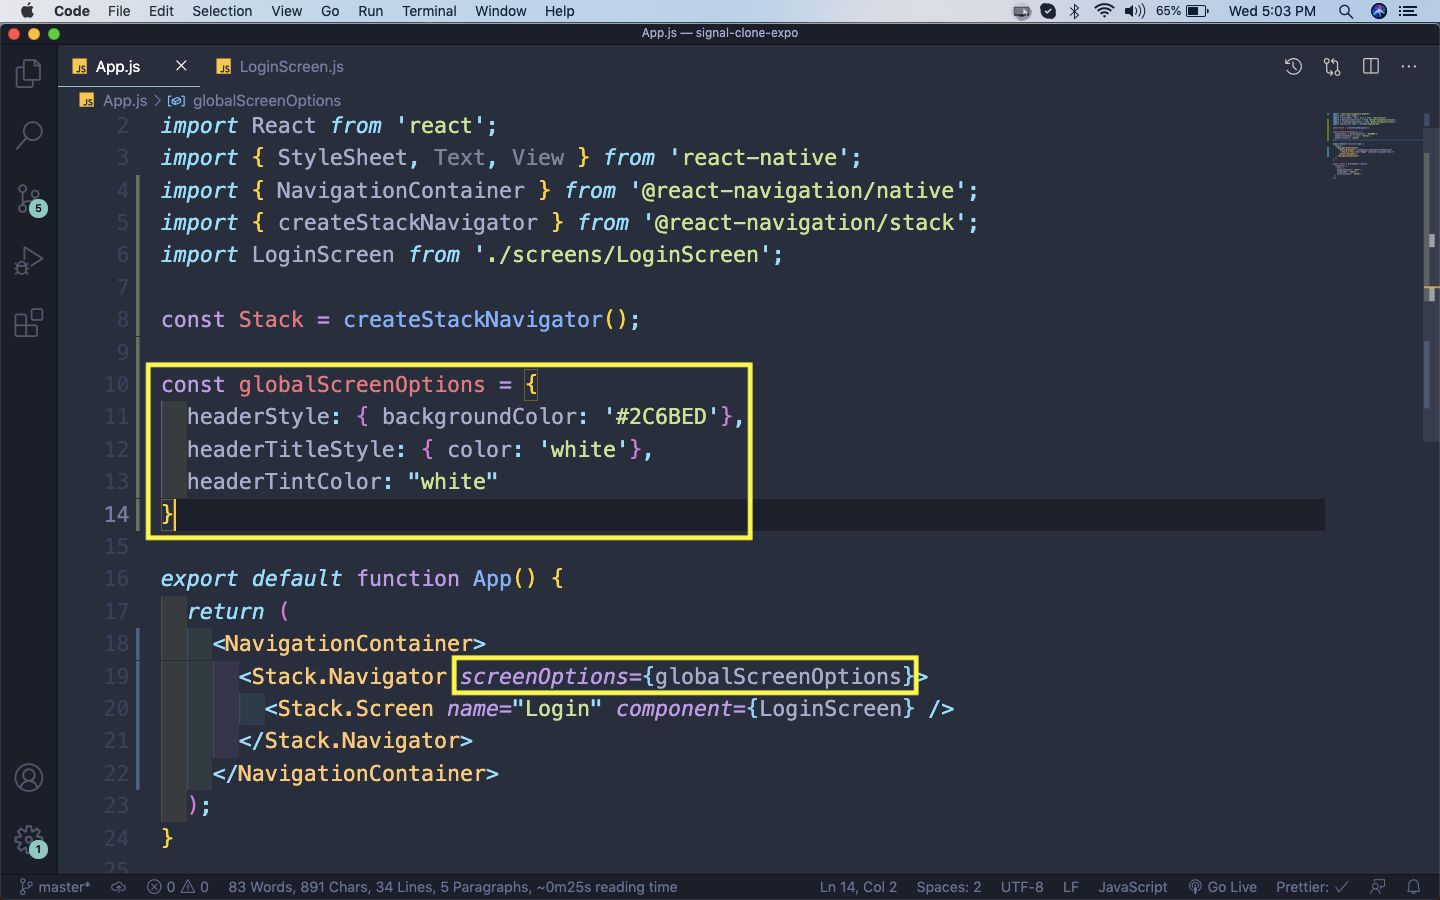 App.js
Now, it will show as below.
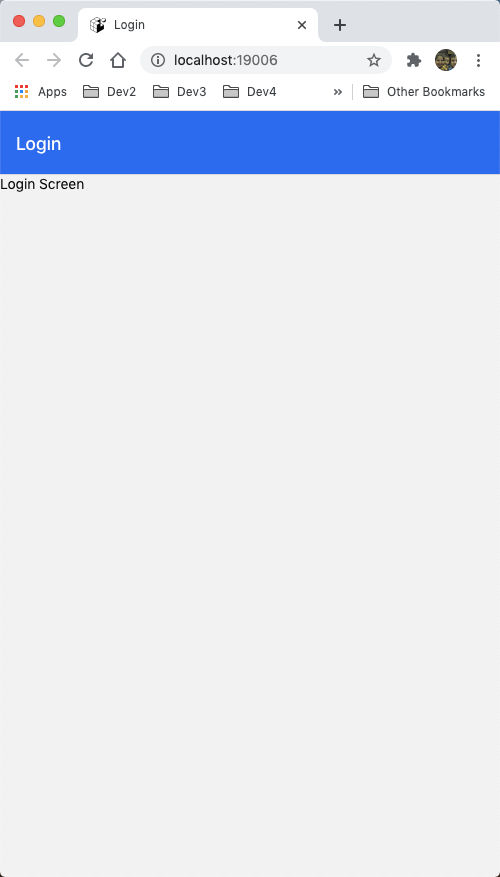 App
App
Now, we will use an external library for our elements called react native elements. The details for the same can be found here. So, we need to do the below npm install in terminal as per docs.
npm install react-native-elements
Now, we will be starting to use it in our LoginScreen.js file. Here, we are doing the necessary imports. After that we are using the Image element with the source as the uri for signal.
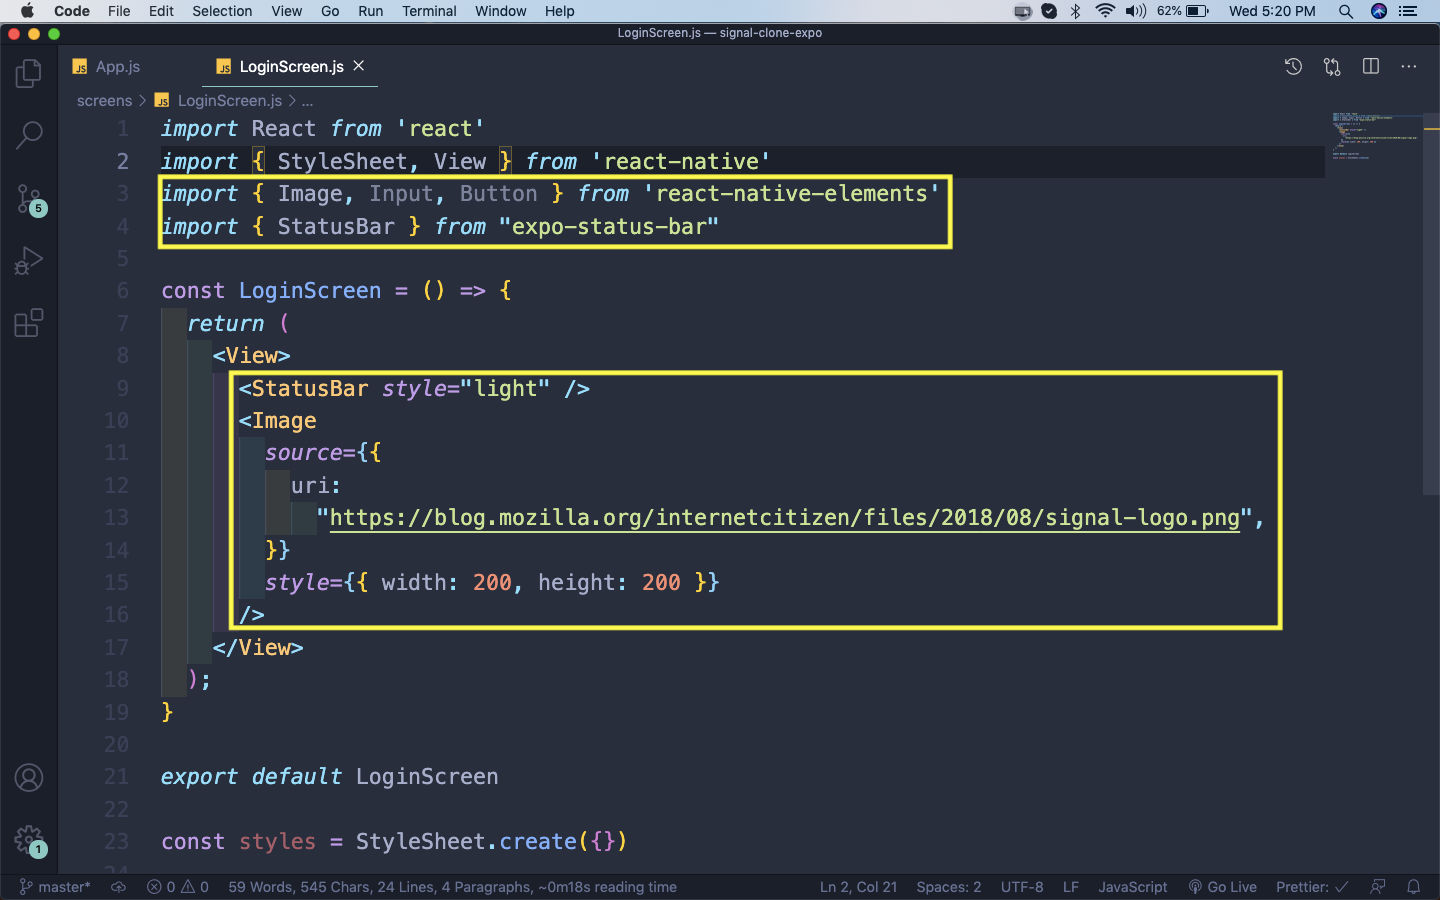 LoginScreen.js
Now, the signal logo will be shown in our app.
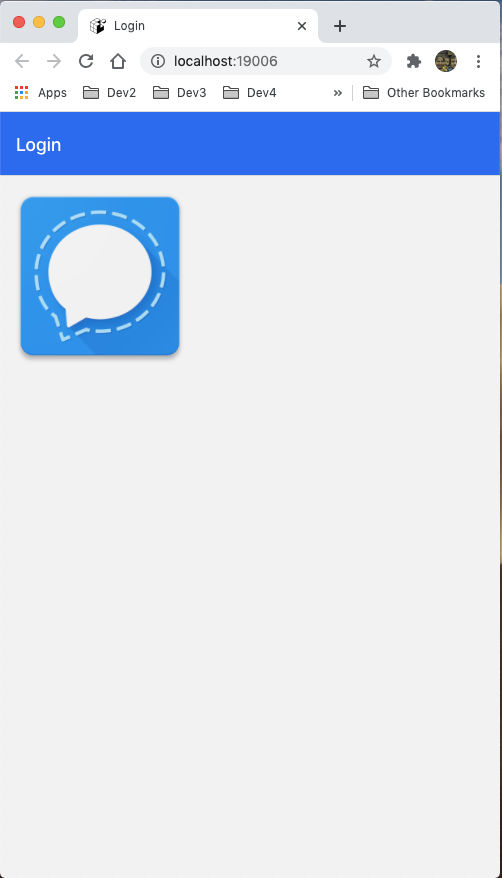 Signal logo
Now, we will add a email and a password field in LoginScreen.js. Here, we are using Input from react-native-elements, but all the concept is from reactjs controlled element.
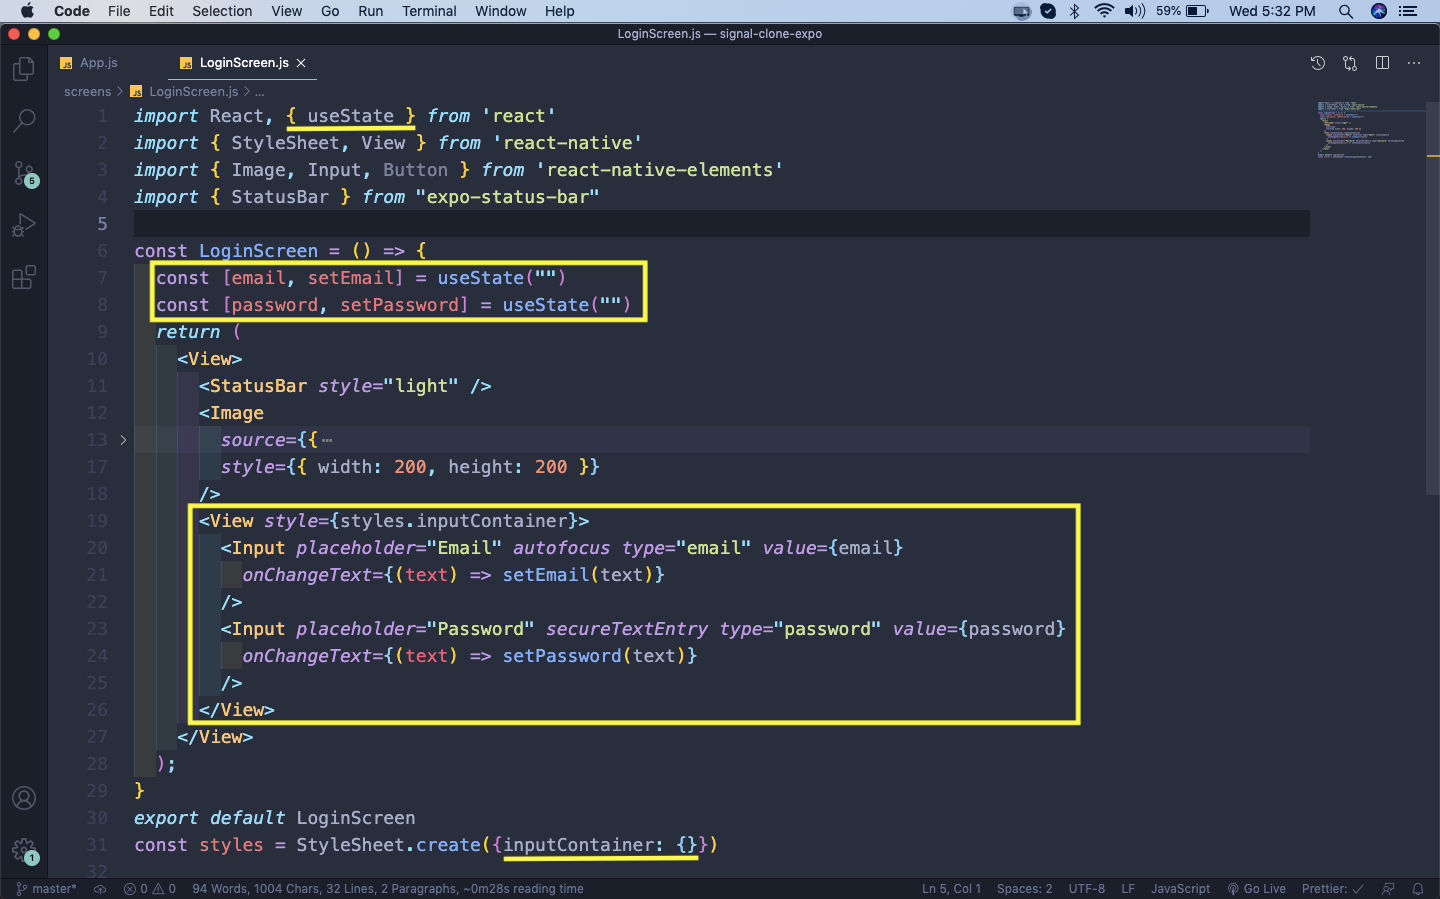 LoginScreen.js
Now, we will get the Email and the Password field in our app.
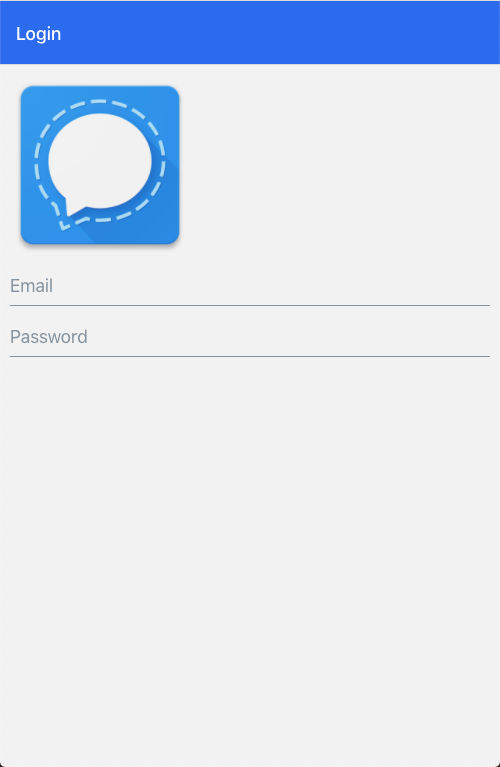 Email
Email
Next, we will add two buttons and also change the View to a KeyboardAvoidingView in LoginScreen.js file.
 LoginScreen.js
Now, we will see those two buttons also in our app.
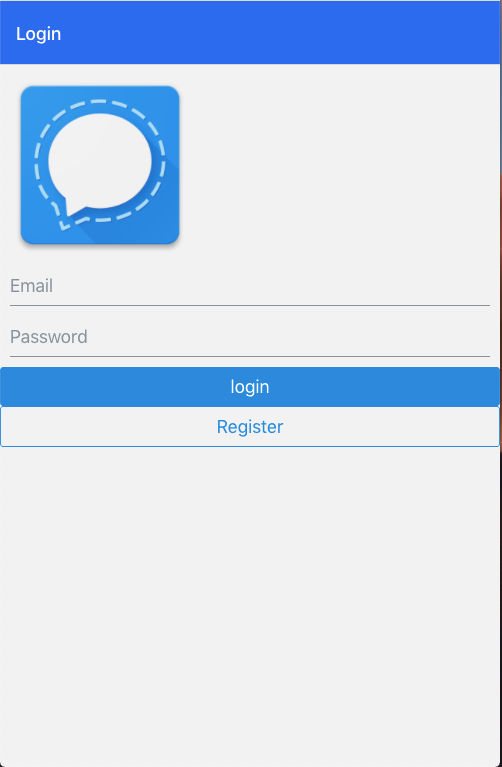 App
App
Now, we will add the styles in LoginScreen.js. Here, we are also adding an empty View, to get a padding when the keyboard on mobile comes up.
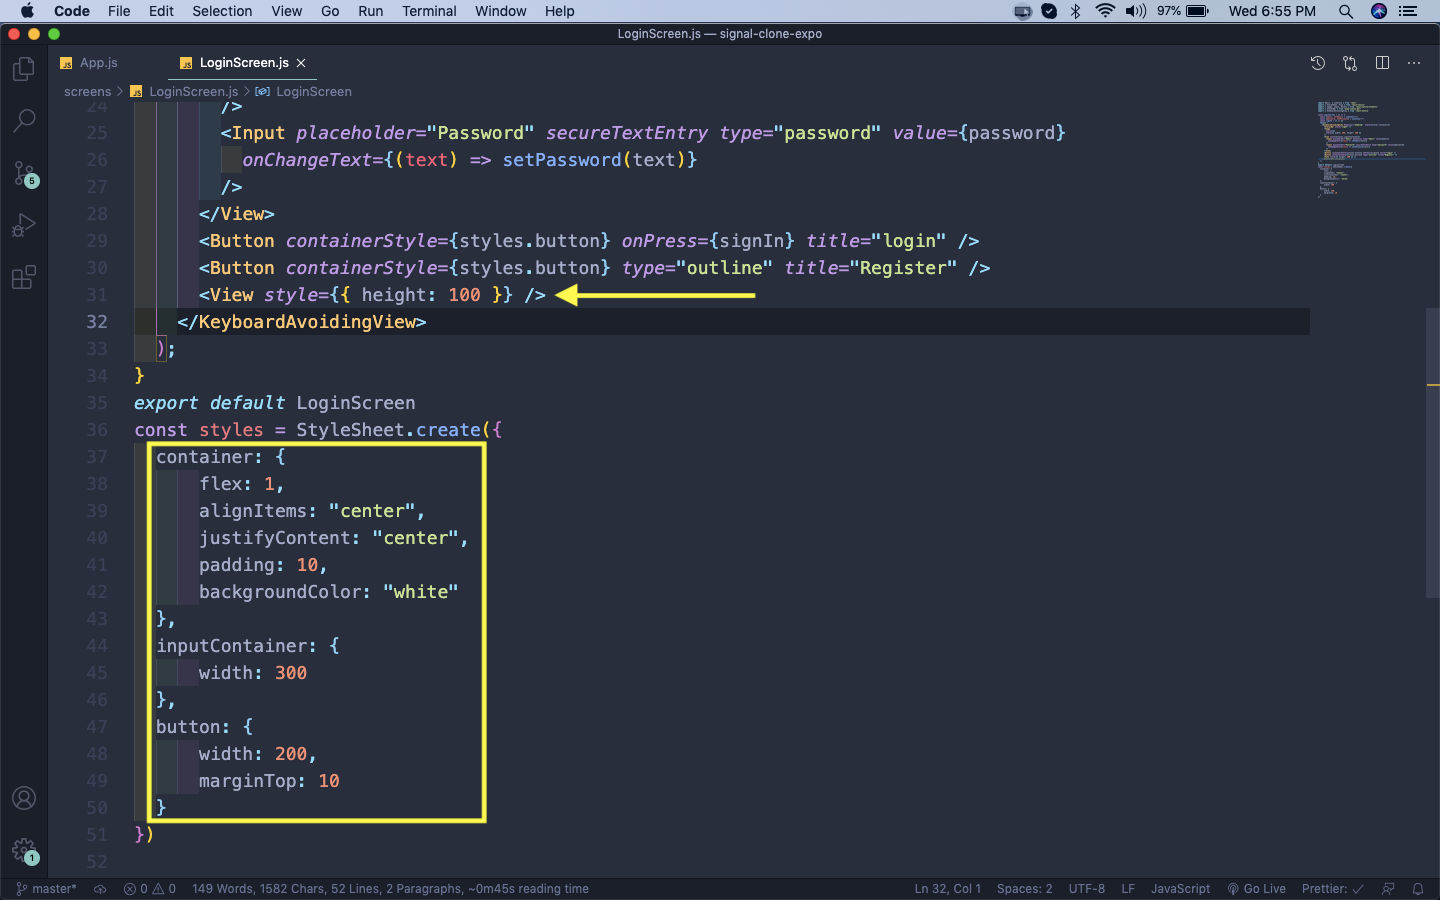 LoginScreen.js
Now, our login screen is complete and will look like below in an Android device.
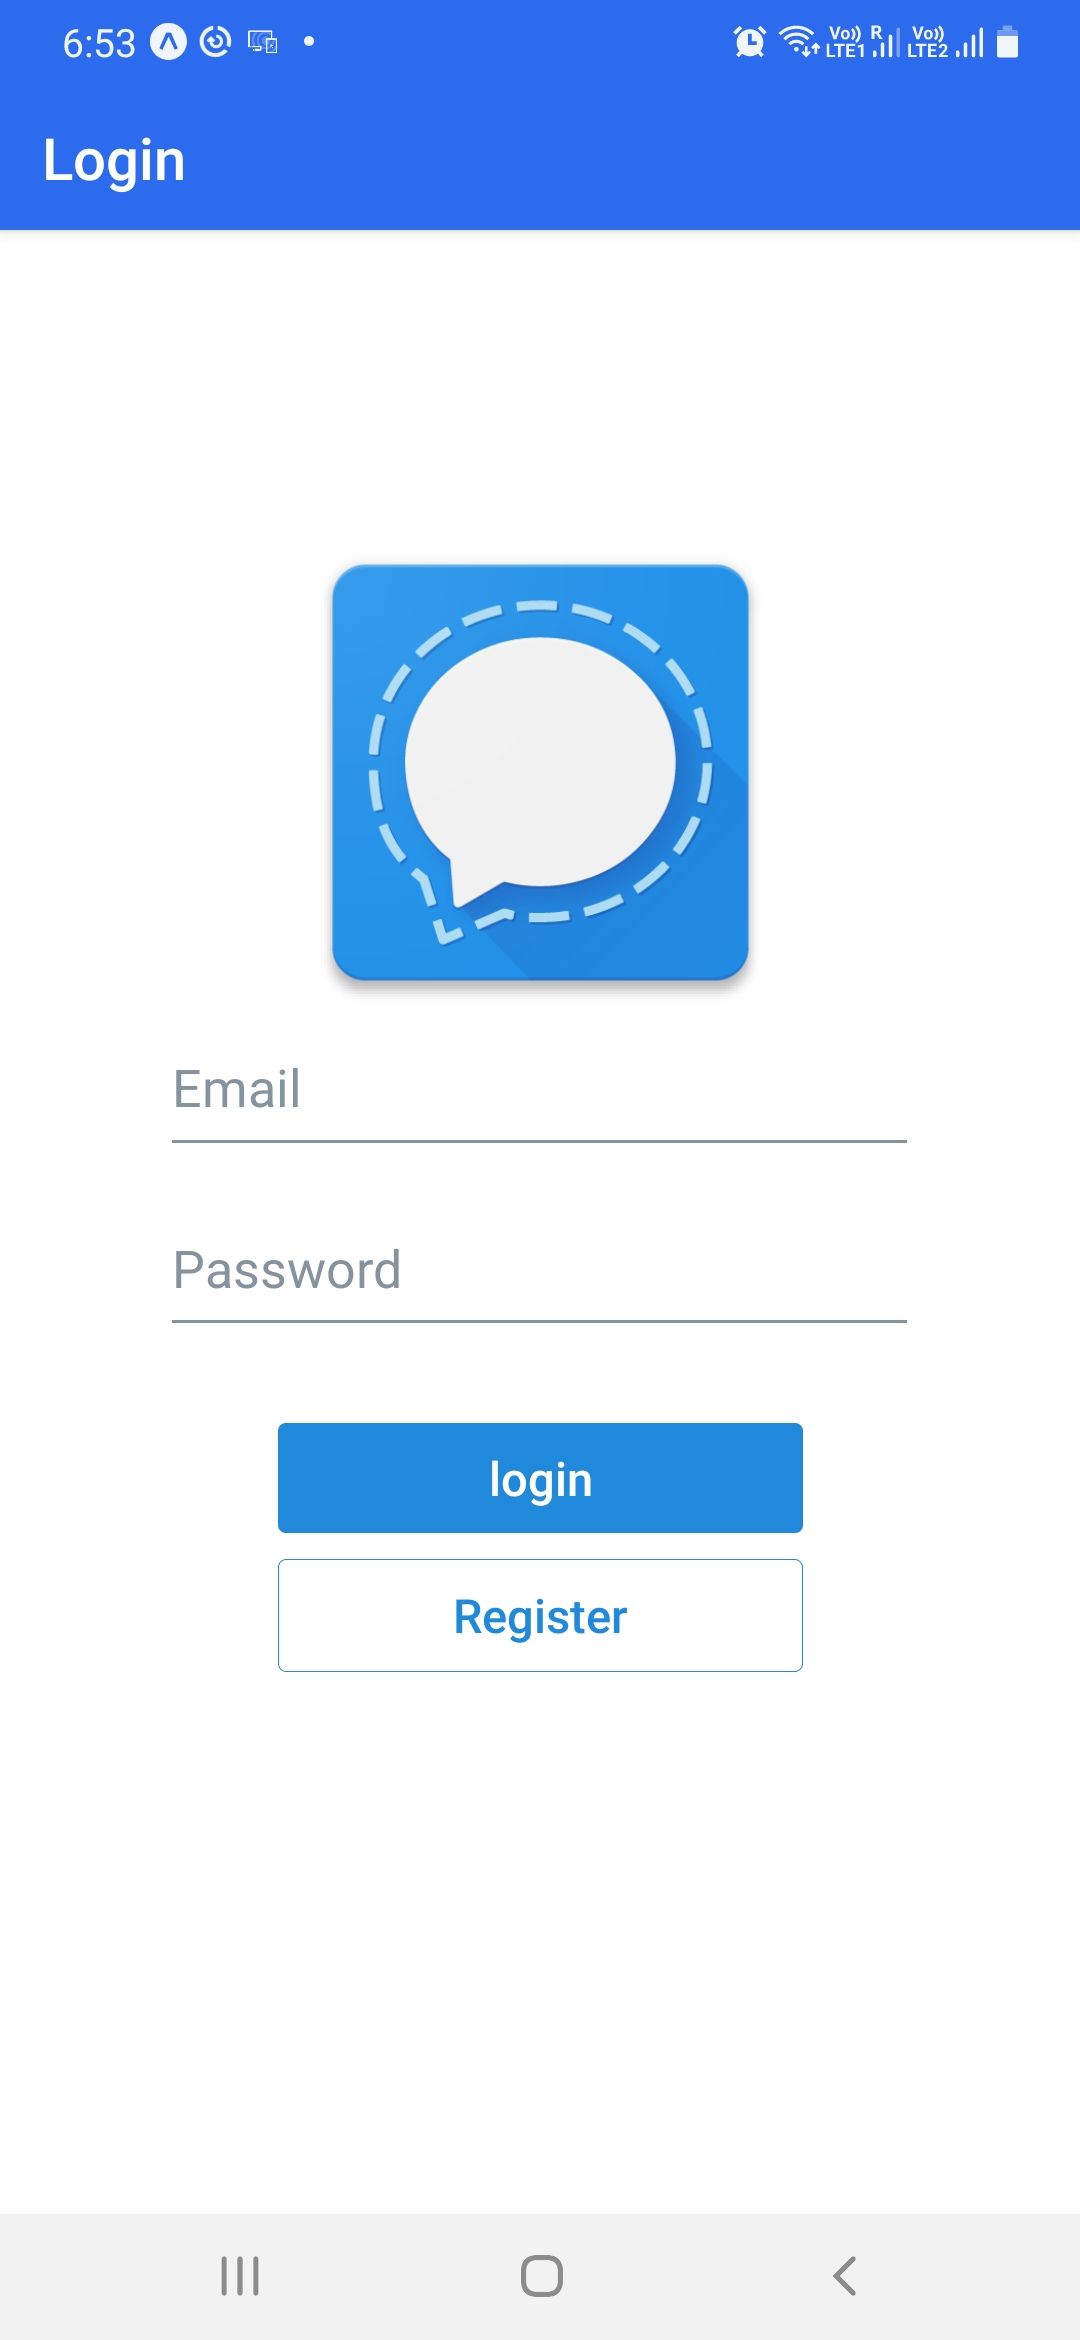 Real Android
Next, we will create the Register Screen. So, create a file RegisterScreen.js inside the screens folder. Now, we also need to include it in App.js file.
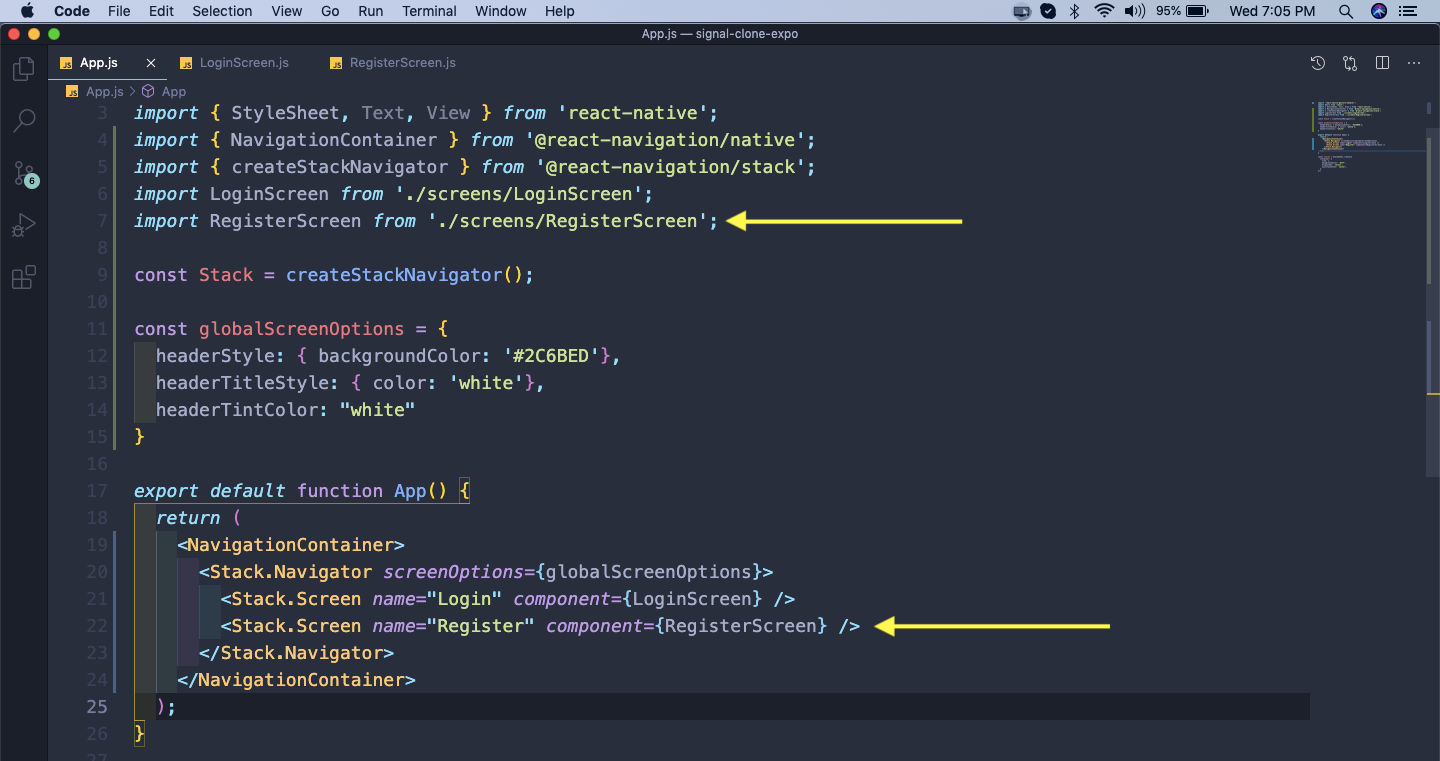 App.js
Now, Stack Navigator gives us access to navigation props which we can use to move around. With it we will create the basic RegisterScreen.js file.
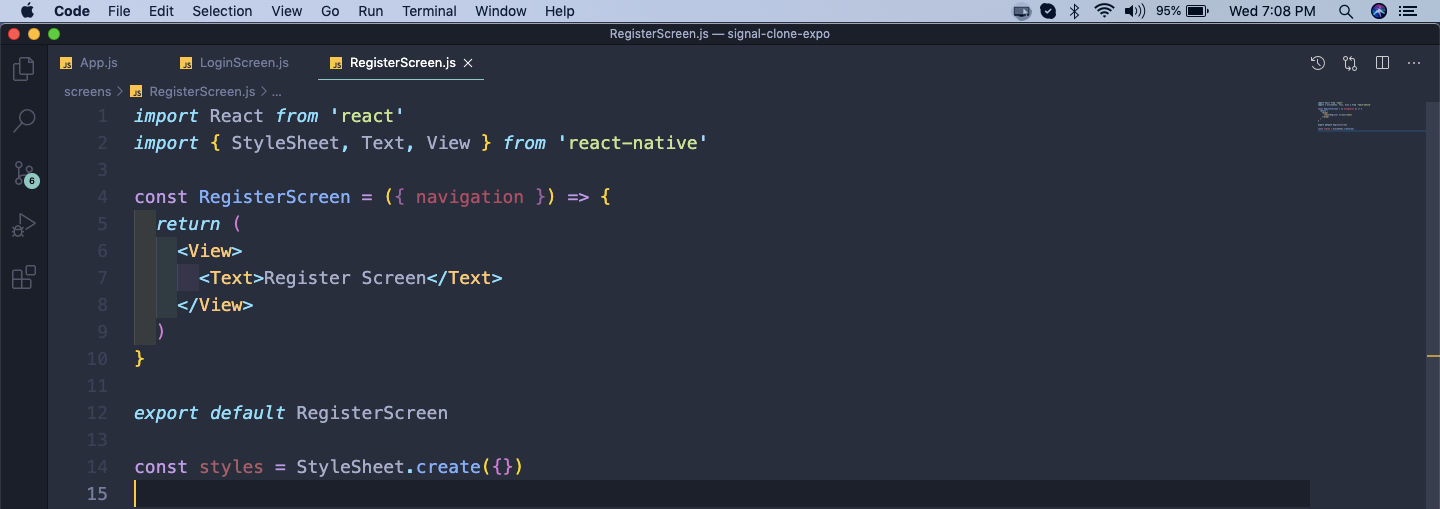 RegisterScreen.js
Now, in LoginScreen.js file we will use navigation props and add it in the onPress of Register button.
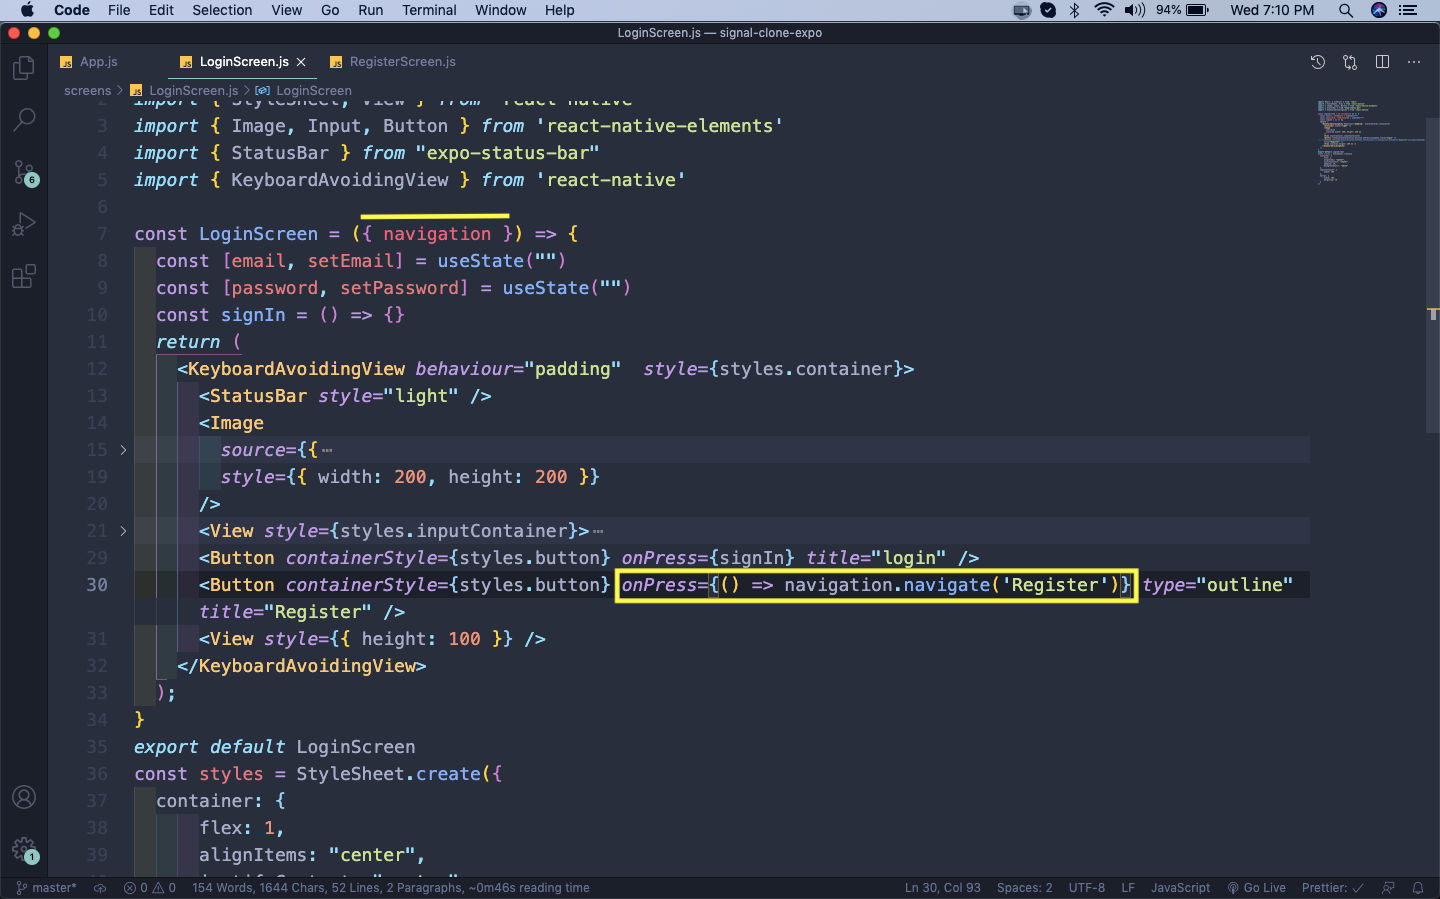 LoginScreen.js
Now, when we click on the Register button in Login screen, we will be taken to the Register component.
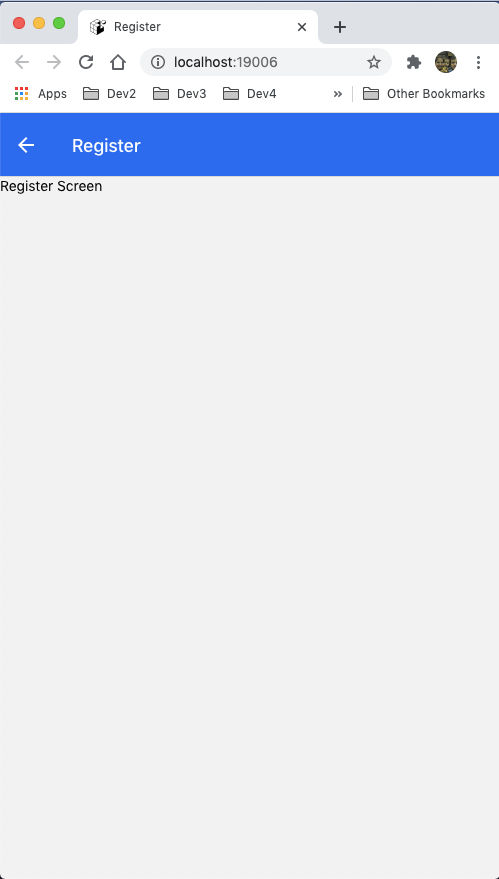 App
App
Now, we will build our Register screen in RegisterScreen.js file. Here, we are have four Input fields and a Button. We also have the respective state variable for all Input fields.
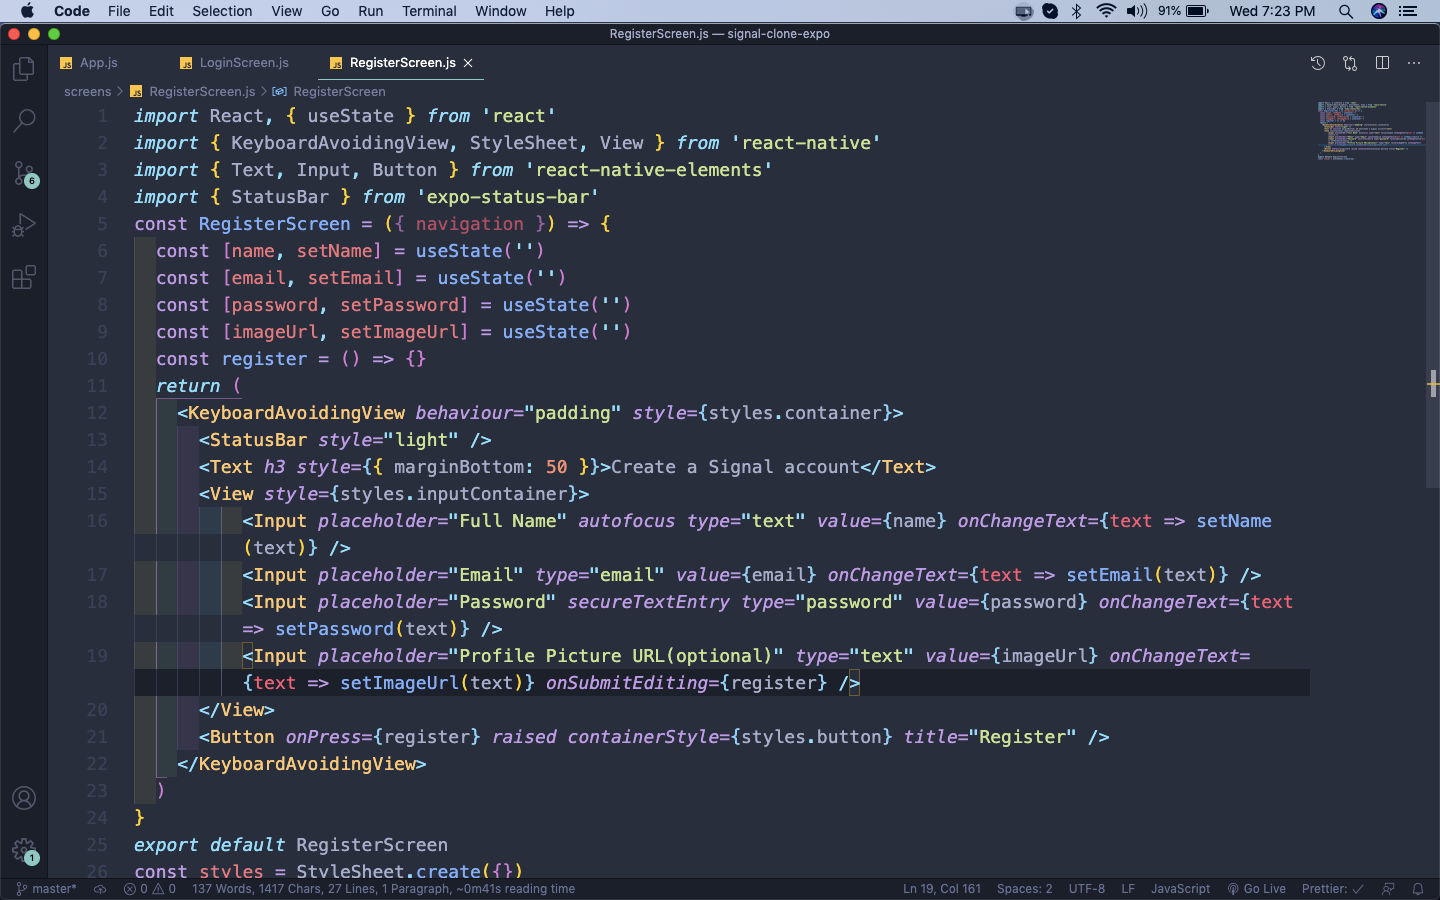 RegisterScreen.js
Our Register Screen will now look like below.
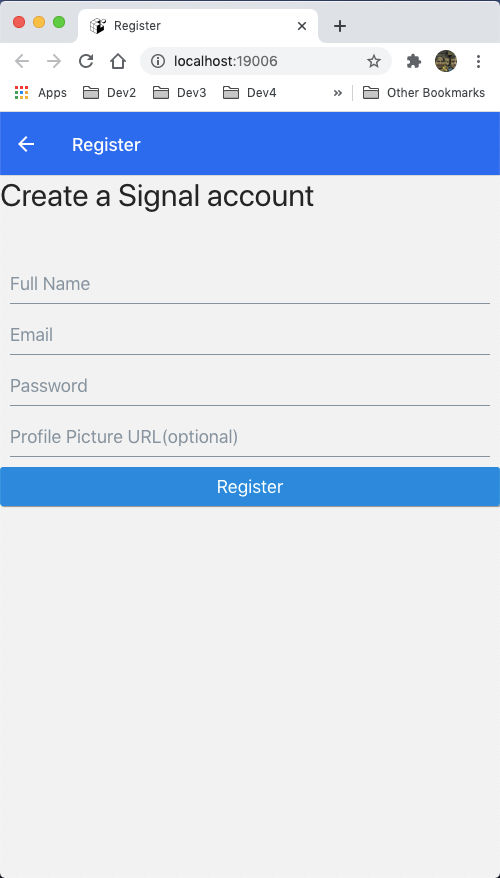 Register Screen
Now, we will add styles in RegisterScreen.js file.
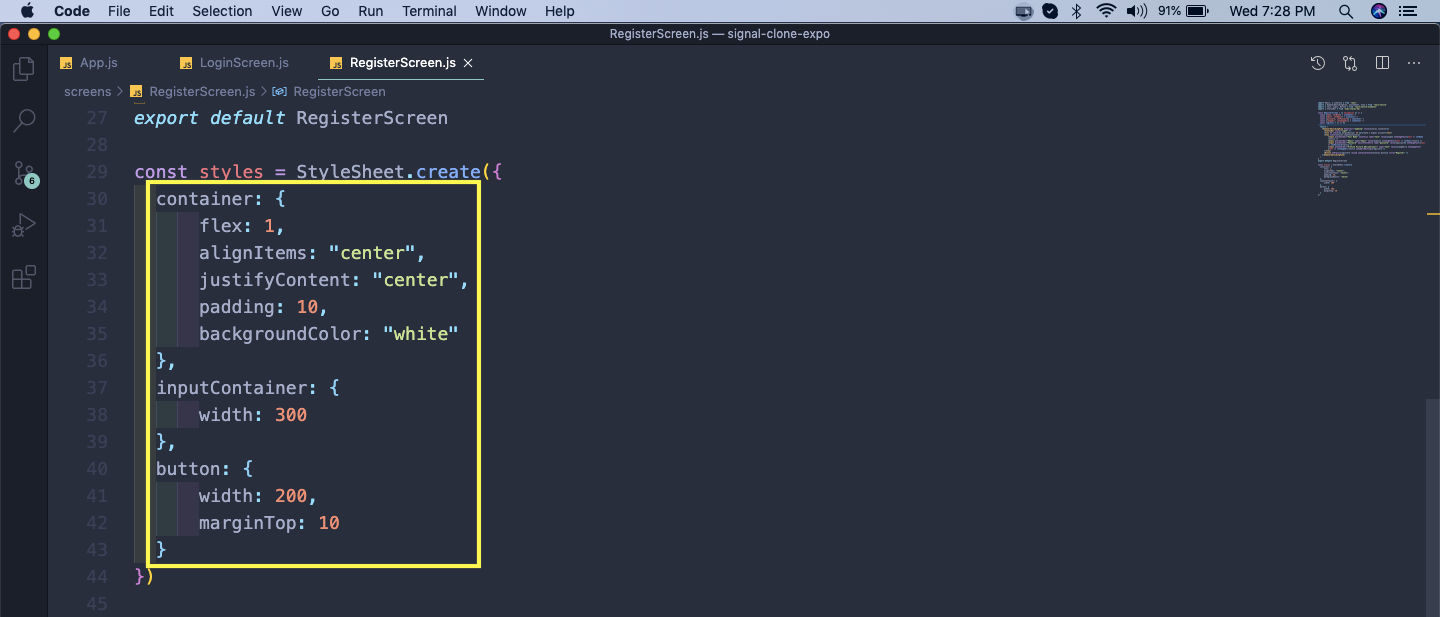 RegisterScreen.js
Now, our Register Screen looks like below.
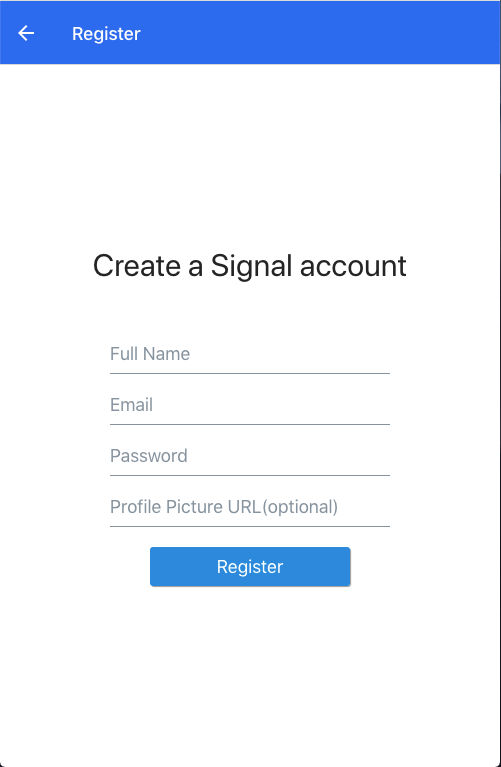 Register Screen
Now, it’s time to use Authentication in our project. So, we will go to firebase console and click on Authentication and then in the Get Started button.
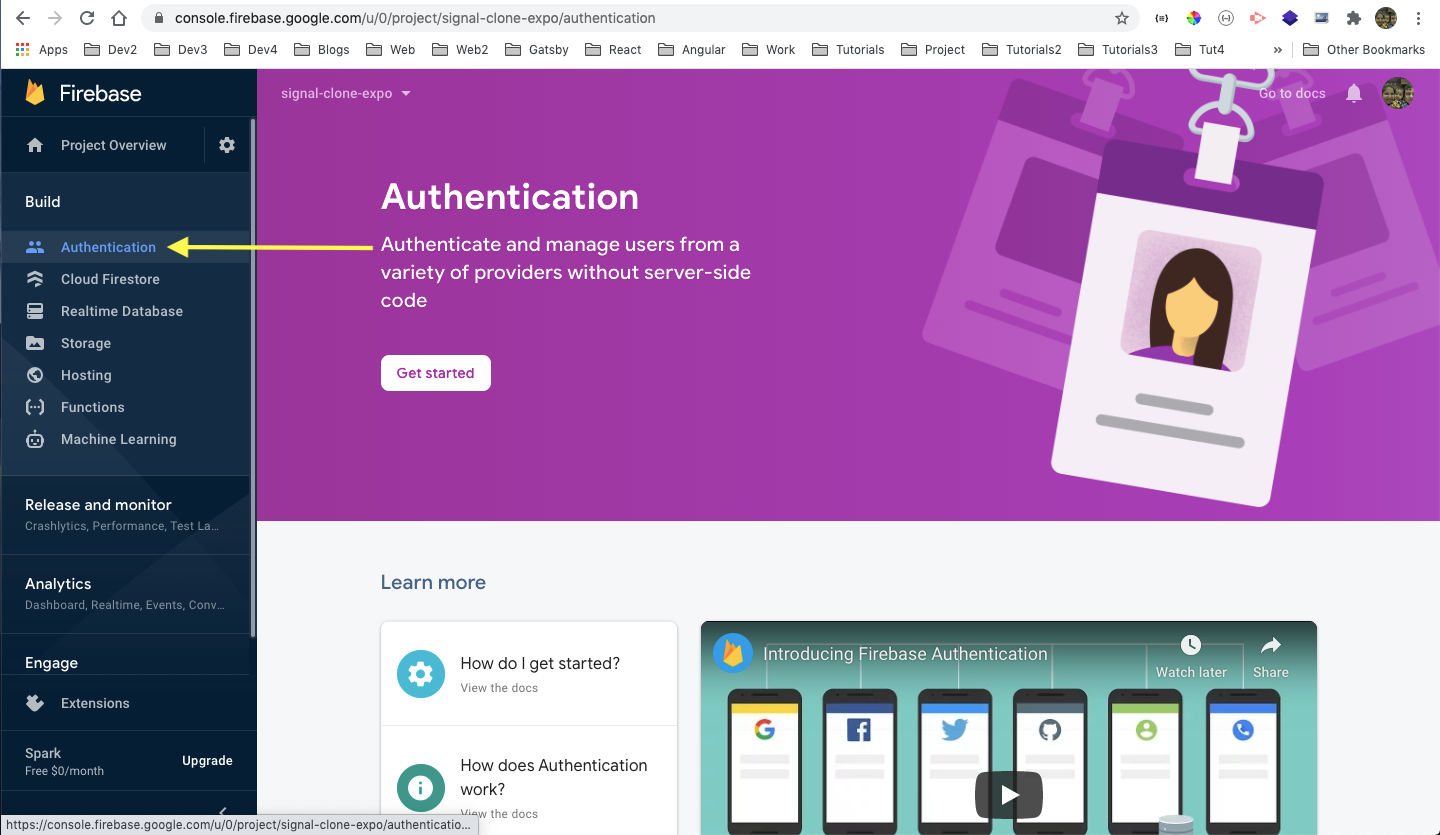 Get Started
In this screen hover over Email/Password and you will see the Pencil icon.
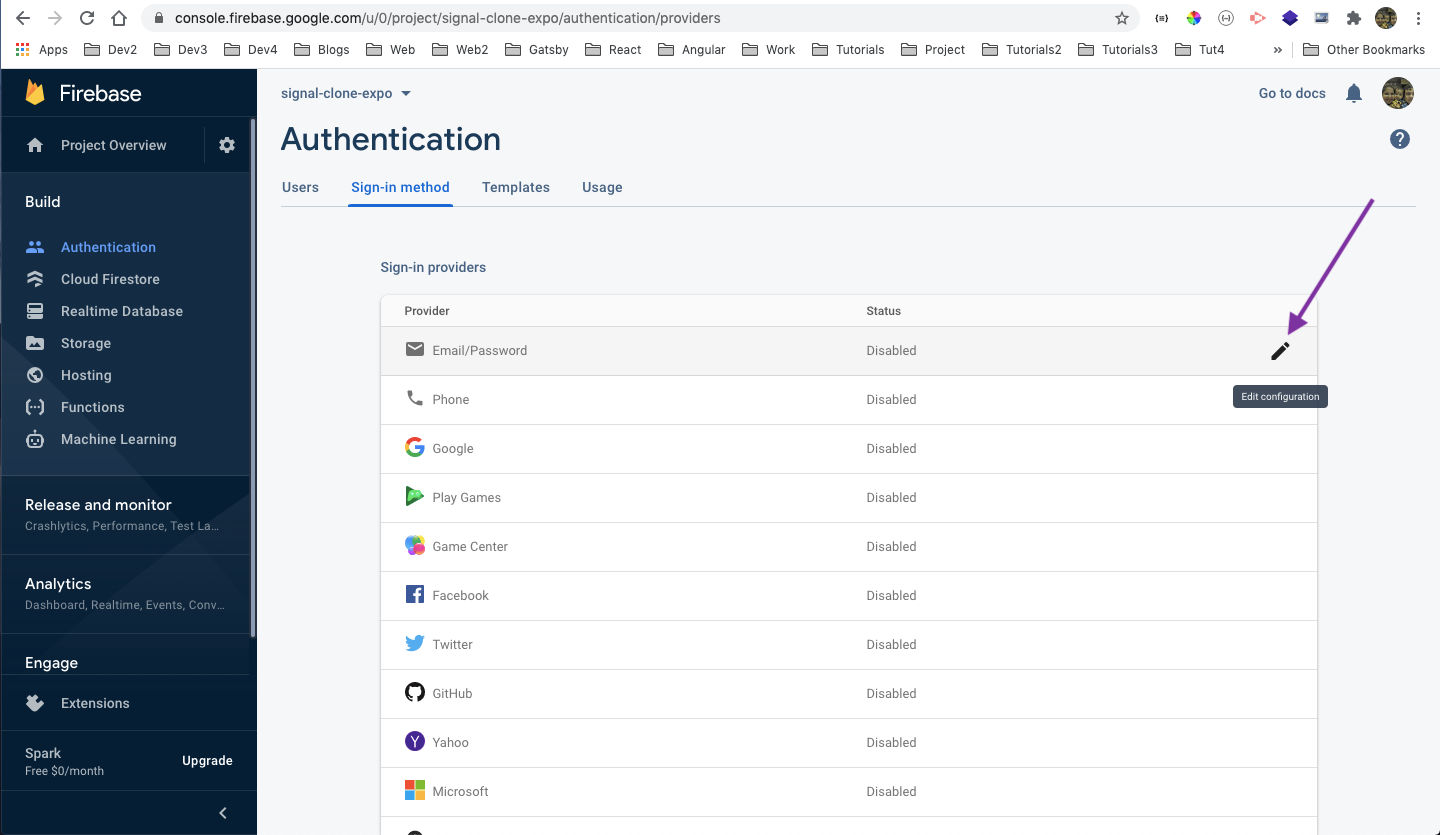 Email
Email
On Clicking on the pencil icon above, we will get the below pop-up. We need to click the toggle for Enable and then click on the Save button.
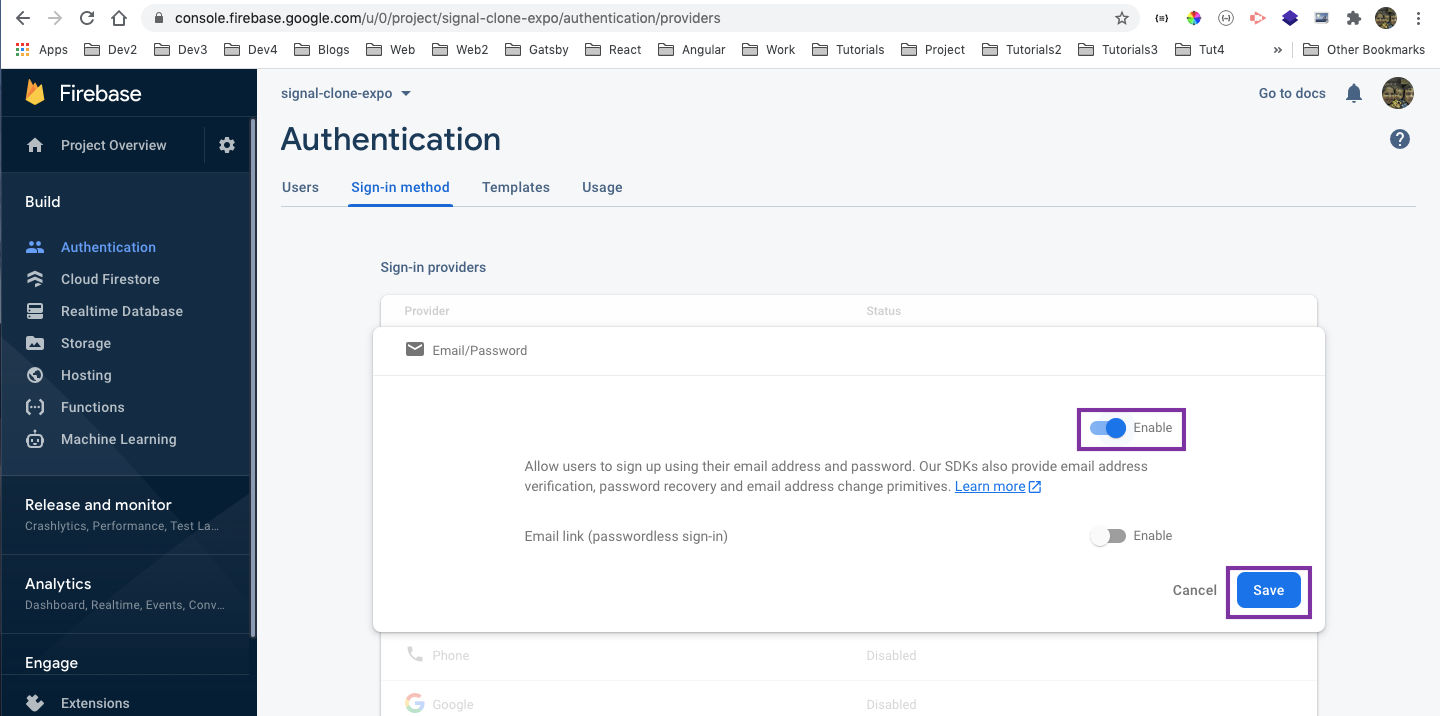 Enable
Now, we will be taken back to the previous screen, where the Email/Password is Enabled now.
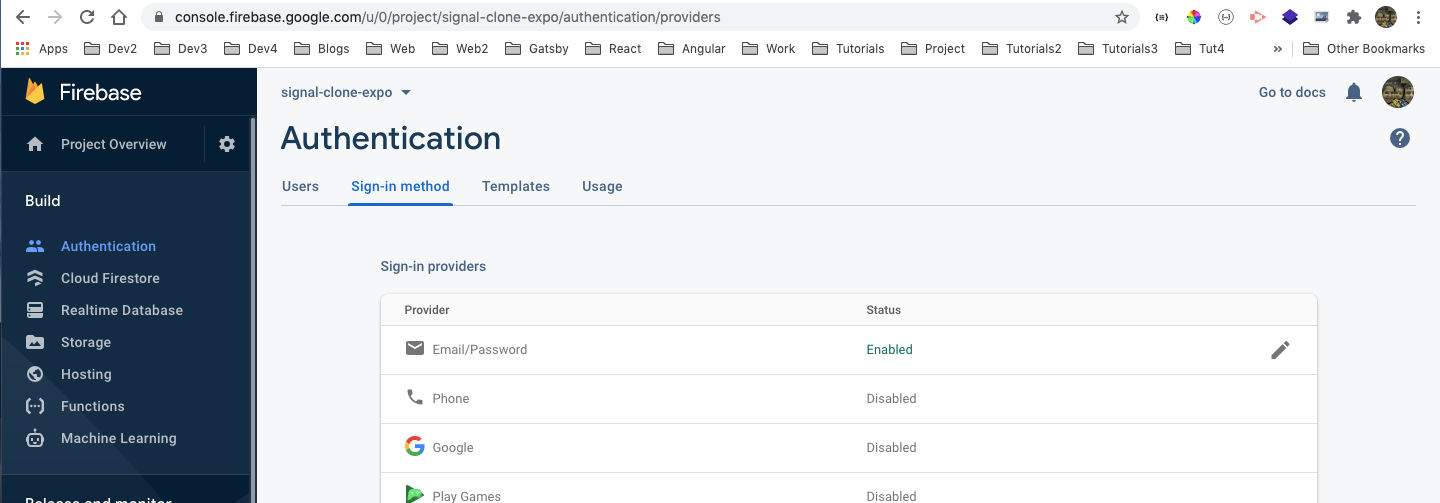 Email/Password
Now, we will go back and click on Cloud Firestore and then Create database button.
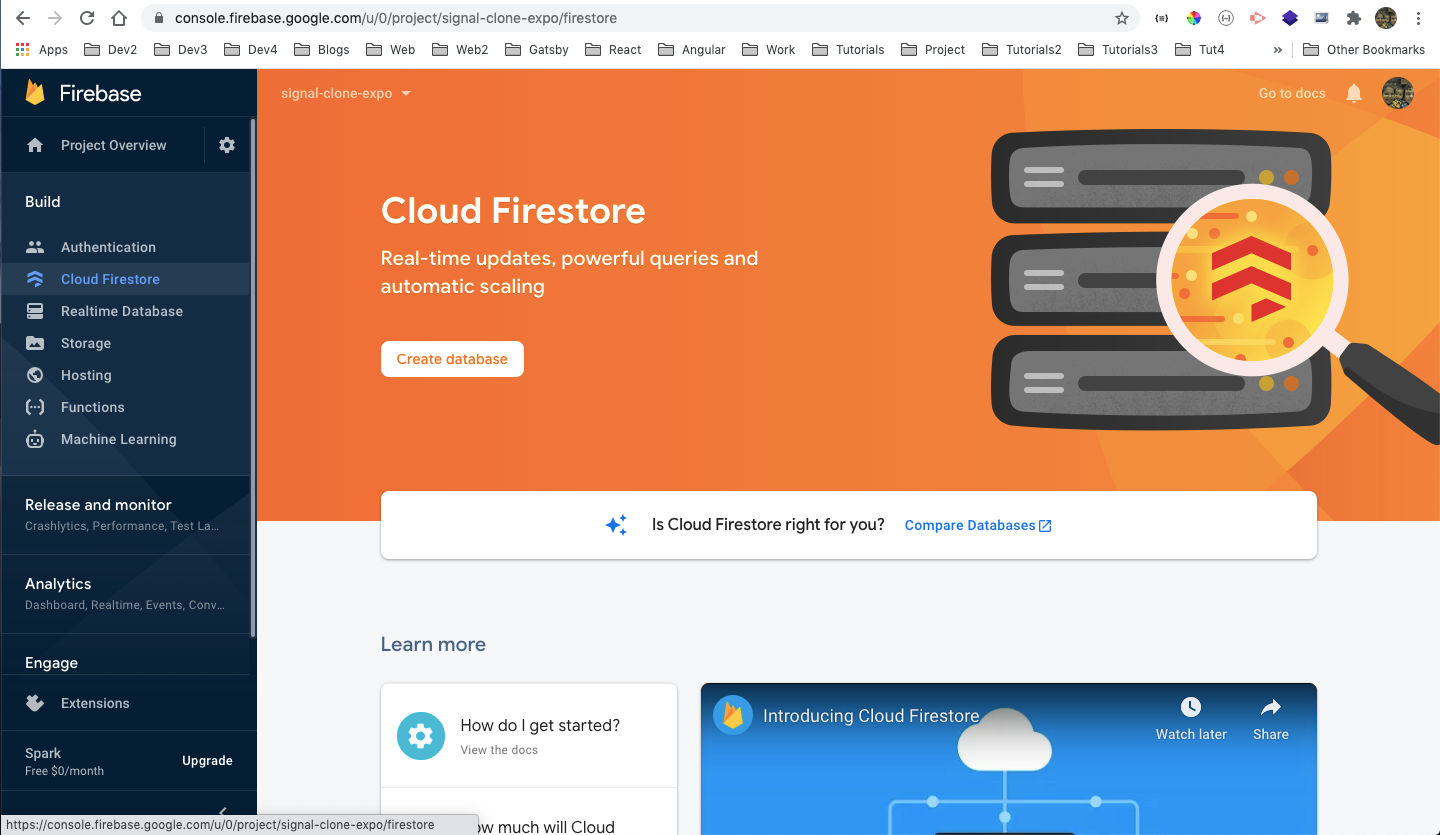 Cloud Firestore
In the next screen select Start in test mode and then click on Next button.
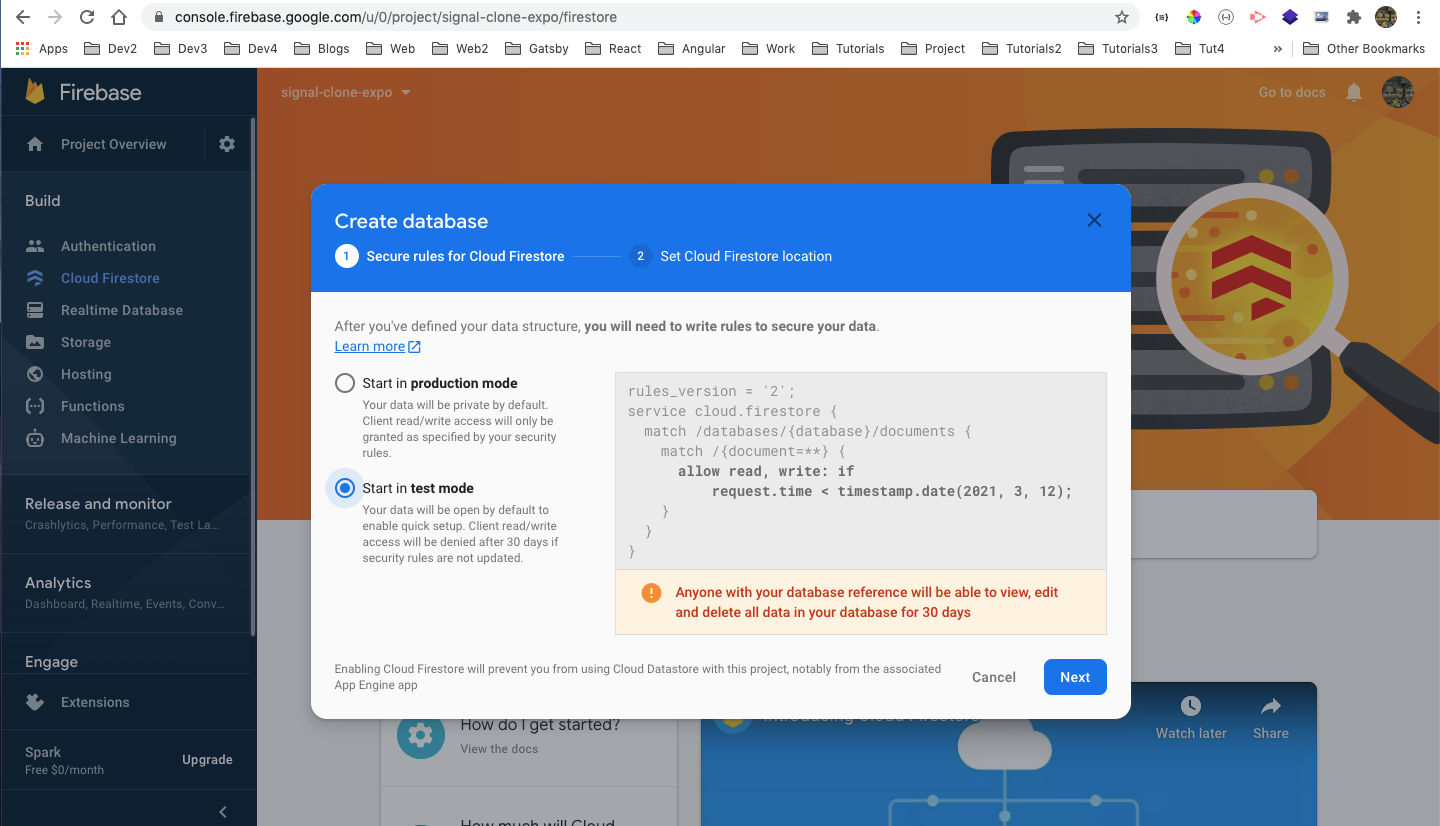 Test mode
After that in the next screen click on Enable button.
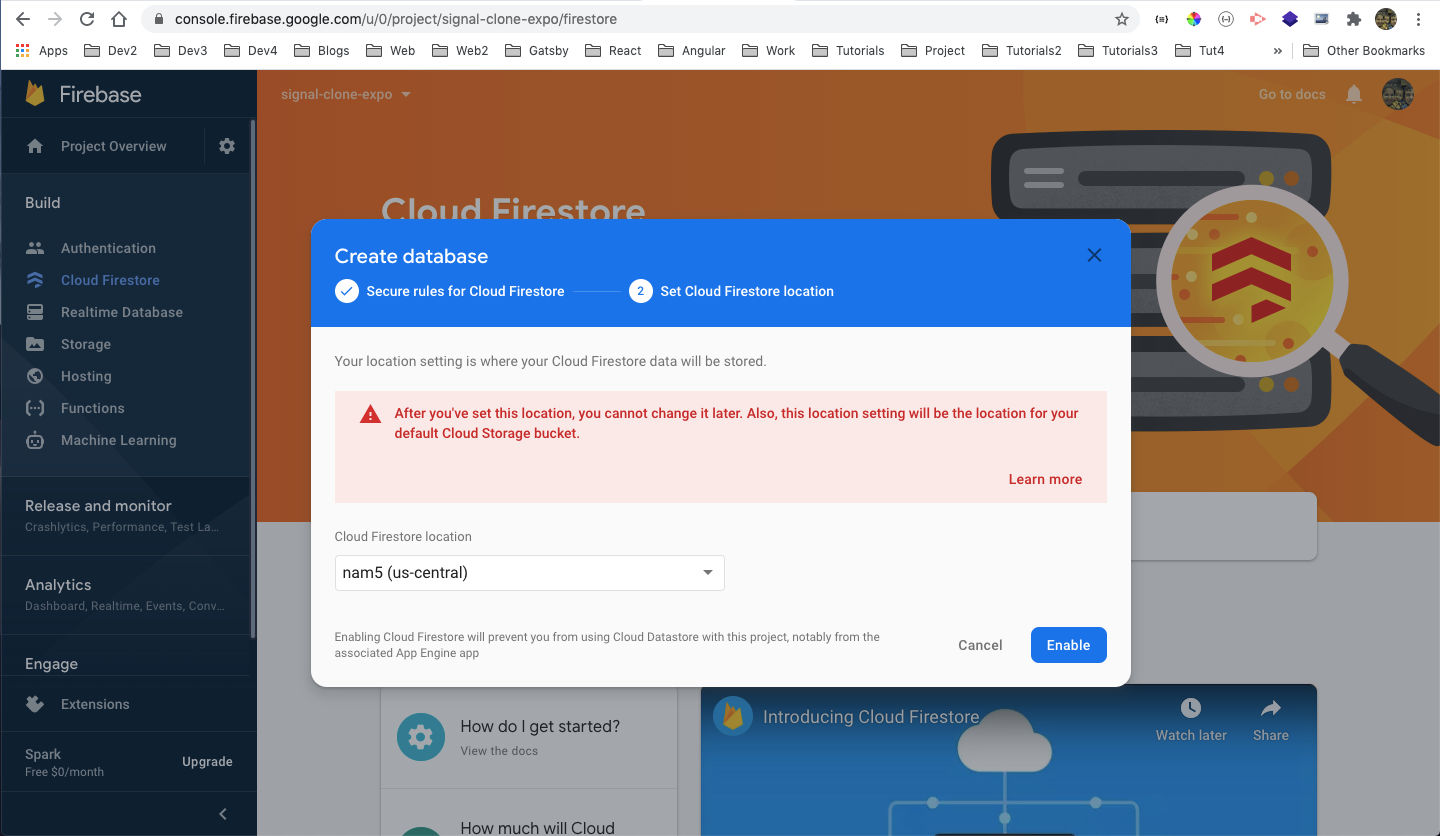 Enable
Now, it will take sometime to create the database. So, we can install firebase in our project. Installing firebase in react native project is a bit different then React project and we need to follow the instruction here.
We need to install it through expo from the terminal, with below command.
expo install firebase
Next, we will go back to firebase.js file and add the imports, initialisation and exports.
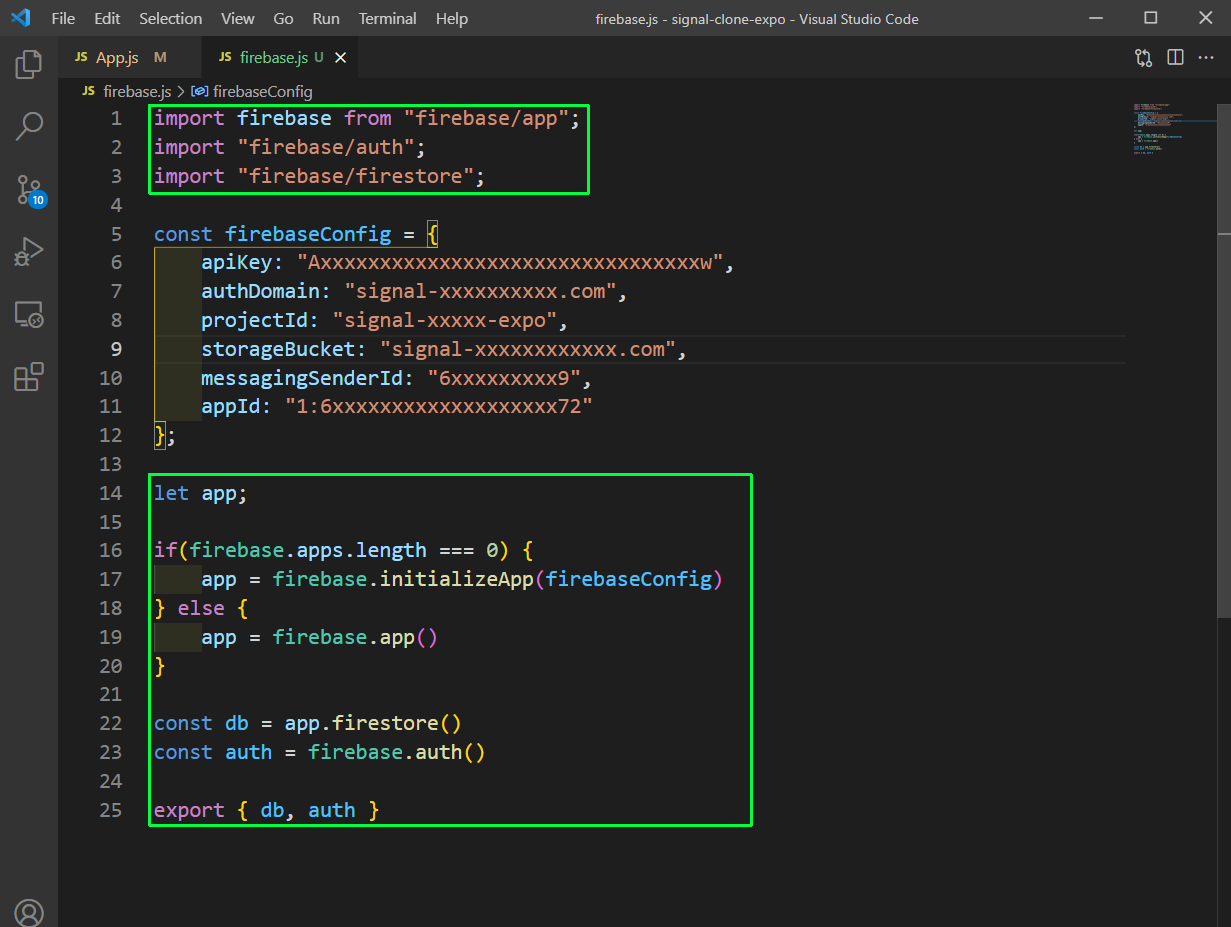 firebase.js
Now, in RegisterScreen.js file, we will use the auth to update the profile of the user with the values entered in the form.
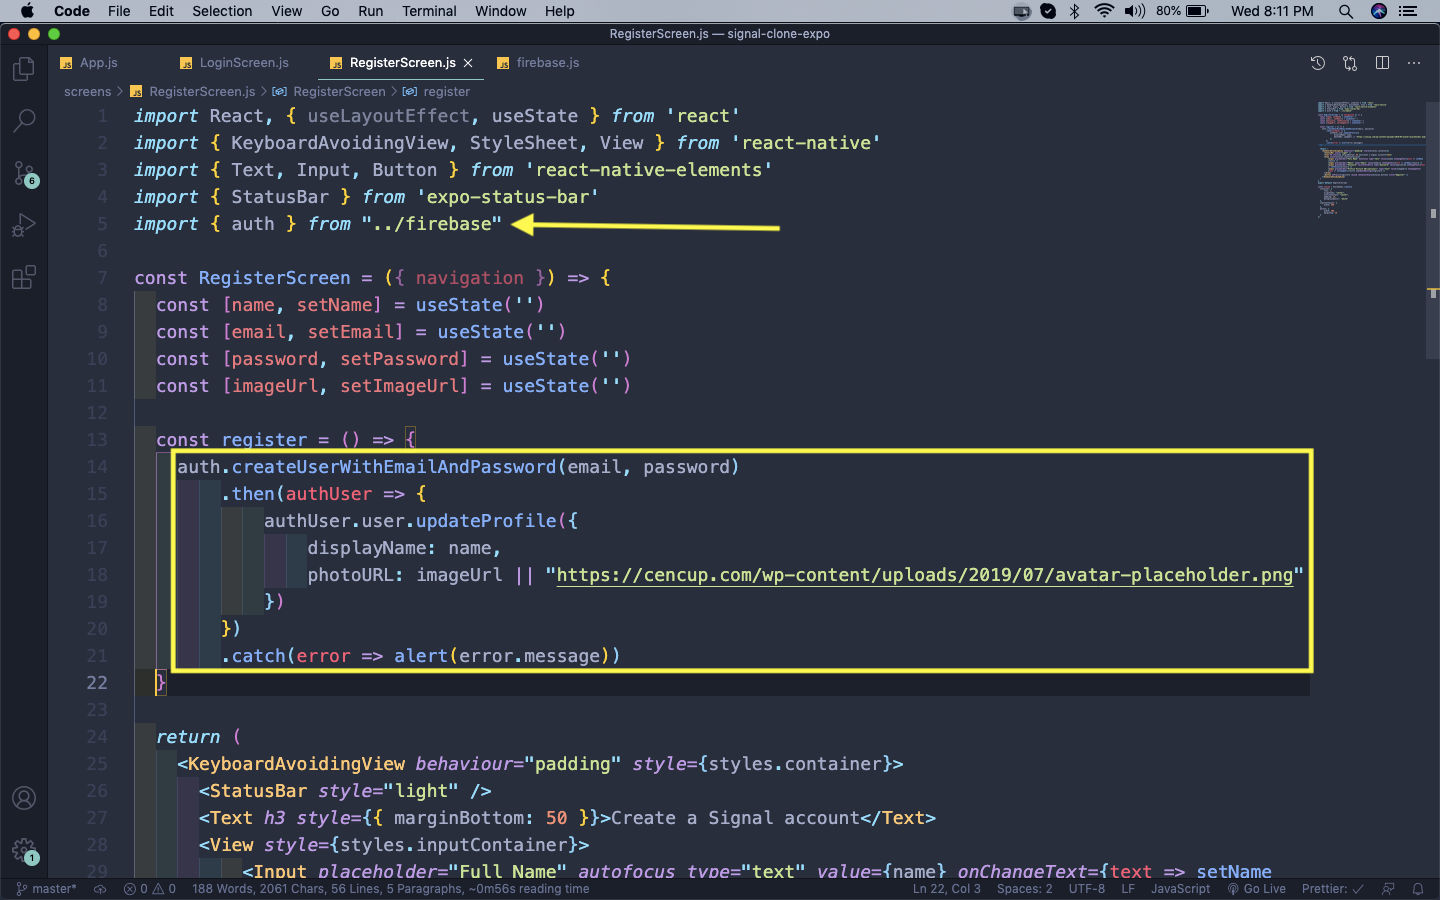 RegisterScreen.js
Now, in LoginScreen.js file, we will have a method onAuthStateChanged inside useEffect(). Here, if the user is authenticated we are replacing the screen with the Home Screen. We have also implemented the logic for signIn().
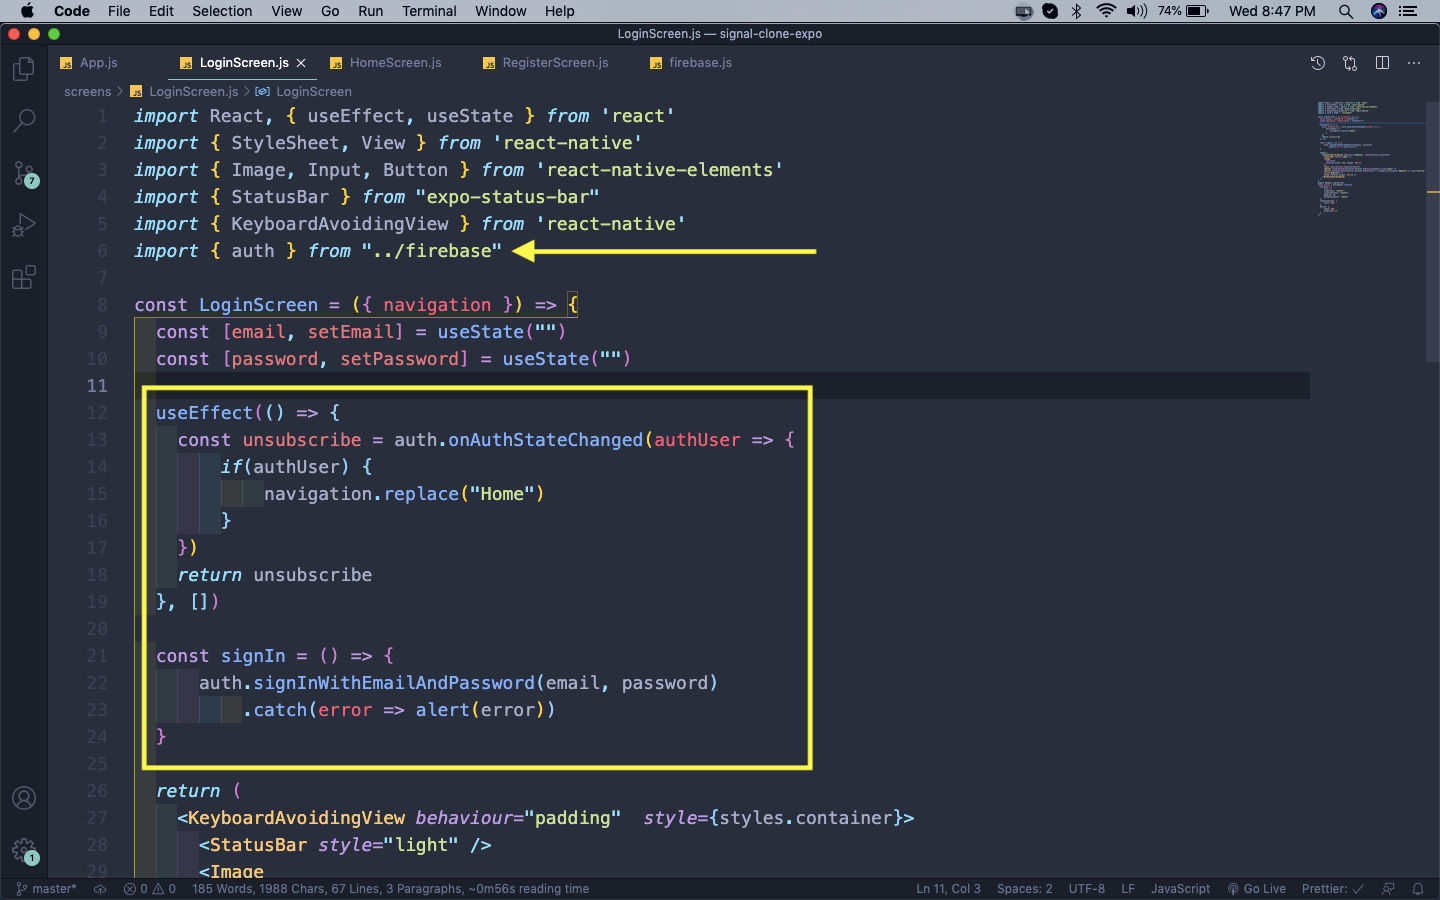 LoginScreen.js
Now, we need to create a file HomeScreen.js inside the screens folder and place the basic content in it.
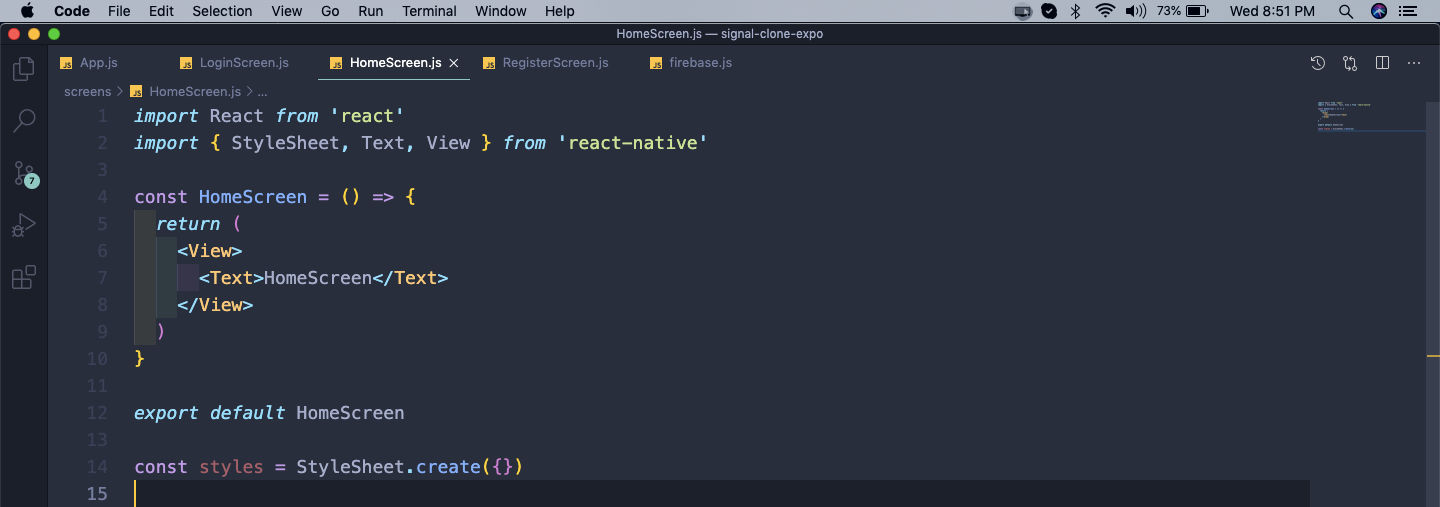 HomeScreen.js
Now, we need to add HomeScreen to our App.js file.
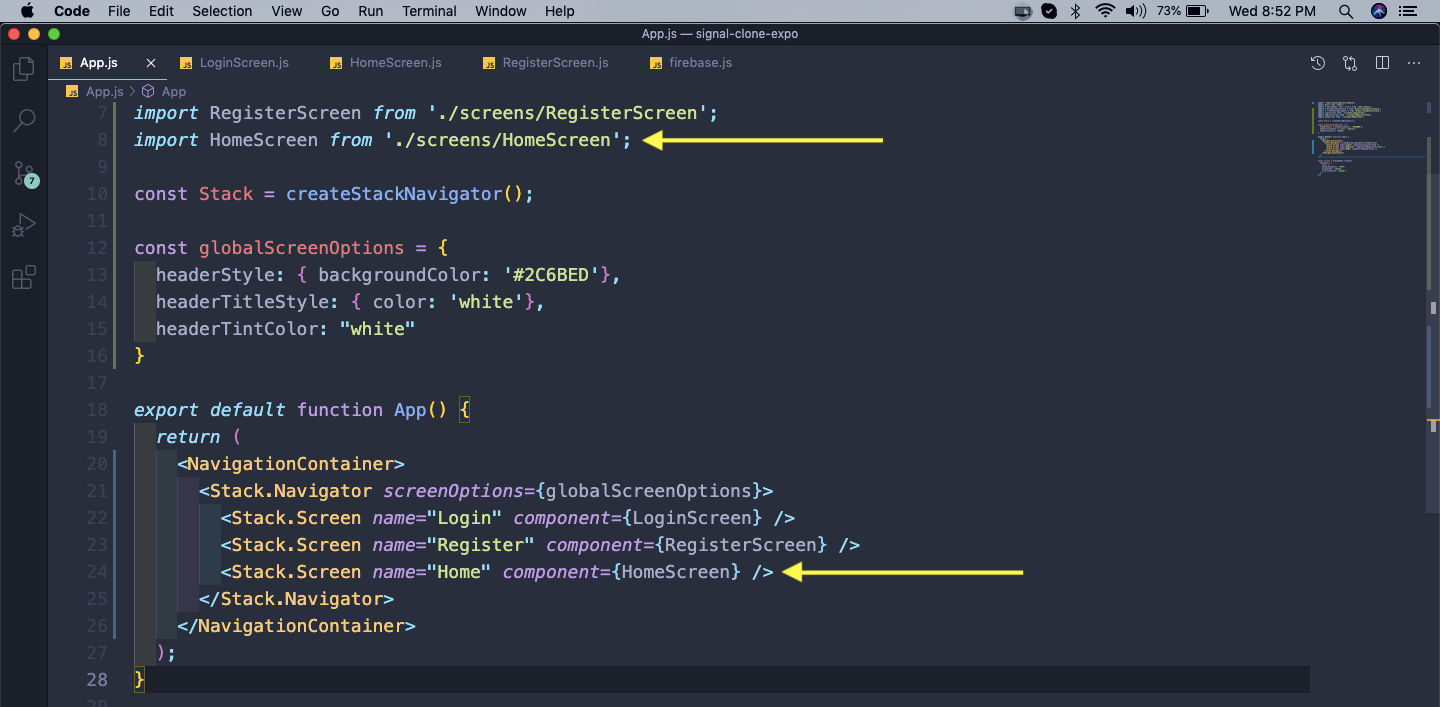 App.js
Now, go to Register Screen and register a user and if everything is right, you will be taken to the Home Screen after you press the Register button.
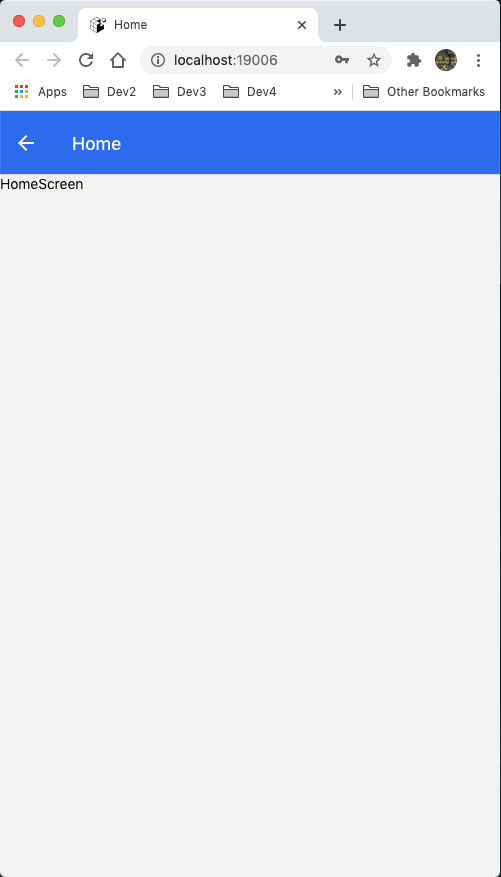 App
App
Now, we will show a list of chats and for that we will first create a file CustomListItem.js inside a components folder in root directory.
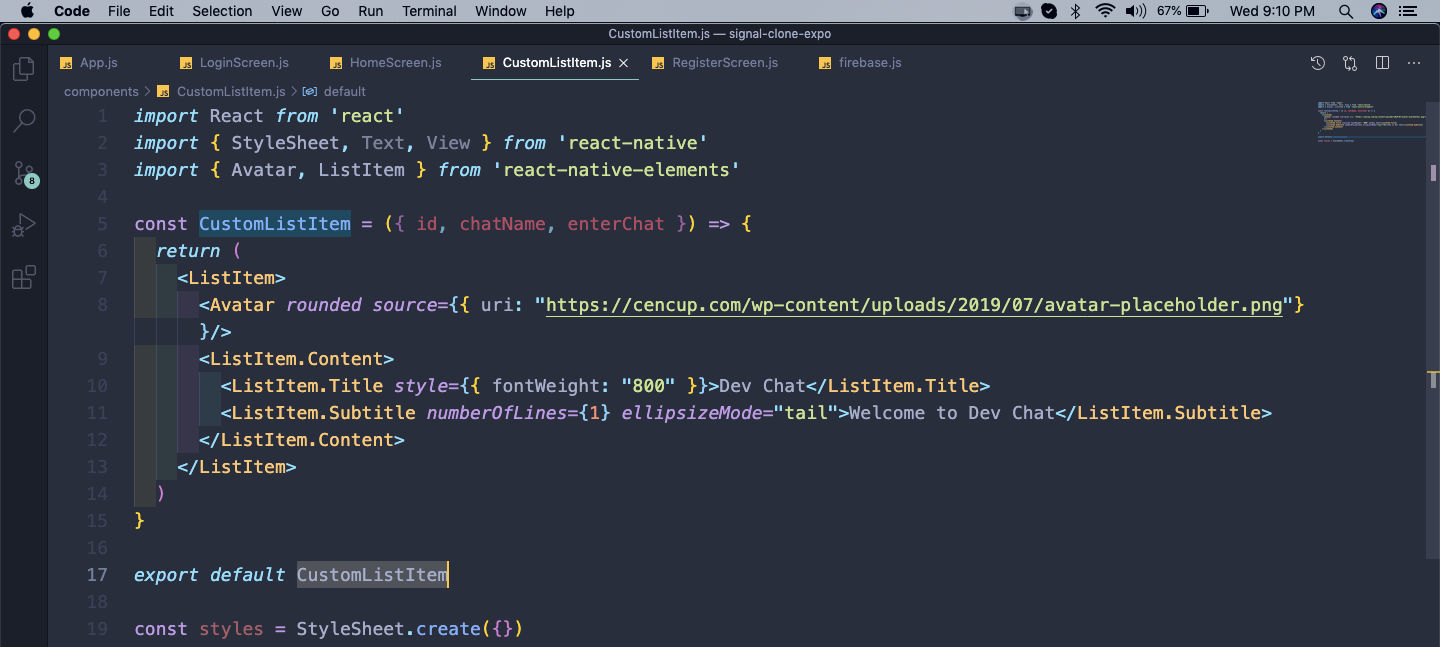 CustomListItem.js
Next, back in HomeScreen.js we will show this CustomListItem component.
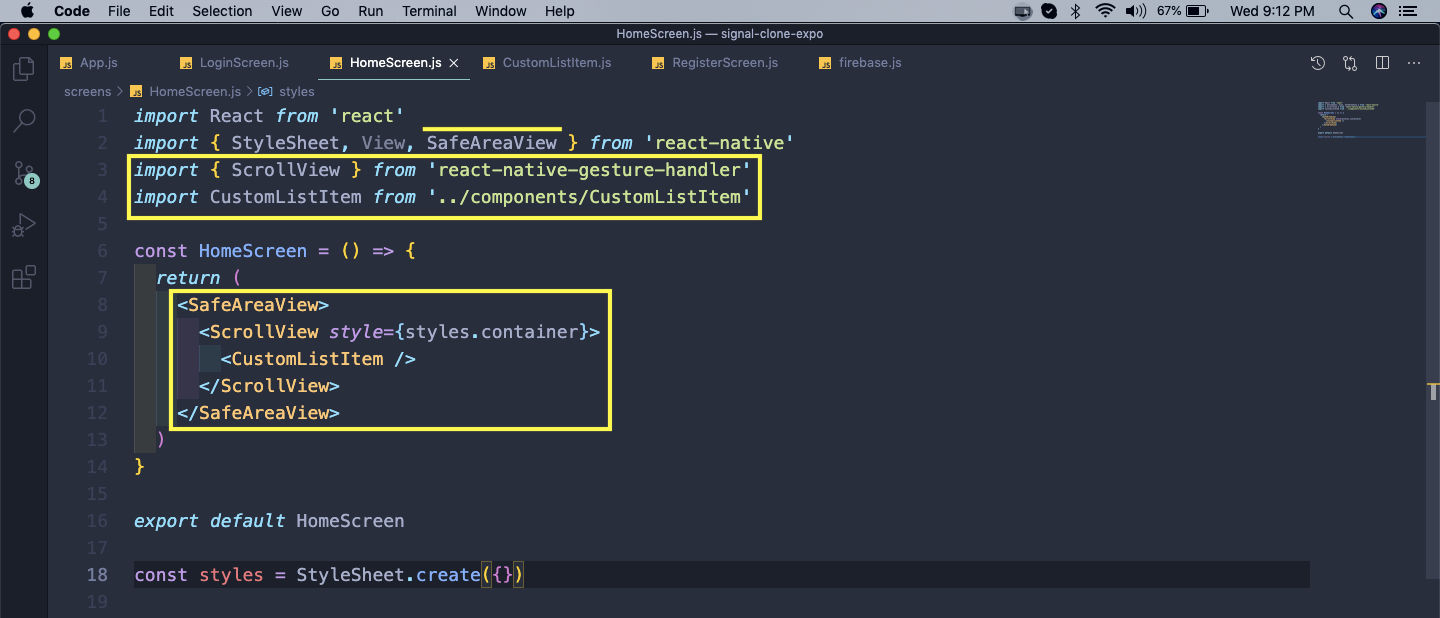 HomeScreen.js
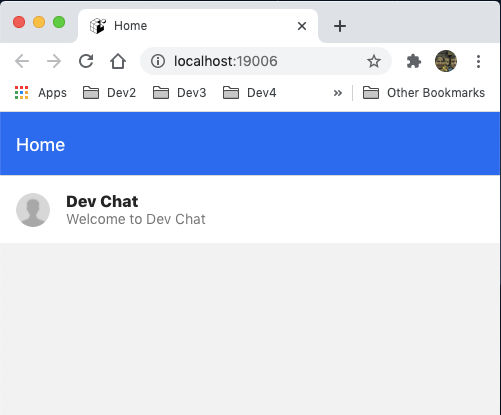
Now, our Home will show the chat.
 Chat
Chat
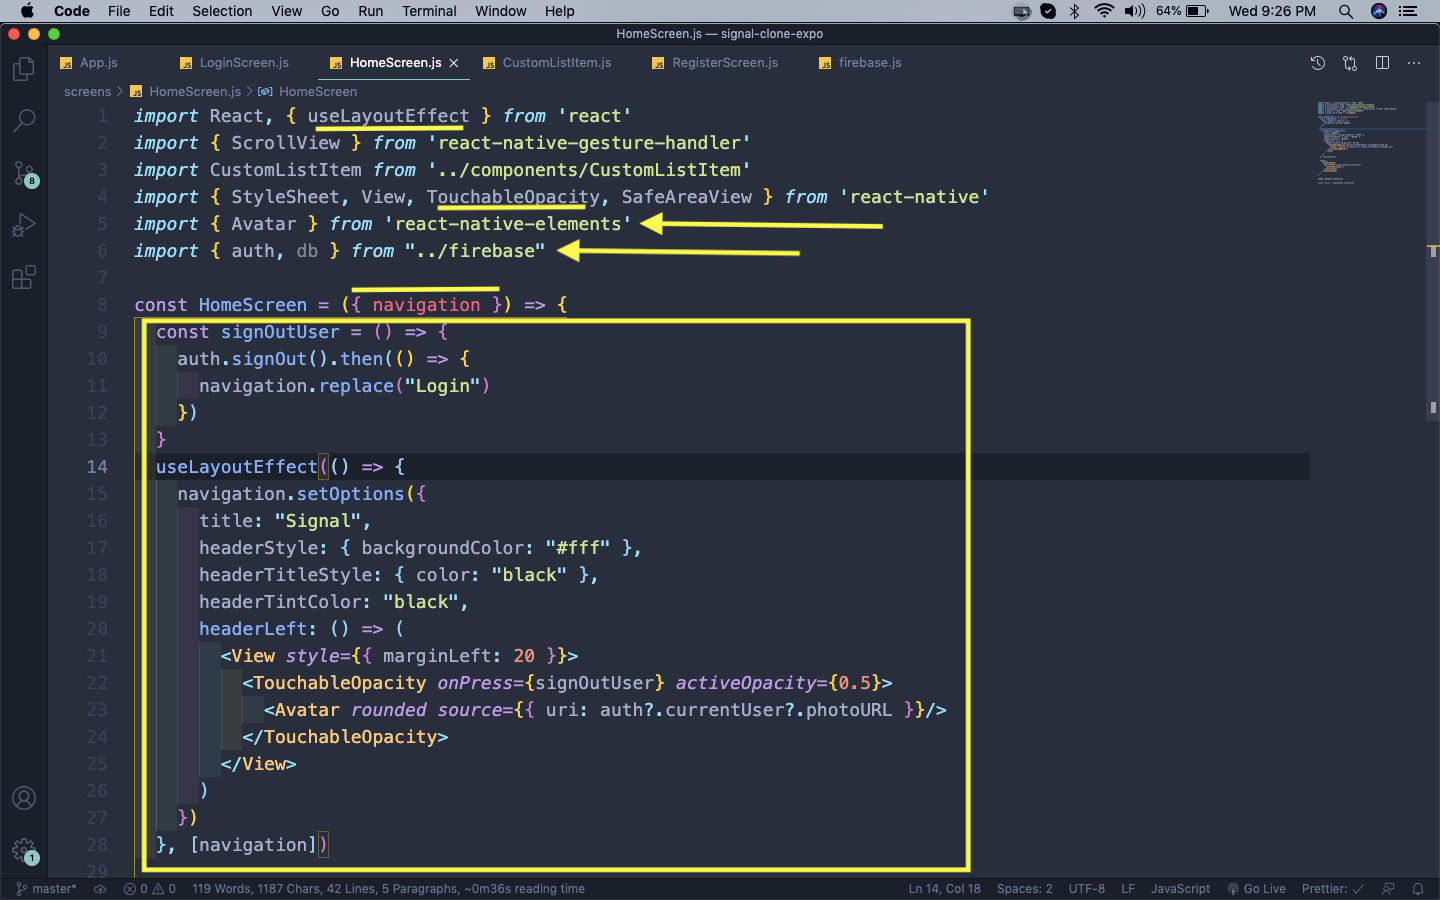
Now, we want to change the Home header and show icons in it. For this, we will use something called useLayoutEffect and it happens before the render and before useEffect, so it’s a good place for navigation code. So, in HomeScreen.js file we add title, headerStyle and other thing.
The main thing is the Avatar icon in the headerLeft, which also have a signOutUser() on a TouchableOpacity.
 HomeScreen.js
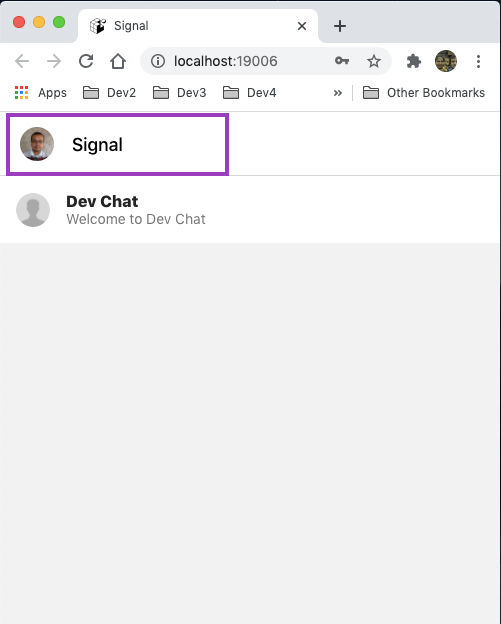
So, if we press on our Avatar we will be logged out.
 Signal
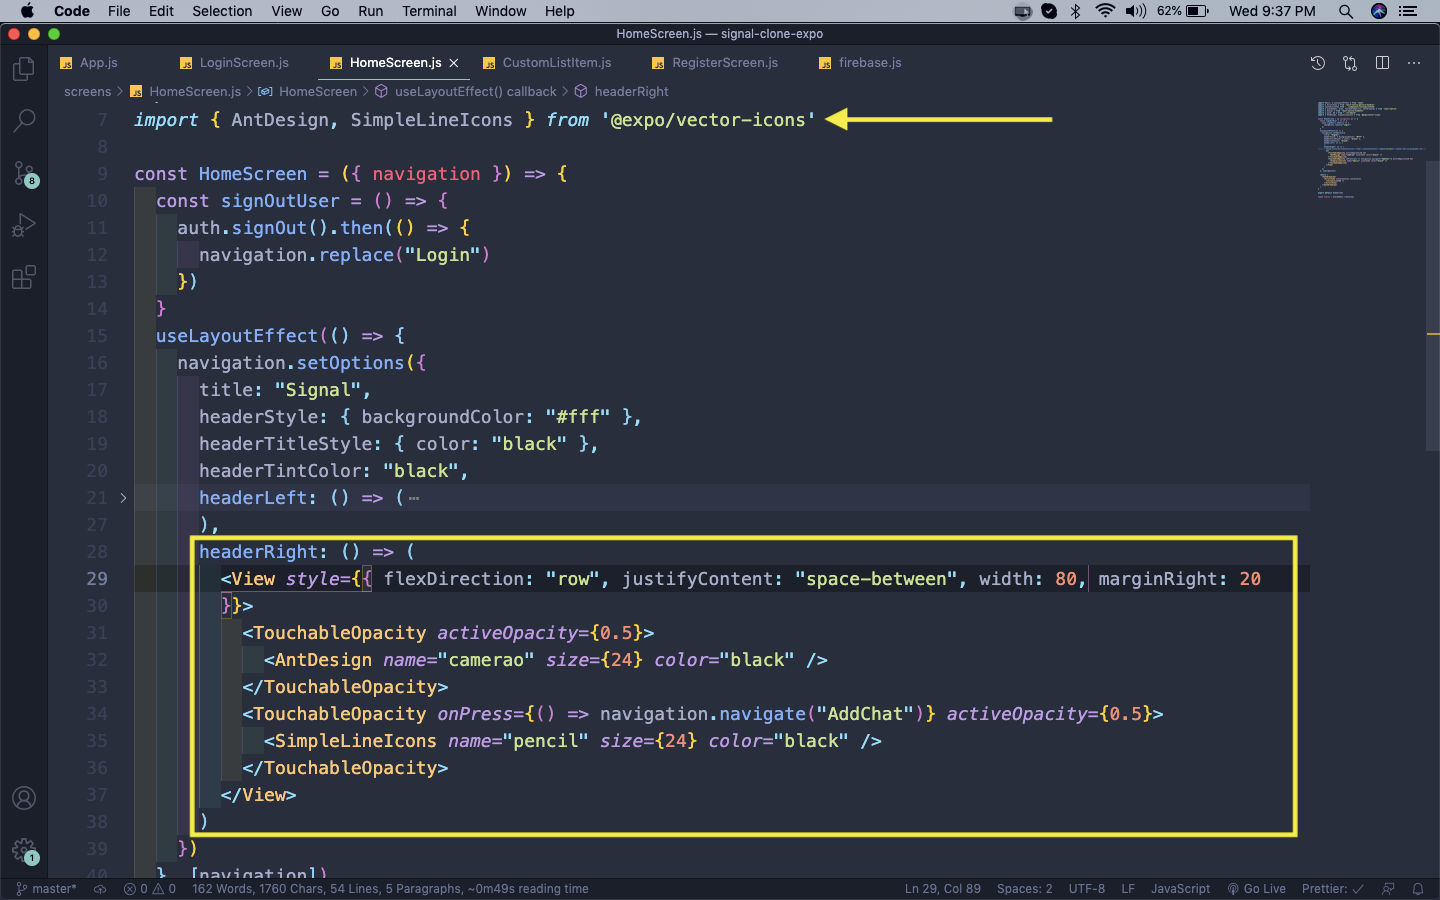
Now, we will complete our right icons in headerRight and for this, we are also using vector-icons from expo.
 HomeScreen.js
Now, our App will show the Camera and pencil icon.
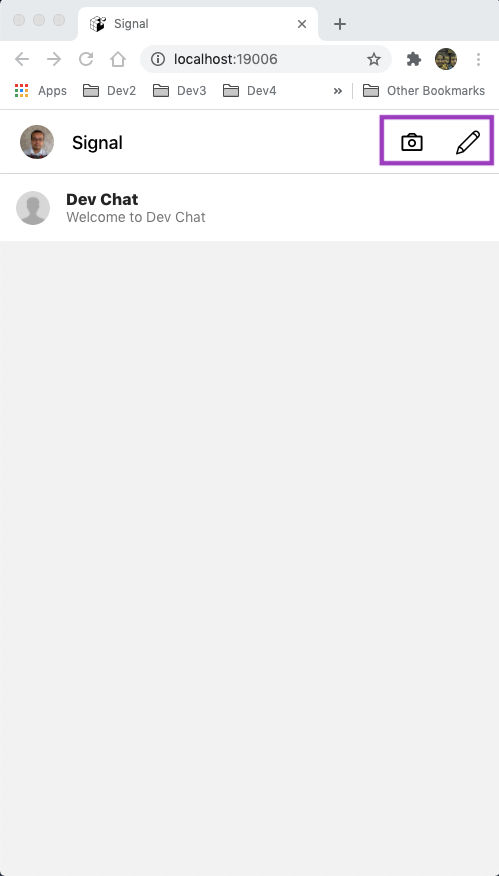 Camera
Now, on press of the pencil icon we will navigate to the AddChat component. So, first let’s add it in App.js file.
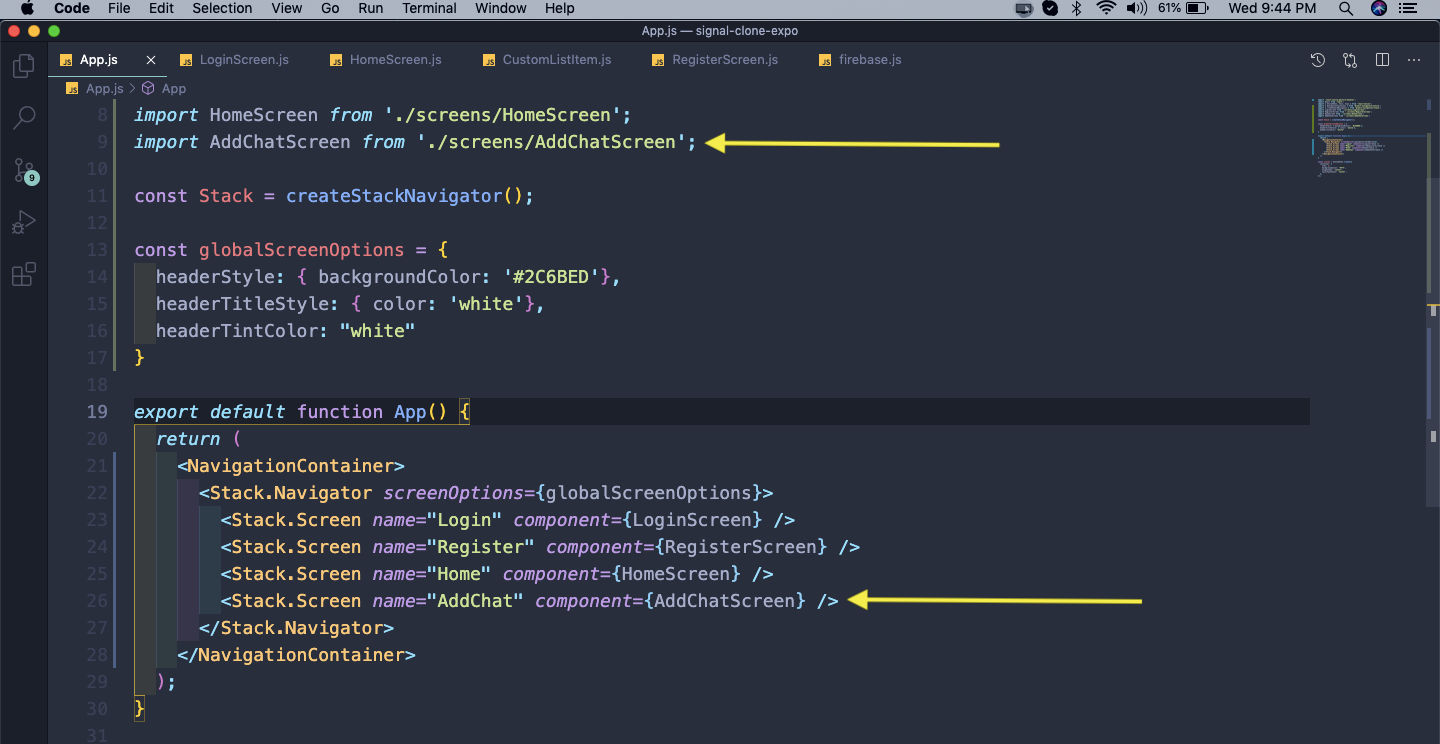 App.js
Next, create a file AddChatScreen.js inside the screens folder. Here, we are creating an Input field with a button to create new chat.
 AddChatScreen.js
Now, in our app we can see this new screen.
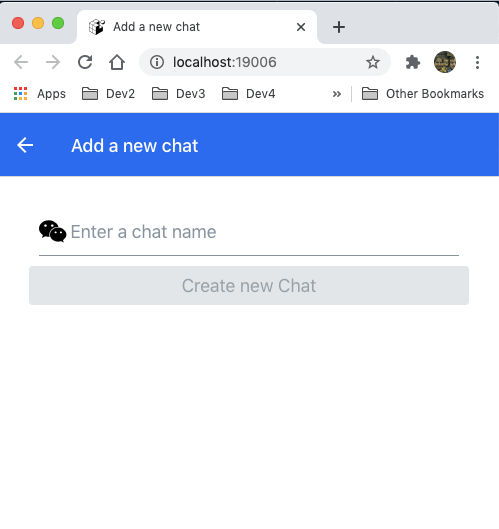 Create new Chat
Now, let’s also add the logic to add a chat in firebase database. So, in AddChatScreen.js first import the db from firebase. Also, inside the createChat() add the input to a field chatName in the chats collection.
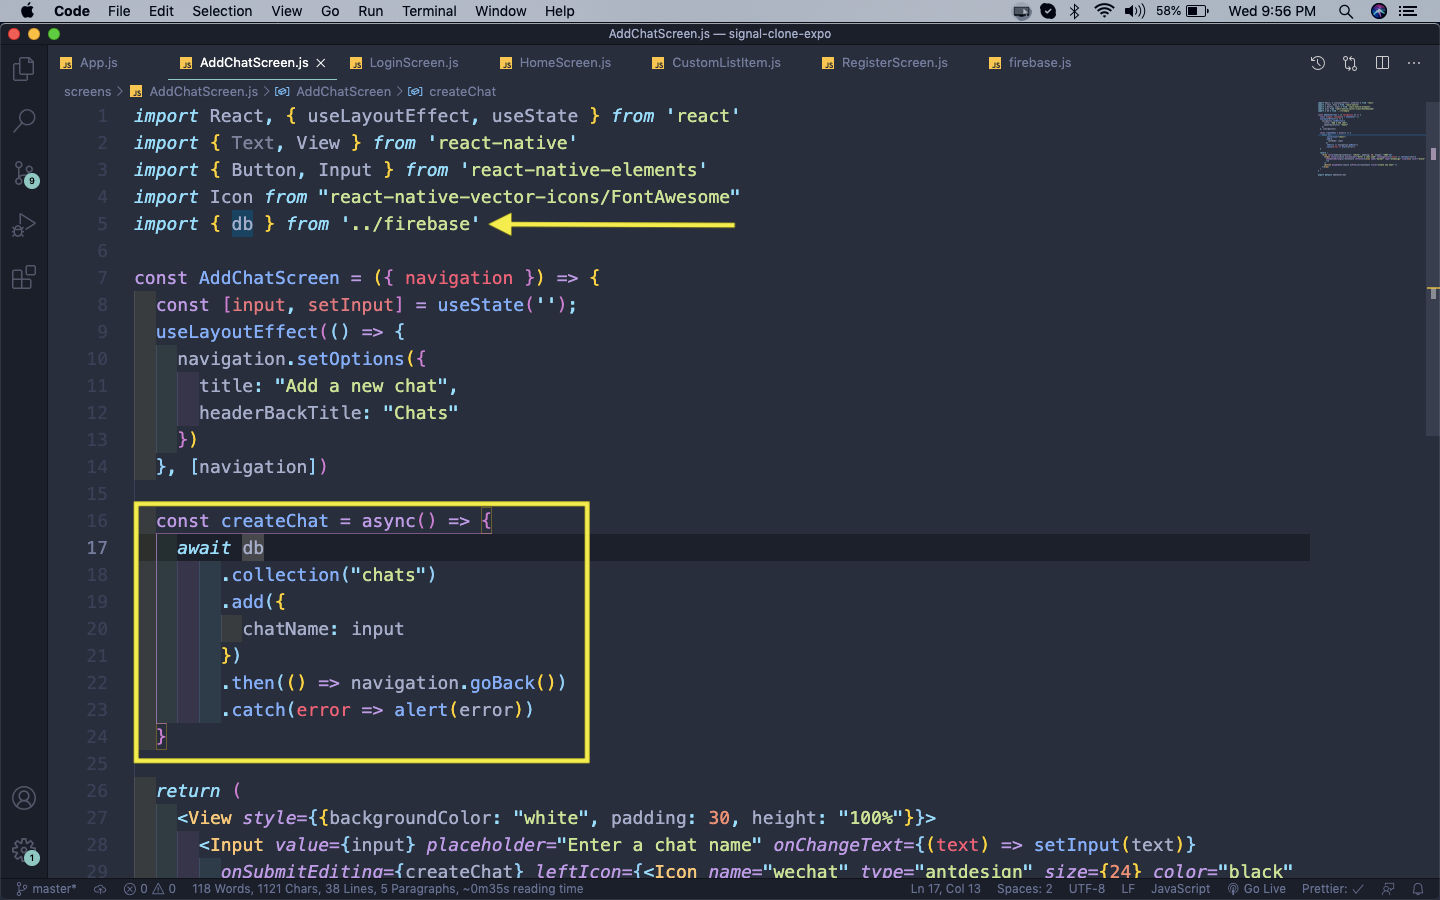 AddChatScreen.js
Now, in the Add a new chat screen we can add a new chat and it will come back to the HomeScreen. We will show our Chats here, but right now we can check it in the firebase firestore.
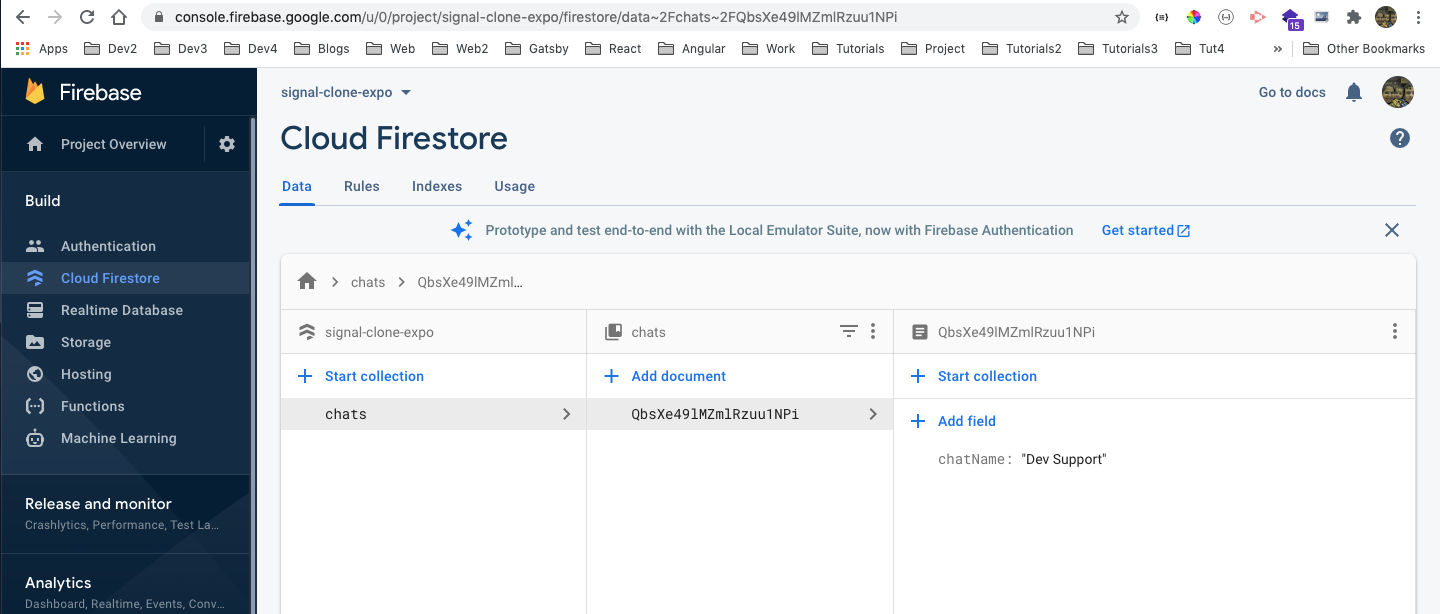 Firestore
Now, in HomeScreen.js file, we will first get the chats from firebase using useEffect and store it in a state variable chats. After that we are looping through it and passing it to CustomListItem component.
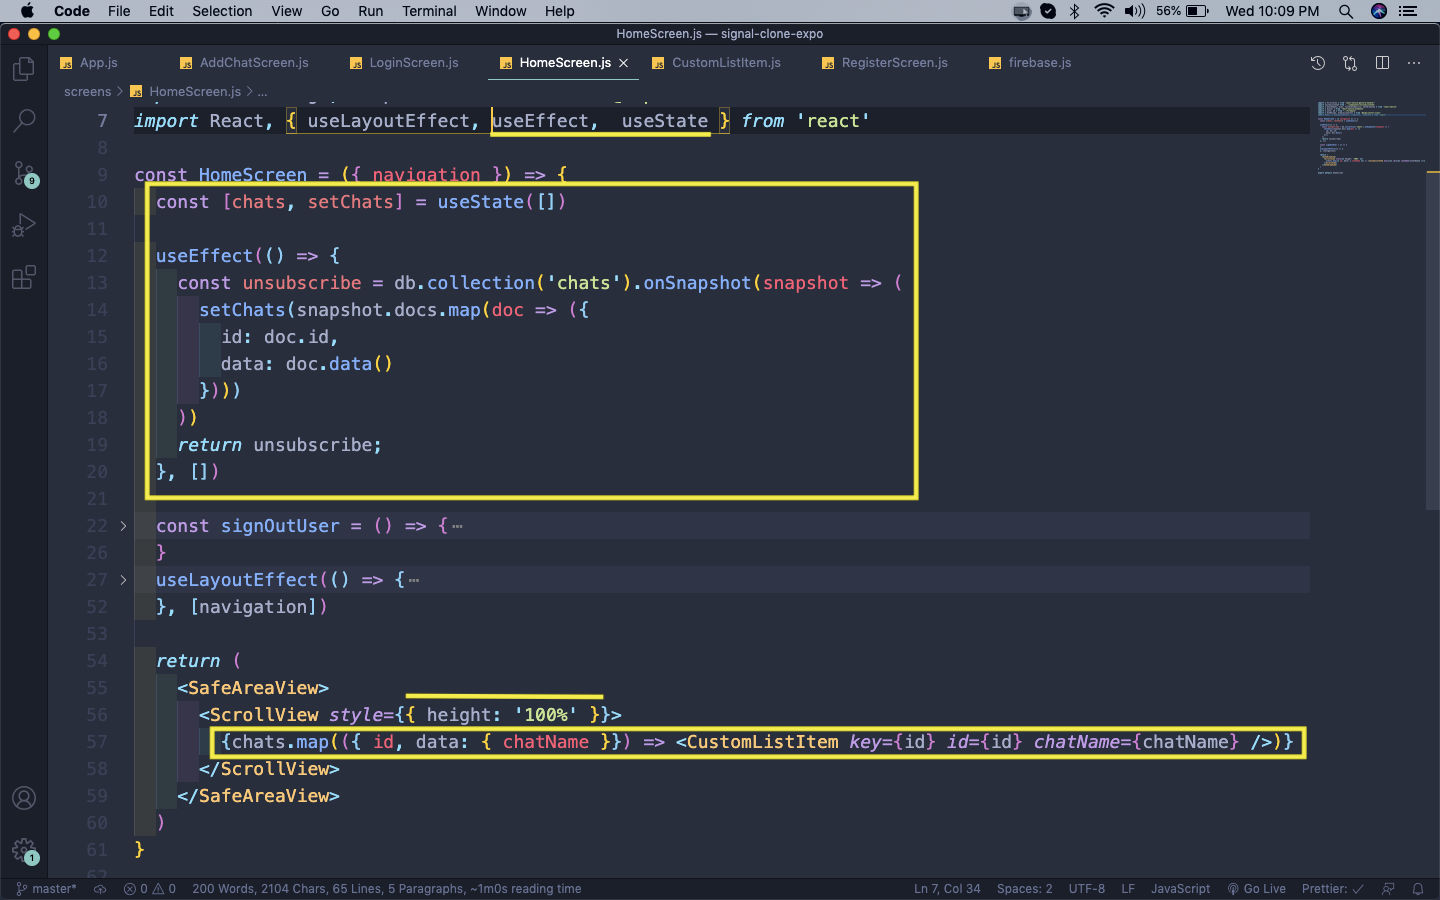 HomeScreen.js
Now, in CustomListItem.js file we can show the chatName instead of the hardcoded one.
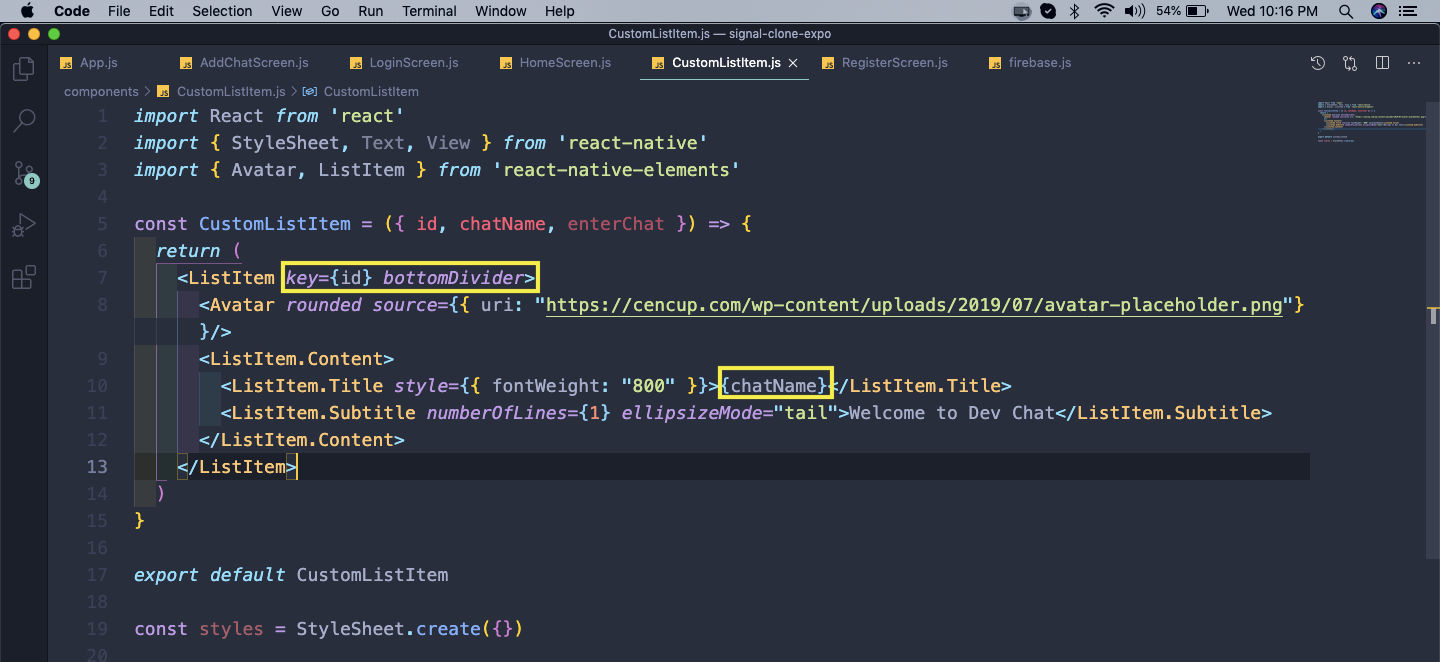 CustomListItem.js
Now, i have created two more chats and they are all showing in the Home Screen now.
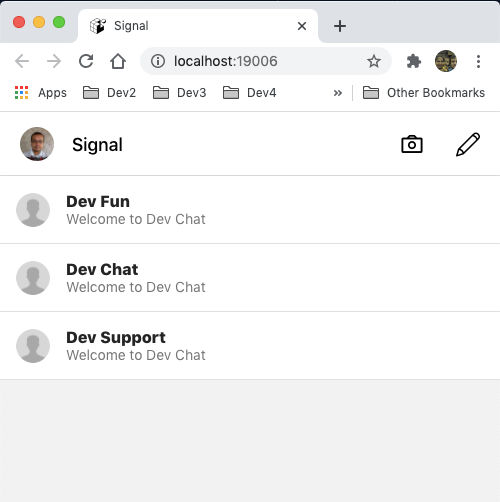 Home Screen
Now, back in CustomListItem.js we will add a callback function enterChat, which will be called with the id and chatName, when we press the chat name.
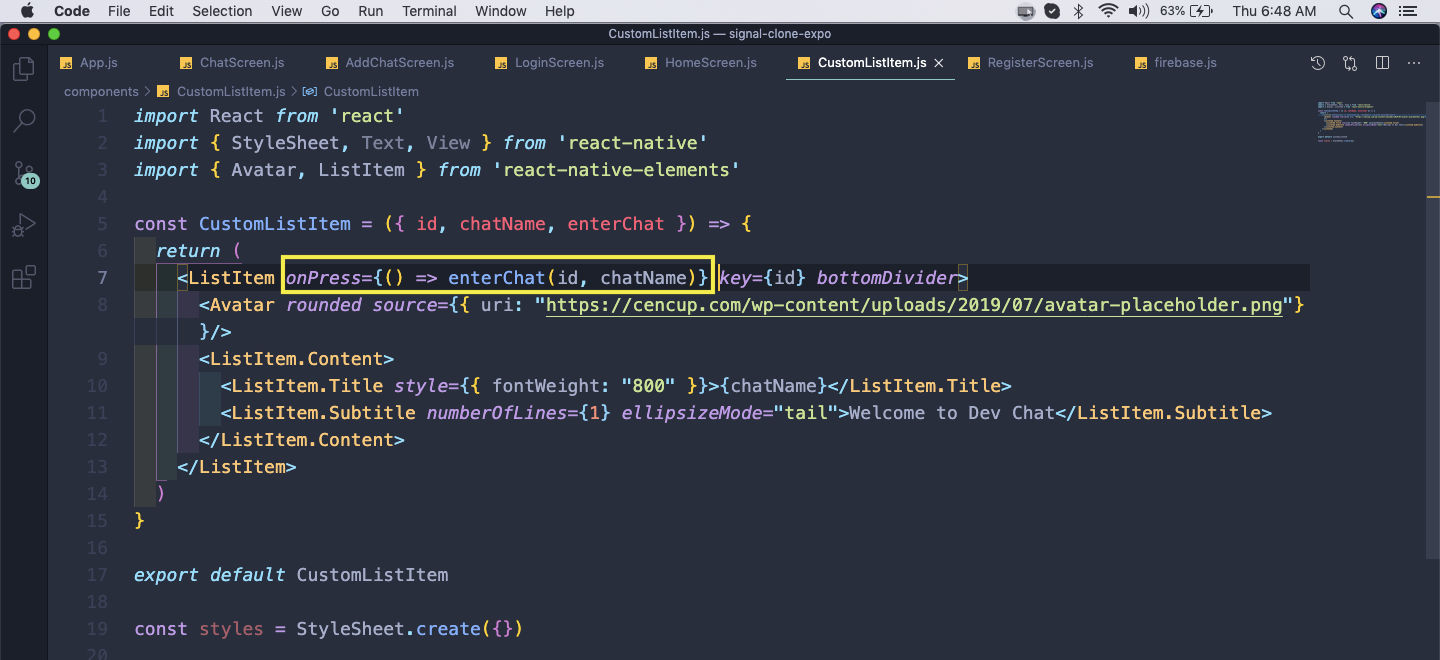 CustomListItem.js
Now, in HomeScreen.js file we will add this function enterChat, which we are also passing as a props to CustomListItem. Inside the function enterChat, we navigate to the Chat screen.
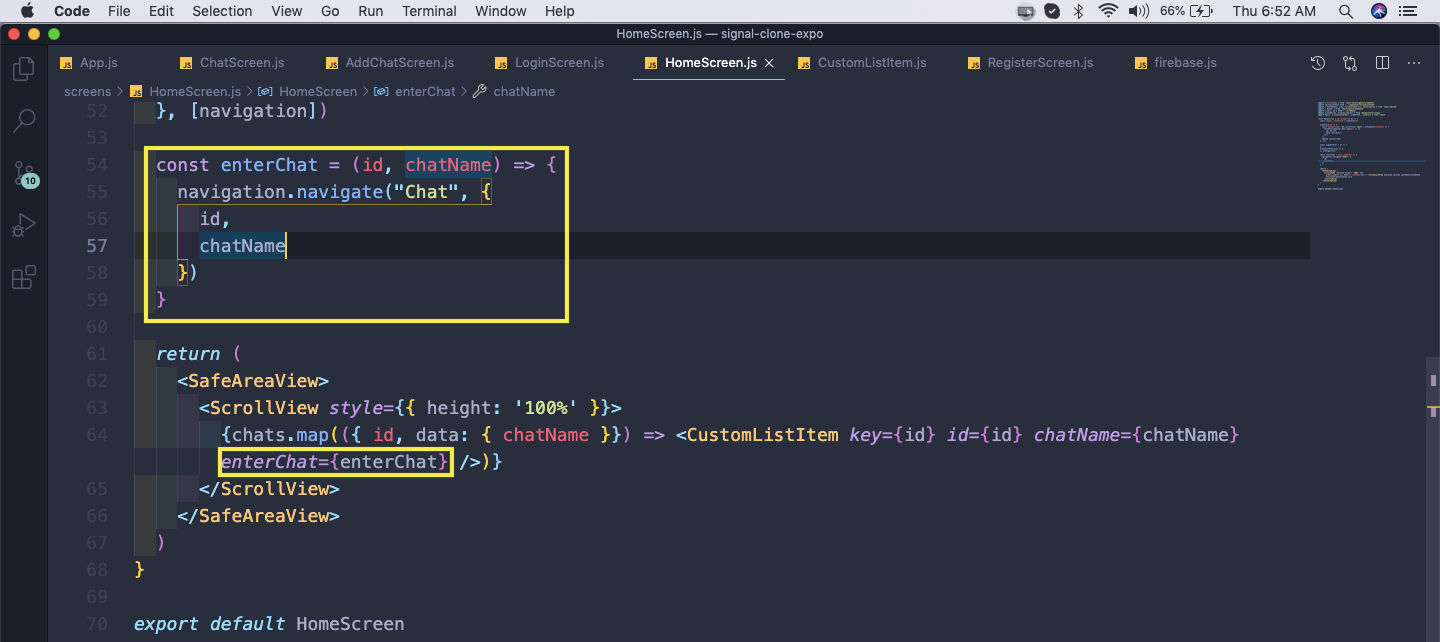 HomeScreen.js
Now, back in App.js we will import and add the ChatScreen component.
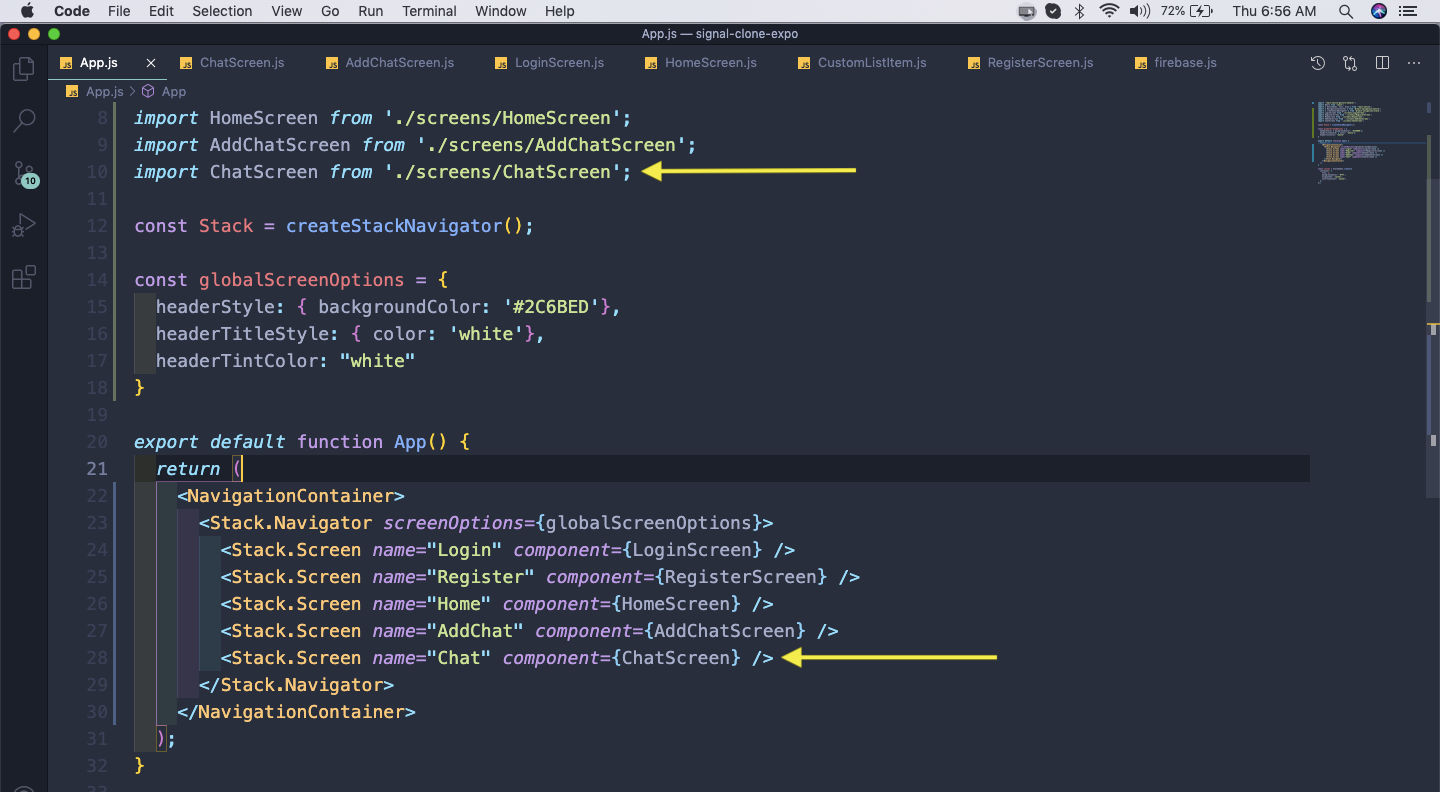 App.js
Now, we will create a file ChatScreen.js inside the screens folder. We will put the basic content in it, where we are also accessing the route params.
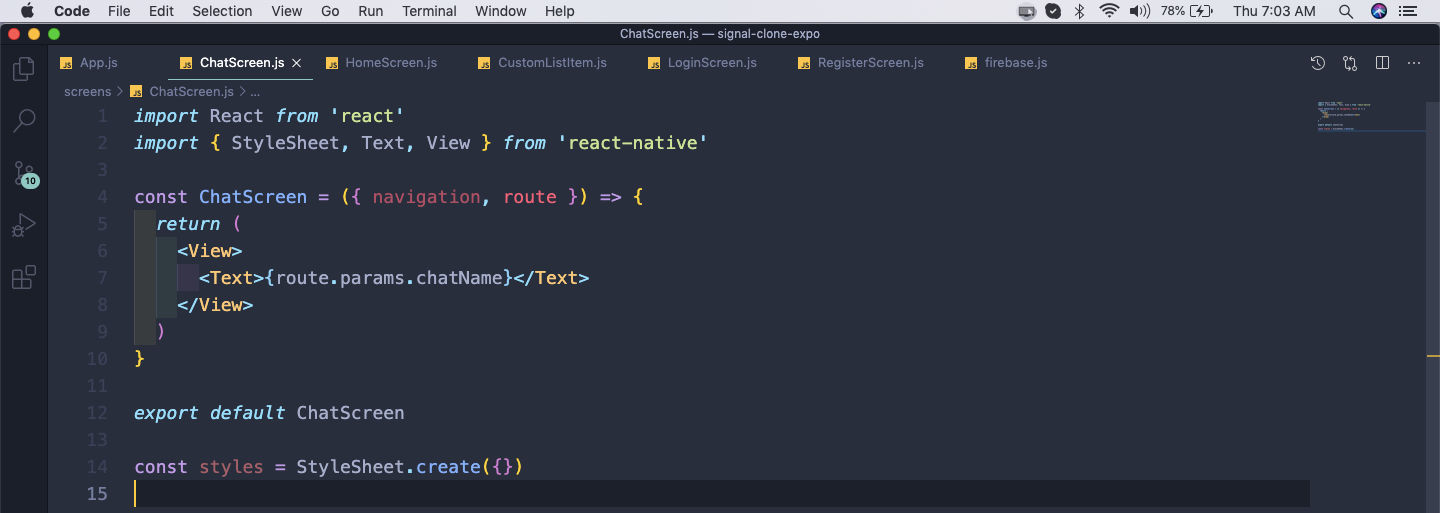 ChatScreen.js
Now, if we click on any chat name, we will be taken to the chat screen showing the Chat name.
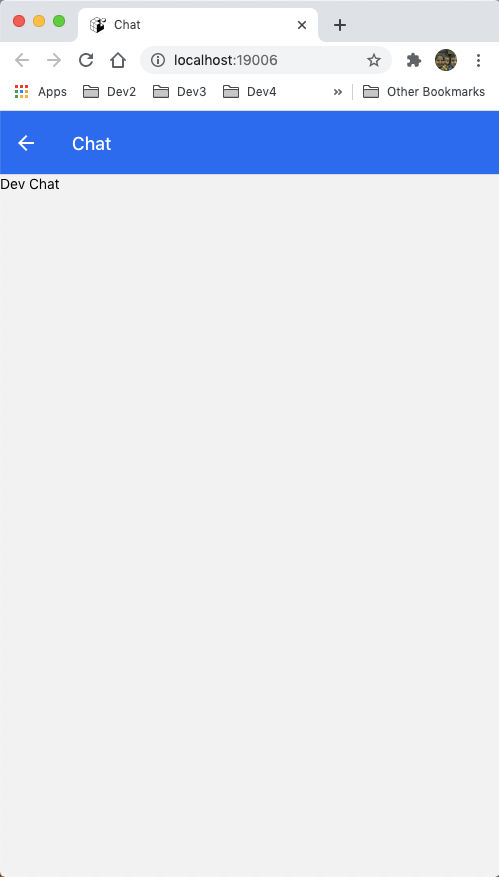 Chat Name
Now, we will use the useLayoutEffect to customize our header in ChatScreen.js file. Here, after the required imports we are having an Avatar and the custom left arrow. Also, added the functionality in the left arrow to go back to the previous screen.
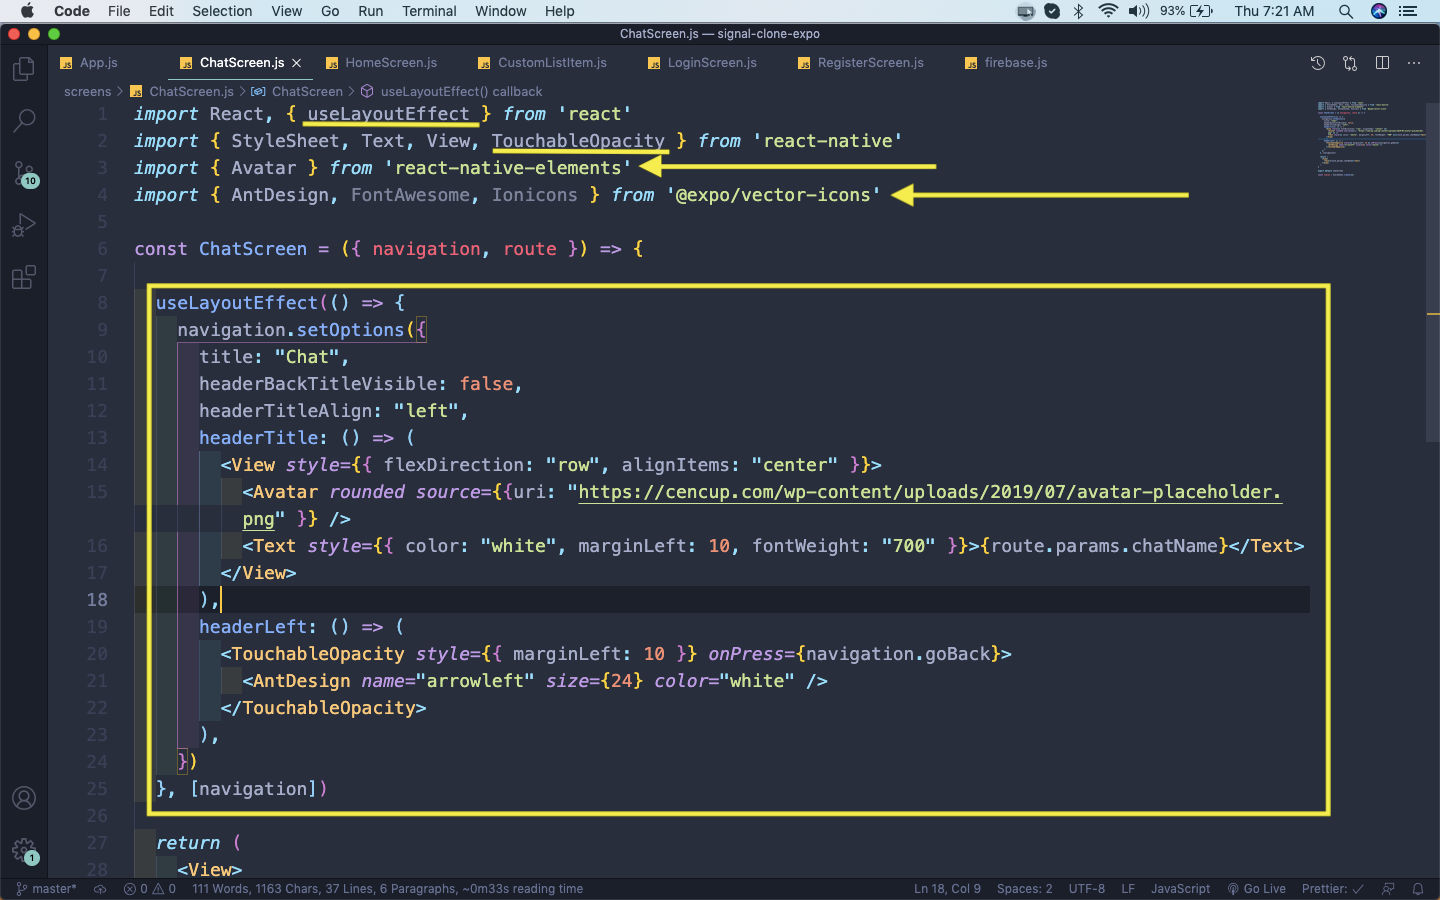 ChatScreen.js
Now, we will customize the headerRight also in ChatScreen.js file, where we will add two icons for Camera and call.
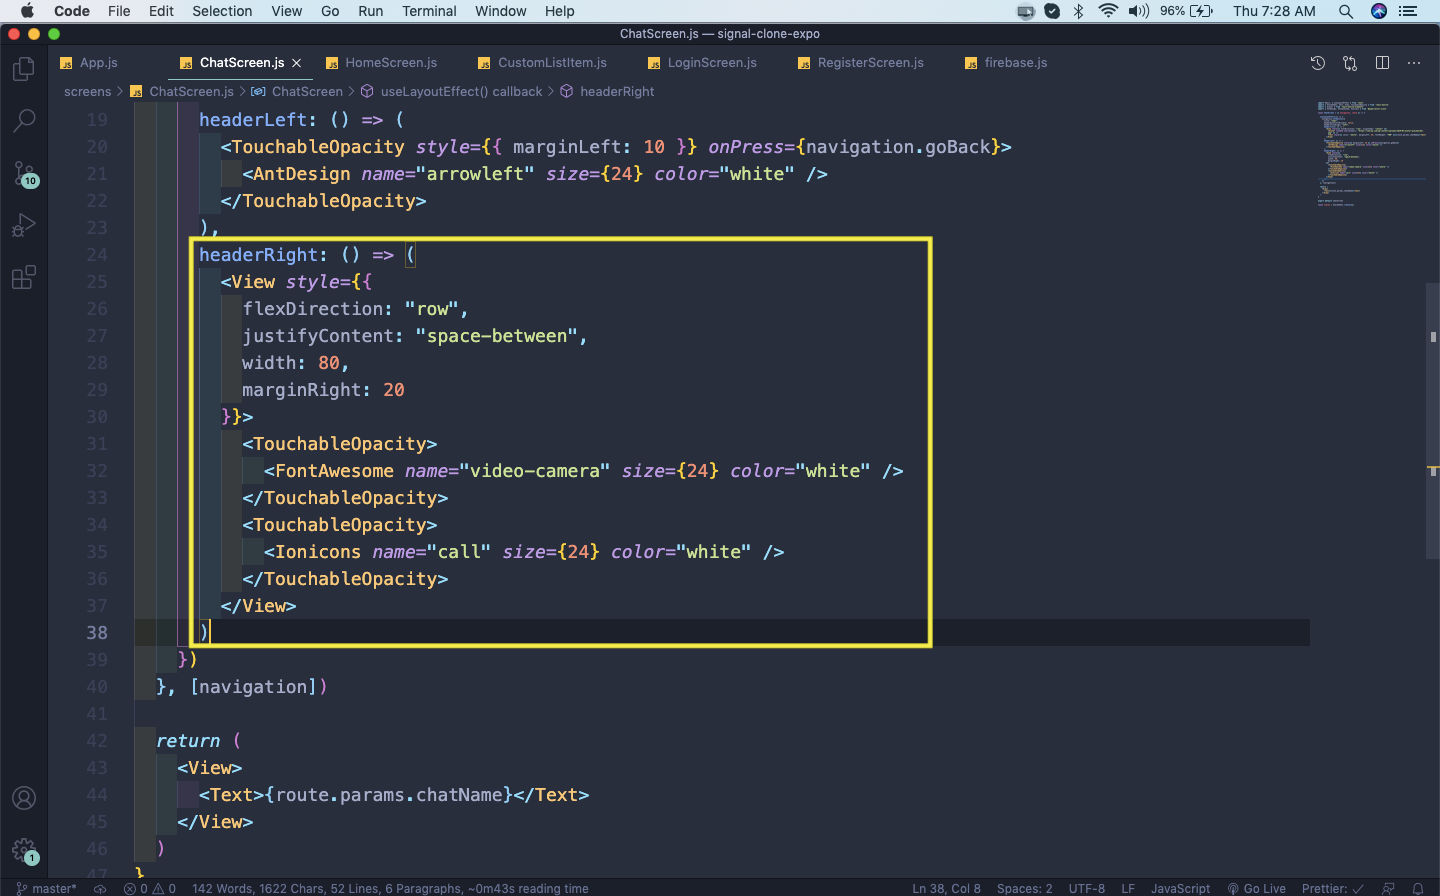 ChatScreen.js
Now, our Chat screen header is fully customized.
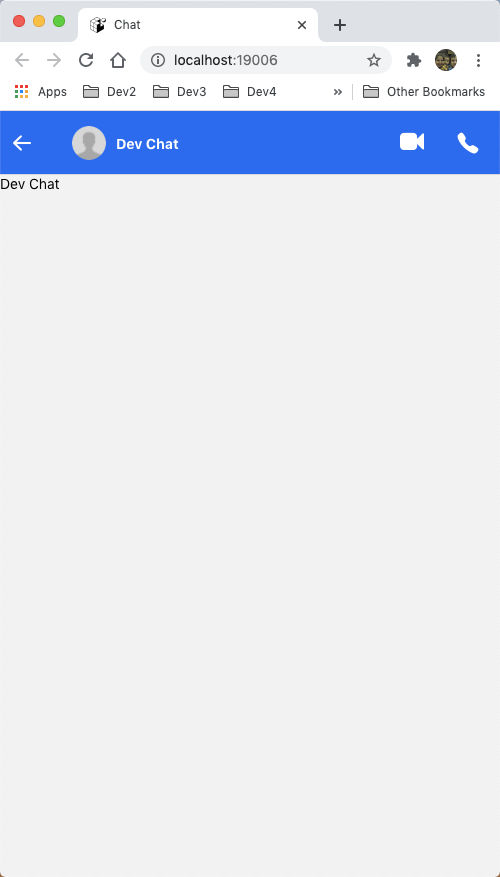 Header
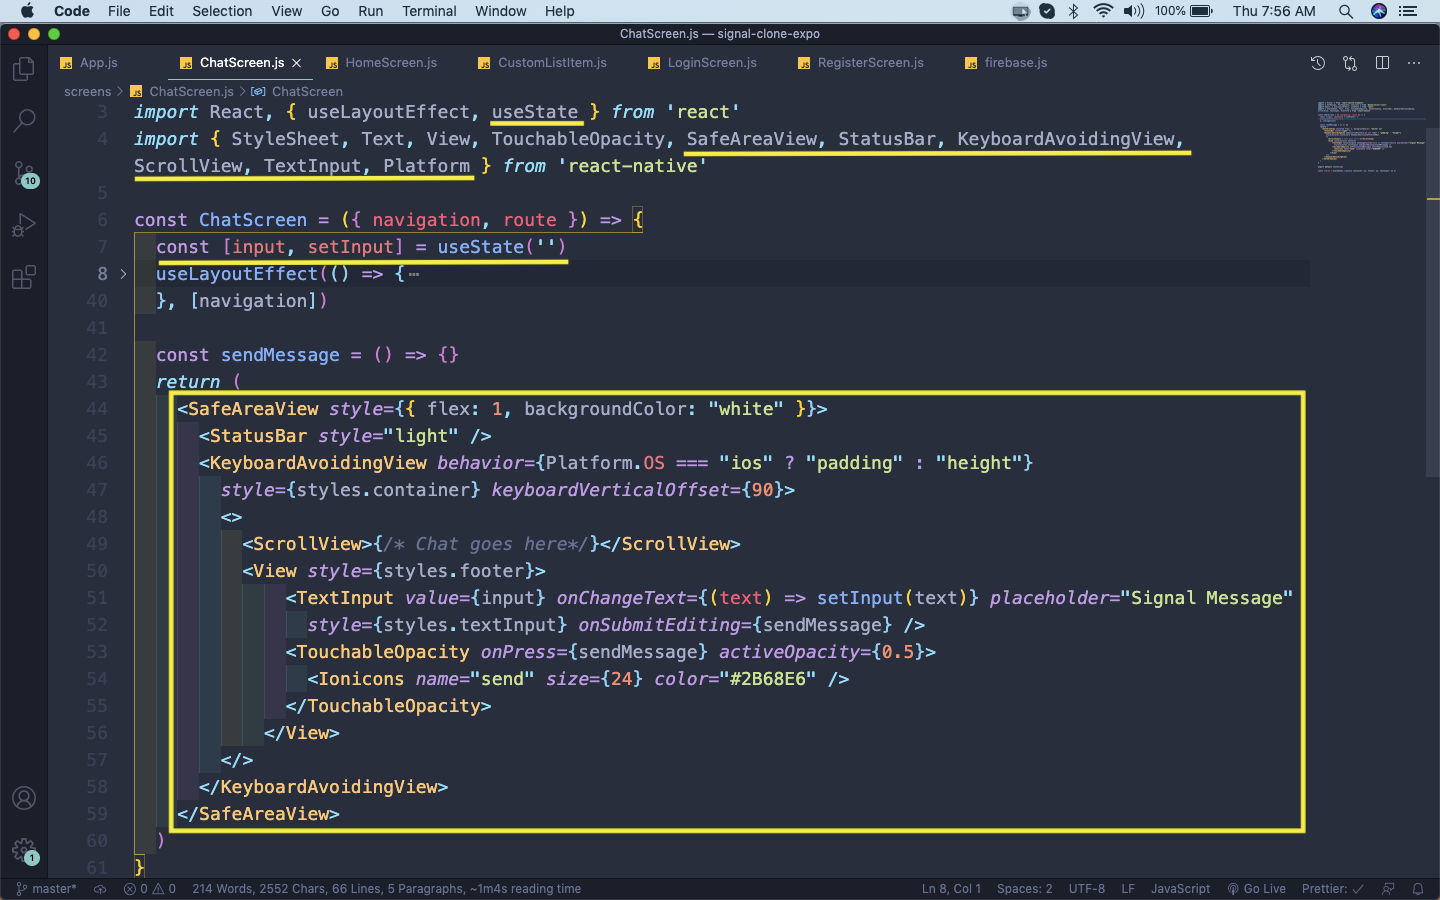
Now, we will add logic in the return of the Chat in ChatScreen.js file. Here, we mainly have a TextInput and a Send button. The SafeAreaView and KeyboardAvoidingView are required to work properly on all platforms.
 ChatScreen.js
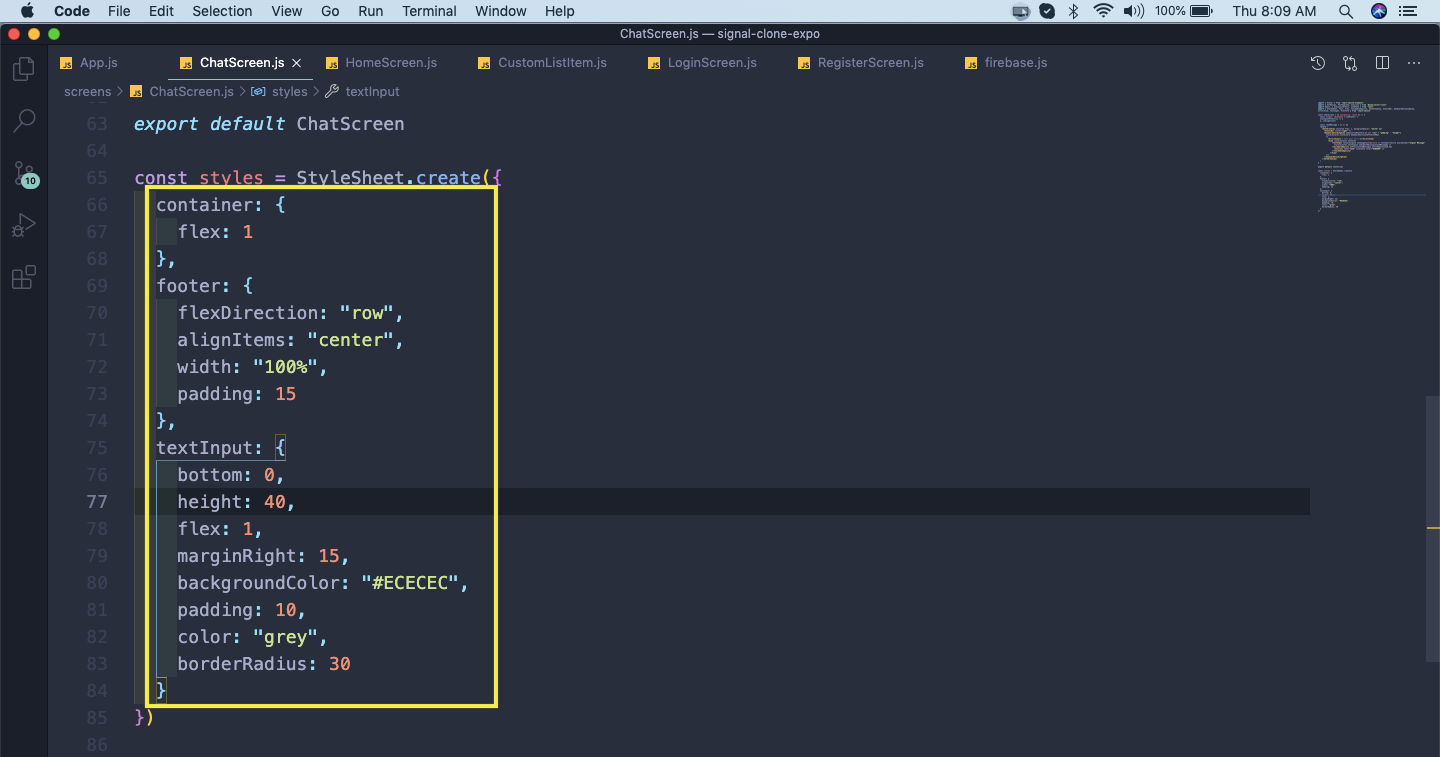
Now, we will add some styles for our container, footer and textInput in ChatScreen.js file.
 ChatScreen.js
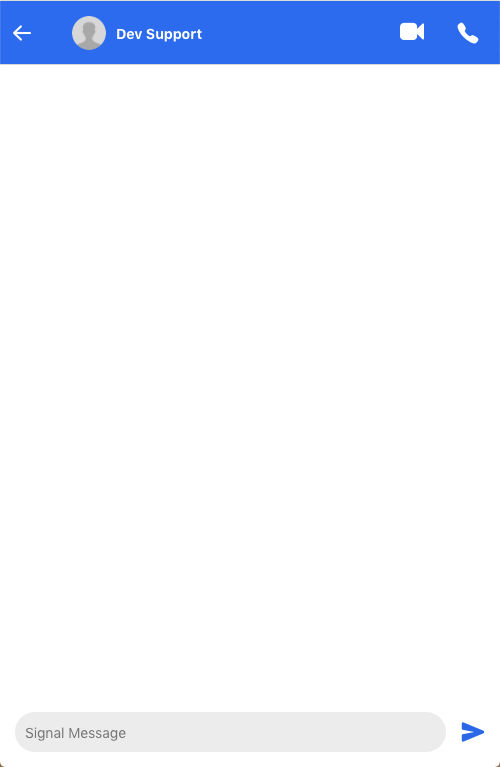
Now, our text input and send button looks perfect and are placed in the bottom.
 App
App
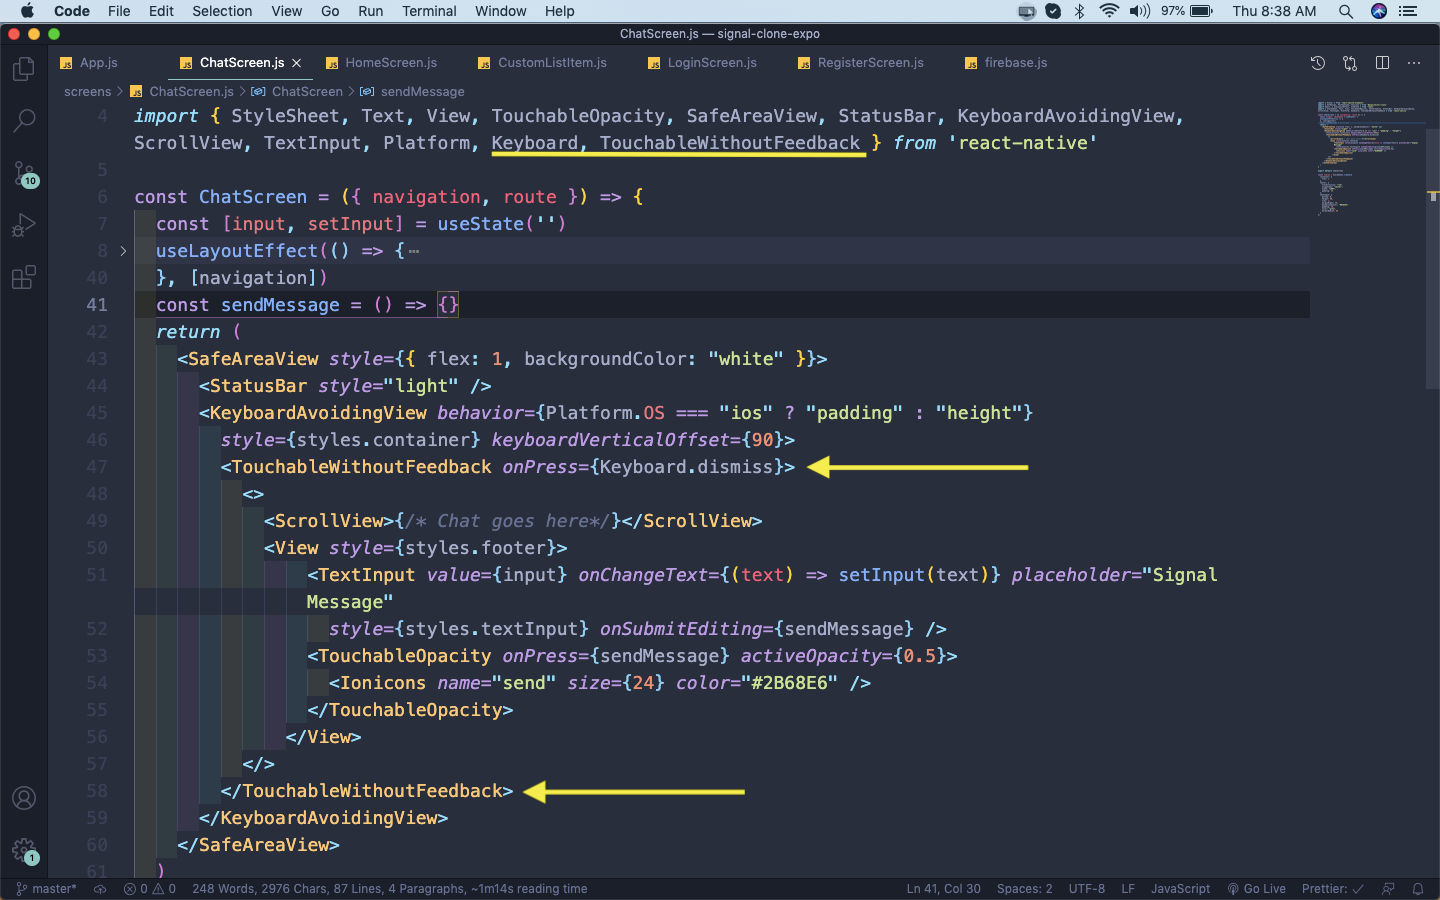
We also want to dismiss the keyboard, once the user send the message. For this we need to wrap the Input and send with TouchableWithoutFeedback in ChatScreen.js file.
 ChatScreen.js
Now, we will add the code for sendMessage() in ChatScreen.js. Here, we are going to a specific chat and adding the message, displayName, email, photoURL and timestamp into firebase.
Notice, that we are using global firebase function serverTimestamp() and storing the server time in our database.
The way to import firebase have changed, so please use this import, instead of the one mentioned in screenshot.
import firebase from "firebase/app"
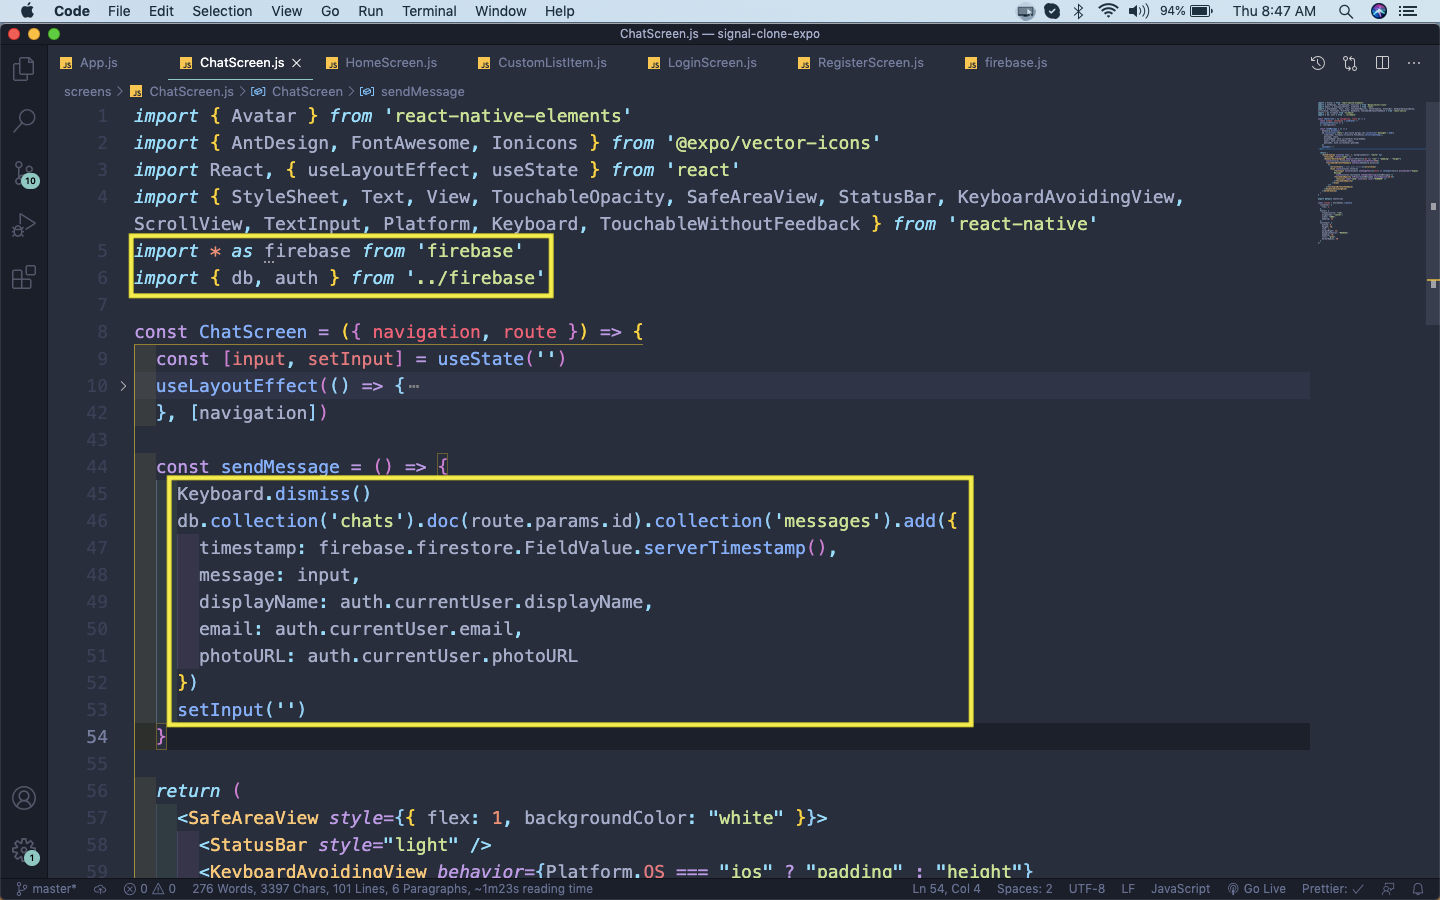 ChatScreen.js
We will now show the messages on screen and for that we will use the useLayoutEffect, because we have access to route in it. We will get the data from firebase and store it in messages state array.
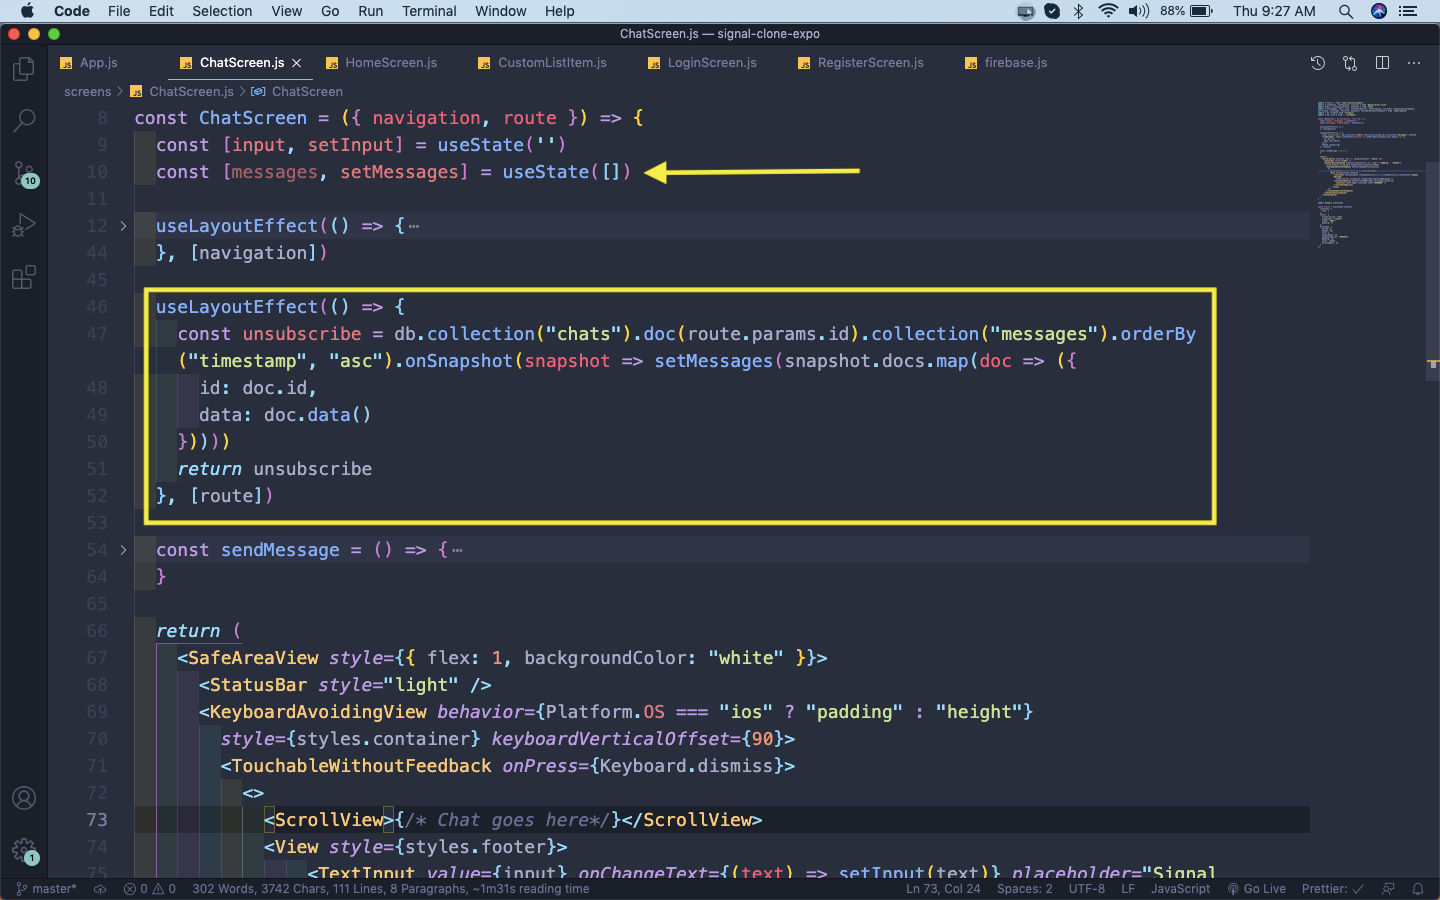 ChatScreen.js
Now, we will show these messages in ChatScreen.js file in the ScrollView. Here, we are mapping through the messages and showing two different styles for sender and receiver.
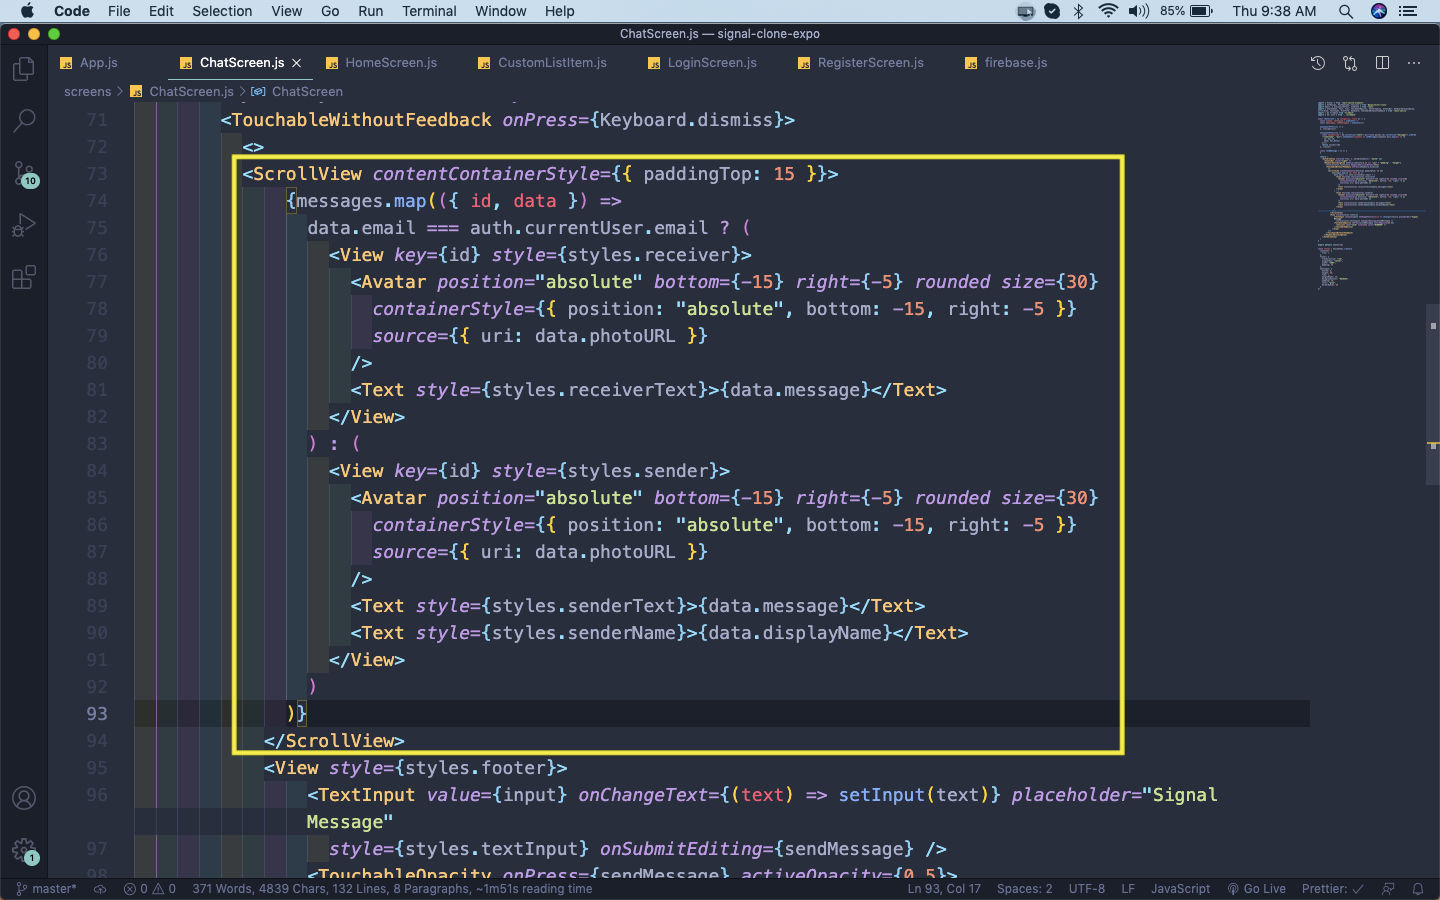 ChatScreen.js
Now, we will write the styles for the newly created styles in our StyleSheet in ChatScreen.js file.
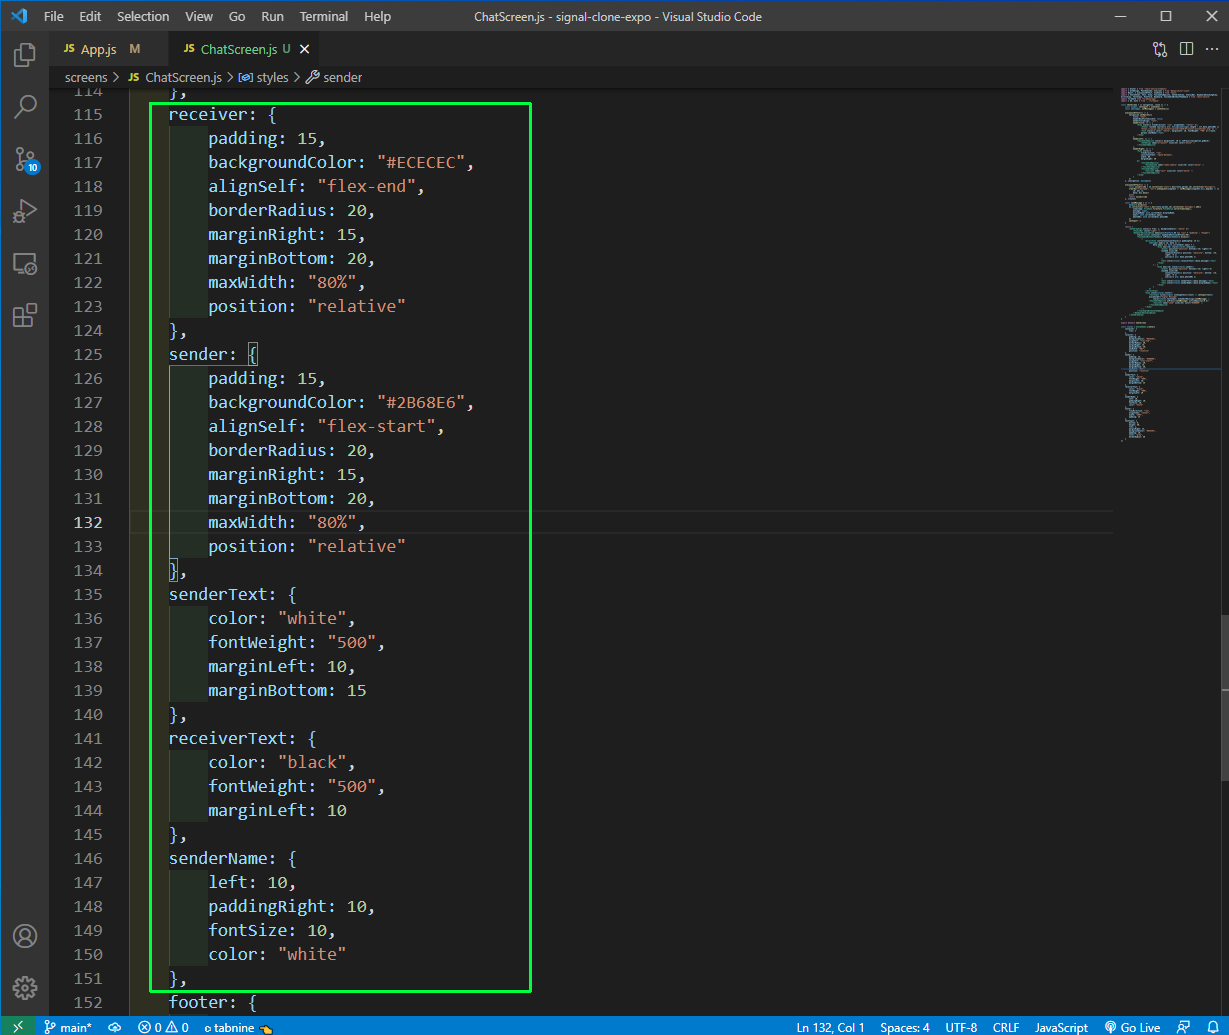 ChatScreen.js
Now, our app is almost complete and i have logged in with other user and it’s is looking great.
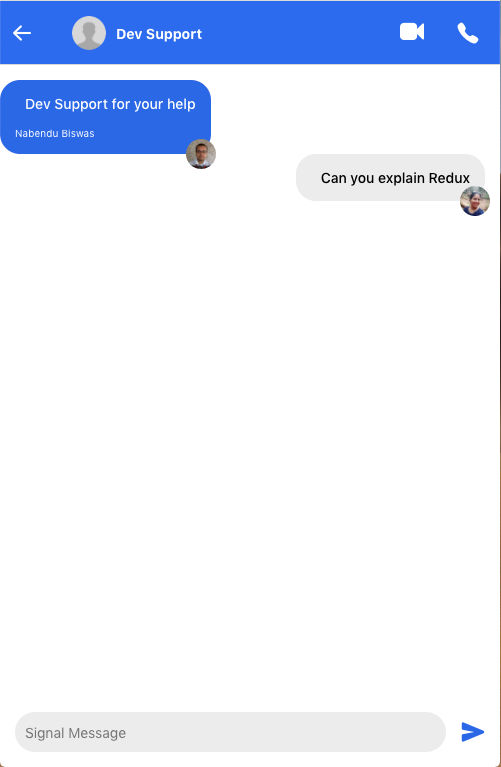 Looking Great
Now, we will also change the Avatar on the Chat page to the last person who had sent the message.
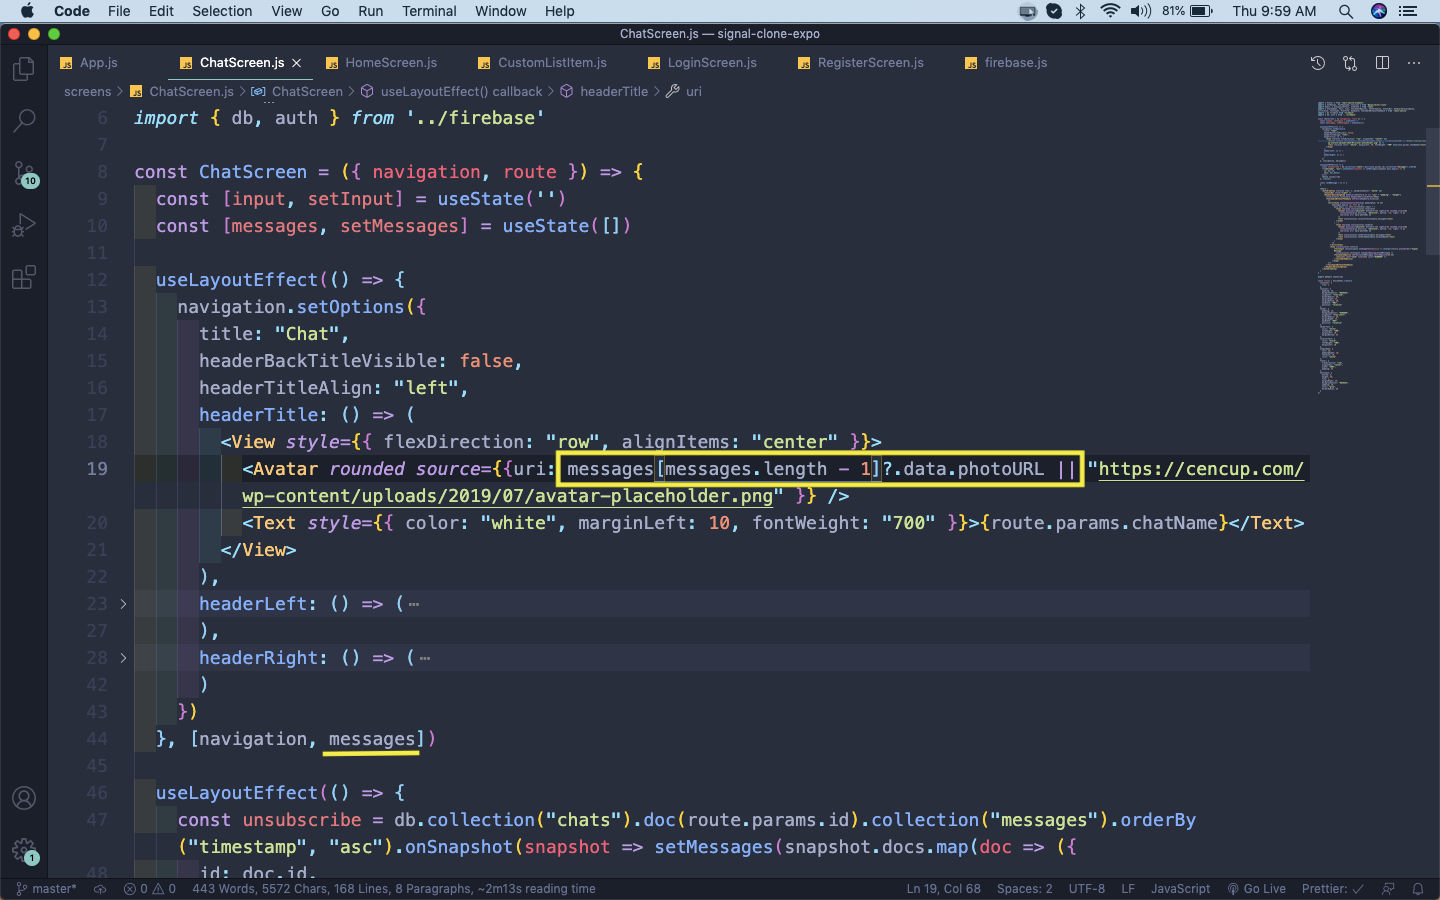 ChatScreen.js
Now, the Avatar is been changed properly.
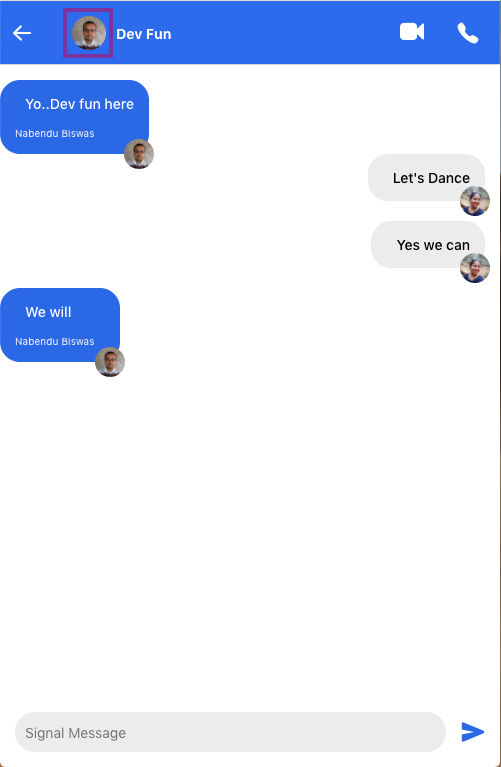 Avatar
Now, we want to update the Avatar and the message in the ChatScreen. We need to update the same in CustomListItem.js file.
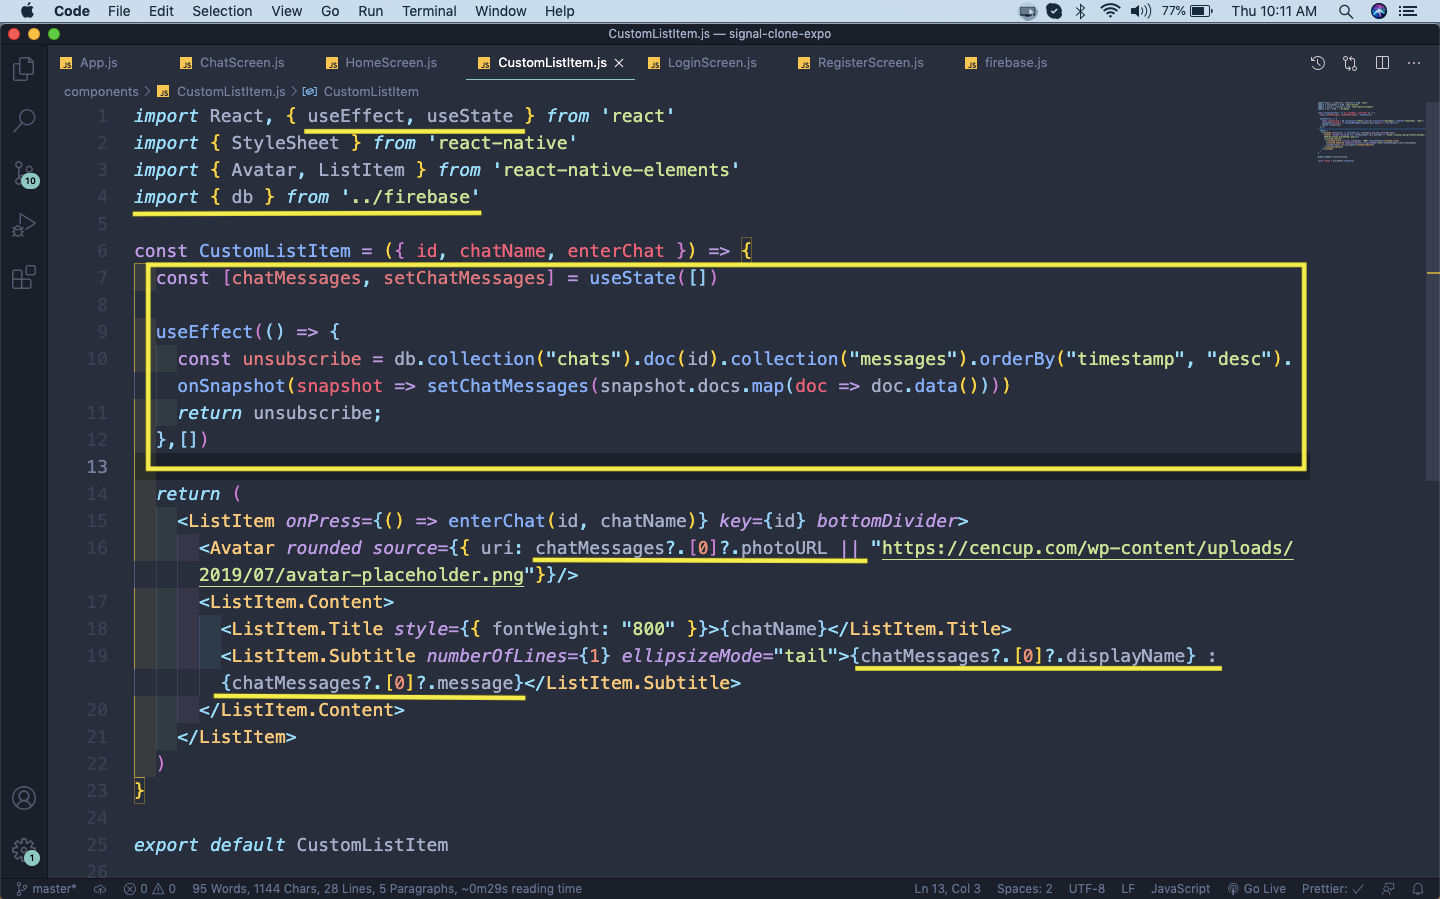 CustomListItem.js
Now, our App is showing the correct data in the Chat Screen.
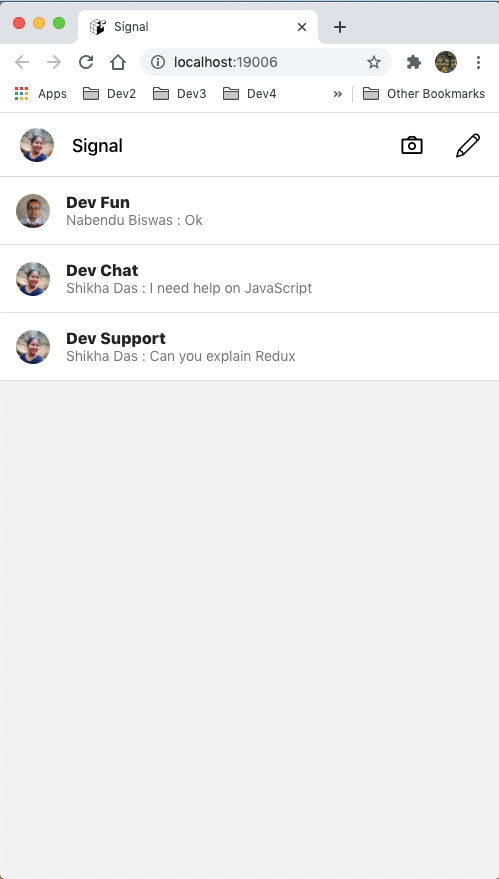 Chat Screen
We will now deploy the web-app in firebase. For getting the apk file for Play Store, we need to follow a different procedure.
So, go to the terminal and do firebase login. If you are logging for the first time in the system, it will open a pop-up to authenticate.
 firebase login
After that give the command firebase init and it will ask us to proceed. Then go down to Hosting using arrow keys and press the spacebar to select it and after that press enter.
 firebase init
Then select Use an existing project and press enter.
 Existing project
Here, you need to select the correct project.
 Correct project
Next, we choose the public directory and it is web-build. The next option is Yes for single-page app and github deploys No.
 web-build
Next, we need to run expo publish from terminal. If you are doing it for the first time, it will ask to authenticate. I have an expo account, so logging in with it.
 expo publish
Next, it asked me to enter my credentials and started to publish.
 Publishing
Now, we need to run the command expo build:web from our terminal.
 expo build:web
The last thing we need to do is firebase deploy from the terminal.
 firebase deploy
And our app is deployed on the web.
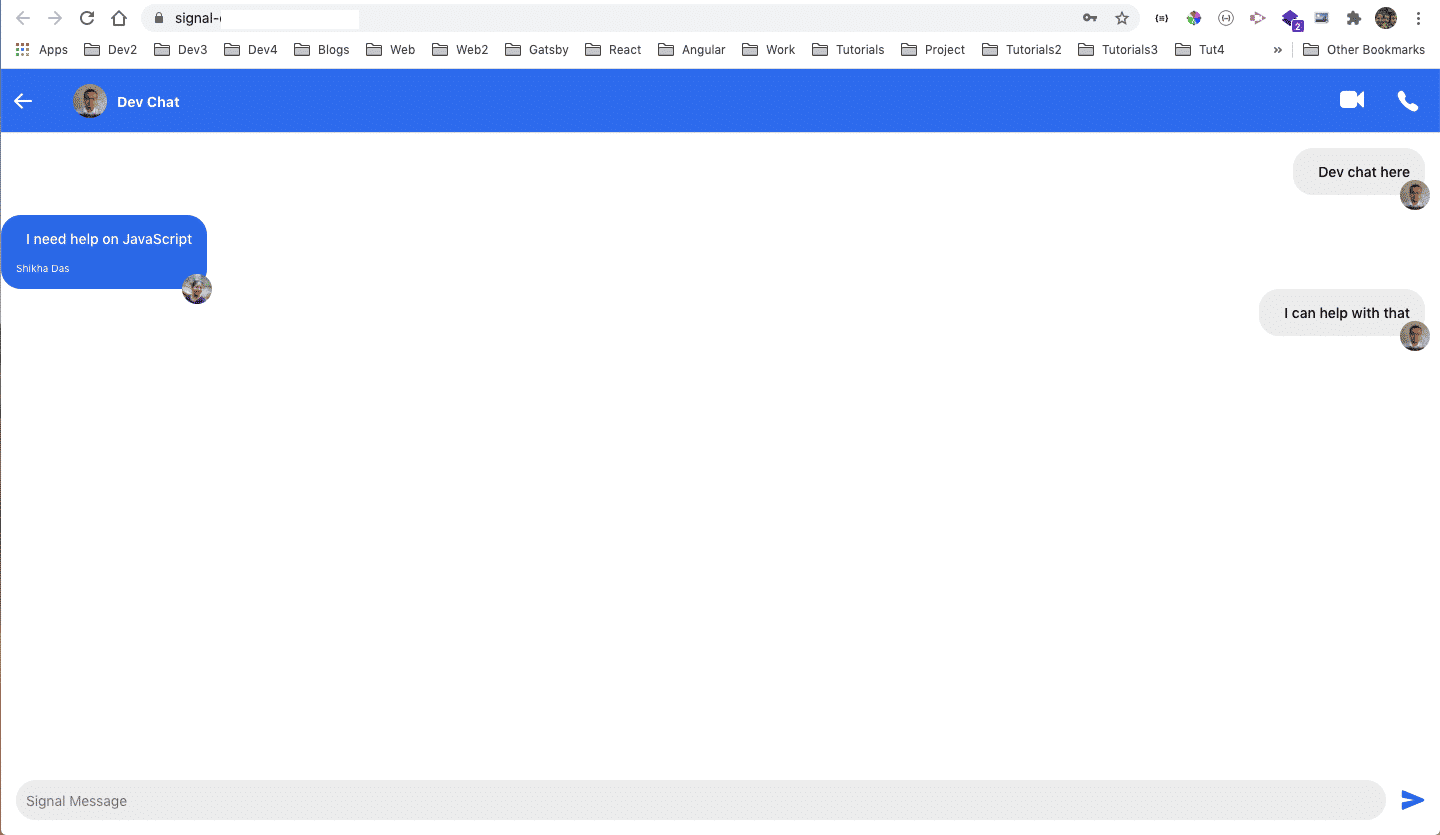 Web-deploy
We can also check it on our phone and deploy the apk file to Play Store.
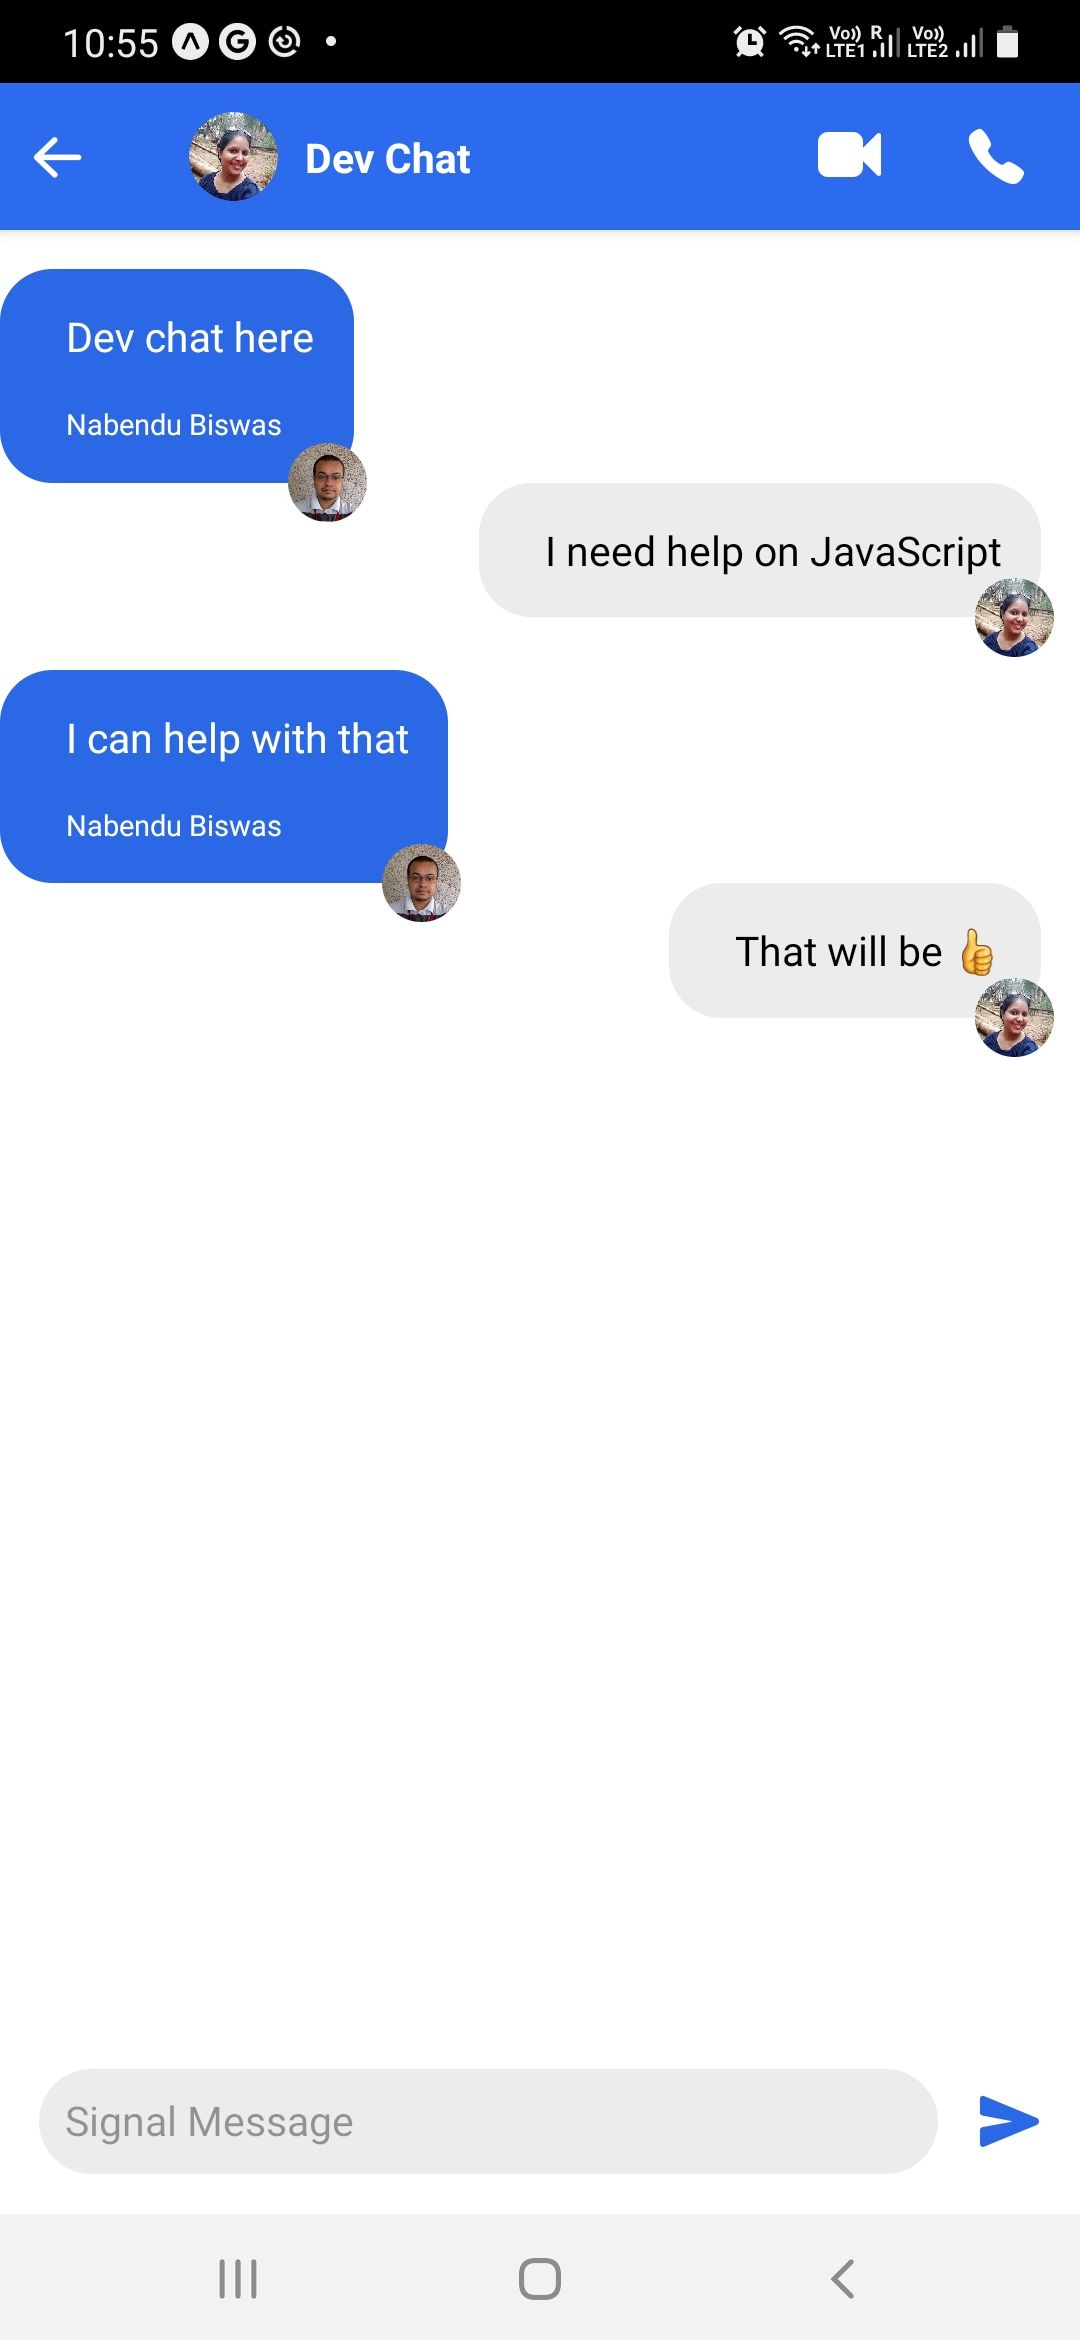 Android phone
This completes our Signal clone. Hope you liked it.