How I deployed my Gatsby site to AWS S3 - 2
by Nabendu Biswas / June 15th, 2020
#AWS #devops #gatsby
Series: Thewebdev-fixes
Welcome to part-2 of our AWS journey. I am deploying my blog site to AWS S3 which is currently deployed in Netlify.
So, we will start to create bucket in this part. Give the bucket a unique name and click on Next button.
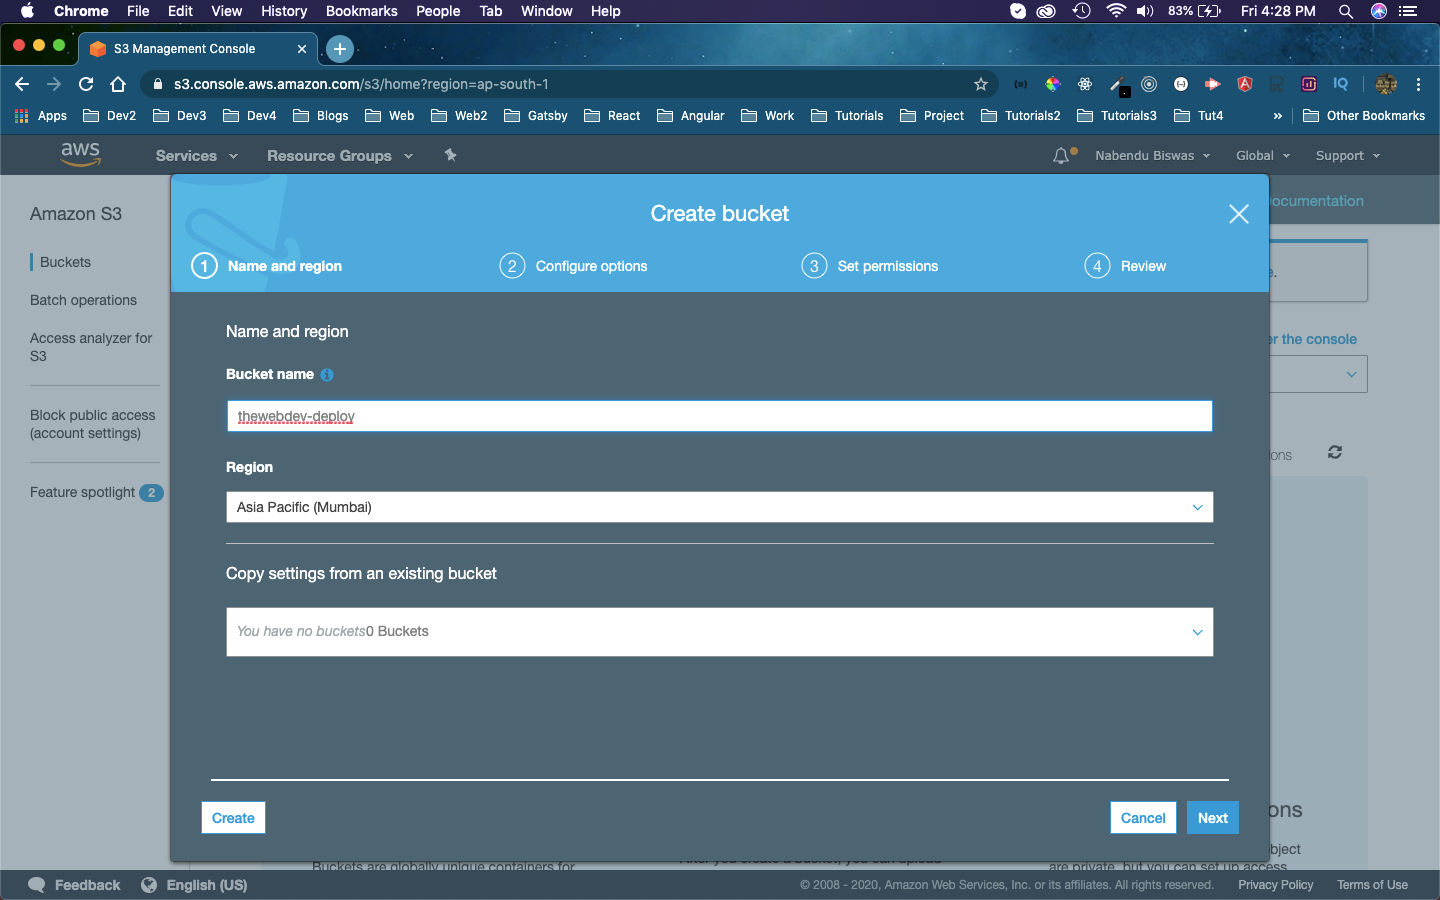 thewebdev
In the next screen keep the default values and click on the Next button.
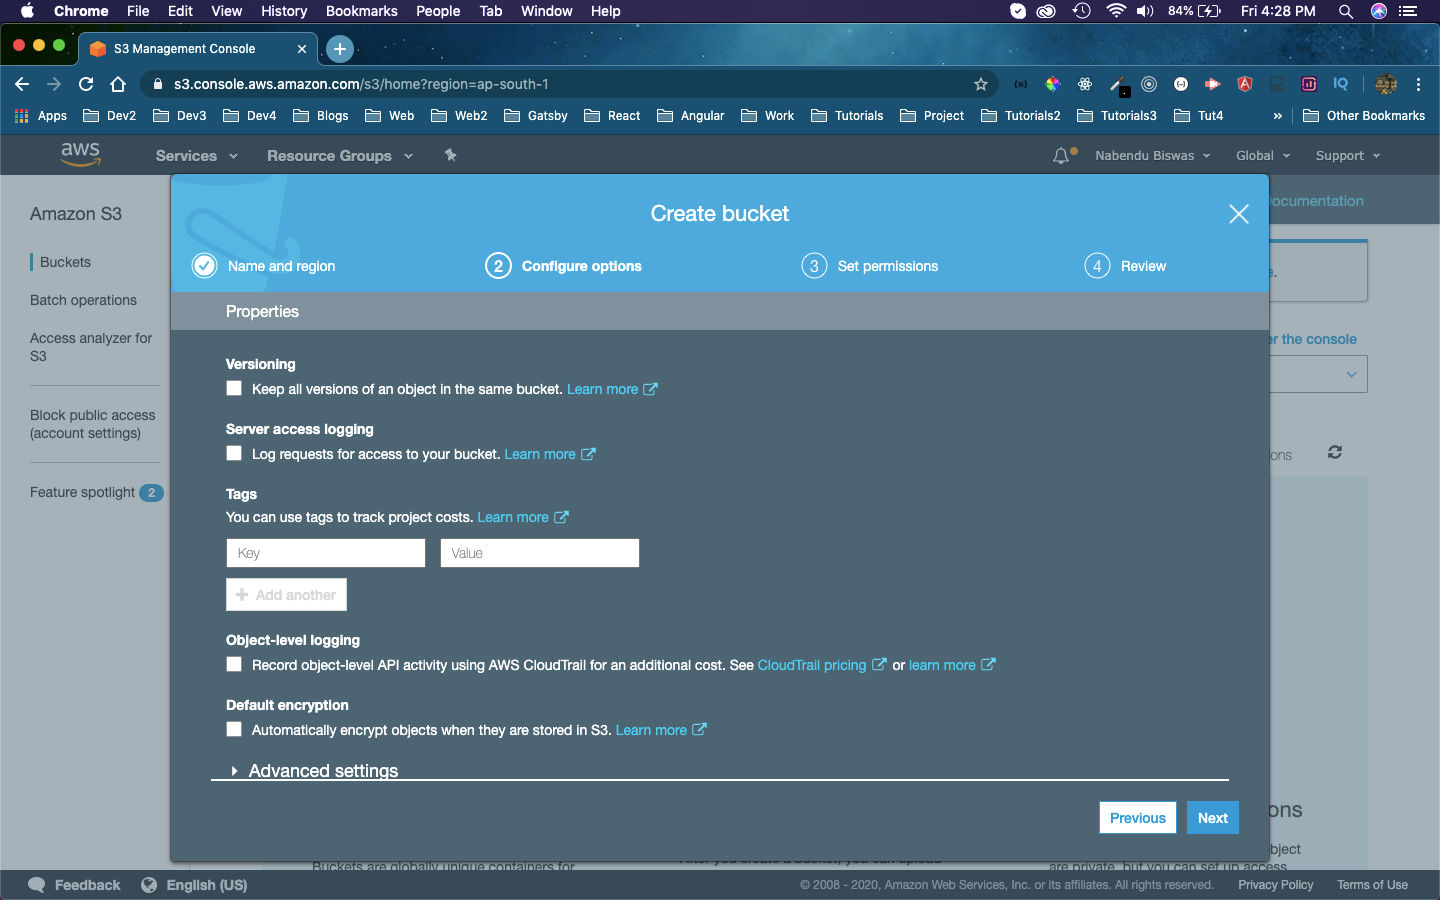 Default
In the next screen also keep the default values and click on the Next button.
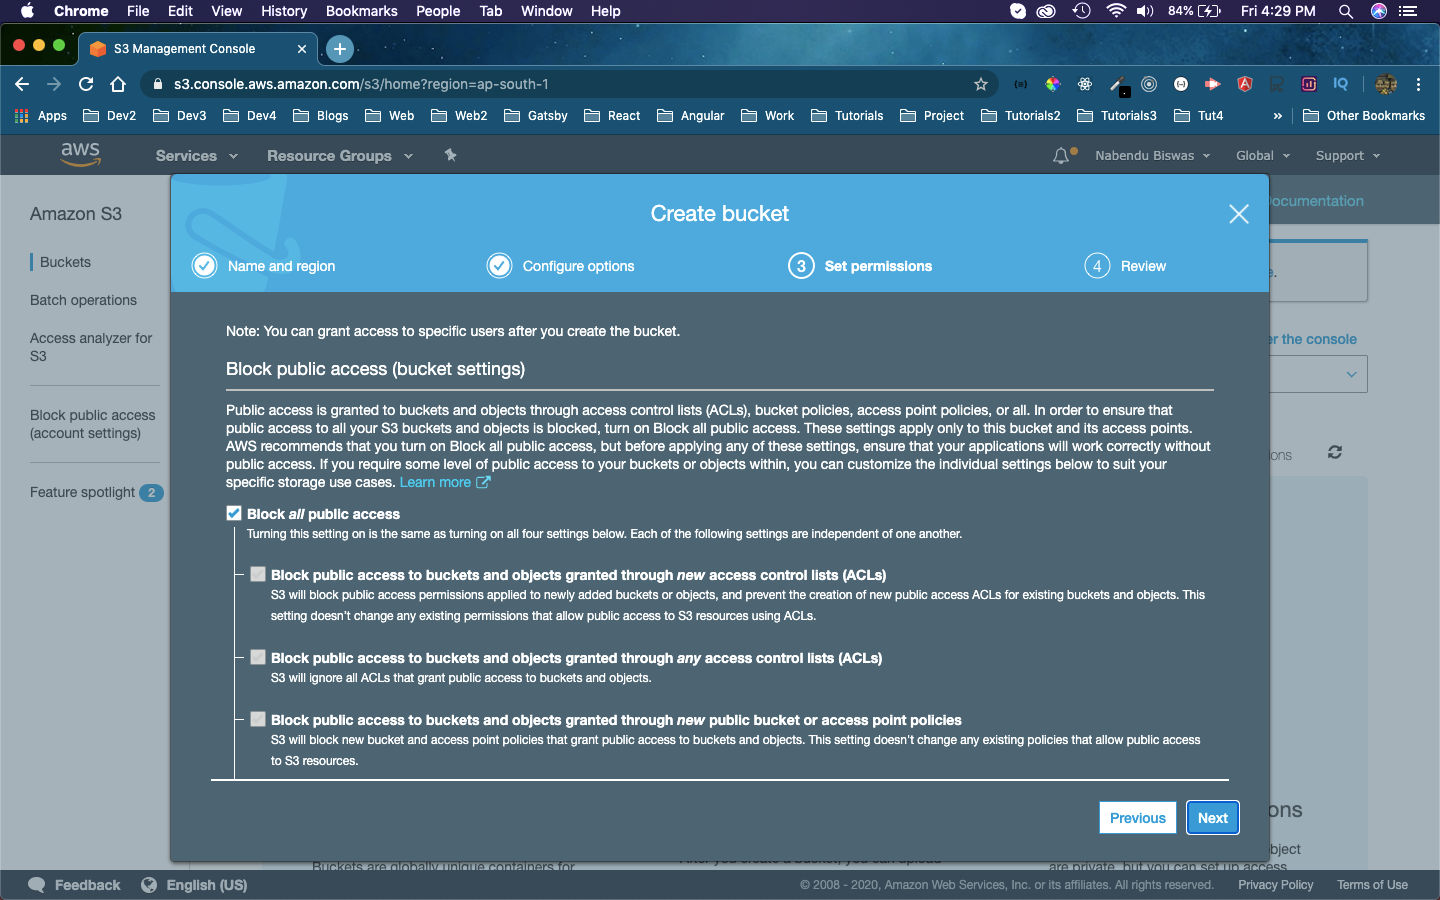 Default
In the next screen we can review our changes and click on the Create bucket button.
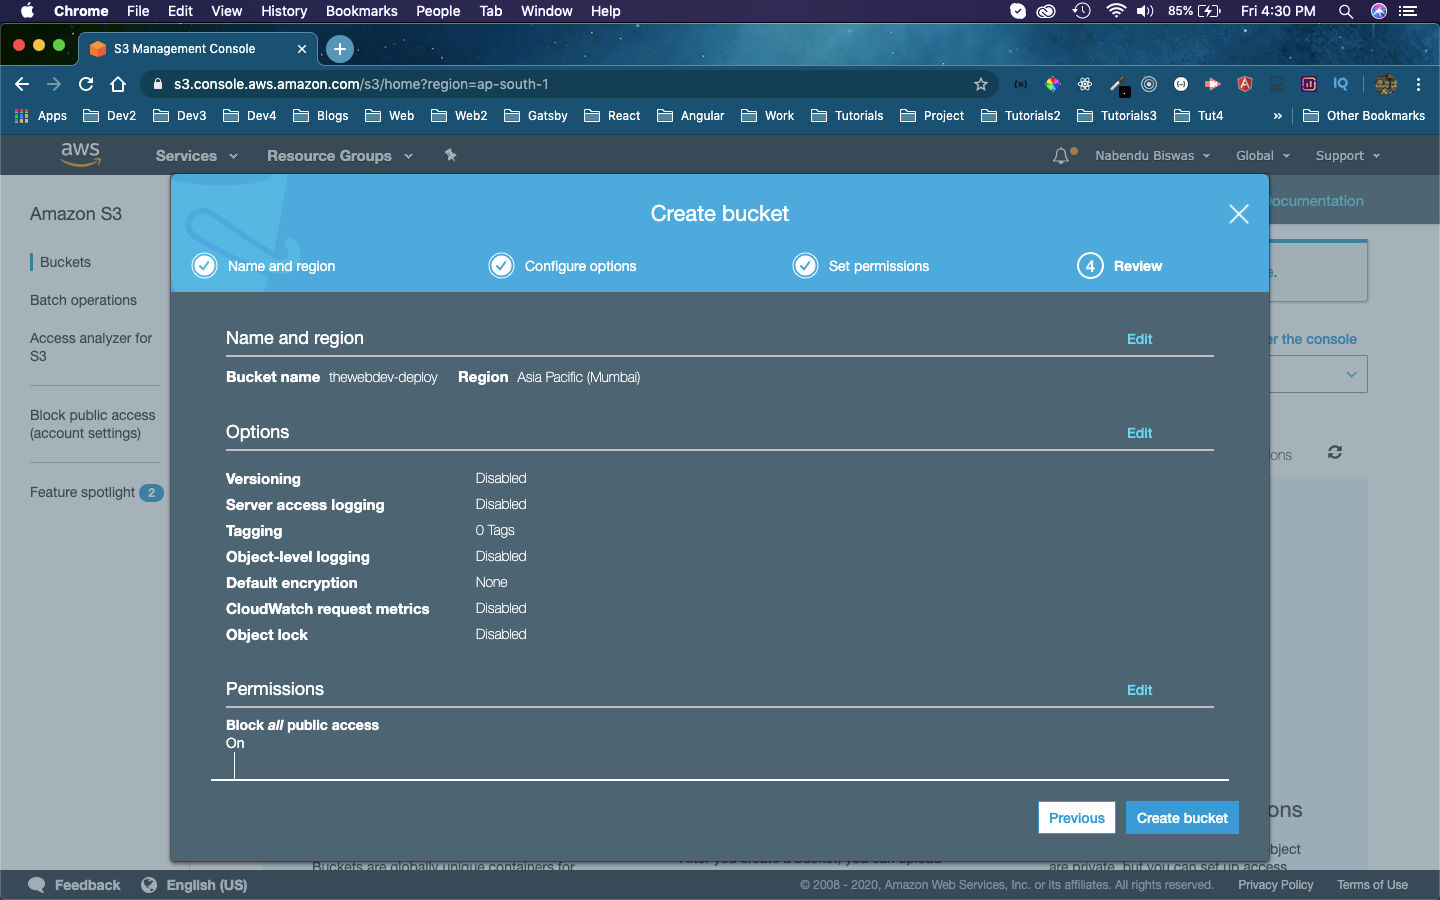 Create Bucket
Now, our bucket thewebdev-deploy is created but we need to do some more settings.
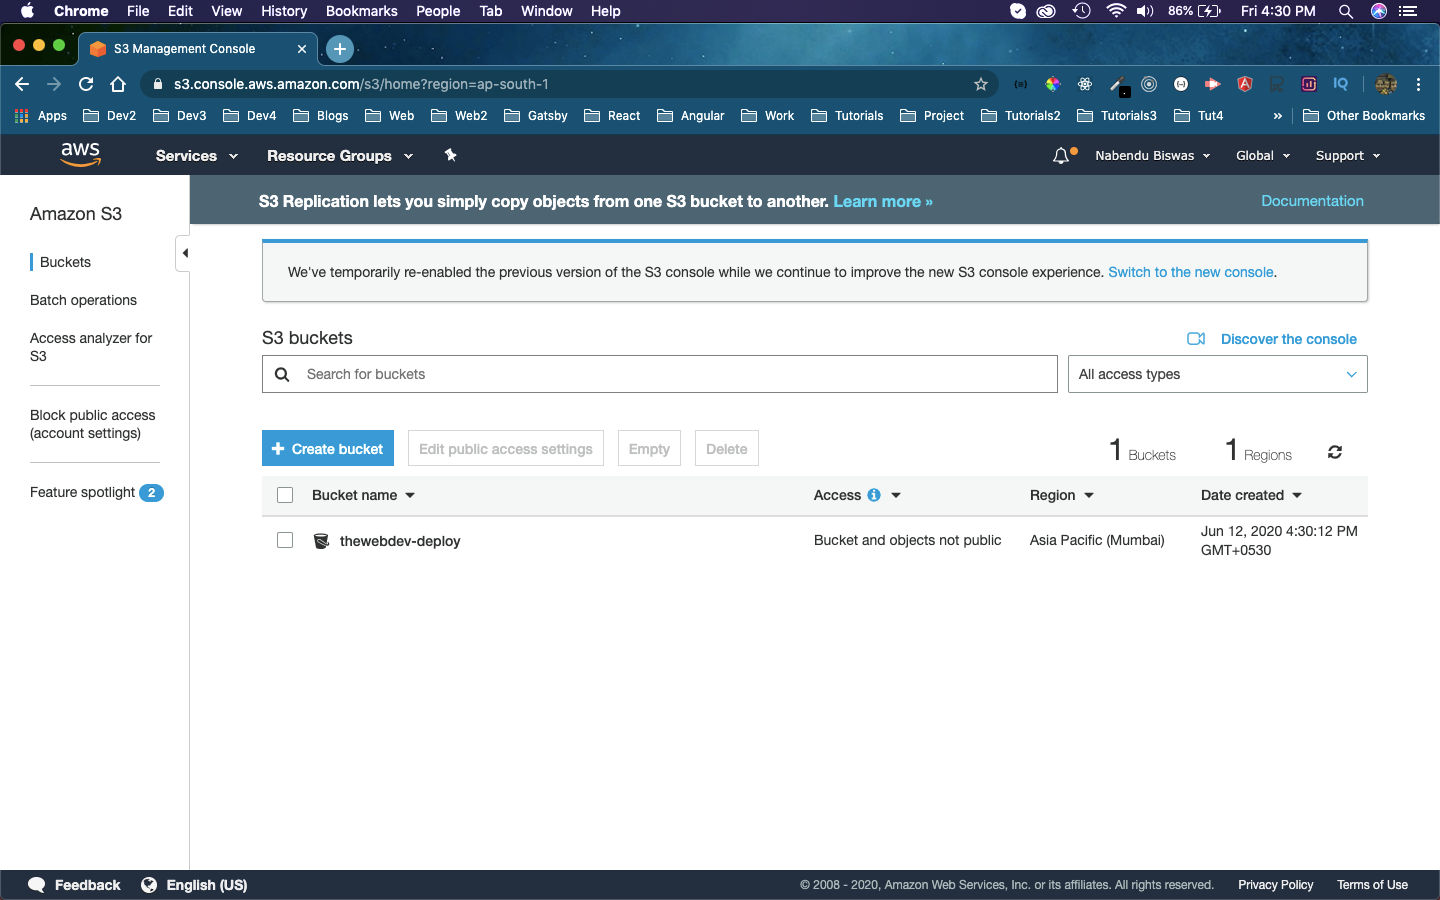 Bucket created
Next, click on the Permissions tab and then the Edit button.
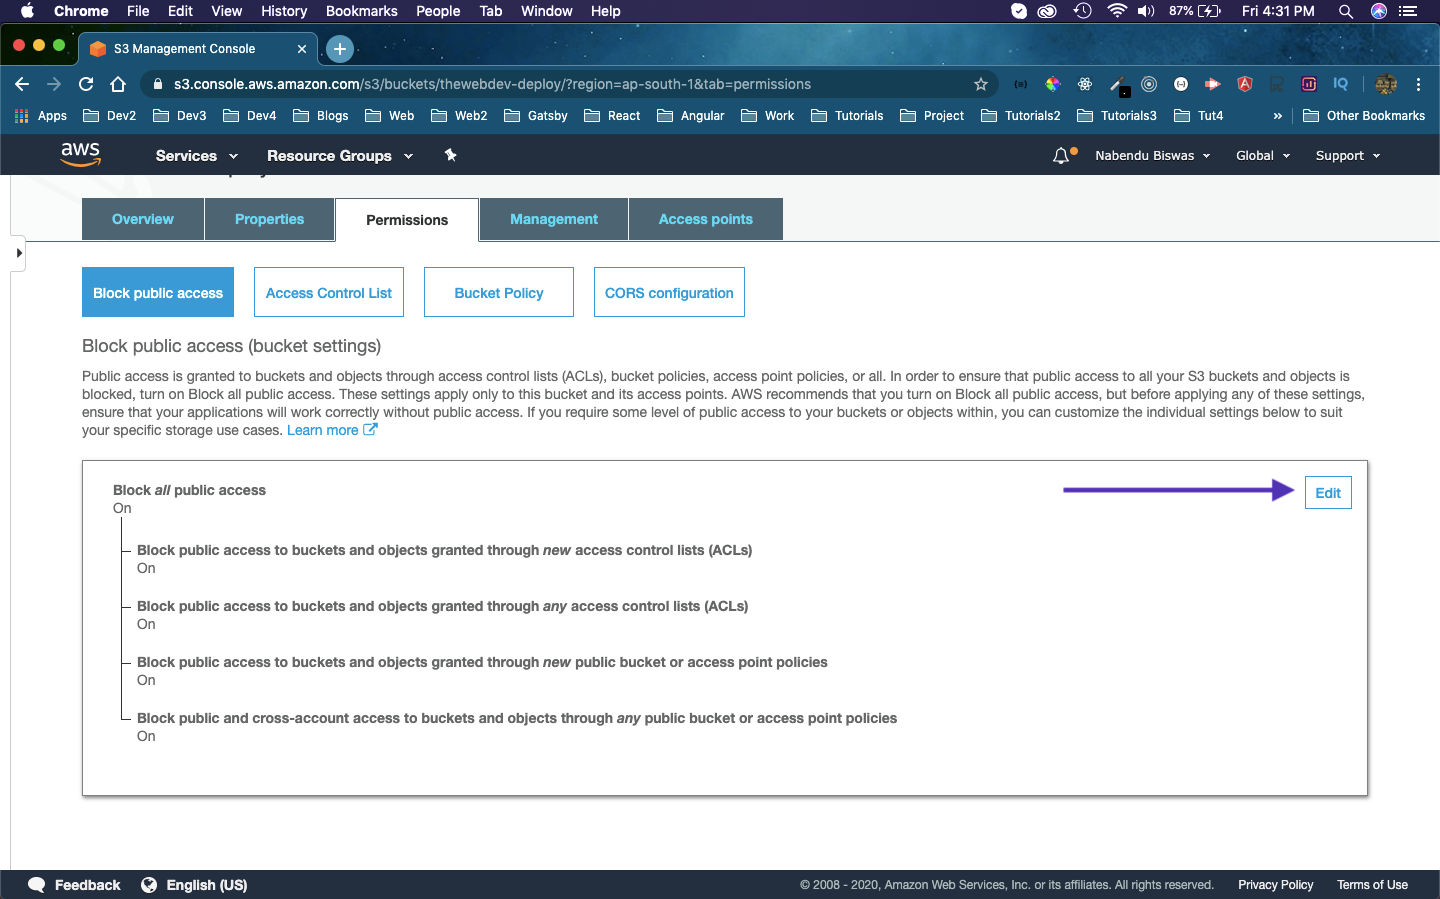 Edit
Edit
Then, we need to un-check the checkbox, next to Block all public access and click on Save button. It will show a pop-up where, we need to type confirm and click on Confirm button.
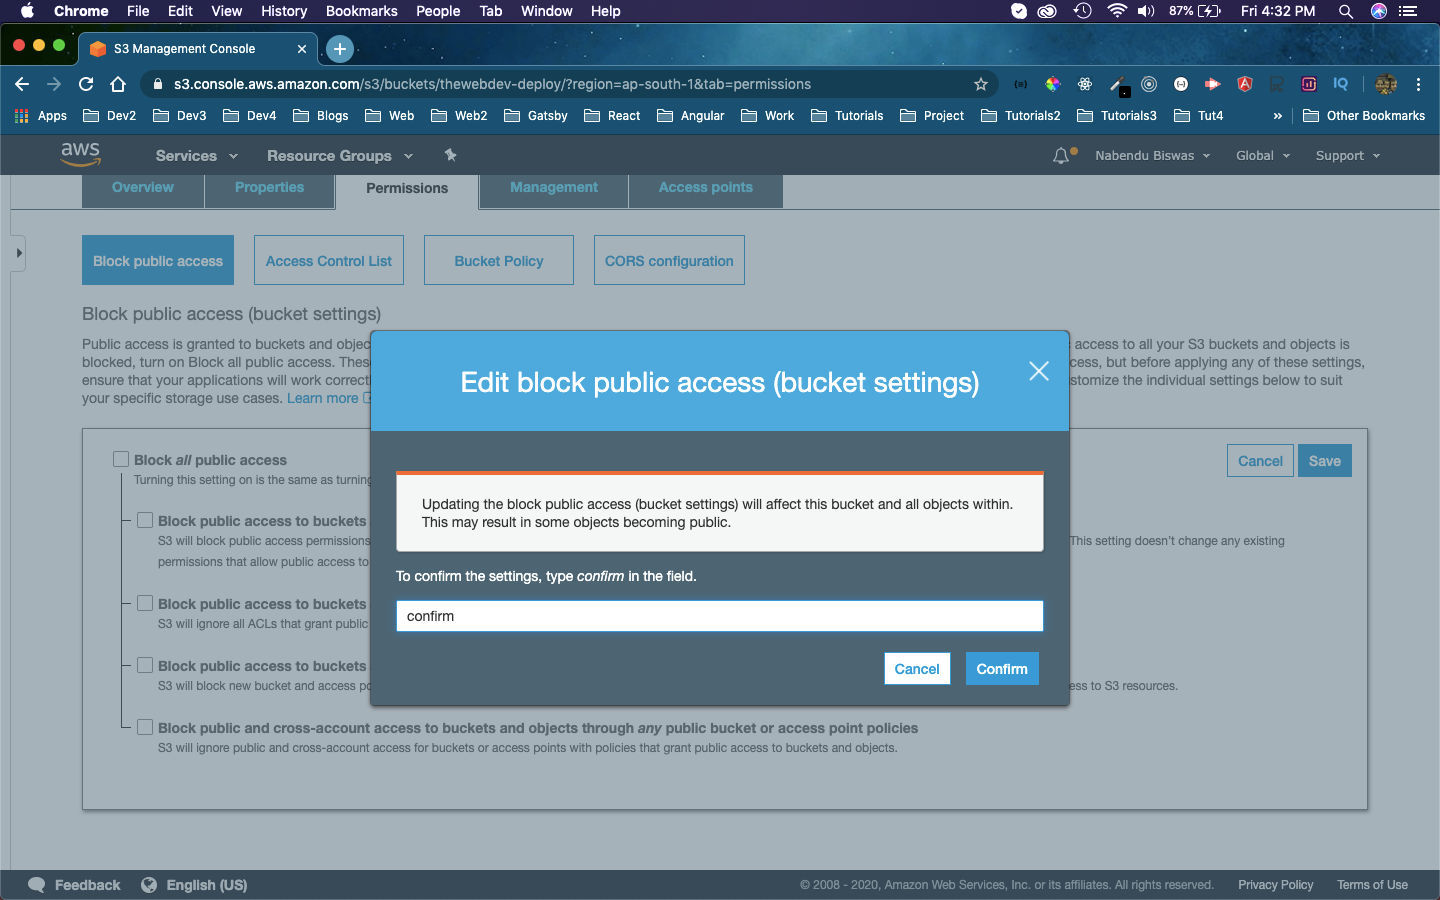 Confirm
We need to restrict the public access, so we will be using this doc and copy the below query.
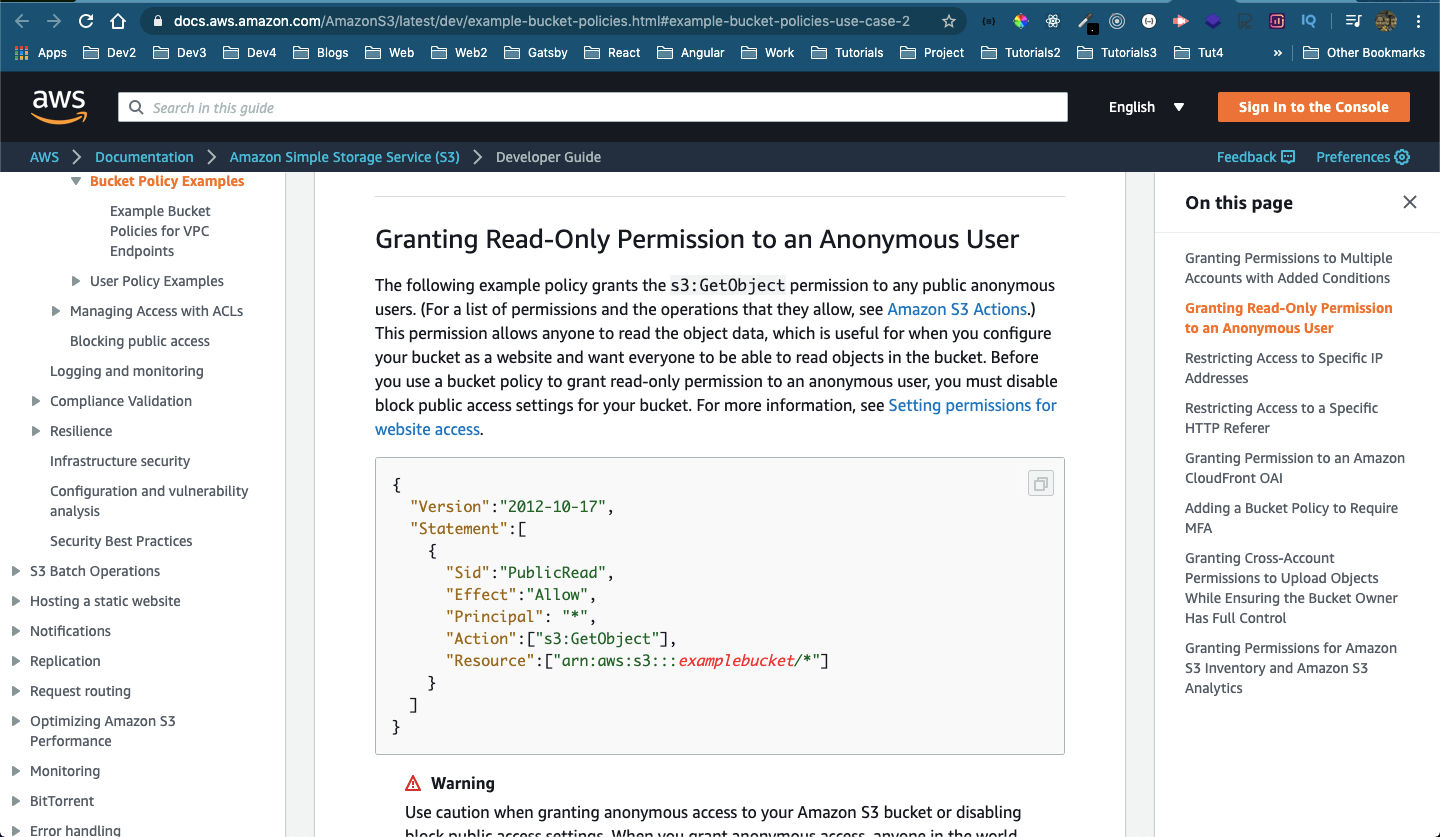 Read Access
Next, in the Permissions tab only click on Bucket Policy and paste the query from above here. We just need to change the examplebucket to the real bucket name, which is thewebdev-deploy in my case.
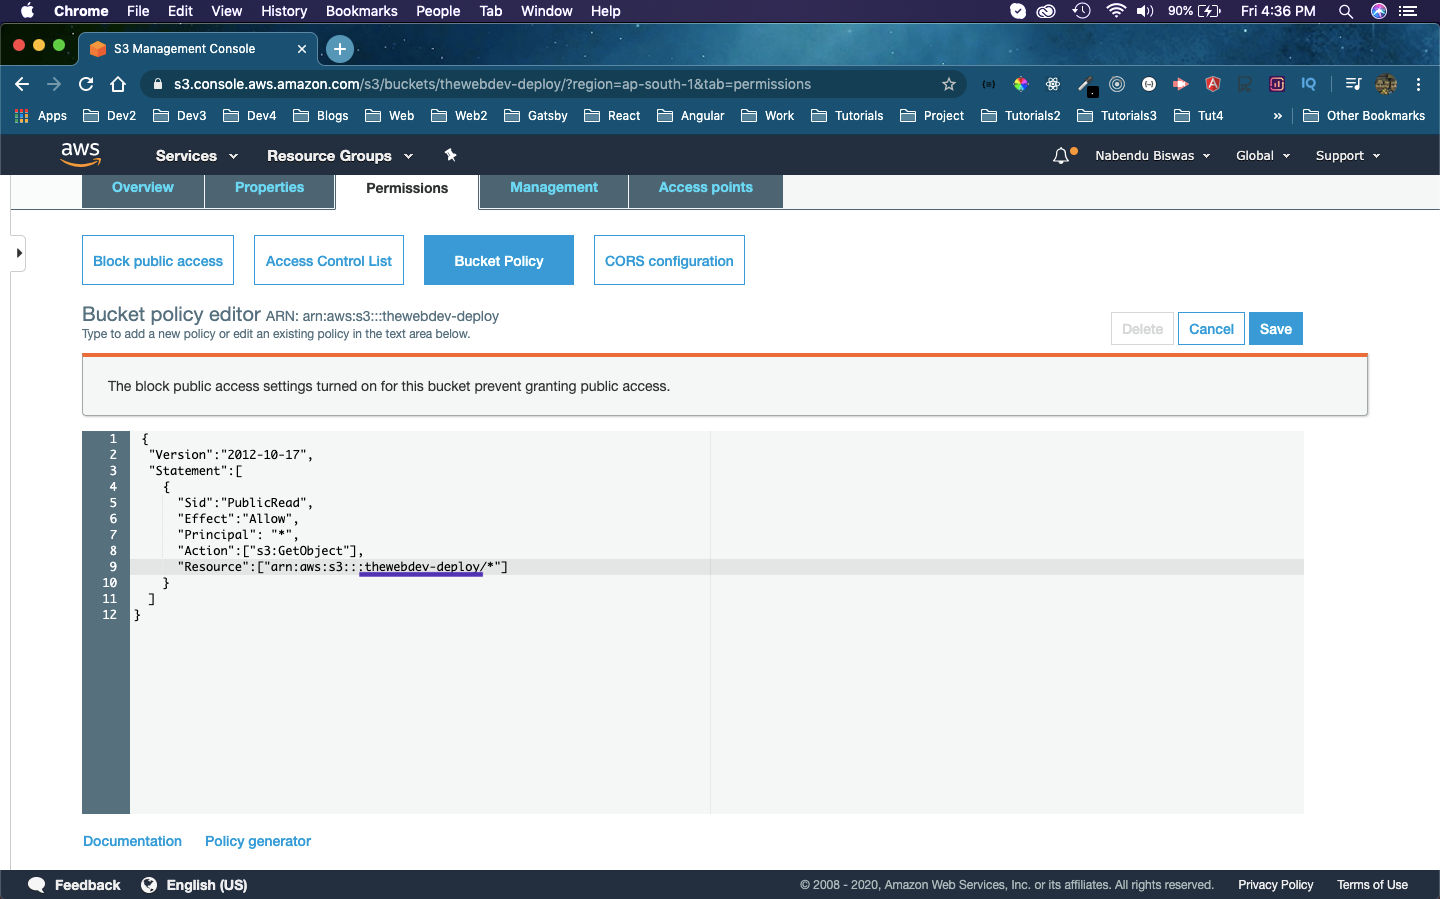 Bucket Policy
After clicking on the Save button, we will get the below message.
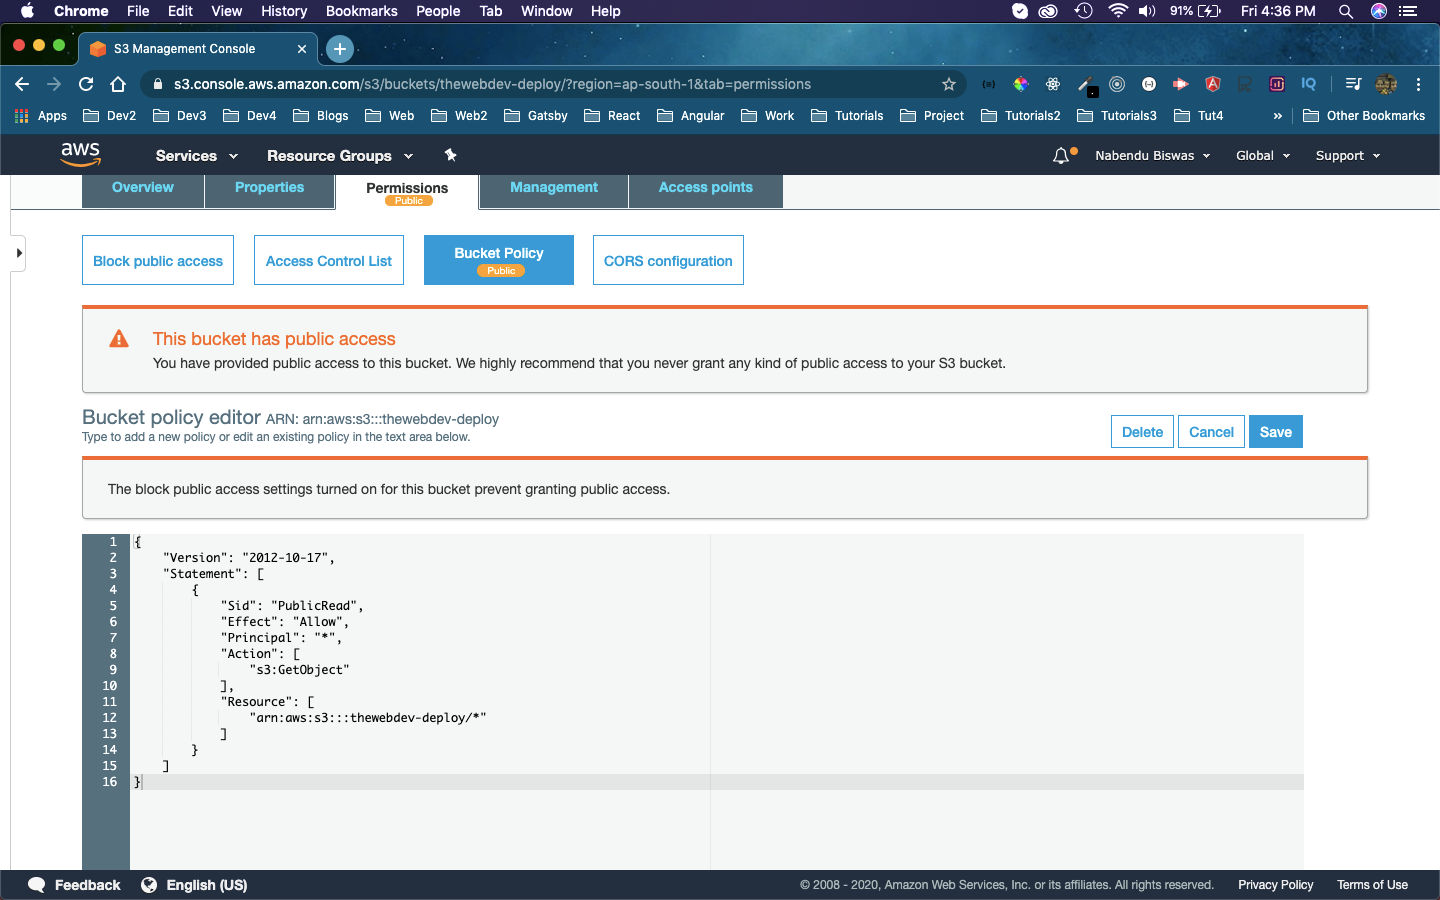 Save
Save
Now, click on the Properties tab and the click on Static website hosting.
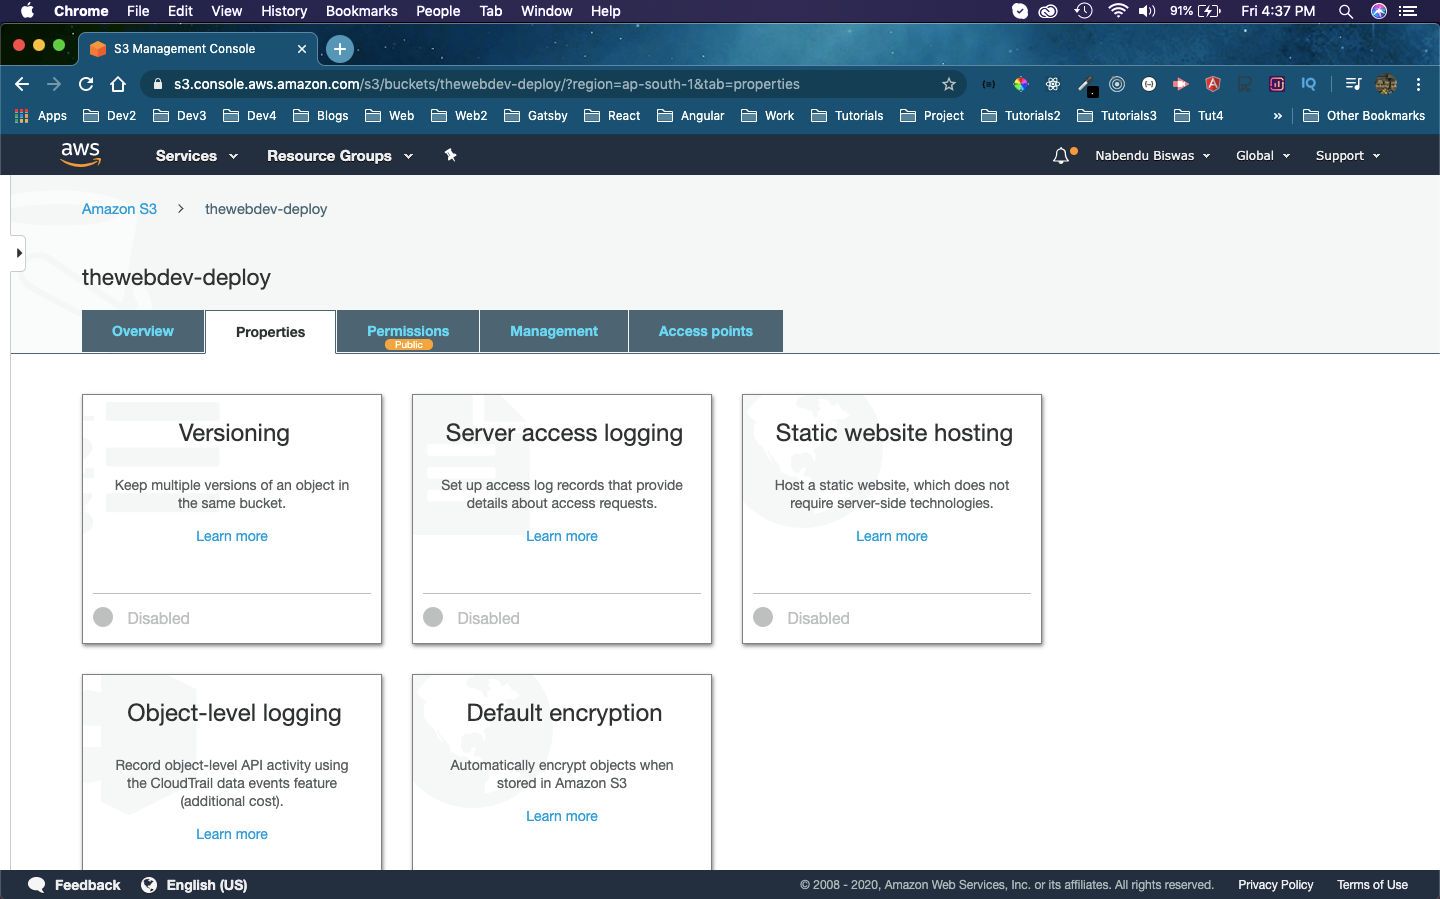 Static
Here, click the radio button Use this bucket to host a website and then give the Index document as index.html and Error document as 404.html. After that click on Save button.
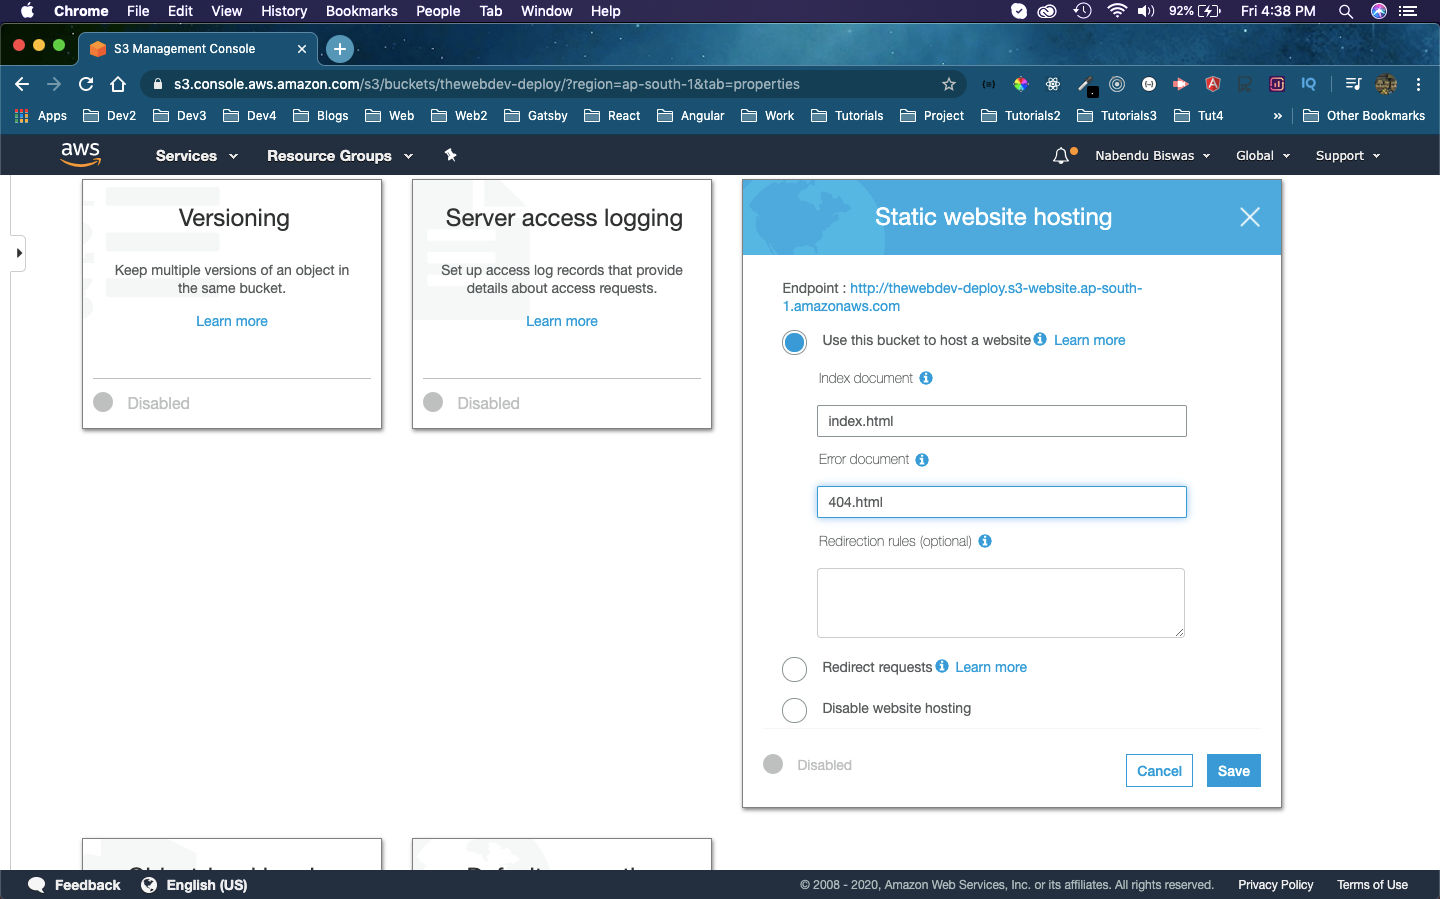 Save button
This completes the part-2 of the series.