How I deployed my Gatsby site to AWS S3 - 3
by Nabendu Biswas / June 16th, 2020
#AWS #devops #gatsby
Series: Thewebdev-fixes
Welcome to part-3 of the series. We will start with creating an iam account before moving forward, as that is what is recommended by AWS. I will be following along with this article from AWS.
First, click on your name and then My Account in aws console.
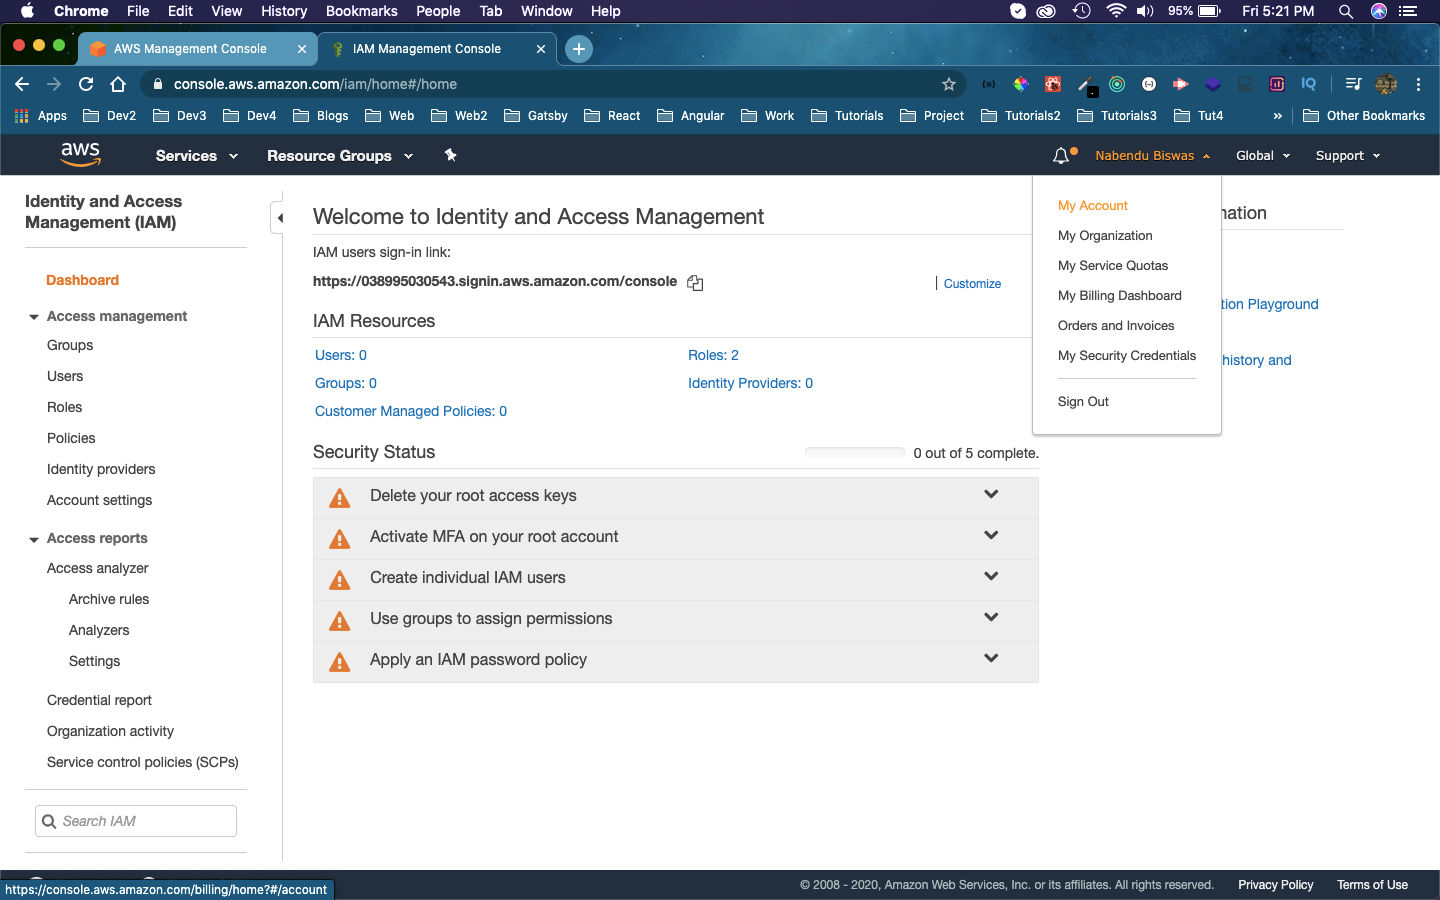 AWS console
After that scroll a bit down and you will find IAM User and Role Access to Billing Information section. Click on the Edit link here.
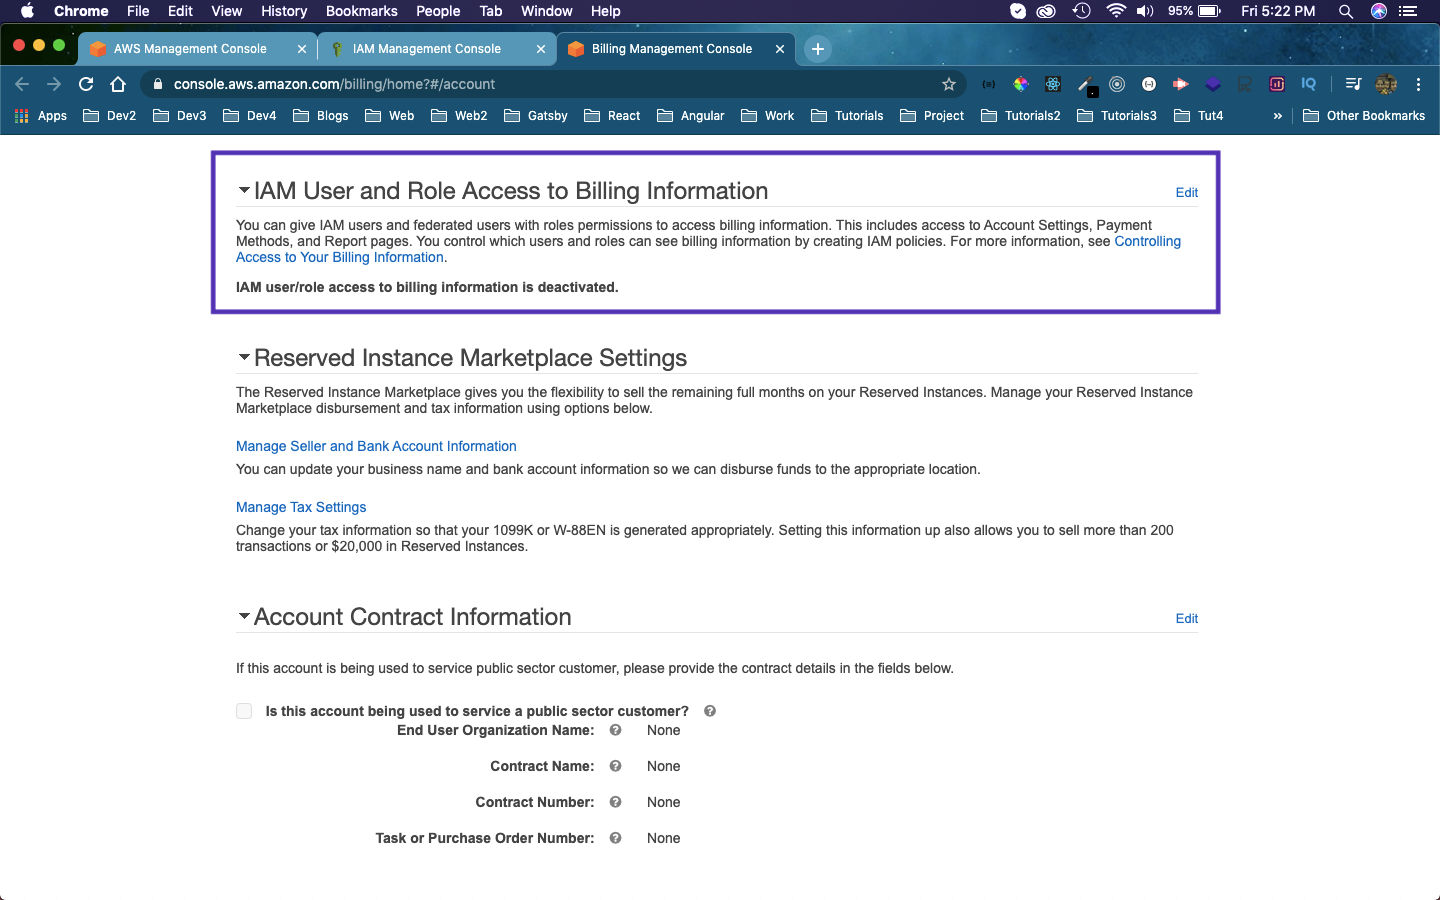 IAM
IAM
Then a checkbox with Activate IAM Access will come. Tick the checkbox and click on Update button.
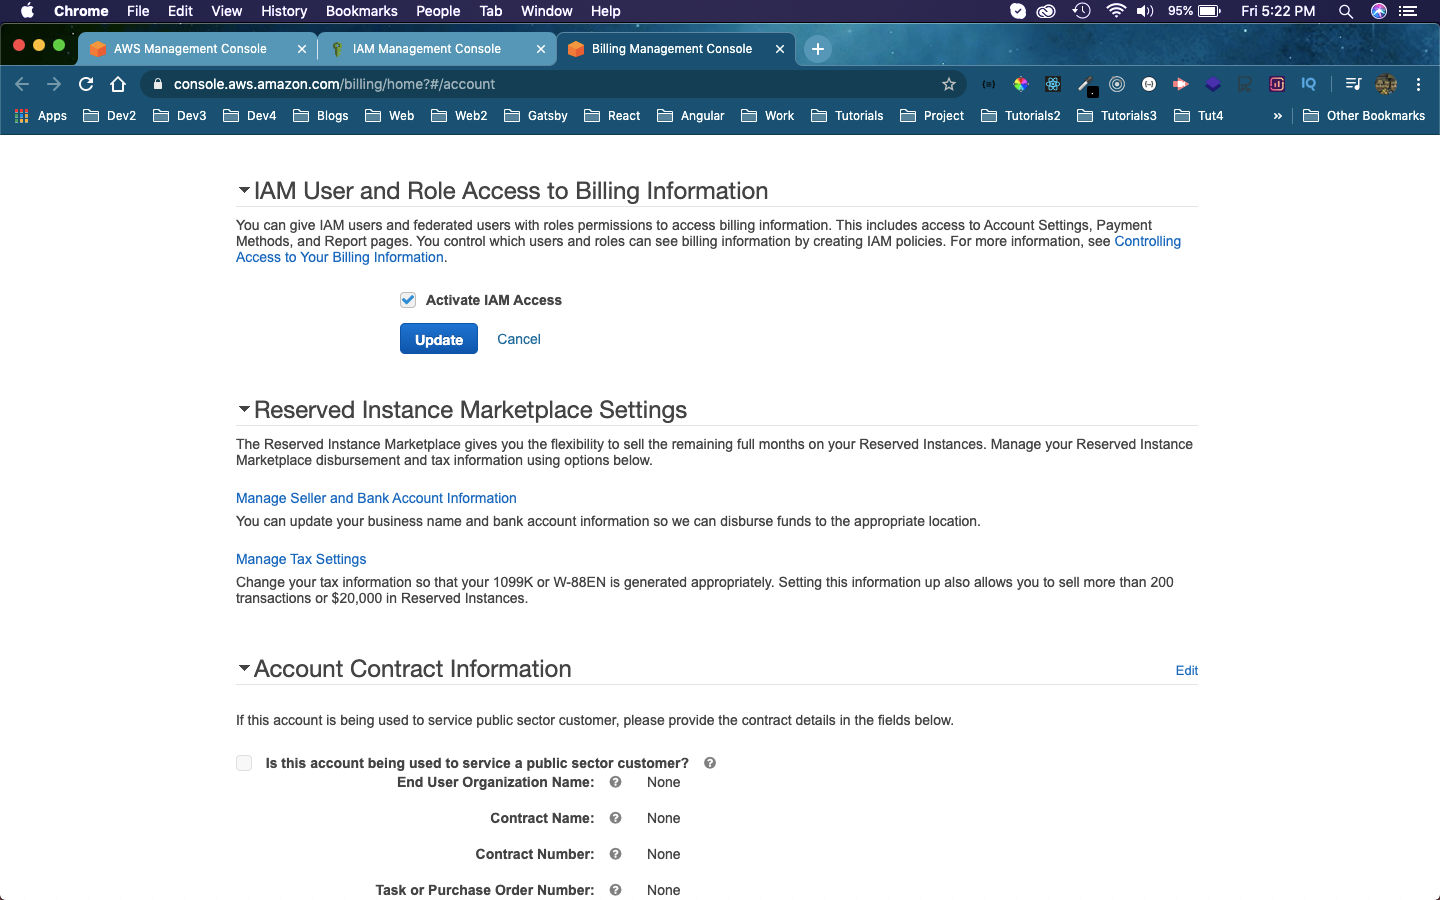 Activate
After that click on IAM in the left menu, to go back to the IAM dashboard.
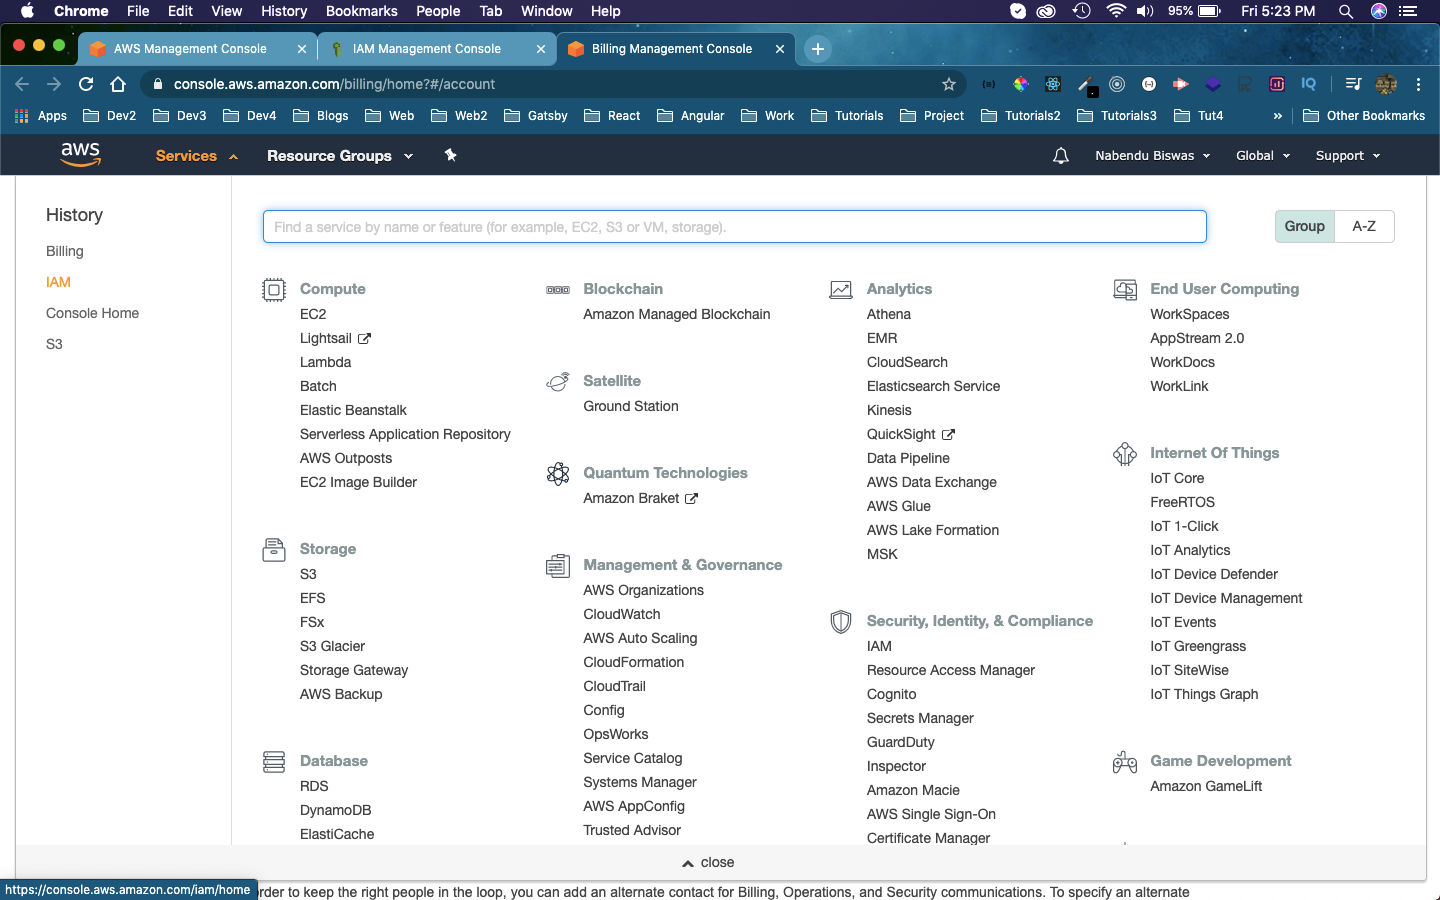 IAM Dashboard
Then, in the dashboard click on the Users.
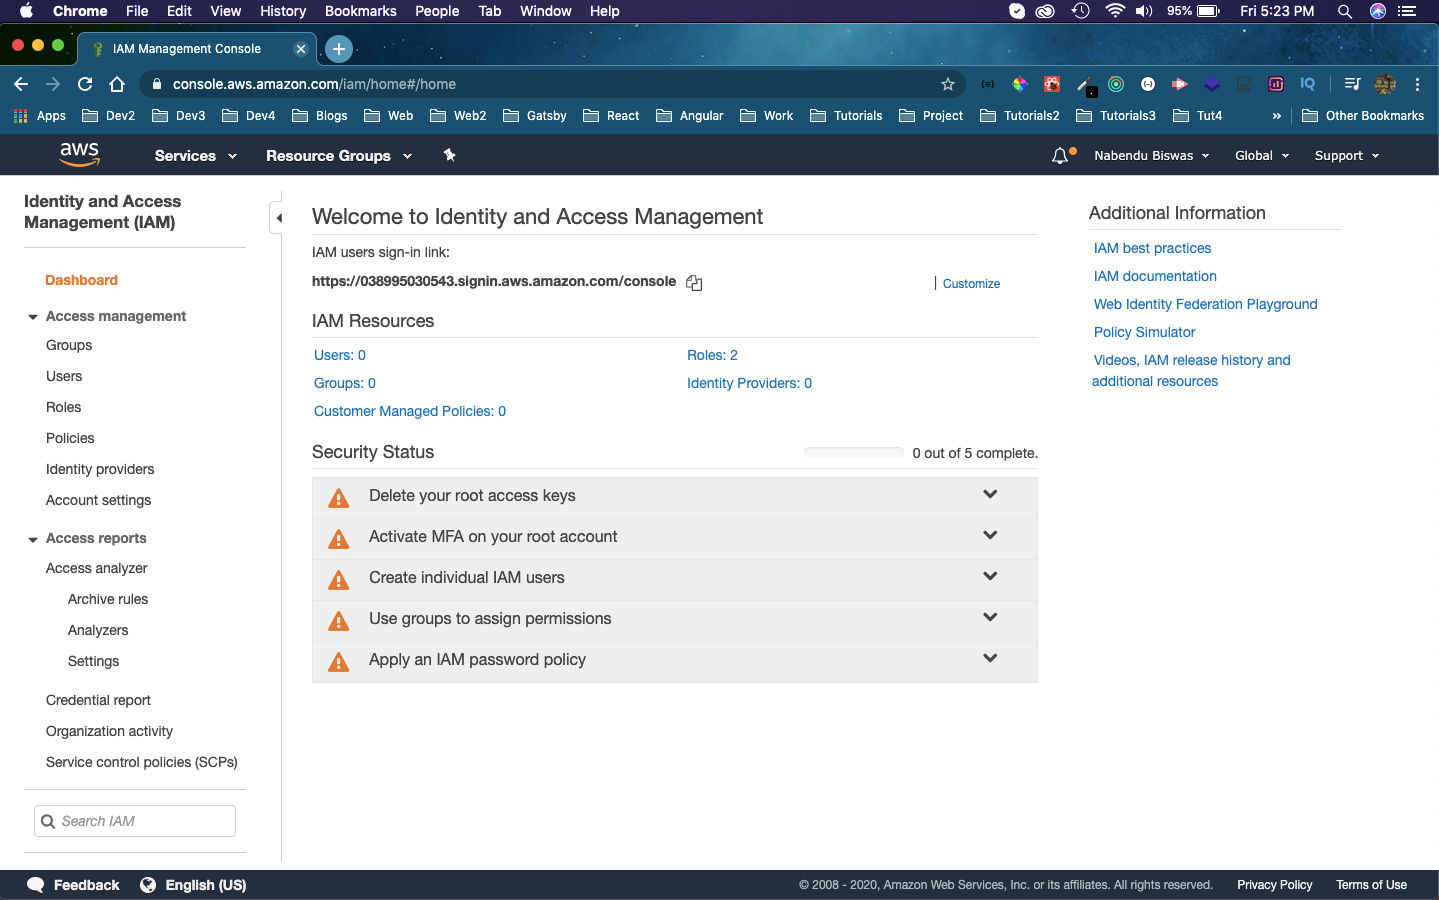 Users
Users
Here, we will have no users. So, click on Add user button.
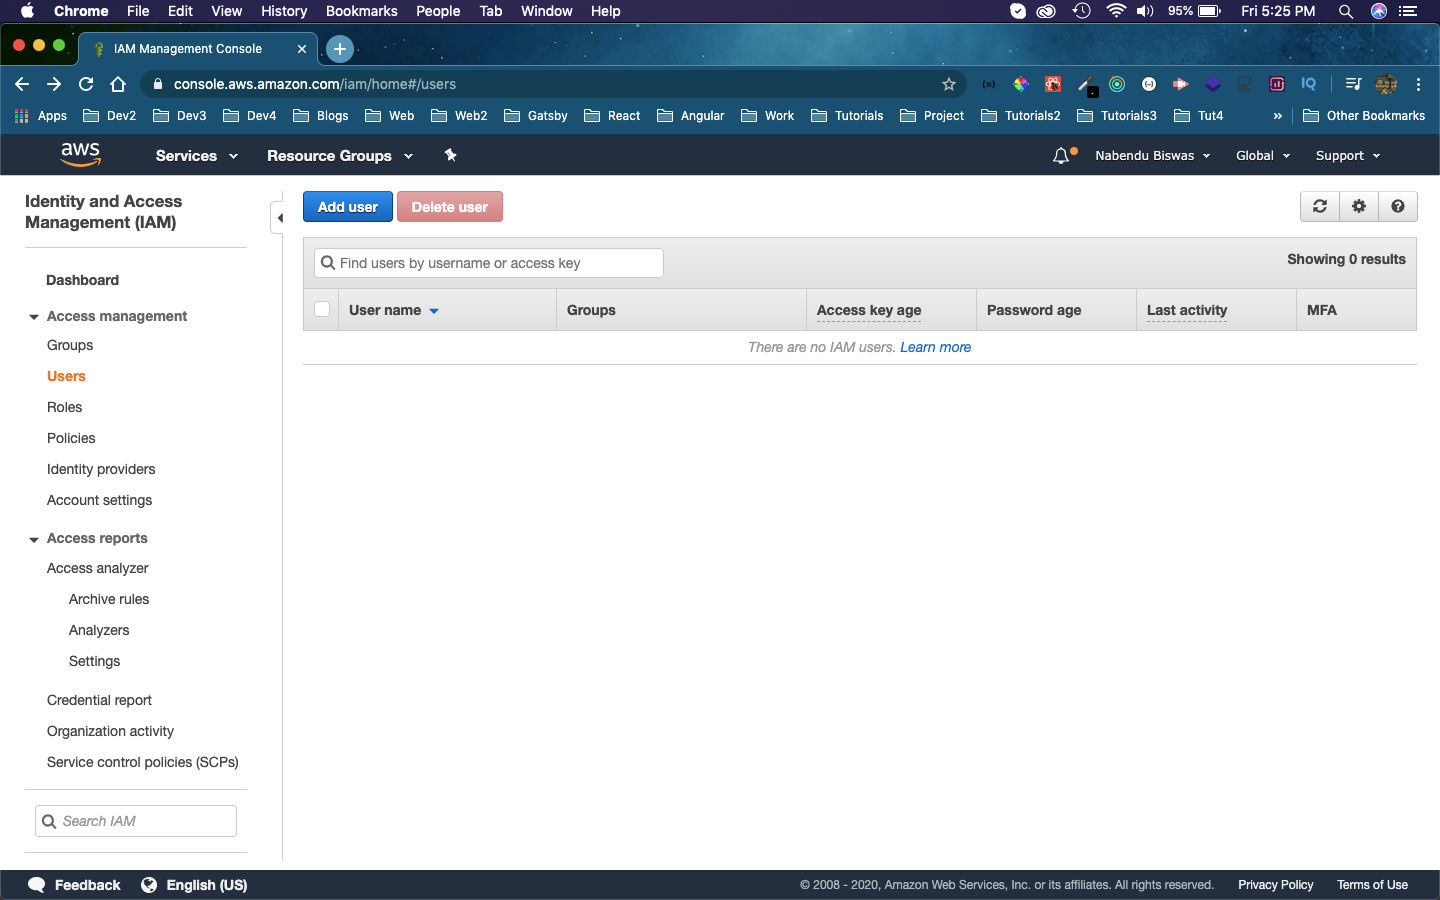 Add User
Then give the User name as Administrator and click on the checkbox next to AWS Management Console access checkbox. The other two marked things are as per your choice. After that click on Next: Permissions button.
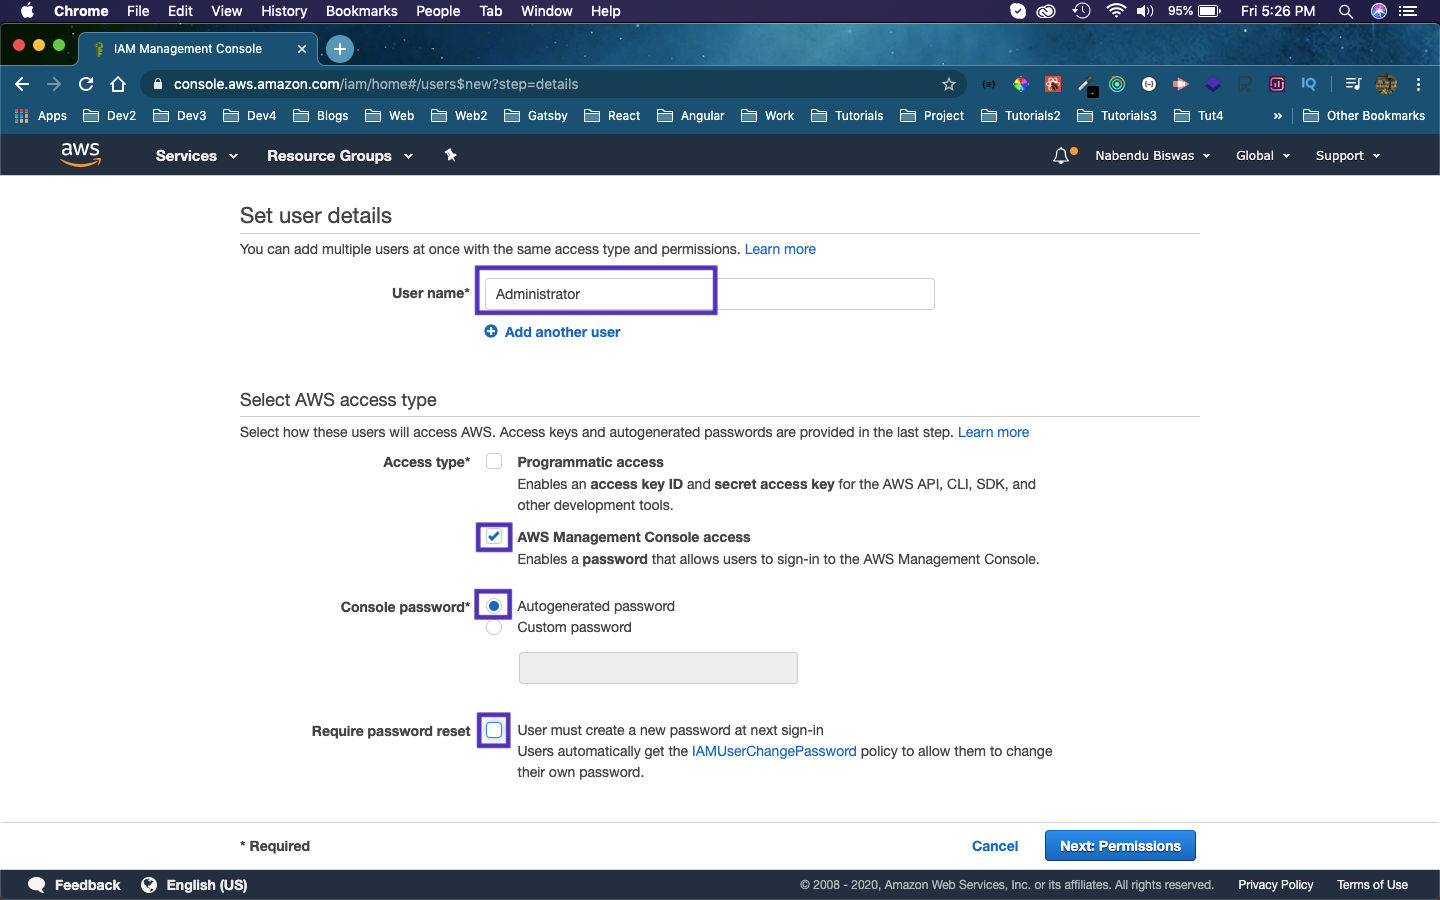 Administrator
Next, click on Add user to group and then the Create group button.
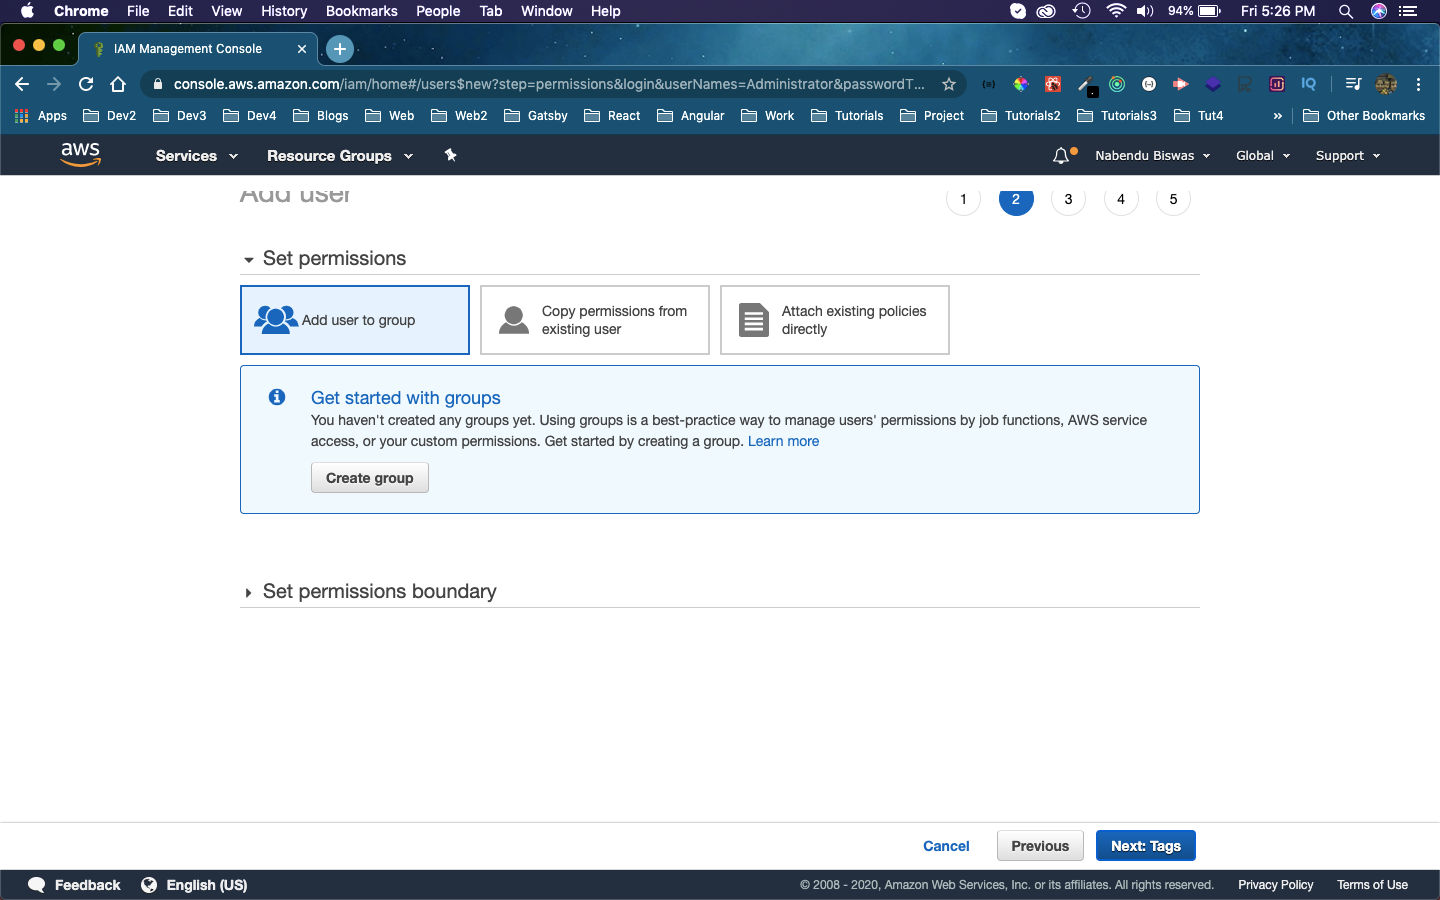 Create group
Now, a pop-up will come. Enter Administrators in the Group name and also click on the checkbox, next to AdministratorAccess. After that click on Create group button.
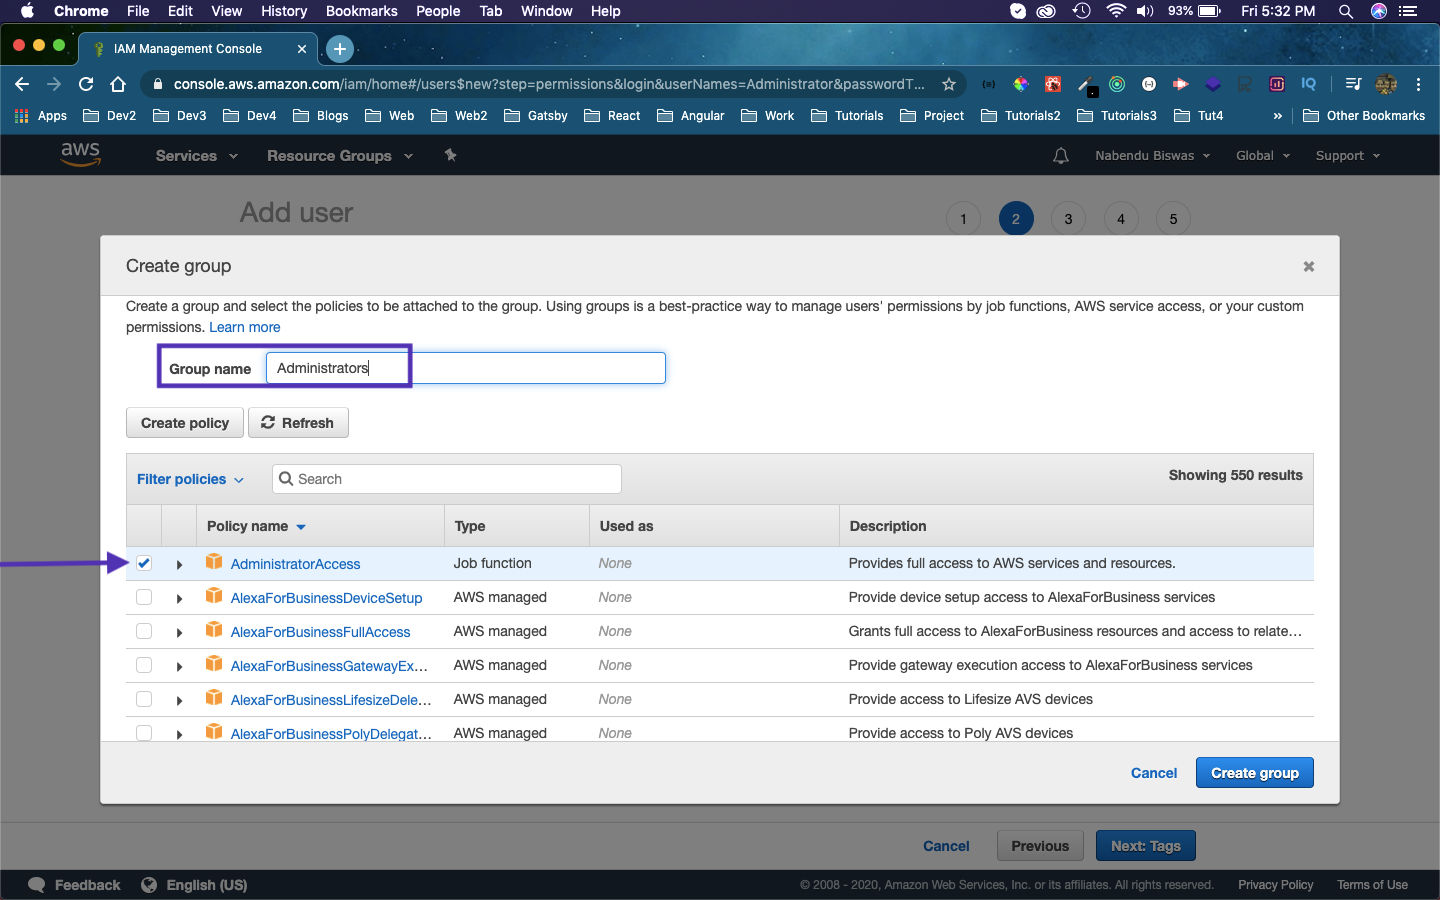 Administrator
Now, we will be taken back to the earlier page which now have, an entry for Administrators. Click on the Next: Tags button on the bottom right of the page.
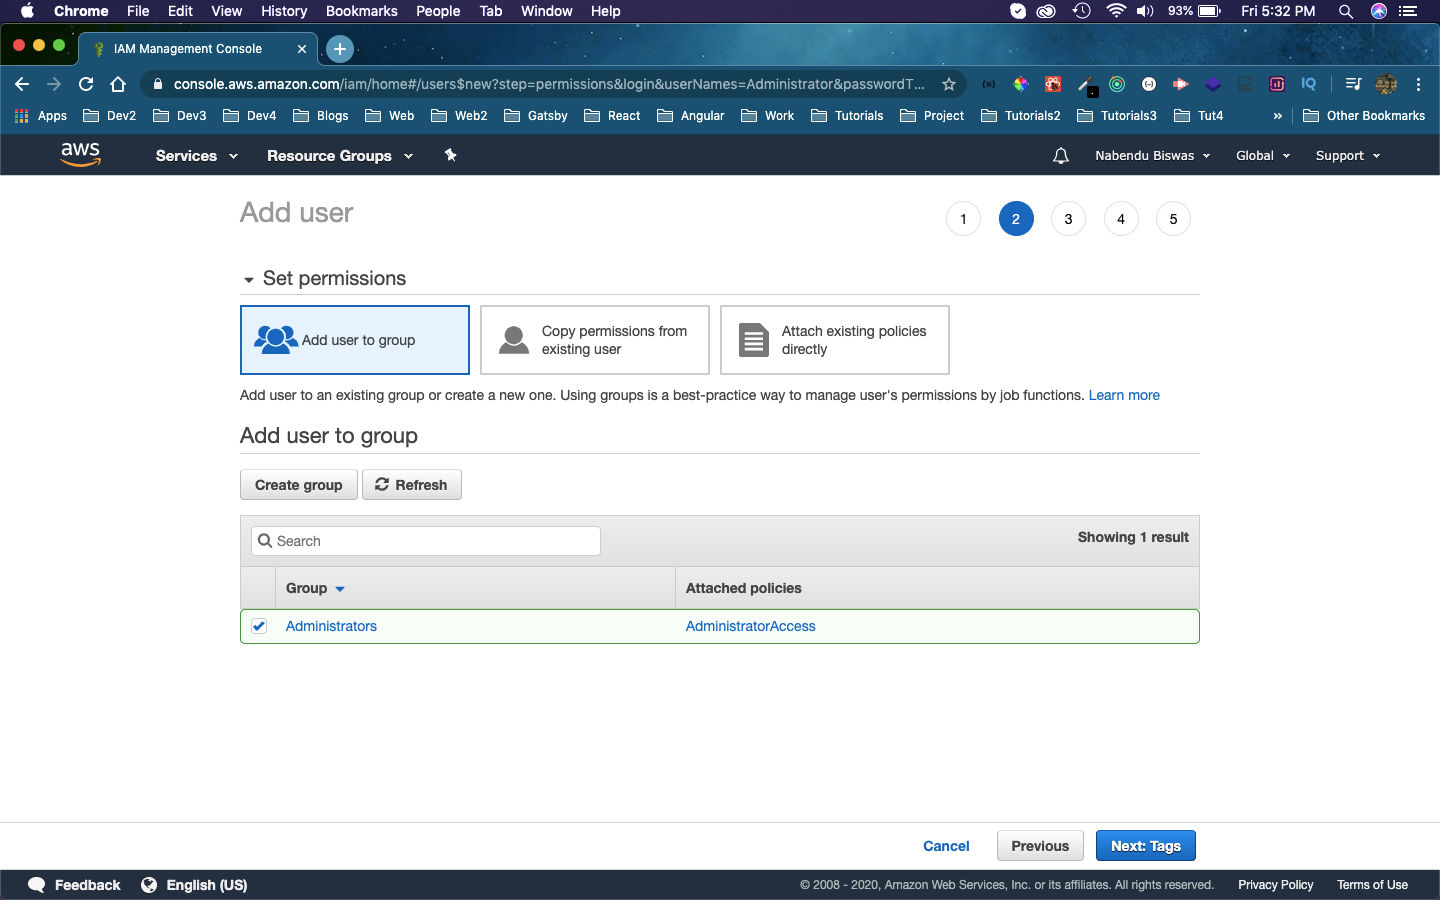 Next
Next
In the next page, enter some tags and click on Next: Review button.
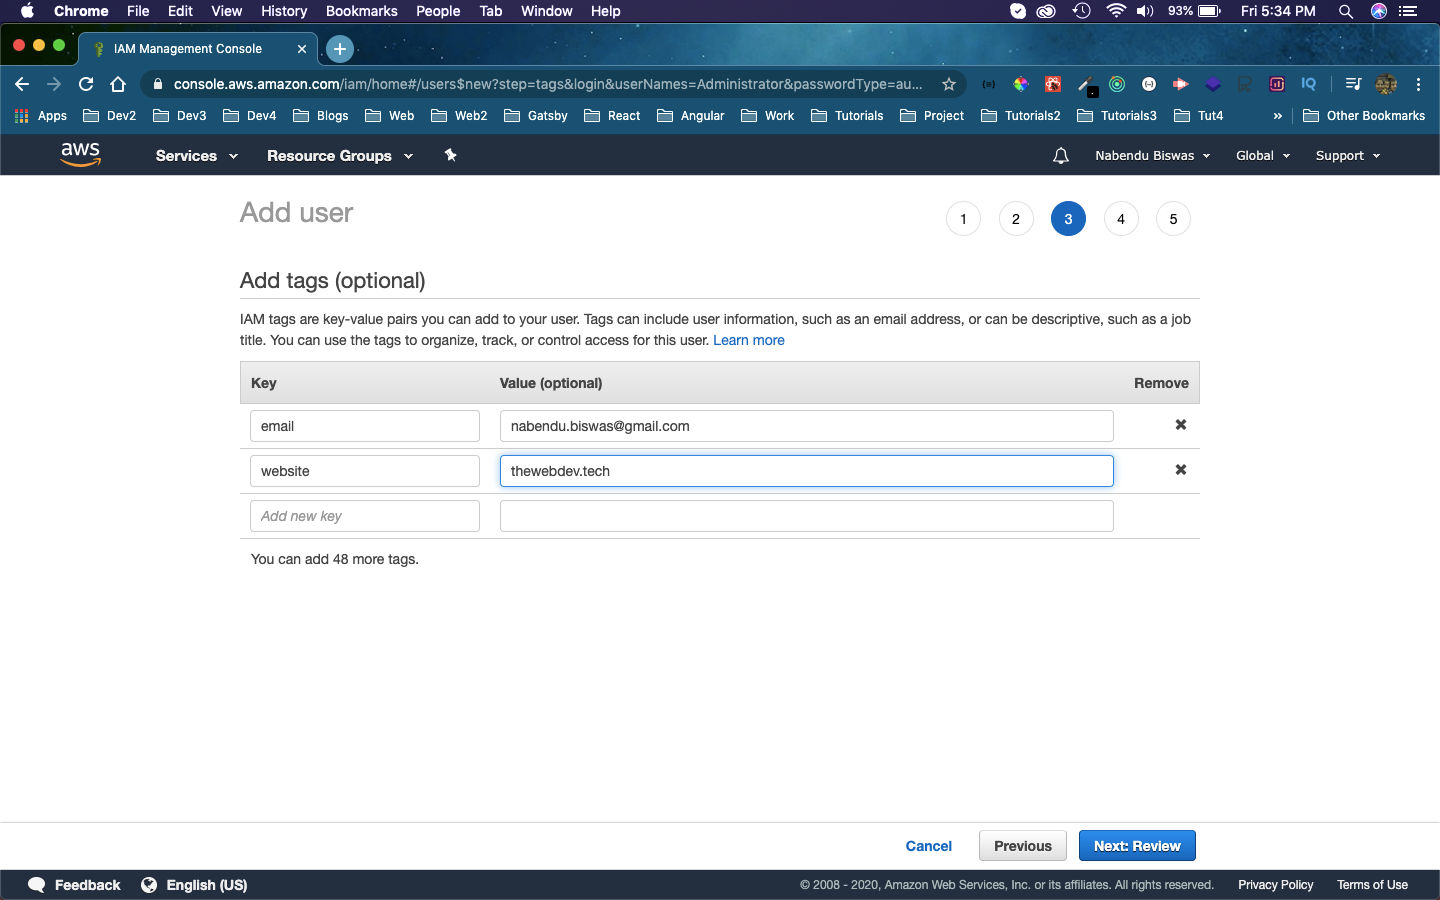 Tags
Tags
In the Review page, once review everything is right and then click on Create user button.
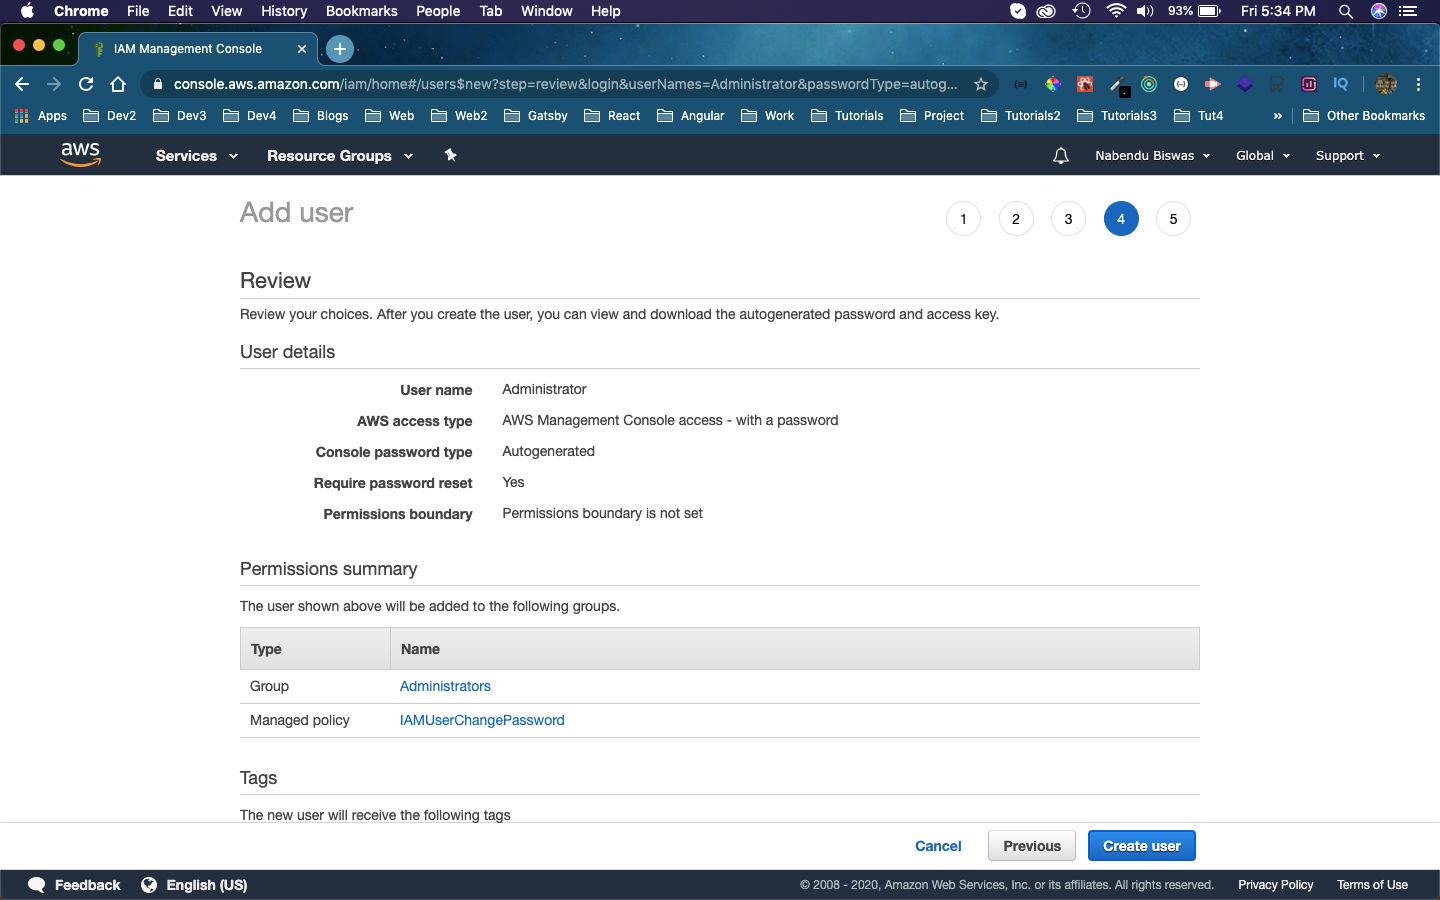 Create user
Now our IAM user with administrator access is created. Here, we can get the password and also send ourself a mail with instructions.
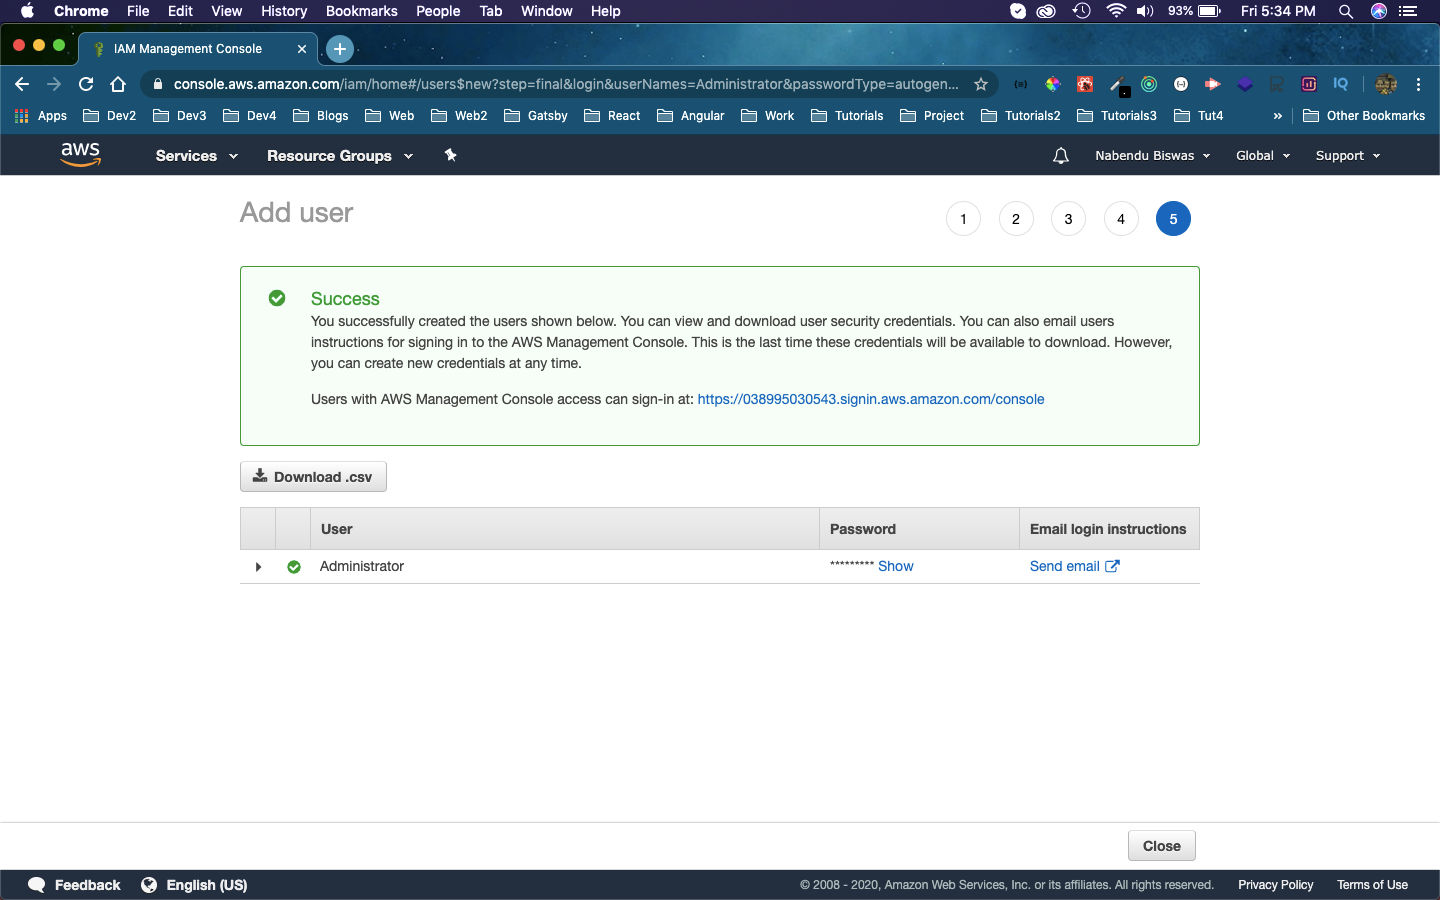 Admin
Admin
This completes part-3 of the series. See you soon.