Build a Tip Calculator app in Flutter
by Nabendu Biswas / April 6th, 2021
#flutter #beginners #dart
Series: Flutter
In this blog we will continue our flutter journey and create an awesome and simple Tip calculator app.
So, open up a terminal and create a new flutter app using the below command.
flutter create tip_calculator
After that cd into the folder and open the code in VSCode. I have also connected my physical device to my computer via USB.
On running the app from Run ->Start without debugging , i will get the basic app running on my phone.
As with the previous app, we will remove everything in in the main.dart file, except the void main() part. Then type stful and press Enter and write MyApp where the cursor points.
After that we will put the a MaterialApp and a Scaffold to get the basic structure. Inside the Scaffold, we have a Appbar and a body containing a column, which contains a Text.
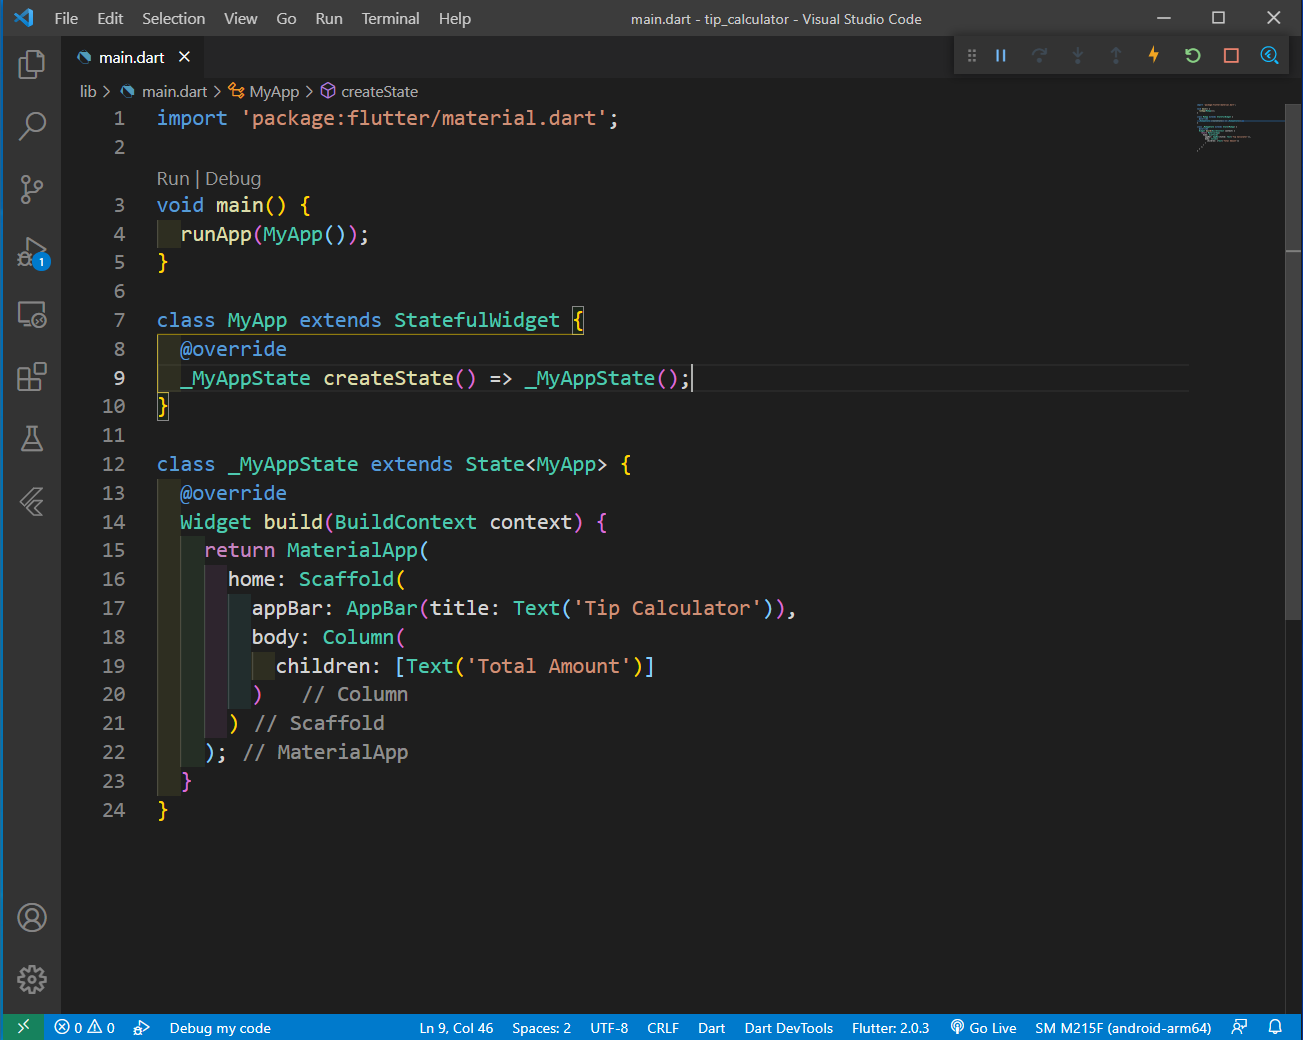 main.dart
Now, we will wrap the Column with a Center, using the same yellow bulb technique we learned in the previous blog. Also, we are giving the mainAxisAlignment as center.
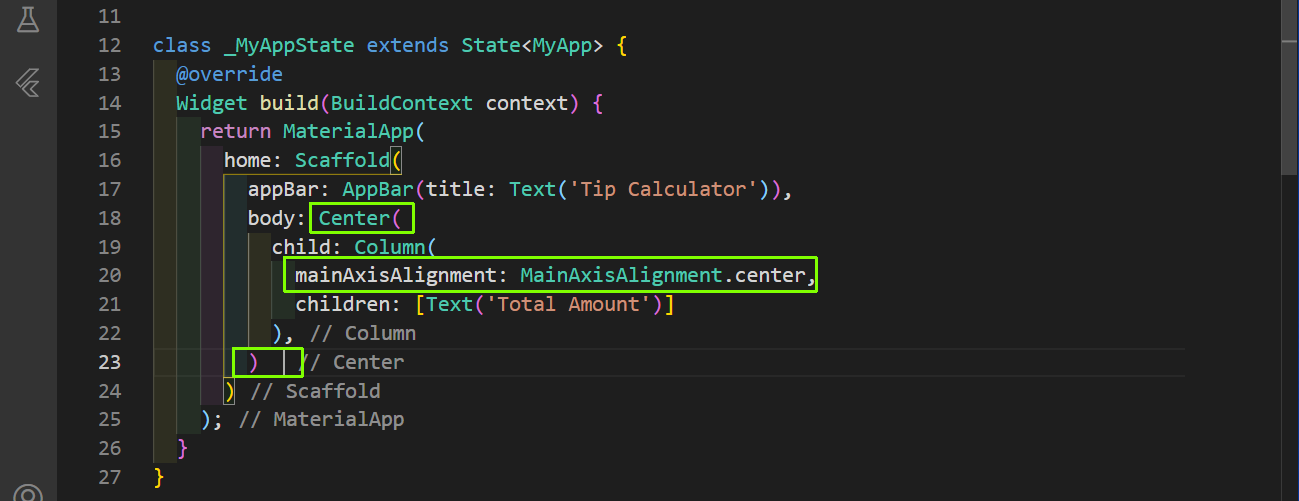 Centering
Now, after adding some styles to the Text, we will create a TextField to take the user input. We are also adding a TextEditingController to it. Also, having the TextAlign and a placeholder. We are also specifying the keyboard to be of number type.
We are wrapping it all in SizedBox with width, so that it doesn’t extends whole line.
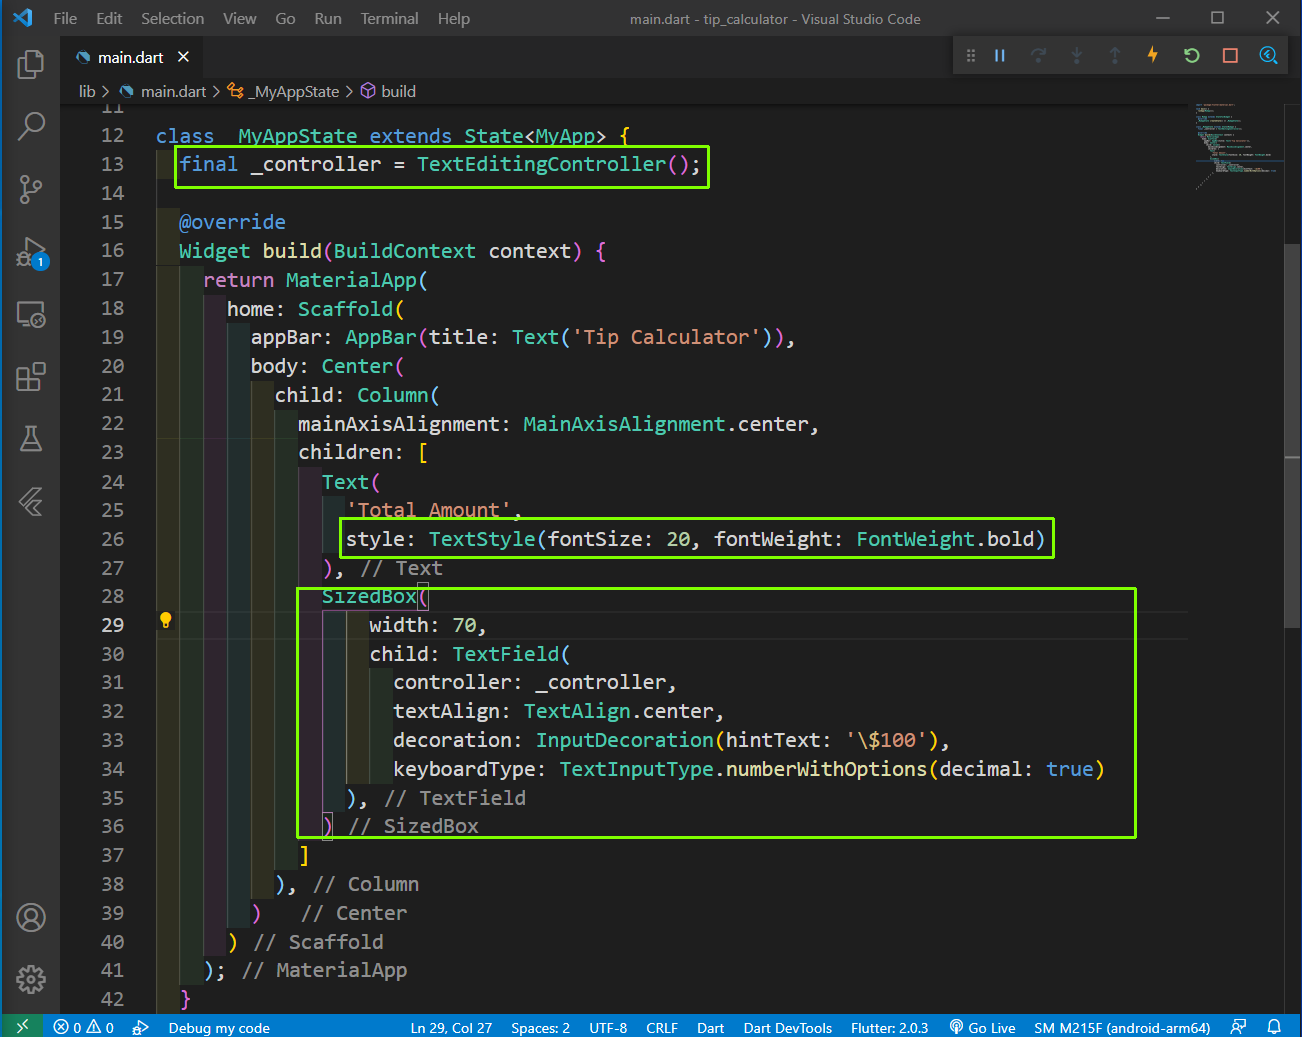 TextField
Our app with the keyboard looks like below.
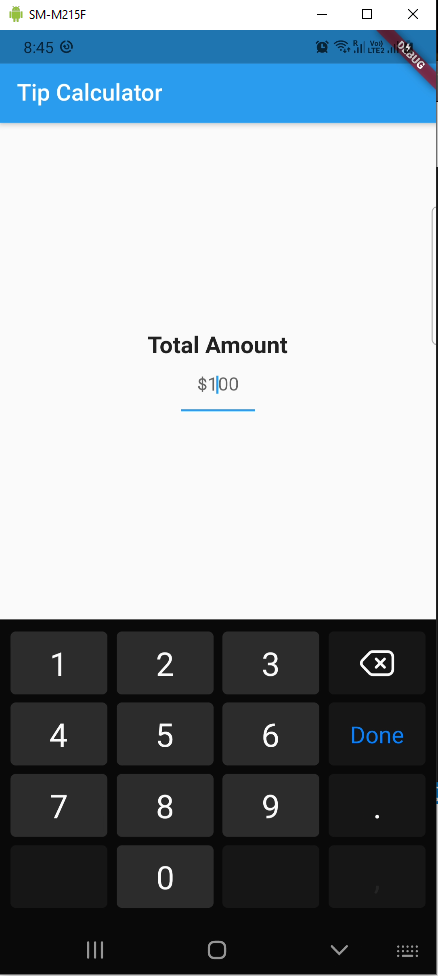 Keyboard
Next, we will add a ToggleButtons widget to our children, which will contain three text of 10%, 15% and 20%. Also, notice that it expects an isSelected item, which is a boolean of List with the first one been true(or selected).
Also, we have used the SizedBox with height of 20, to give some margin between components.
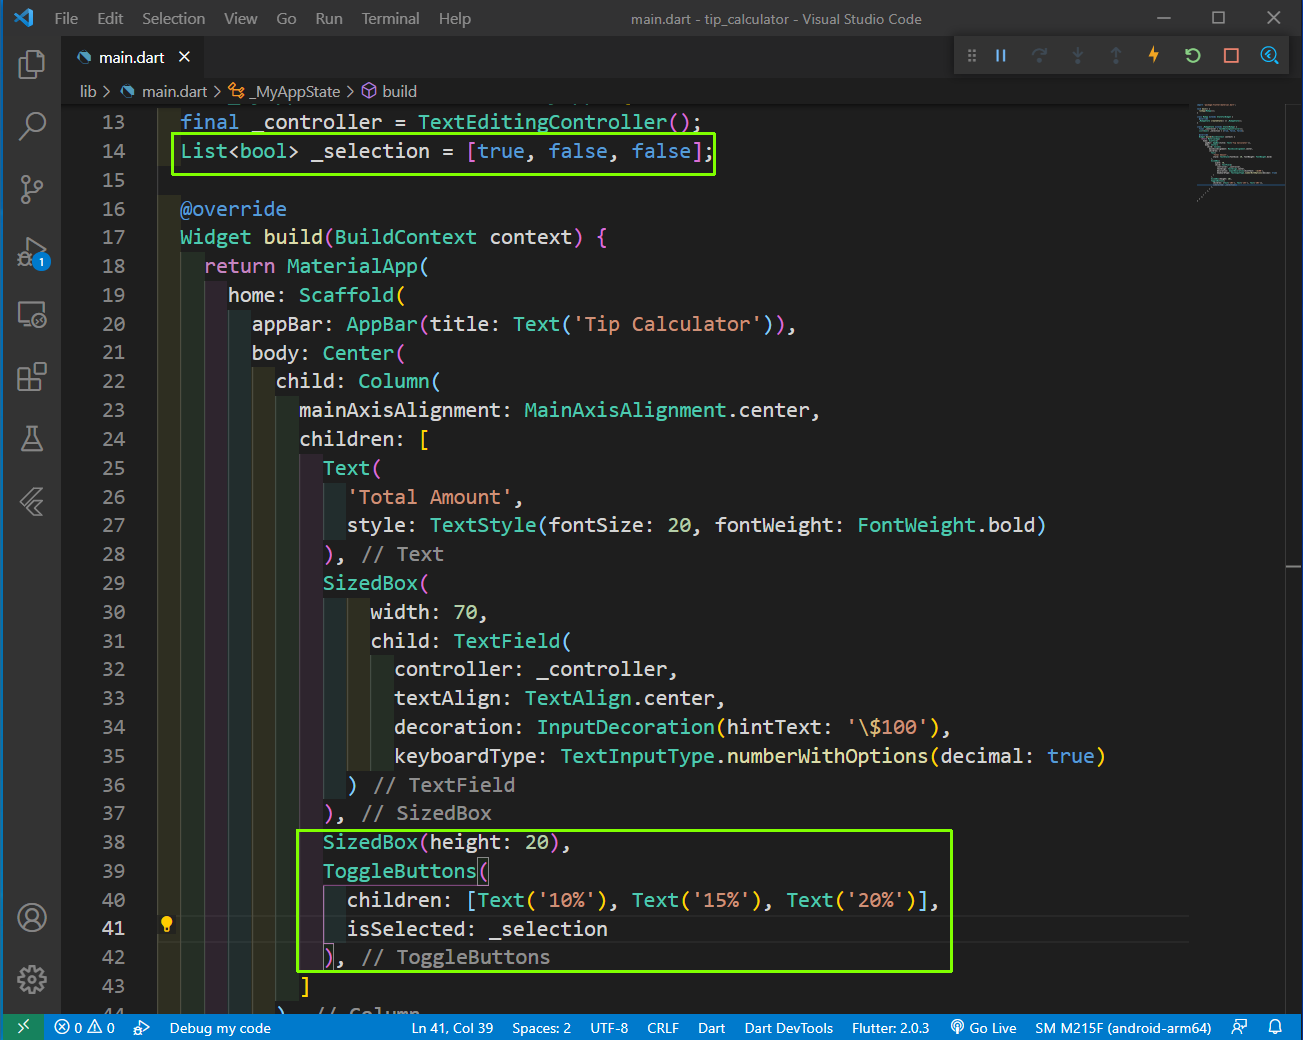 ToggleButtons
Next, we will create the onPressed logic for ToggleButtons. We are adding an onPressed handler and calling the function updateSelection from it.
Now inside the function updateSelection, we are getting the selectedIndex which is passed when we press any of the three button.
Suppose, we pressed 15% button then selectedIndex will be 1. Inside the for loop, we are looping through the _selection list which currently is [true, false, false]
Now, in the first iteration of the loop, the statement _selection[i] = selectedIndex == i; will execute as below.
    _selection[0] = 1 == 0;
    _selection[0] = false;
The next iteration will be.
    _selection[1] = 1 == 1;
    _selection[1] = true;
The last iteration will be.
    _selection[2] = 2== 1;
    _selection[2] = false;
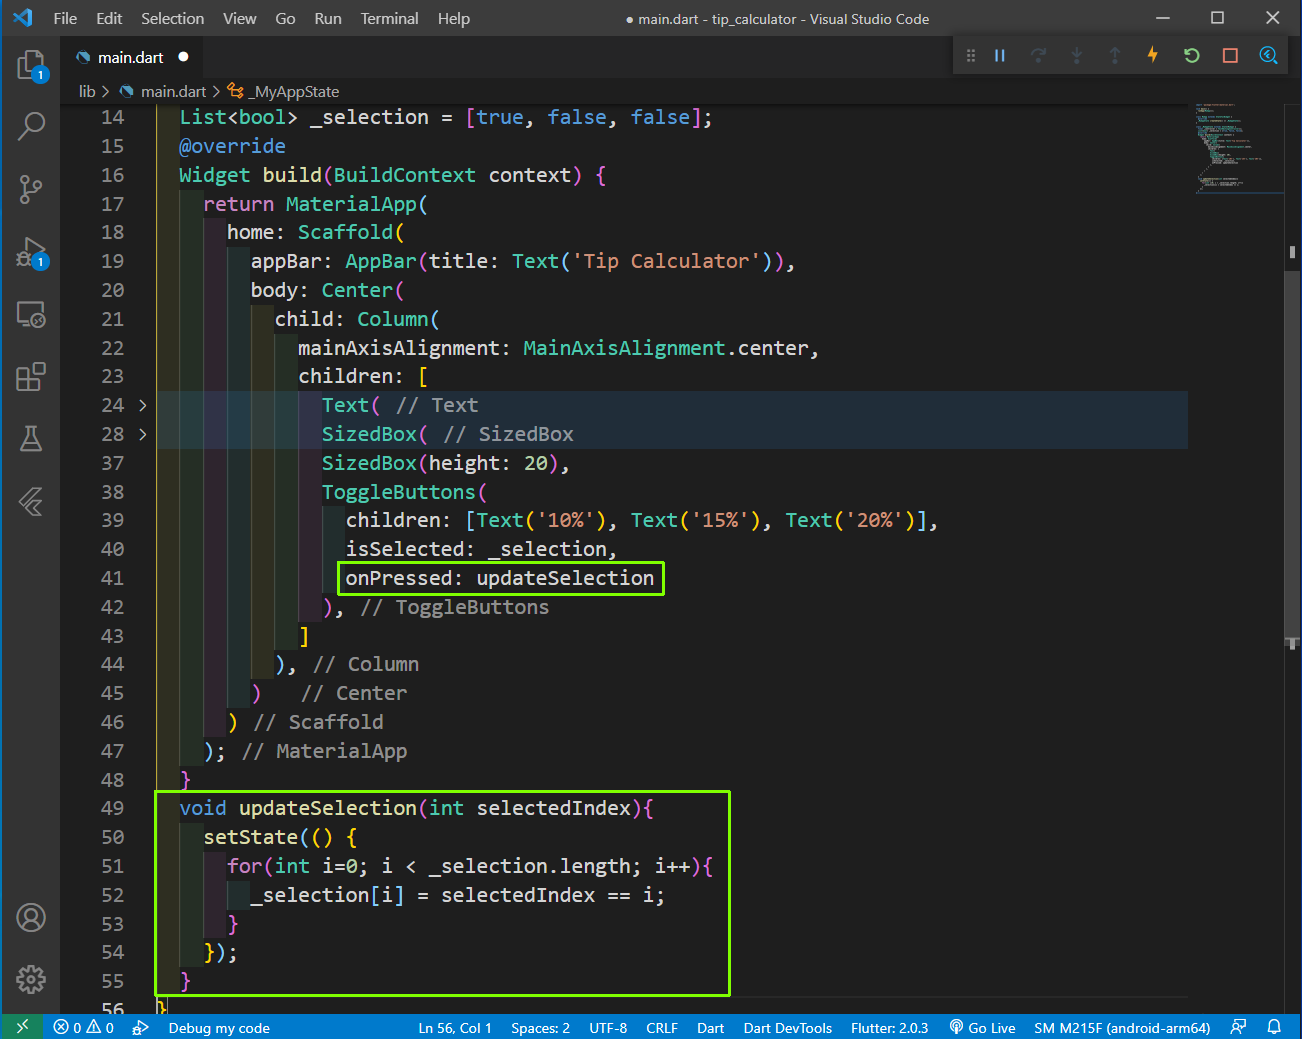 updateSelection
So, our new _selection List will be [false, true,false] and our selection will be highlighted as below.
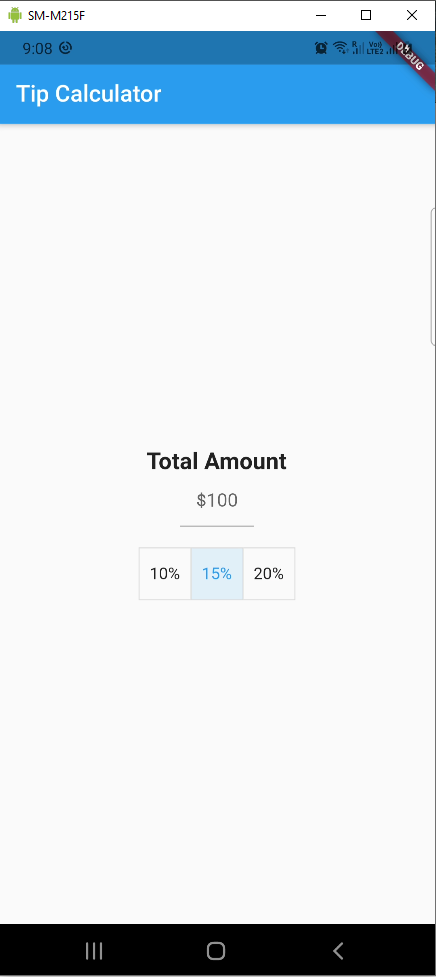 App
App
Next, we will create the TextButton to calculate the tip. Again we are giving some margin between components using SizedBox.
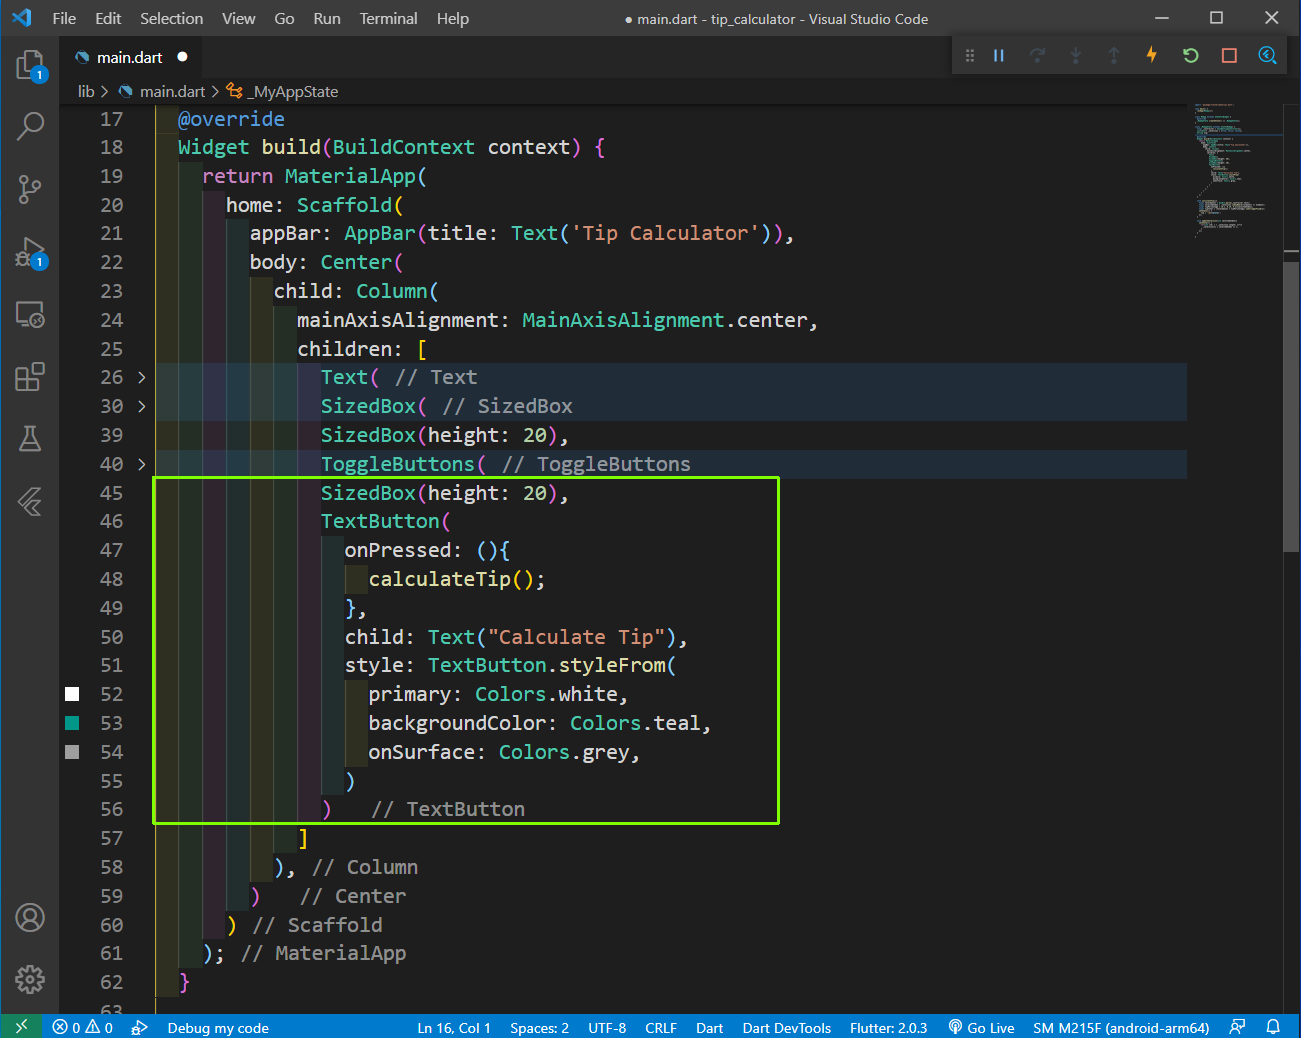 TextButton
Now, we will create our calculateTip function. Here, we are first getting the totalAmount, which is from the TextField.
After that we are getting the selectedIndex from the complicated piece of boiler code at Line 66. So, suppose we pressed 15% button, we will get 1 as selectedIndex.
We are using the to get the tipPercentage which is 0.15 in our case. Next, we are calculating the tipTotal using simple mathematics.
After that we are setting the tip as $tipTotal.
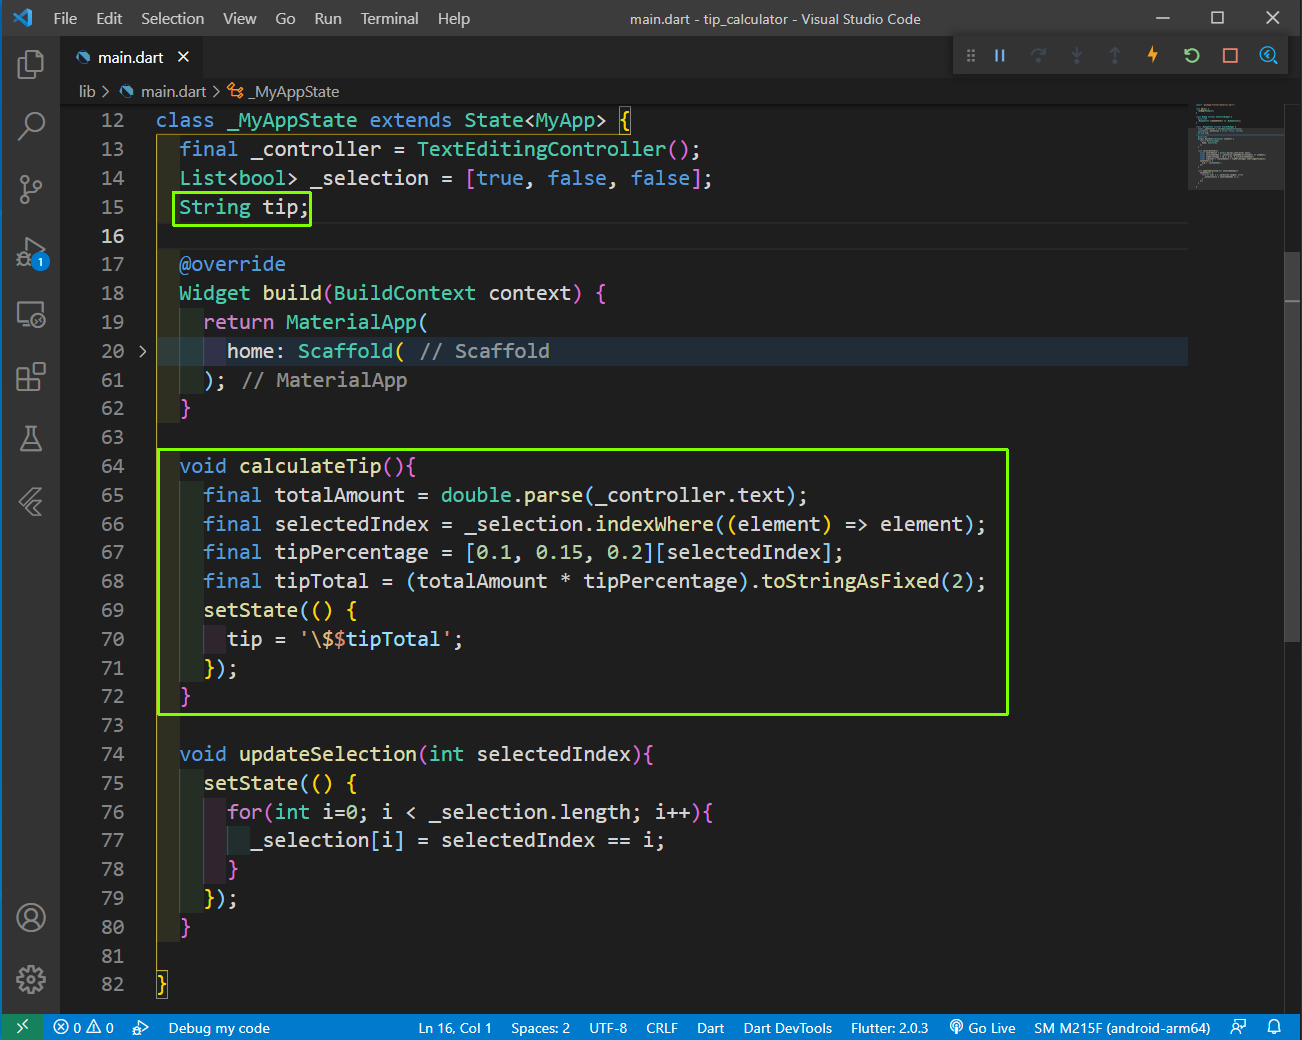 calculateTip
Now, the last part is to have the the tip displayed in our app. But, again we need to have it with if statement, so that we take care of the null case.
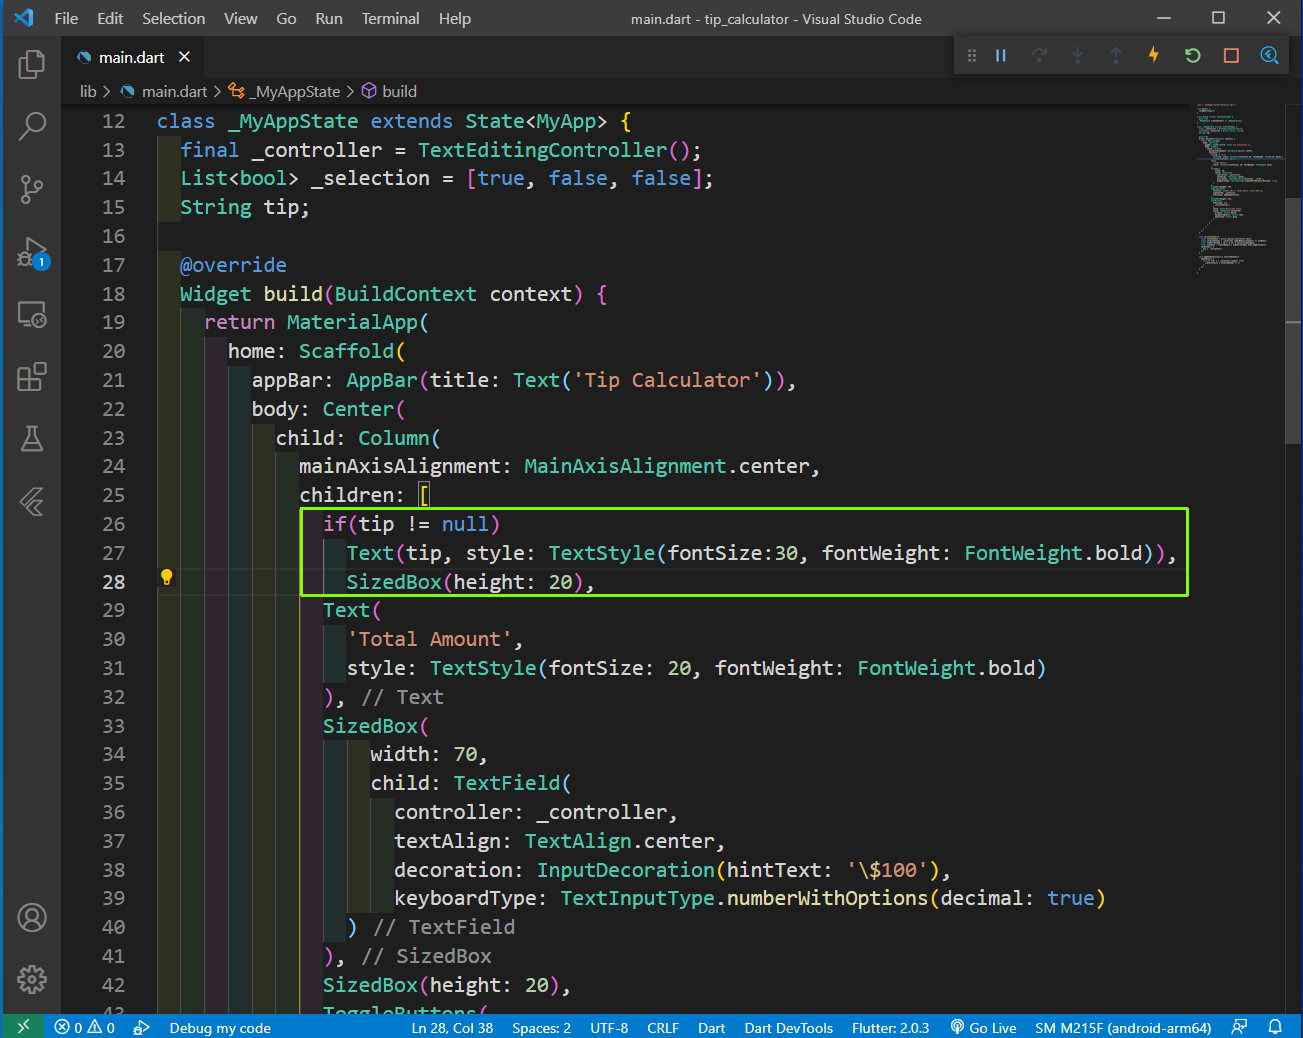 tip
tip
Now, our app is working perfectly and calculating the tip.
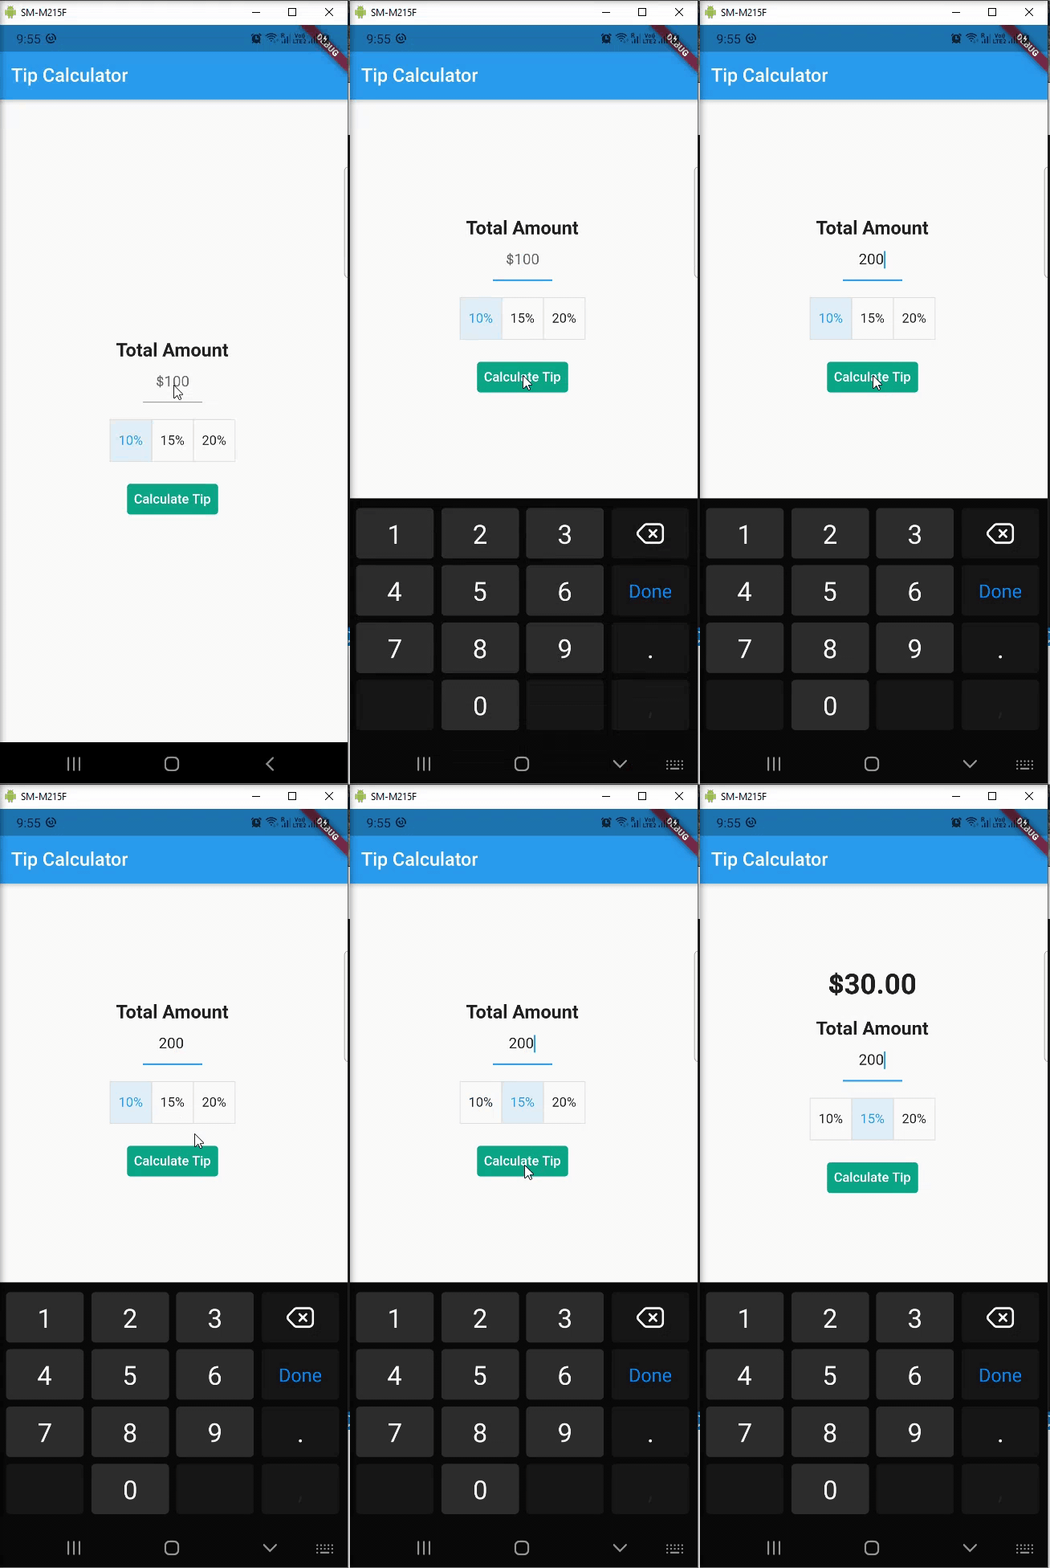 Tip
Tip
The code for the same can be found in this github repo.