React Redux Tutorial | Create Youtube Player -1
by Nabendu Biswas / June 24th, 2020
#react #javascript #redux
Series: Youtube-Player-React
My first blog was a react tutorial to create a YouTube player. After 2.5 years and 240 blogs, i decided to revisit it. I had started my YouTube journey by creating videos from it. Below is the playlist for the same.
This is a very simple app and can be done with plain React only, but i had also converted it into Flux. But as we all know Redux had won that war with Flux and become the top state management framework. As redux is still very popular and used in enterprises a lot, decided to convert the simple app to use Redux.
I will not be explaining much of Redux concepts here. You can learn about the same from my earlier blog post here.
I will be using the old youtube-player project for the same. You can clone or download it from here.
Let’s first do a npm install in the downloaded/cloned project.
 npm install
After that we need to npm install the redux dependencies.
npm install --save react-redux redux redux-thunk
 redux dependencies
The first thing to do in a Redux project is to wrap everything in a Redux Provider. So, open the index.js and change it to wrap the App component with Provider. We are also passing a props store to it, which we are going to create next.
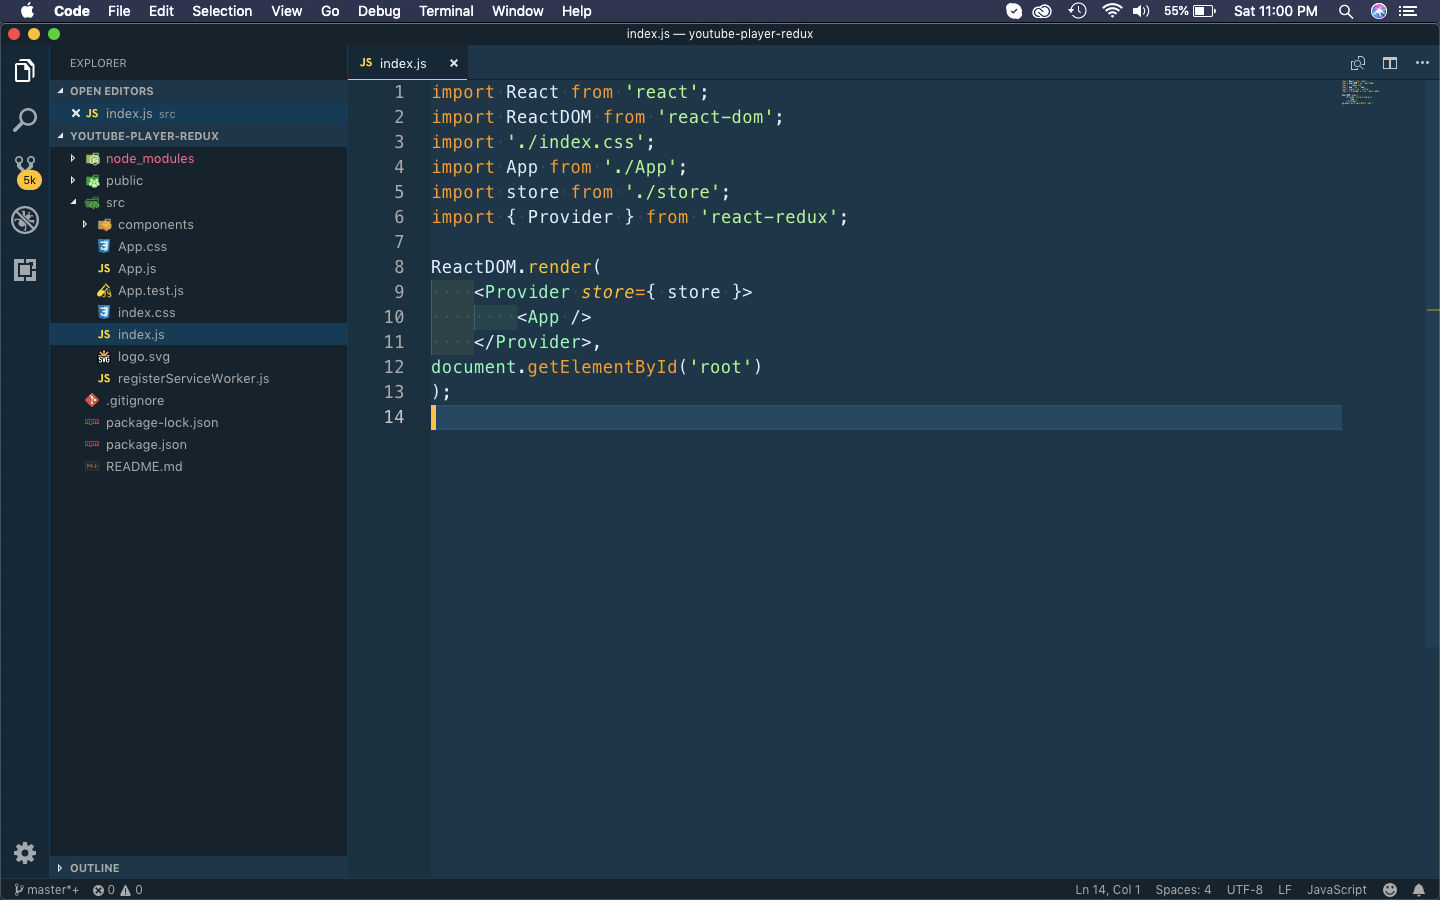 index.js
Create a folder store inside src and a file index.js inside it. Put the below content in it. We are using the middleware thunk here, which is very important when we do a asynchronous call to an API. You can learn more about it here, in Question 58.
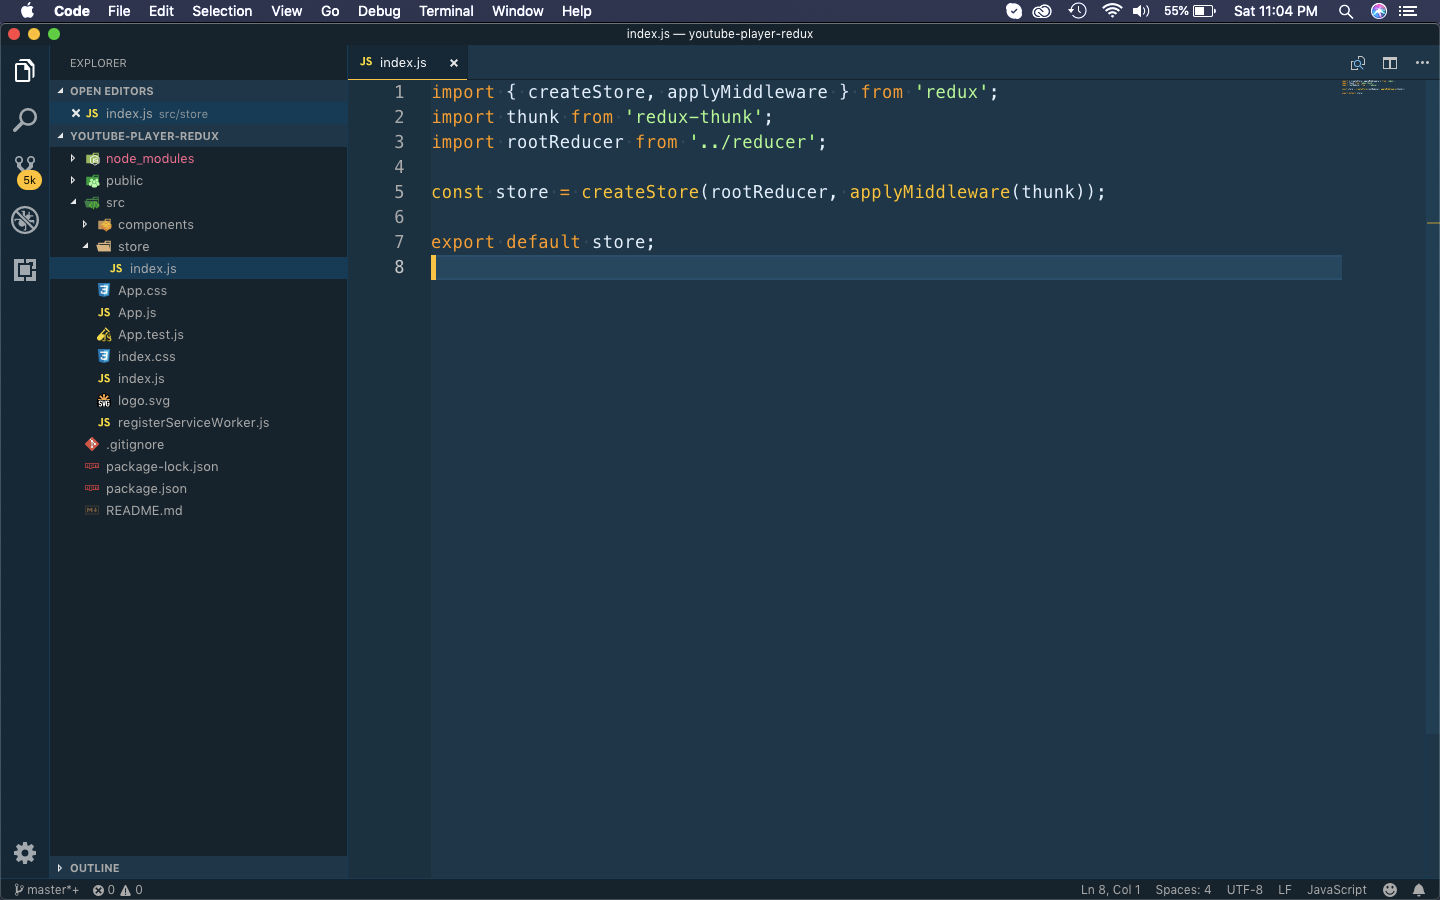 index.js
Next, let’s update our App.js as below. Here, we are only displaying the VideoListItem component. We are using the redux concept of triggering an action creator from this component.
We are calling a function from the constructor and then using mapDispatchToProps to dispatch it. We are using the connect function from react-redux at the end to wrap the App component.
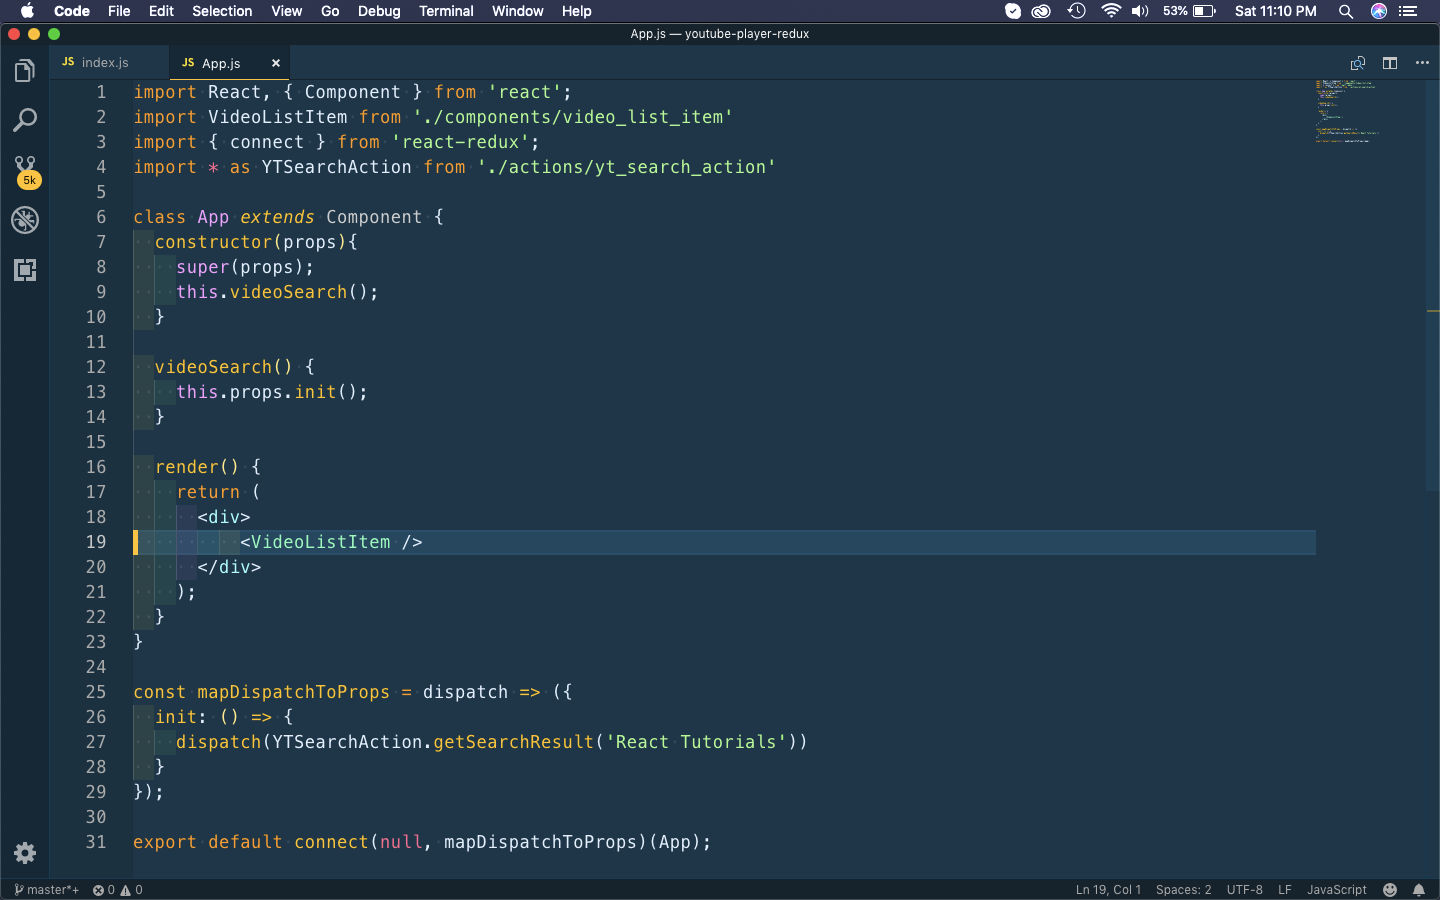 App.js
Now create an actions folder in src directory and a file yt_search_action.js inside it. Here, we are using our familiar YTSearch function, with the API_KEY to call the api. When we are getting the result, we are dispatching it, with a type and payload.
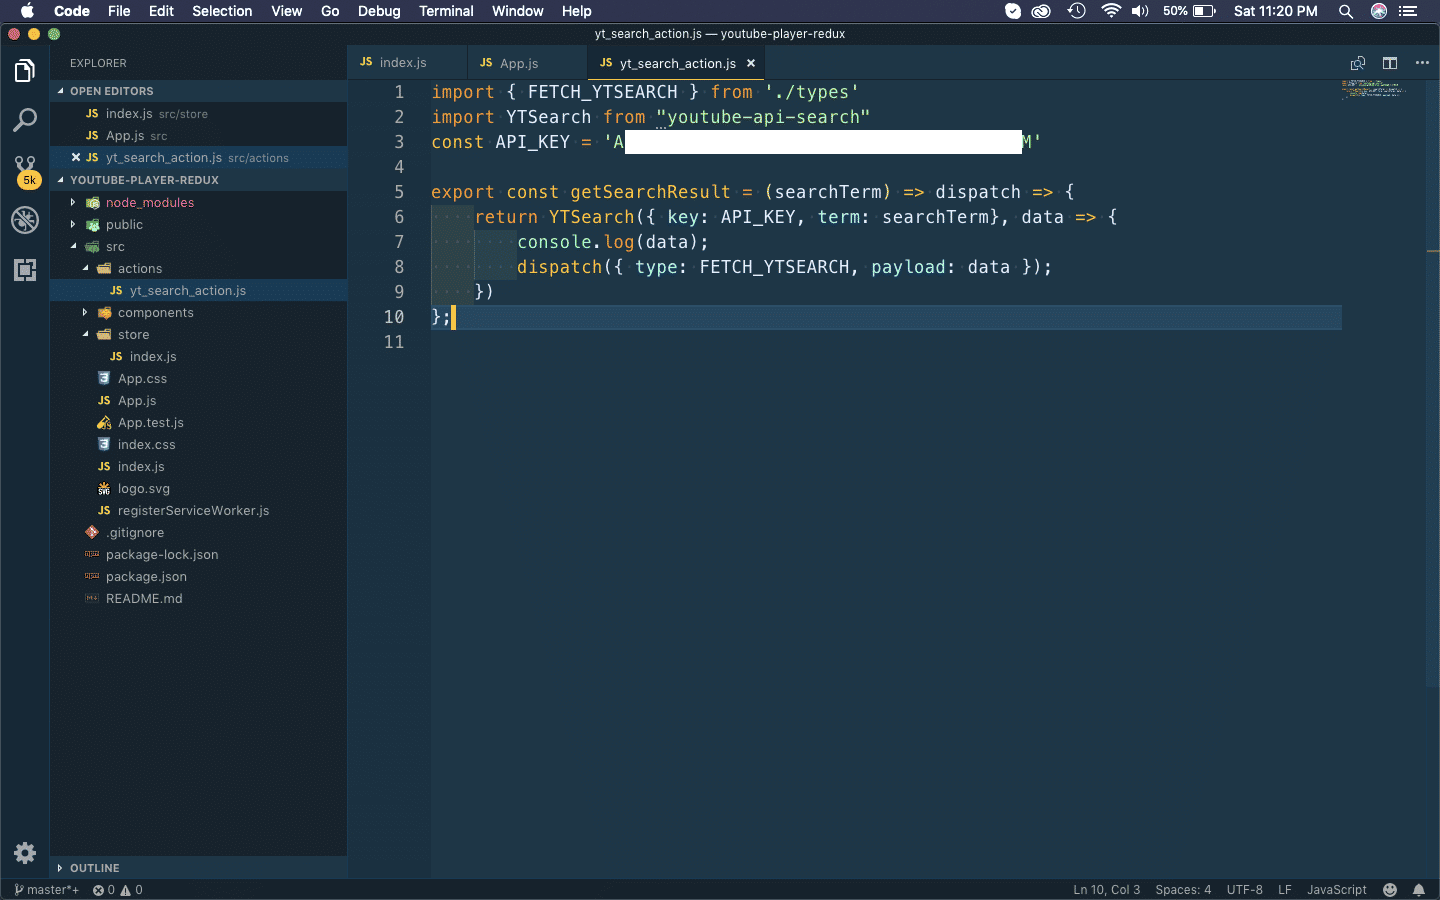 yt_search_action.js
Now, let’s quickly create the types.js file inside the same directory and the below content in it. This file is basically used to keep the constants maintainable.
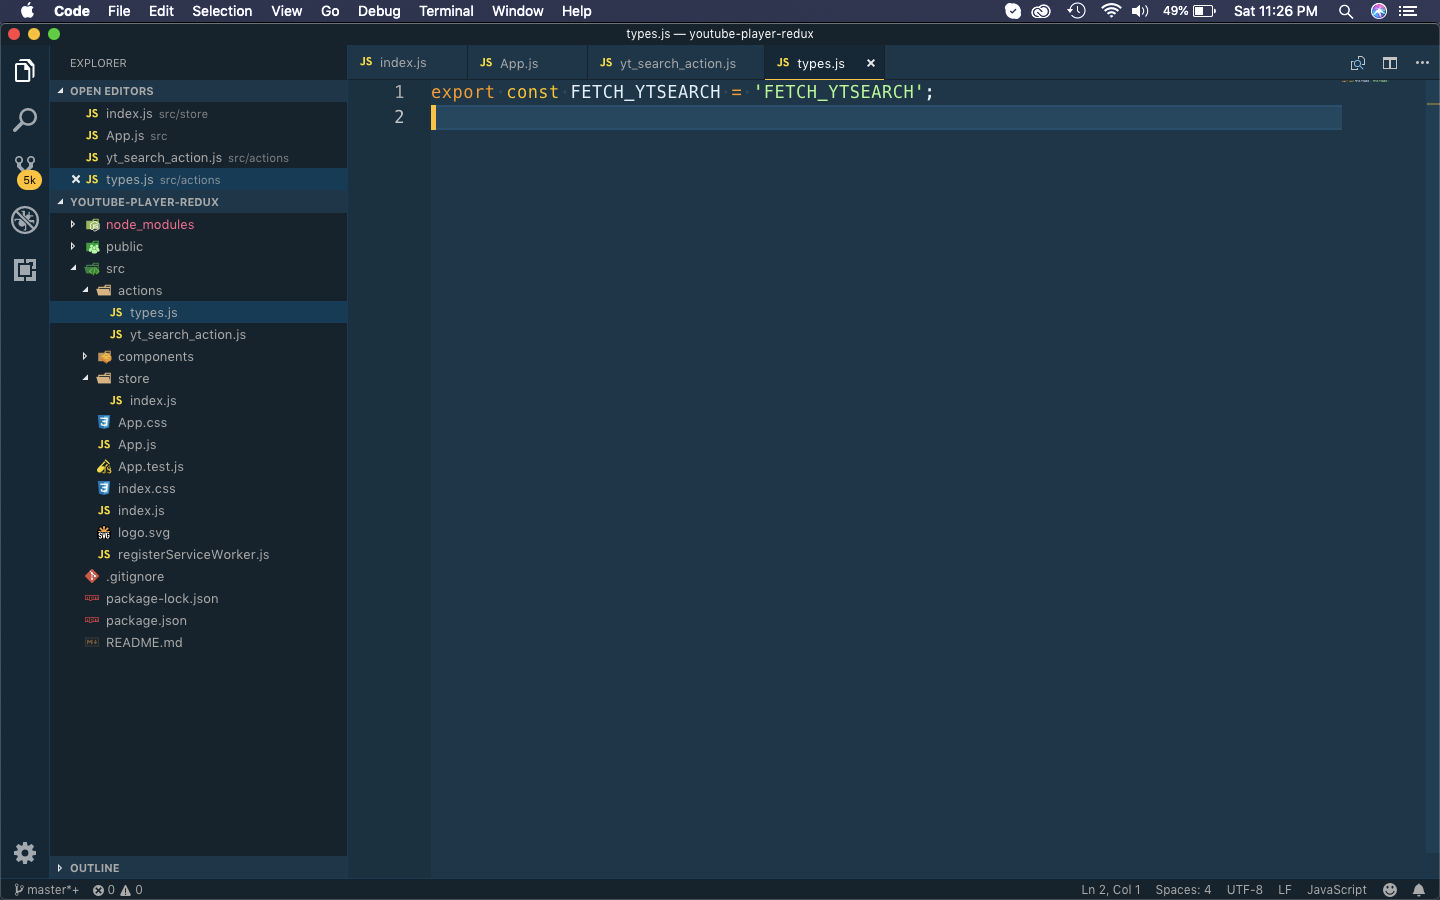 types.js
Now, it’s time to create the reducer. So, create a folder reducer inside the src folder and the file index.js inside it. Here, we are using combineReducers from redux, because in larger projects we can have multiple reducers and we combine them here.
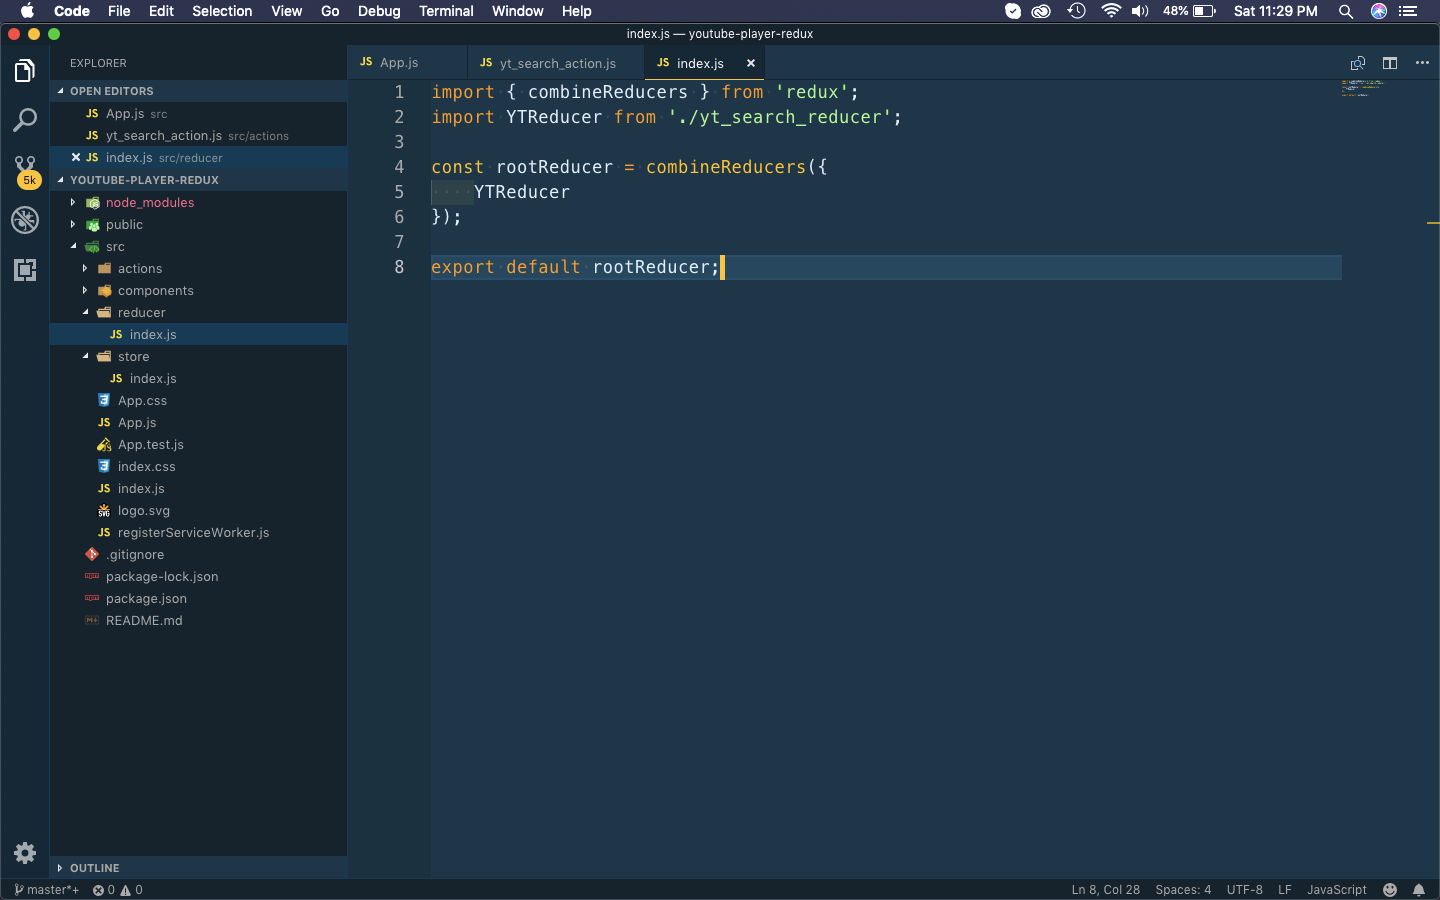 index.js
It’s time to create our reducer, so create a file yt_search_reducer.js inside the same folder. This is a pretty much standard reducer, where we are setting the _ytSearchState in the initialState. We are updating it with the data, we are getting from the api call.
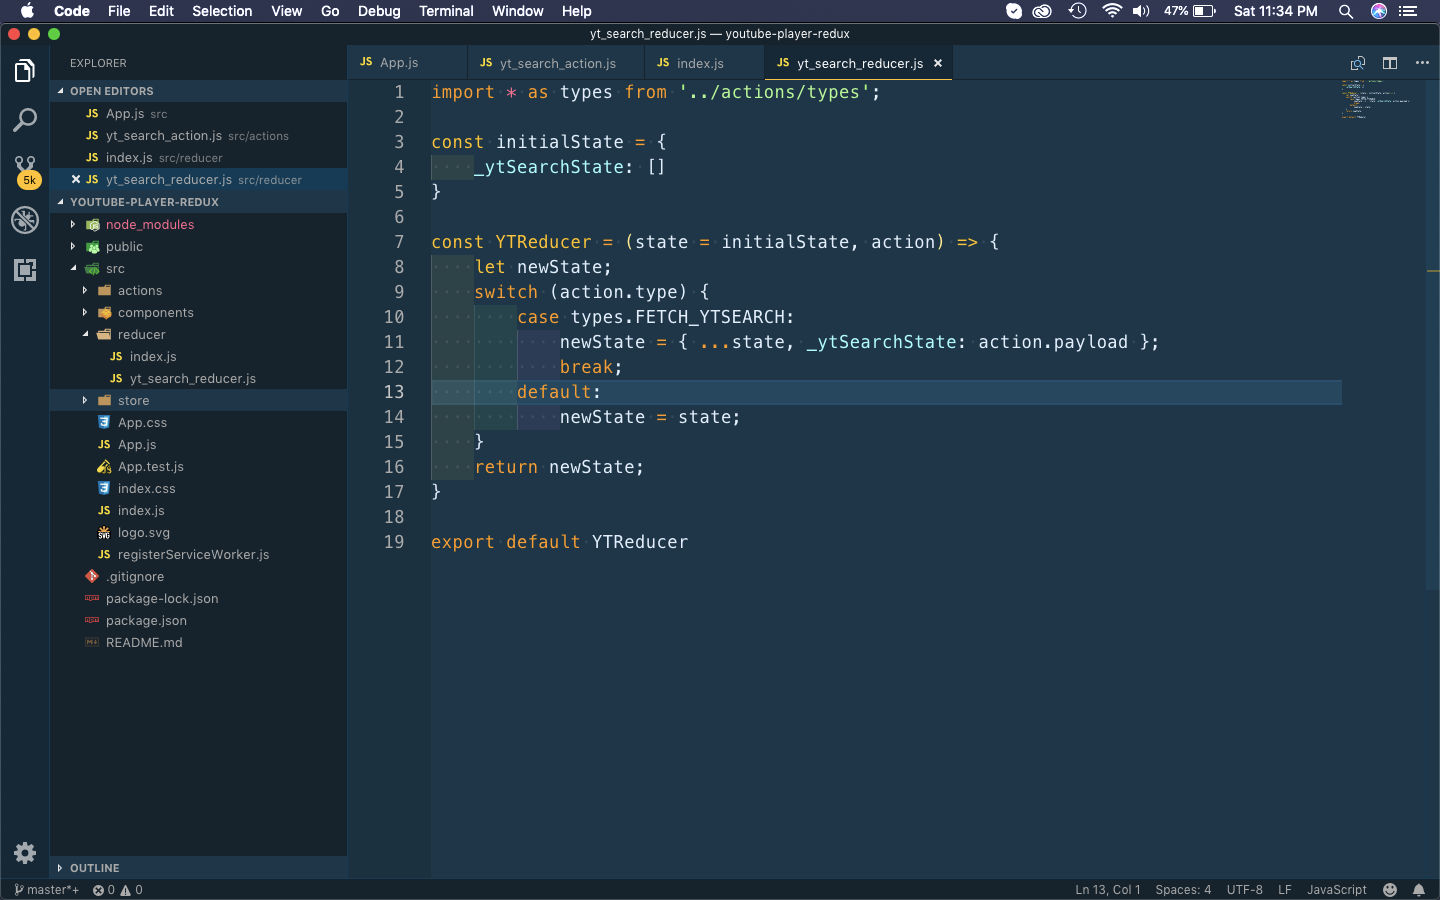 yt_search_reducer.js
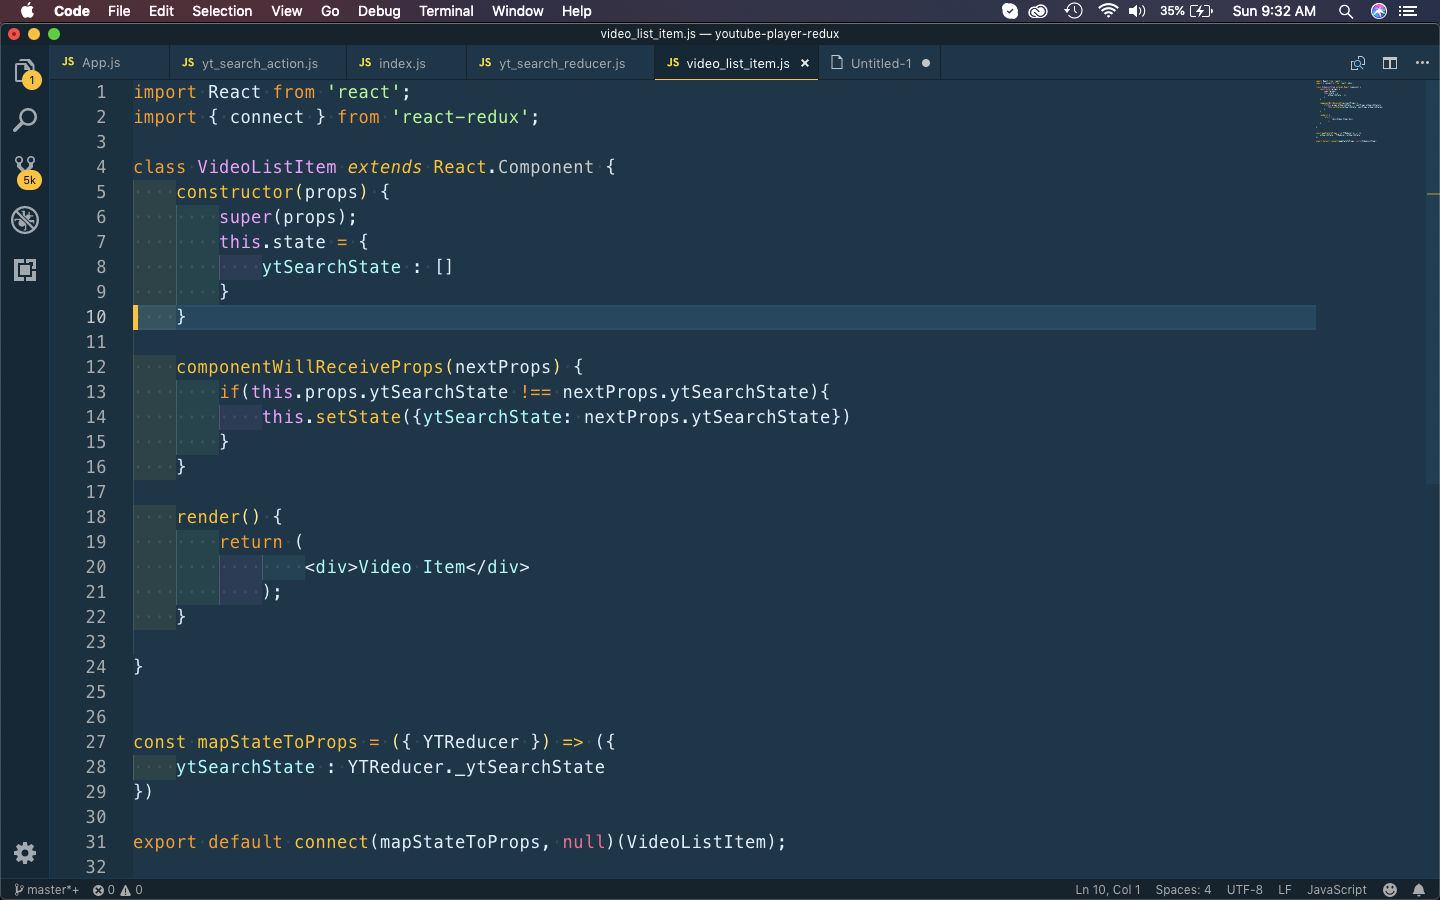
Next, we will get this global state to display in our VideoListItem component. So, open your video_list_item.js file and update it as below. We are getting the global state ytSearchState by the mapStateToProps function.
So, whenever the global state changes, we will receive it as props ytSearchState. We are then comparing it with the current prop in componentWillReceiveProps and setting it to the local state ytSearchState.
 video_list_item.js
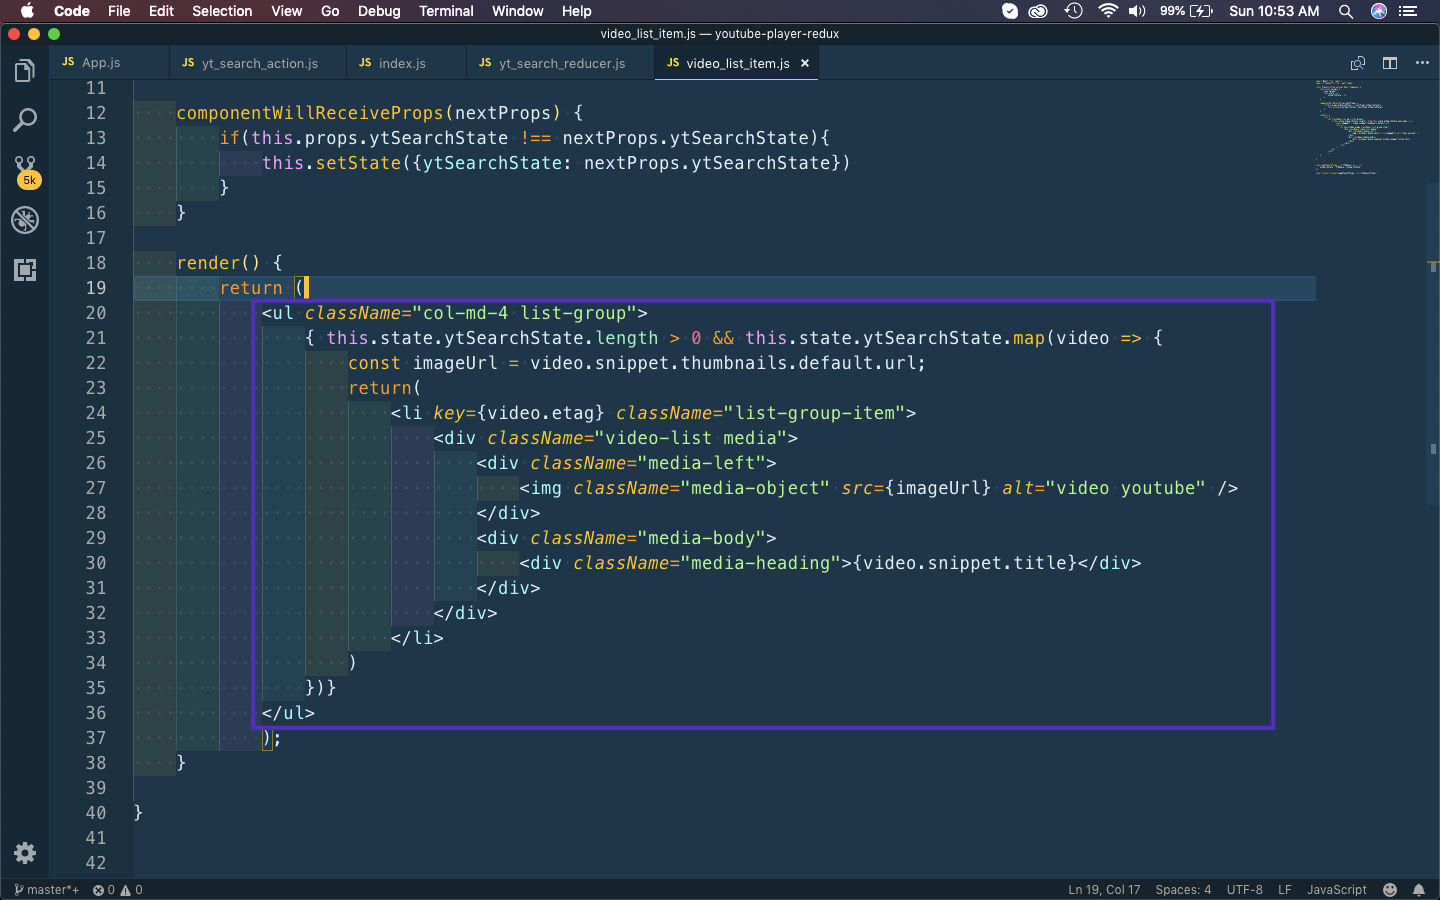
Next, let’s show this in our video_list_item.js file, by mapping through the local ytSearchState and getting the imageUrl and title.
 video_list_item.js
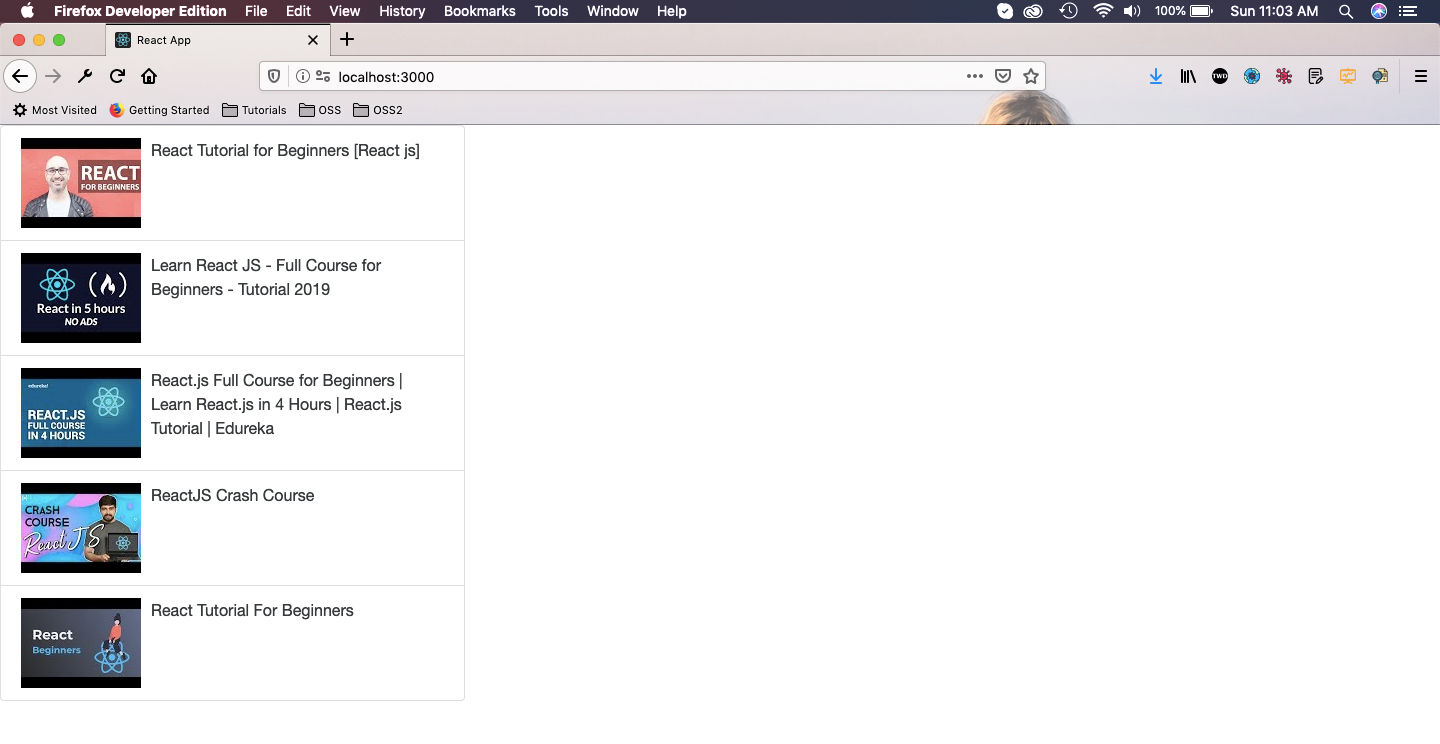
Now, with npm start on your terminal you will get all the videos on the browser.
 npm start
This completes part-1 of the series.
