React Tutorials - A beginners Guide - 3
React
To get started with building a project follow the steps on this link.
Now every time you are opening your project you just need:
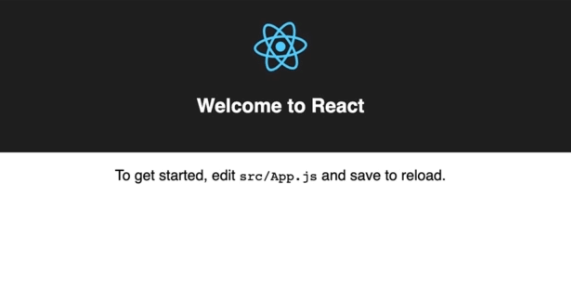
npm startYour project will be running live in your browser. Any changes made will be reflected there. If everything went smoothly and it is your first run, you will see something similar to this
Understanding folder structure
- node_modules folder has all the dependencies and sub-dependencies of the project
- the public folder contains a index.html. we only need this one HTML file in our project.
- We will be working mostly with our src folder
Understanding component basics
As we know that our react app is made up of components. In our directory, we can see App.js. This is going to be our root component. All other components will be nested in this only.
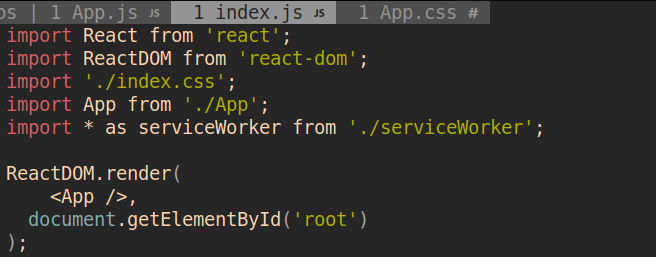
In index.js we can see ReactDOM.render(). It is used to render our components. We are passing App as our 'root' component. Note that here we can even write HTML/JSX in place of App />. It will work just fine, but that defeats the purpose of using react as we want to work with components only.
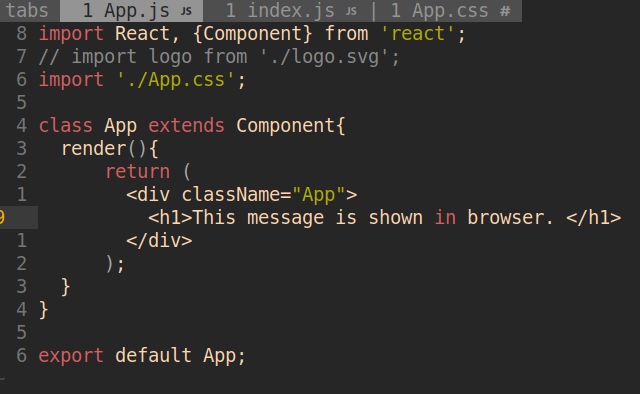
Inside App.js, one way of making a component is shown. As we can see, we need to import from 'react' library. This component needs to have a render() function defined. Also, we can see HTML like syntax in between. It looks like it but behind the scene is converted to js only. There are certain differences from normal HTML like the className here is different.
Understanding JSX
The HTML we saw above is basically JSX. Below code has similar effect. But this time we don't use JSX.
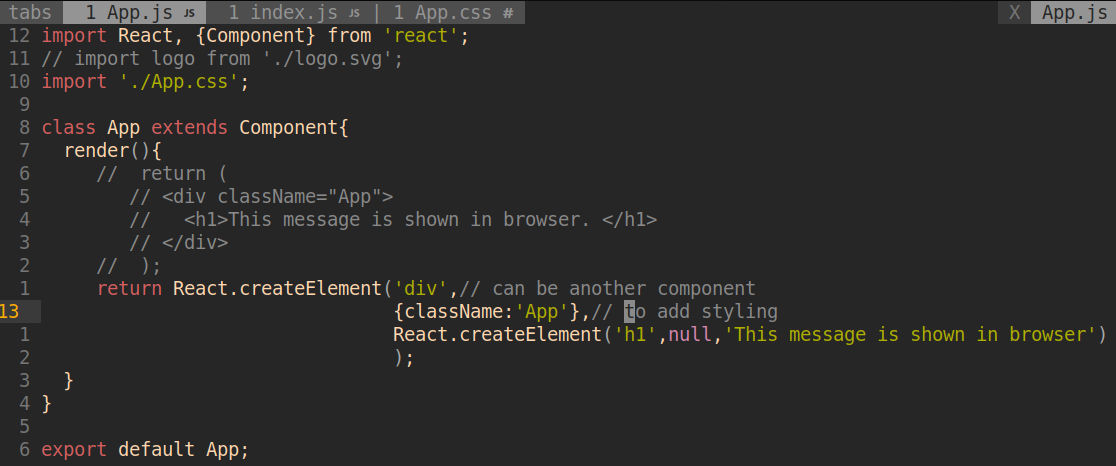
As we can see instead of the JSX(commented) we use React.createElement()(Reason of importing React). It can have many parameters, but here we have three.
- first one can be any element including another component
- second is the configuration we want (can be null)
- third is a nested element
- here we defined another
h1element again usingReact.createElement().
- here we defined another
- to use App.css, we had to use
{className}(configuration) So this is how JSX gets used behind the scene. For more see.
Note that when we are using JSX, as best practice we will only create a root element. And no other adjacent elements.
Creating a functional component
Now we will try to create another component. For this, I created a folder named Food in the same directory and inside it Food.js. This is how the naming convention is i.e. with the first letter capitalised. Inside food.js:
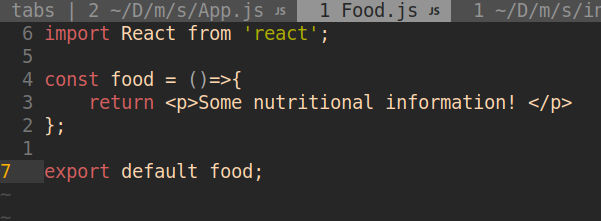
Using arrow notation to create a component. It returns some JSX (for which we need React import). Note that we can create components using class (like in App.js) or using function(here).
Now importing in App.js
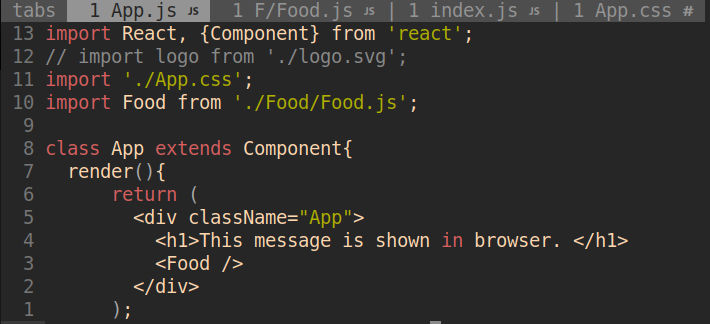
First, we imported the Food.js. And then adding it to our JSX with <Food/>. Note that the first letter of component is kept capital to tell react that it is a 'custom component'.
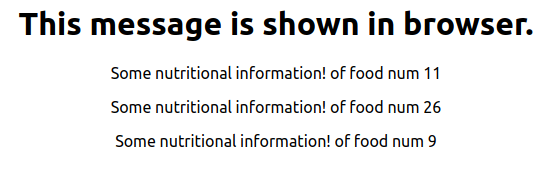
Result:

Now the advantage of making a component are:
- Out
App.jsdoesn't get crowded; especially for a bigger application - Separate files for separate component make it easy to maintain them
- we can use or declare the component in our app as many times with little code.
Outputting Dynamic content
We can provide some dynamic output from within our JSX. We write some JS in curly braces for this. Example: In Food.js
const food = () => {
  return <p> Some nutritional information! of food num {Math.floor(Math.random()*30)}</p>
}
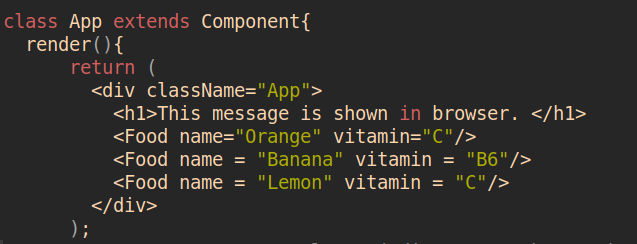
Here, we are generating random numbers using Math.random(). Similarly, we can make a function call or give one-line expressions. We can even give property values from App.js and then use in our component template. For example:
//in App.js
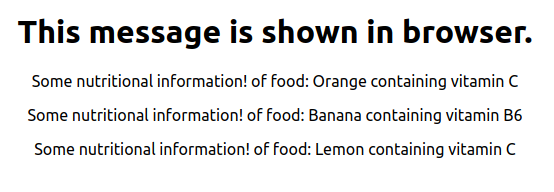
<Food name = "Orange" vitamin = "C"/>Here we defined attributes name and vitamin and assigned value to them. These can be accesses in template(Food.js) using object named props. We can name it anything we like but that is the convention. We pass props as parameter to our food function and then we access it in our JSX.
//in Food.js
const food = (props) => {
  return <p> Some nutritional information! of food: {props.name} containing vitamin {props.vitamin}</p>
}
Our App.js now looks like:
Output:
What we learned :
- Basics of component
- Understanding JSX
- JSX working behind the scene
- Making components
- Outputting dynamic content